

How do you create a "shadow" group that is only located in the tenant, not reliant on an IDP? Add the group to the SCIM database directly using Postman or similar method and/or tool.
The use case in this instance is to create a group that is specific only to the tenant and "hidden" from the sight of others who are not Netskope tenant admins. A good example of this is creating a group which contains users who should be in an "offboarding" group, but are also members of the team who manages the IDP, i.e. Okta, that is set to provision users and groups to the tenant.
This will only apply to users who are provisioned to the tenant via SCIM from an IDP such as Okta. It cannot and should not be used when users are provisioned to the tenant using the Netskope Directory Importer or manually added to the tenant.
A high level overview of meeting this use case are:
- Download and install the Postman application;
- Import a Postman Collection for Netskope SCIM;
- Create a "shadow" group using Postman;
- Add the "offboarding" user to the "shadow" group; and,
- Limit activities, permissions, etc of the "shadow" group.
NOTE: Do not proceed unless you are comfortable with using Postman or a similar tool and understand the repercussions of editing groups or users in the SCIM database. Irreparable damage to users and groups may occur which might impact tenant operations.
Download and Install Postman
https://www.postman.com/downloads/

Import a Postman Collection
Complete the following steps to import a Postman Collection for Netskope SCIM.
- Browse to https://documenter.getpostman.com/view/7998136/SVfNwVFT
- After browsing to this site, click on Run In Postman, located in the upper right-hand corner of the browser. A dialog window titled "Run in..." will appear, click on the local installation for Postman.

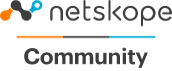
- The Postman application will launch and prompt you to select a workspace into which you will import the collection.
- Choose "My Workspace" and click Import. My Workspace will have the Netskope SCIM collection in it.

Create a "shadow" group using Postman.
Complete the following steps to create a “shadow” group using Postman.
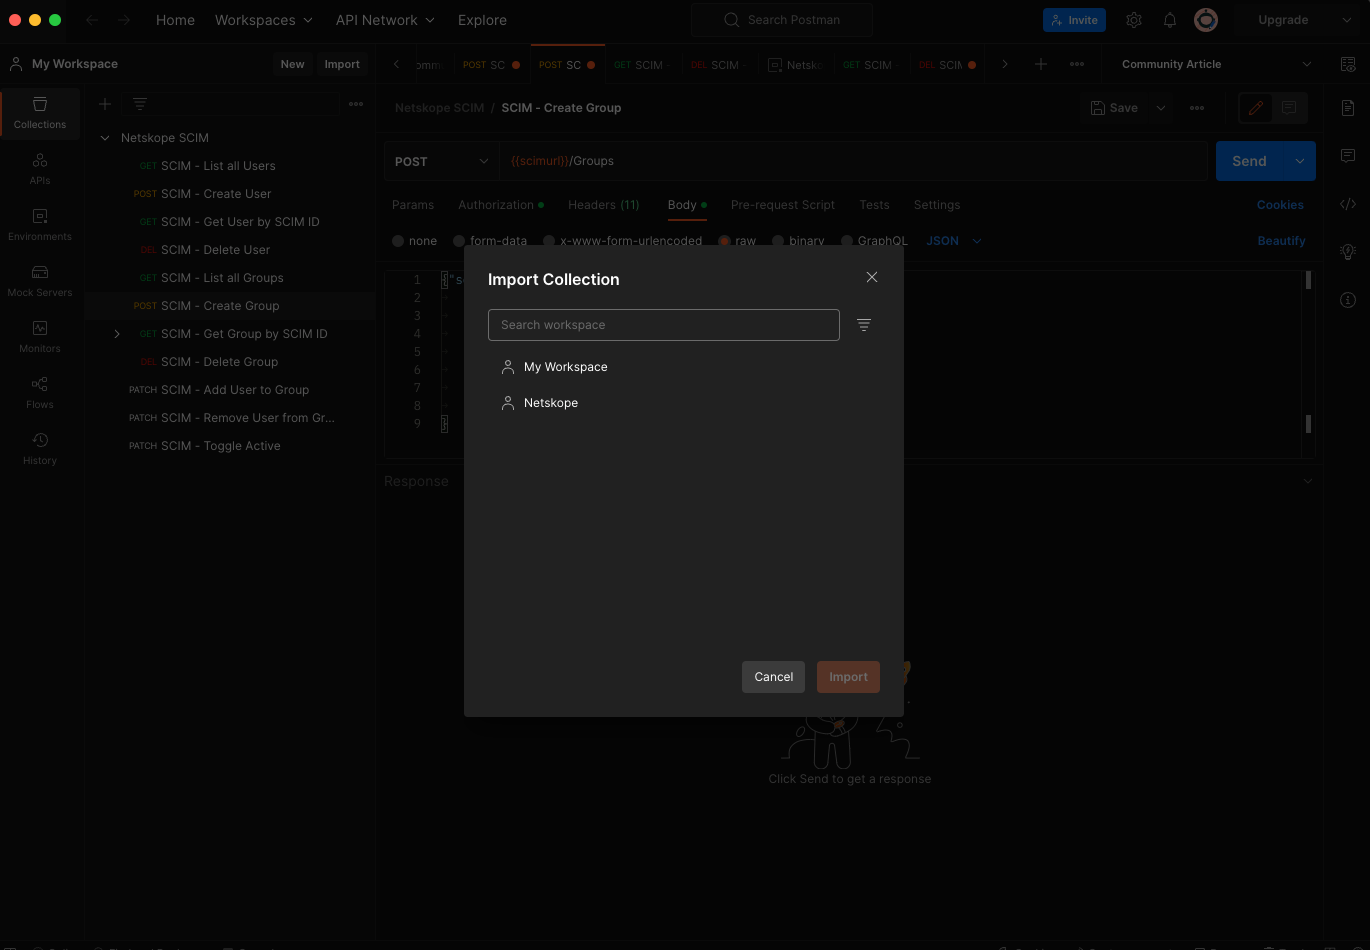
- Login to the Netskope tenant and navigate to Settings, Tools, and Directory Tools. The Directory Tools page will be displayed.
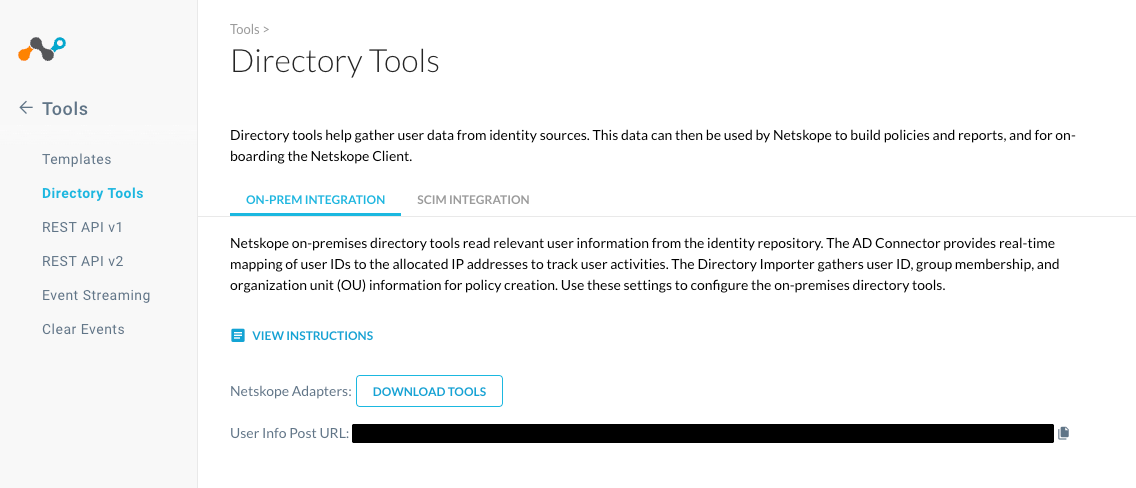
- Click on SCIM INTEGRATION. The SCIM INTEGRATION page will be displayed.
- Click on the New OAUTH Token Button. A New OAuth Token window will appear. Enter a Client Name and click on Generate Token.
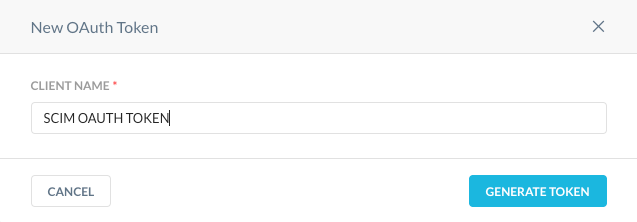
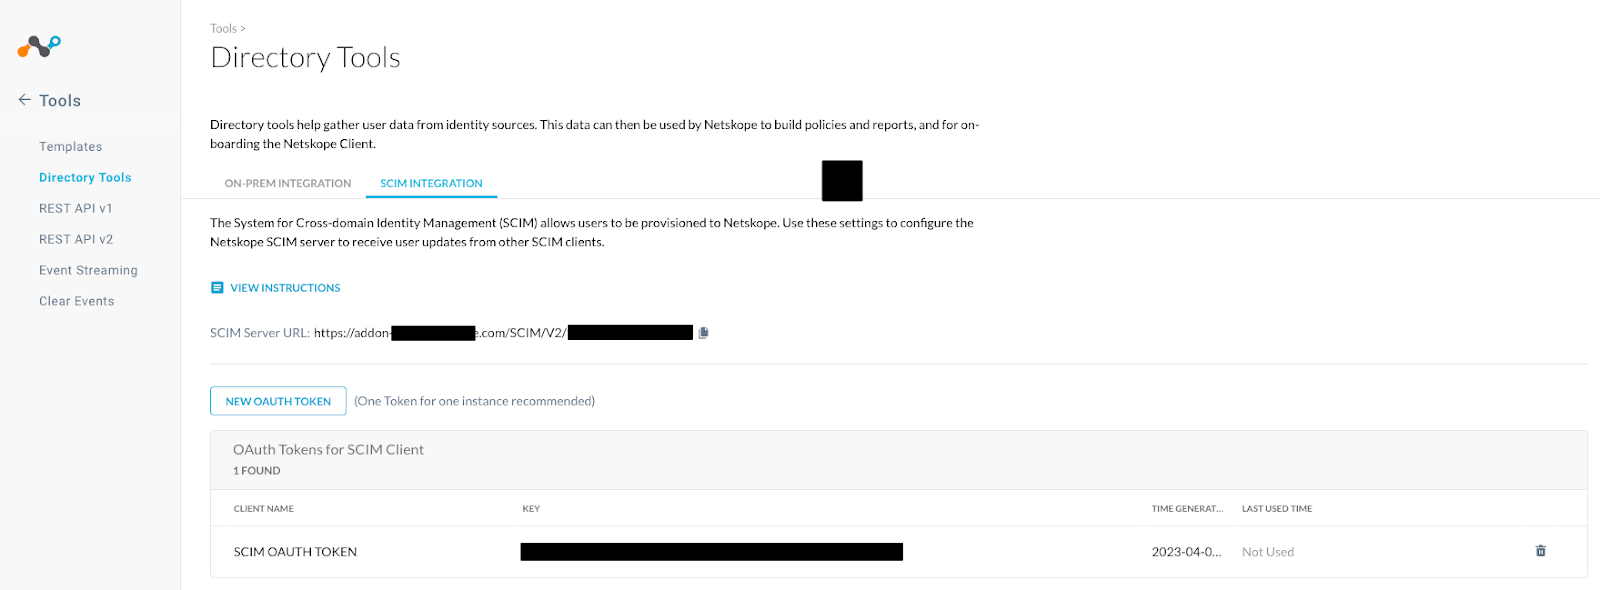
- Copy the SCIM Server URL and new SCIM OAUTH token for use later.
- Create collection variables for the previously imported Netskope SCIM collection.

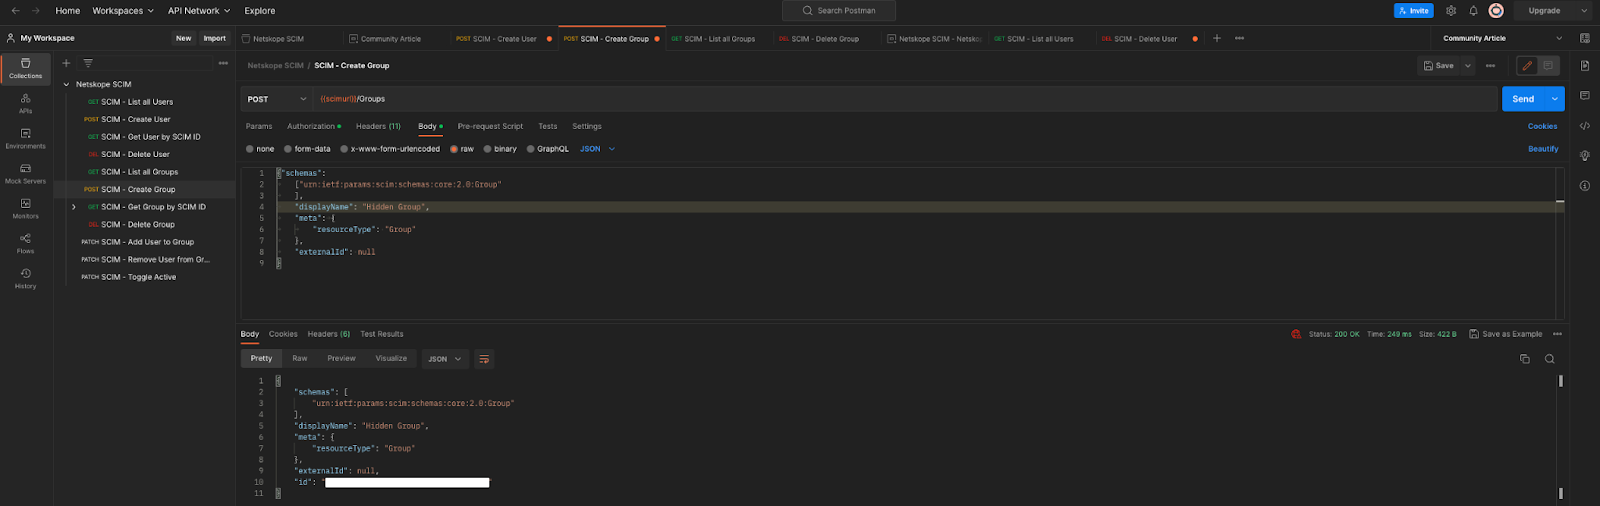
- Within the collection, click on Post SCIM - Create Group then click on Body underneath the post parameters.

- In the body of the request, change {{group_name}} to the name of a group to be created. Then select the Environment for variables created earlier by using the drop-down located in the upper right. Click Send.
- Postman should refresh with output from the tenant and a status code of “200 OK”. In the body of the response, copy the group ID.
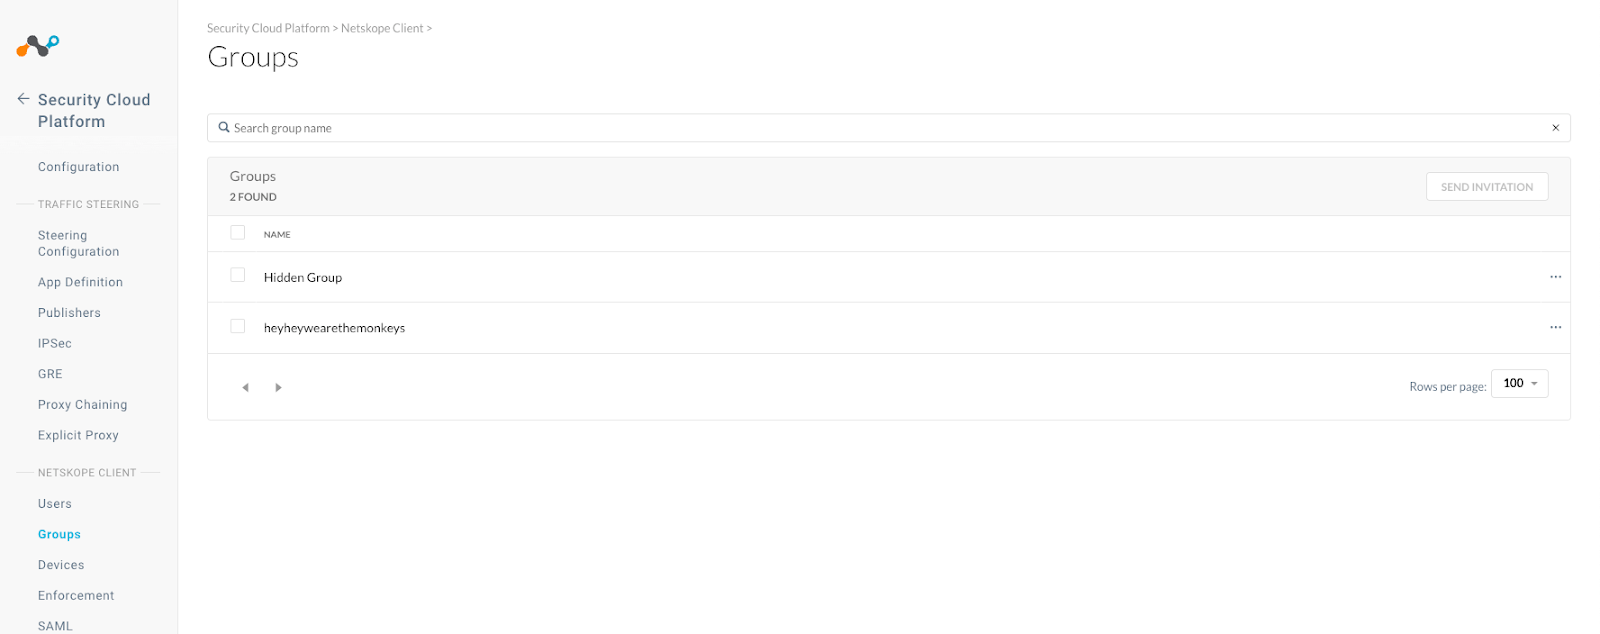
- Open your browser and navigate to the Netskope tenant Settings, Security Cloud Platform, and Groups. The new “shadow” group should be visible.
Add the "offboarding" user to the "shadow" group.
Complete the following steps to add the "offboarding" user to the "shadow" group.
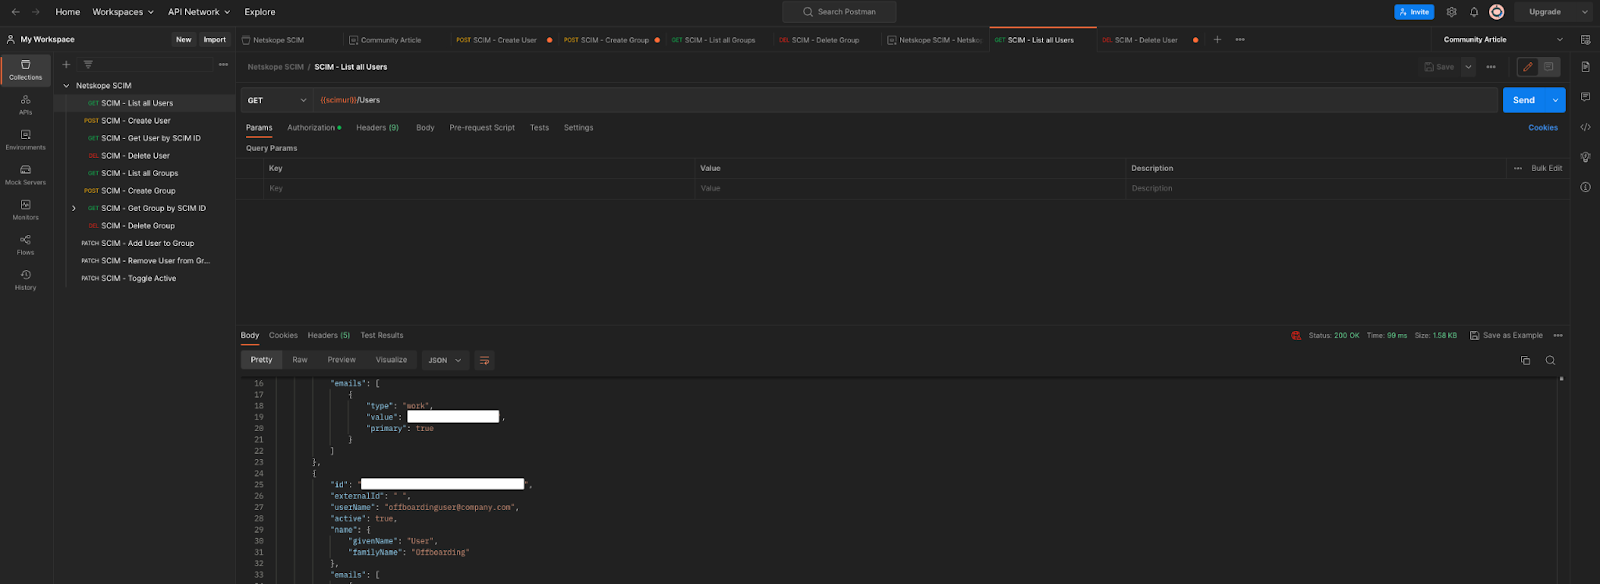
- In Postman, click on GET SCIM - List All Users then click Send. In the body of the response, locate the user ID which needs to be added to the “shadow” group. Copy the user ID.
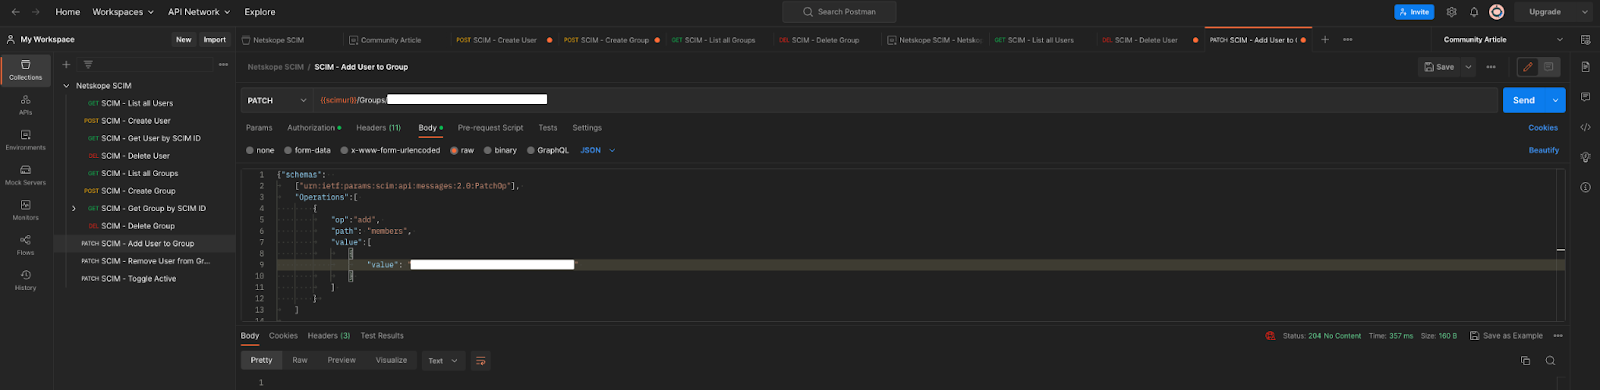
- In Postman, click on PATCH SCIM - Add User To Group.
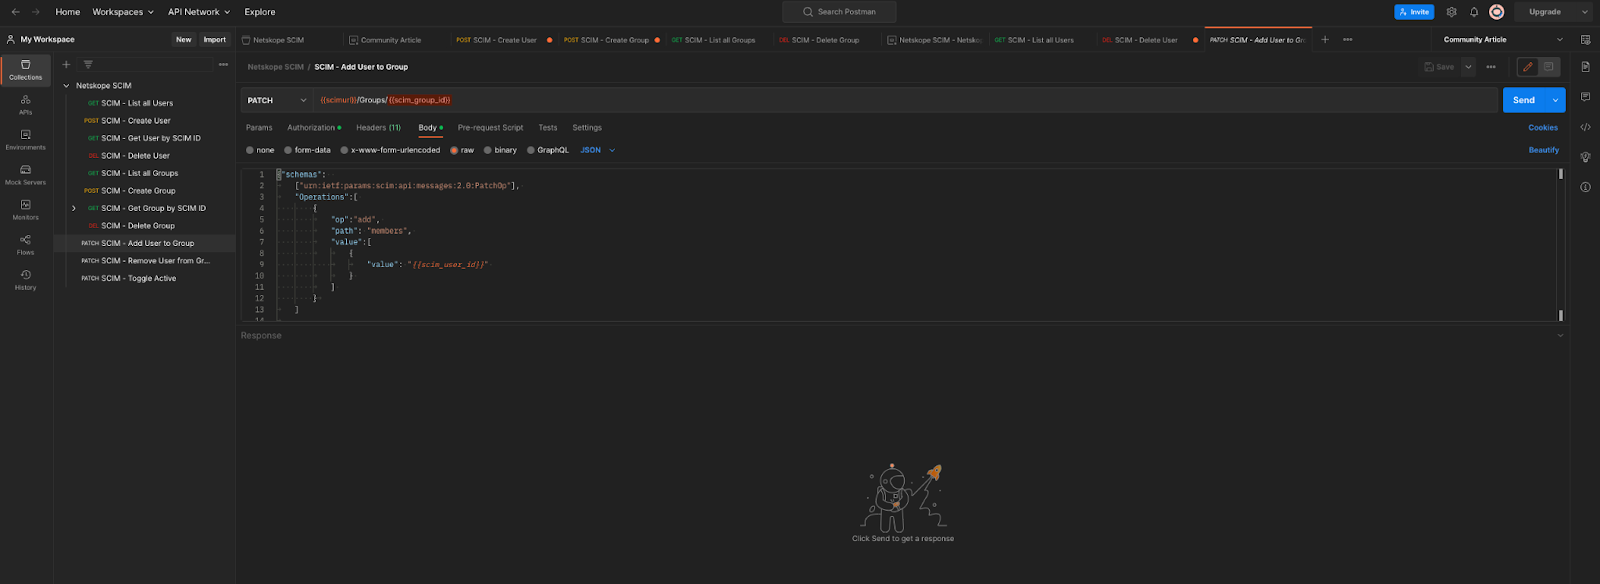
- In Postman, in the body, replace {{scim_user_id}} with the user ID copied earlier. In the PATCH URL section, replace {{scim_group_id}} with the group ID copied earlier. Then Click Send. The status should read 204 No Content.
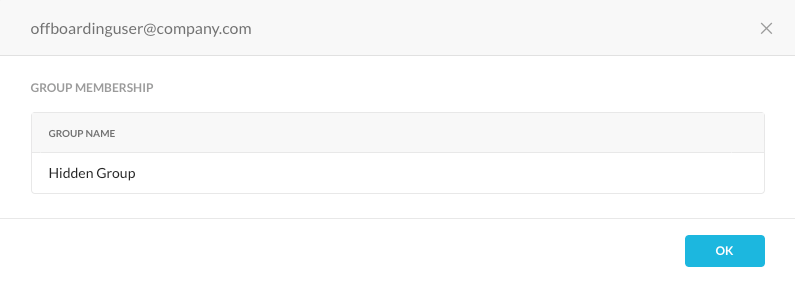
- Open your browser and navigate to the Netskope tenant Settings, Security Cloud Platform, and Users. Open the user being “offboarded” and that user should be a member of the new “shadow” group.
Limit activities, permissions, etc of the "shadow" group.
After the “shadow” group has been created and the “offboarding” user added to it, we are going to limit the ability of the user to interact with the Netskope Client and create policies specific to the “shadow” group and/or the “offboarding” user.
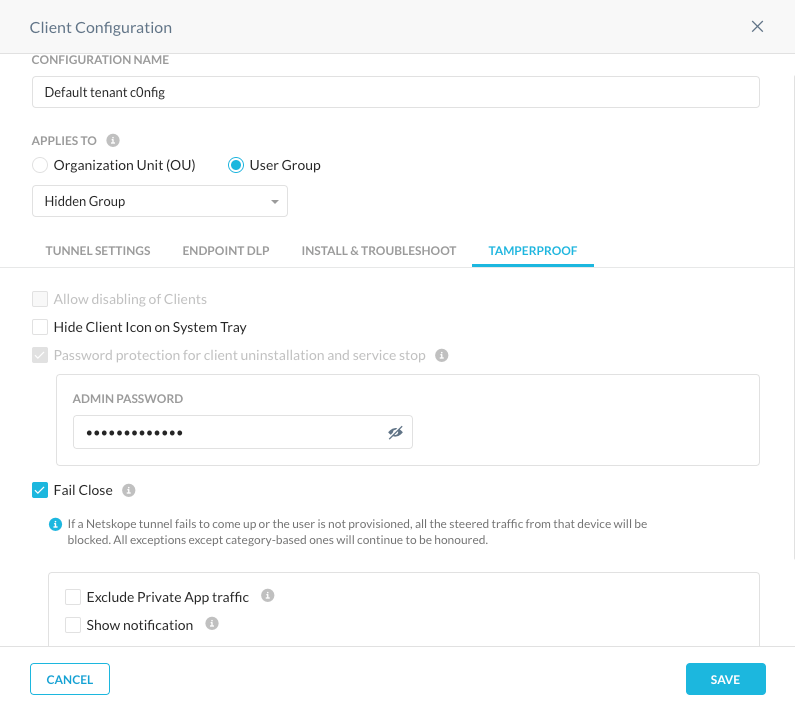
As a reminder, the “shadow” group was created to maintain control of groups in the tenant without knowledge of IDP administrators. Therefore it is advisable to create groups similar to those in use within the tenant to avoid alerting others. For example, “Default tenant config” might become “Default tenant c0nfig”, where then “o” is replaced with a 0.
If all client configurations have similar restrictions such as administrative passwords, then creating a client configuration for this new “shadow” group might not be warranted. However, by creating a client configuration specifically for the new group, we are able to align configurations to groups thereby making administration and operations easier in the future, same applies with steering configurations.
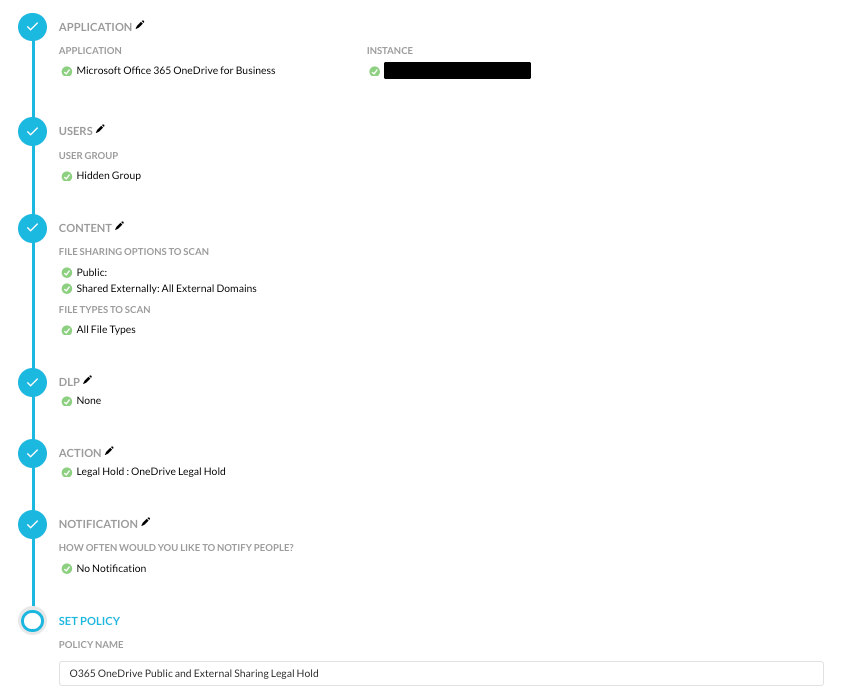
With regards to policies, policy decisions may be made to move objects into legal holds if an “offboarding” user is sharing objects publicly or externally for API-enabled Protection such as Microsoft’s Office 365 OneDrive for Business.
With Real-time Enabled protection, we are able to create a policy that alerts when someone in the “shadow” group performs activities that will potentially exfiltrate data.

By utilizing the API-enabled Protection and Real-time Protection policies mentioned earlier, we are able to achieve various use cases such as placing objects under legal hold during the offboarding of users and detecting any activities that could lead to data exfiltration, among others. Although these use cases may appear simple, there are numerous other possibilities that can be accomplished by adopting a creative and open-minded approach.