


In this article, we will cover how to silent deploy the Netskope Client on Mac devices using IDP enrollment mode with Jumpcloud MDM.
Prerequisite: SAML Forward Proxy integration with Jumpcloud as an IDP must be configured prior to deploying the Netskope Client.
Configuration Steps
1 - Install Netskope Certificates
Download both certificates from the Netskope Tenant on Settings > Manage > Certificates > Signing CA:
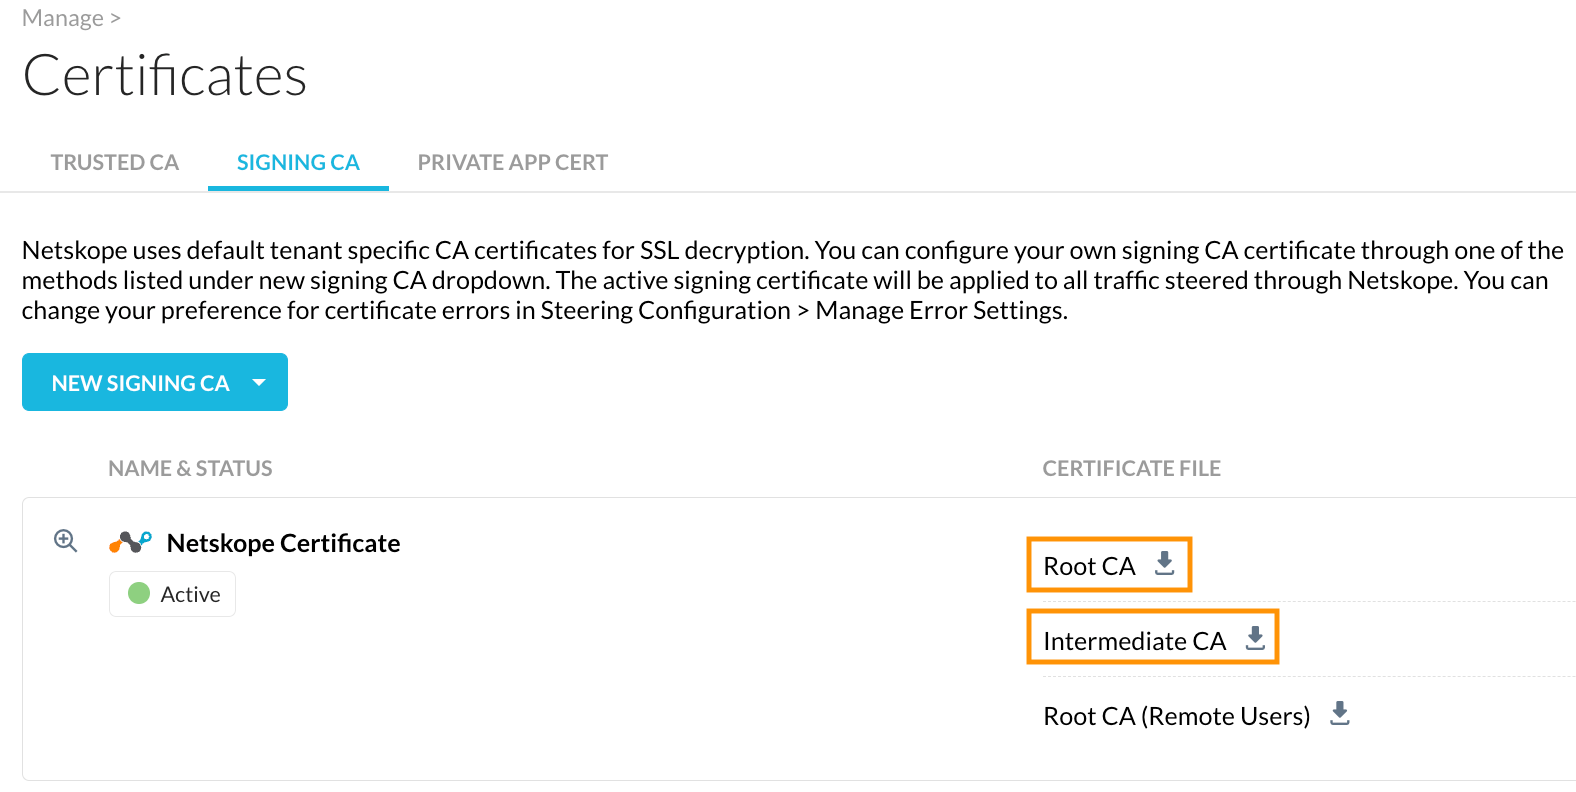
Jumpcloud allows you to choose only one certificate per policy.
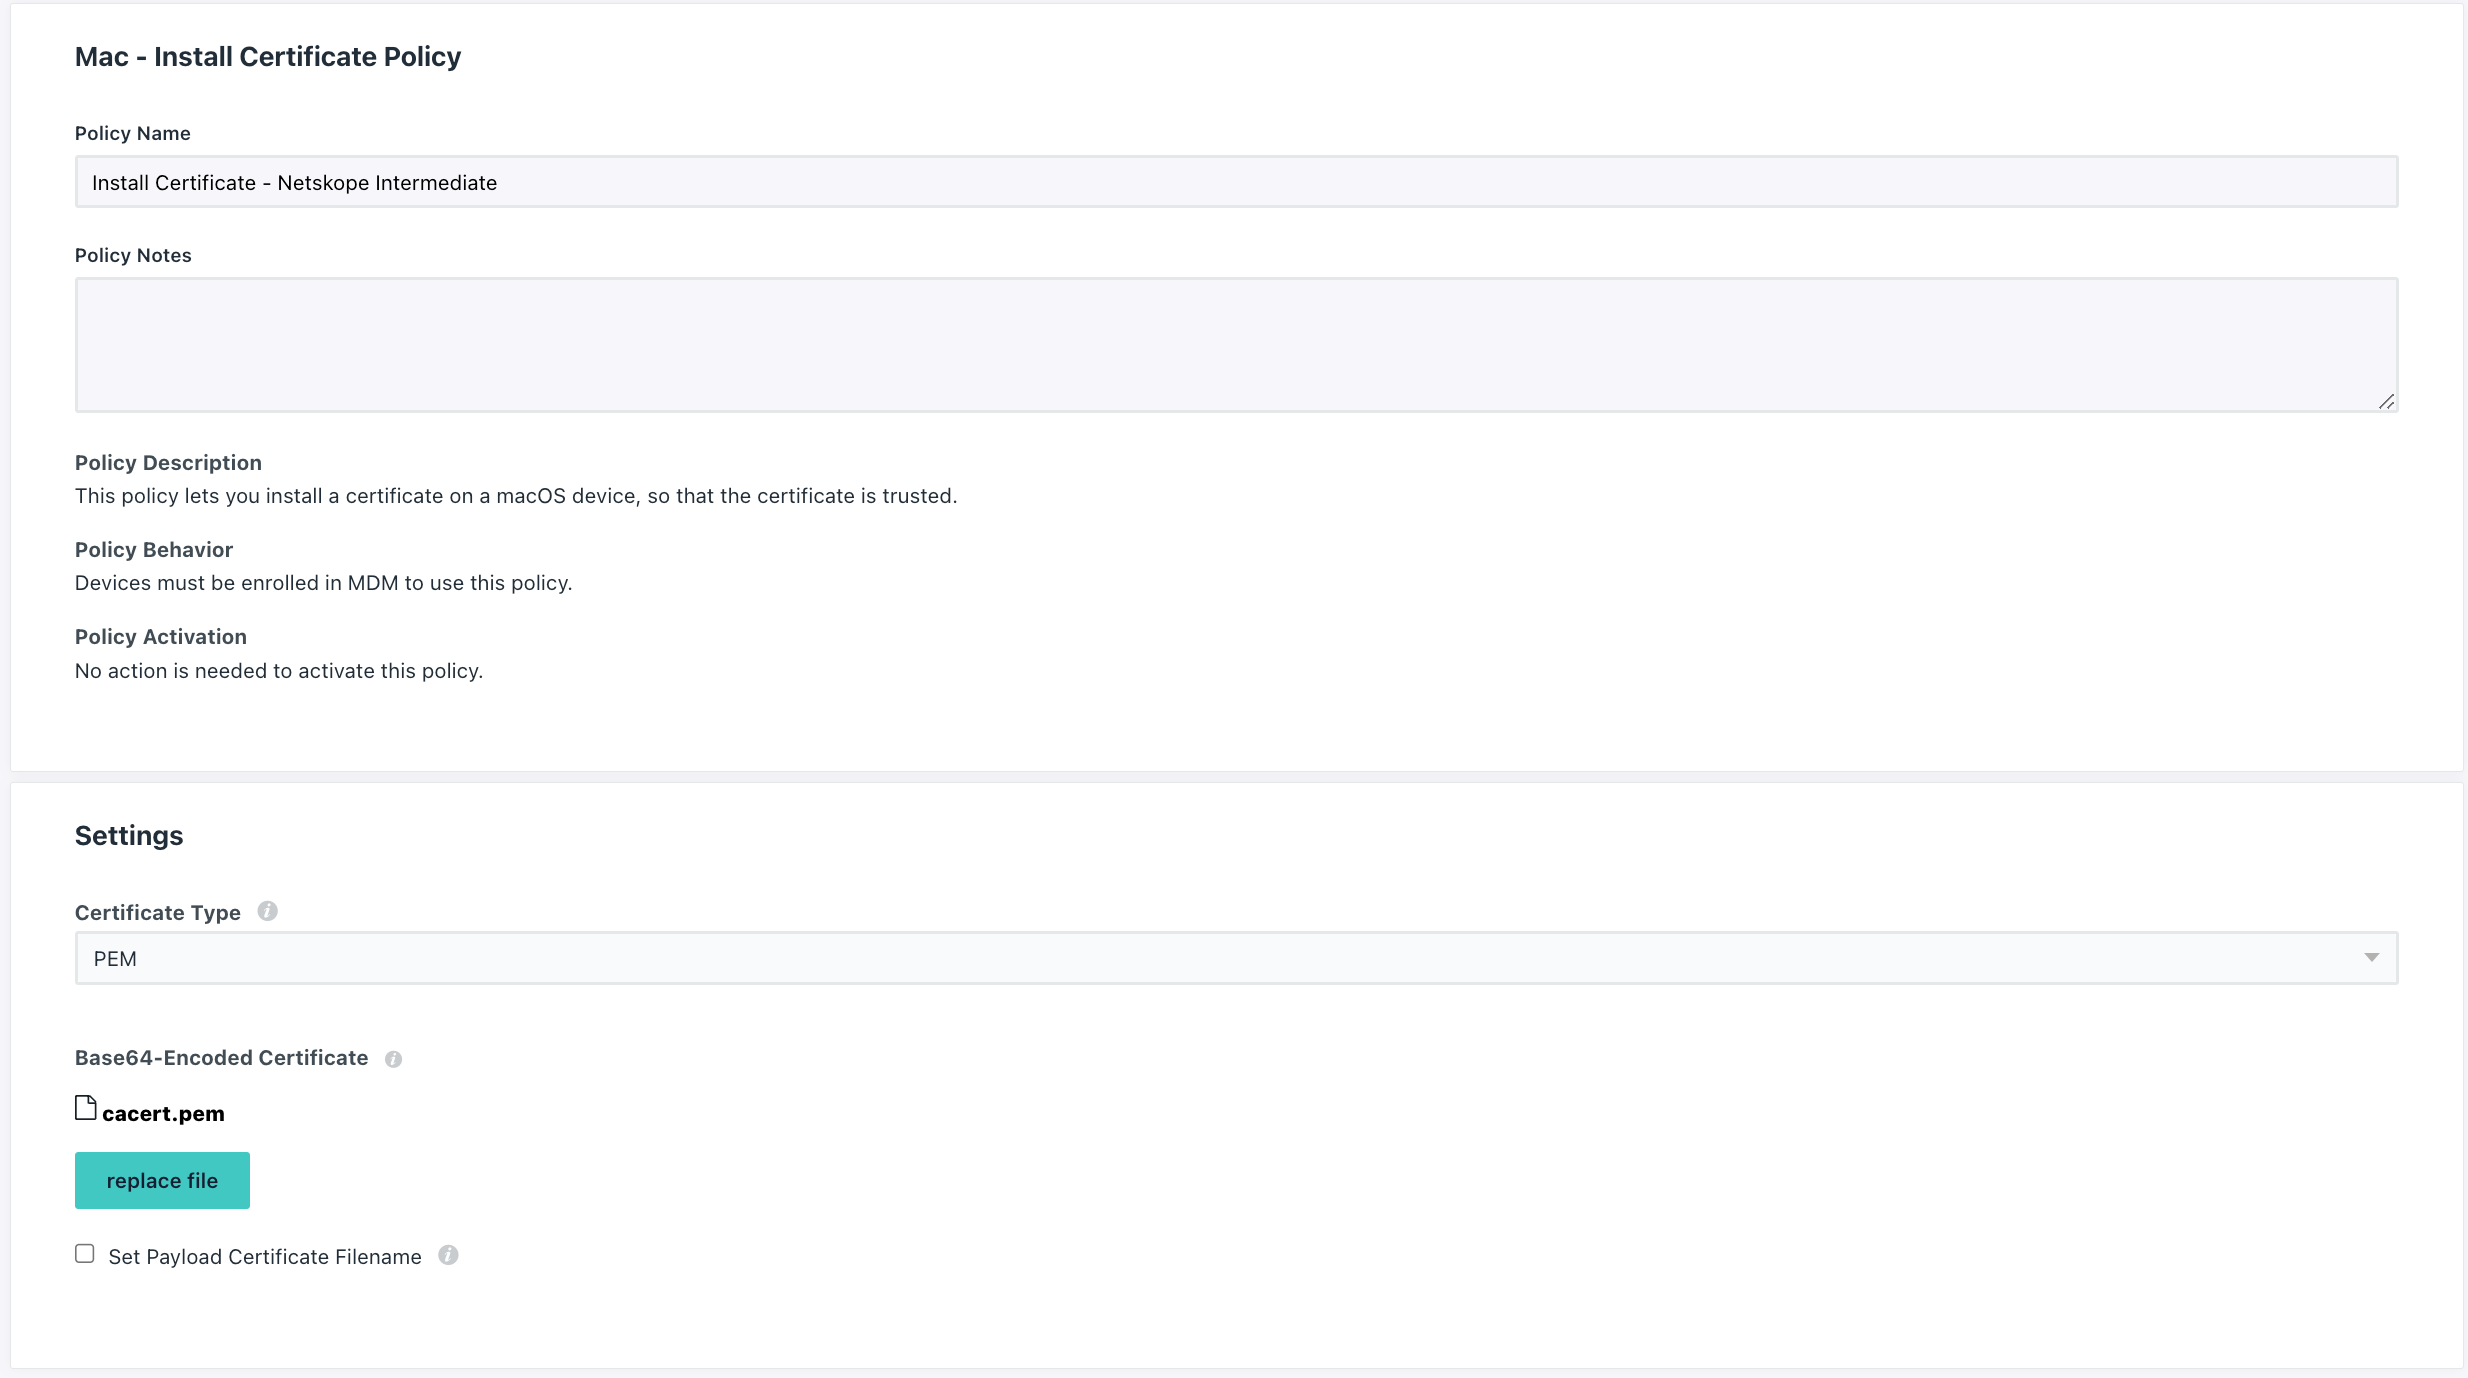
Follow the steps off the link Create a Mac or iOS Install Certificate Policy and create two certificate policies on Jumpcloud. One for the Netskope Root Certificate and one for the Netskope Intermediate Certificate:

Approve System Extension and Network Extension
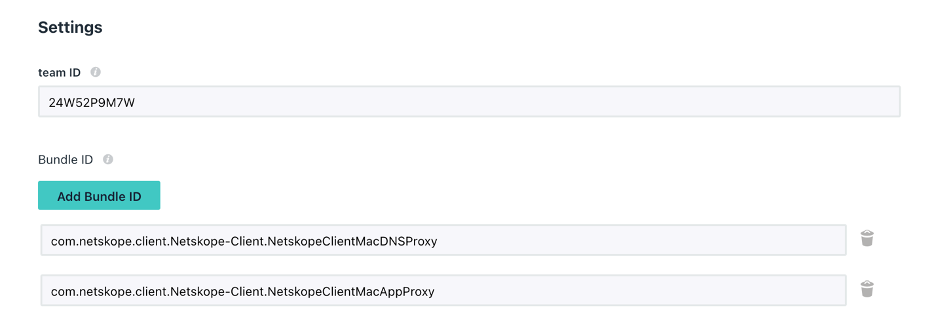
Create a new Jumpcloud policy following the steps of the link Create Mac System Extension Policy to Approve the System Extension and use the following details on the policy:
Team ID: 24W52P9M7W
Bundle IDs:
com.netskope.client.Netskope-Client.NetskopeClientMacAppProxy
com.netskope.client.Netskope-Client.NetskopeClientMacDNSProxy
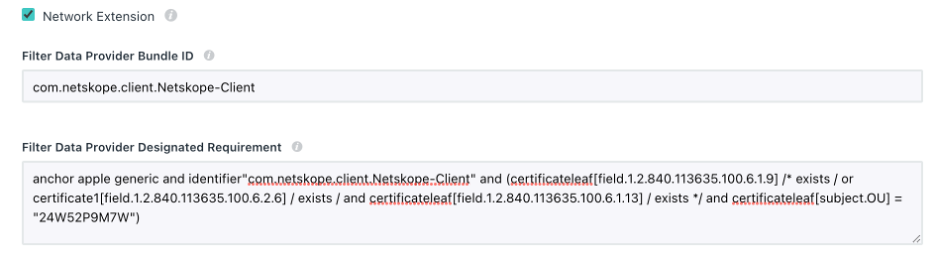
Filter Data Provider Bundle ID:
com.netskope.client.Netskope-Client
Filter Data Provider Designated Requirement:
anchor apple generic and identifier"com.netskope.client.Netskope-Client" and (certificateleaf[field.1.2.840.113635.100.6.1.9] /* exists / or certificate1[field.1.2.840.113635.100.6.2.6] / exists / and certificateleaf[field.1.2.840.113635.100.6.1.13] / exists */ and certificateleaf[subject.OU] = "24W52P9M7W")
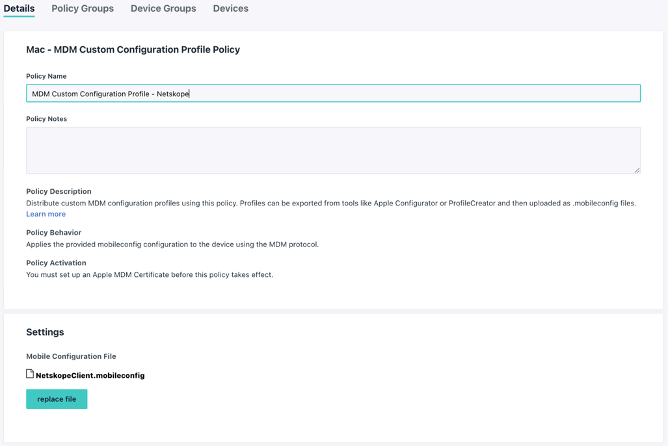
VPN Profile
Create a Jumpcloud Custom MDM Profile to deploy the VPN Profile following the steps of the link Create a Mac or iOS MDM Custom Configuration Profile Policy and use the NetskopeClient.mobileconfig file attached to this article.
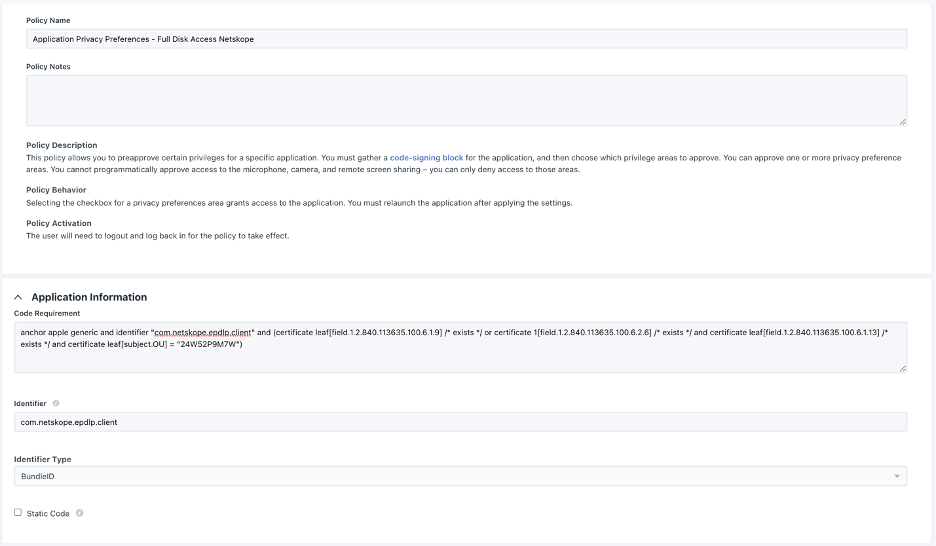
Full Disk Access to Endpoint DLP
Create an Application Privacy Preferences Profile Policy on Jumpcloud following the steps of the link Create a Mac Application Privacy Preferences Policy and use the following details on the policy:
Code Requirement:
anchor apple generic and identifier "com.netskope.epdlp.client" and (certificate leaf[field.1.2.840.113635.100.6.1.9] /* exists */ or certificate 1[field.1.2.840.113635.100.6.2.6] /* exists */ and certificate leaf[field.1.2.840.113635.100.6.1.13] /* exists */ and certificate leaf[subject.OU] = "24W52P9M7W")
Identifier:
com.netskope.epdlp.client
Identifier Type:
BundleID
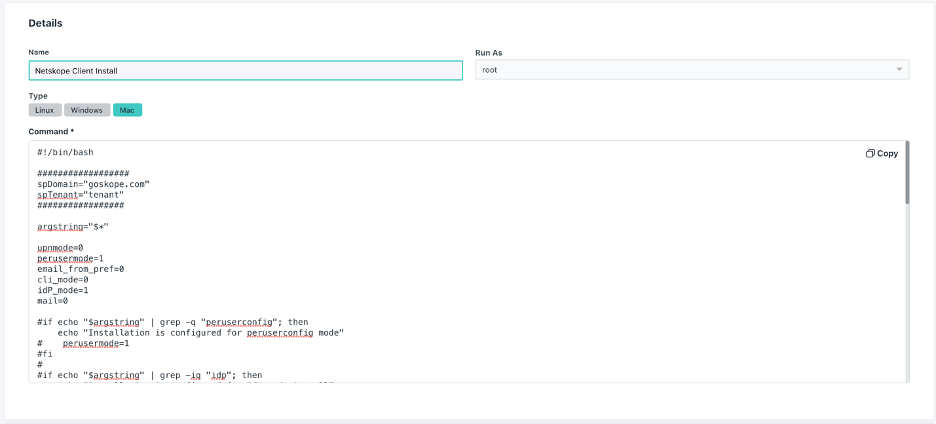
Installation Script Command
Edit the installation script attached to this article and update the spDomain and spTenant variables at the beggining of the script with the proper details of the tenant that the agent will connect to.
Use the modified installation script and create a Command to install the Netskope Client, refer to the link Get Started: Commands if necessary:
Final Result
You should have 5 profiles created:
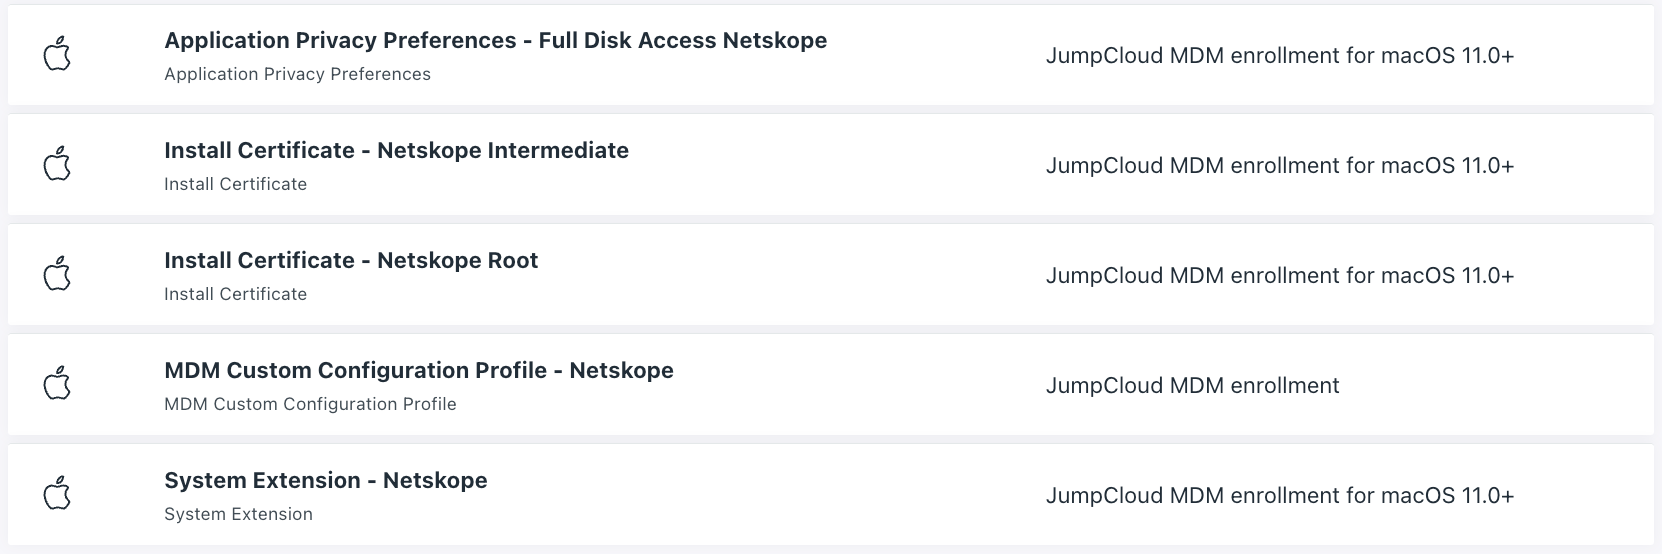
and one command to install the client:

Make sure you have all 5 profiles pushed into the devices before running the installation script.
Following this steps you should have successfully deployed the Netskope client silently to your Mac devices using IDP enrollment with you Jumpcloud MDM solution.