

Welcome to the world of Reverse Proxy!
Today, I will be your guide on creating a Reverse Proxy as a Service (RPaaS) in Google Workspace. We’ll then apply contextual awareness to “guide” employees to steer traffic to Netskope using RPaaS if they are not originating from a Netskope IP address. This is similar to what we do with Microsoft Azure AD RPaaS and conditional access policies; the contextual awareness is Google’s implementation of conditional access.
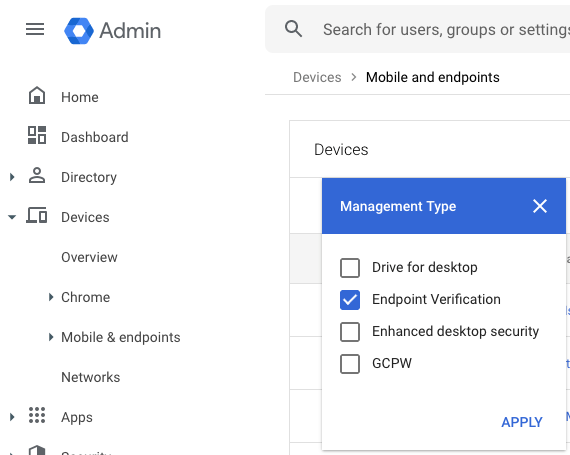
There are requirements needed for licensing as well as caveats which warrant mentioning. You will need to be licensed for Protect your business with Context-Aware Access - Google Workspace Admin Help . There are a limited number of applications at this point which context awareness works with or for, see pic below.
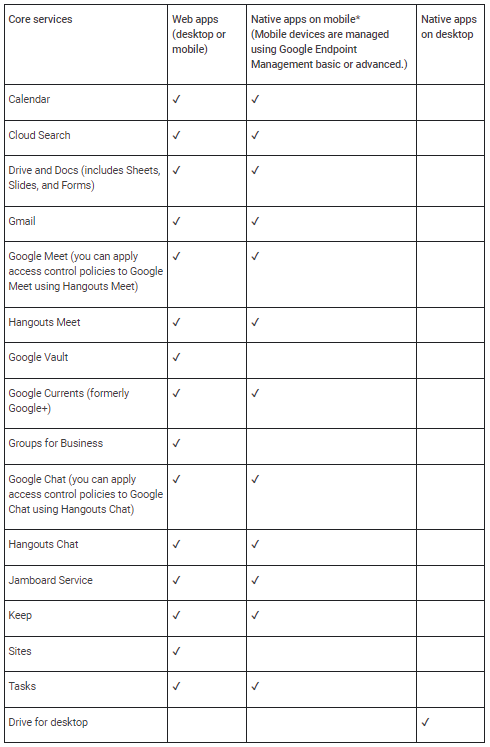
For SAML apps, policy evaluation occurs on sign-in to the app.
- Third party SAML apps that use Google as the identity provider. A third party identity provider (IdP) can also be used (third party IdP federates to Google Cloud Identity and Google Cloud Identity federates to SAML apps). For details, go to About SSO - Google Workspace Admin Help .
- Context-Aware Access policies are enforced when a user signs in to a SAML app.
Example: If a user signs in to a SAML app at the office and walks over to a coffee shop, a Context-Aware Access policy for that SAML app isn’t rechecked when the user changes location. For SAML apps, the policy is rechecked only when the user session ends and they sign in again. - If a device policy is applied, web browser access on mobile (including mobile apps that use a web browser for sign-in) is blocked.
- Context aware access policies for custom SAML applications are validated at sign-in where applications within the Google Workspace are continuous. If a user decides to disable the client after authenticating and accessing the SaaS application, they will be denied access to the application since the check is continuous.

Cloud Identity Premium allows for only the following context awareness policies.
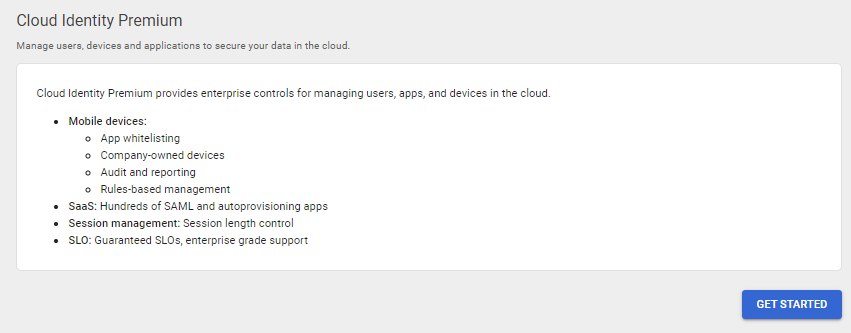
In addition, endpoint management will need to happen on desktops and mobile devices, see Create Context-Aware access levels - Google Workspace Admin Help
Instructions
At a high-level, there are two steps required to create Google’s Reverse Proxy As A Service and limit access to it. First setup a reverse proxy as a service as a web SAML application in Google Workspace. Second and last of all, configure context-aware access control policies.
Setup Reverse Proxy as a Service
- Login to the Google Admin portal at https://admin.google.com/
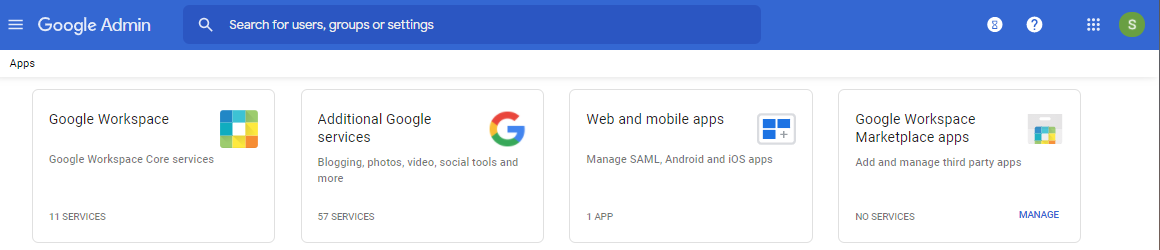
- Click the Apps icon located on the initial launch page of Google Admin portal. If that is missing click on the hamburger stack next to the Google Admin words on the top left.
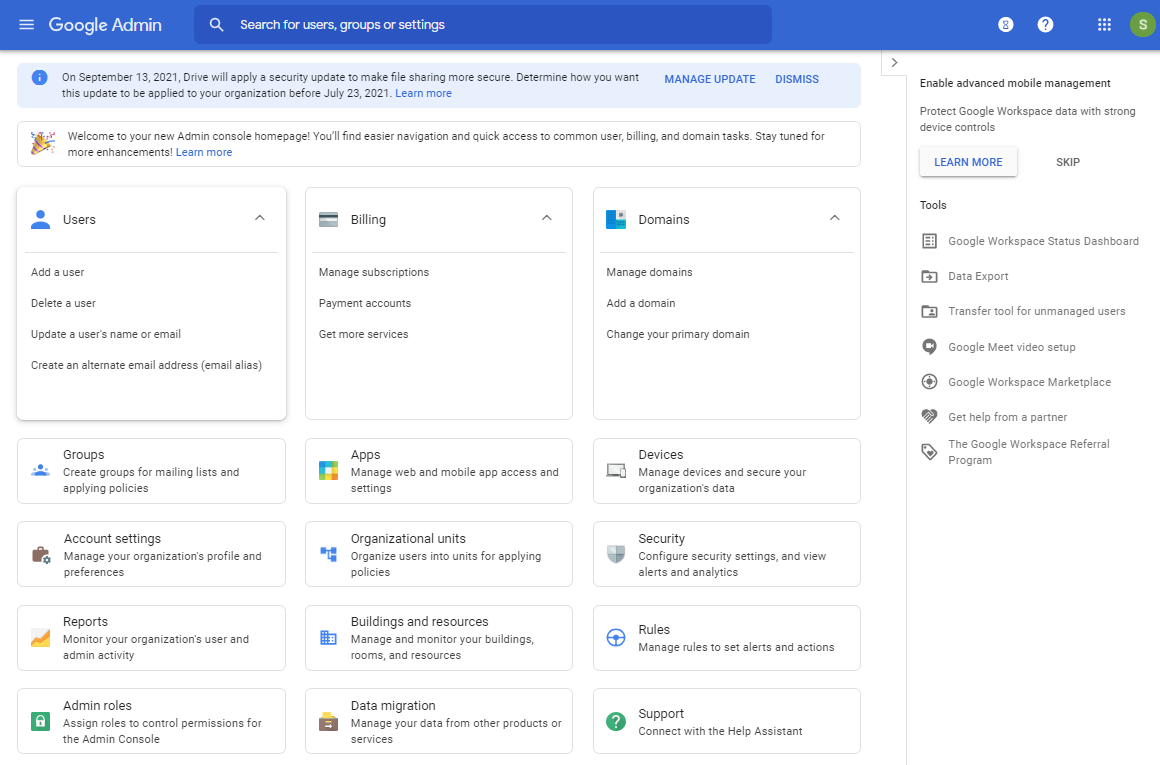
- After the Apps page loads, click on the Web and mobile apps icon.
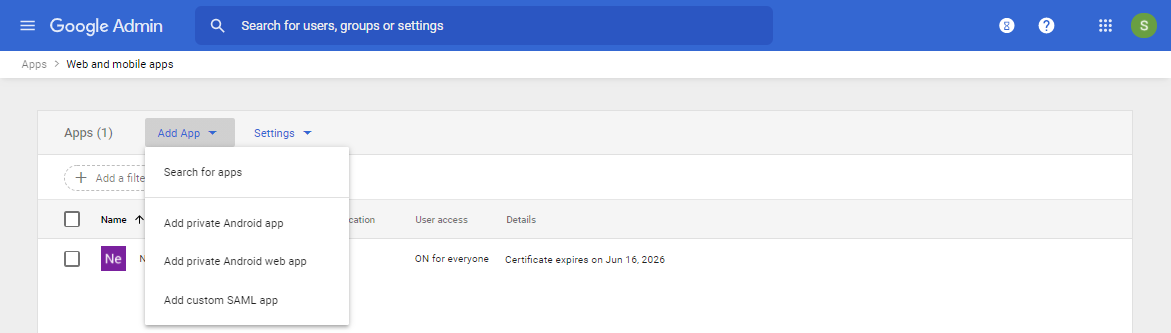
- Select the Add App drop down menu and click on Add custom SAML app.
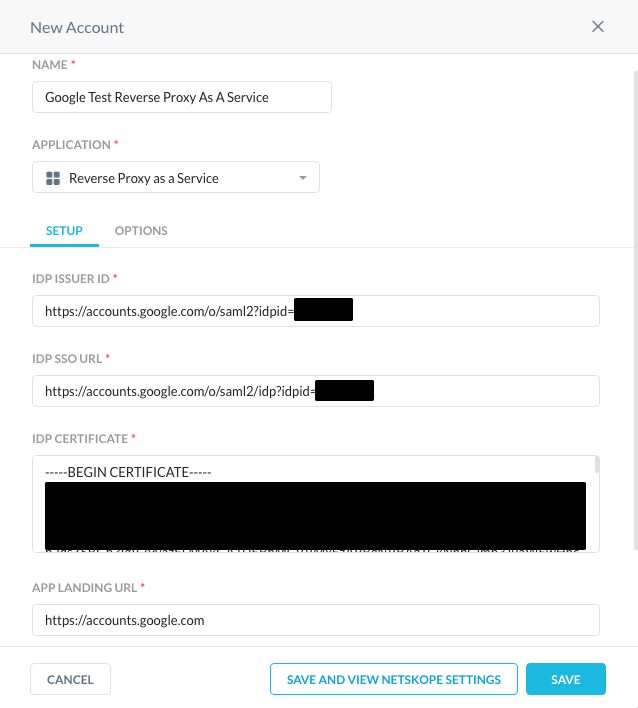
- Enter a name for the new application and click Continue.
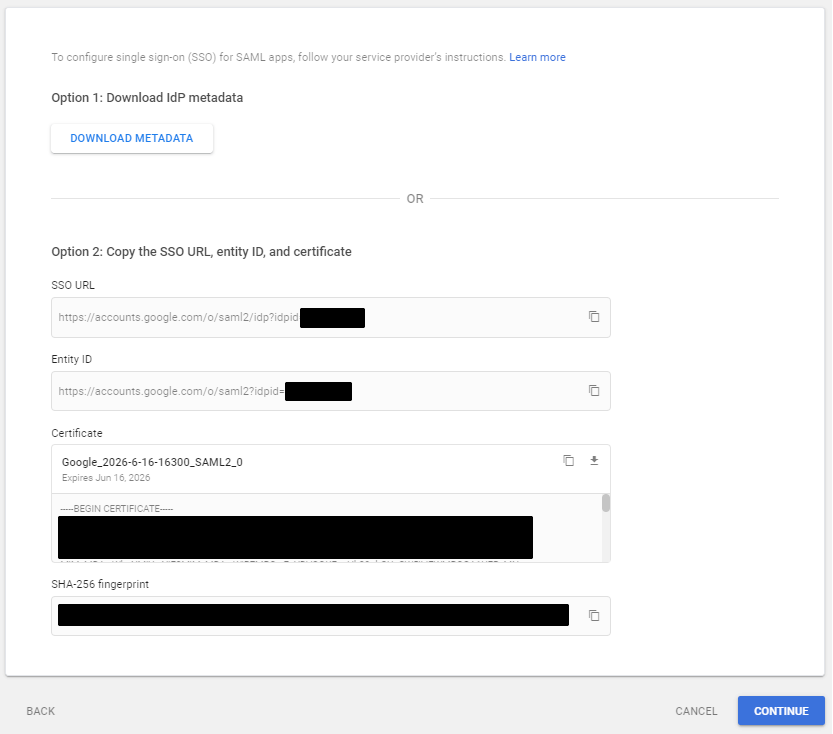
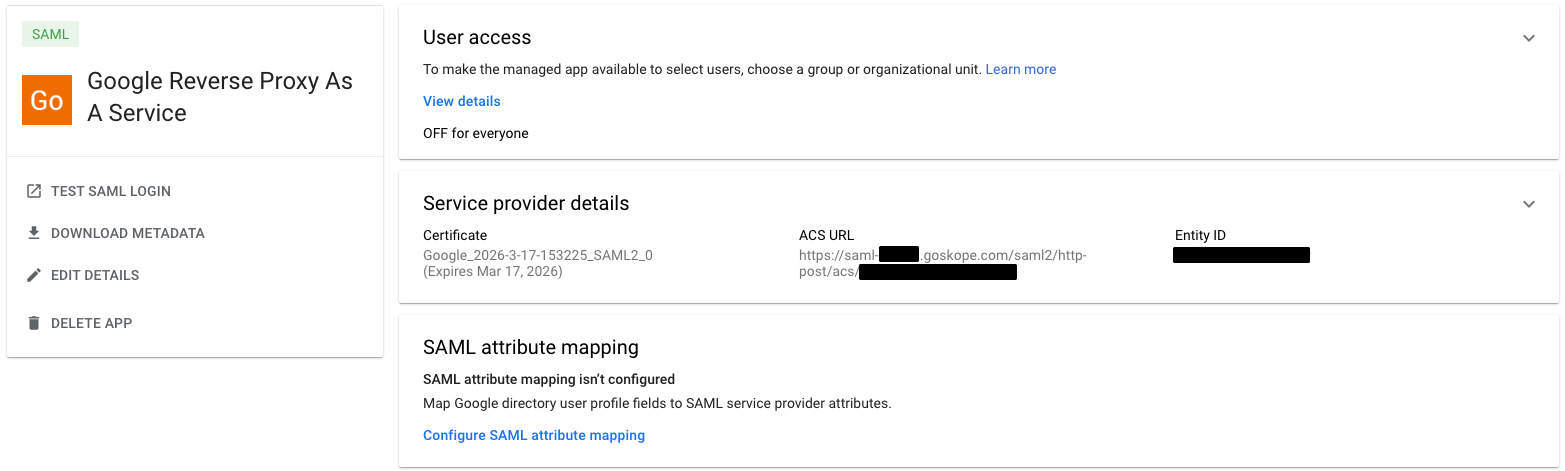
- Copy the SSO URL, Entity ID, and Certificate for later use. Then click Continue.
- Login to the Netskope tenant and go to Settings, Security Cloud Platform, Reverse Proxy, SAML, and Add Account.
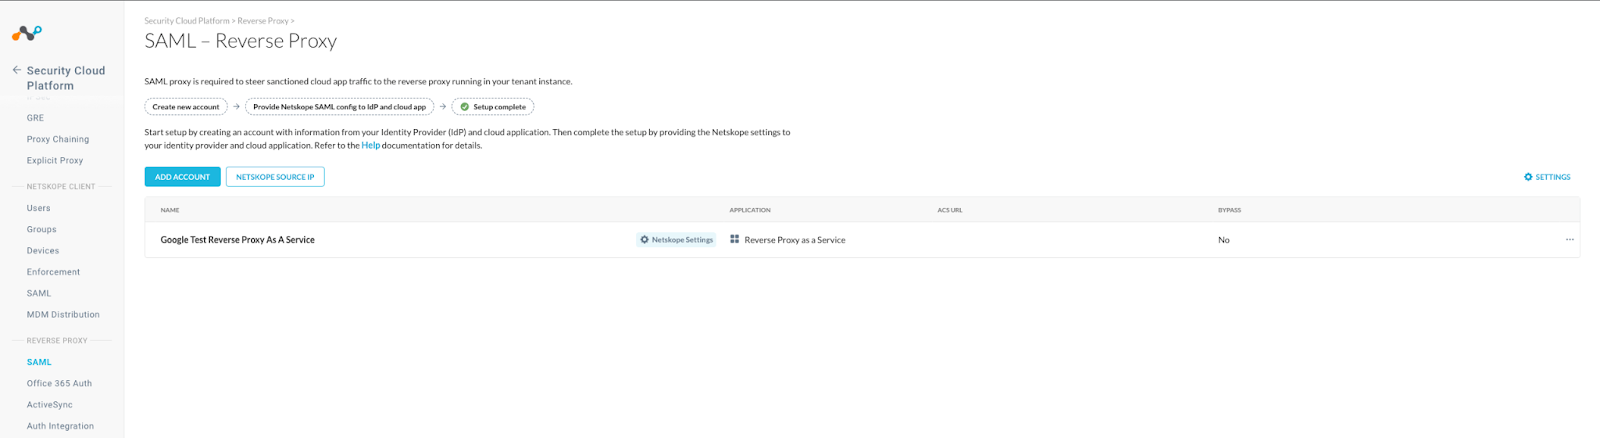
- Name the Reverse Proxy, select the Application type as Reverse Proxy as a Service, use the Entity ID copied earlier for the IDP Issuer ID, use the SSO URL copied earlier for the IDP SSO URL, and use the certificate copied earlier as the IDP certificate. Then save it.
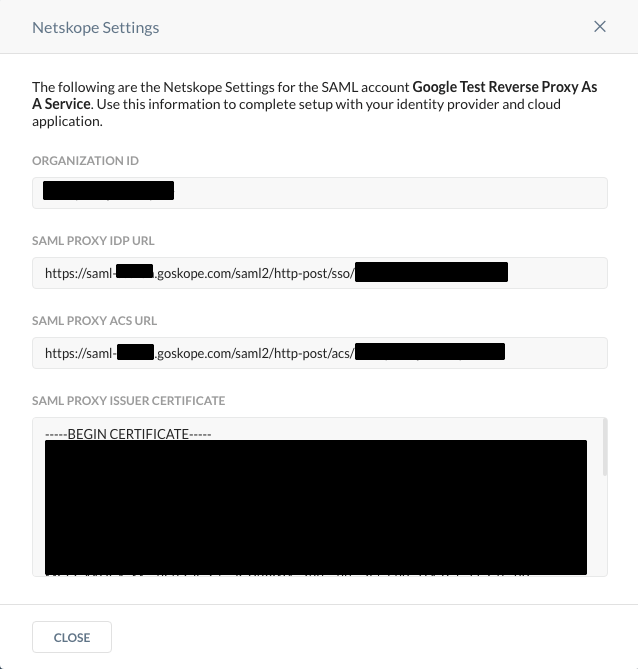
- From the list of SAML Reverse Proxies, click on Netskope Settings.

-
Copy the SAML Proxy ACS URL and Organization ID to be used later.
-
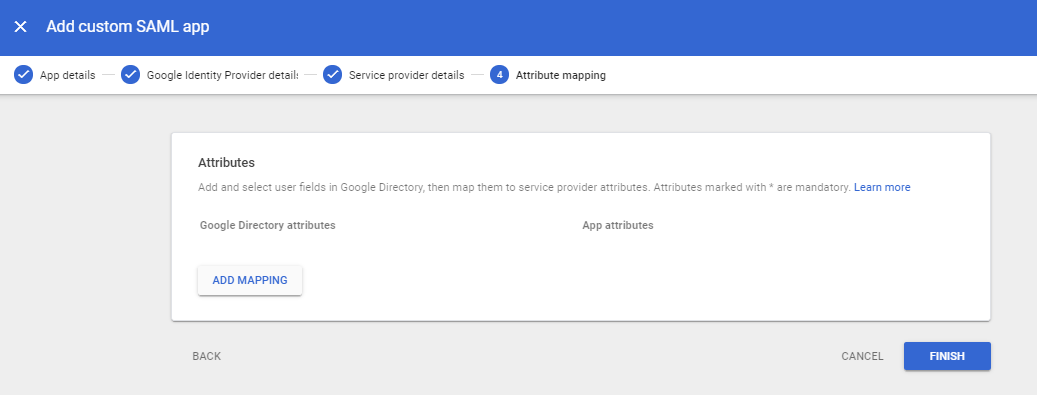
On the Google Identity Provider Details page, click Continue.
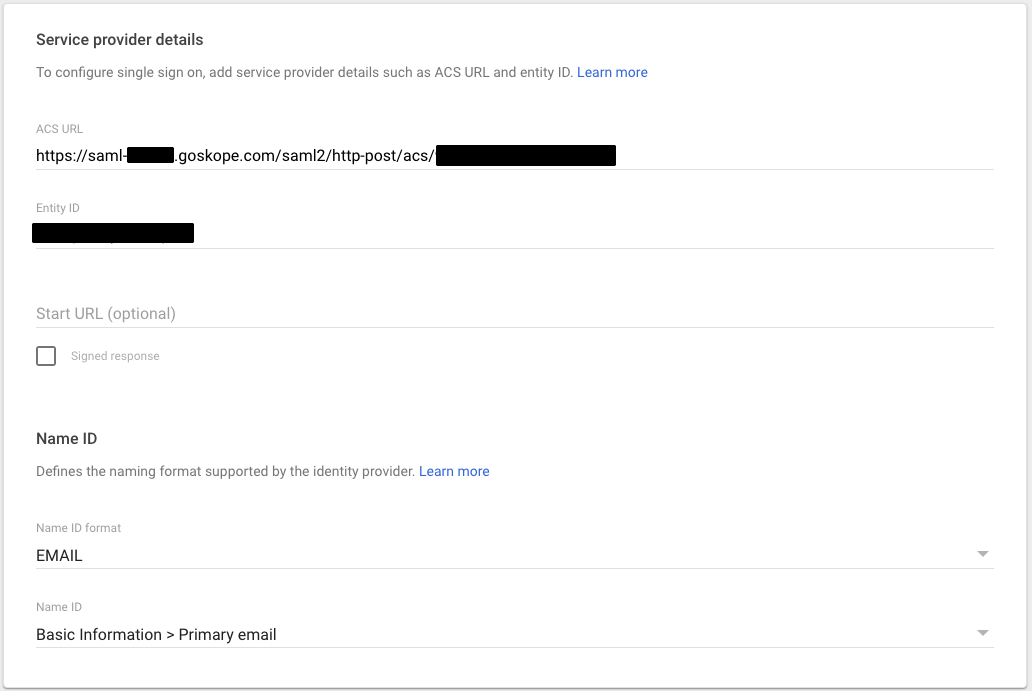
- On the Service provider details page, use the SAML Proxy ACS URL copied earlier in the ACS URL field and use the Organization ID copied earlier in the Entity ID field. Then click Continue.
-
Click Finish.
-
Locate the Google Reverse Proxy As A Service Web SAML application in Web and mobile apps.

-
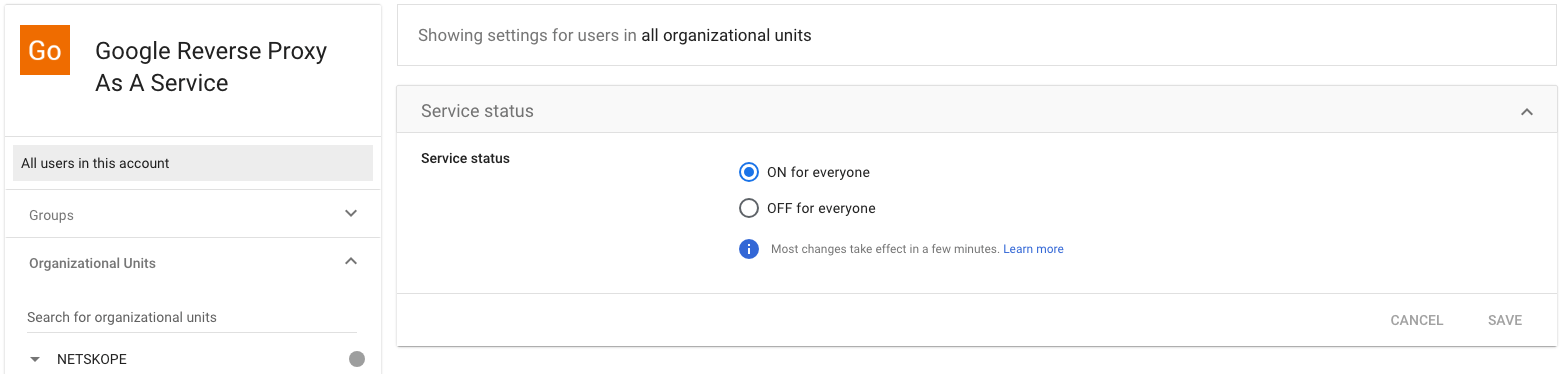
Click on the newly defined SAML app in Google Workspace. In the User Access area, click the down character and expand the selection.
-
Turn on the application for everyone and then click Save.
-
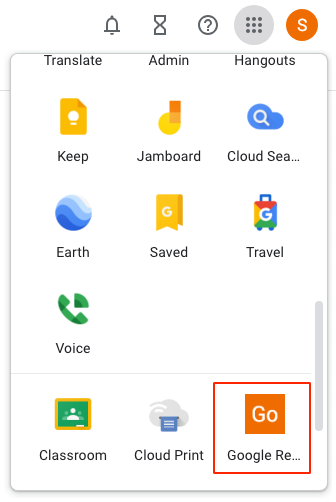
In the upper right-hand corner of the browser, locate the nine bullets stacked on each other in a 3X3 pattern. A list of applications will appear.
- Scroll down and locate the Google Reverse Proxy As A Service, see red outlined applications.
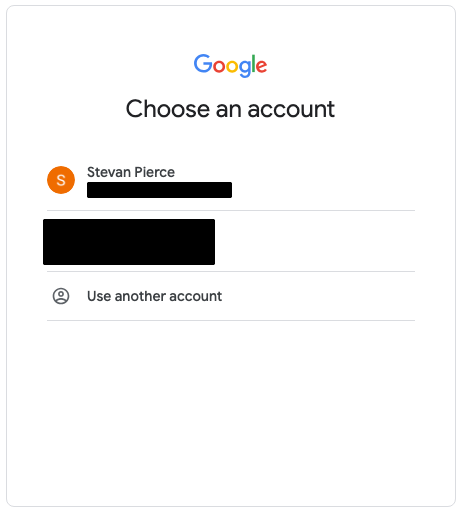
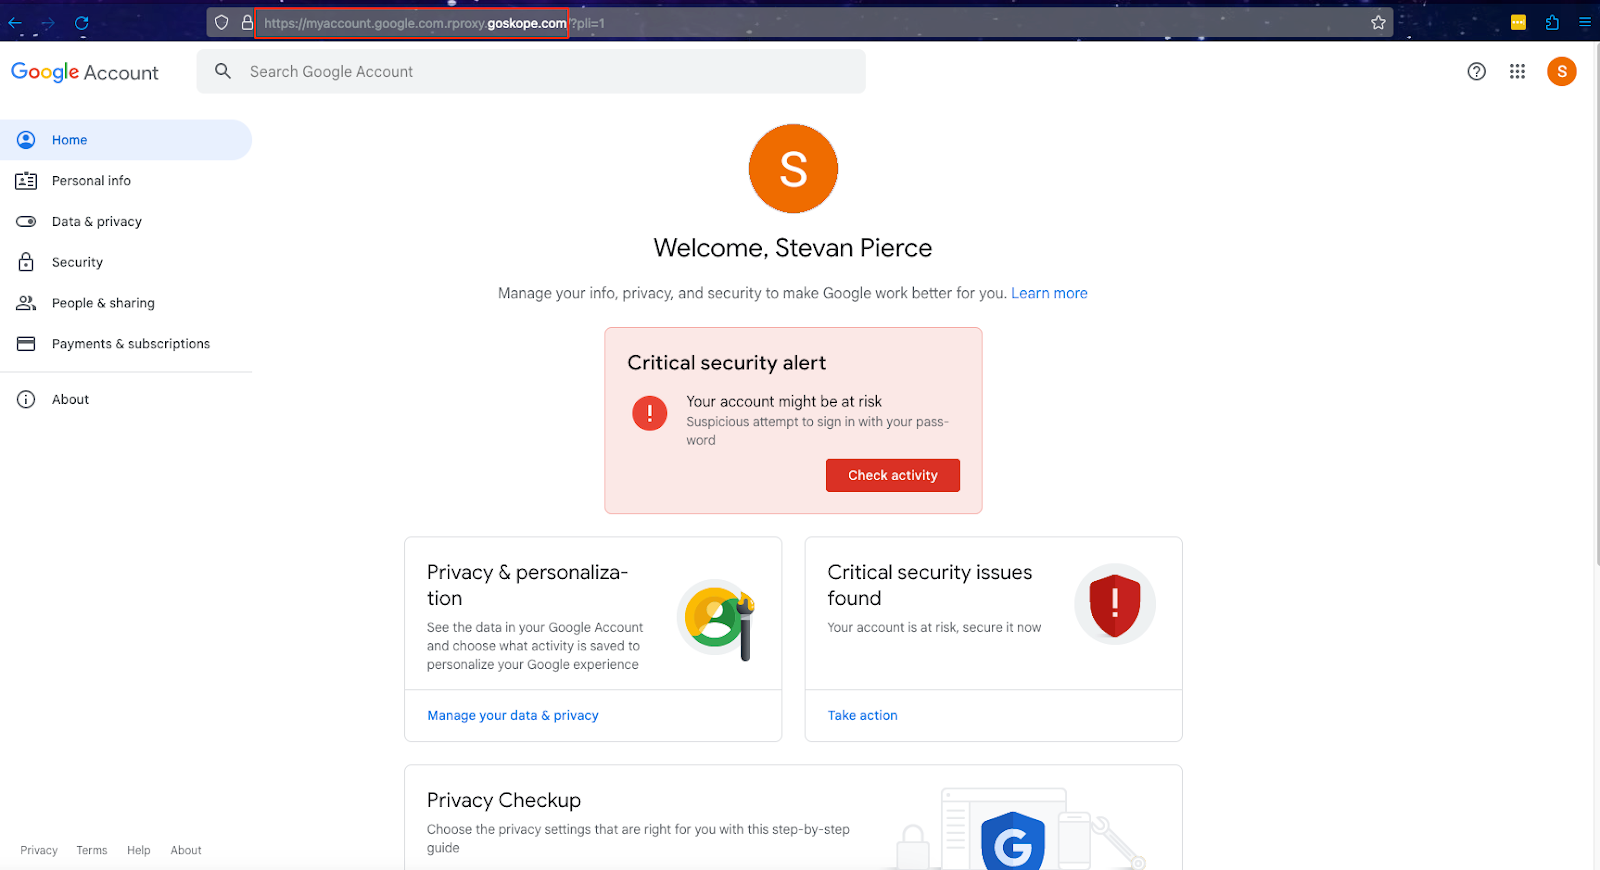
- Authentication needs to happen twice, once to initially login to the Google Workspace and a second time to login to the Google Reverse Proxy As A Service.

- After authenticating twice, the browser should be redirected to https://myaccount.google.com.rproxy.goskope.com/?pli=1 provided this is the page which has been designated in Step 8 above.
-
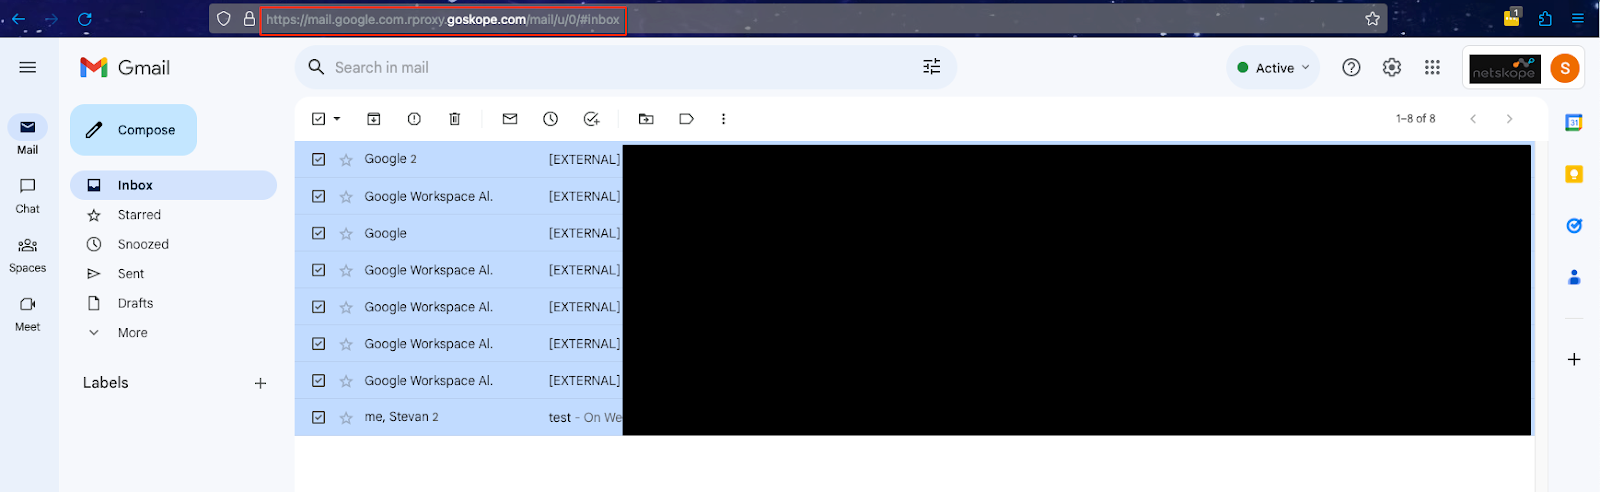
In the upper right-hand corner of the browser, locate the nine bullets stacked on each other in a 3X3 pattern. Select an application from the list to test the Google Reverse Proxy As A Service.
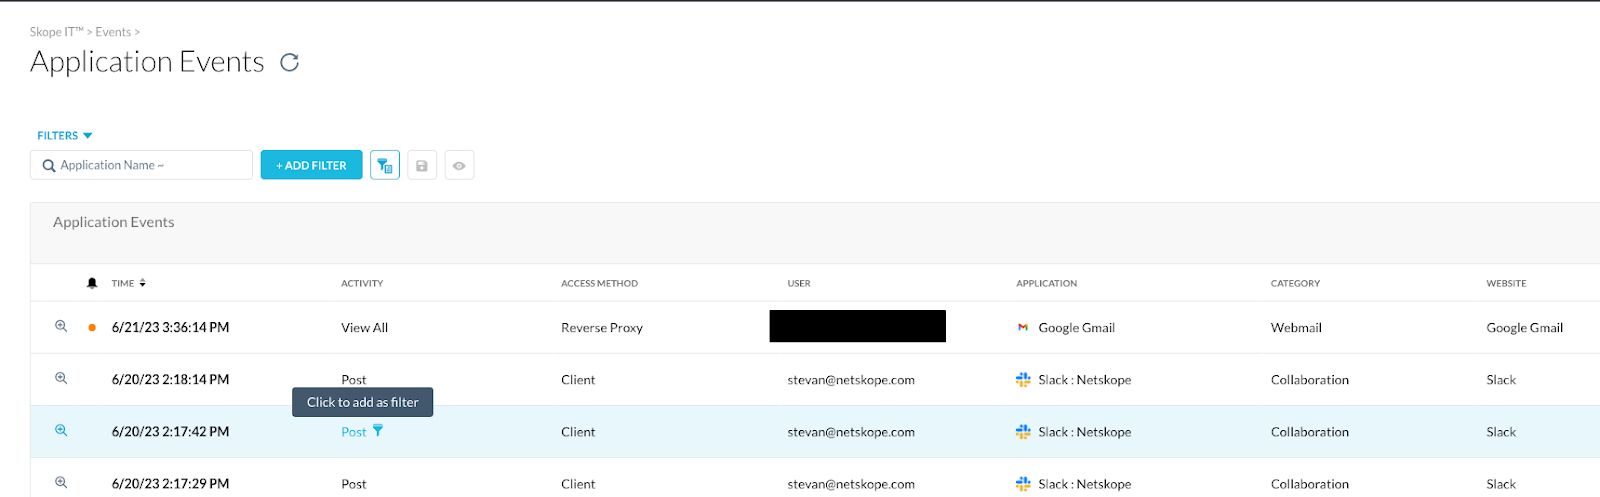
- Confirm that the tenant has seen Reverse Proxy traffic by going to Application Events in SkopeIT.
Setup Context Aware Access Policies
The final step is to create a context awareness policy which limits access to Google Workspace applications as well as the Google Reverse Proxy As A Service application.
For Google Workspace Applications, you would limit access from non-Netskope IP addresses. These of course will vary based on the features in the tenant such as the Egress IP feature.
For the Google Reverse Proxy As A Service, we would limit access to this application from Netskope IP addresses.
The net effect is that we are funneling people to use the Google Reverse Proxy As A Service when the client is disabled, connected to another tenant, or access is attempted from a personal device.
Just like setting up the Google Reverse Proxy As A Service application in Google Workspace, there are a number of steps required for this to work.
Enable endpoint verification
The following OSes are supported for endpoint verification, mobile devices excluded from this discussion.
- Apple Mac OS X El Capitan (10.11) and later
- Devices running ChromeOS
- Linux Debian and Ubuntu, CPU must support AES instructions
- Microsoft Windows 7, 8, 8.1, 10, and 11
- Go to the the Google Admin console at https://admin.google.com
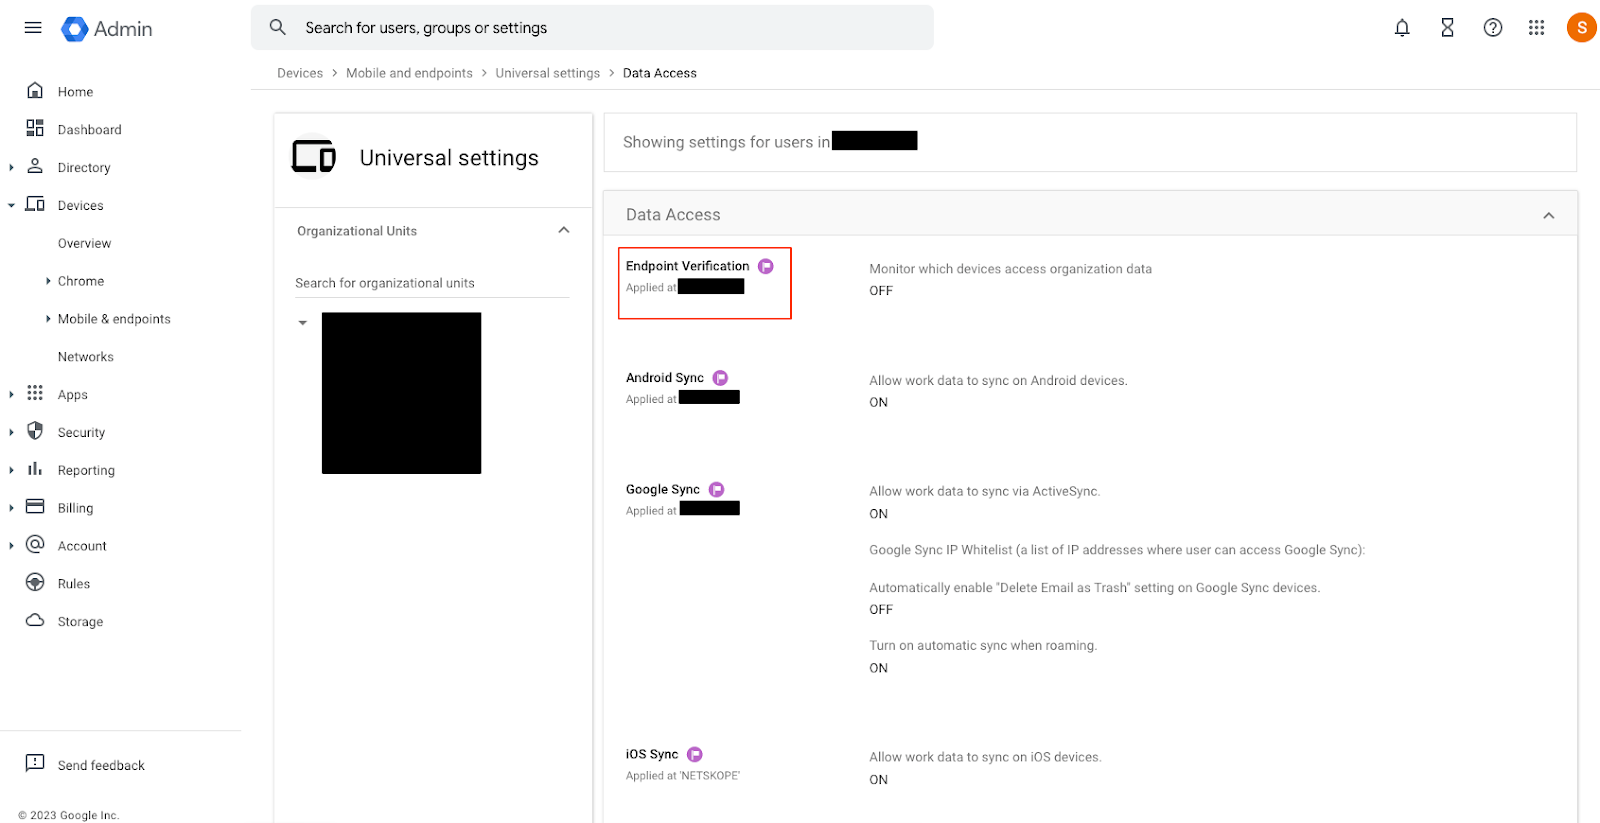
- Go to Menu, Devices, Mobile & endpoints, Settings, Universal.
- Click on Endpoint Verification.
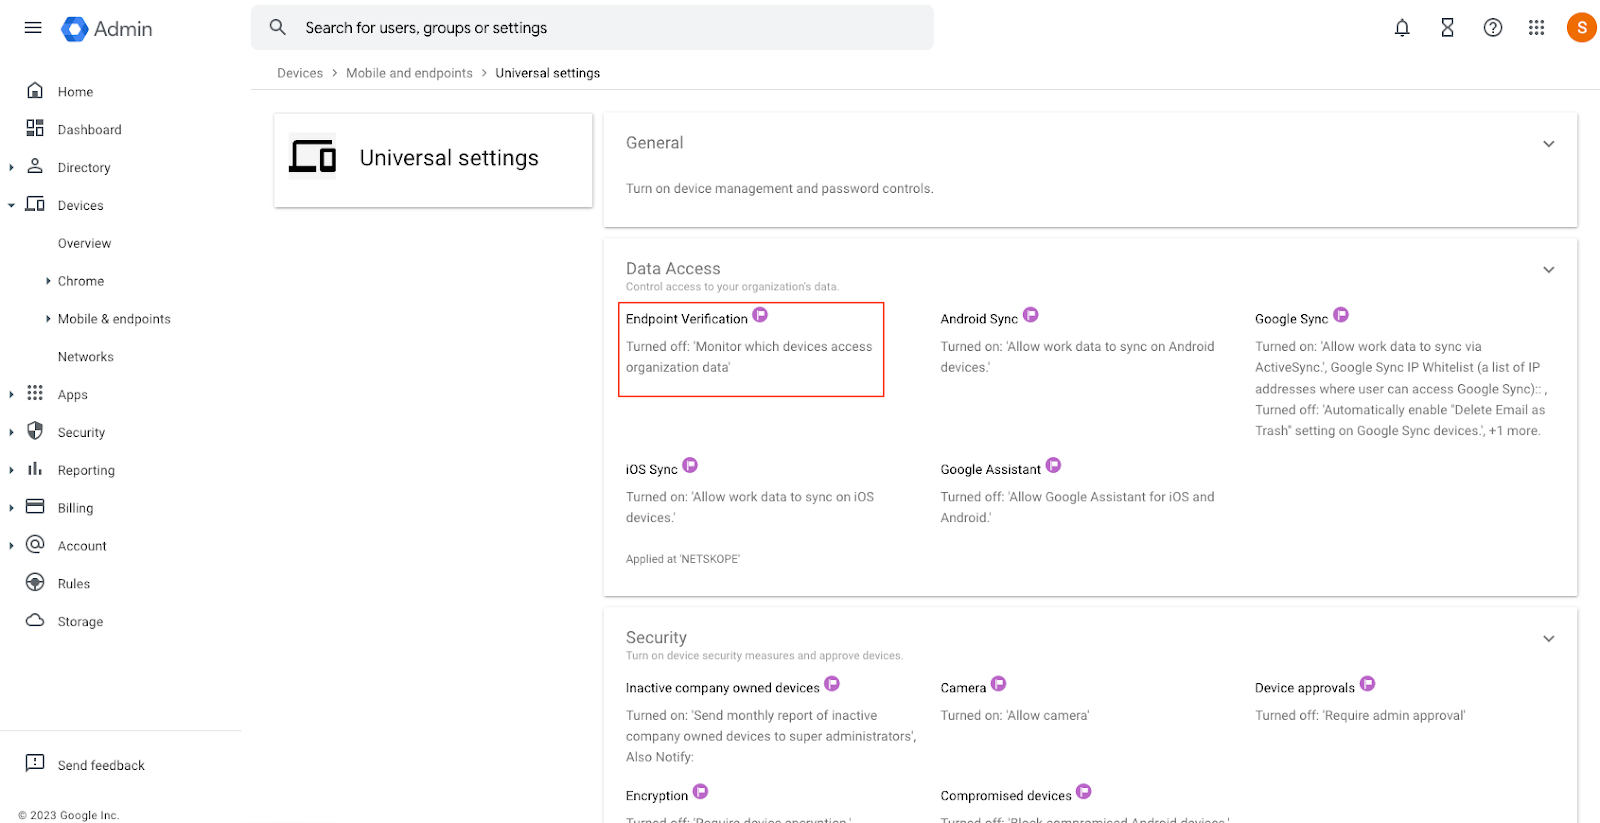
- Click on Endpoint Verification.
-
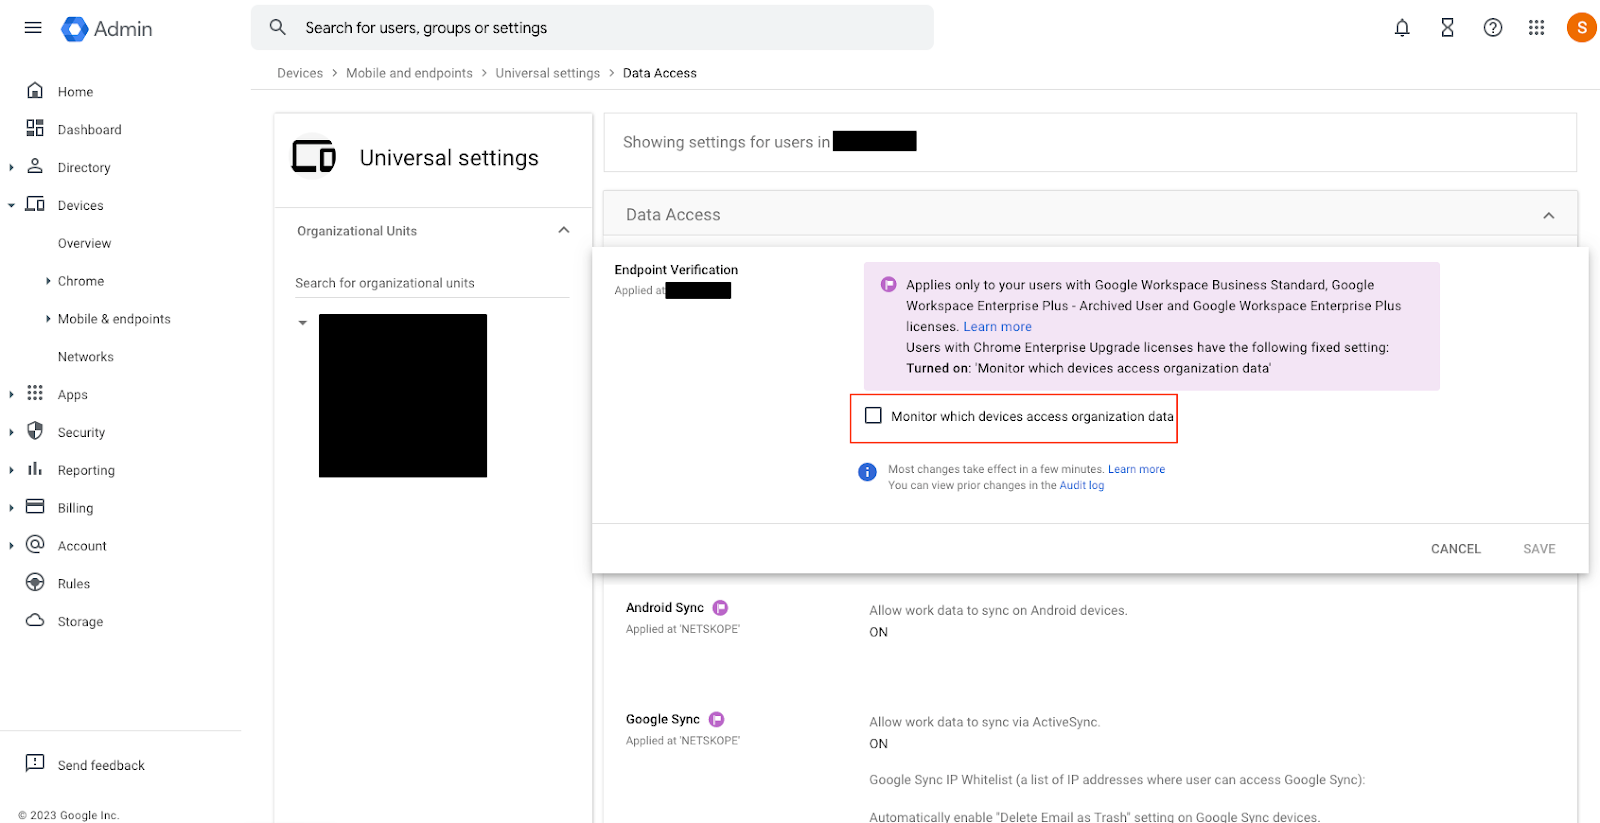
Click on the check-box for Monitor which devices access organization data and then click Save.
Verify endpoint verification
- Endpoint verification must be set up by going to the the Google Admin console at https://admin.google.com
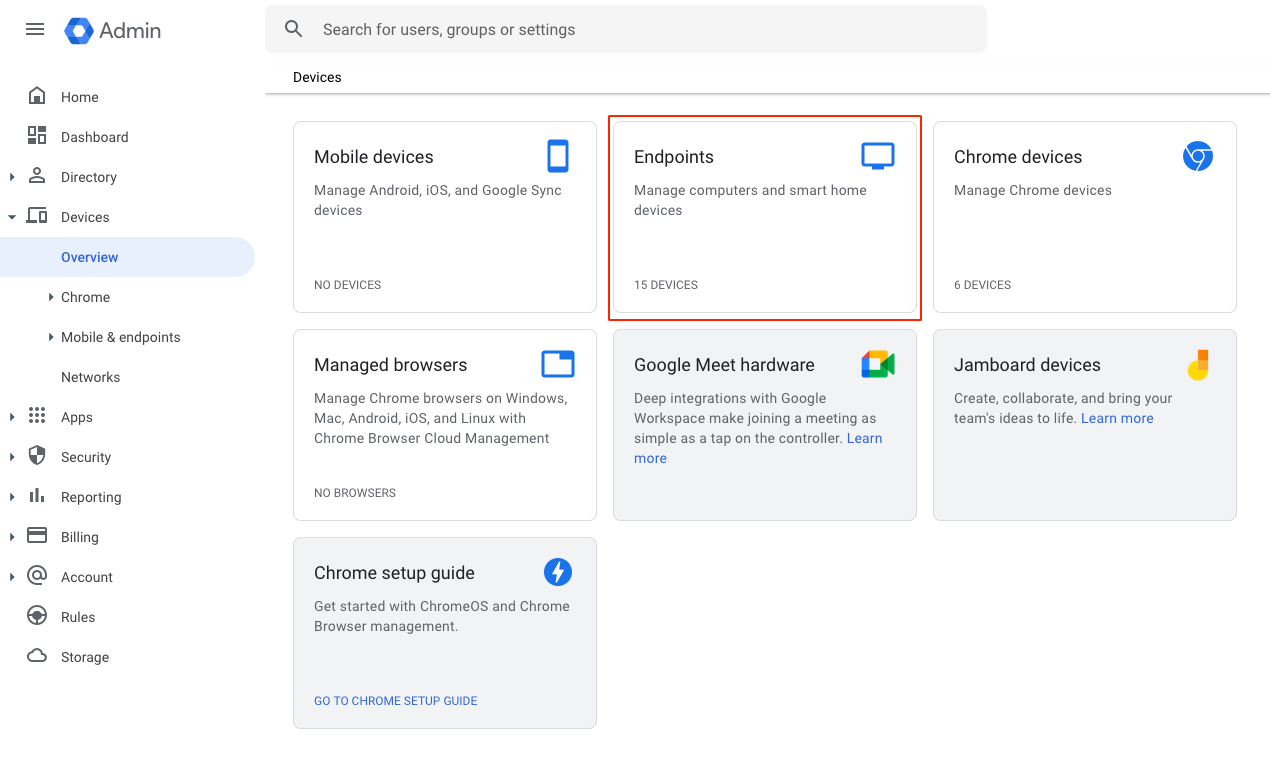
- Go to Menu, Devices, and Overview.
- Click on Endpoints.
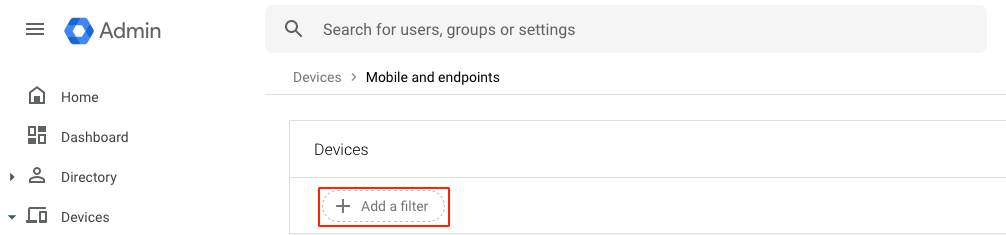
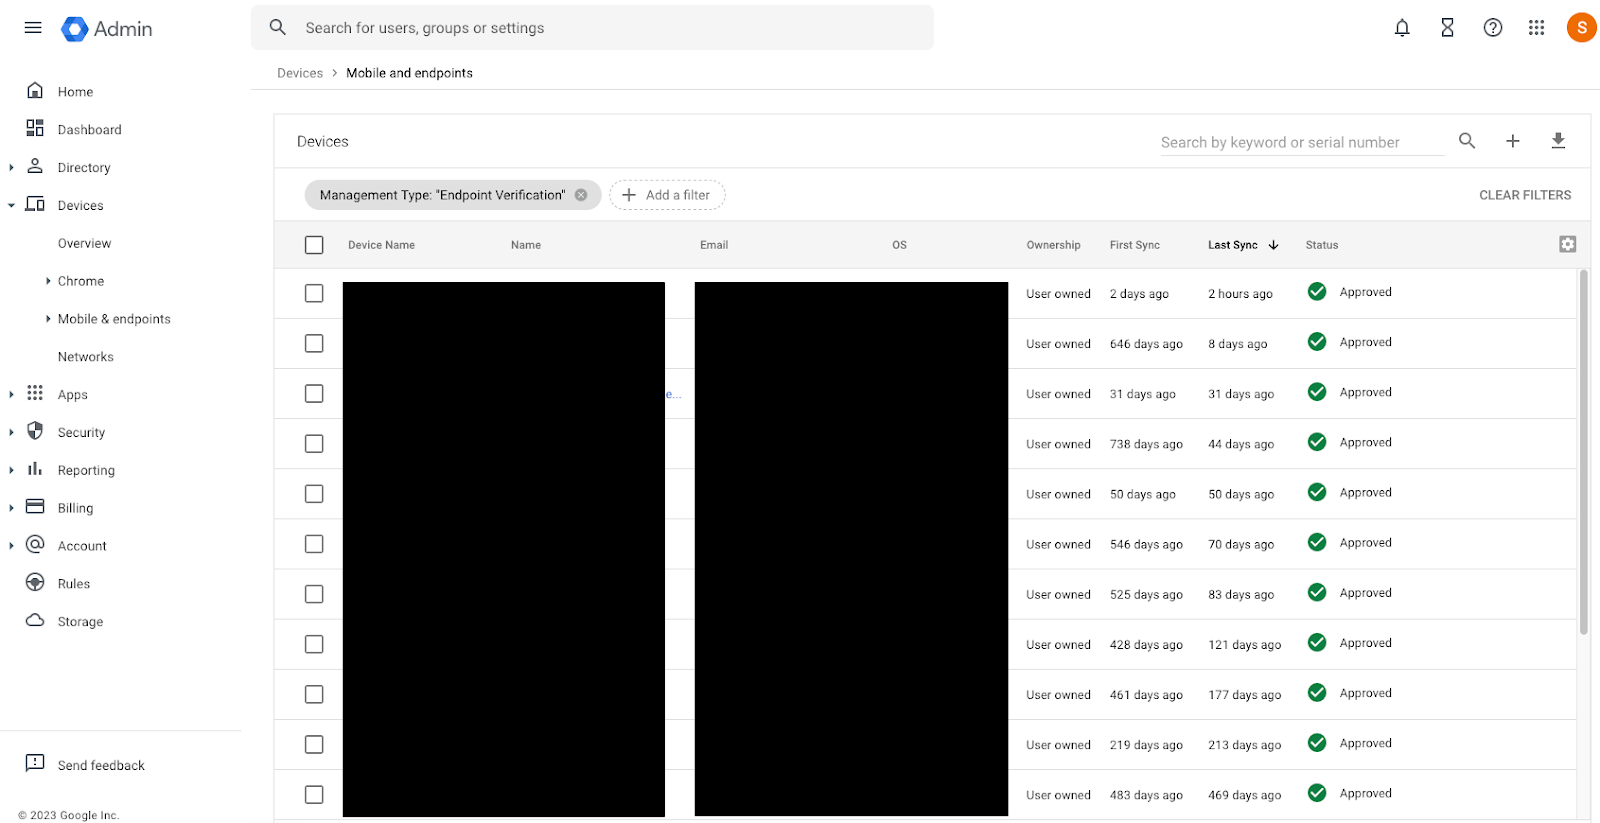
- Click Add a filter.
- Enter Management Type, select Endpoint Verification, and click Apply.
- Confirm that devices have endpoint verification enabled by reviewing the list of filtered devices.
Turn on Context-Aware Access
- Go to the the Google Admin console at https://admin.google.com
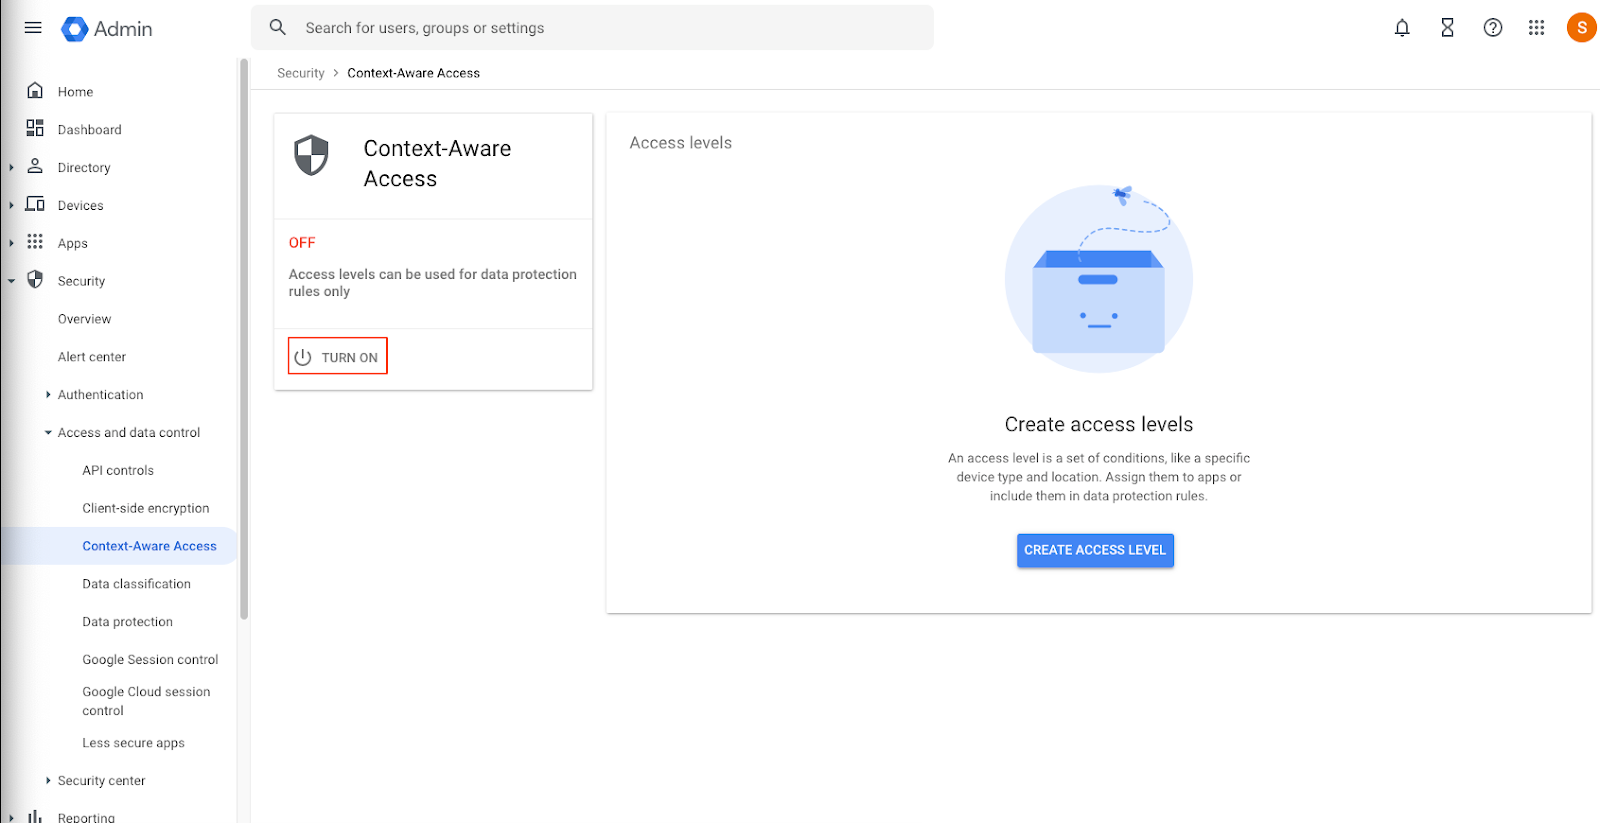
- Go to Menu, Security, Access and data control, and Context-Aware Access.
- Click Turn On.
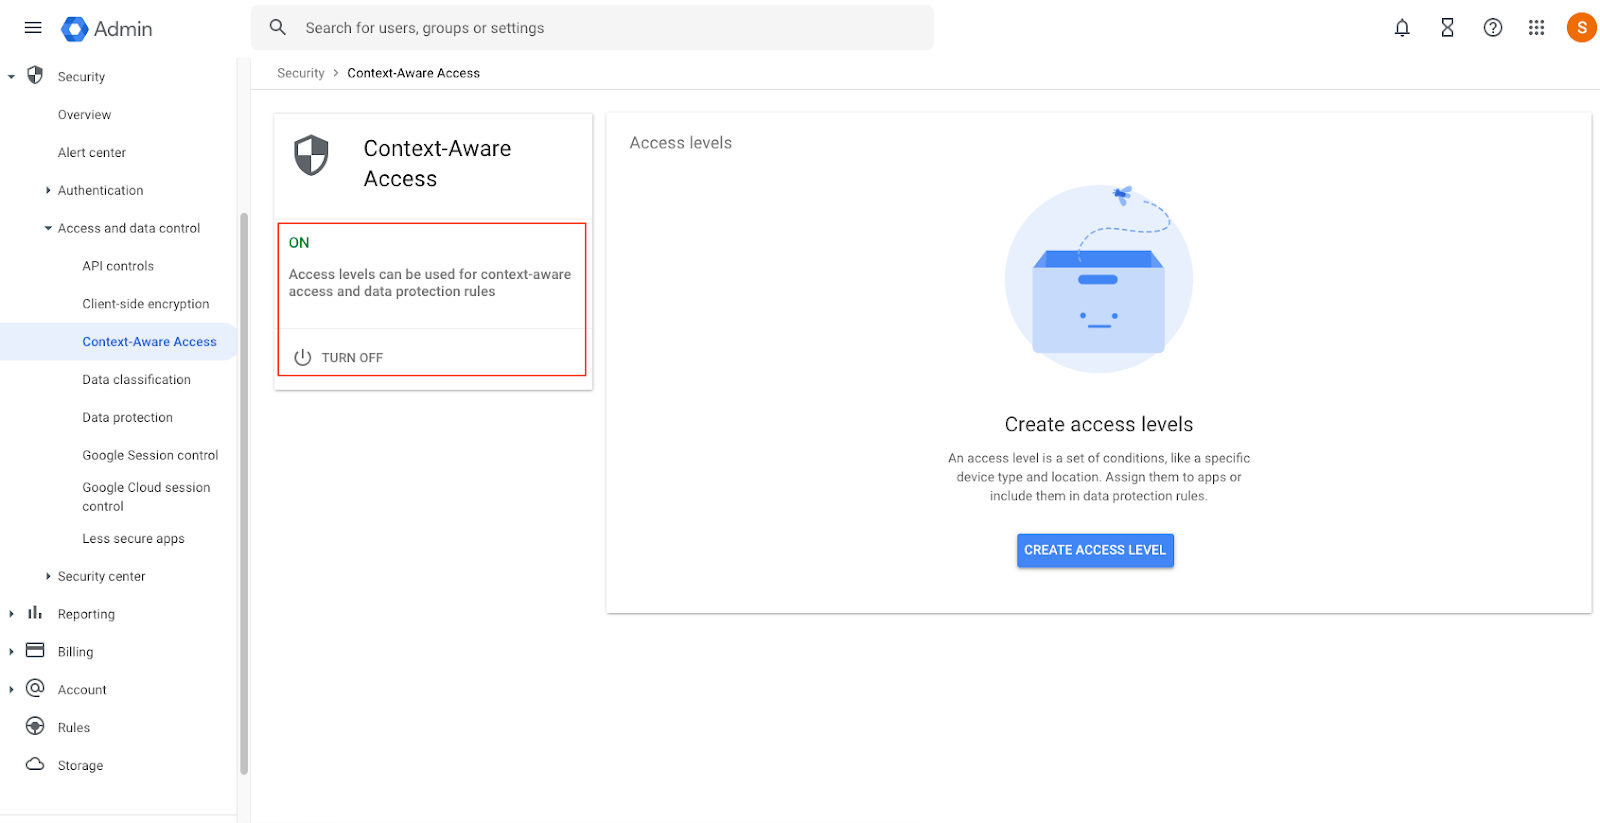
- Context Aware-Access Access will be turned on.
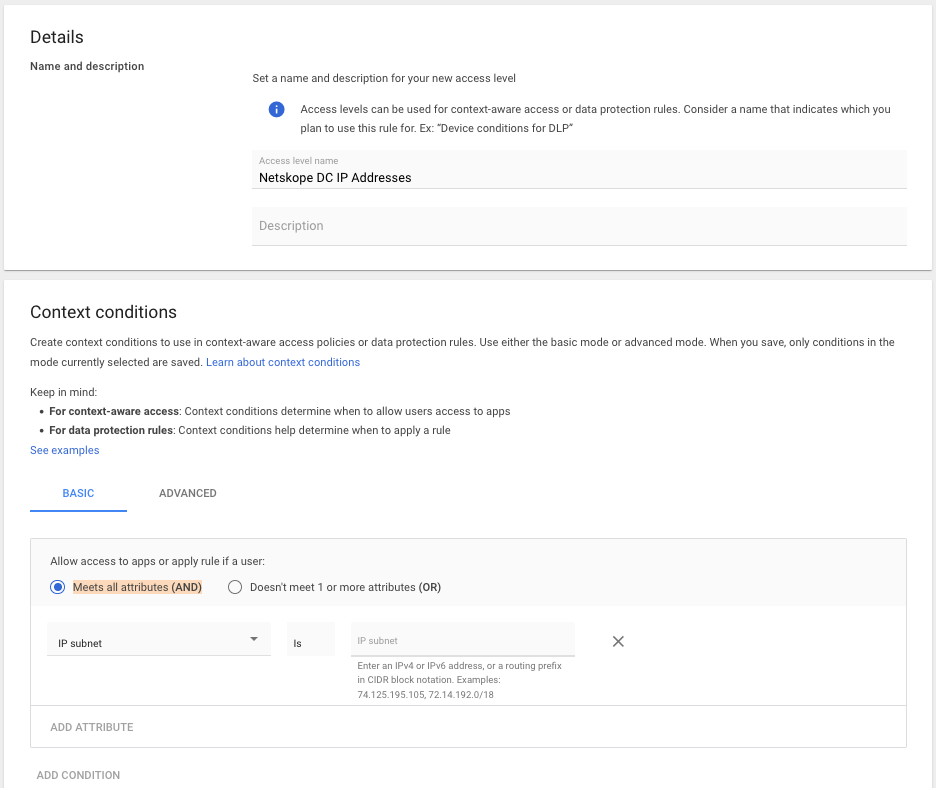
Create an Access Level
- On the right-hand side of the page, click on create the access level button.
- Name the access level. In the context conditions section, select Basic, use the radio button to choose Meets all attributes (AND), and use the drop-down to choose IP subnet.
- Login to the Netskope tenant and go to Settings, Security Cloud Platform, Reverse Proxy, SAML, and click on Netskope IP Addresses.

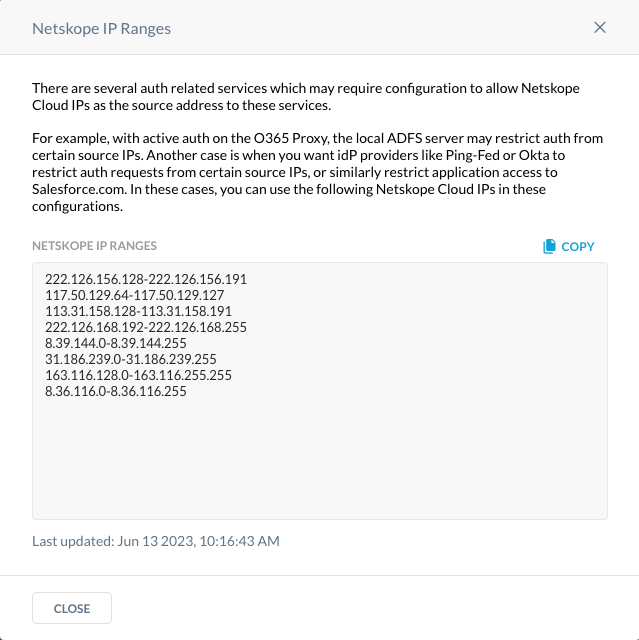
- Convert these addresses to a routing prefix in CIDR notation. A good site to convert the ranges is https://www.subnet-calculator.com/cidr.php It’s important to note that each tenant may be different. However, the address ranges above have been converted and located below.
222.126.156.128/26
117.50.129.64/26
113.31.158.128/26
222.126.168.192/26
8.39.144.0/24
31.186.239.0/24
163.116.128.0/17
8.36.116.0/24 - Add the IP subnets in a routing prefix in CIDR notation to the IP subnet section.
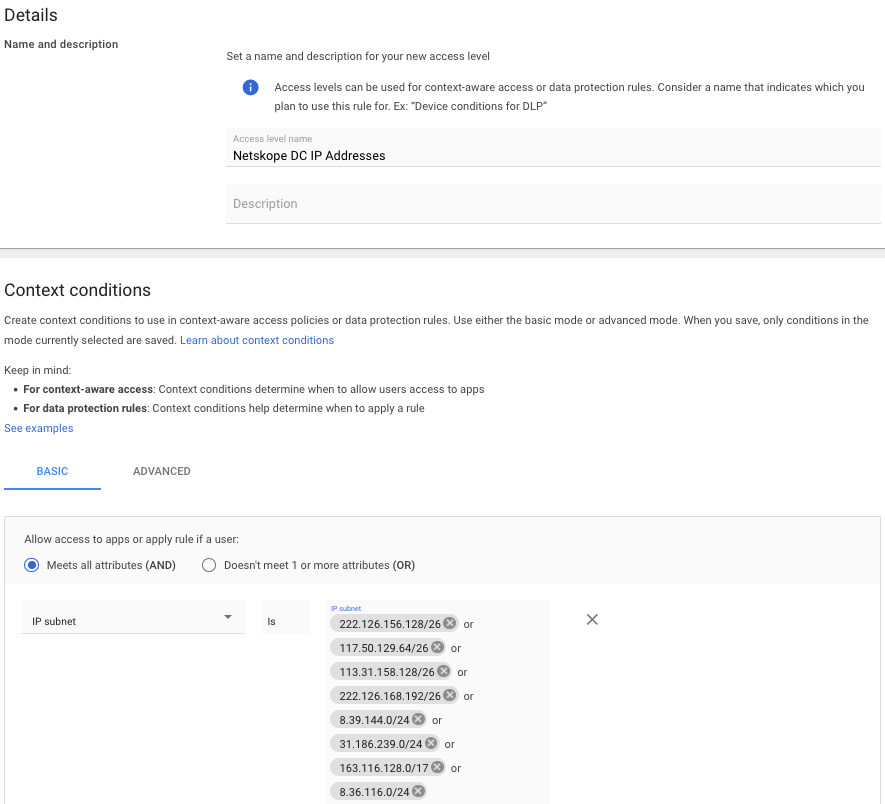
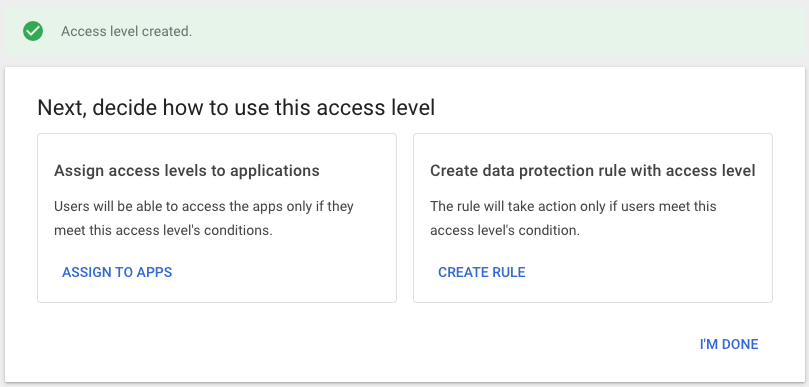
- Click create in the lower right-hand corner.
- Assign the access level to applications by clicking on assign to apps.
- Assign the context level access to all of the applications which will have access restricted to access using devices that are not steered by Netskope, i.e. a Netskope Client or IPSec tunnel. Click assign at the top of the list of applications.
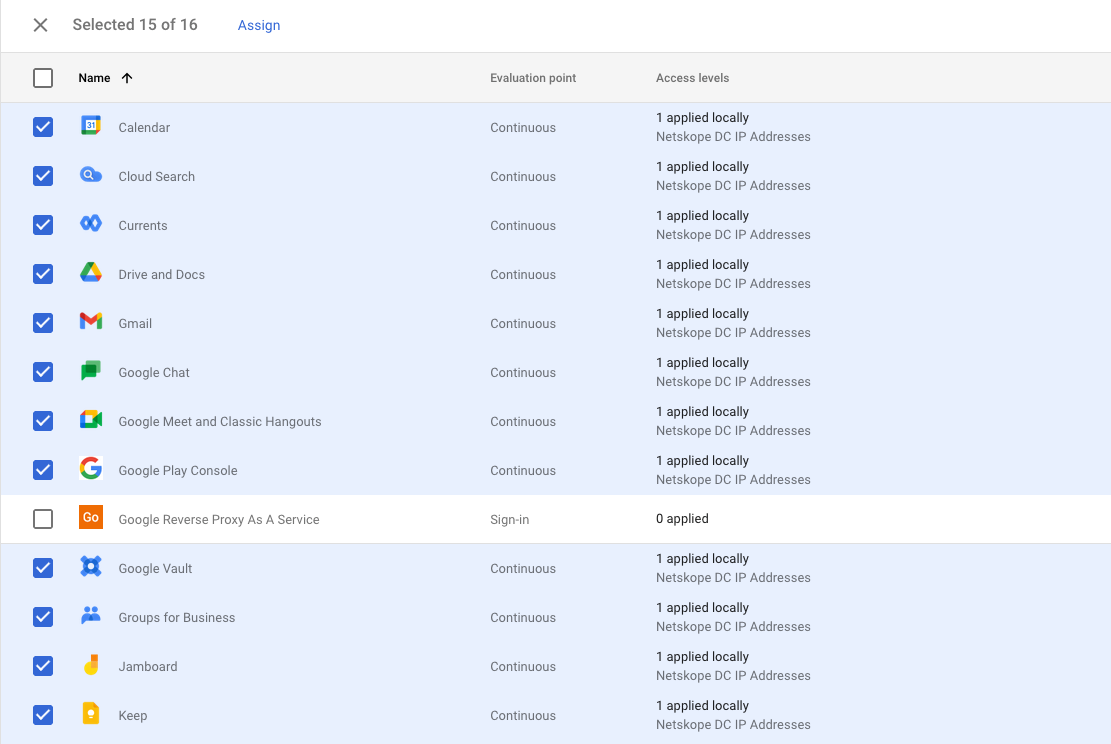
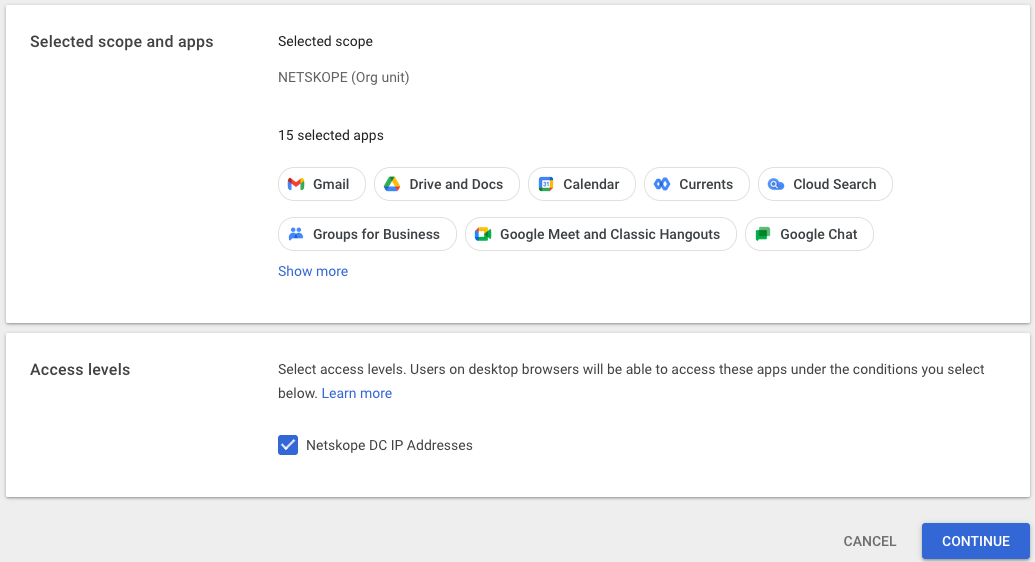
- Confirm the list of applications to have a context aware access policy applied and click continue.
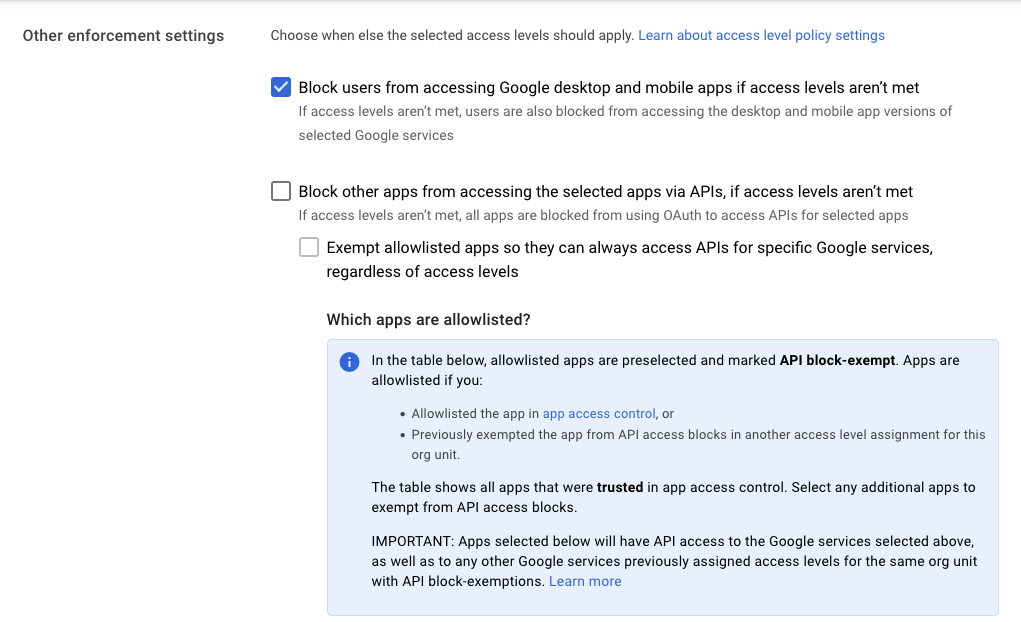
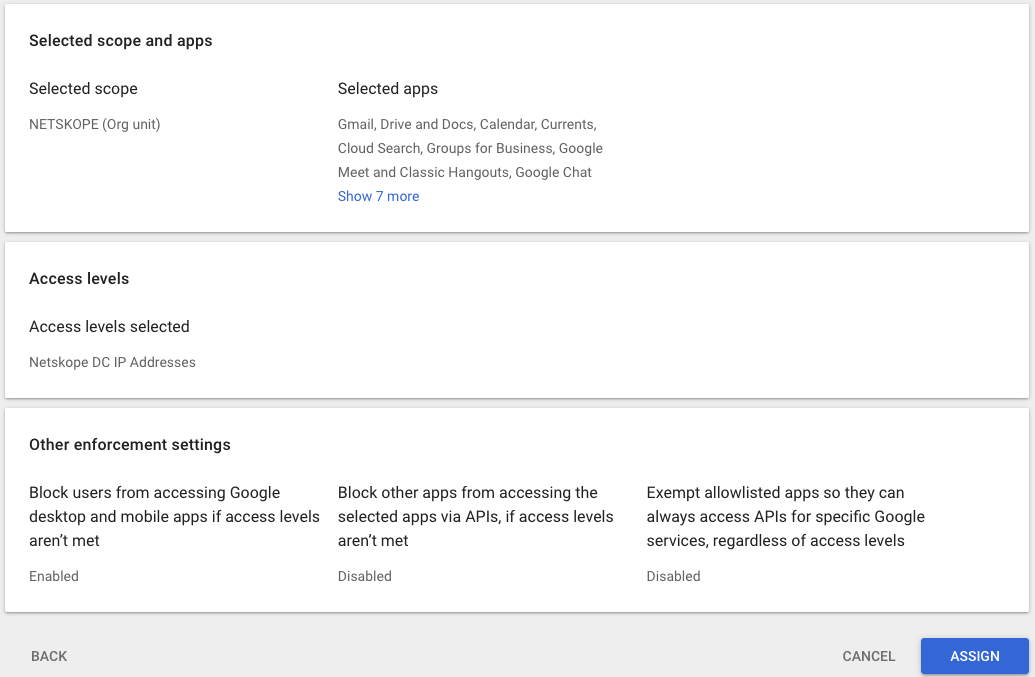
- In the other enforcement settings, select the check box to block users from accessing Google desktop and mobile apps if access levels aren’t met. The click continues on the lower right hand side of the page.
- Click Assign.
Test Access to Google Workspace Applications
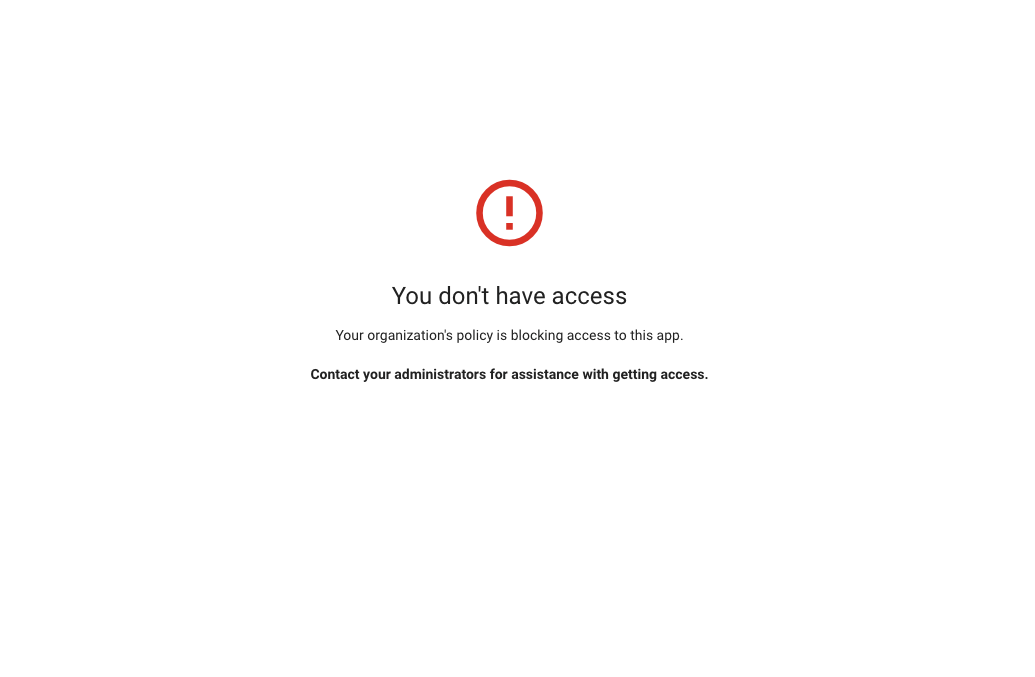
Confirm access to applications with the Netskope Client on and with the Netskope Client disabled.
With the Netskope Client disabled, access to the application is blocked and a notification page will be displayed.