


Netskope Private Access and Cloud Exchange running in Azure
Overview
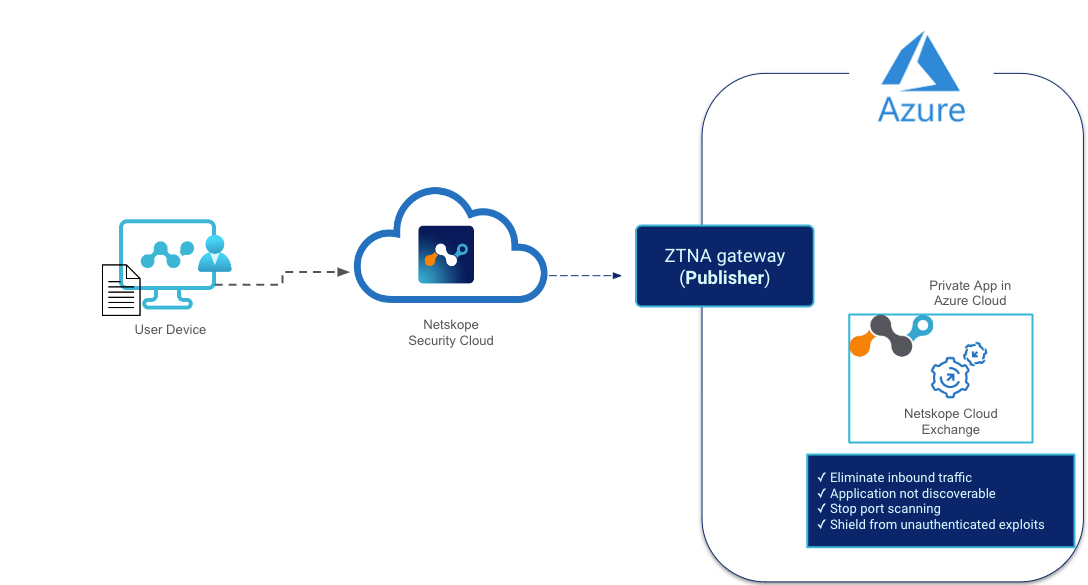
Using Netskope’s Private Access (NPA) can help secure workloads in Azure like deploying Netskope’s Cloud Exchange there. In this solutions guide NPA is used to front end a Cloud Exchange server that doesn’t have direct inbound internet access.
Requirements
- Netskope tenant with a NPA license
- Azure account
Setup Steps
Netskope
- Configure a Netskope Publisher in your Tenant
Azure
- Deploy Virtual Machine Netskope Publisher
Cloud Exchange
- Setting up Cloud Exchange in Azure
- Deploy Virtual Machine Ubuntu Server
- Add Access to Cloud Exchange via NPA
- Setup Cloud Exchange on Ubuntu Server
Verify
- Netskope Tenant sees your publisher
- Check your client for the NPA tunnel
- Try to access cloud exchange on your private IP
Configure a Netskope Publisher in your Tenant
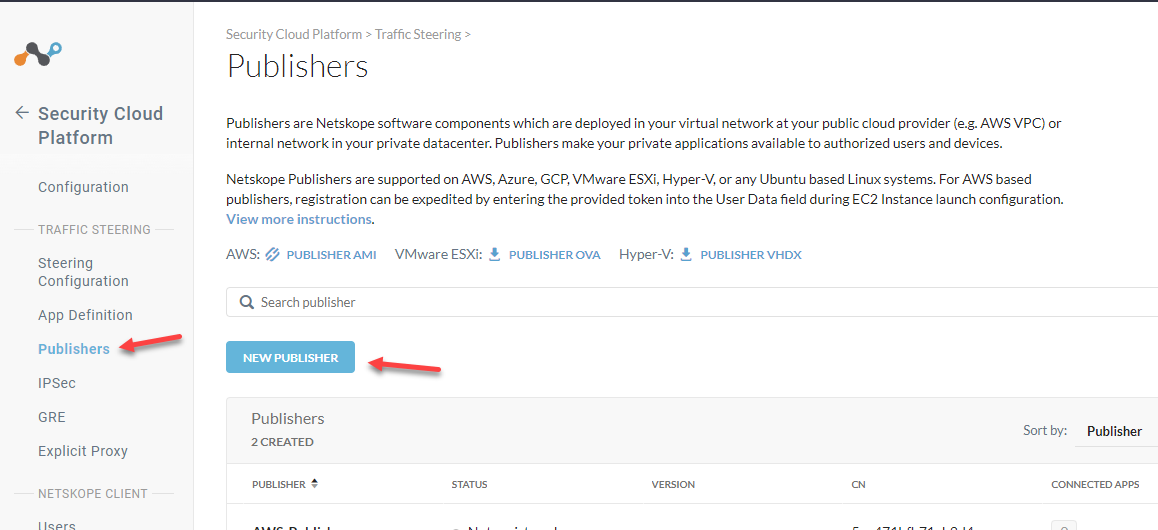
Go to your Netskope Tenant > Settings > Security Cloud Platform > Publishers
Click New Publisher
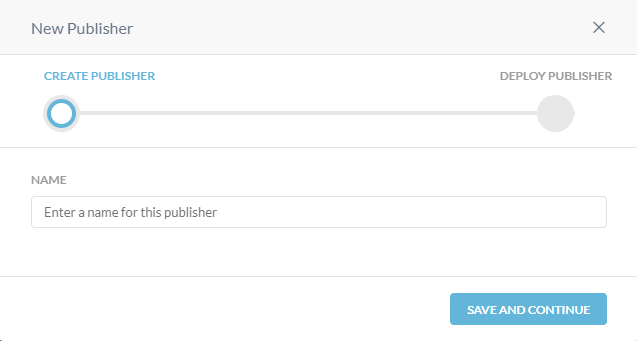
Give your publisher a name
Save and Continue
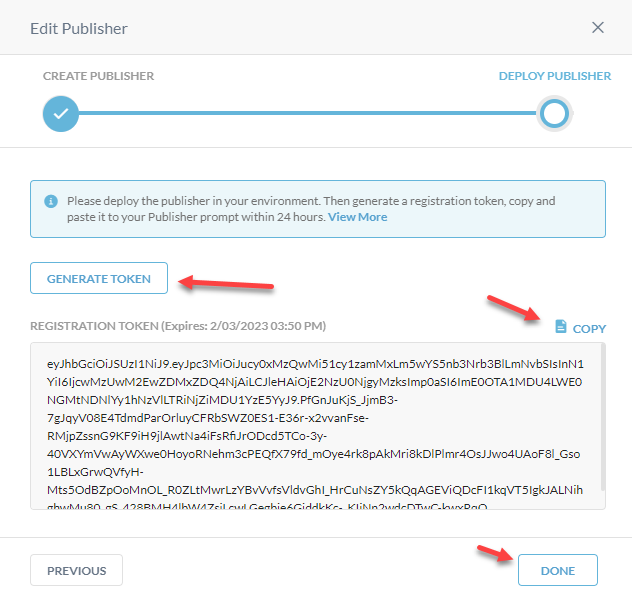
Generate Token > Copy
Done
Deploy Virtual Machine Netskope Publisher
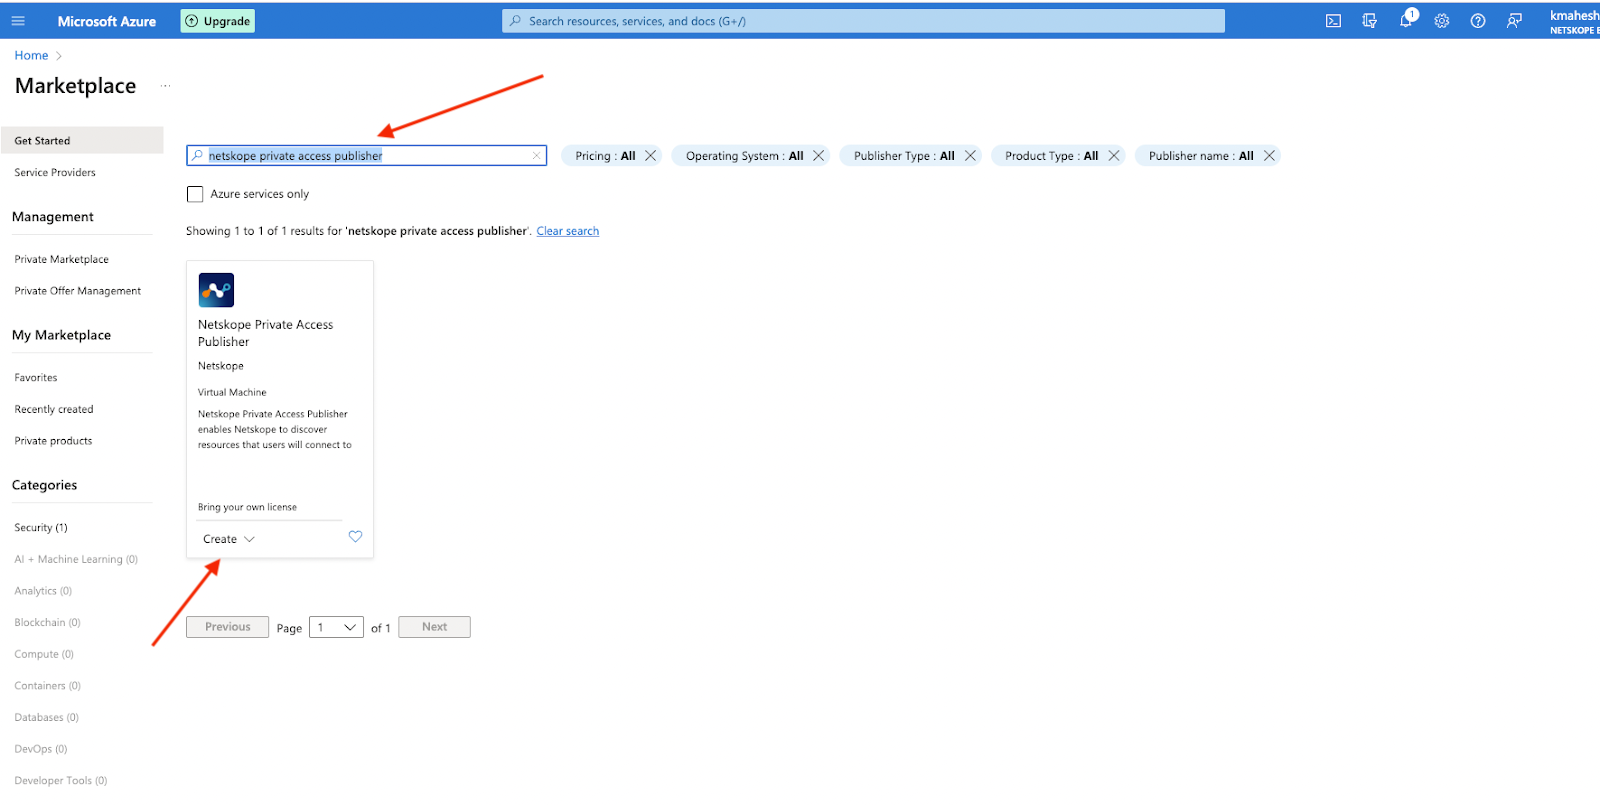
Log into your Azure account and go to Azure Marketplace. Search for the Netskope private access publisher.
Click on Create
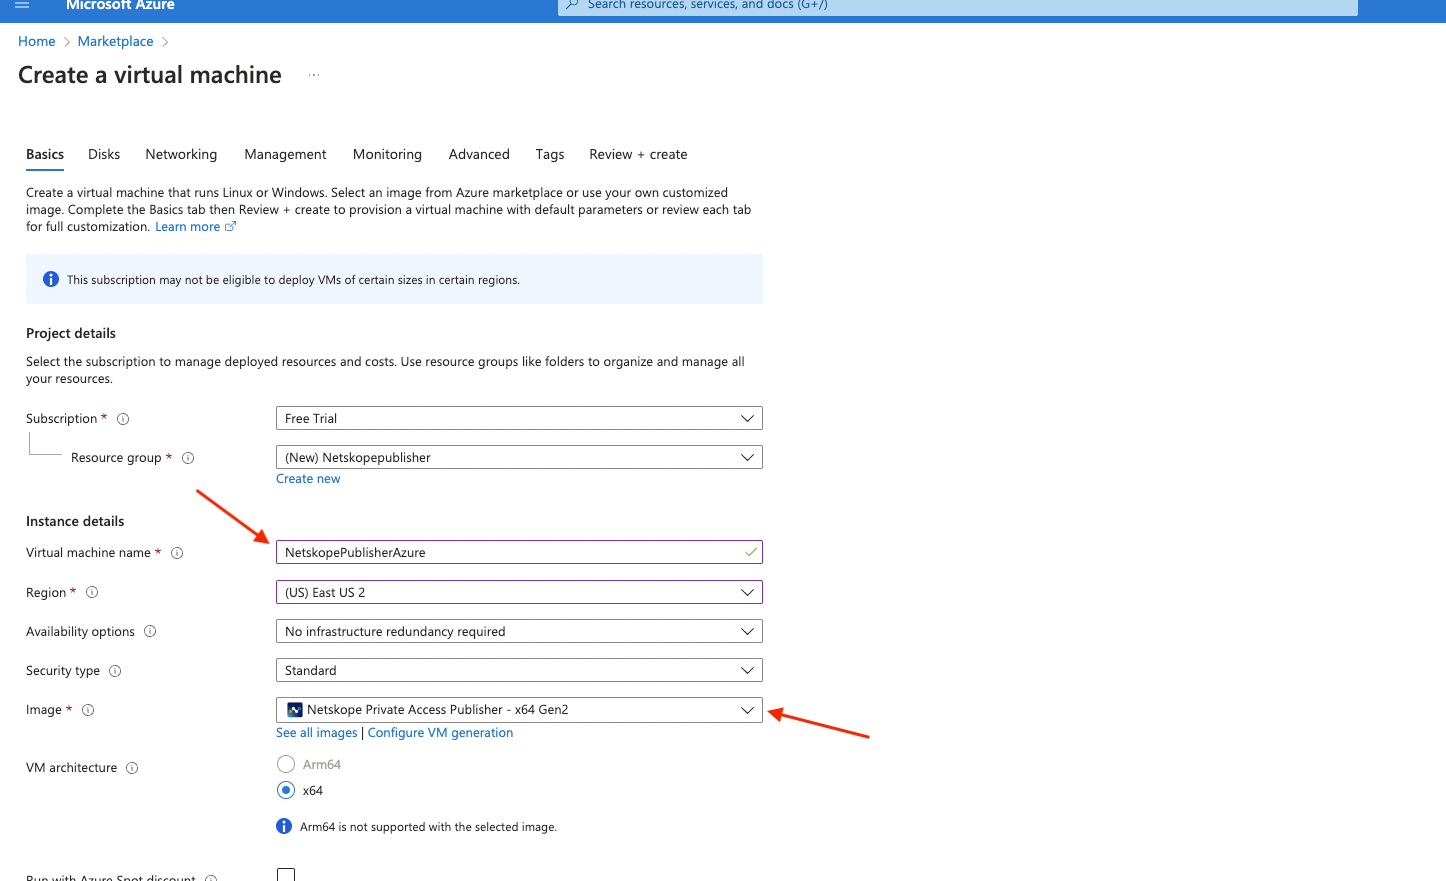
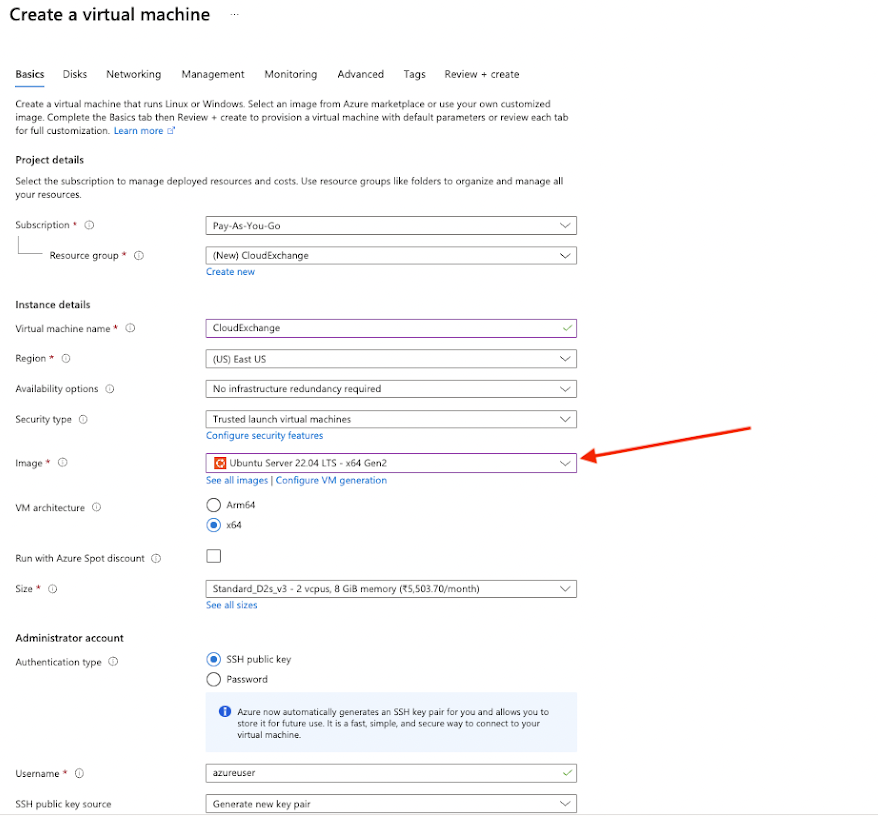
Create your Virtual Machine with the appropriate permissions & Add a name for your instance and you can also search for Netskope publisher in the Image section below
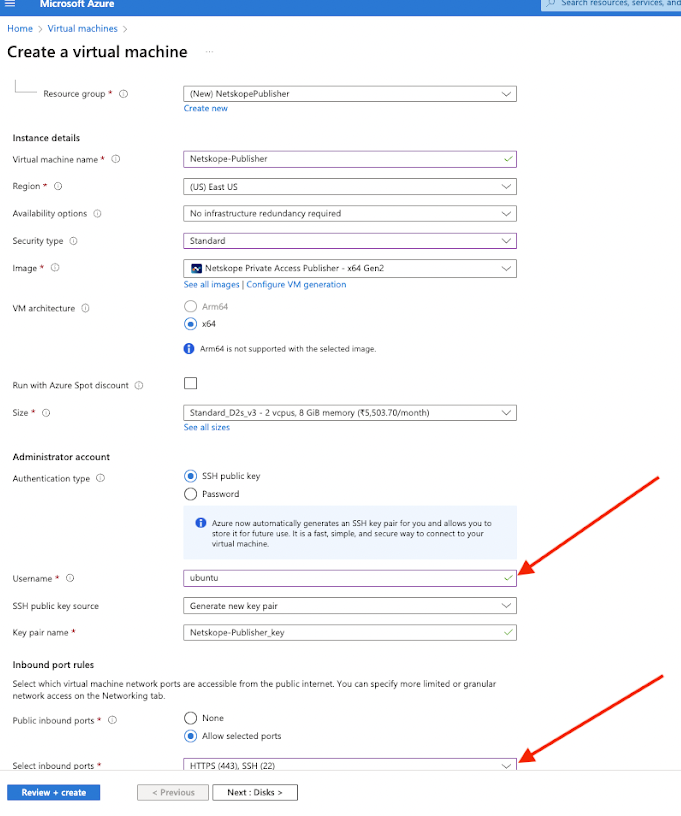
Key pair - Select or create a Key Pair so that you can ssh into it if needed.
Network settings - I am going to have it automatically create a security group. When we add Cloud Exchange, we will use this same Network vpc and Security Group
Allow HTTPS.
Also Please make sure to replace the username: azureuser to ubuntu to successfully SSH into the Azure Netskope Publisher.
Open the SSH port and generate the new SSH key pair or use the existing one if you have one.
SSH connection would be needed to configure the Generated token and any other updates related to the Netskope Publisher.
After creating the Azure Netskope Publisher try to ssh into the machine:
ssh -i PublisherNetskope_key.pem ubuntu@Machine-Ip
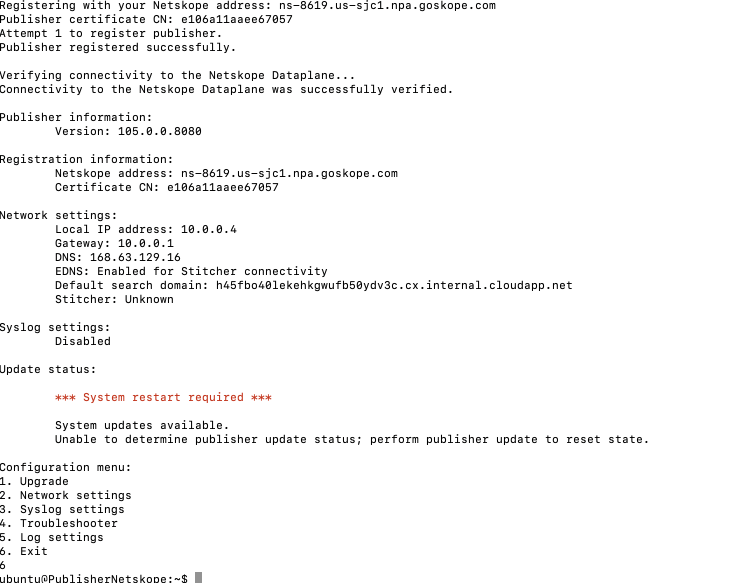
After the SSH it will land you into the Publisher Registration page:
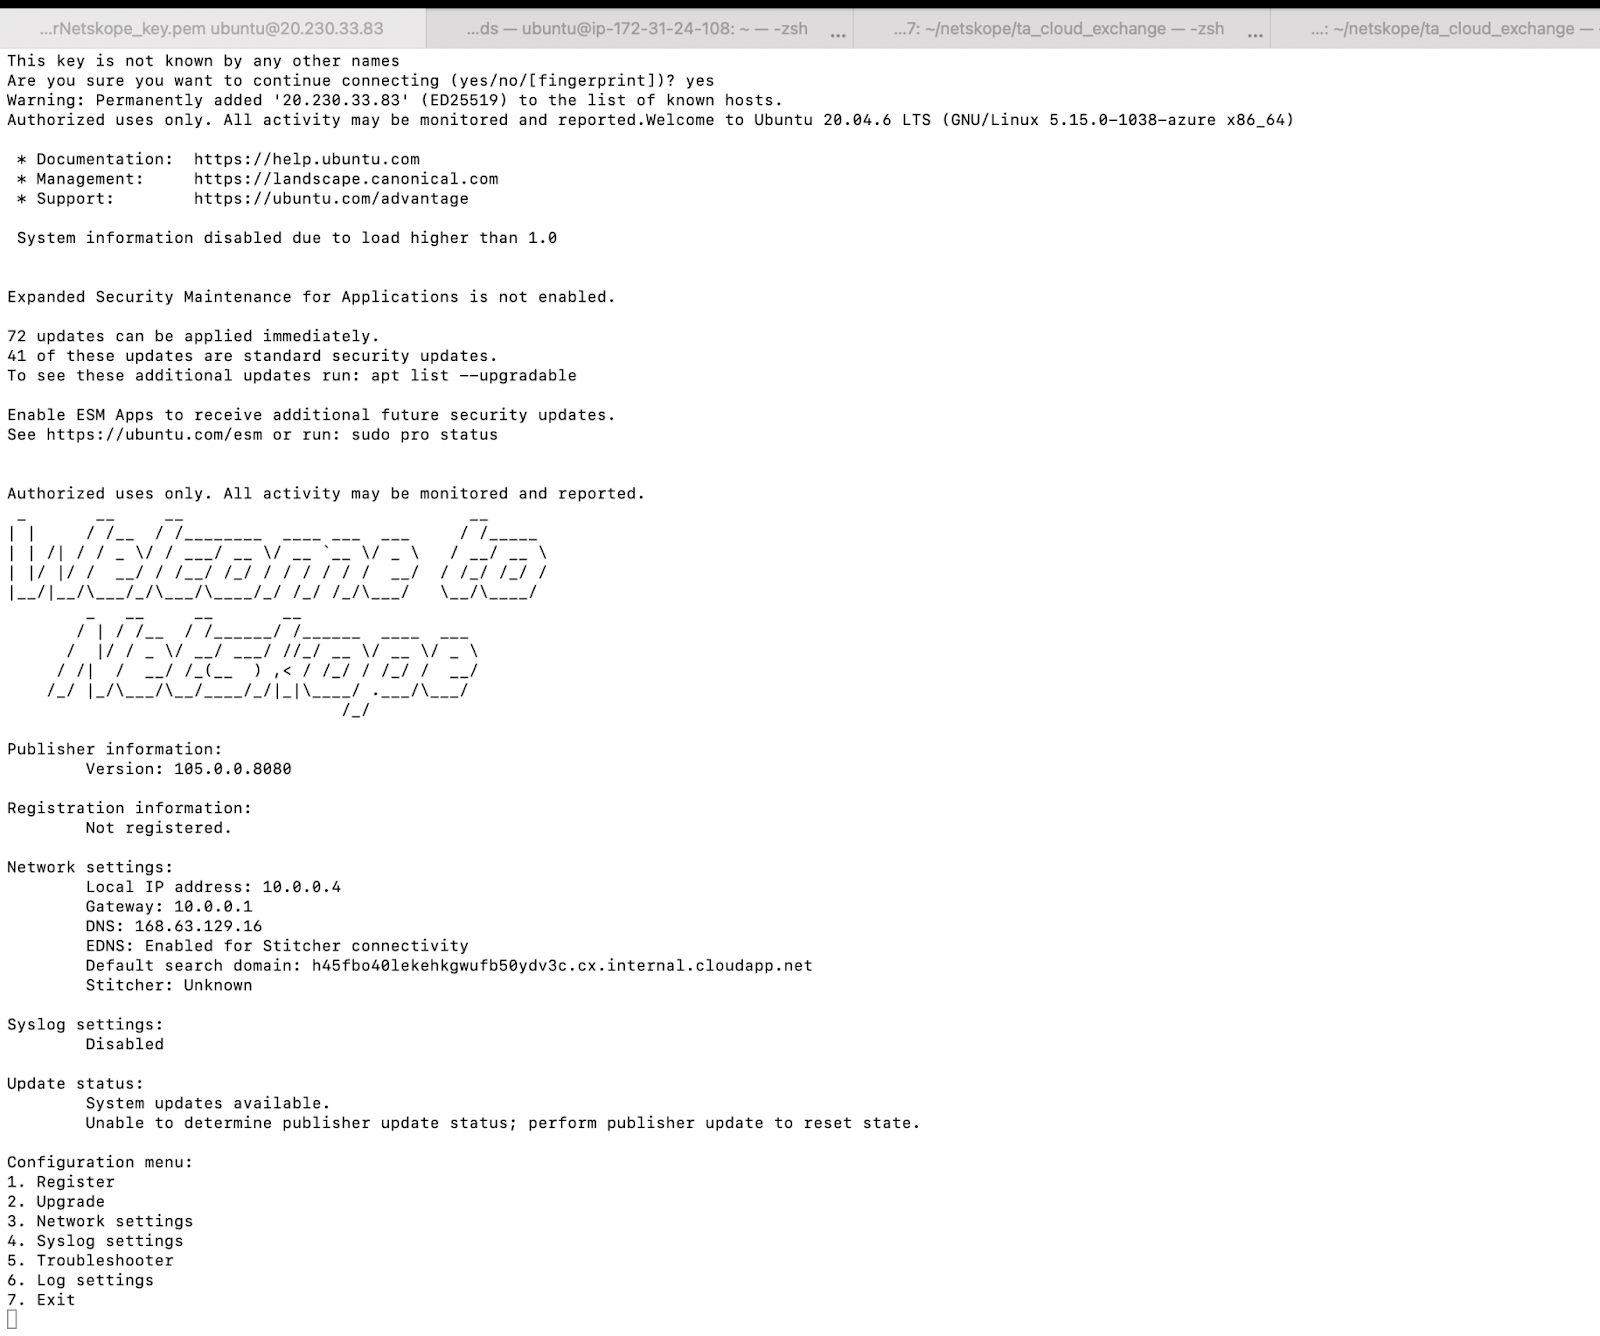
Press 1 and add the generated token from when you created the publisher
Verify
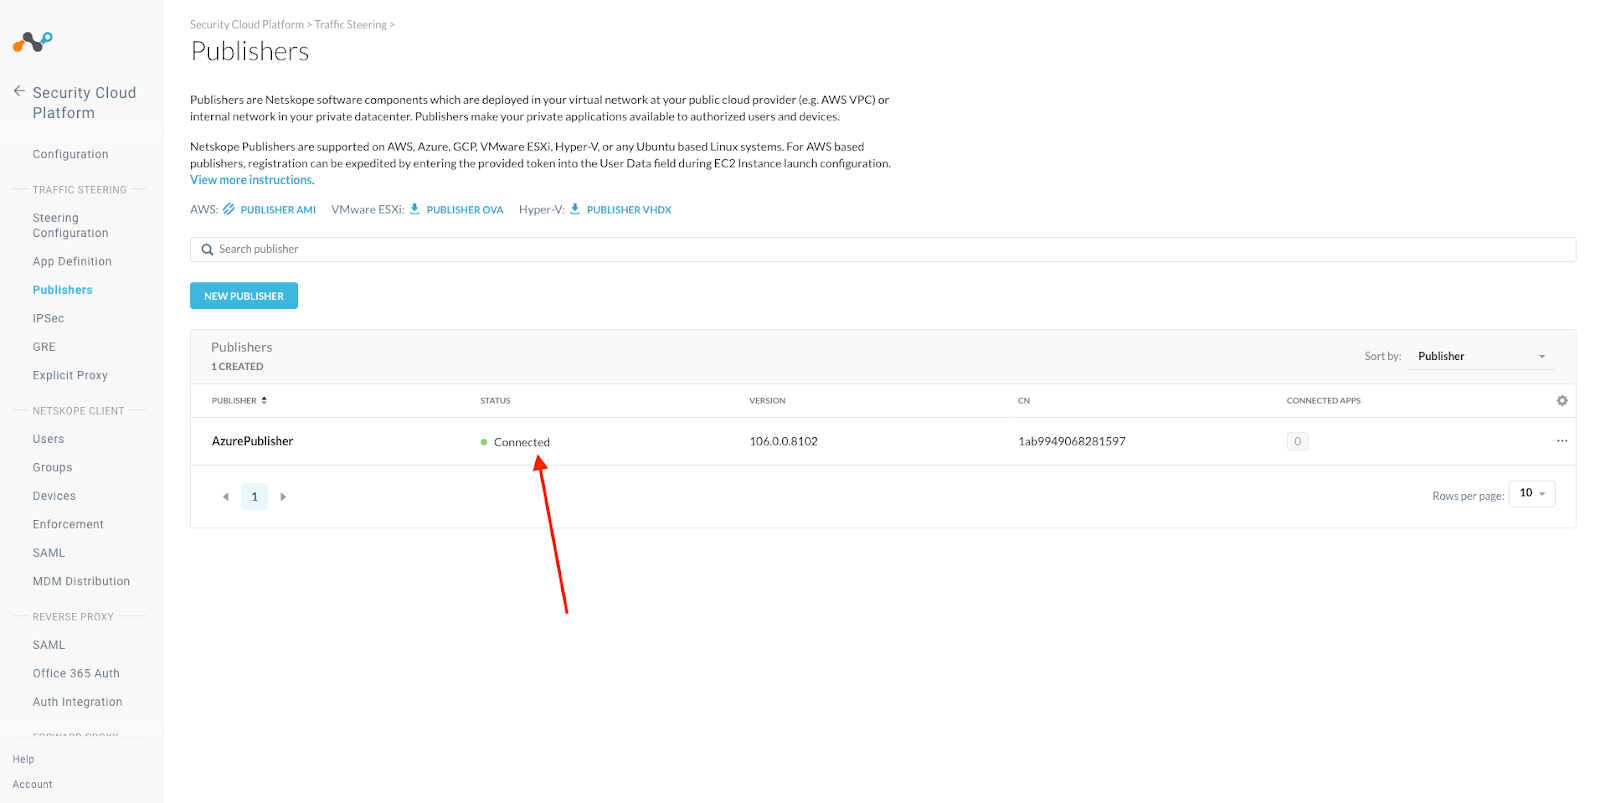
Netskope Tenant sees your publisher
Go back to your Netskope tenant and verify that your publisher is Connected.
Security Cloud Platform > Traffic Steering > Publishers
Setting up Cloud Exchange in Azure
Deploy Virtual Machine Ubuntu Server
Log into your Azure account and go to Virtual Machine. If you don’t see that on your main dashboard you can search for Virtual Machine.
Click Create > Azure Virtual Machine

Give your new Virtual Machine a name and select Ubuntu 22.04 LTS
Select an Instance type. To help you decide on size, check out our Sizing the System section here:
https://docs.netskope.com/en/cloud-exchange-system-requirements.html
Select or create a key pair. If you create the key, you will need to save it to your hard drive. We will use this to SSH to Cloud Exchange in a couple of steps so be sure to know the path of where you put it.
Since you are fronting this with Netskopes NPA, you don’t need any connection from the internet.
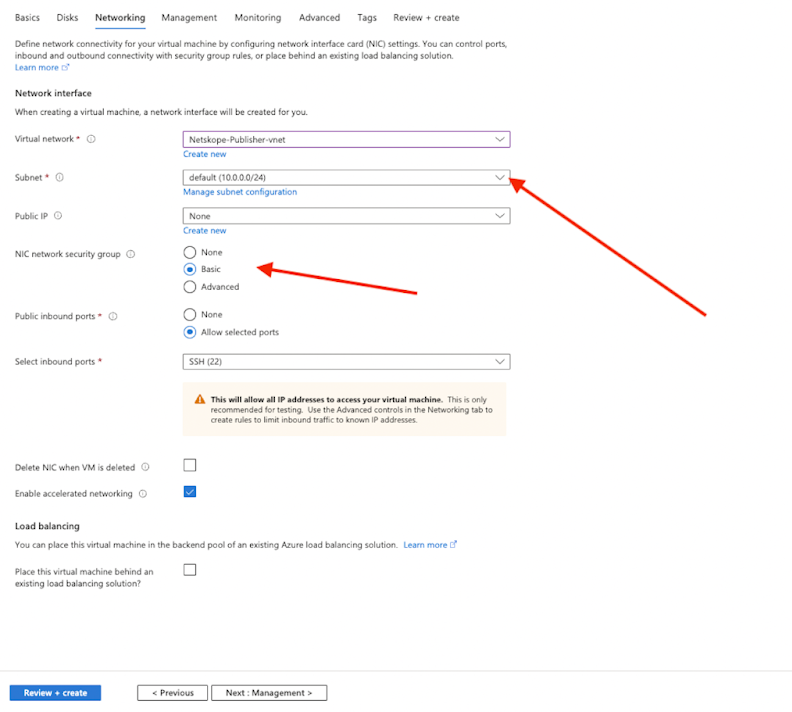
Network settings - Edit these to match the Virtual Network that you put the NPA in.
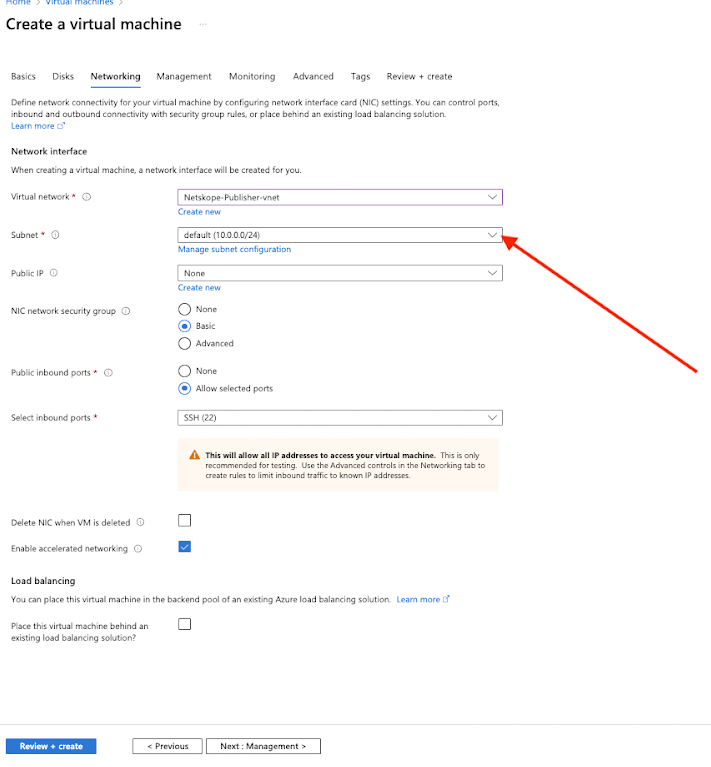
Firewall security group - you will need a new security group since the NPA one is allowing https. This one doesn’t need to allow any inbound traffic from the internet. You will only be getting to it from the NPA tunnel.
Review the summary and Launch instance.

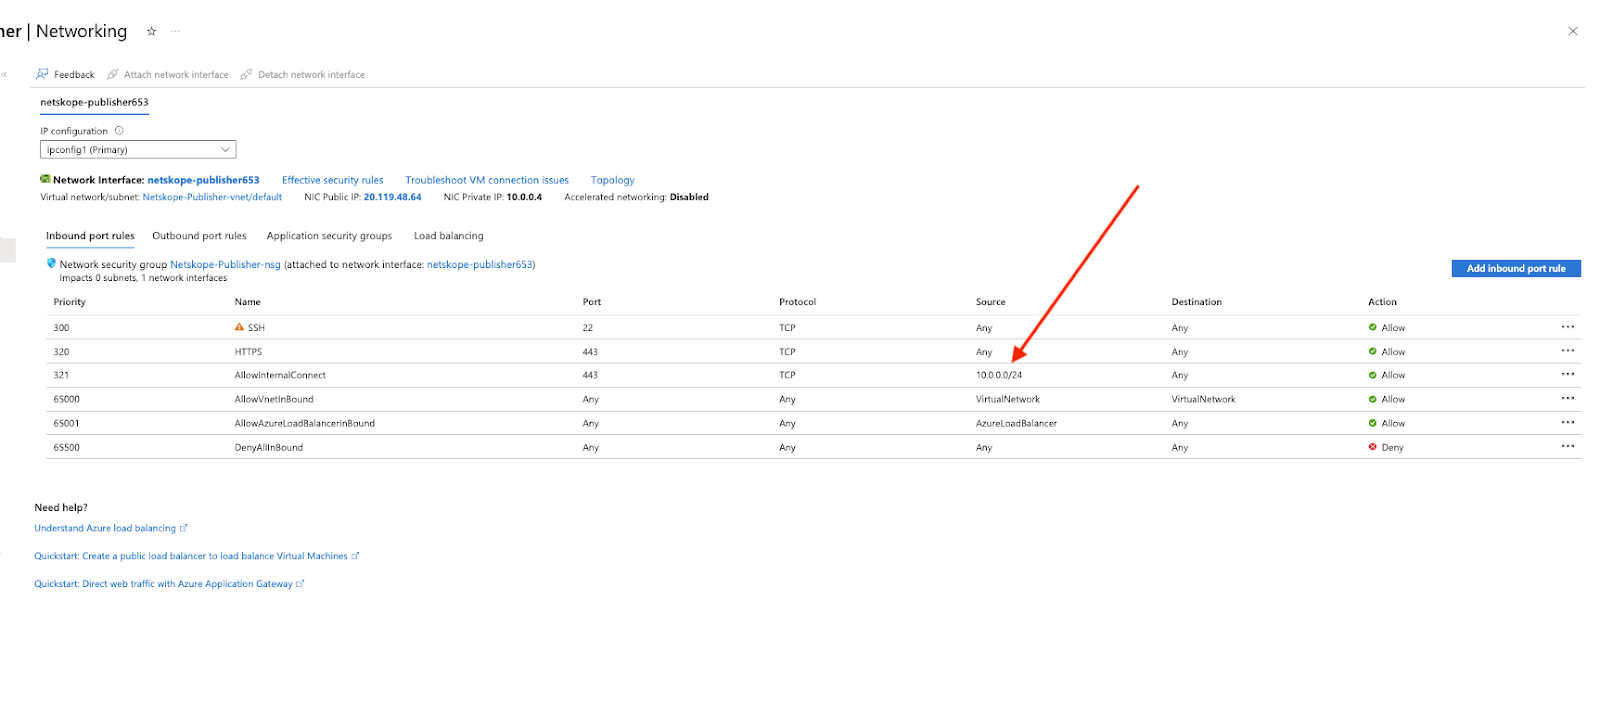
You will also need to add an Inbound Security rule so that your Publisher can talk to your Cloud Exchange. Mine are both in this subnet and I just created an allow for the entire subnet.
Go to specific Virtual Machine > Networking > Inbound Port Rules
Add Access to Cloud Exchange via NPA
Before you can SSH to Cloud Exchange to finish the setup, you will need to tell Netskope to allow that traffic down the NPA tunnel by adding it to the App Definition. You will also need the private IP address of your Cloud Exchange server.
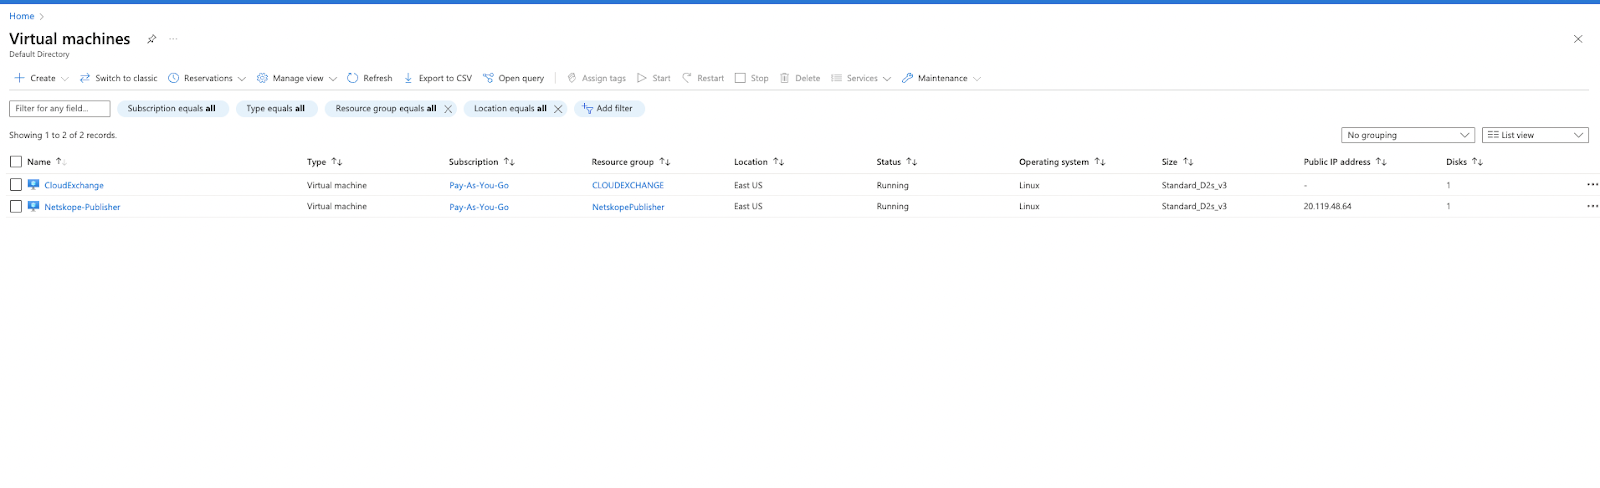
Private Address of Cloud Exchange
Go into your Azure Virtual Machine and select your Cloud Exchange Server. It will list your Private IP.
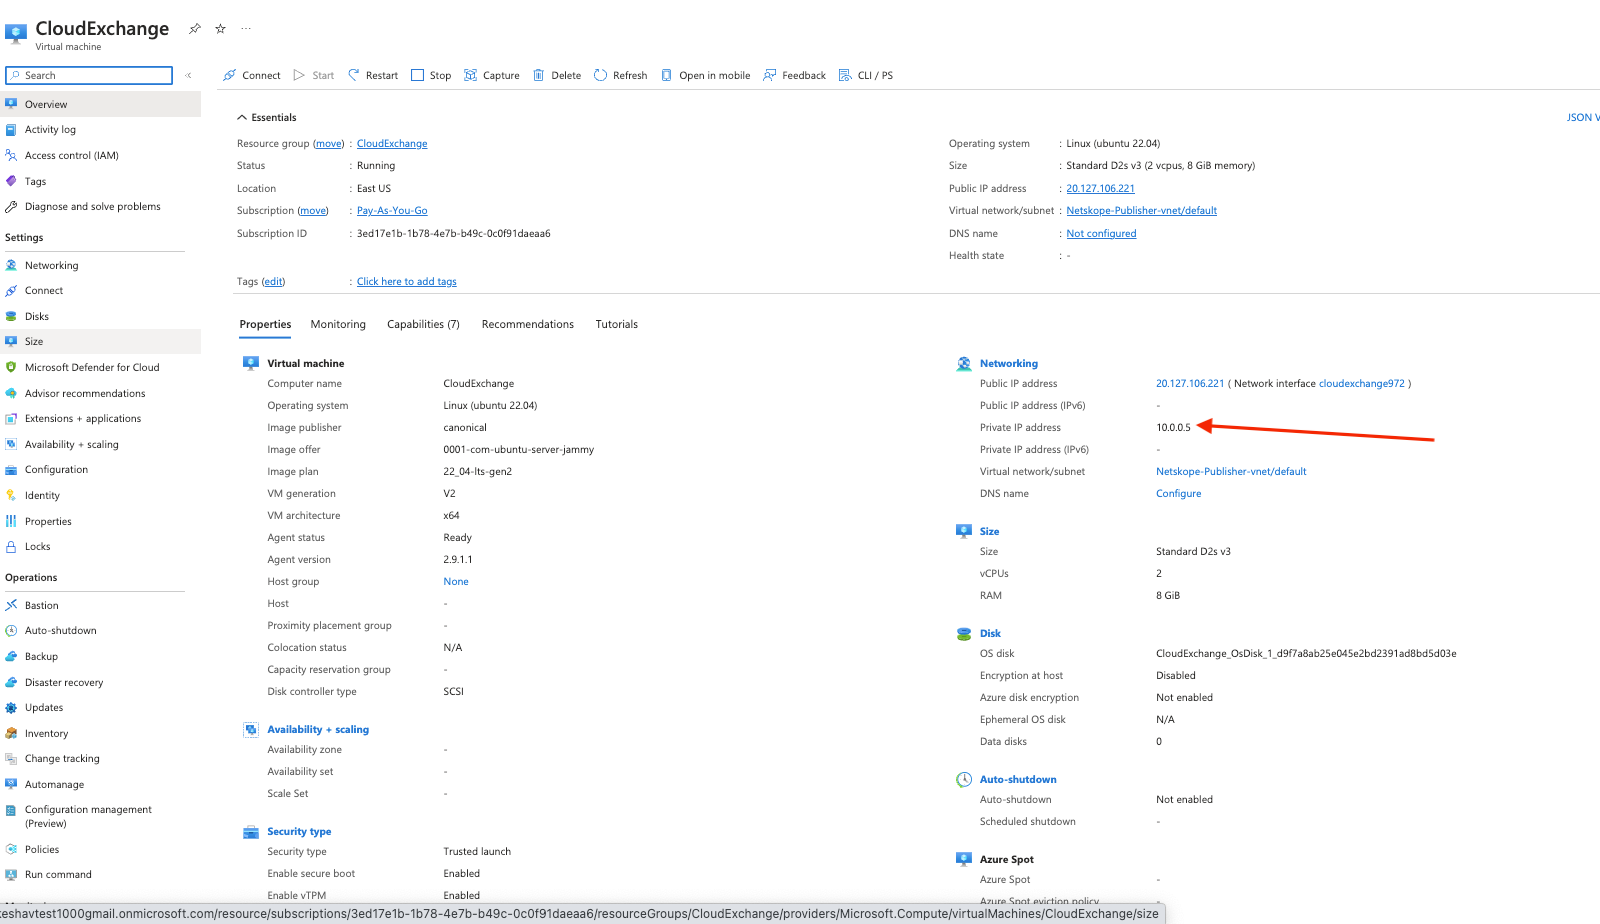
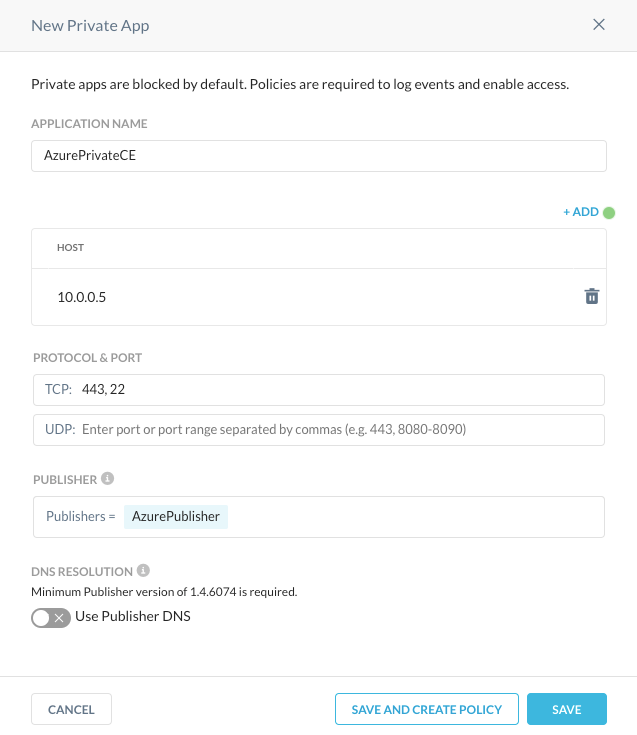
Now that you know your IP, create a new Private App for TCP 443 and 22.
Settings > Security Cloud Platform > Traffic Steering > App Definition > Private Apps
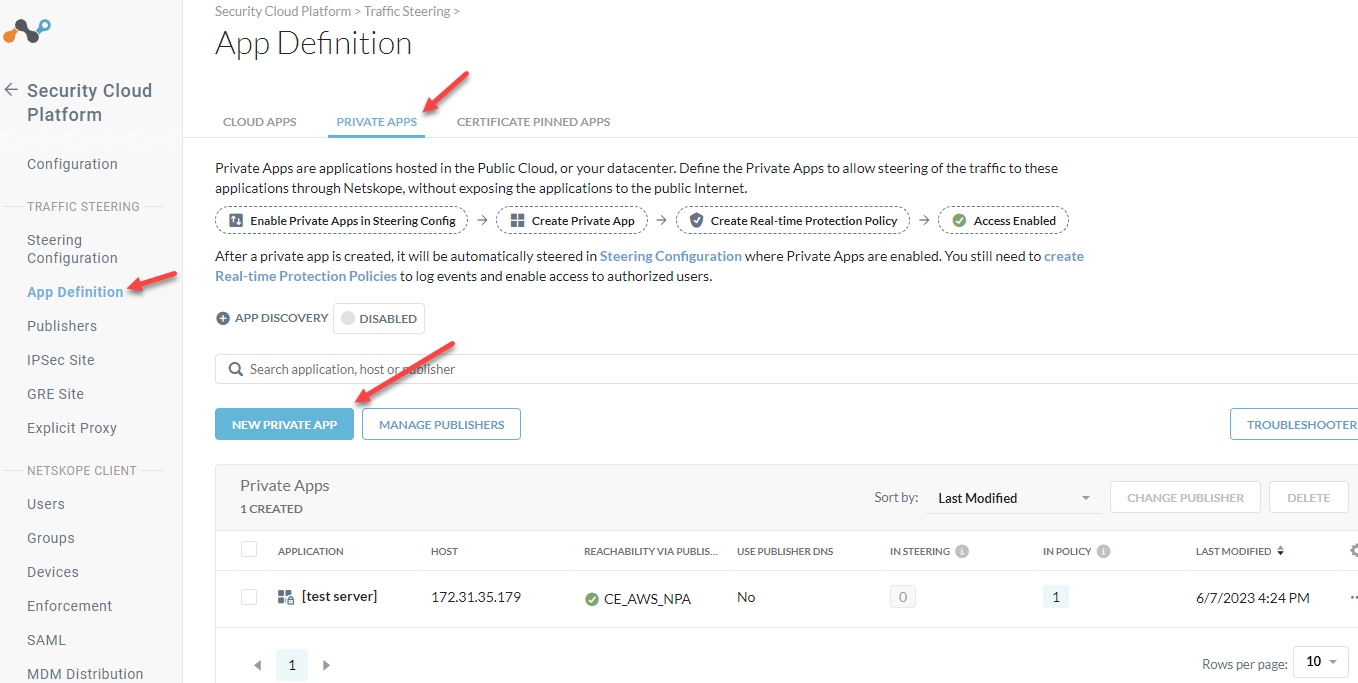
Give your application a name, list the IP in the host field, add TCP 443 and 22, and Select your Publisher.
Save
Steer your Client Traffic
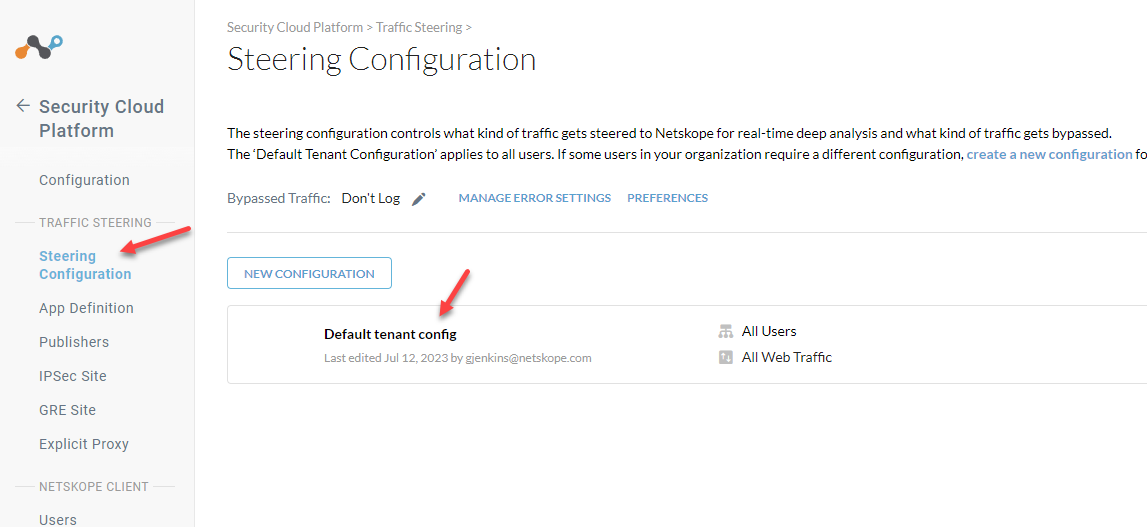
Before your NPA traffic will go through the tunnel, you need to add your Private Apps to your Client Steering Configuration.
Settings > Security Cloud Platform > Traffic Steering > Steering Configuration
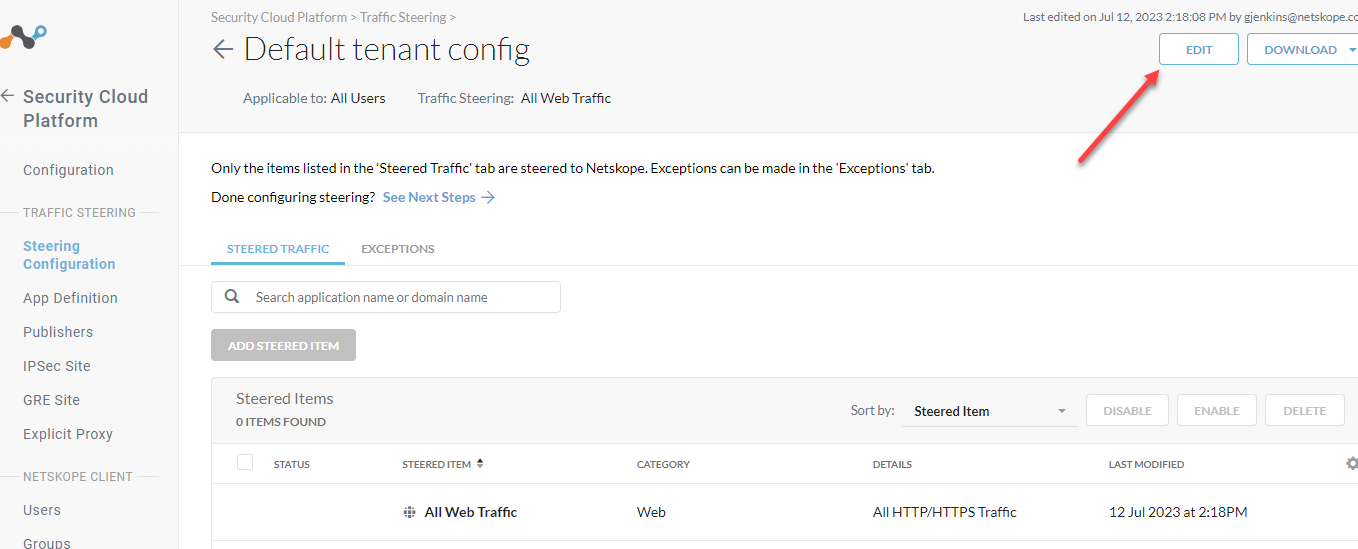
Edit your config.
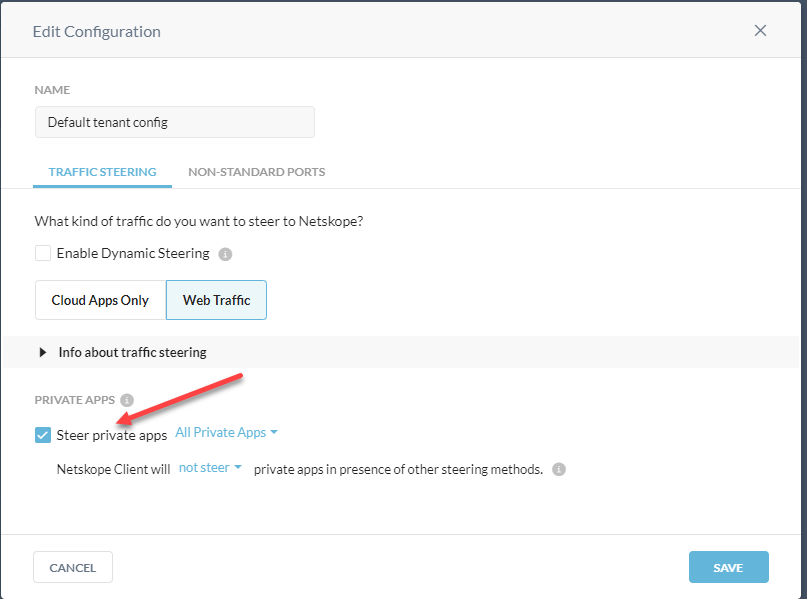
Steer private apps
Save
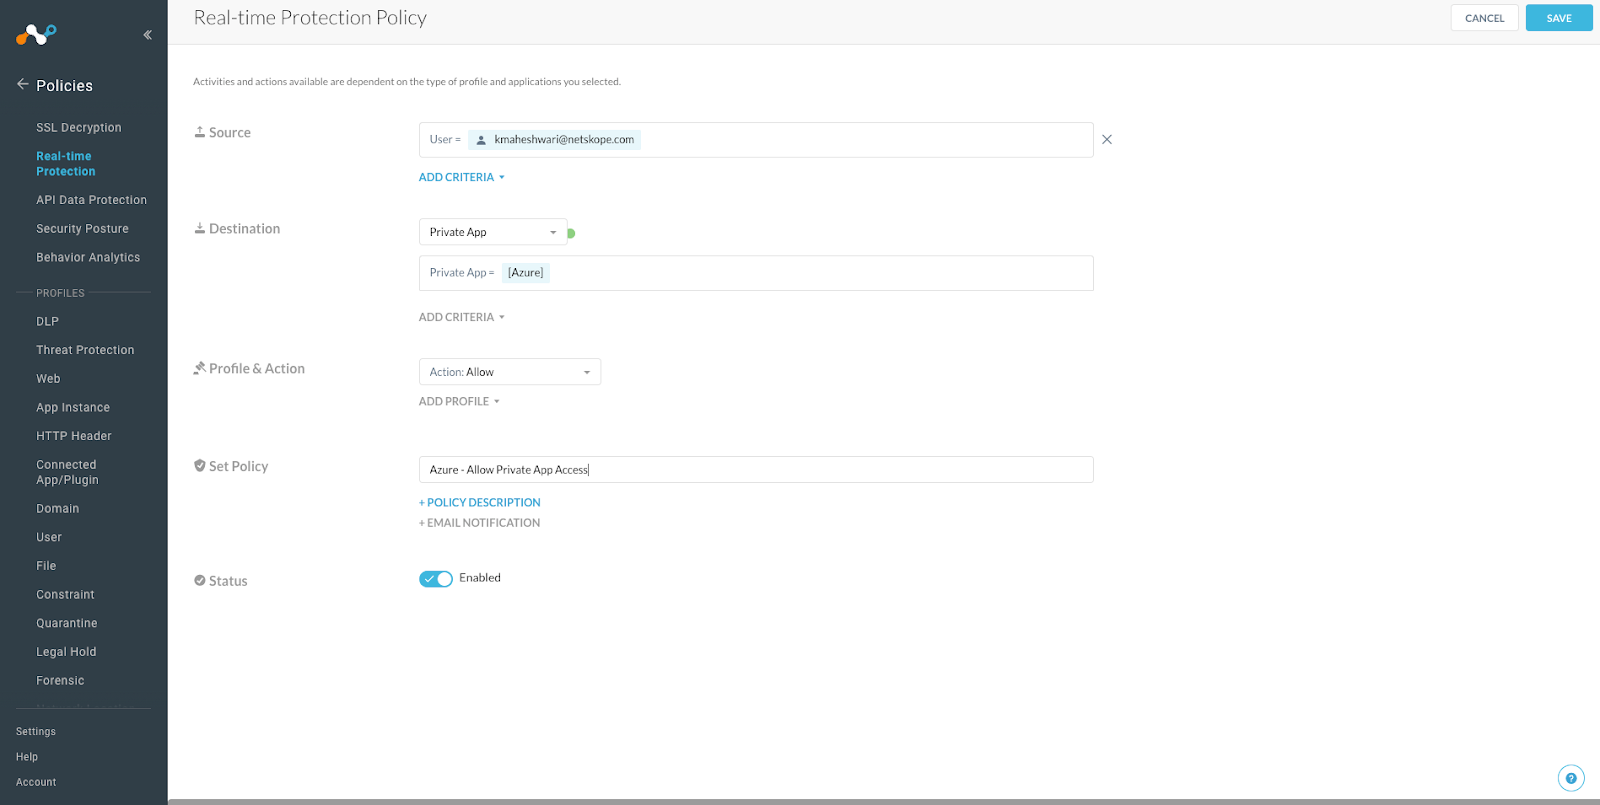
After this is done please also make sure to assign the Policy for the private app to allow the required traffic for the app:
Go to the Policies > Real-Time-Protection
Create the new Policy specifically for the private app
Now to check if everything is working fine you need to again go to Private App > Troubleshooter
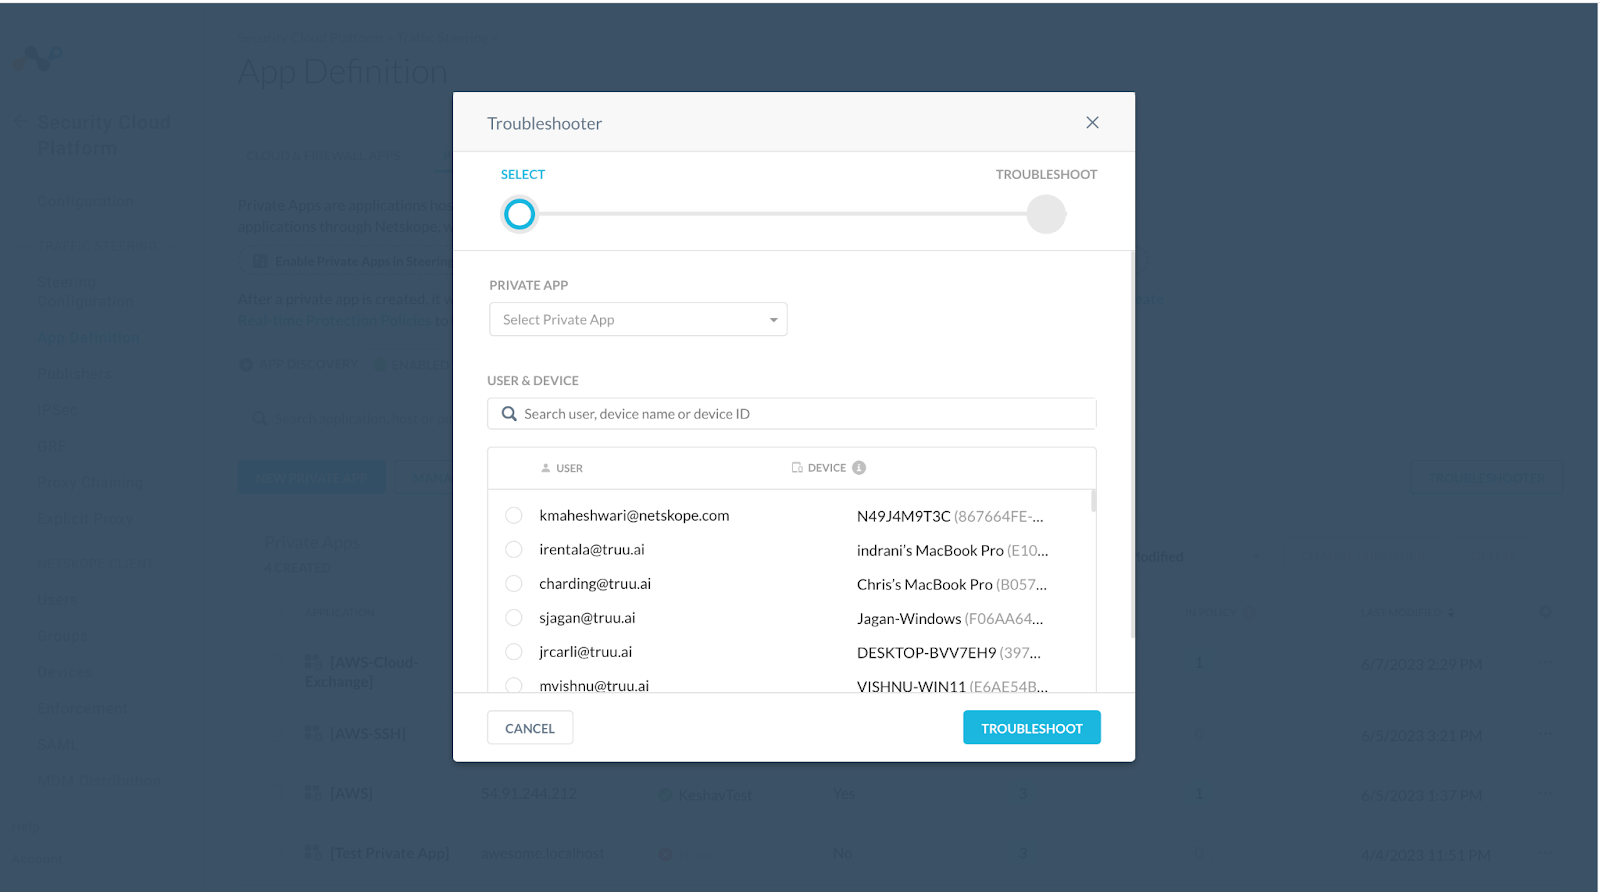
Click on your user to check if the private app can be accessible:
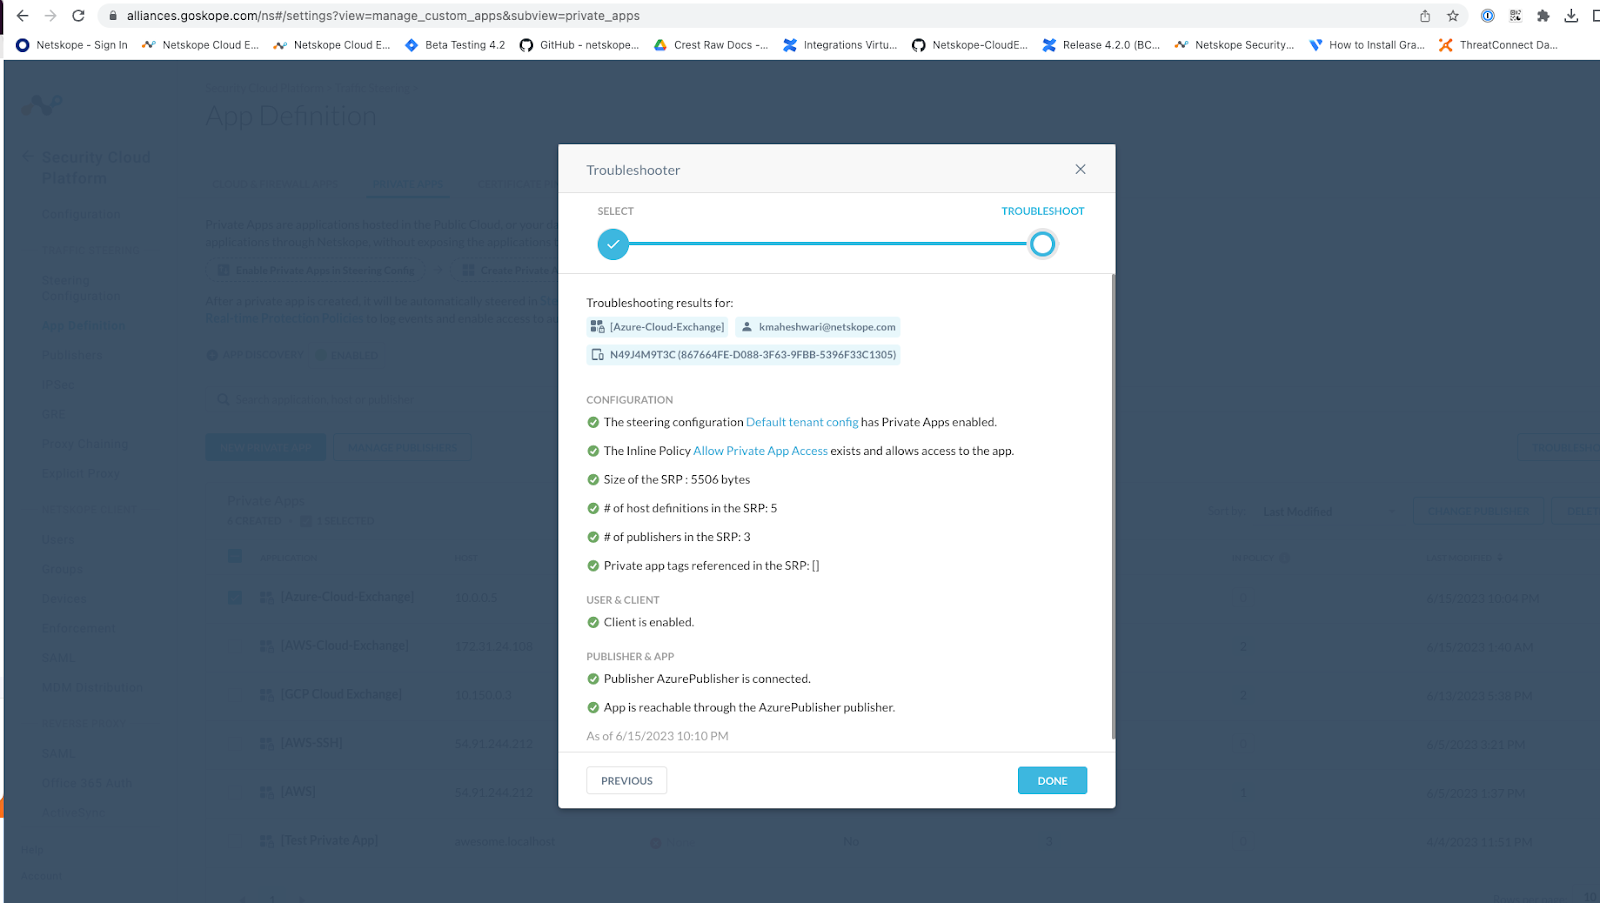
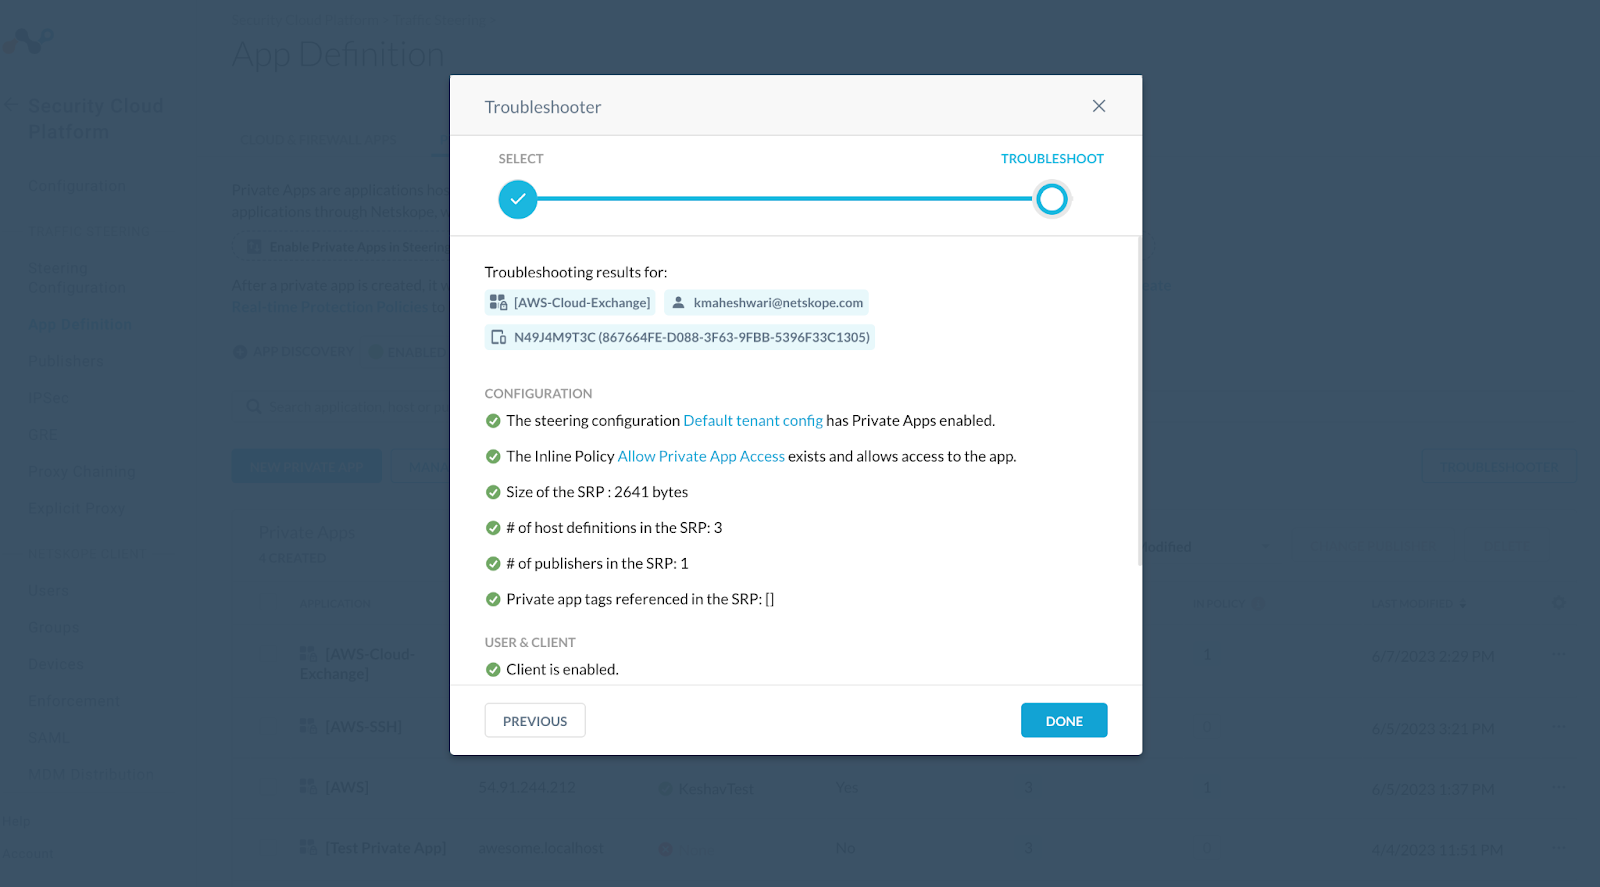
Make sure your client is enable or other results mentioned in the Troubleshooting:
Verify
Check your client for the NPA tunnel
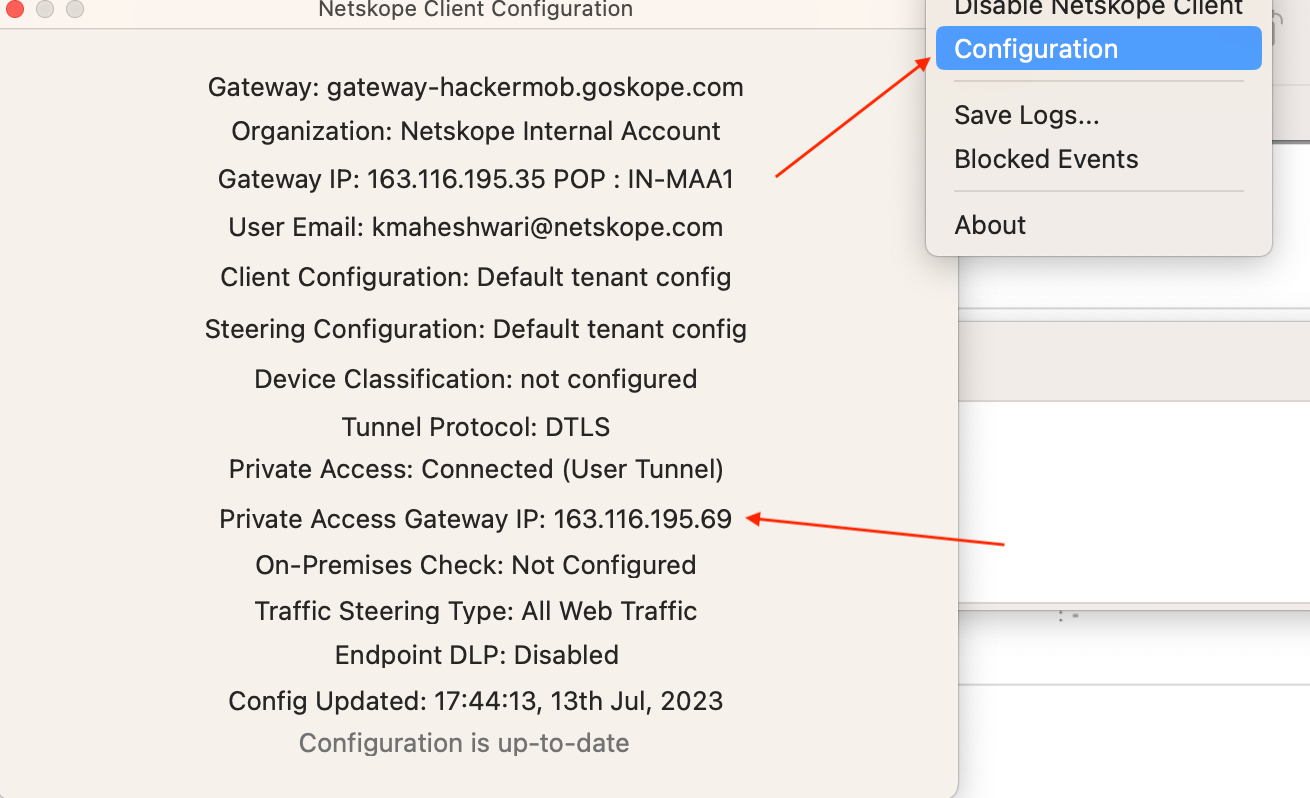
Setup Cloud Exchange on Ubuntu Server
You will need to SSH to it to finish the setup.
SSH with your public key.
The default user is azureuser.
Here is the command I will use.
ssh -i CloudExchange_key.pem azureuser@10.0.0.5

Update the system and load Docker
A Netskope employee, Nathan Catania, has created this guide for you to follow to setup Cloud Exchange on your new Azure instance.
https://community.netskope.com/t5/Blogs/A-Guide-to-Deploy-Netskope-Cloud-Exchange/ba-p/1143
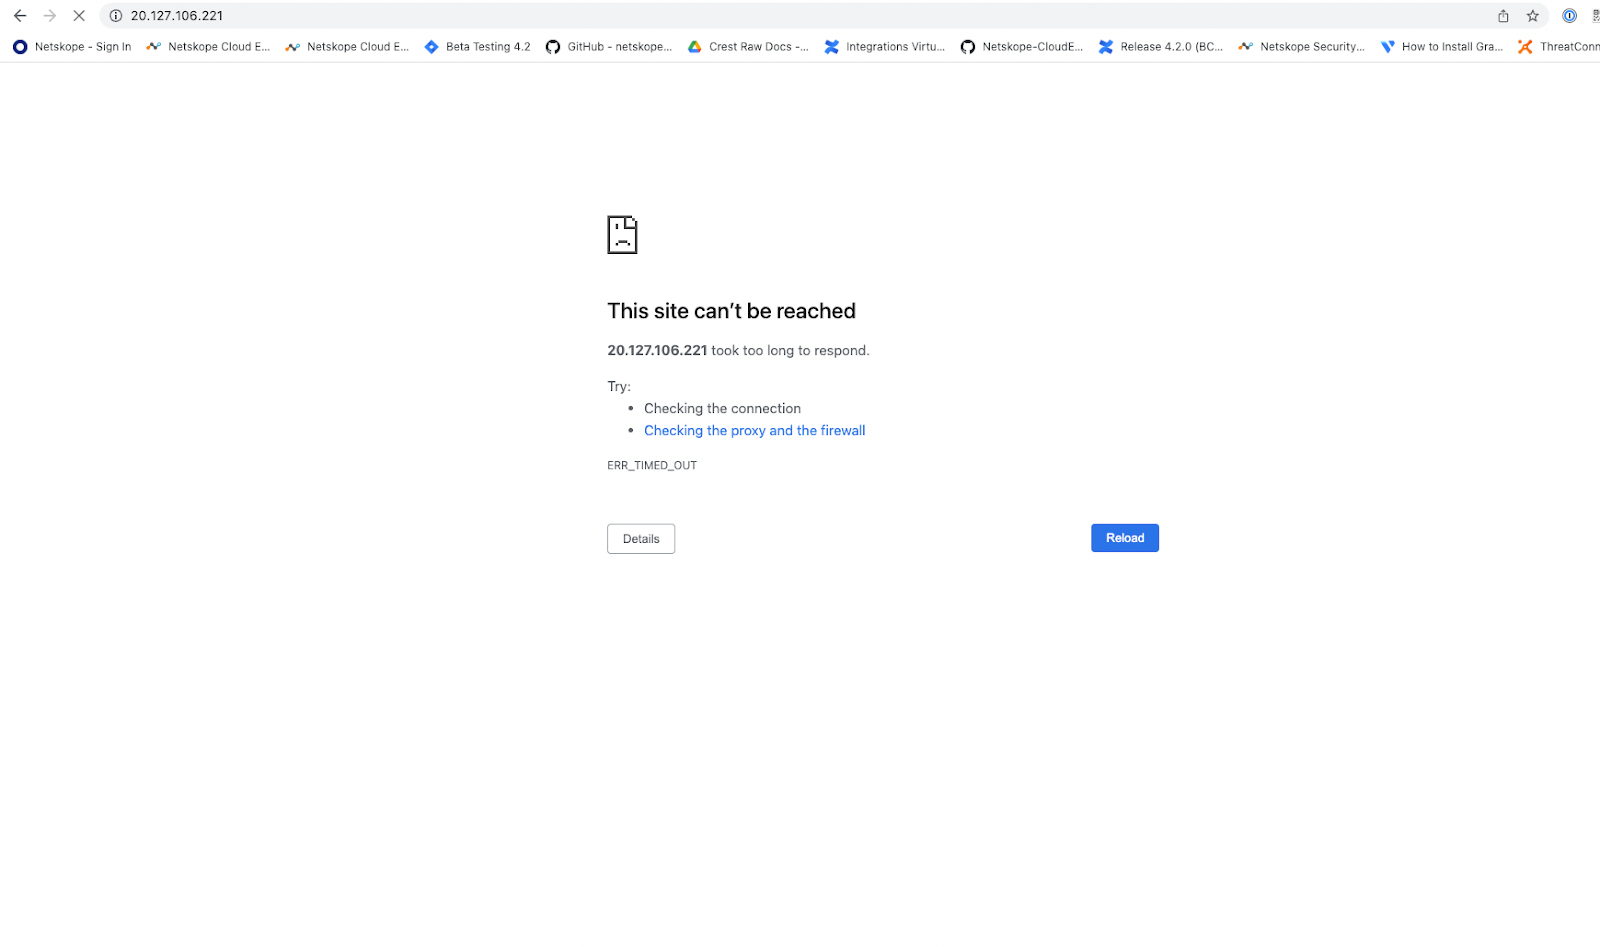
Verify
Try to access cloud exchange on your private IP
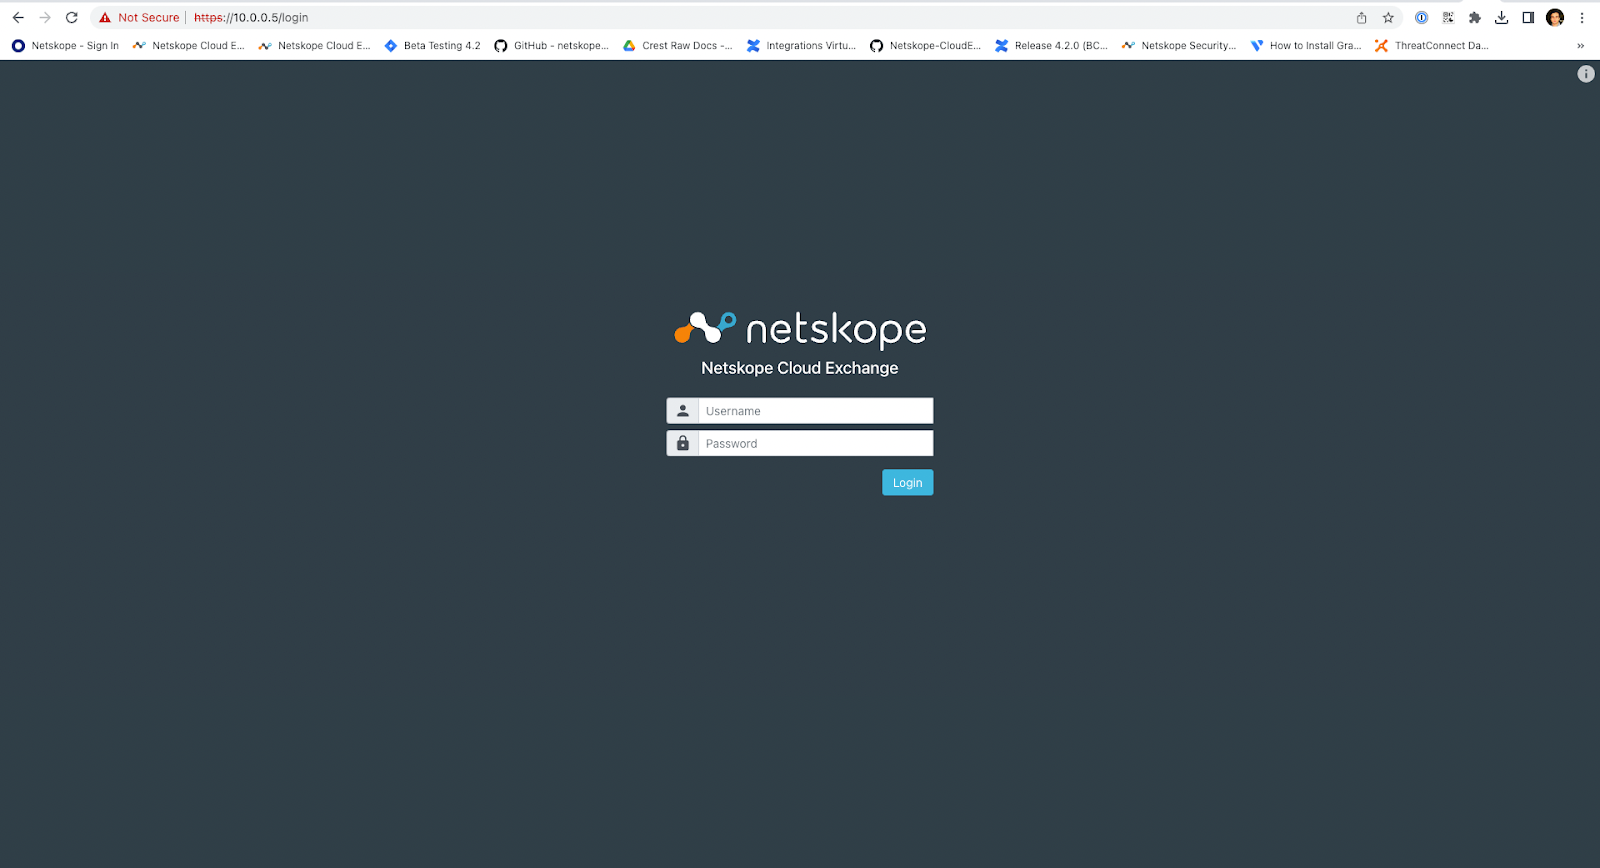
Check to see if you can get there over the public IP address. It should fail. You can remove this address from your Virtual Machine.
This is how we can access the Cloud Exchange running in Azure as private app using the Netskope Publisher.