Objective: Develop a comprehensive guide for configuring SAML-based Single Sign-On (SSO) between PingFederate and the Netskope Admin Console.
Overview: This documentation will outline the methodology for enabling secure administrative access to Netskope using PingFederate as the Identity Provider (IdP).
Prerequisites:
-
Netskope Tenant: Local administrator privileges are required to modify SAML settings within the Netskope console.
-
PingFederate: Administrative access to the PingFederate environment to configure the Service Provider (SP) connection.
Workflow:
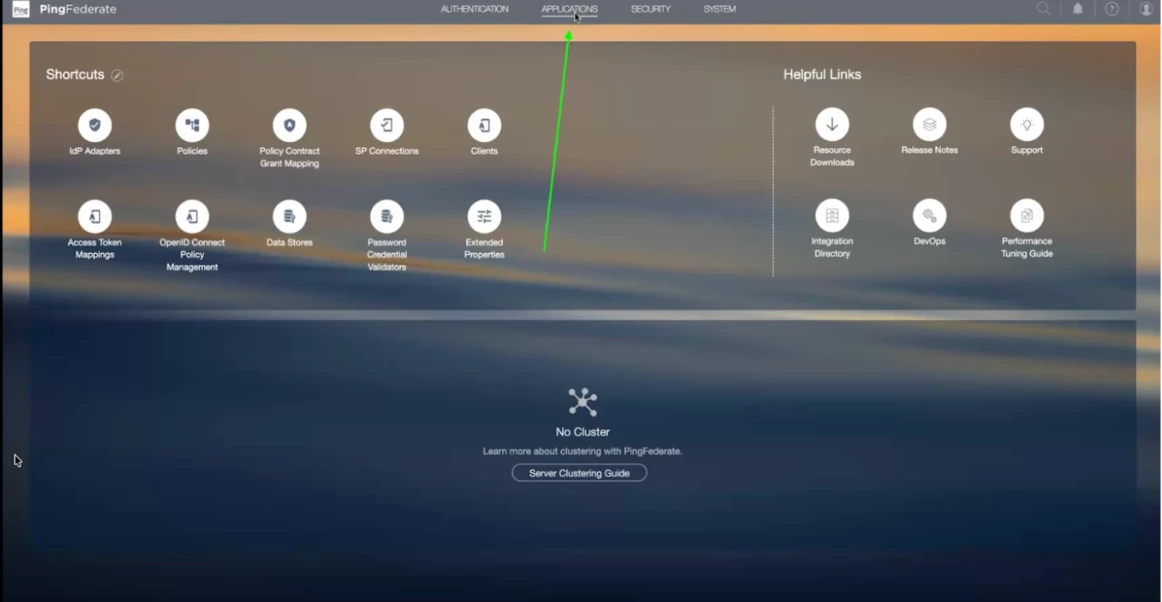
Step 1 - Click on Application button in the top bar
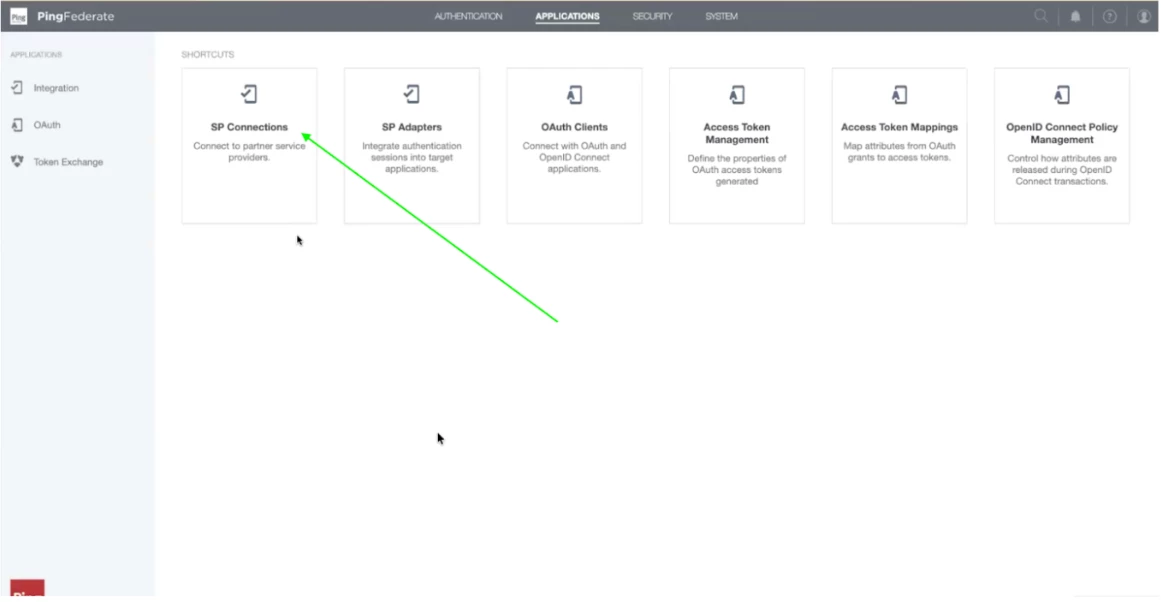
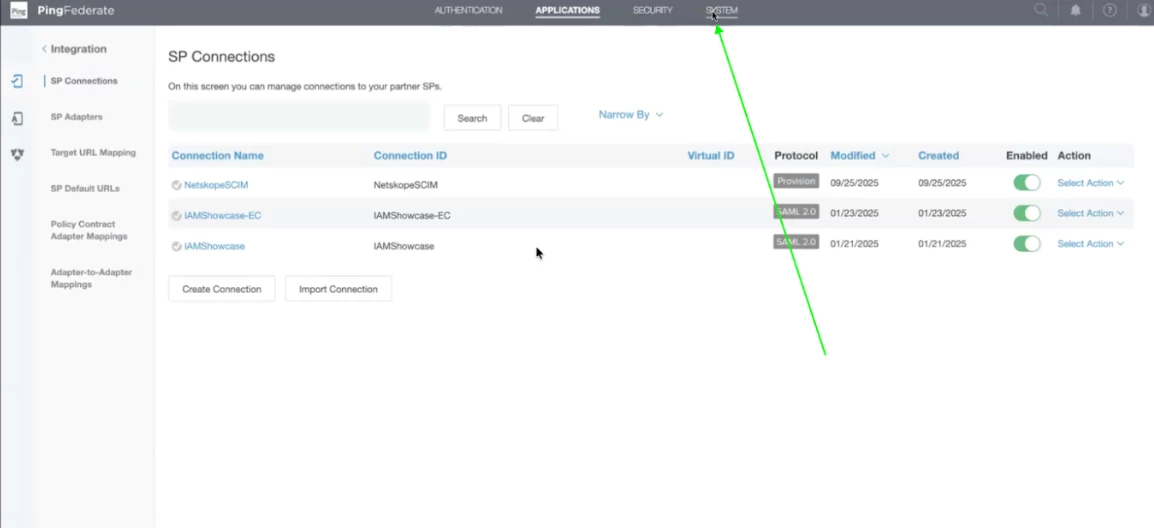
Step 2 - Once the application page loads, click on SP Connections.
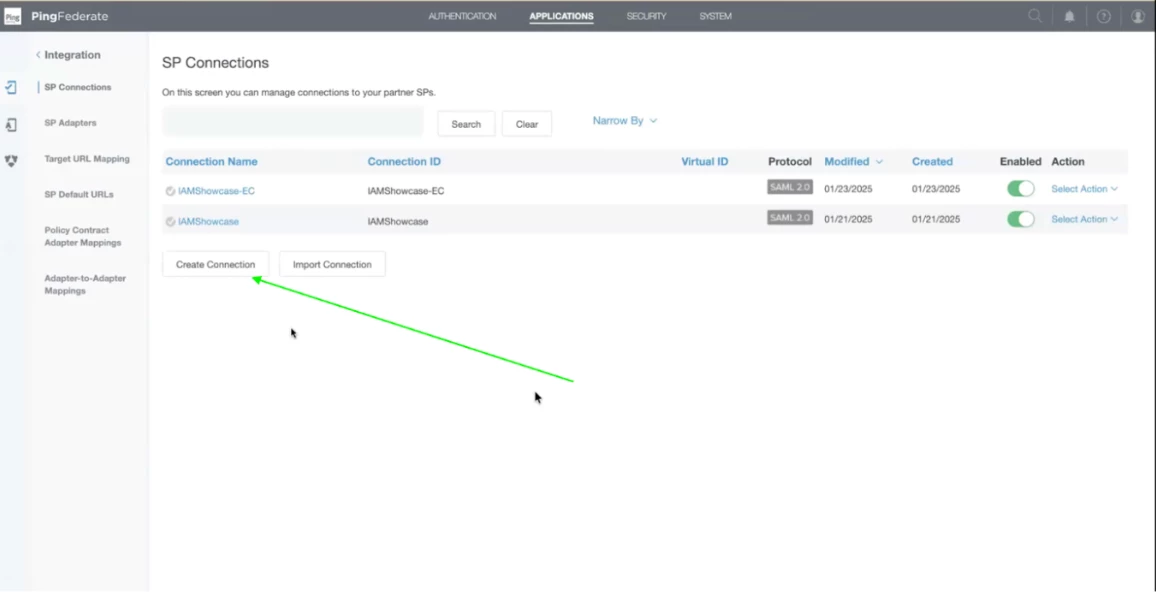
Step 3 - In the SP Connections, Click on Create Connection. A SP (Service Provider) Connection is a configuration set that allows PingFederate (acting as the Identity Provider or IdP) to securely communicate and share identity data with an external application or service.
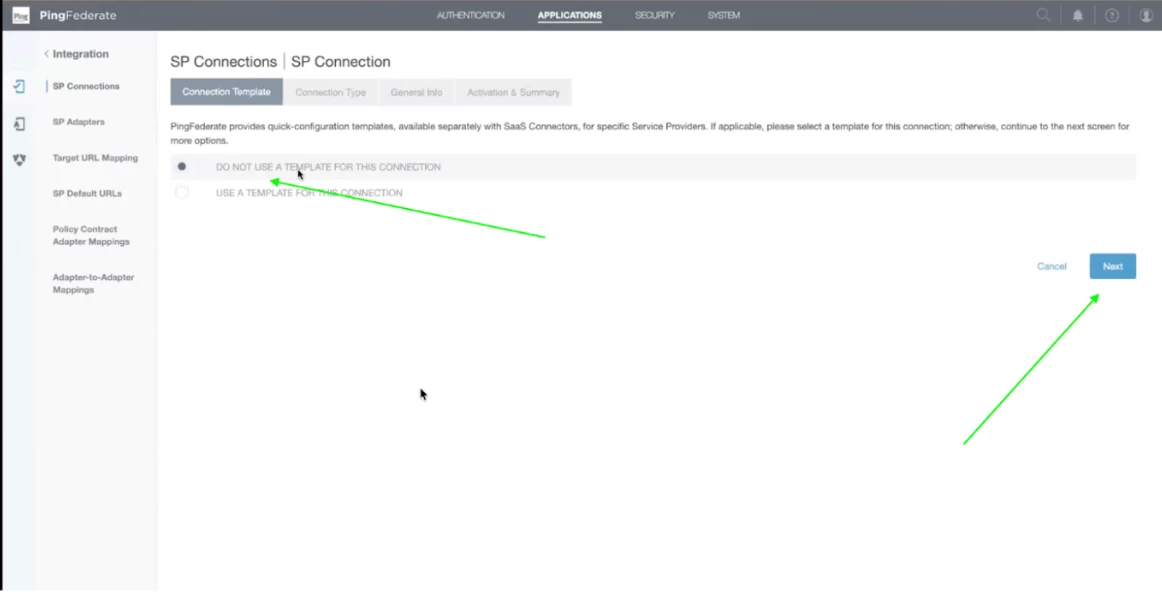
Step 4 - Select Do not use a template for this connection and click Next.
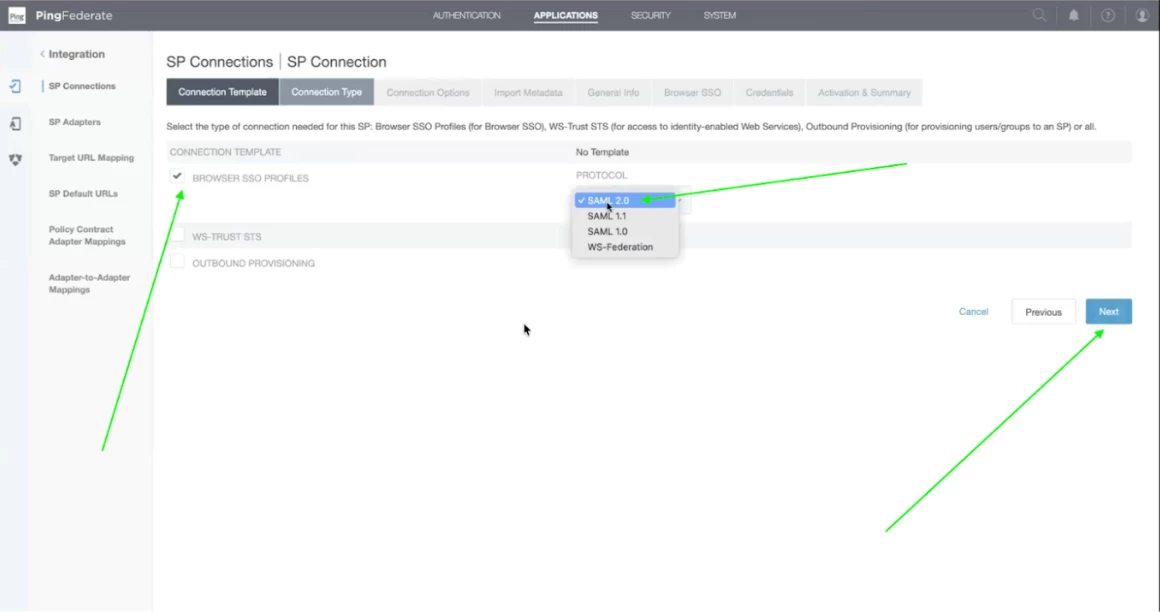
Step 5 - Check on Browser SSO Profiles and select SAML 2.0 and click on Next.
Note: You can also Select SAML1.0 / SAML 1.1
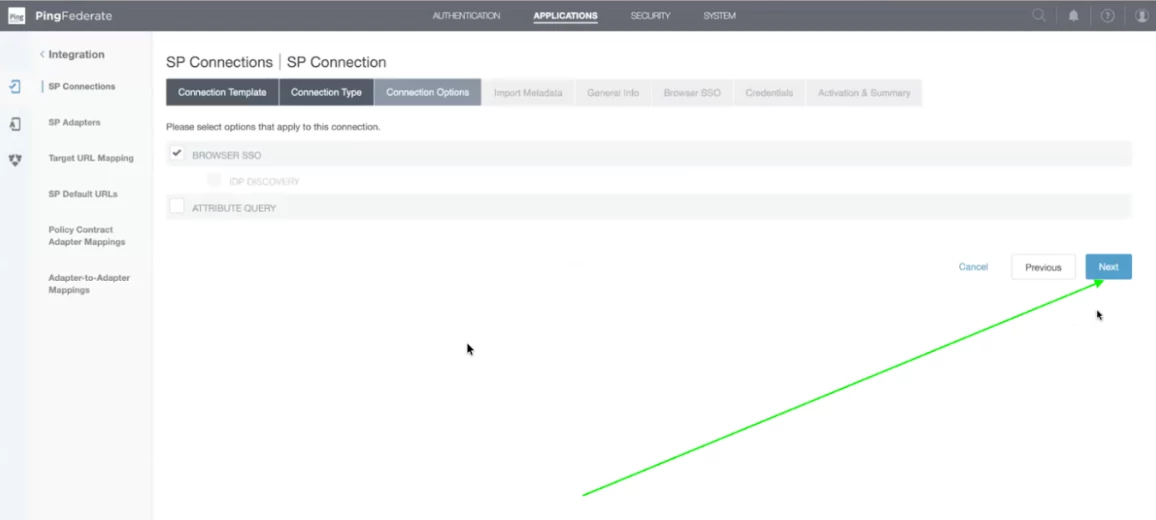
Step 6 - Click on Next and remain the default values.
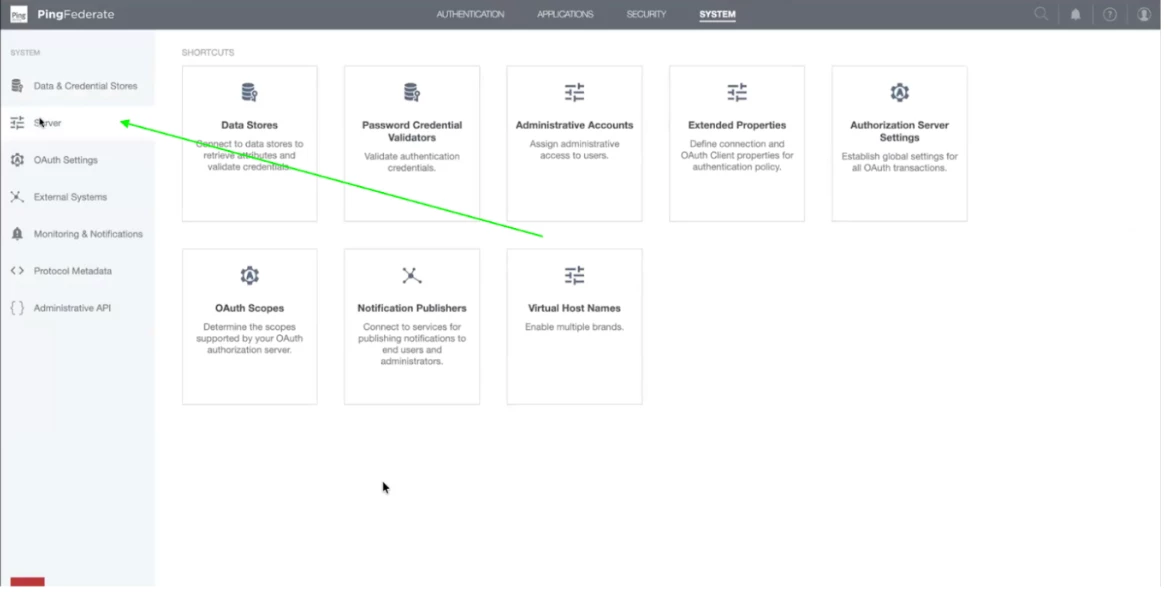
Step 7 - Now, we will extract the SSO URL and Entity Id for downloading the metadata from the Netskope tenant. Click on System on the top bar.
Step 8 - Now, click on Server on the left side menu panel.
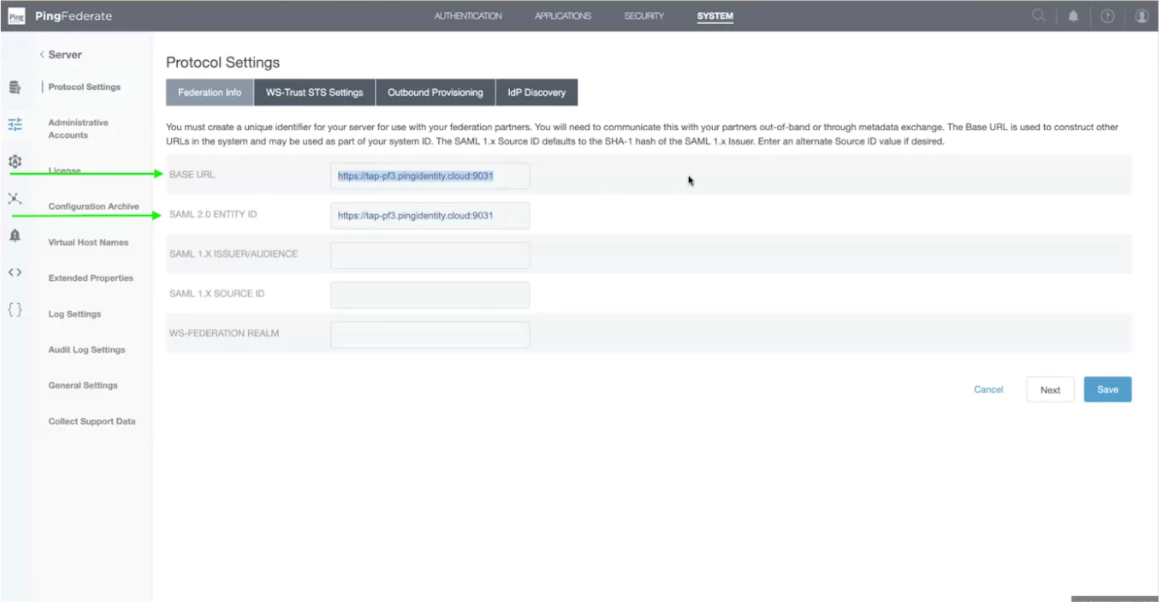
Step 9 - Now, under the Protocol settings, under the tab Federation info, you will find the Base URL which is used in SSO URL. And ML Entity Id is used in Entity Id URL.
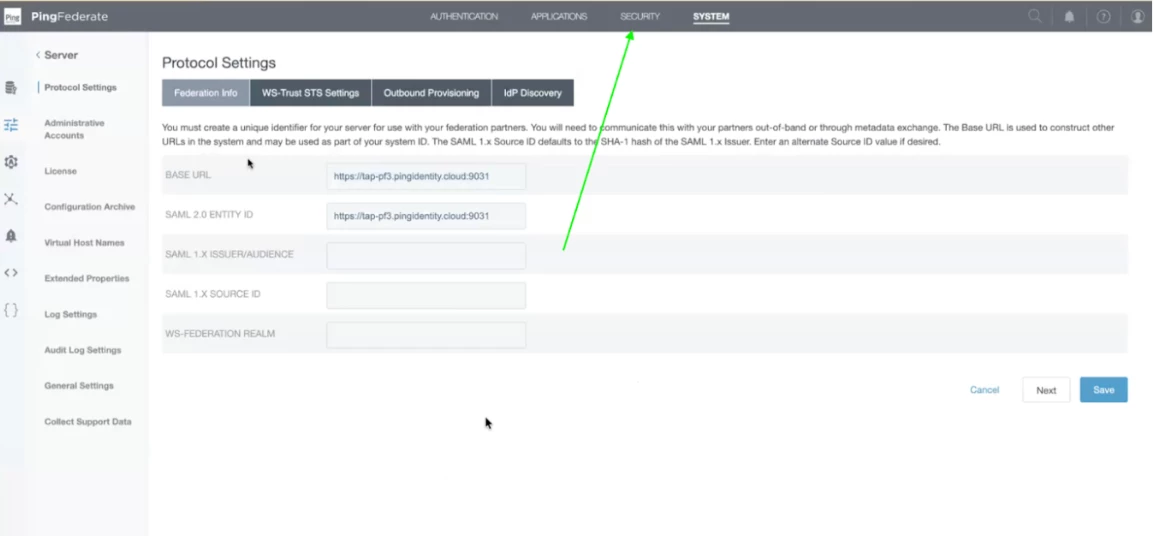
Step 10 - Once you find these details you will require a certificate which needs to be uploaded in the Netskope Tenant. Click on Security, present on the top right bar.
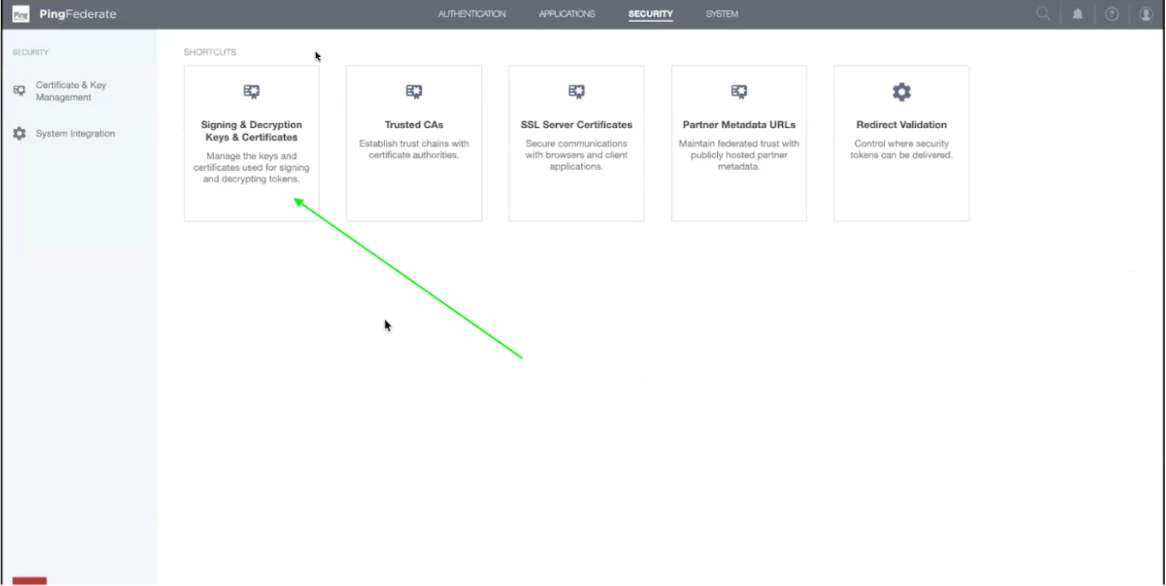
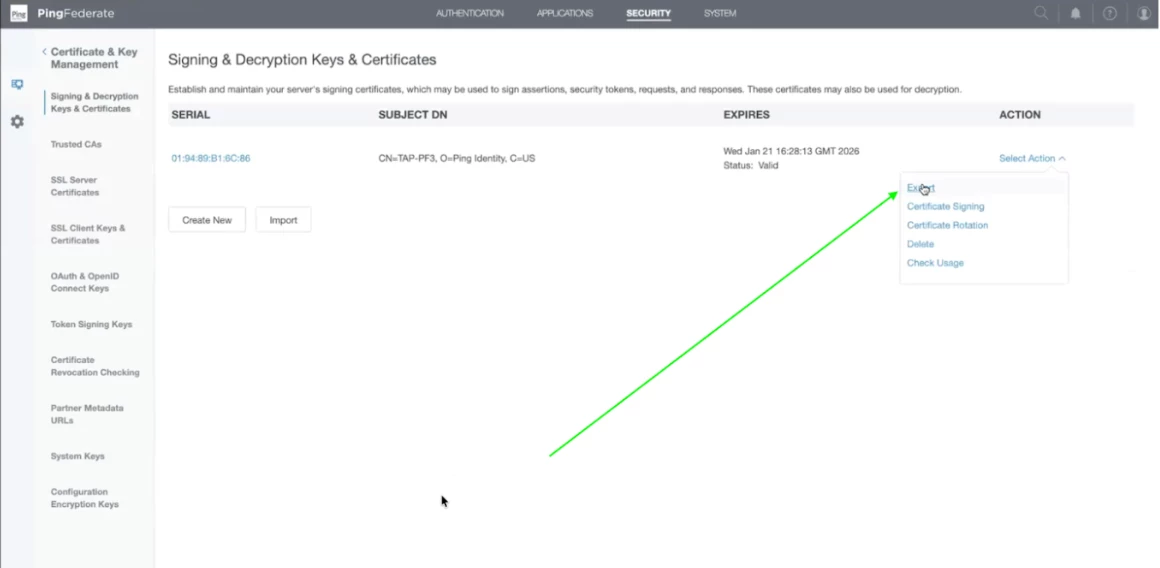
Step 11- Now click on Signing & Decryption Keys & Certificates.
Step 12 - Now click on Select Action Drop down on the right. You will find an export button. Click on the Export Action item and your certificate will be downloaded.
Step 13 - Now another screen will appear. Ensure that certificate only is selected. Click on Next.
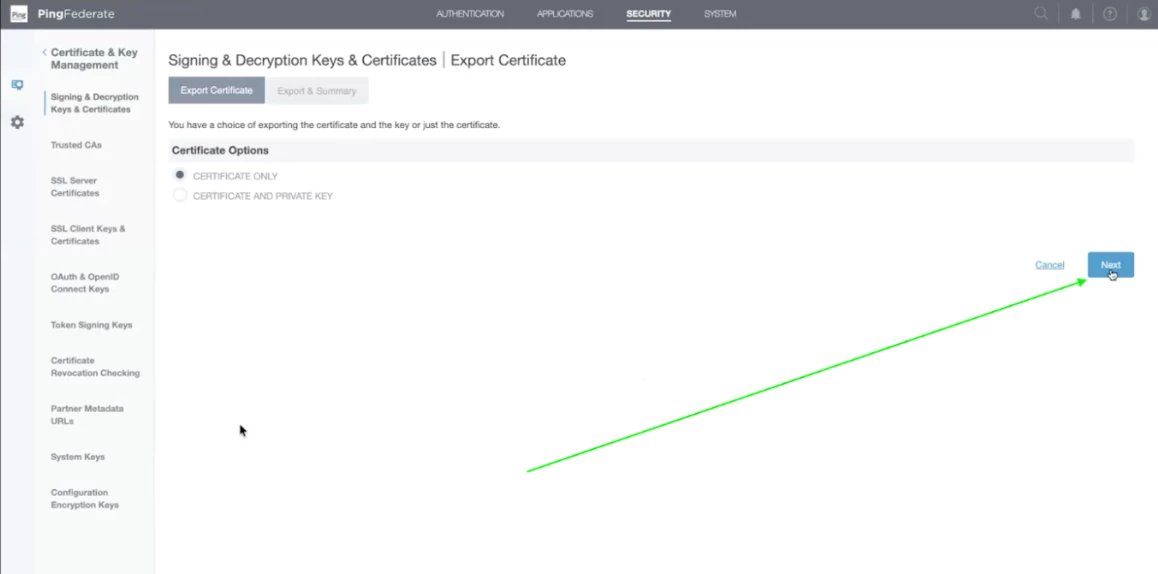
Step 14 - Now, certificate details summary will appear. Click on Export.

Step 15 - Now we need Metadata for SAML Configuration.
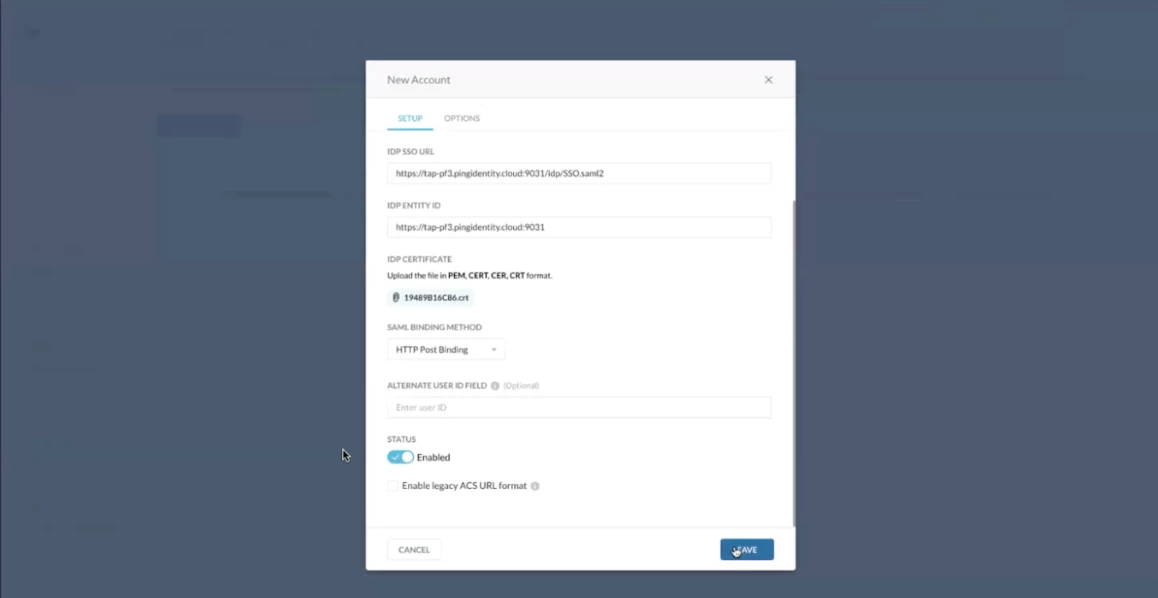
Log in to your Netskope tenant. Click on Settings then click on Security Cloud Platform. After that scroll down and click on SAML under Forward Proxy. Click on New Account. Please use the details mentioned below for creating a new account in your netskope tenant.
Enter SSO URL => https://tap-pf3.pingidentity.cloud:9999/idp/SSO.saml2
Entity Id => https://tap-pf3.pingidentity.cloud:9999
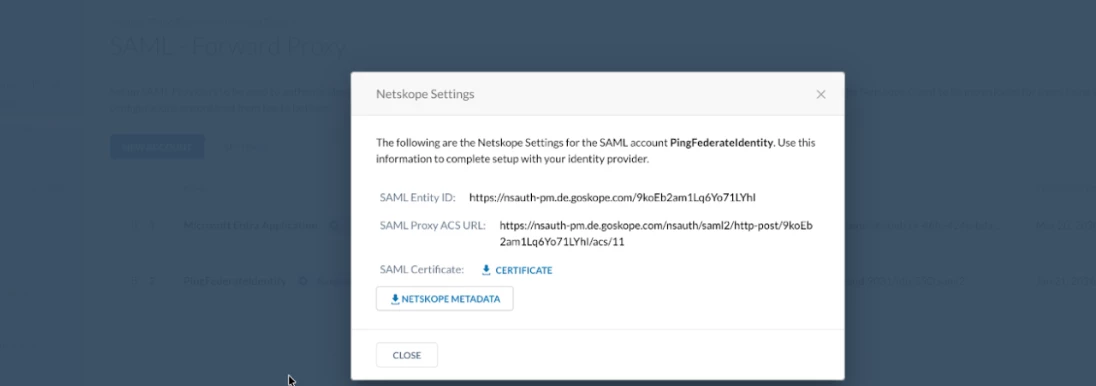
Step 16 - Download the metadata certificate from your netskope tenant. Once the certificate is downloaded, go back to the Ping tenant.
Step 17 - Upload the certificate downloaded from Netskope tenant in your Ping Application.
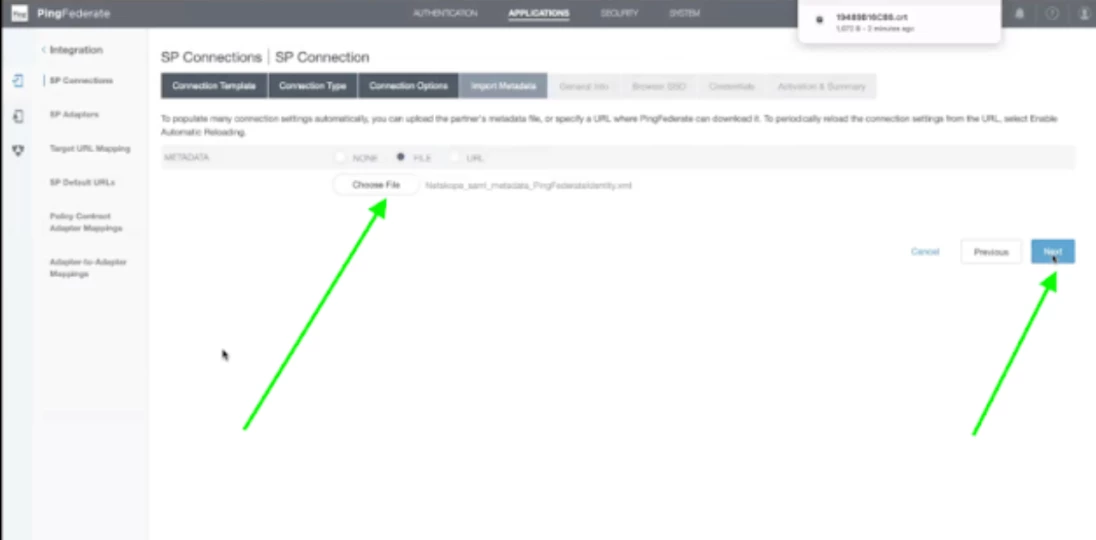
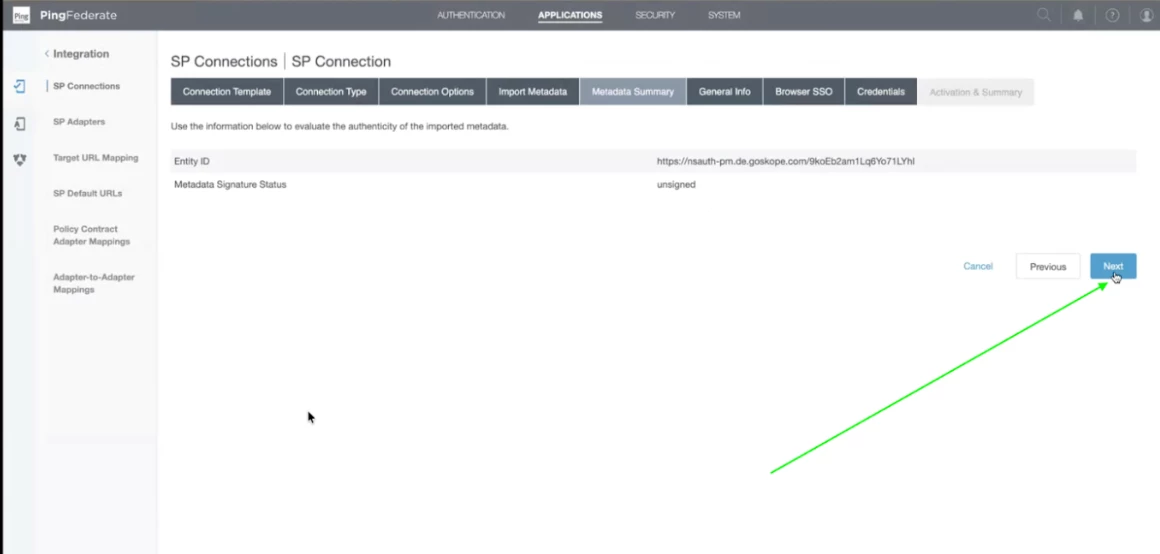
Step 18 - Review the metadata summary and click on Next.
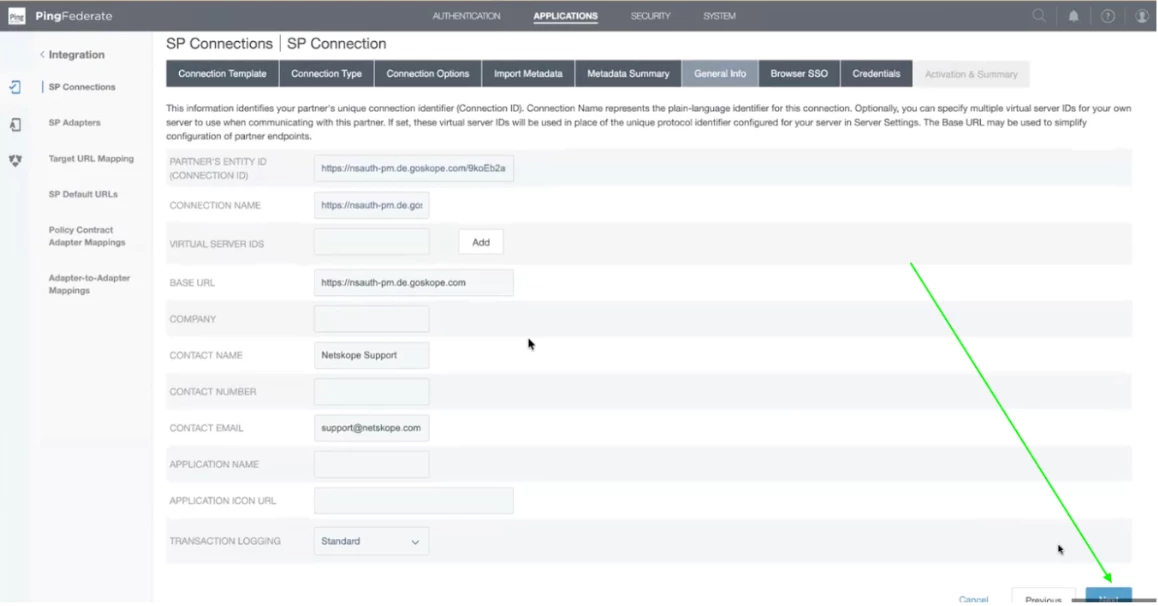
Step 19 - All the details will be populated in the General Summary. Click on Next after review.
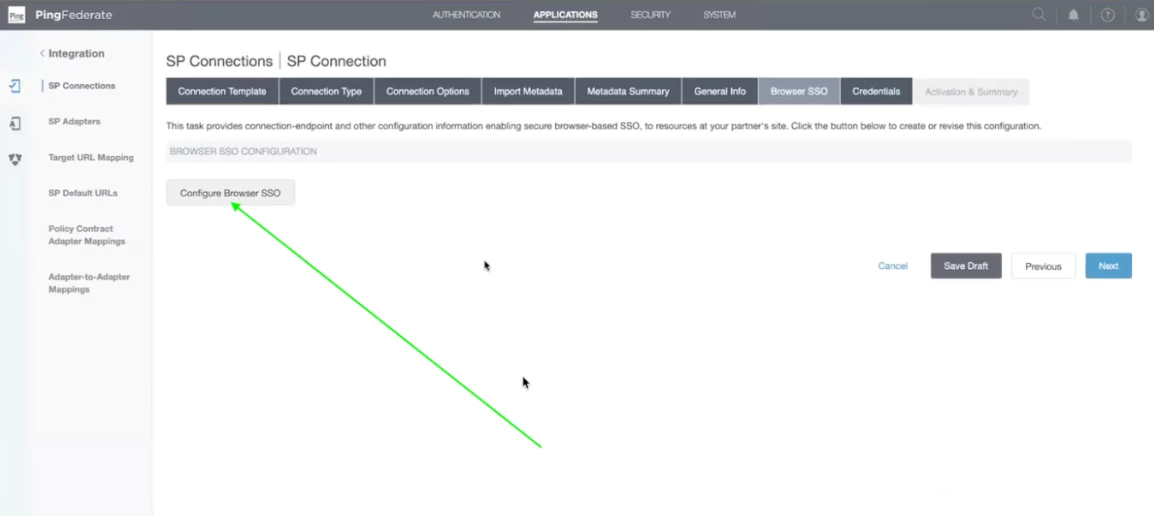
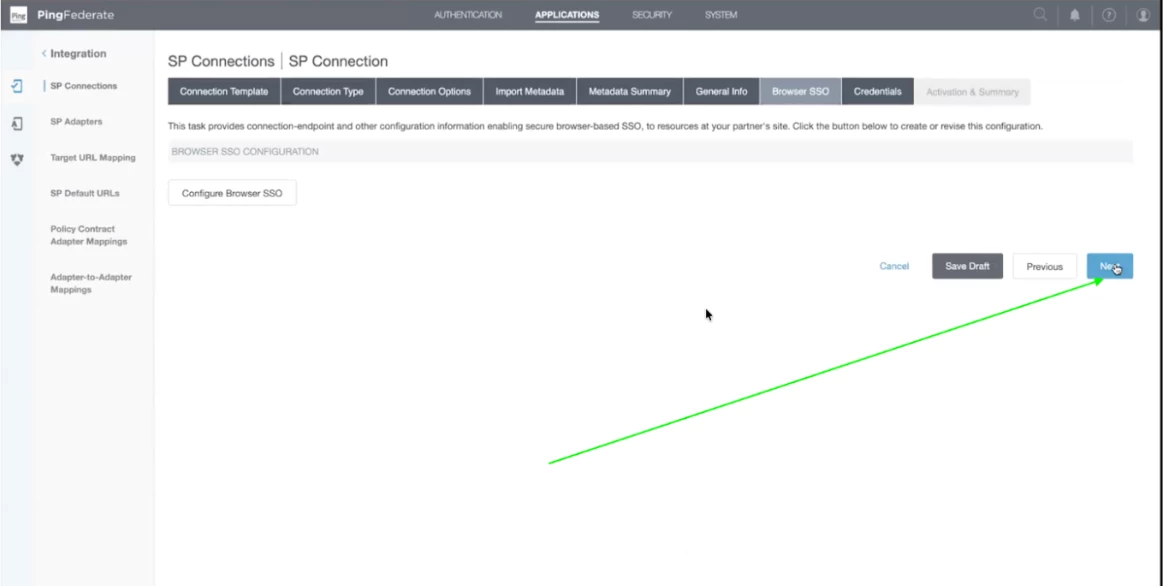
Step 20 - Click on Configure Browser SSO
Step 21 - In the Single Sign on Profile check the IDP Initiated SSO. In the Single logout (SLO) Profile check the IDP-Initiated SLO.
In IDP Initiated, Ping will initiate the Login. In SP initiated, netskope will redirect to Ping.

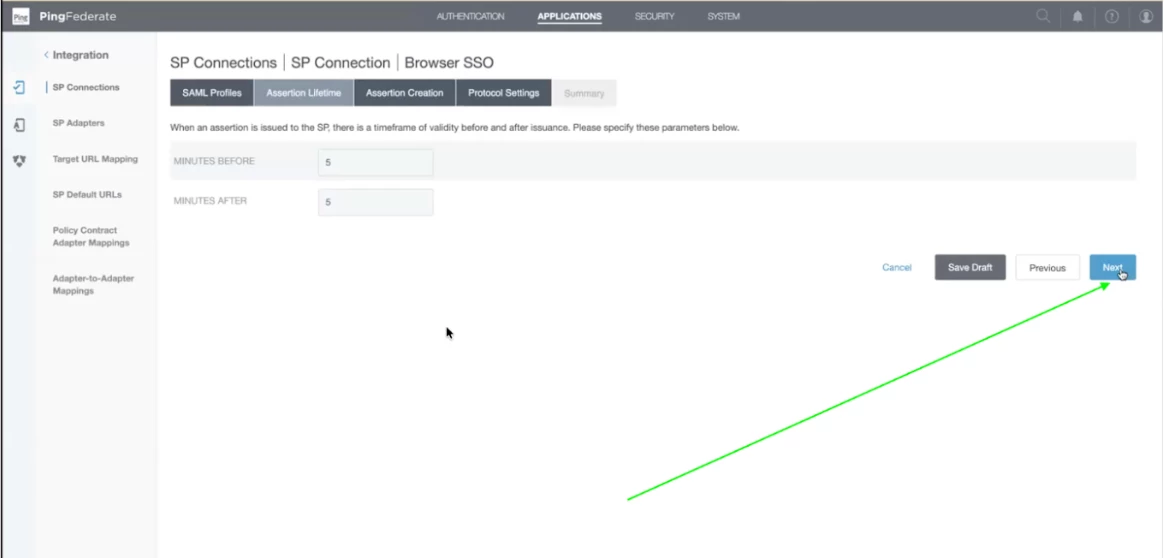
Step 22 - Under the assertion lifetime, default values must be as it is. Click on Next.
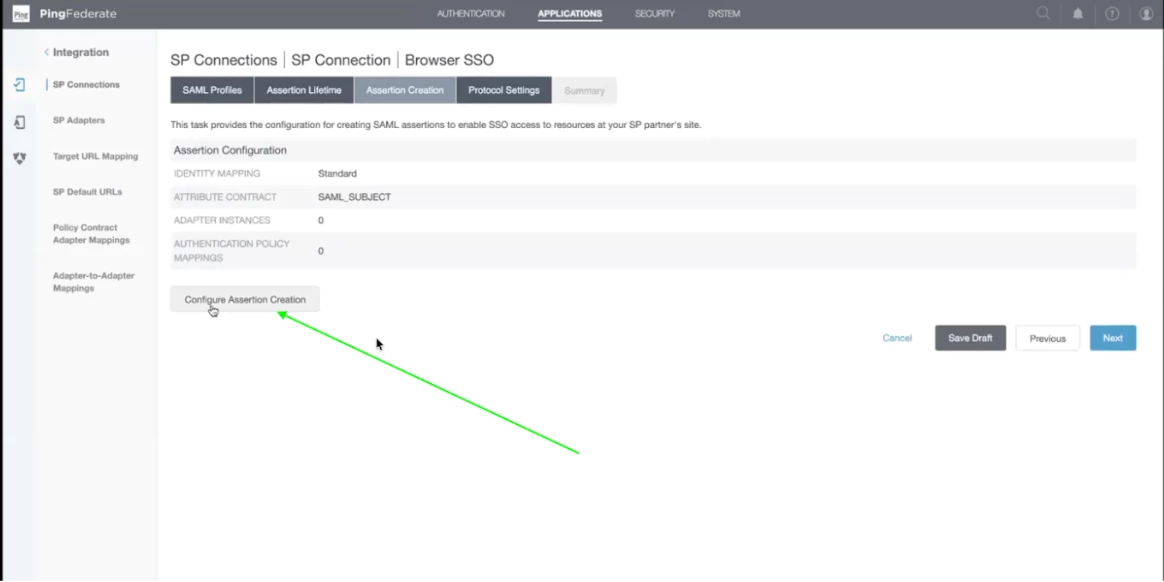
Step 23 - In the Assertion Creation screen, click on Configure Assertion Creation Button.
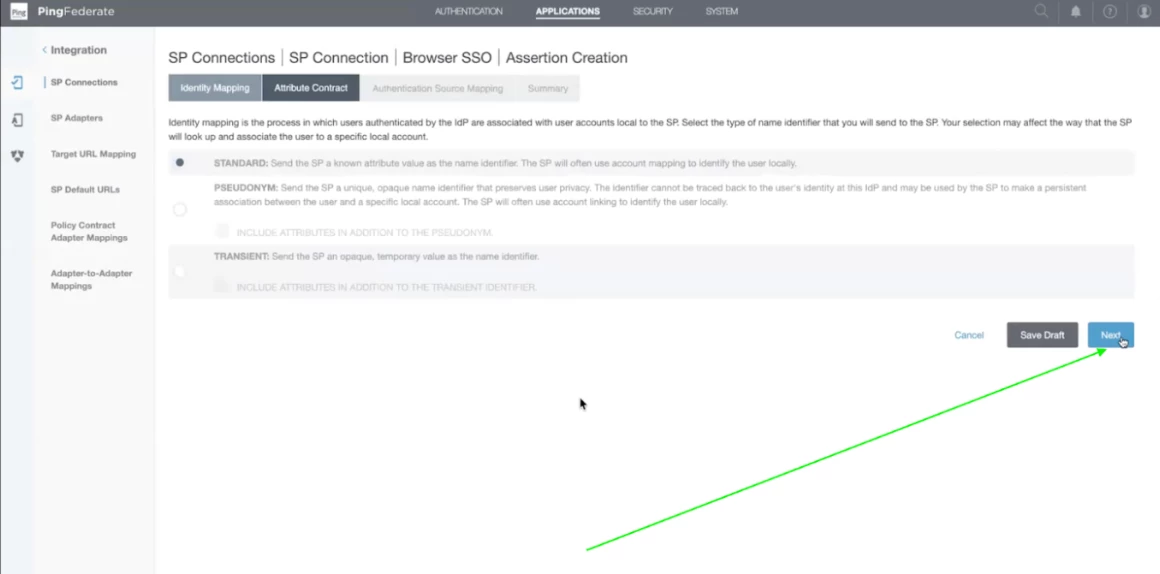
Step 24 - let the default values be checked. Click on Next.
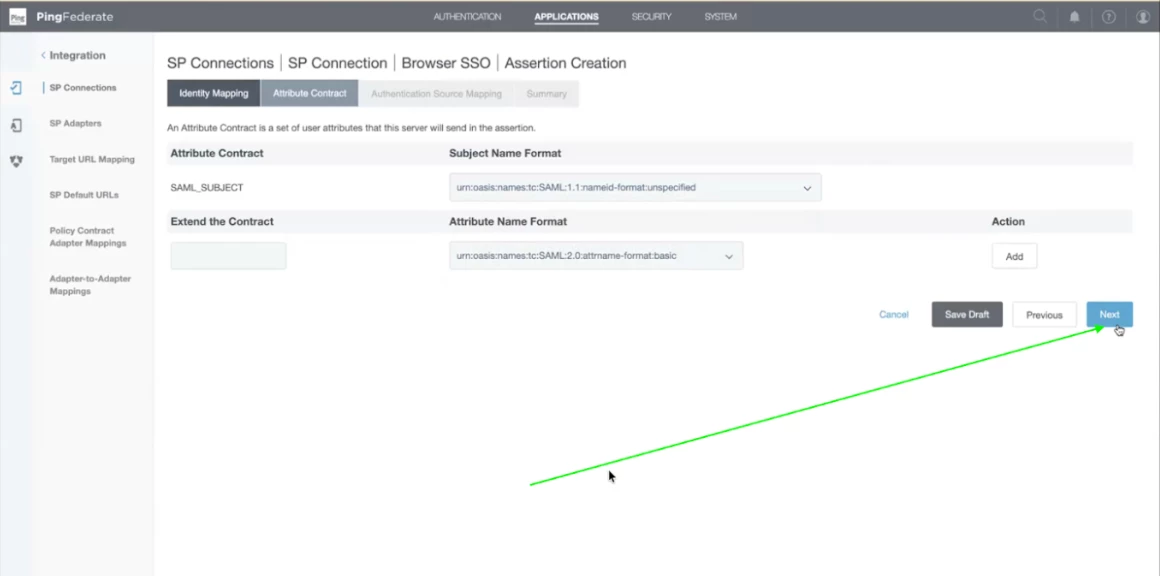
Step 25 - Now, these are the SAML Subject details. By default username is checked. You can change it / add more attributes as per your requirement. We have left it as default. Click Next.
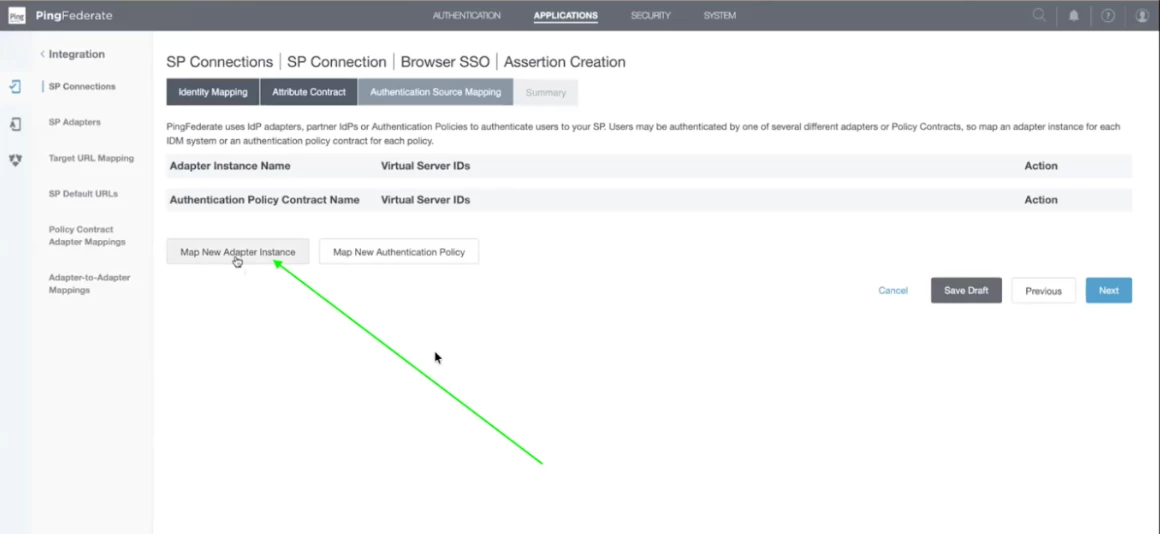
Step 26 - Now we need to add the Adapter Instance and Authentication Policy contract name. To keep it simple, we will add the HTML Form adapter which is used for MFA and in Authentication Policy we can add the policy. Click on Map new Adapter.
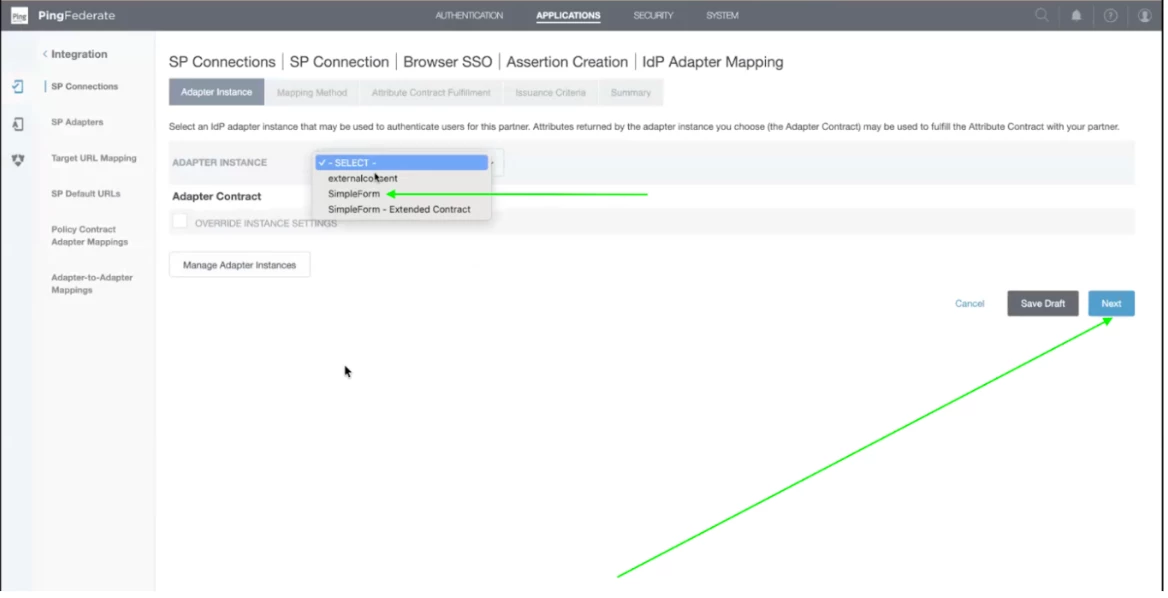
Step 27 - Now click on Adapter Instance and select the Simple Form adapter from the dropdown which we have created before. Then click on Next.
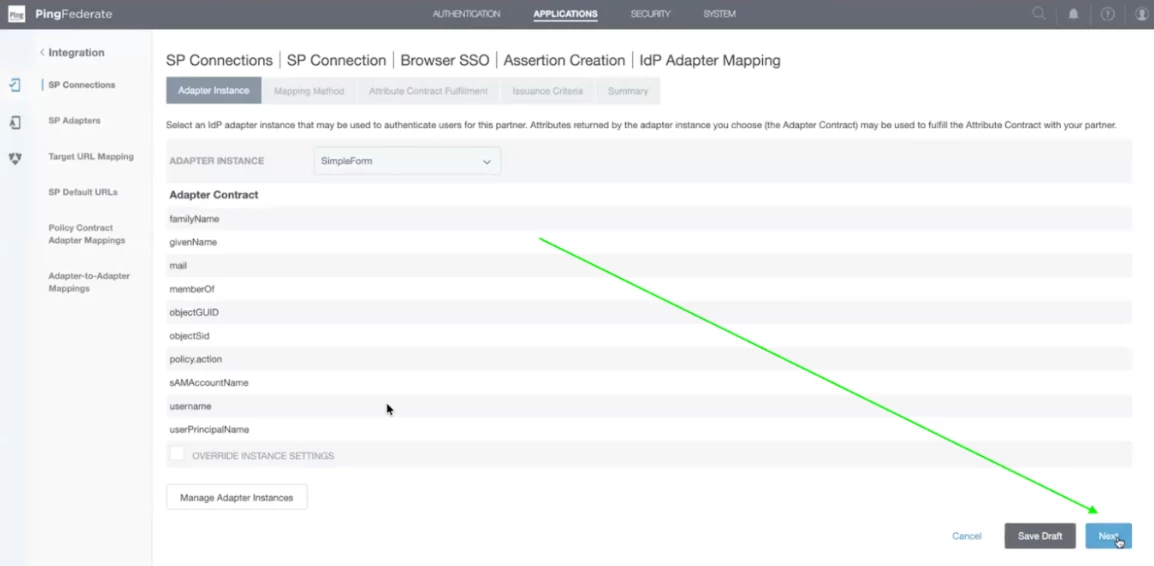
Step 28 - Now you will be able to see the Simple Form Adapter Summary on the page. THese are from Active Directory. Click on Next.
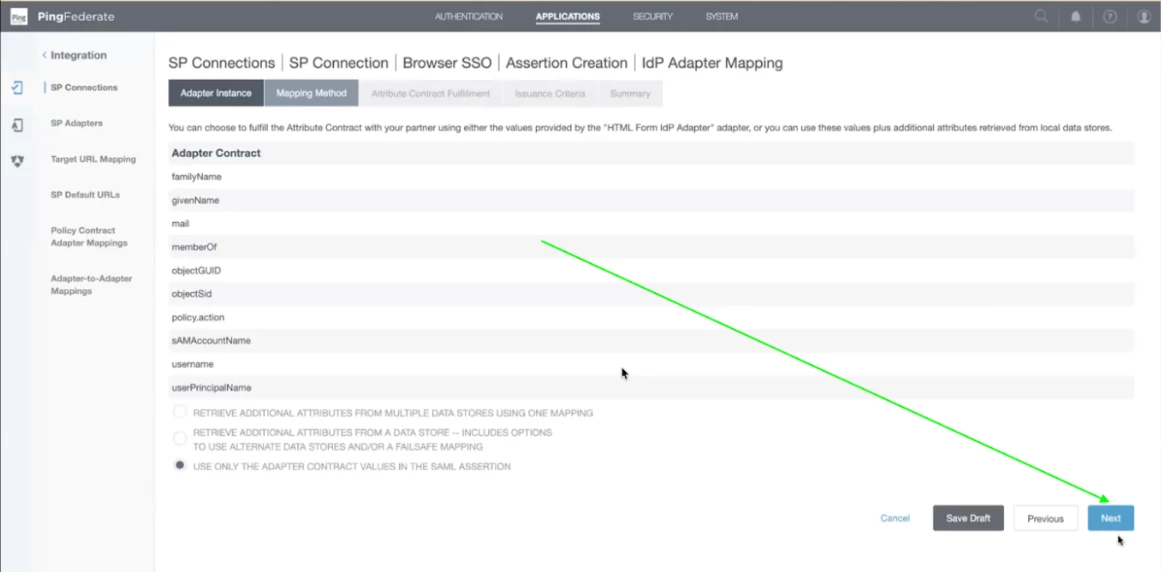
Step 29 - Now let the values be default and click on Next.
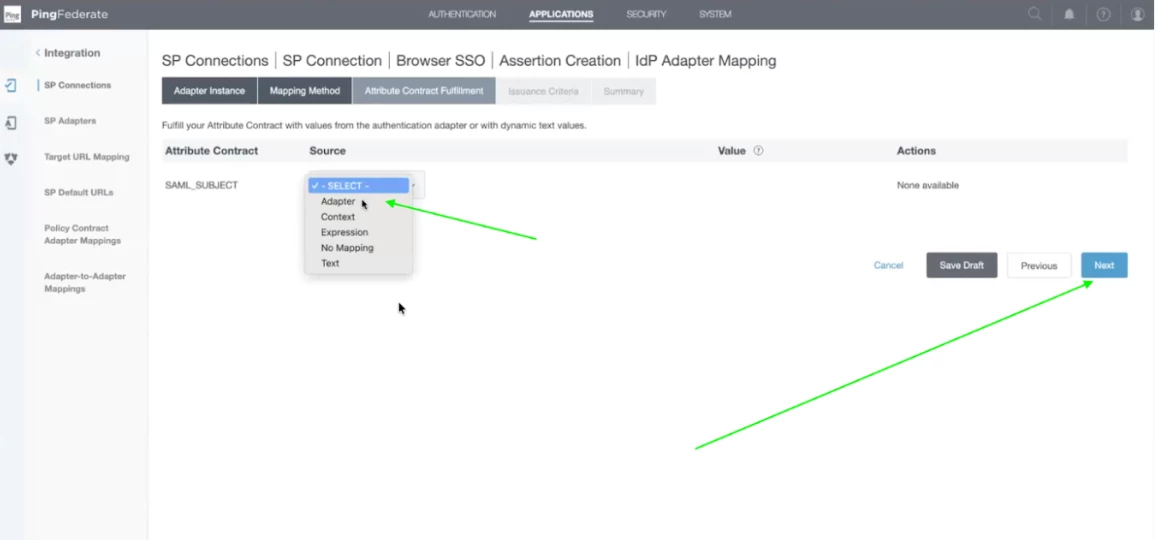
Step 30 - Now select the SAML Subject. From the dropdown menu, select the Adapter and click on Next.
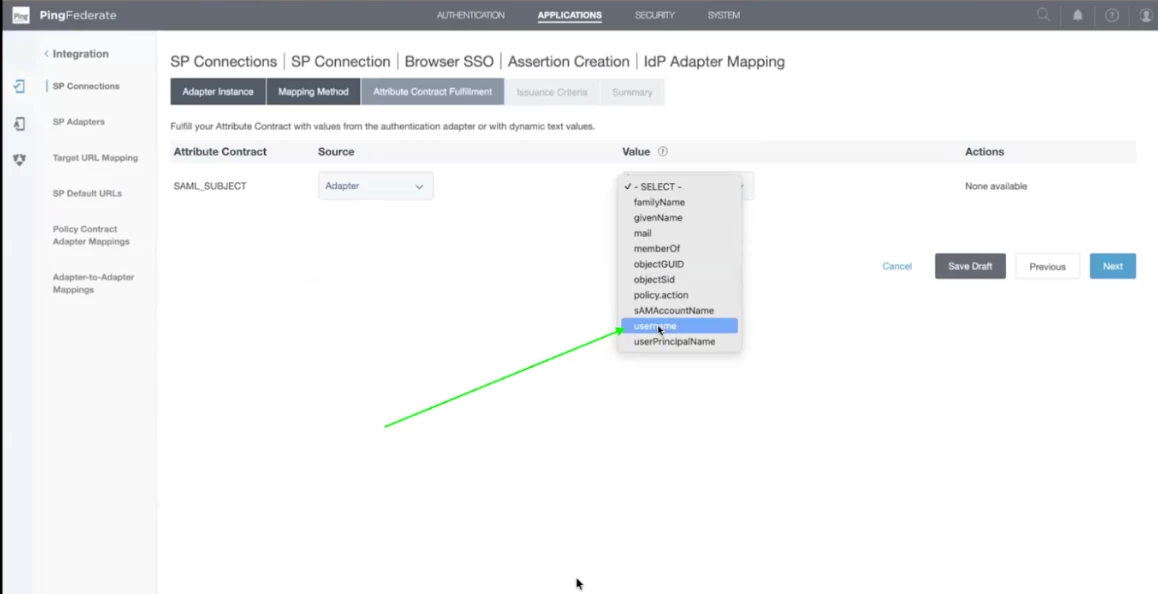
Step 31 - Now select the username form the drop down under Value. After that click on Next.
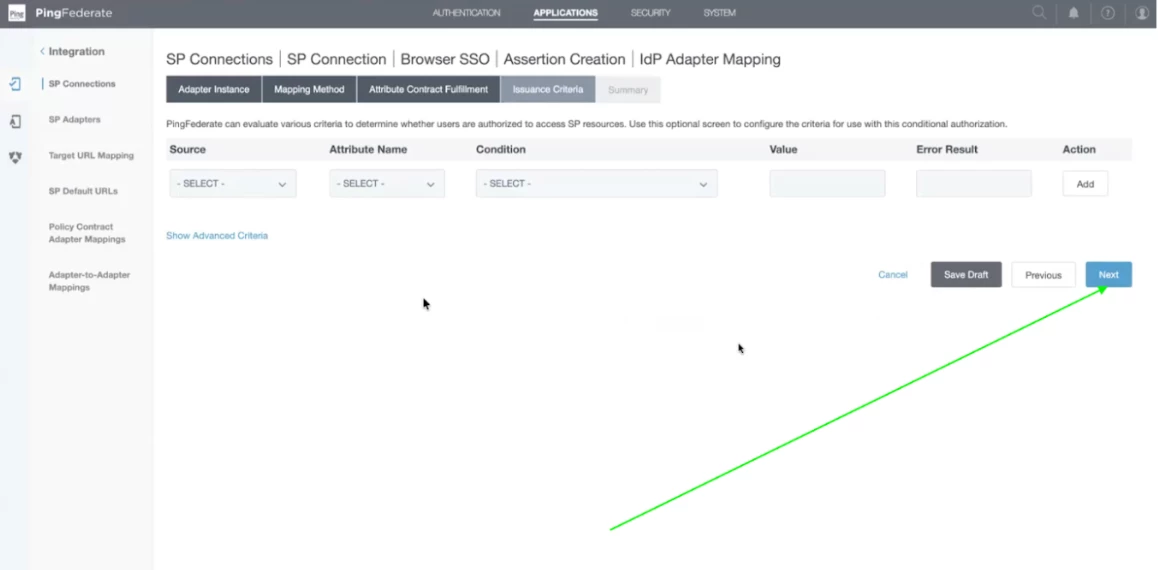
Step 32 - Now let the values remain default. Click on Next.
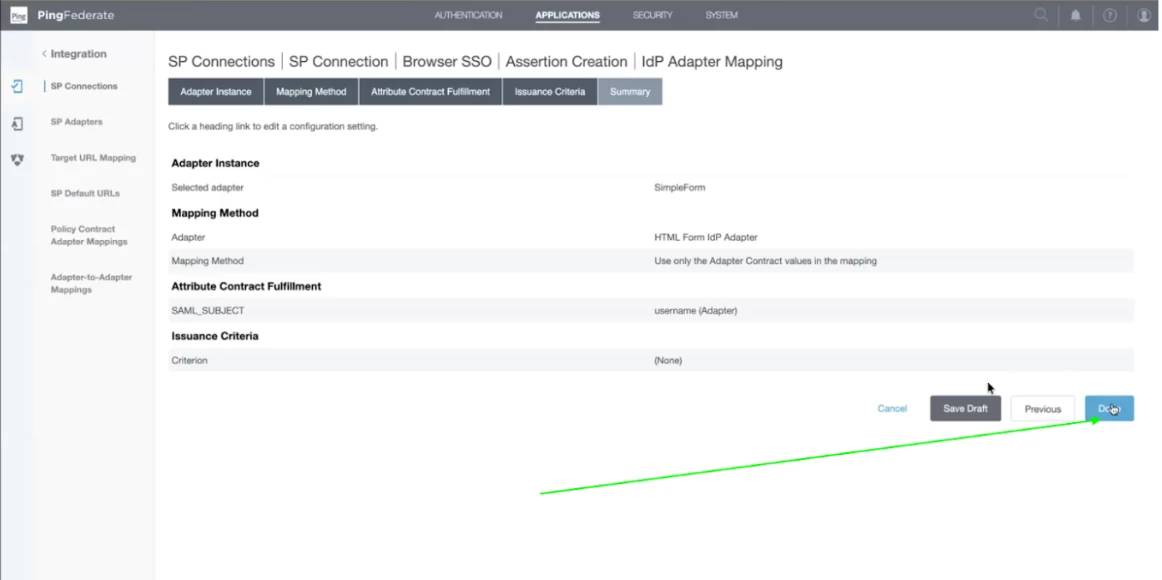
Step 33 - After that summary will be there. Click on Done.
Step 34 - After that summary, you will get the details of Adapter and Authentication policy. Click on Next.
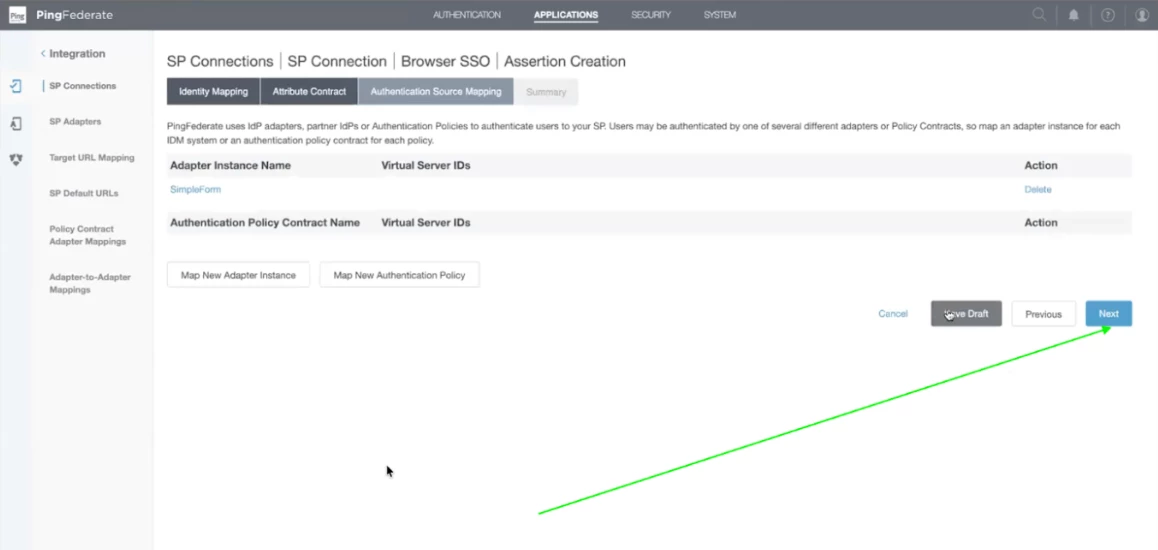
Step 35 - In the end, you will get the detailed summary. Click on Done.
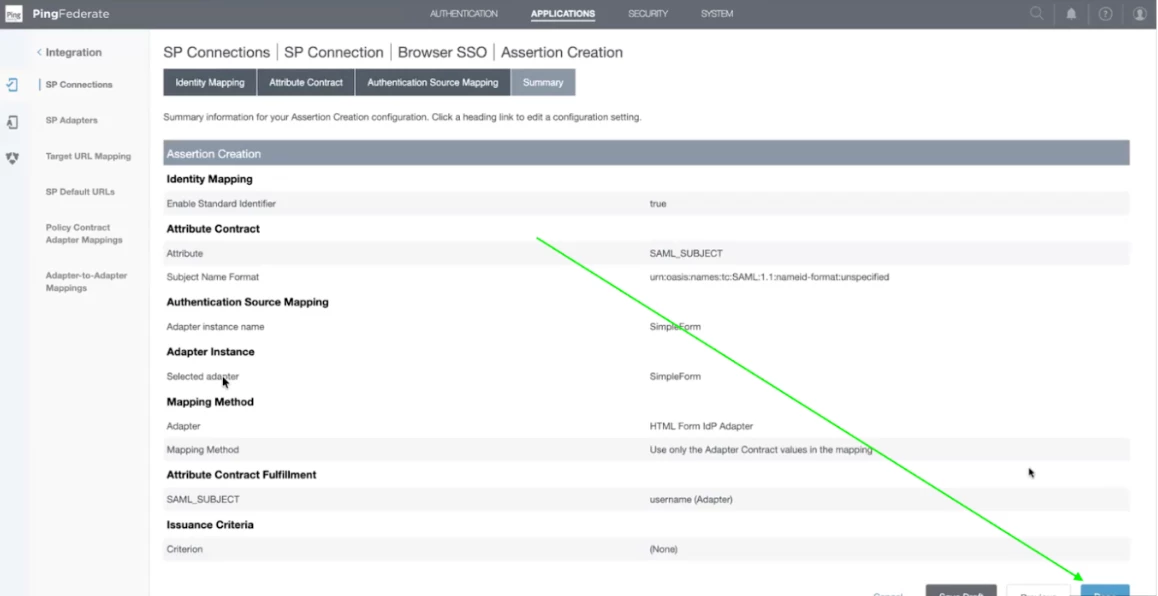
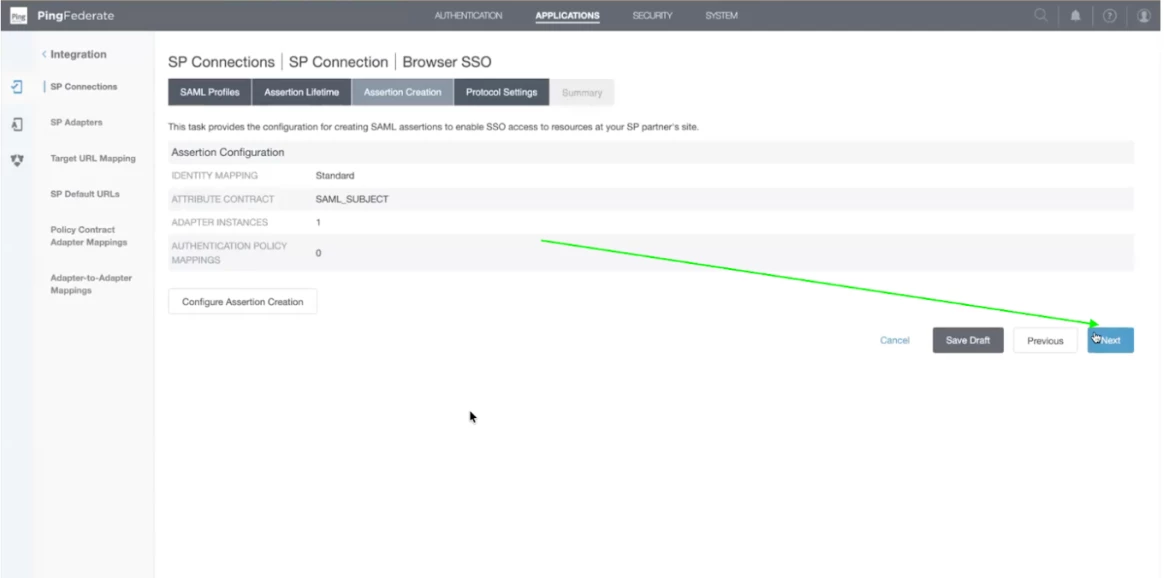
Step 36 - Now you will be redirected to Assertion Creation. Click on Next.
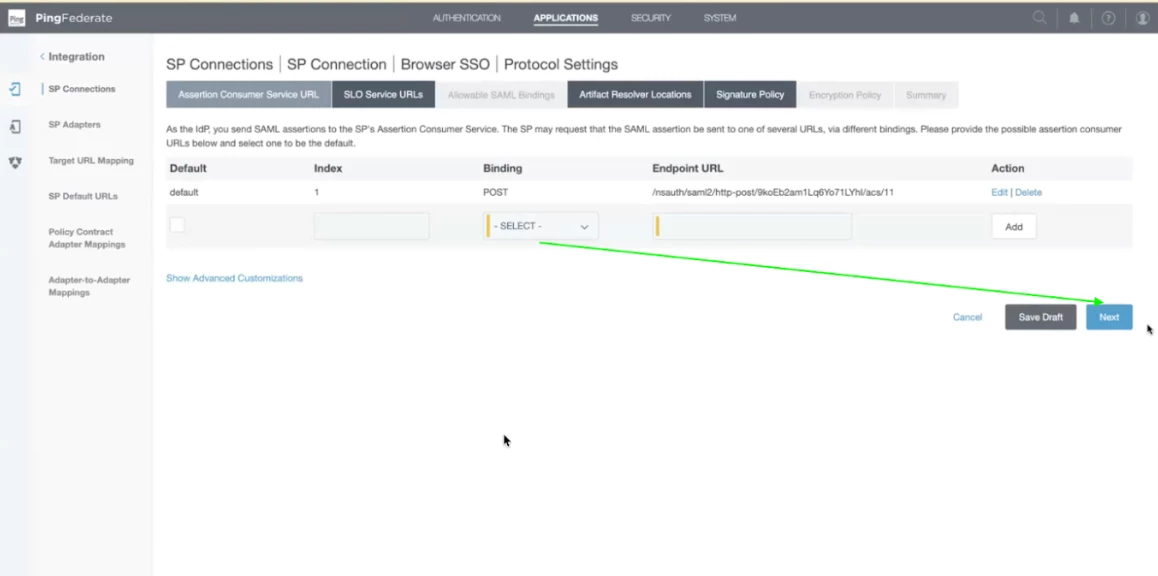
Step 38 - Now we will configure the Protocol Settings. Click on Configure Protocol Settings.
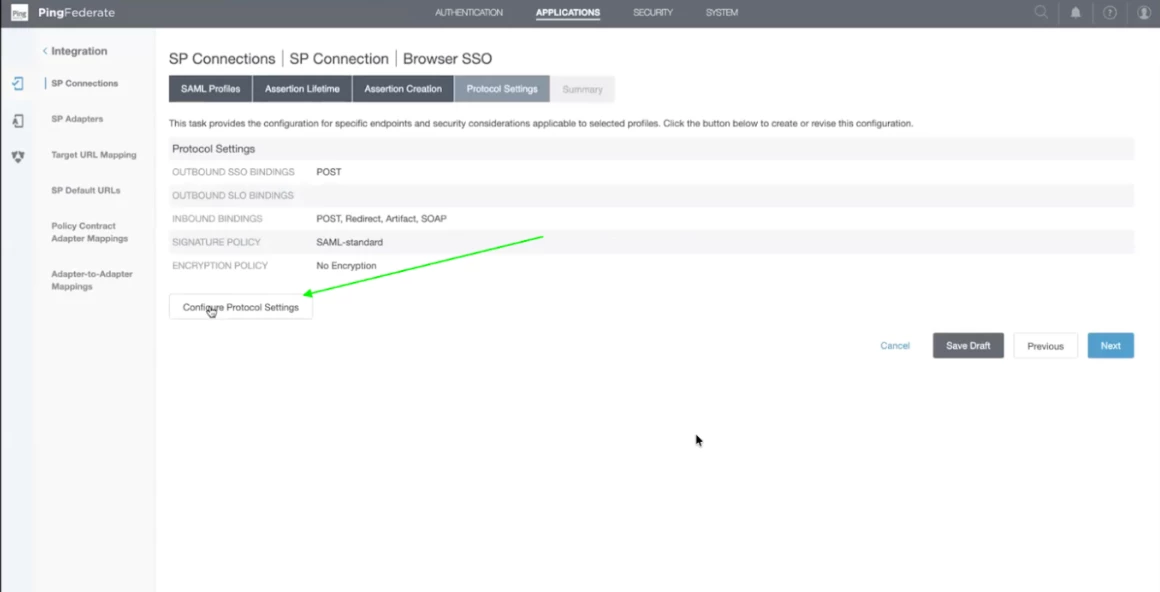
Step 39 - It will be autofilled from the Netskope Tenant Certificate Metadata. Click on next.
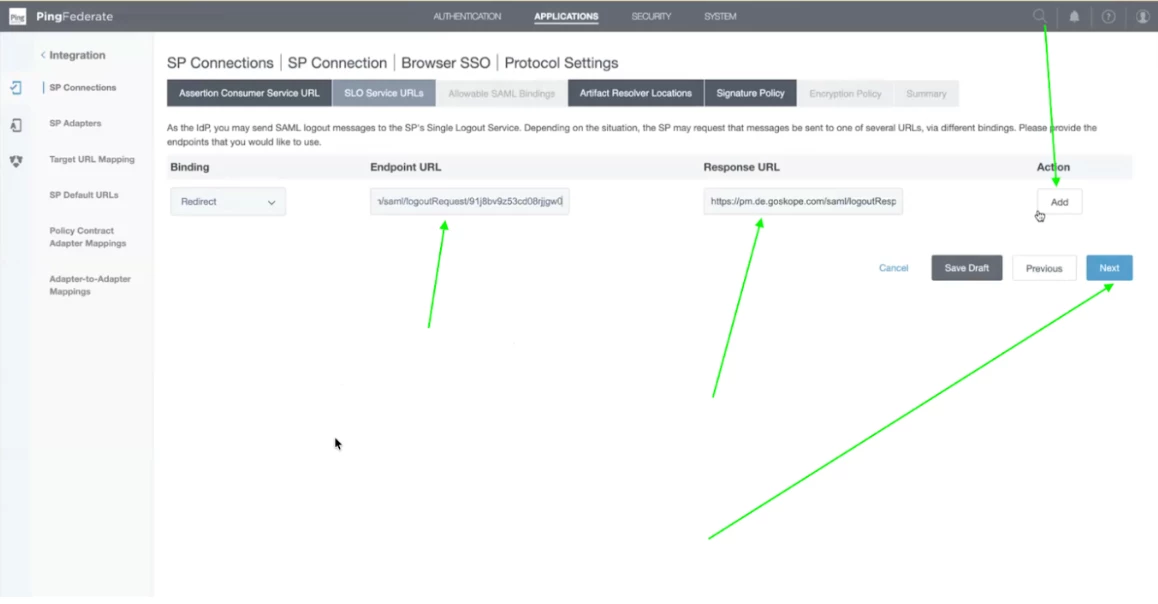
Step 40 - Now, add the logout URL Details and click on Add. Once it is added, click on Next. You will be able to find the logout details in your netskope tenant.
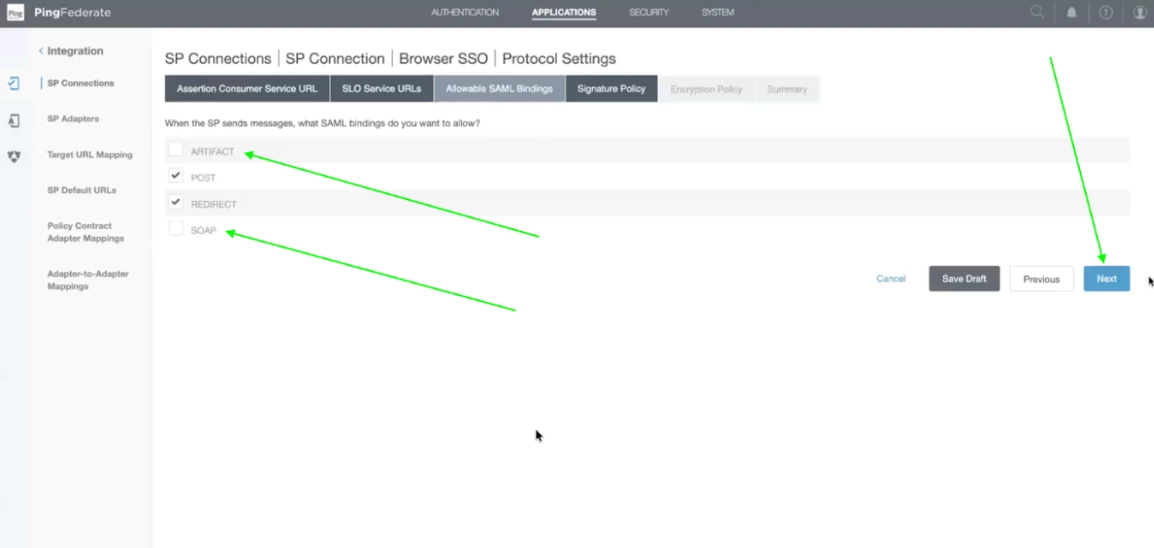
Step 41- Now, uncheck the Artifact and SOAP Bindings and click on Next.
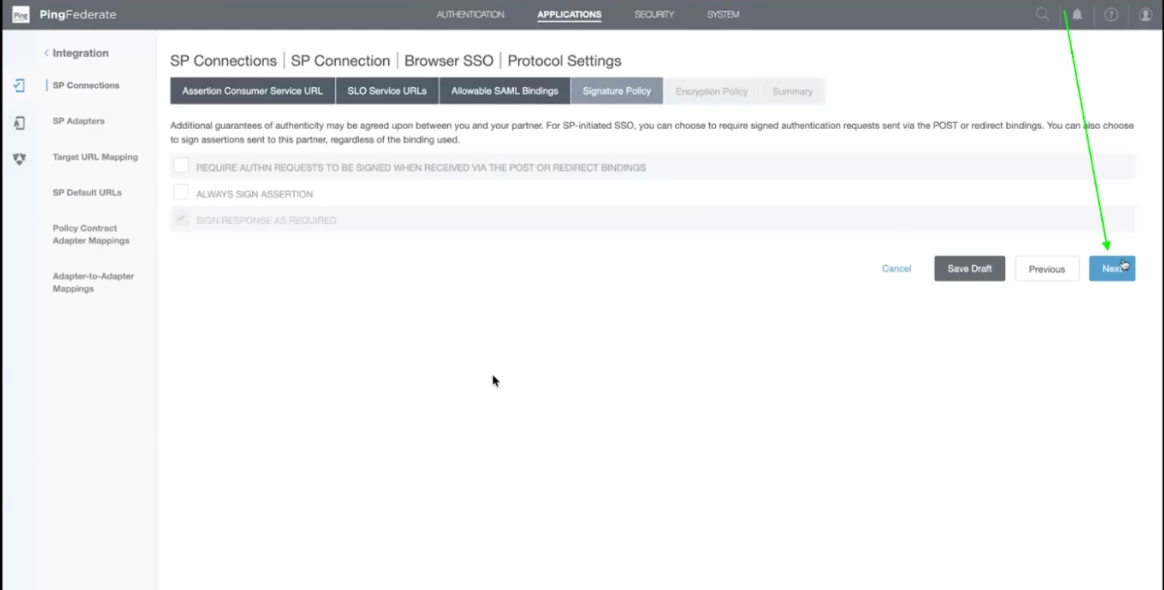
Step 42 - In the Signature policy, keep the checkbox selected as default. Click on Next.
Step 43 - Now we don't have any encryption, So click on Next and let the values be kept default.
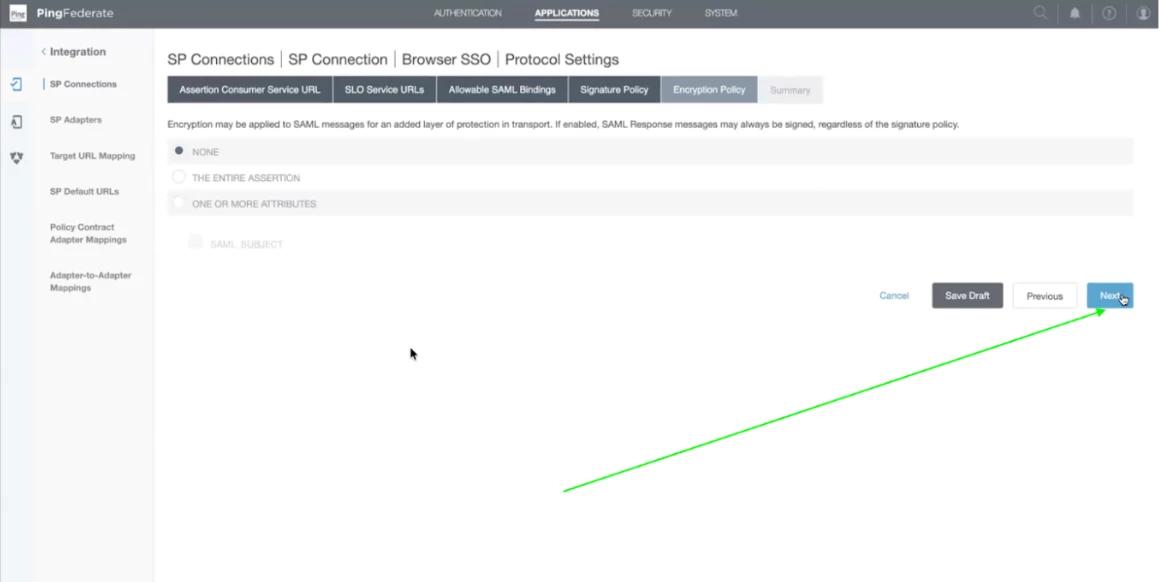
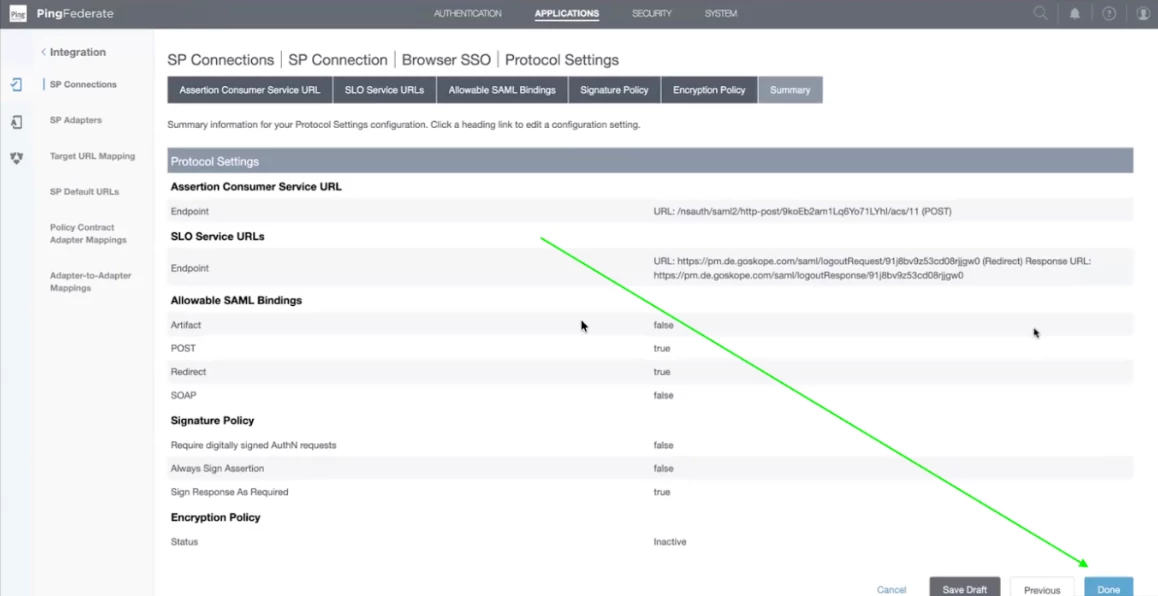
Step 44 - Now you will get the summary of the Protocol Settings. Click on Done.
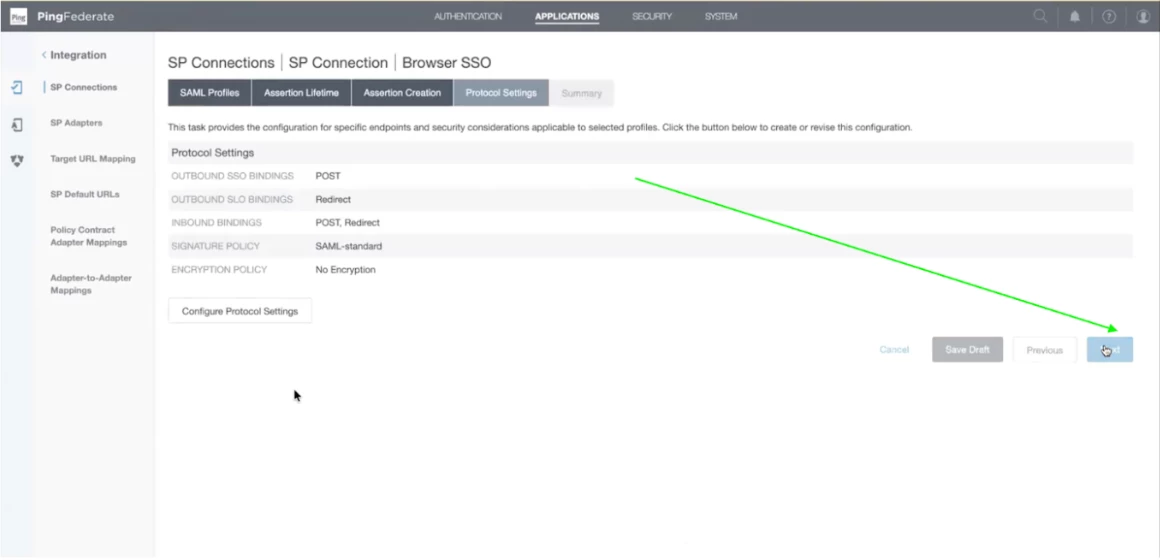
Step 45 - Now, you have completed the Protocol Settings, Click on Next.
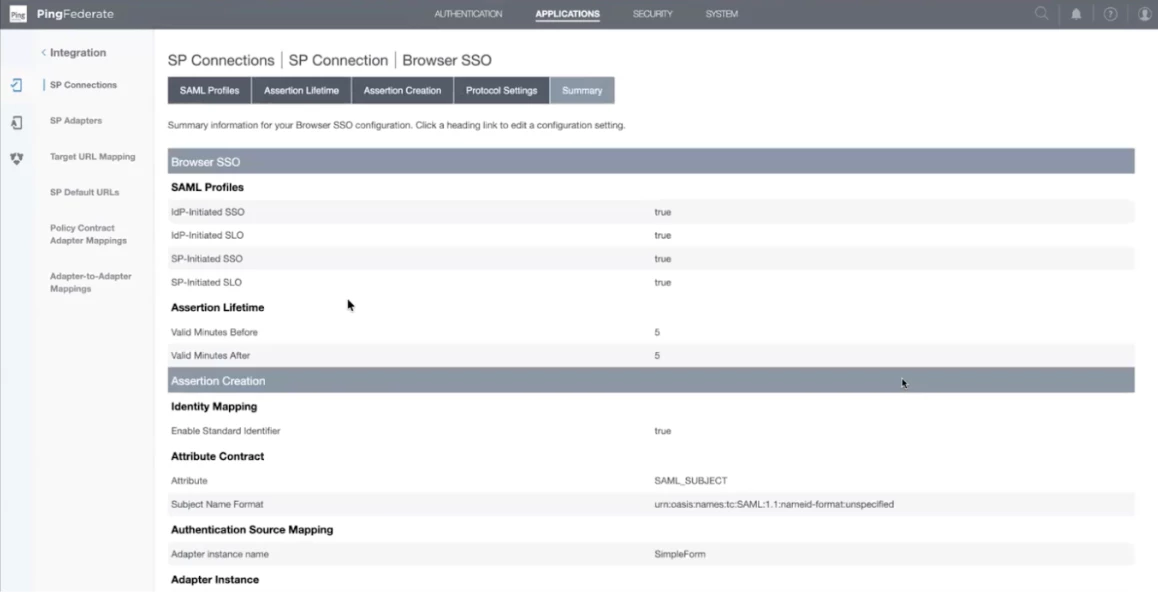
Step 46 - Now you have completed the Browser SSO Settings. Scroll down and click on Done.
Step 47 - Now click on Next to complete the SP Connection.
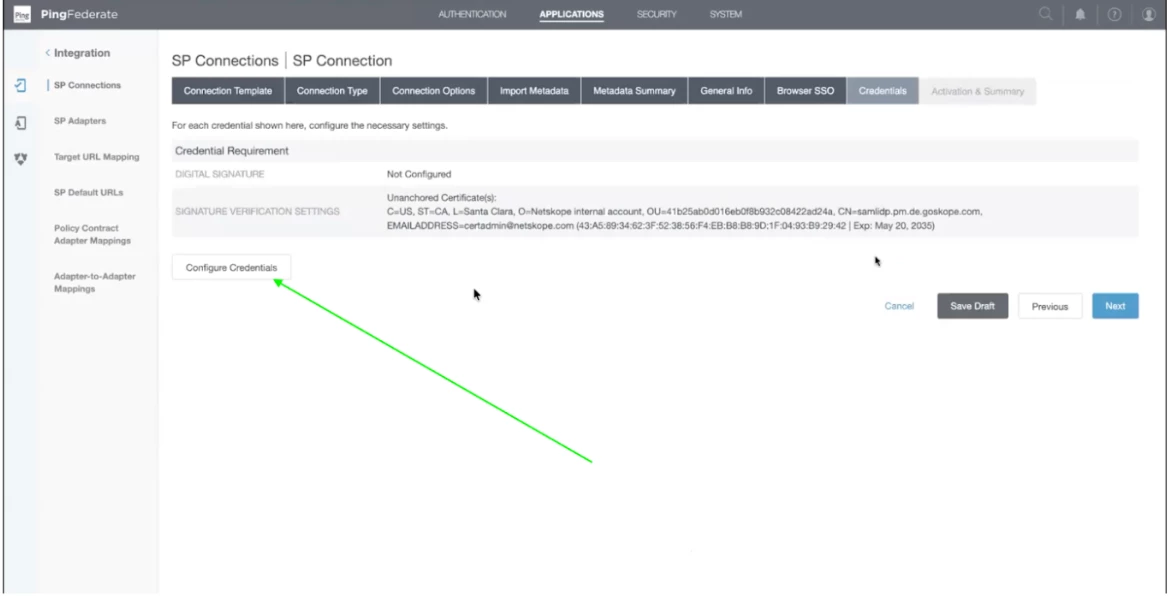
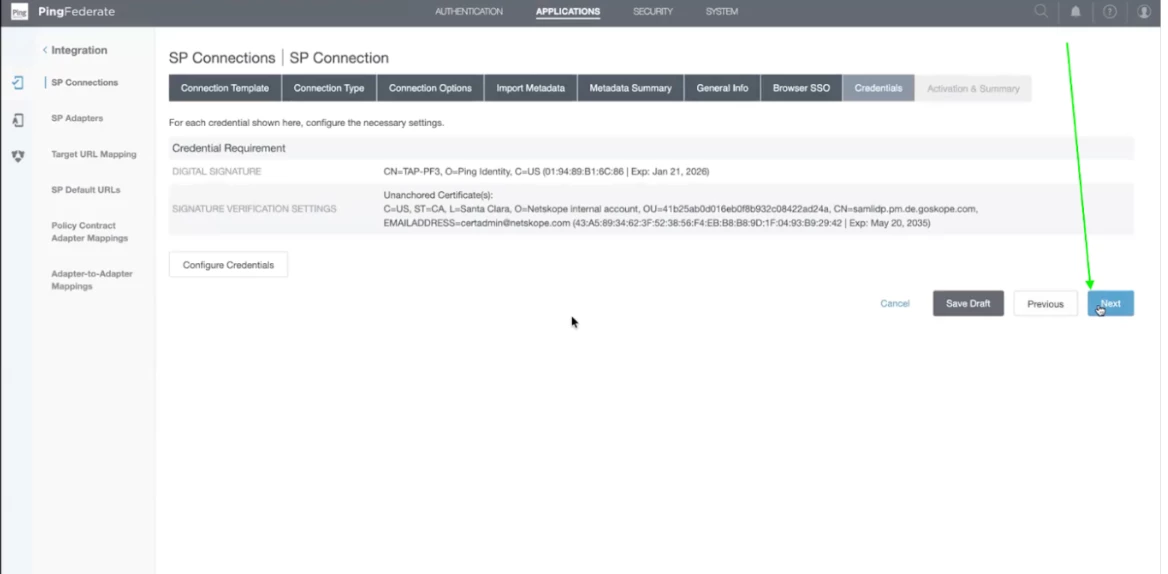
Step 48 - Now configure the credentials. Click on Configure Credentials.
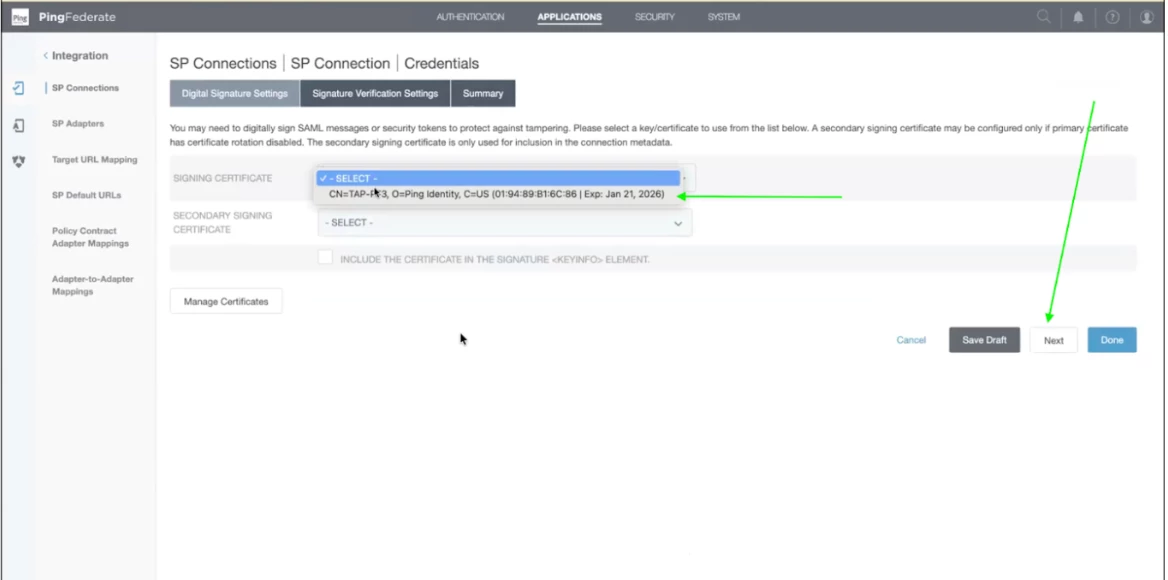
Step 49 - Now select the signing certificate from the dropdown. It will be auto populated. Leave the secondary signing certificate blank. After that click Next.
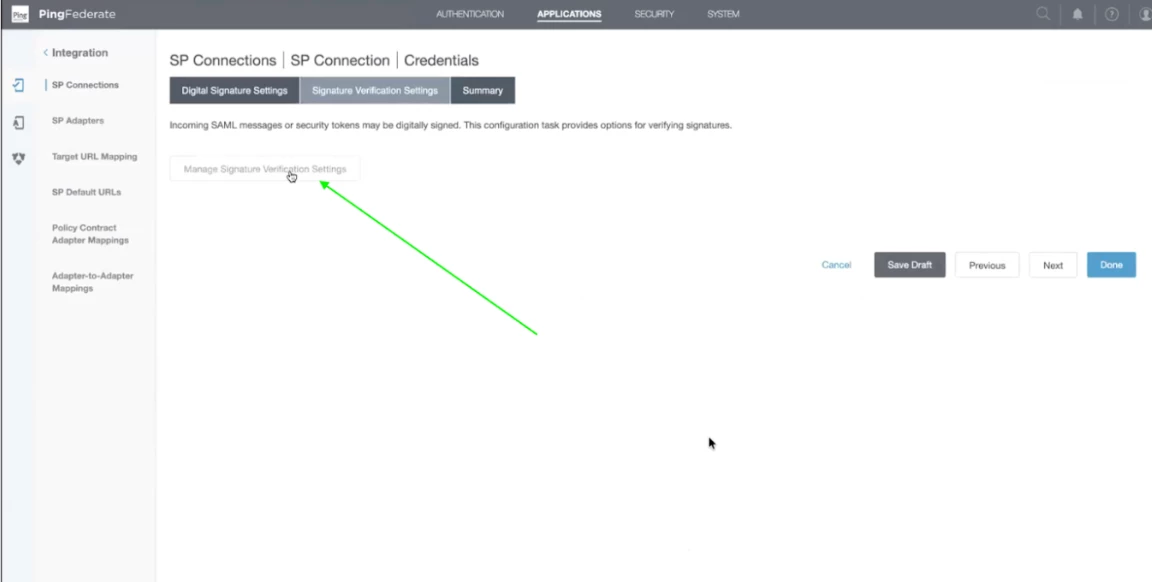
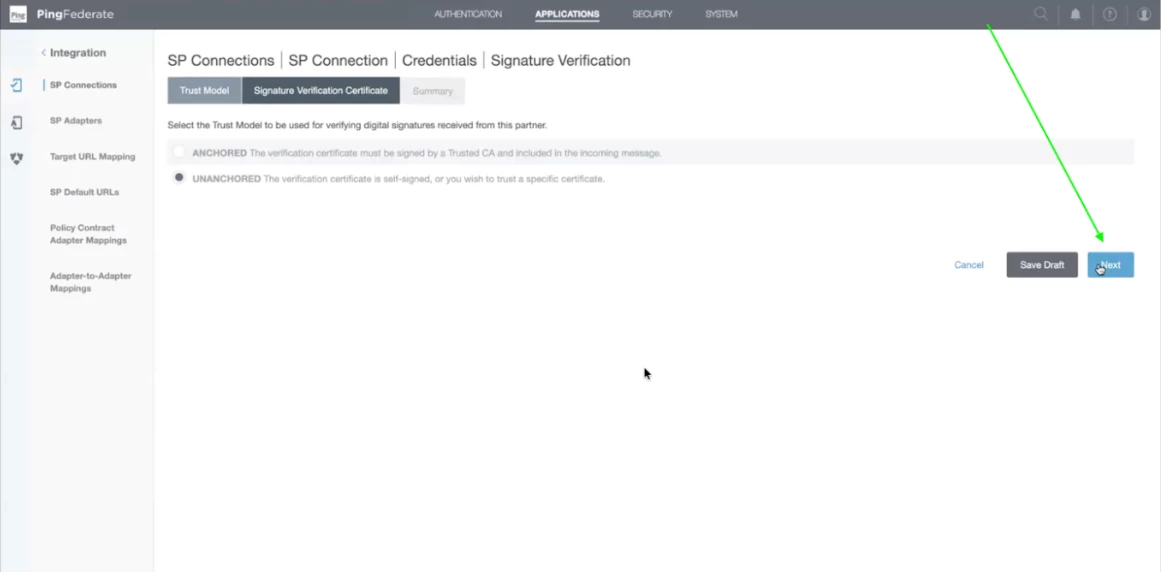
Step 50 - Click on Manage Signature Verification Settings.
Step 51 - Leave it selected as Unanchored. Click on Next.
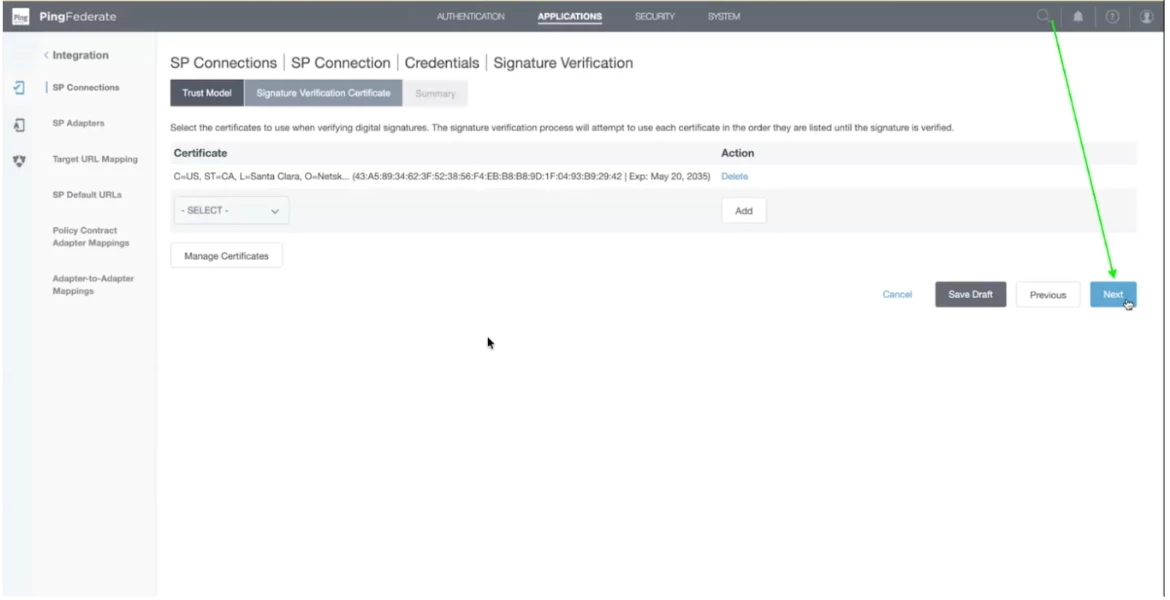
Step 52 - Certificate details will be as it is. Click on Next.
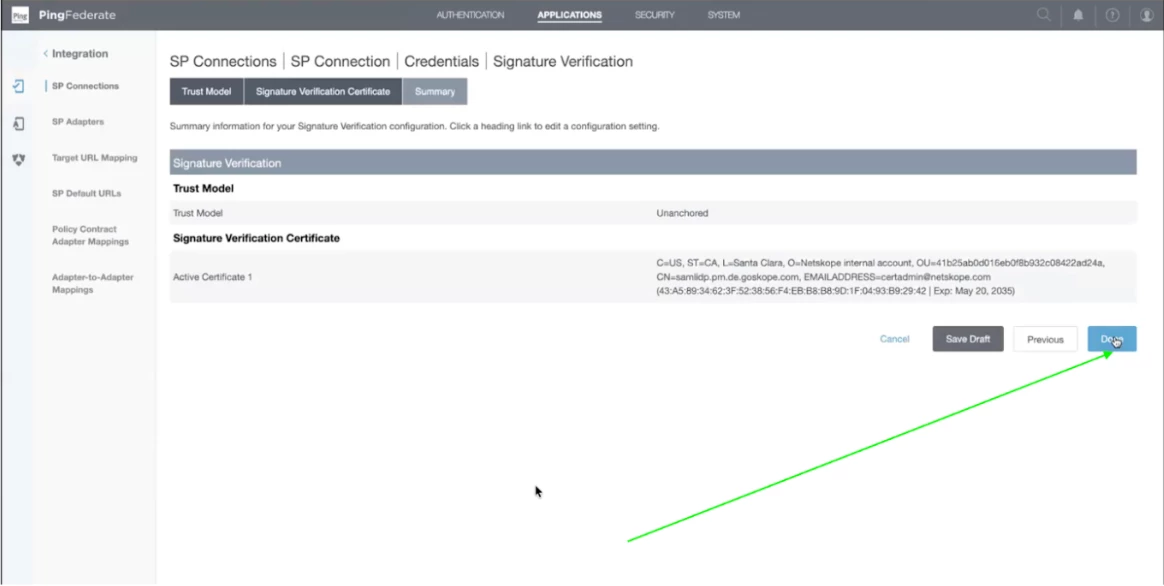
Step 53 - Now click on Done.
Step 54 - Signature Verification is completed. Now, click on Next to complete the SSO SP Connection.

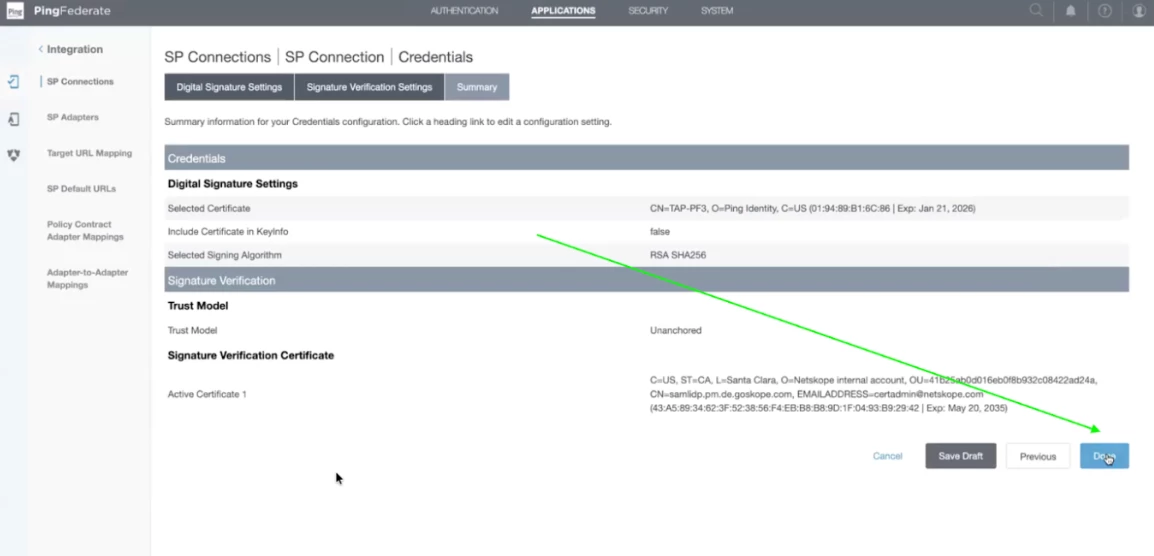
Step 55 - Now, you will get the summary of the configuration. Click on Done.
Step 56 - Now click on Next after reviewing the credential requirement details.
Step 57 - This is the final step which contains a summary of the configuration. Scroll down and click Save. You will receive the SSO Application Endpoint URL which you can use for loggin in to the SSO Profile.
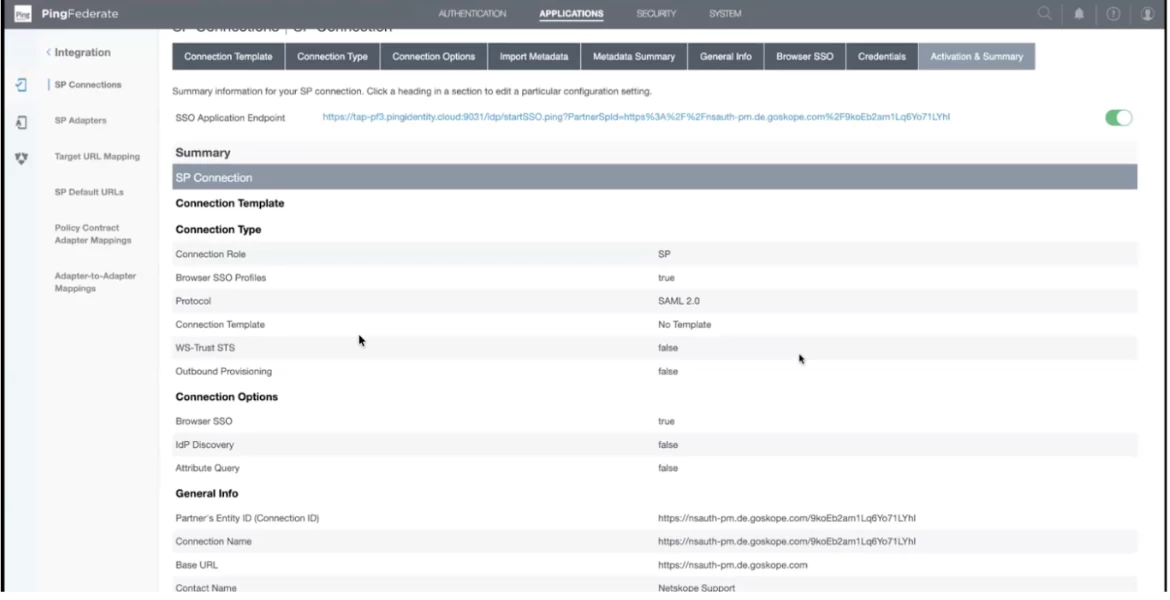
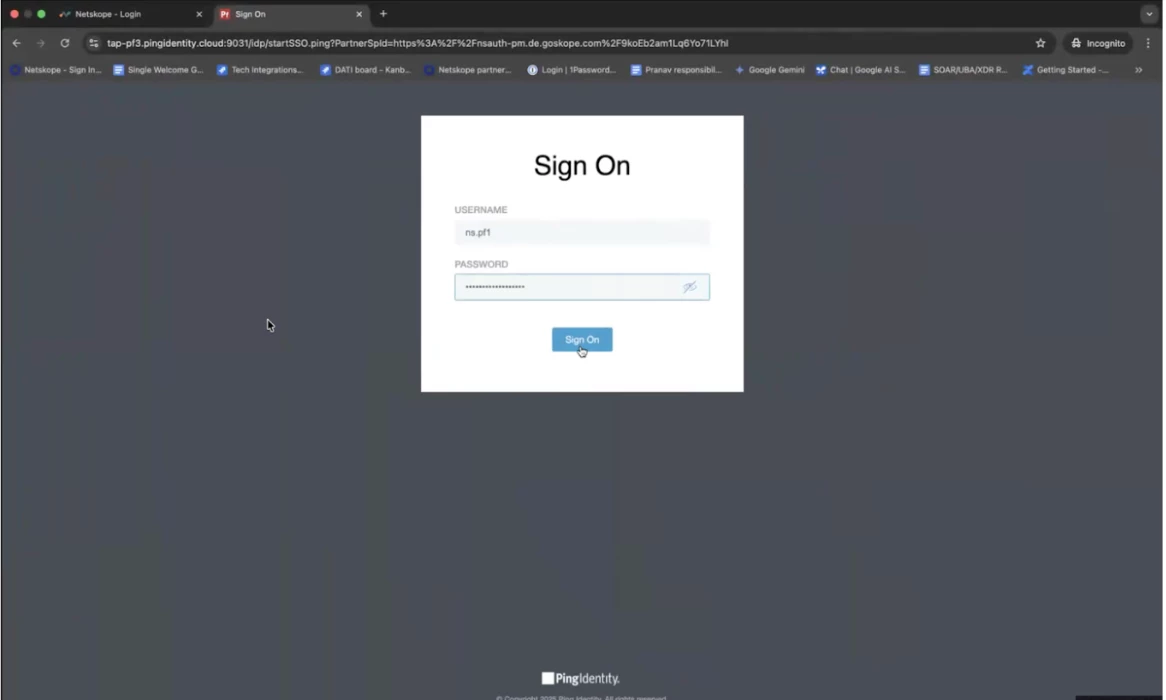
Step 58 - To test the connection. You can open the URL and use the credentials to login to the account.