Objective: Develop a comprehensive configuration guide for SCIM provisioning between PingFederate and Netskope.
Scope: This guide will detail the end-to-end process for automating user provisioning via the SCIM protocol.
Prerequisites:
-
Netskope: Administrative access to the local tenant is required to configure SCIM settings.
-
PingFederate: Administrative privileges within the PingFederate environment to manage application integration.
Workflow:
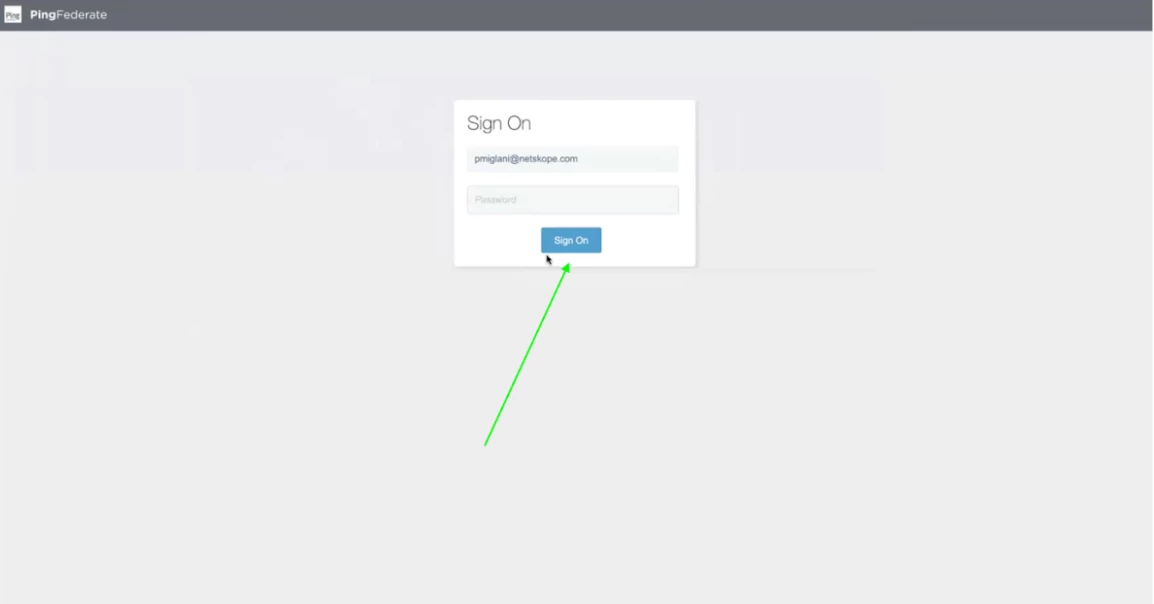
Step 1 - Login to your PingFederate Application using your login credentials.
Step 2 - If it's your first time login then you will be asked to reset your password. Else, continue to the next step.
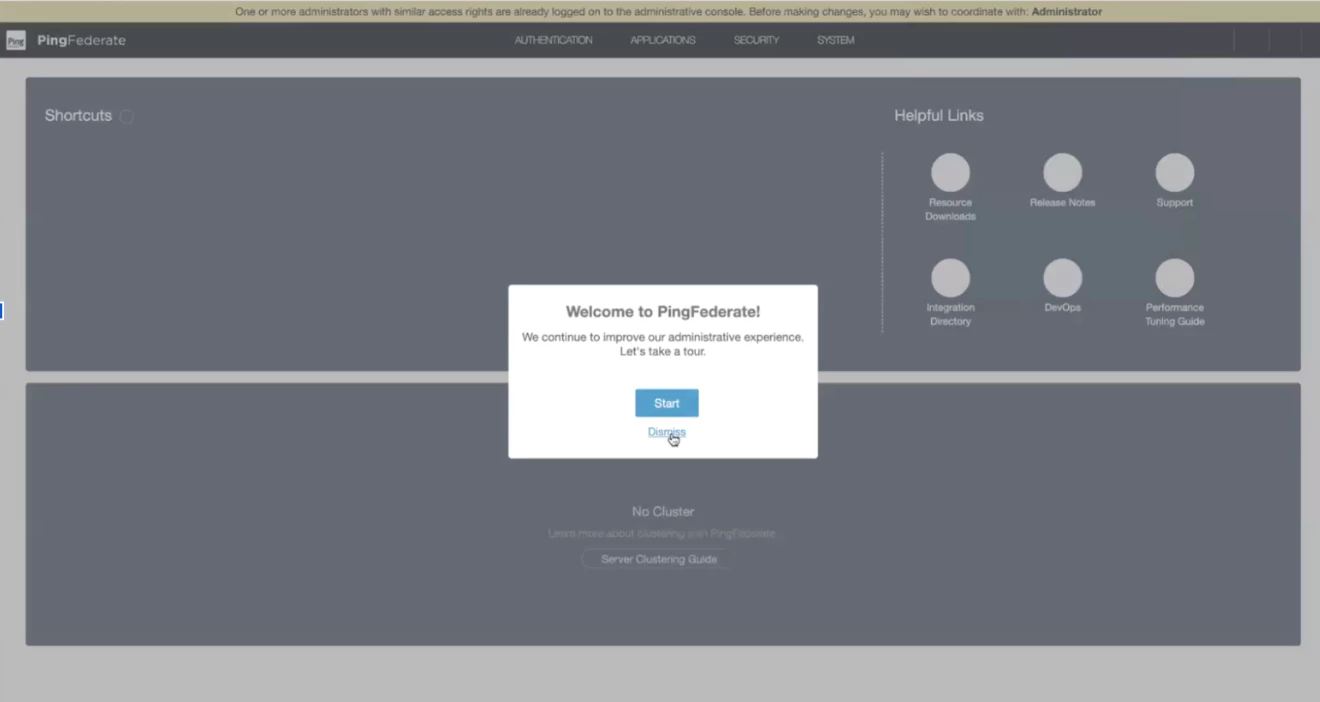
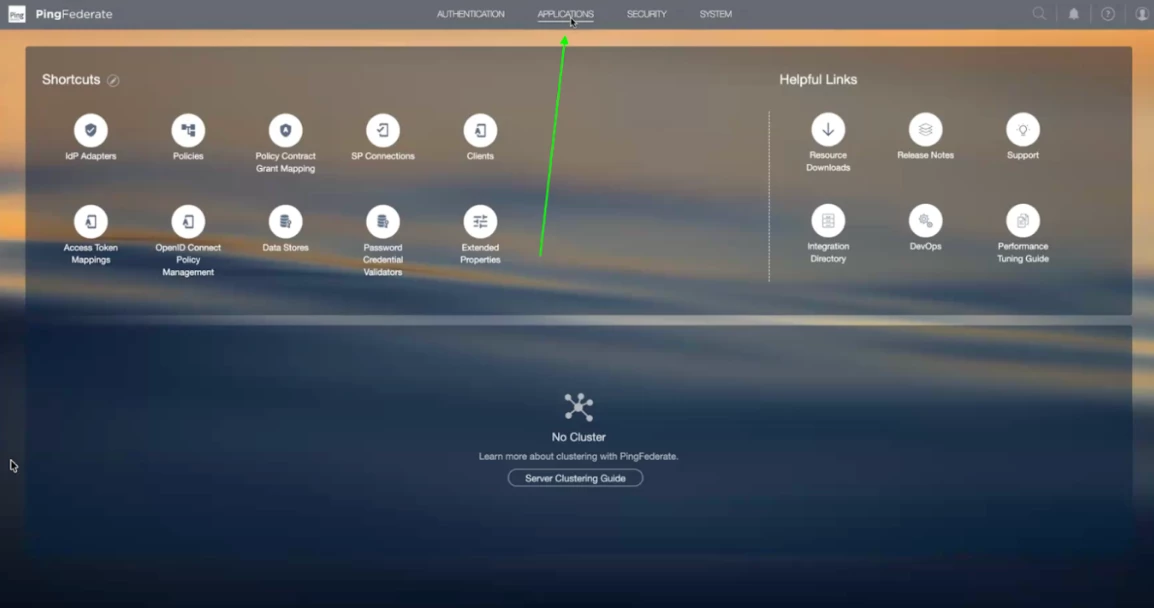
Step 3 - Once you login successfully, you will see the home screen. In the home screen, you will find all the required actions items.
Step 4 - Now, before enabling the SCIM integration, we need a service account for the PingFederate application to communicate with the netskope tenant. Login to your tenant which needs to be integrated for SSO / SCIM. URL will be like: <tenant-name.goskope.com>
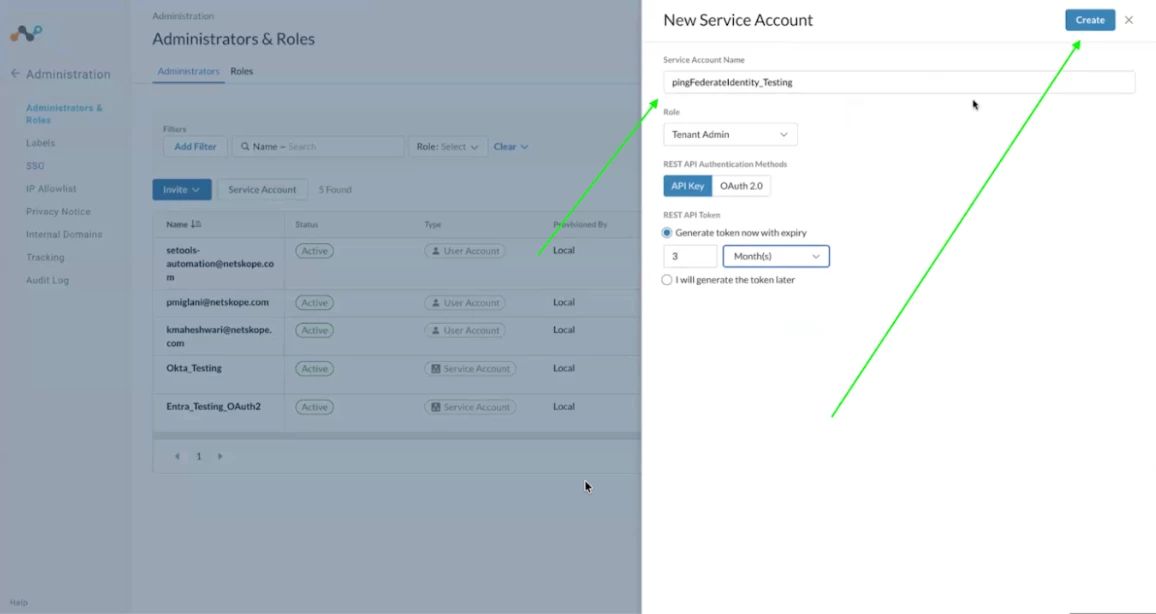
Step 5 - In the netskope tenant, go to Settings => Administration => Administrator and Roles. Create a new Service Account by giving it a name, Role, expiry timeline. Once you click on the create button, store the token securely. It will be used in the later steps.
Step 6 - Click on Application button in the top bar
Step 7 - Once the application page loads, click on SP Connections.
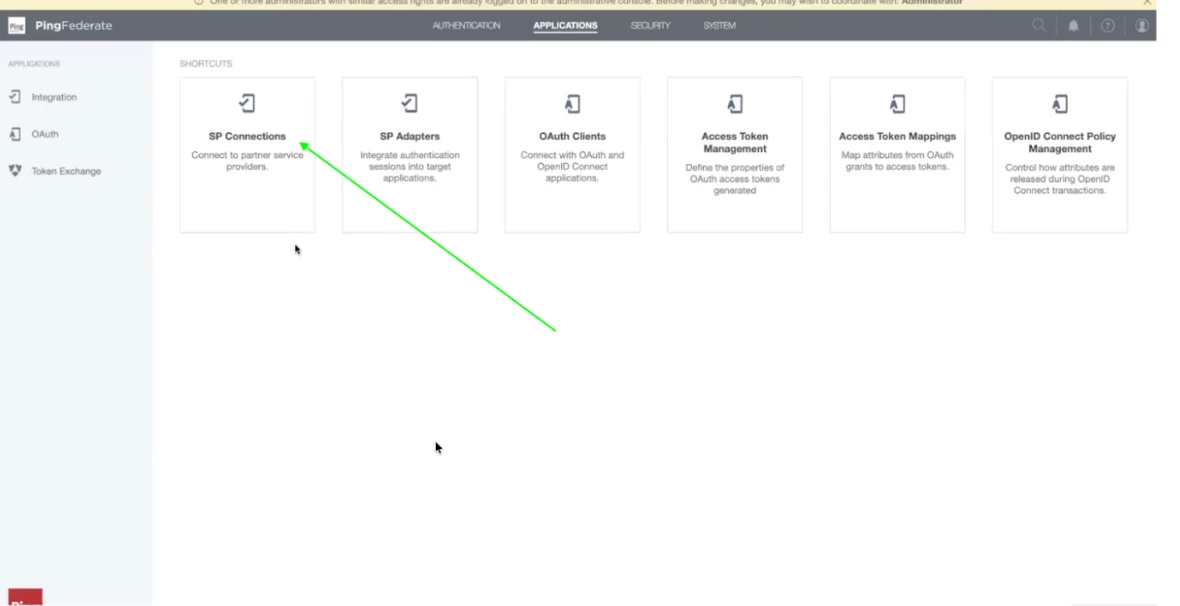
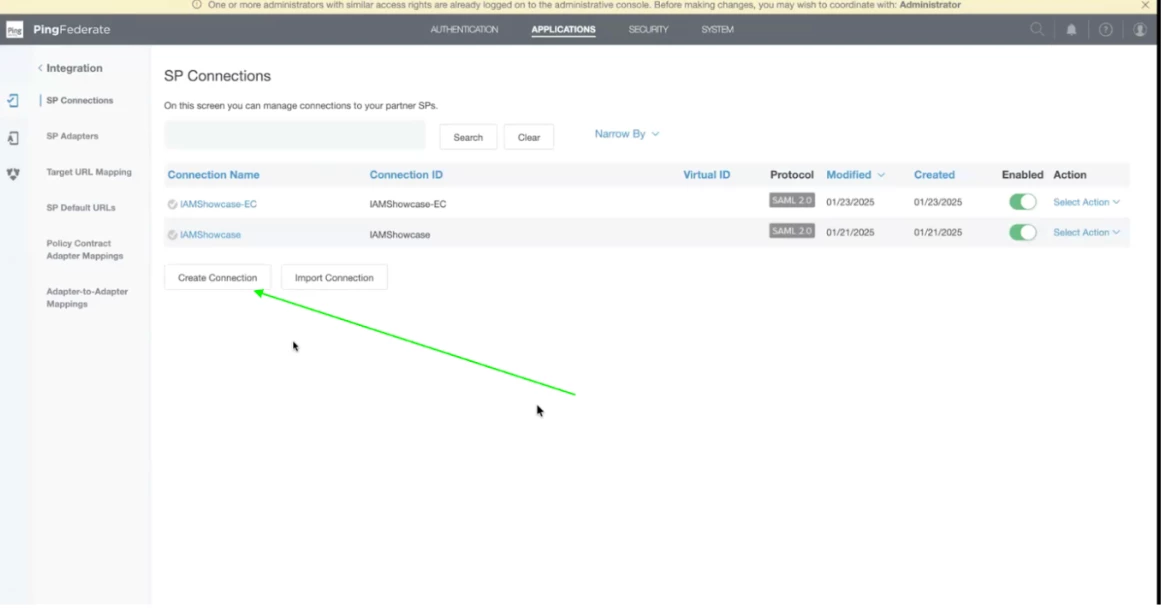
Step 8 - In the SP Connections, Click on Create Connection. A SP (Service Provider) Connection is a configuration set that allows PingFederate (acting as the Identity Provider or IdP) to securely communicate and share identity data with an external application or service.
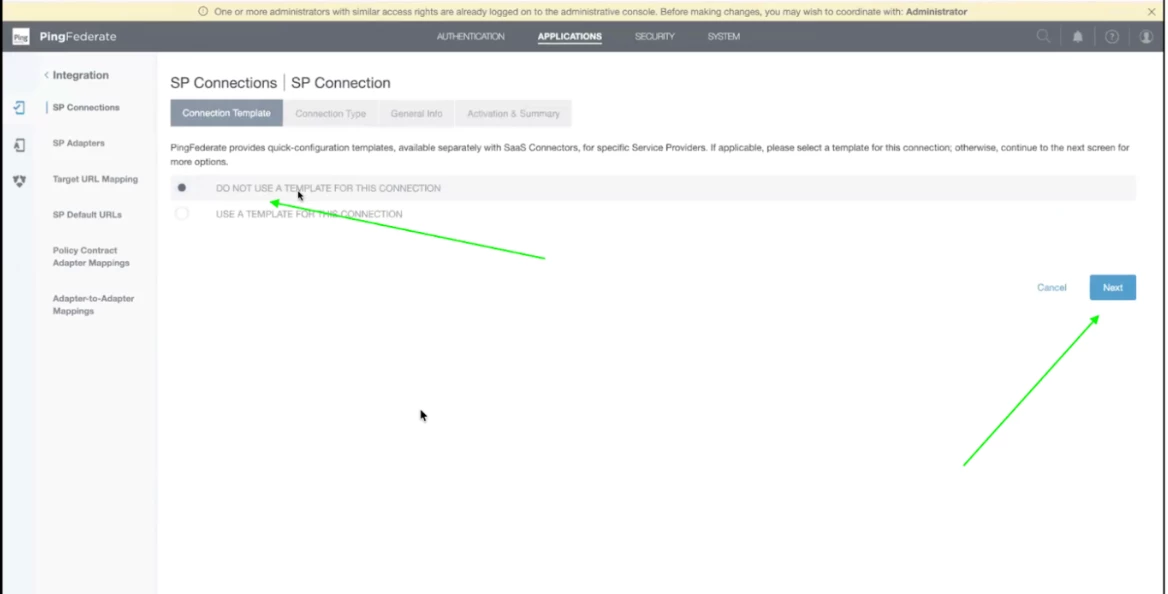
Step 9 - Select Do not use a template for this connection and click Next.
Step 10 - Select Outbound Provisioning and click on the dropdown menu.
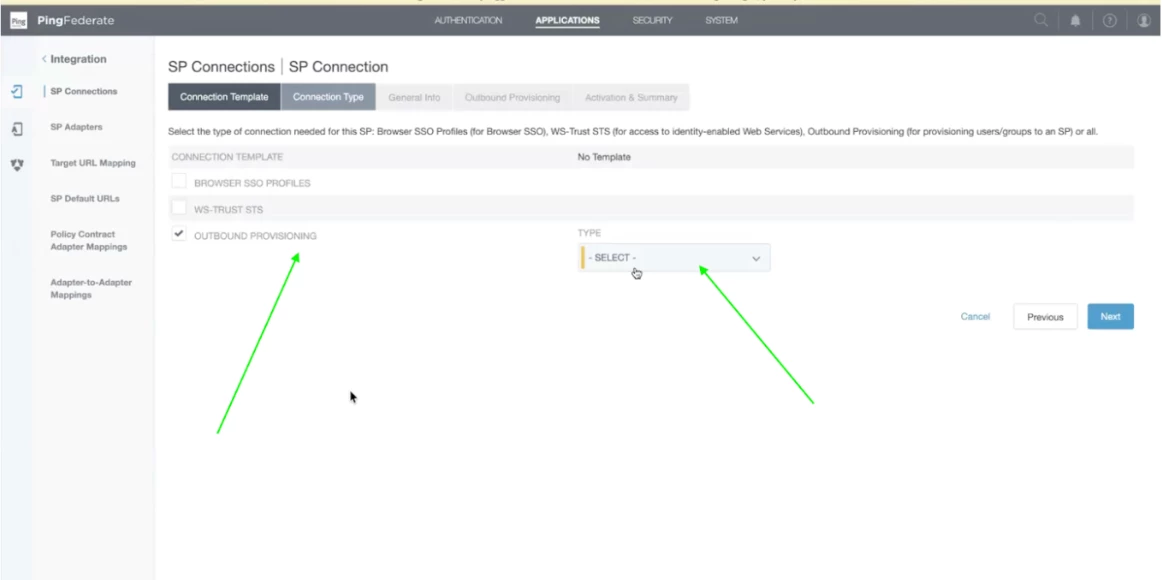
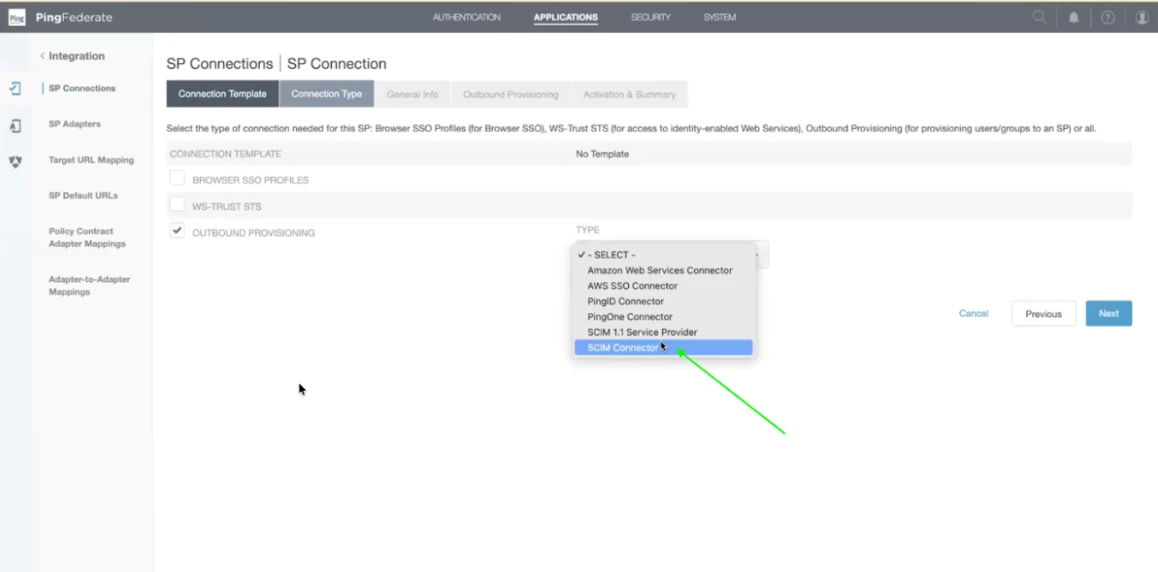
Step 11 - Choose SCIM connector from the drop down menu and click Next.
Note: It is compliant with SCIM 2.0
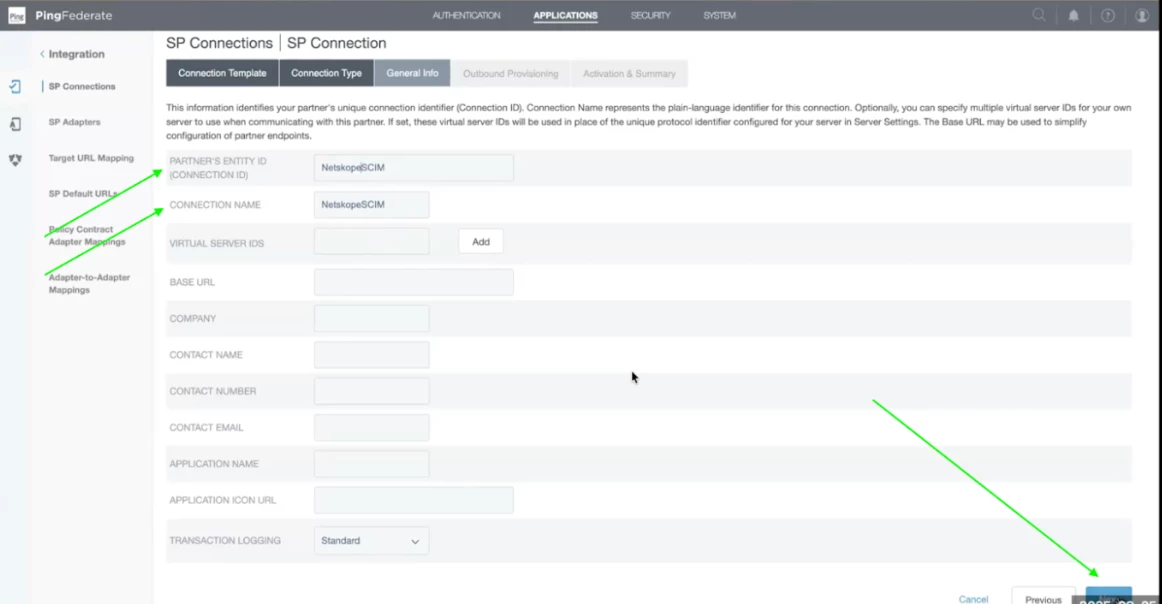
Step 12 - For SCIM, we only need to enter Entity id and connection name and then click Next. Please enter dummy details as we will get it from the Netskope Tenant metadata file. If you know entity id,then you can enter else proceed with dummy data.
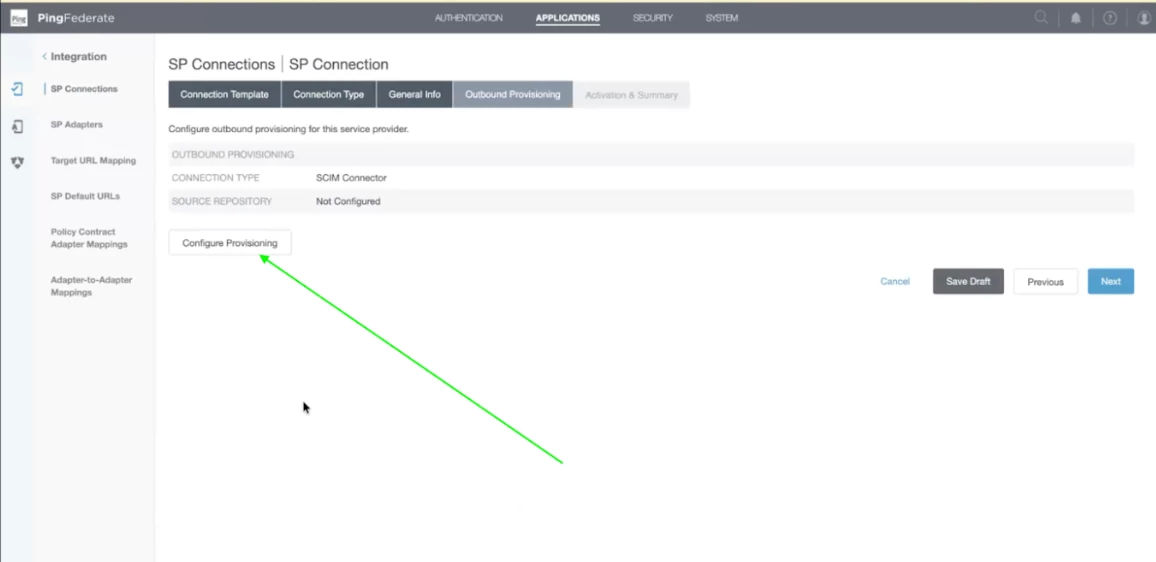
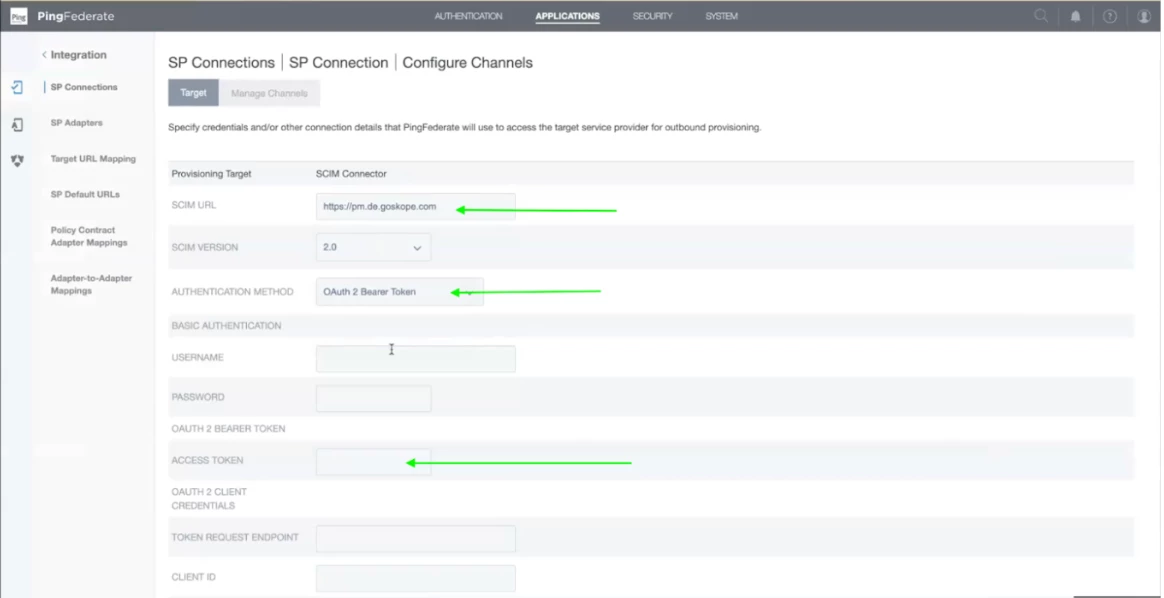
Step 13 - Now click on Configure Provisioning. This is where we will be providing the service account credentials for SCIM Configuration.
Step 14 - Now, enter the details as follows:
SCIM URL: https://<tenant-name>.goskope.com/api/v2/scim
Authentication Method: OAuth Bearer Token
Under the OAUTH2 Bearer Token add the token which was generated in Step 5.
Leave the rest of the details as default and scroll down and click on Next.
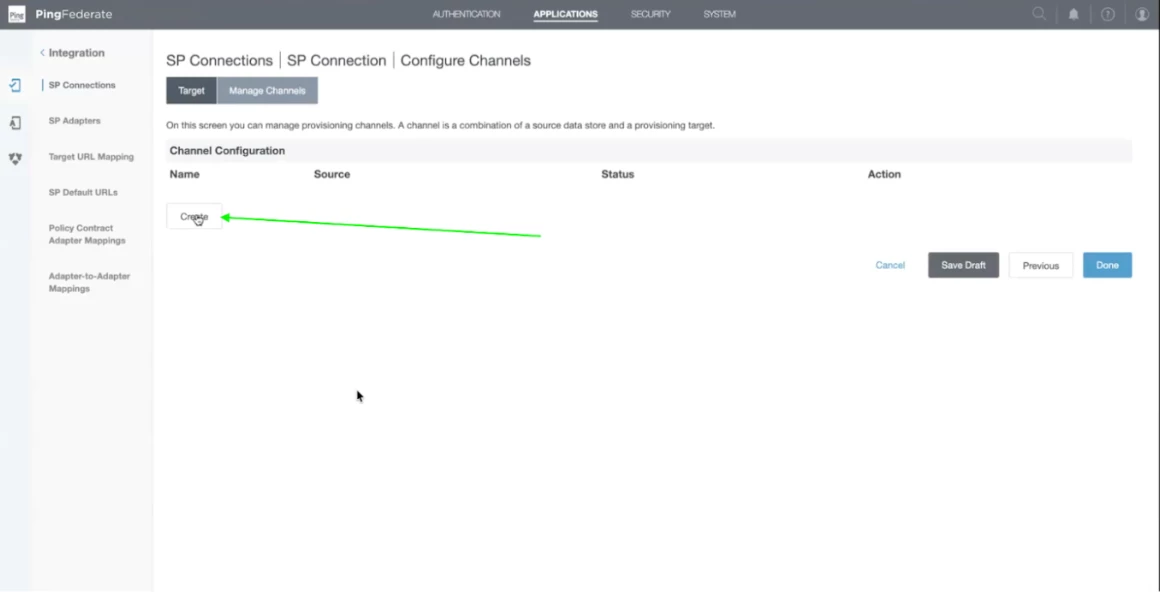
Step 15 - Now, click on Create Channel. Channel is where basically where you want to map the attribute mapping. It is the actual configuration for SCIM execution.
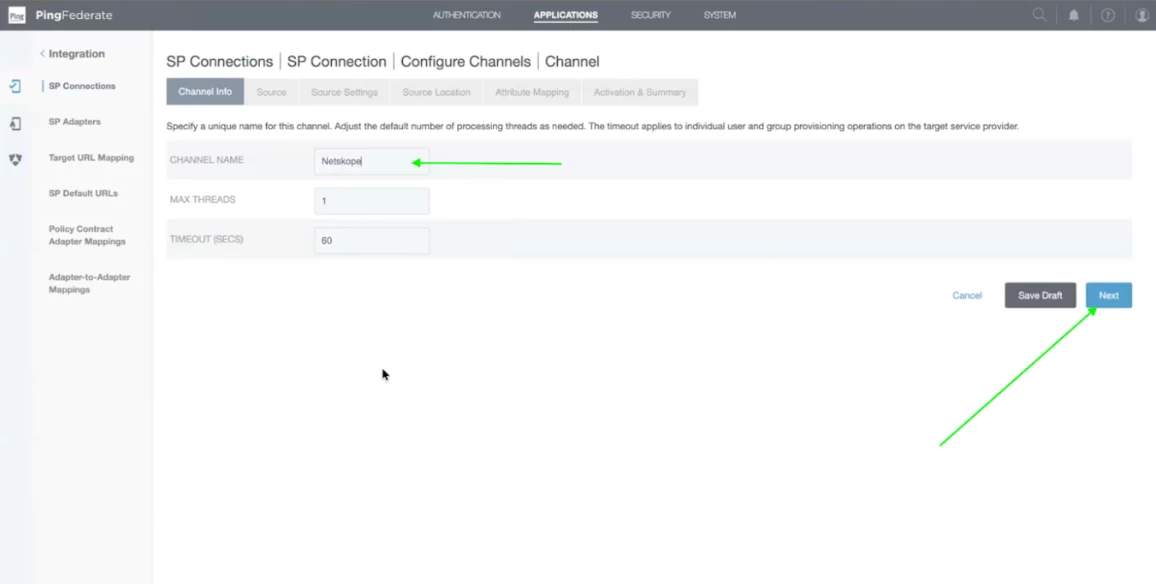
Step 16 - You can keep channel names as per your convenience. Input the channel name and click on next.
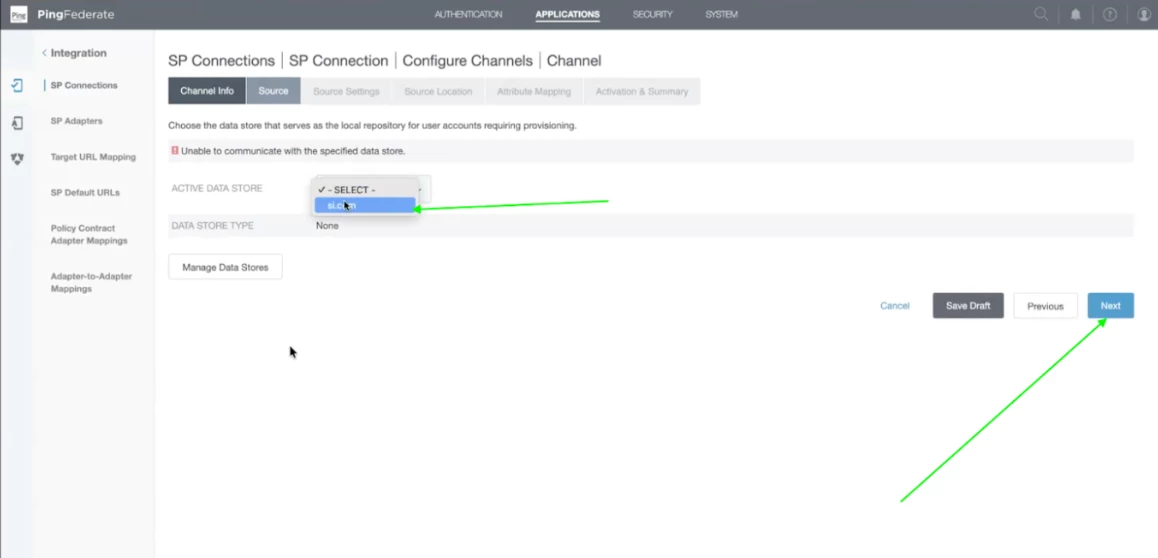
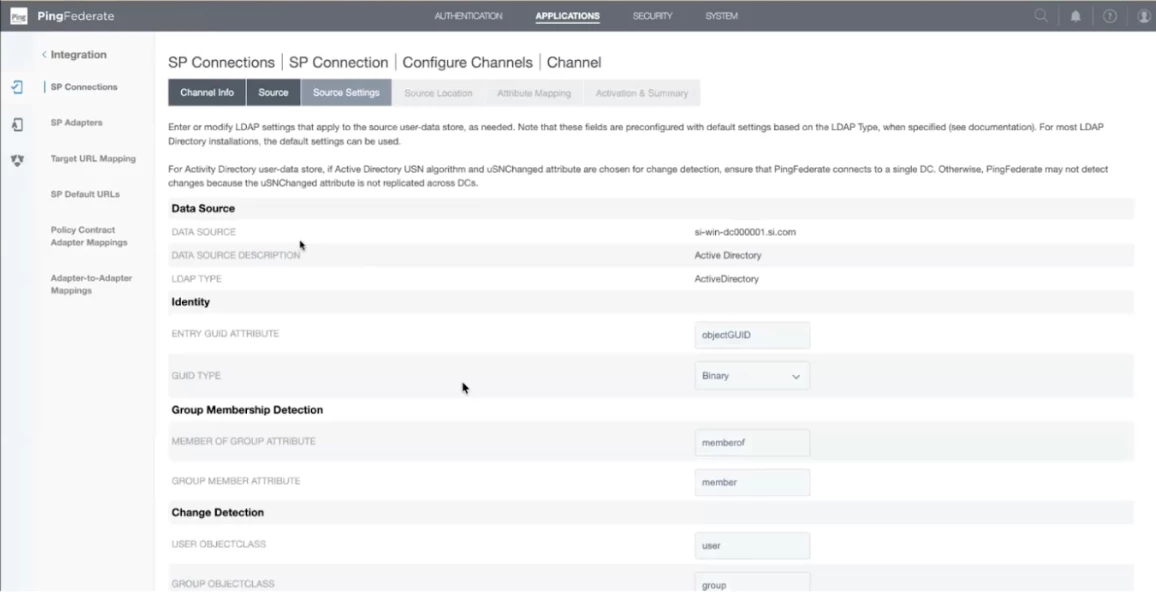
Step 17 - Select the active data store as si.com and click on Next. THis Active Directory, I have added previously so that is why it is present in the drop down menu. If you want to integrate a new Active Directory then click on Manage Data Stores and add the new AD Server details which will be populated once it is successfully added.
Step 18 - In the Source settings, details of the Active directory will be present. Review it once. Scroll down on the page and click on next once the review is completed.
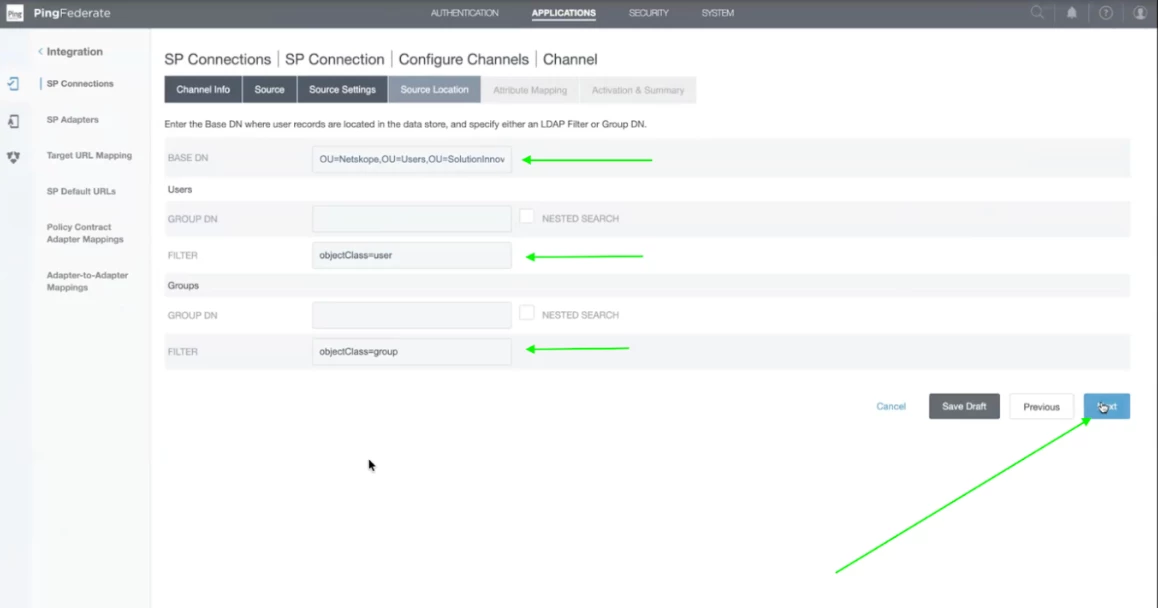
Step 19 - In the Base DN, enter the details mentioned below. This is the place where users exist. This configuration helps SCIM to locate the users and how to find them.
CN=poiuy lkjhg,OU=USERS,OU=GOOGLETESTING,DC=NETSKOPEGOOGLETESTING,DC=COM
Note - This information is for example and will be different for different active directories.
Add objectClass=user and objectClass=group in User and Group filter respectively.
We use filters to tell the SCIM configuration that Grab every user if they fall in the mentioned OU and below.
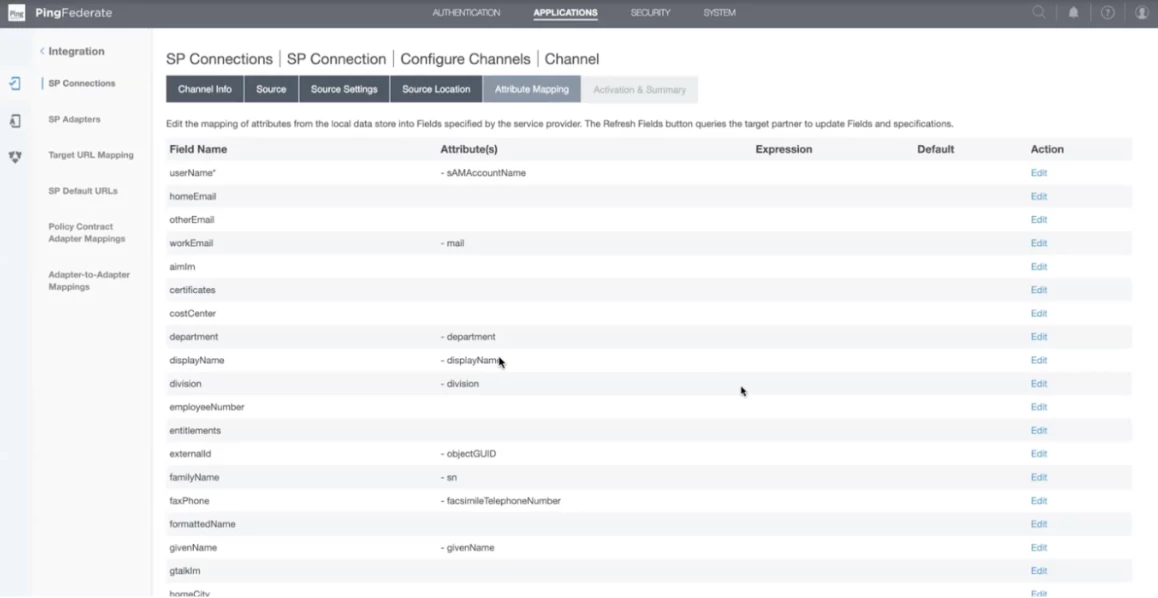
Step 20 - In the attribute mapping, you can change as per your configuration. In our case, we have kept it default.
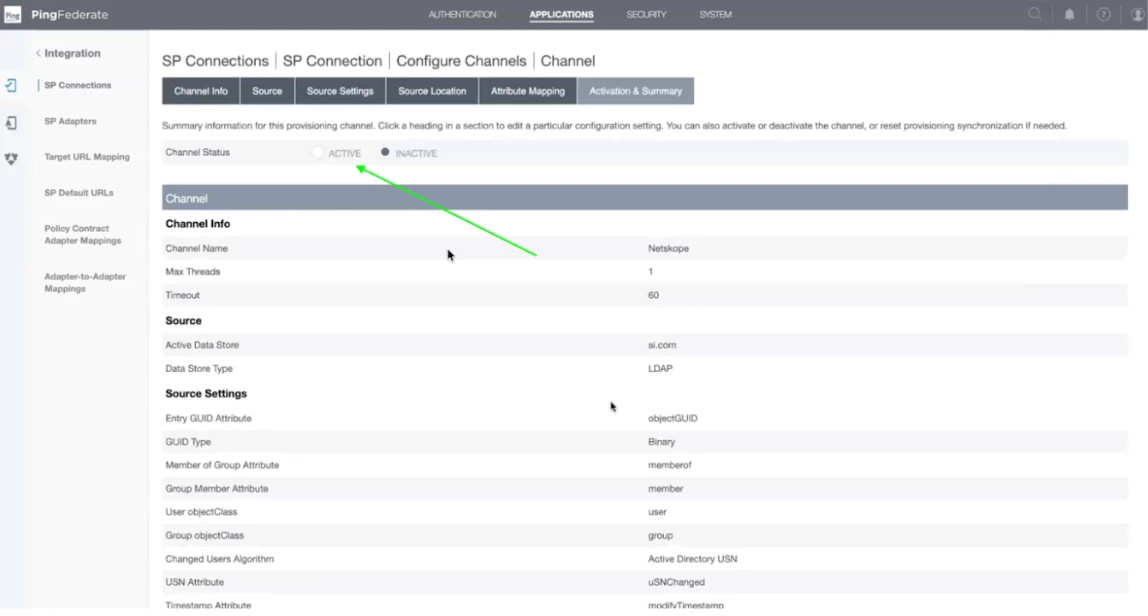
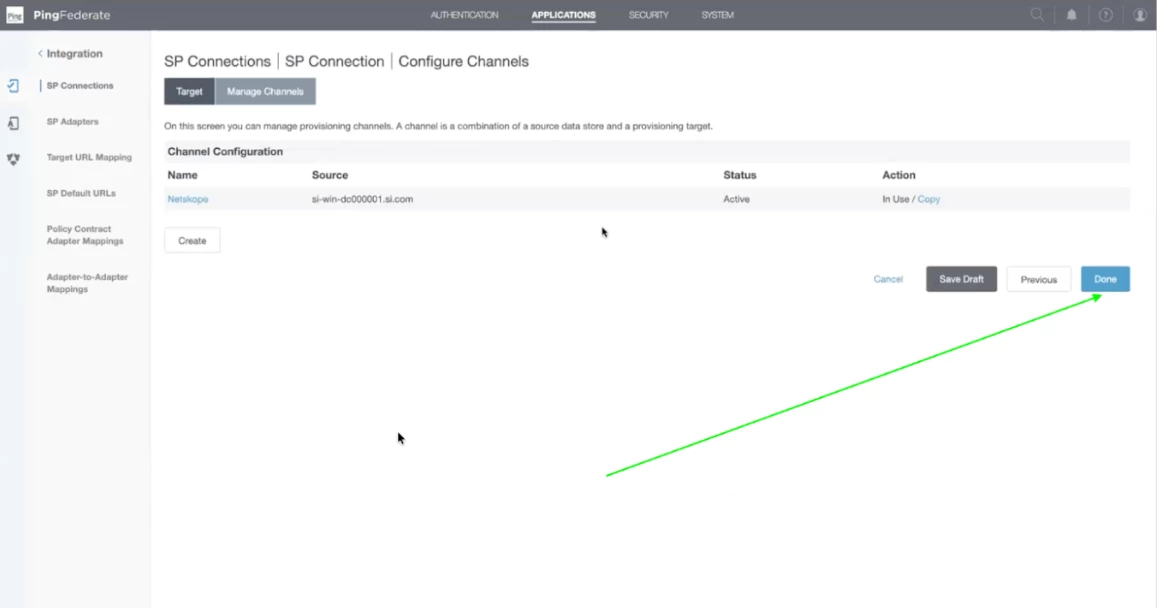
Step 21 - Change the channel status to Active and scroll down to click on Done.
Step 22 - Now channel configuration will appear. Click on Done.
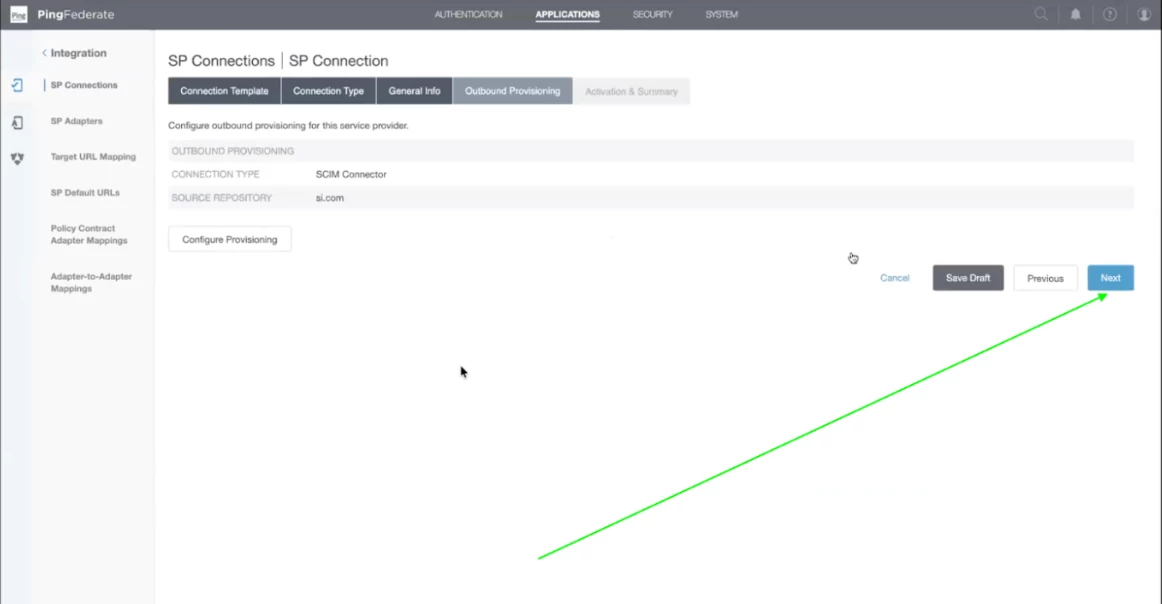
Step 23 - Details regarding Outbound provisioning will appear on the screen. Click on Next.
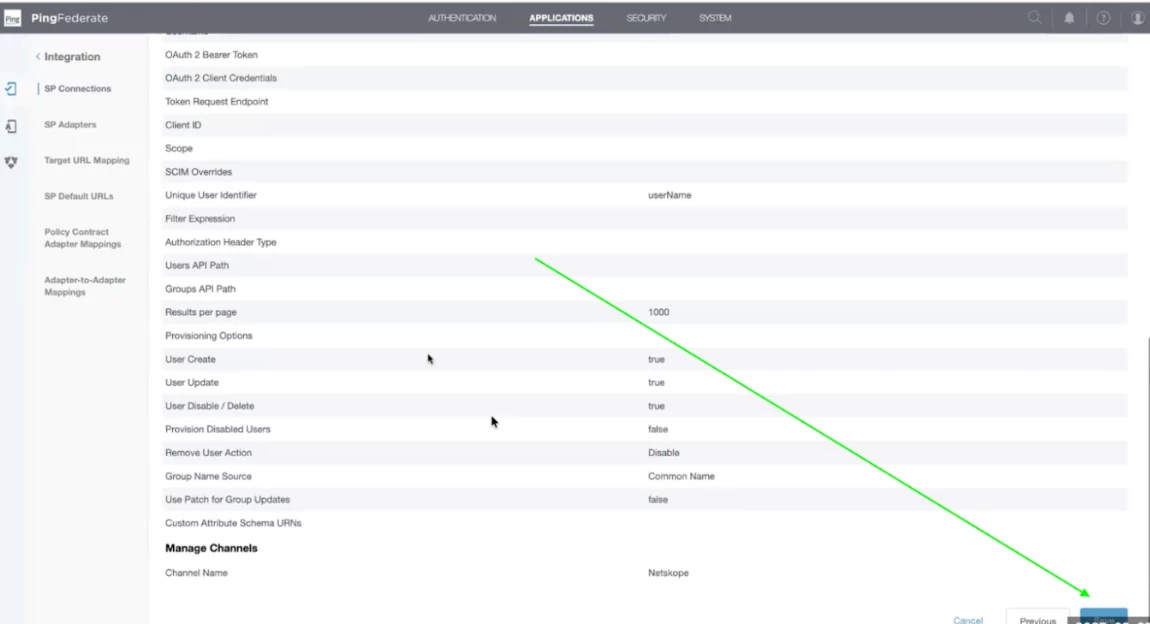
Step 24 - Now you will find the summary of all the configurations. Go through it and scroll down to click on Save.
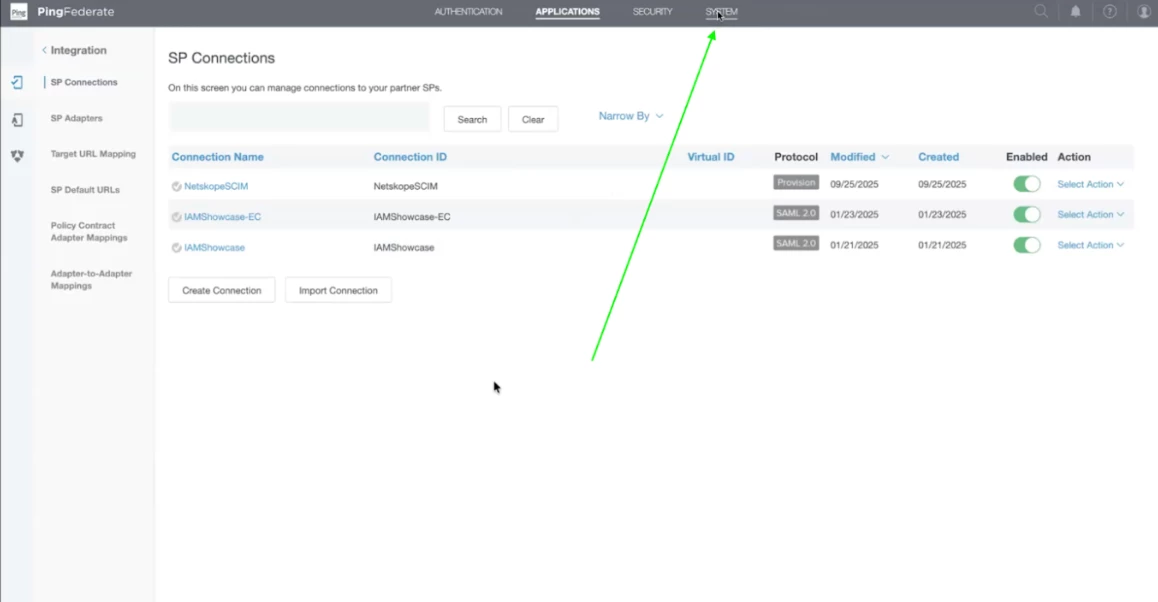
Step 25 - Now the SCIM Configuration is completed. The next step is to check the logs. Now click on System on the top right.
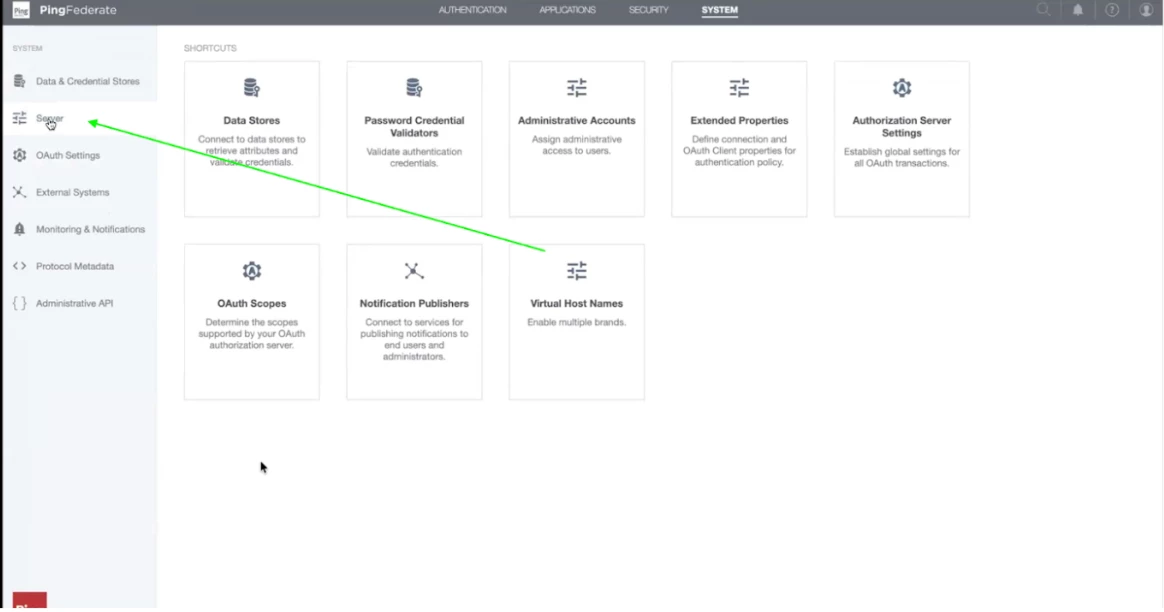
Step 26 - Now, Click on Server present on the left menu panel.
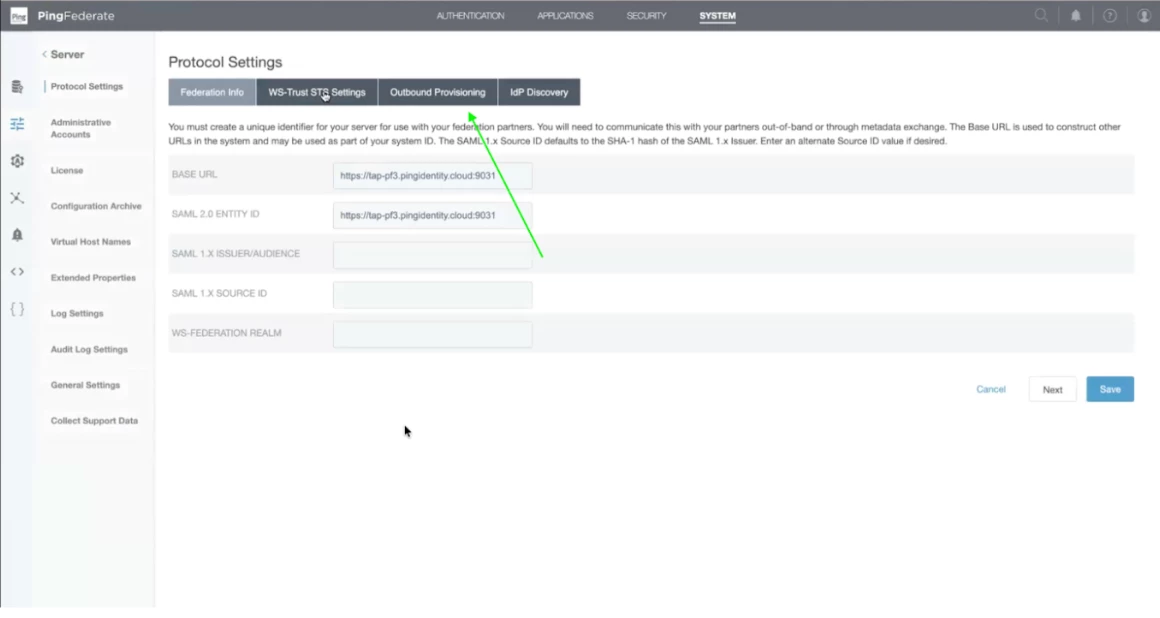
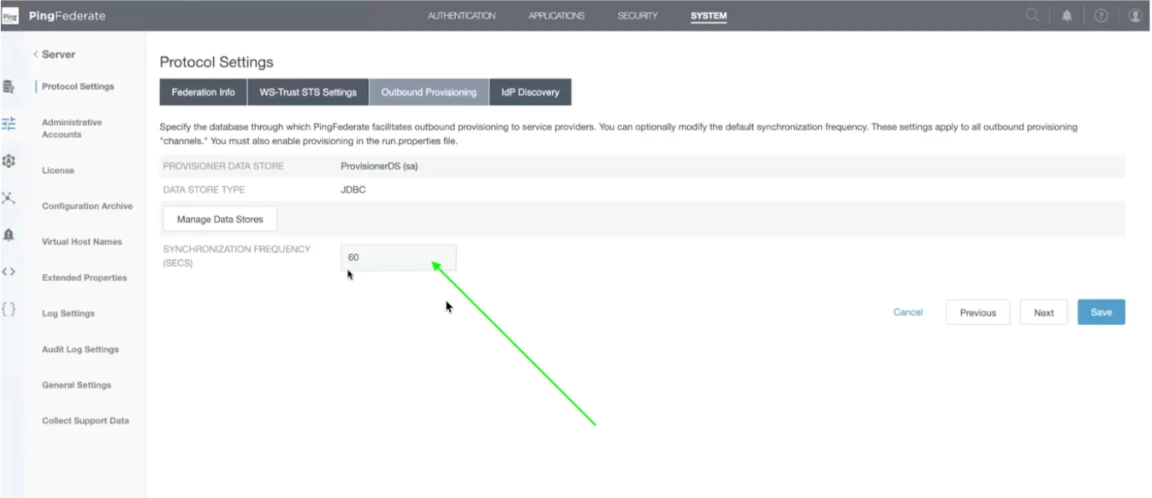
Step 27 - Now click on the Outbound provisioning tab under protocol settings. Ensure that it is set to 60 Seconds.
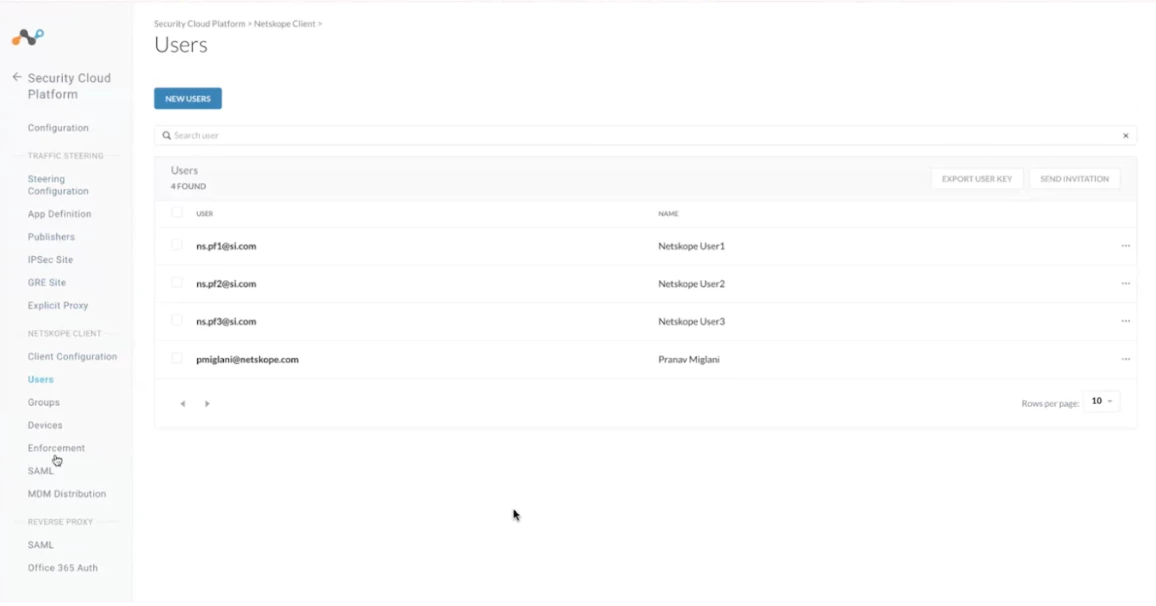
Step 28 - Now, our configuration is completed and values are correct. We will check if the users present in Active Directory are created in the netskope tenant or not.
For that, log in to your tenant and click on Settings. After that click on Security Cloud Platform and scroll down to click on Users.. You will be able to see the users list on the page. These users will be present in your active directory also.
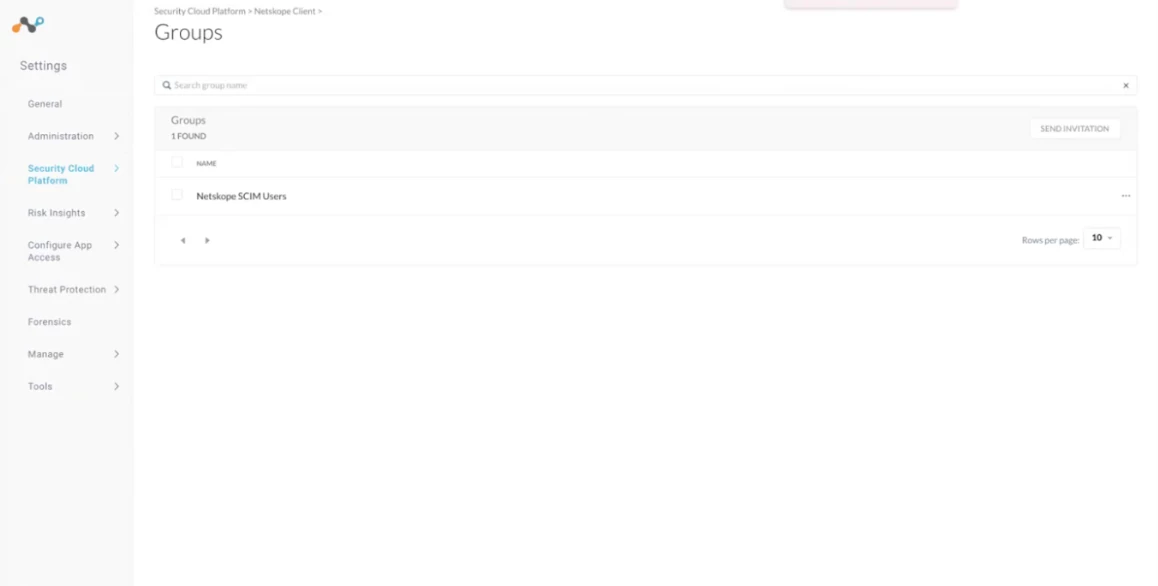
Step 29 - We will check if the groups present in Active Directory are created in the netskope tenant or not.
For that, log in to your tenant and click on Settings. After that click on Security Cloud Platform and scroll down to click on Groups.. You will be able to see the groups list on the page. These groups will be present in your active directory also.