


Netskope Global Technical Success (GTS)
Use Case - How to Tag Application instances
Netskope Cloud Version - 120
Objective
Tag Application instances on the tenant
Prerequisite
Netskope Inline CASB license is required
Context
Customers in the Adoption process seek to limit access to approved applications within their environment. Specifically, they aim to permit access solely for their corporate instance IDs of applications. This article will outline a potential approach for enabling access to corporate-sanctioned instances while preventing access to other applications in the same category.
Do You Know?
- Netskope introduced the concept of Application instance Tagging in addition to Application Tagging as a result of which you can Tag Instances of an Application as Sanctioned / Unsanctioned. Here is a document link that demonstrates the process : Link
Configuration
There are 2 approaches at present to Tag the Application instances in the tenant. For demonstration purpose, I have considered 2 different Applications -
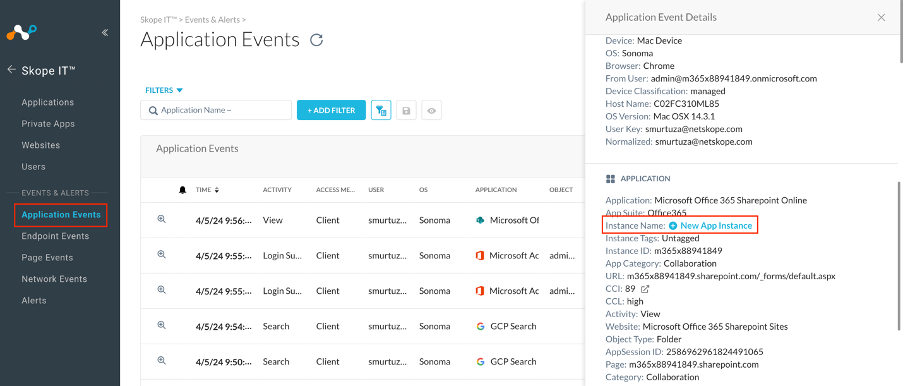
Method 1 : Application instance tagging via Application events
Path: Netskope Tenant UI >>> Skope IT >>> Applications - - - Choose the App you want to Tag the instance for >>> New App Instance
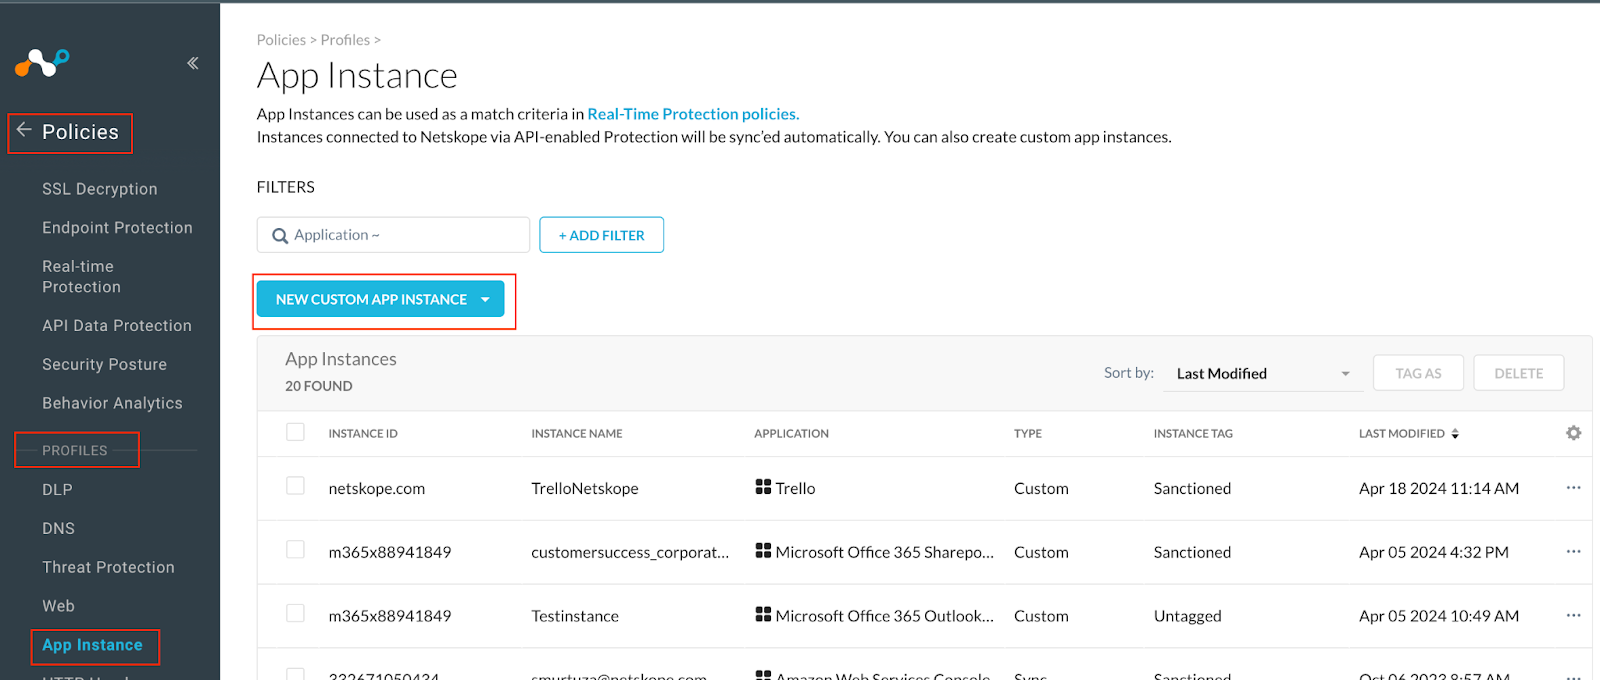
Method 2 : Application instance tagging via App Instance profile
Path: Netskope Tenant UI >>> Policies >>> Profiles >>> App Instance - - - New Custom App Instance - - - New App Instance
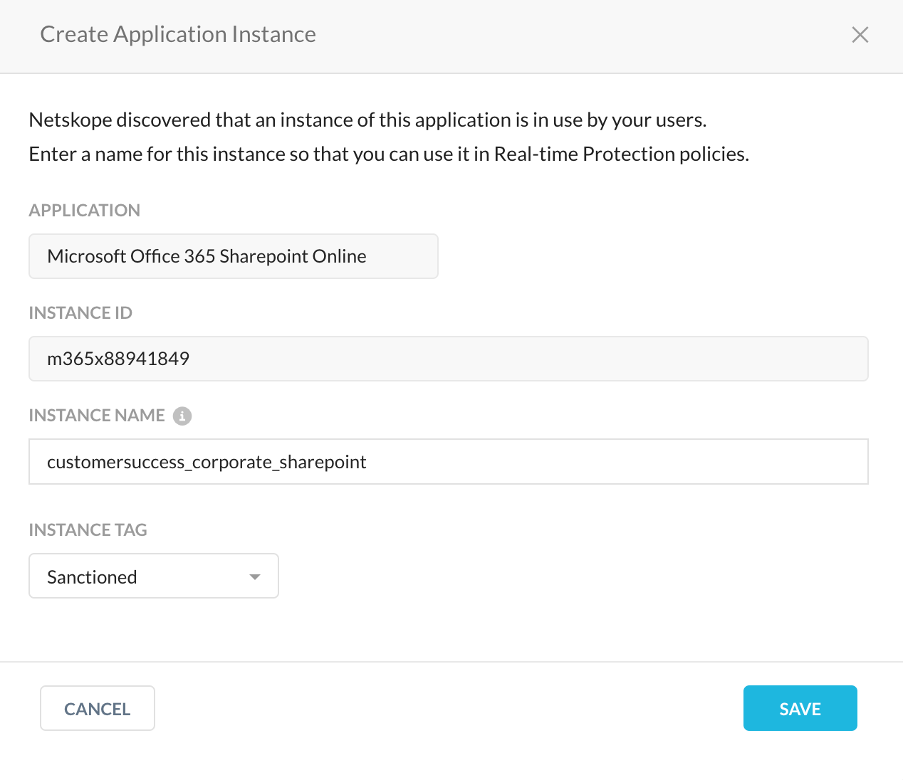
After creating the App Instance, please enter the necessary details and Click Save
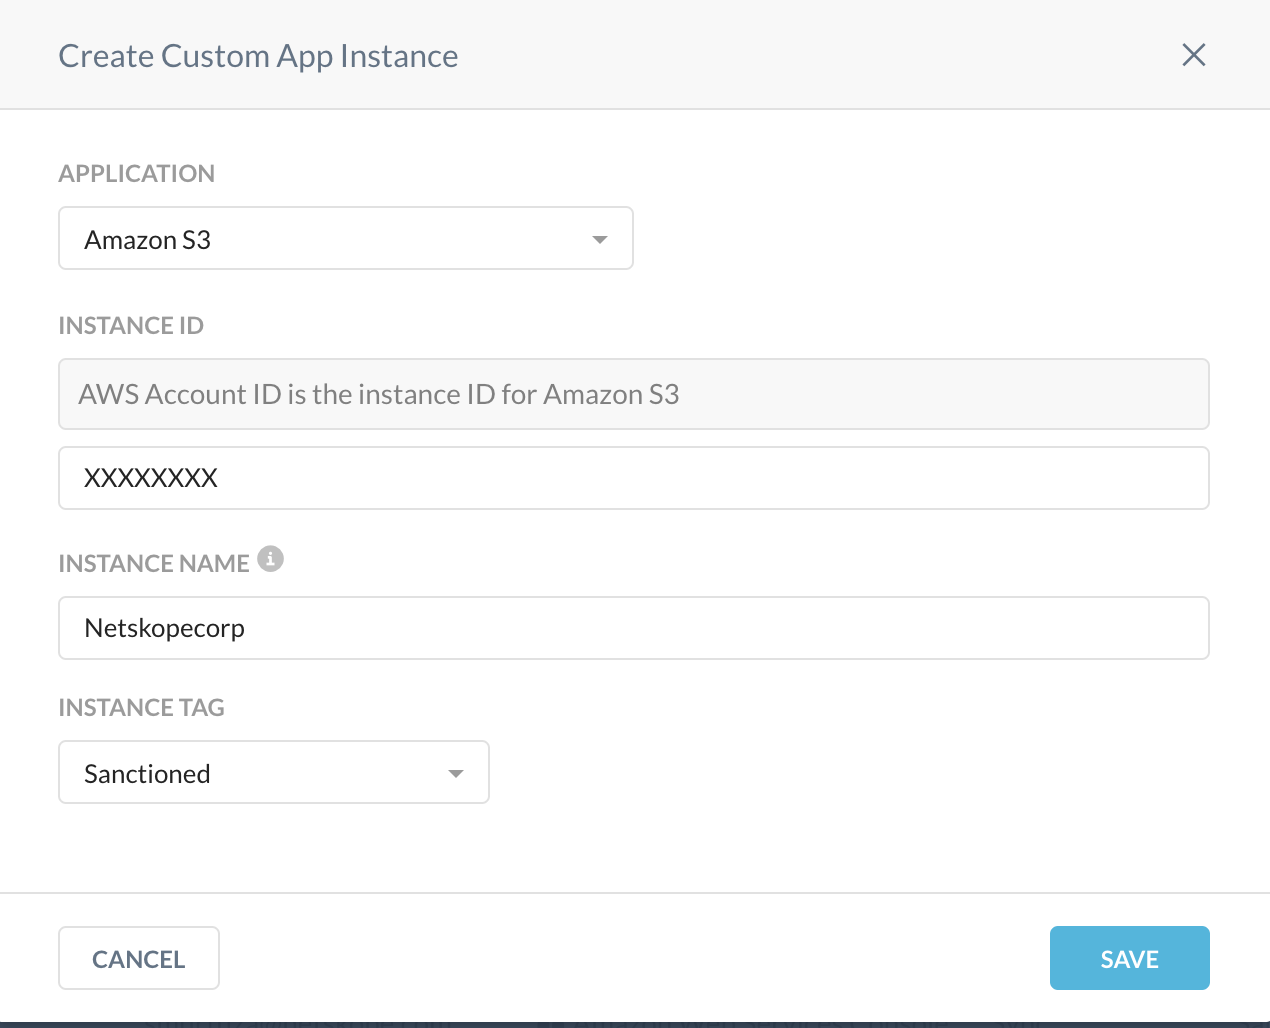
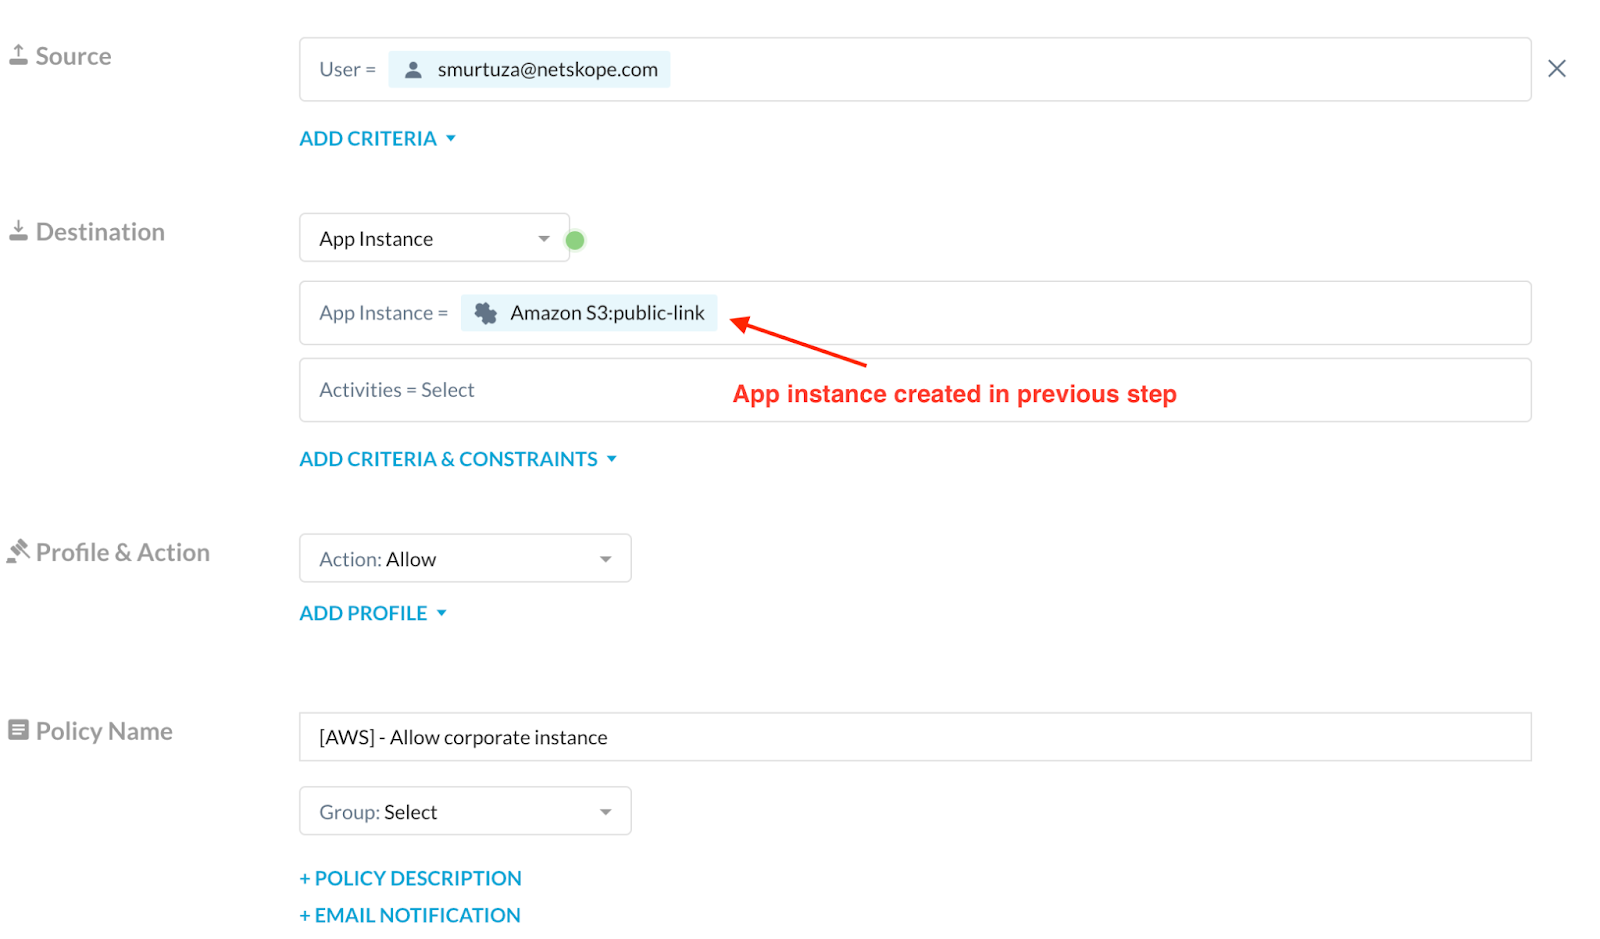
The App Instance is now ready to be used in a Real time protection policy
Terms and Conditions
- All documented information undergoes testing and verification to ensure accuracy.
- In the future, it is possible that the application's functionality may be altered by the vendor. If any such changes are brought to our attention, we will promptly update the documentation to reflect them.
Notes
- This article is authored by Netskope Global Technical Success (GTS).
- For any further inquiries related to this article, please contact Netskope GTS by submitting a support case with 'Case Type – How To Questions'.


