Overview
Cloud Exchange CTE’s integration with Trend Micro Vision One gives you the ability to bilaterally share indicators of compromise (IOCs) in the form of URLs and file hashes. For example, if Trend Micro Vision One detects a suspicious object, you can configure an action to add it to Netskope’s blocked URL or file list.
Requirements
- CloudExchange 4.2 or newer
- Basic Cloud Exchange setup (Netskope tenant API v1 and v2 setup)
- Netskope plug - Netskope CTE
- Trend Micro Vision One
Setup Steps
Trend Micro Vision One
- Find Region URL
- Create API Token
Netskope Cloud Exchange
- Setup Netskope Plugins
- Netskope CTE Plugin
- Trend Micro Vision One CTE v1.0.1 or greater
- Create a Cloud Exchange Business Rule
- Create Sharing Configuration
- Sharing Hashes to Netskope
Netskope
- Create File Profile Policy
- Create New Malware Detection Profile
- Add file list to Netskope Real-time Protection Policy
Verify Integration
- Verify Sharing of IoCs
Trend Micro Vision One setup steps
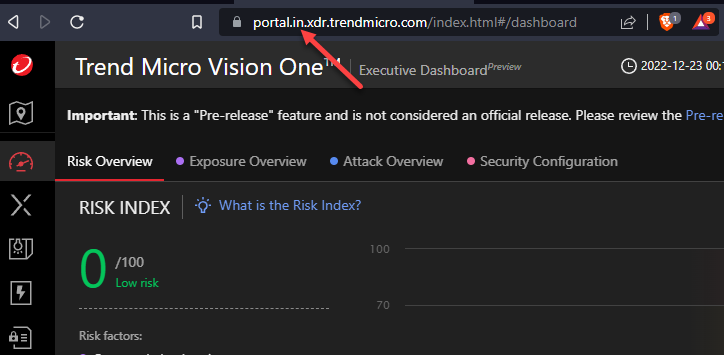
Finding your Regional URL
When you log into your Trend Micro portal, the URL will have a “Data Region” right before xdr. In my example I have “in” or India as my region. Note down your region.
The options are:
Australia - au
European - eu
India - in
Japan - jp
Singapore - sg
UAE - uae
portal.in.xdr.trendmicro.com
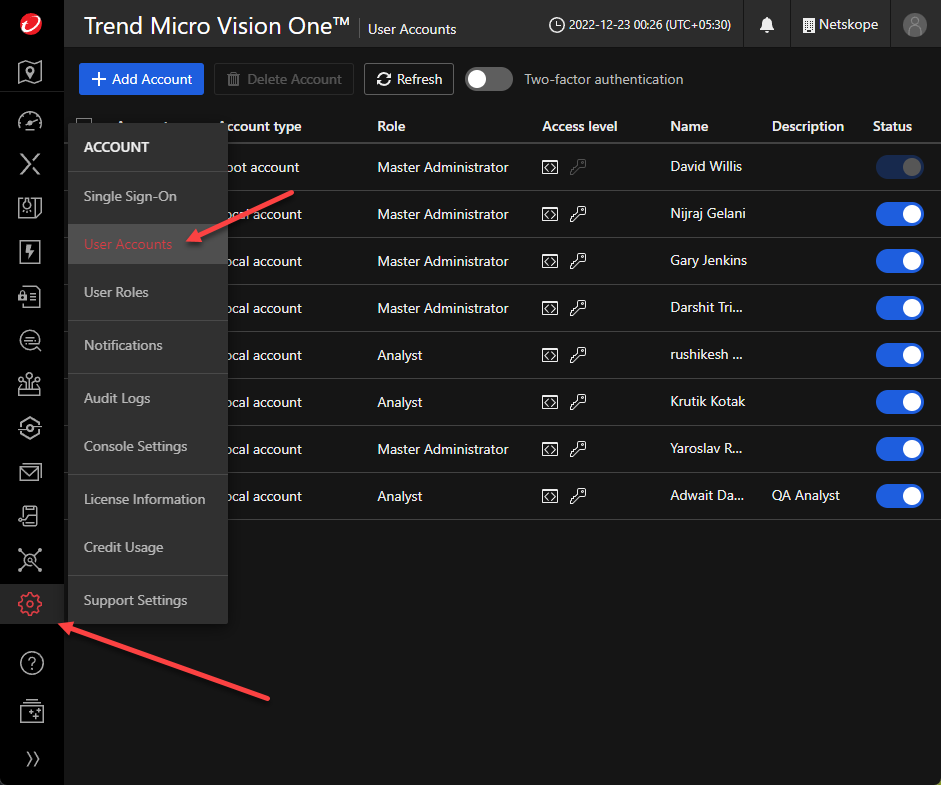
Create API Token
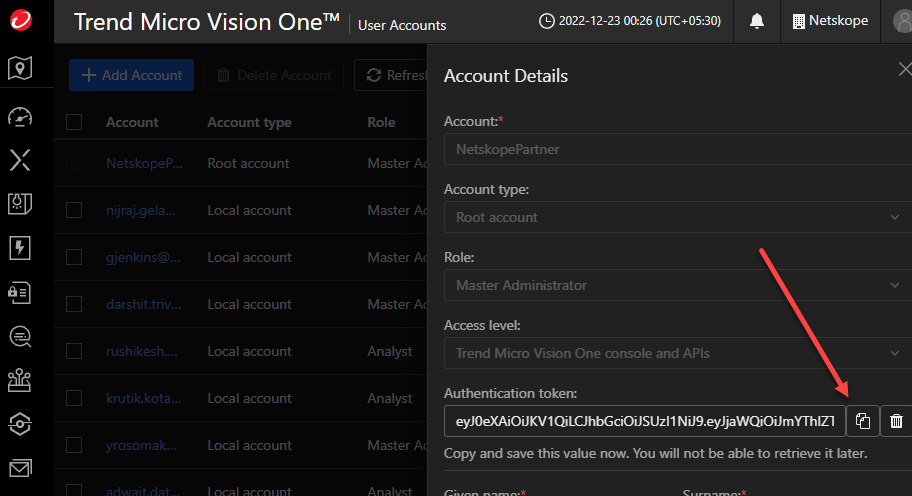
Go to Account > User Accounts and select the user that you would like to create the token under.
In the Account Details of this user, click on generate new authentication token
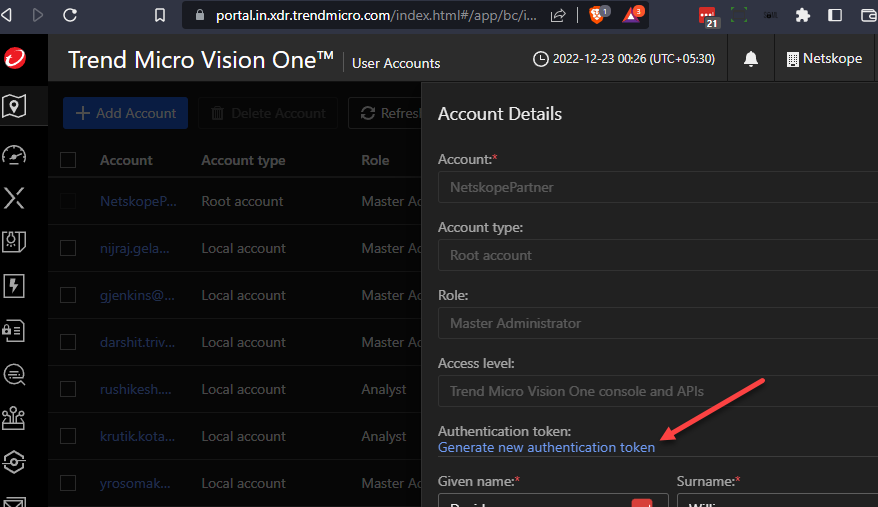
Be sure to copy the token
Netskope Cloud Exchange setup steps
Cloud Exchange Plugins
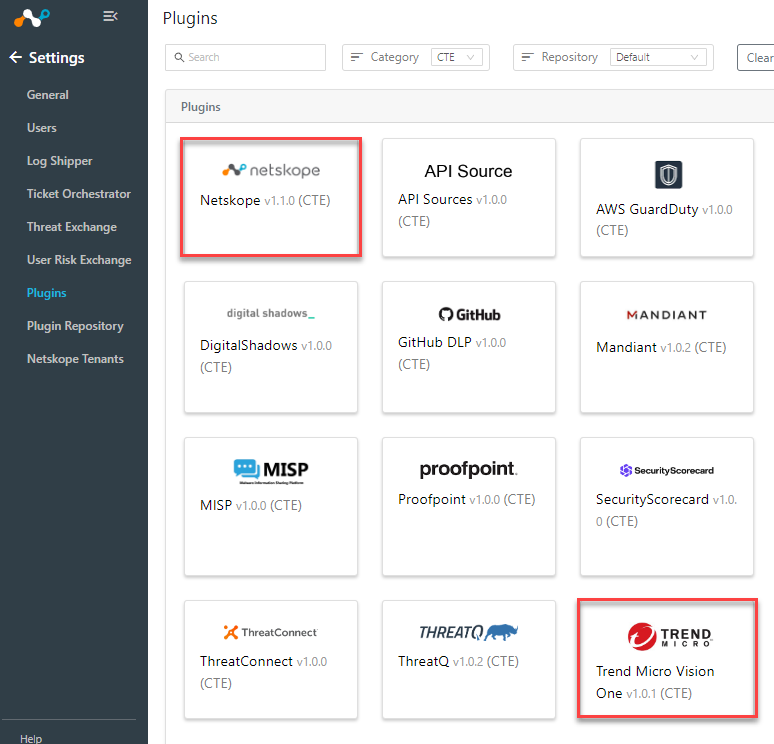
On your, Netskope Cloud Exchange go to Settings > Plugins
You will need two plugins configured for this solution. The Netskope CTE plugin and the Trend Micro Vision One v1.0.1 CTE plugin.
If you need to update your plugins go to the Plugin Repository tab and select ‘check for updates’.
Configure Netskope CTE plugin
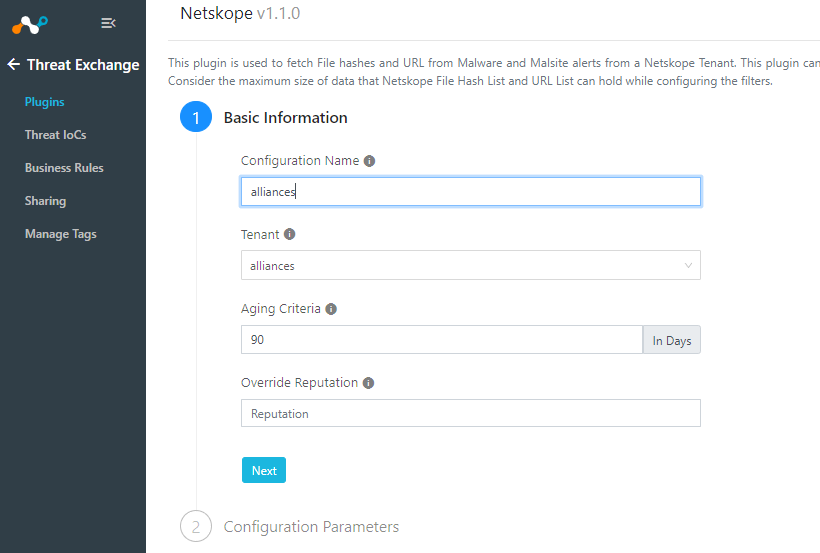
Select Netskope CTE
Name your plugin and select a Tenant
>Next
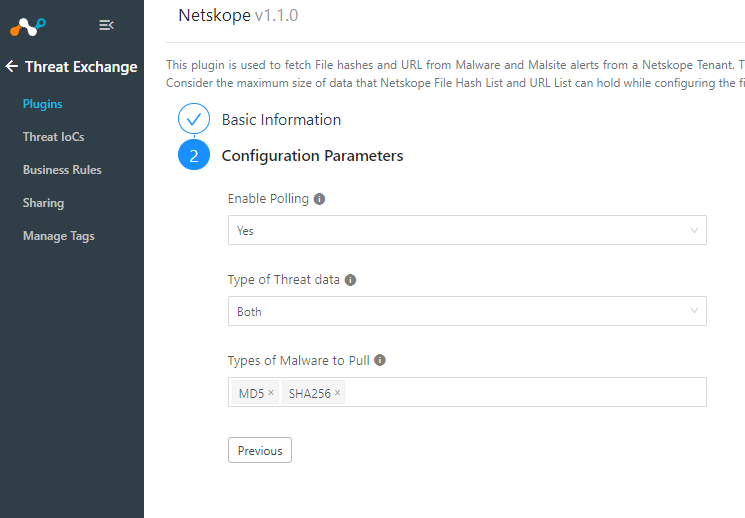
For the Configuration Parameters you can select polling, which direction URL and malware will be shared and which types of malware.
>Save
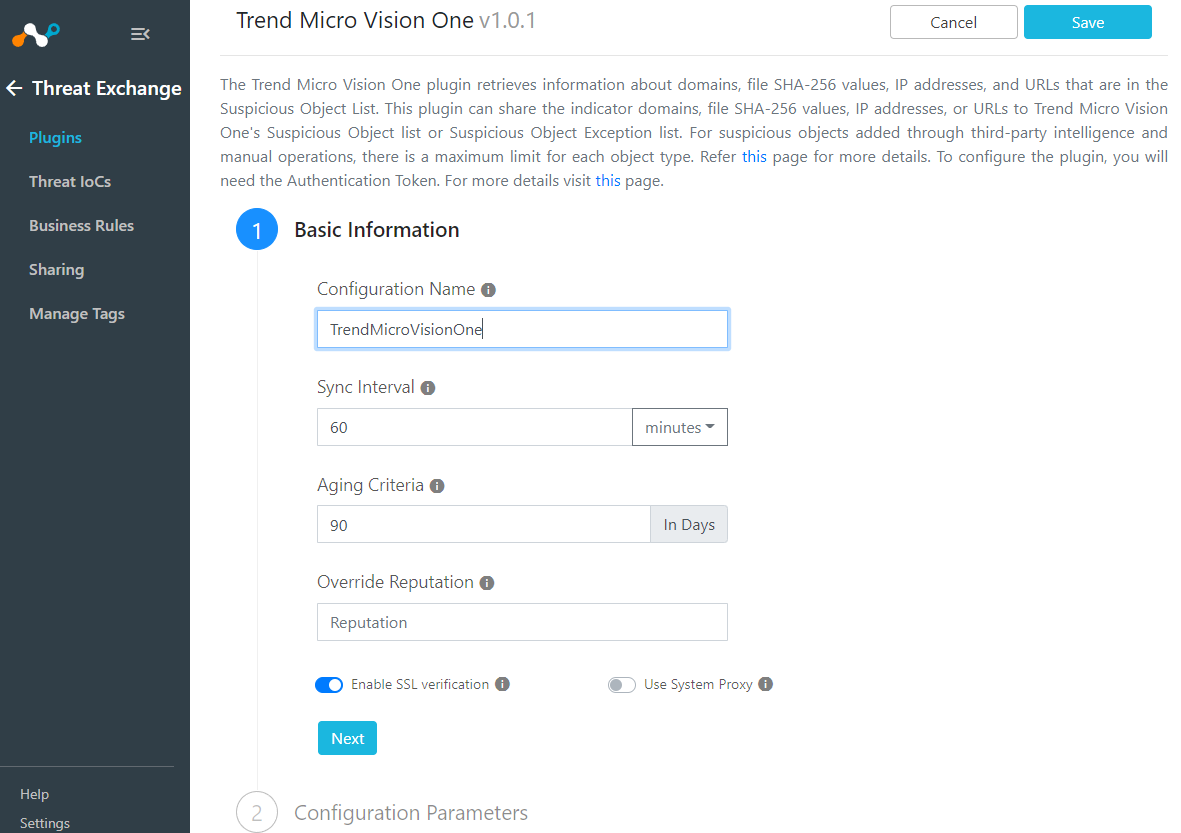
Configure Trend Micro Vision One CTE plugin
From the plugin page select Trend Micro Vision One v1.0.1 or newer.
Give it a Configuration Name and edit the Sync Interval if needed
>Next
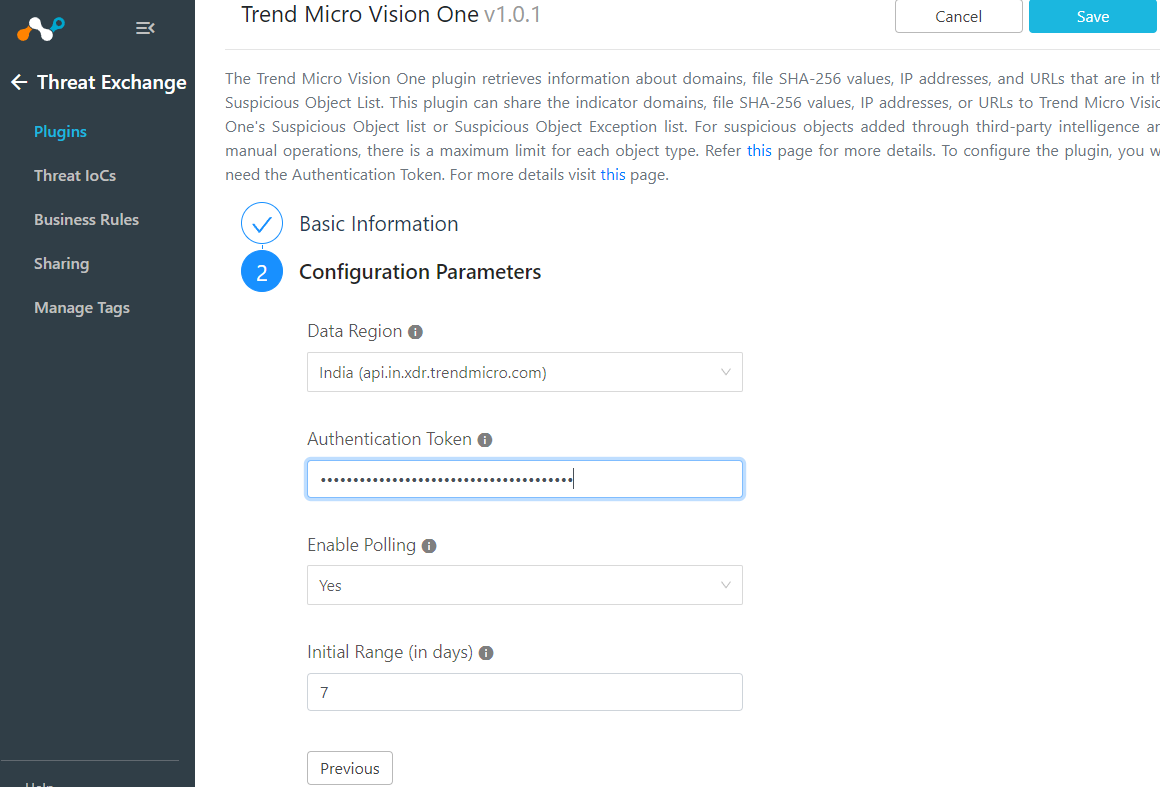
Configuration Parameters
Select the Data Region based on the URL from your Trend Micro Vision One portal.
Add the API Token that you saved from your Trend Micro user account.
>Save
Create a Cloud Exchange Business Rule
On your Cloud Exchange interface go to Threat Exchange > Business Rules
Select Create New Rule
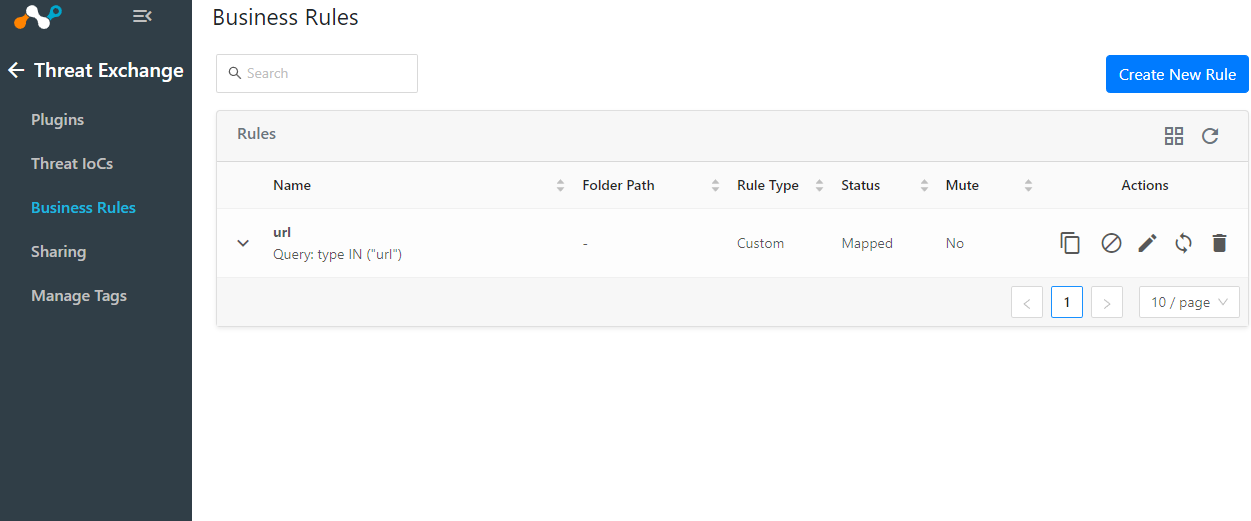
You can bring in URLs and file hashes with one rule or break up into two.
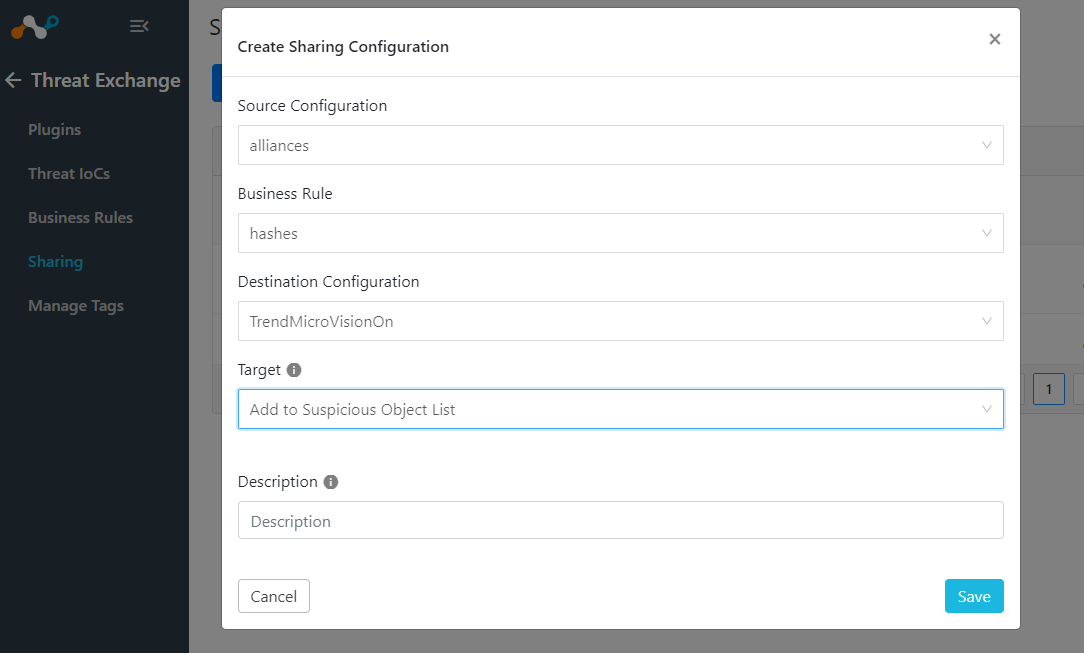
Sharing Configuration
Now that you have the plugins configured and the business rules in place, the next step is to tell Cloud Exchange which products you would like to share the threat IoCs with. The source field will be where the IoCs are coming from and the destination field is where they will go. The business rule will act as a filter for what you are sharing. If you want bidirectional sharing, you will need two sharing rules.
Threat Exchange > Sharing > Add Sharing Configuration
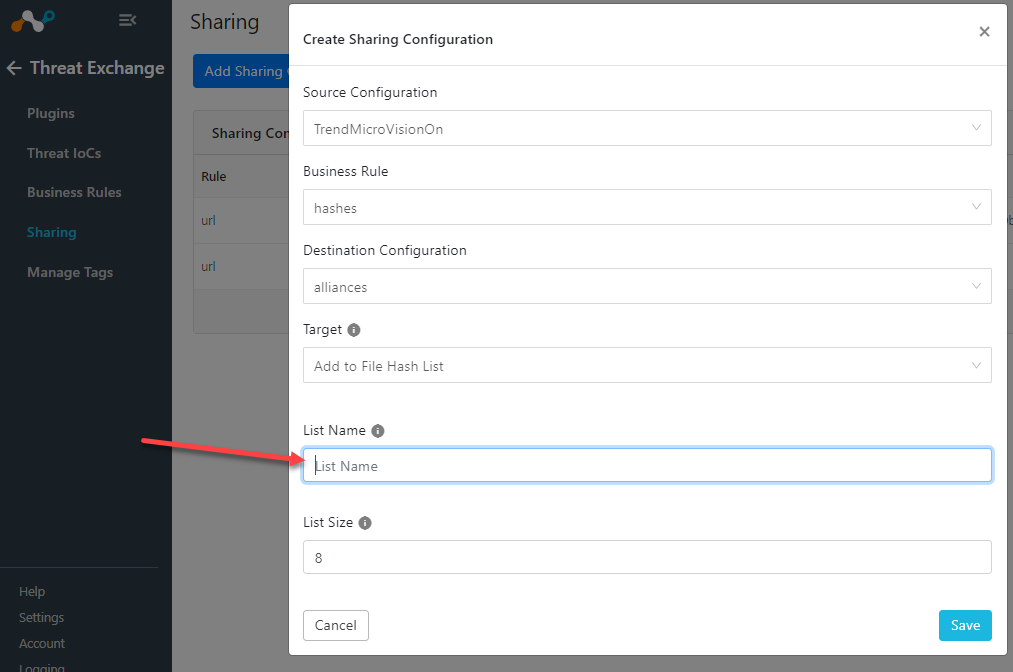
Sharing Hashes to Netskope
When sharing hashes to Netskope it will ask you for a List Name. This name needs to be set on the Netskope Tenant side also.
- See below on how to configure your Netskope tenant’s List Name
Netskope
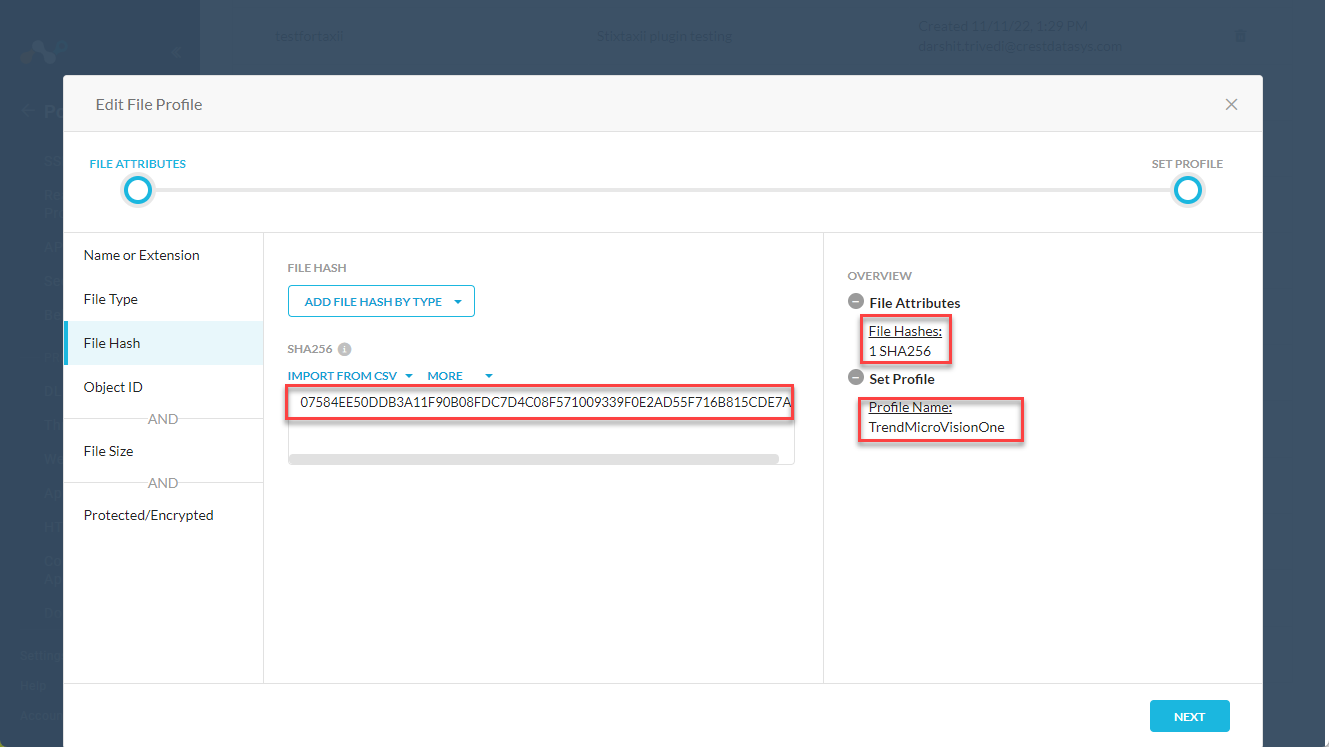
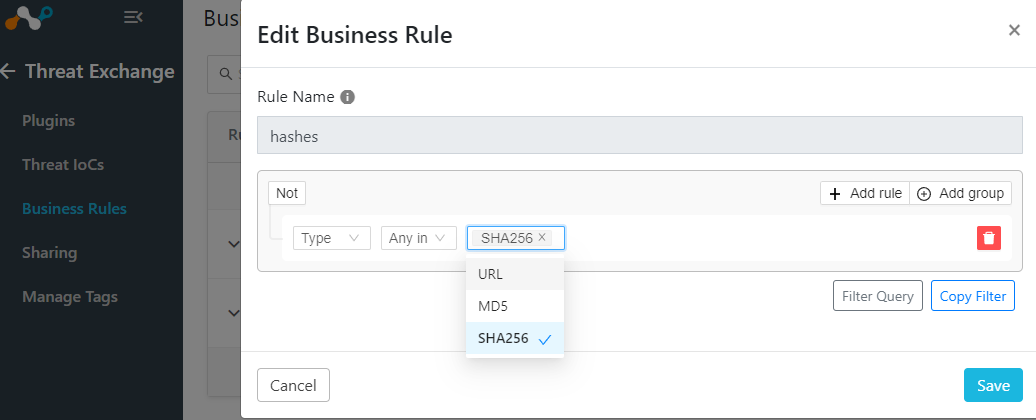
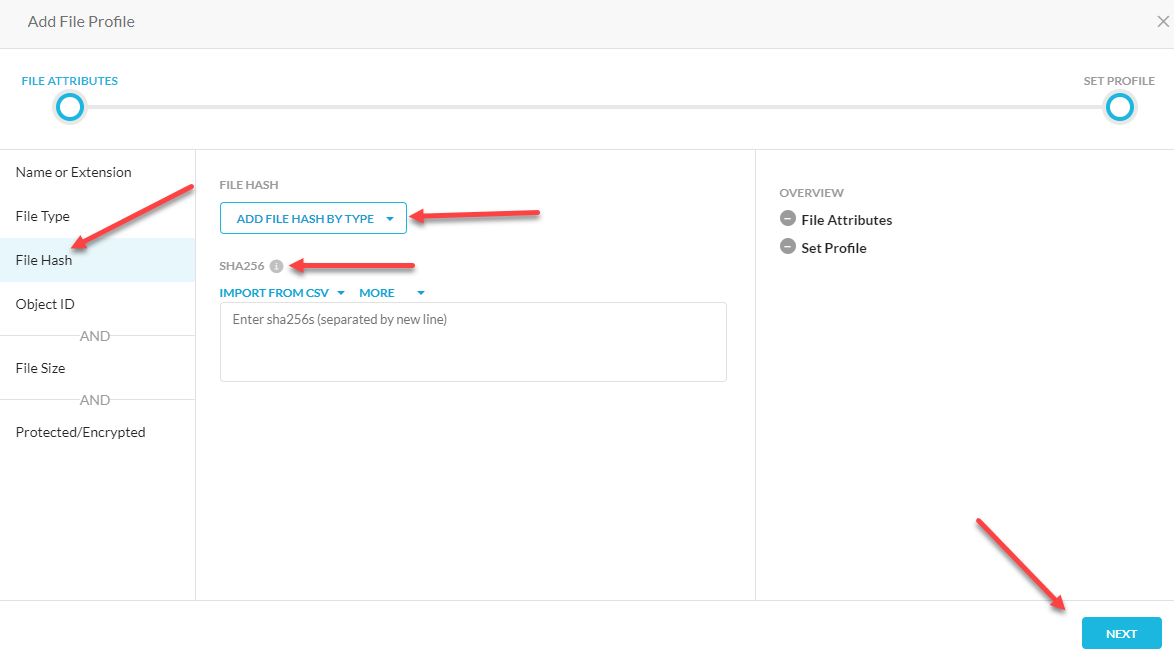
Create File Profile Policy
To configure the file location in your Netskope Tenant (not in Cloud Exchange) go to Policies > File > New File Profile

Go to File Hash and drop down the Add File Hash by Type and select your sharing type. I selected SHA256 for Trend Micro Vision One.
>Next
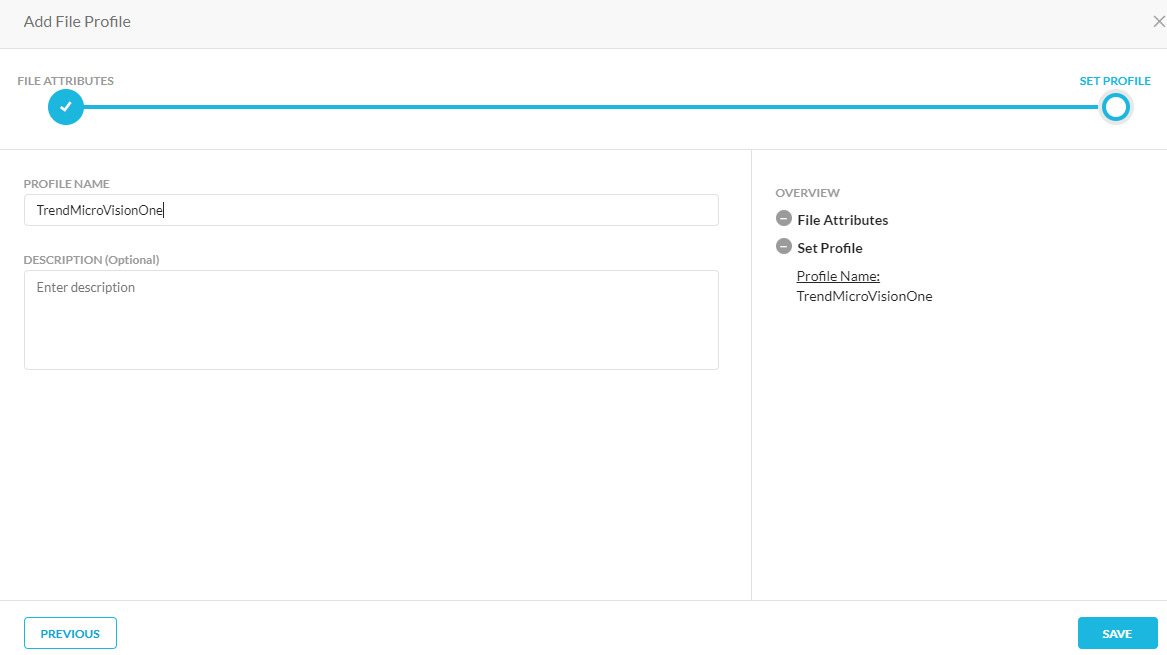
Give it a name and Save
This file name will be the “List Name” that you will use in Cloud Exchange.
Create New Malware Detection Profile
Go to Policies > Threat Protection > New Malware Detection Profile.
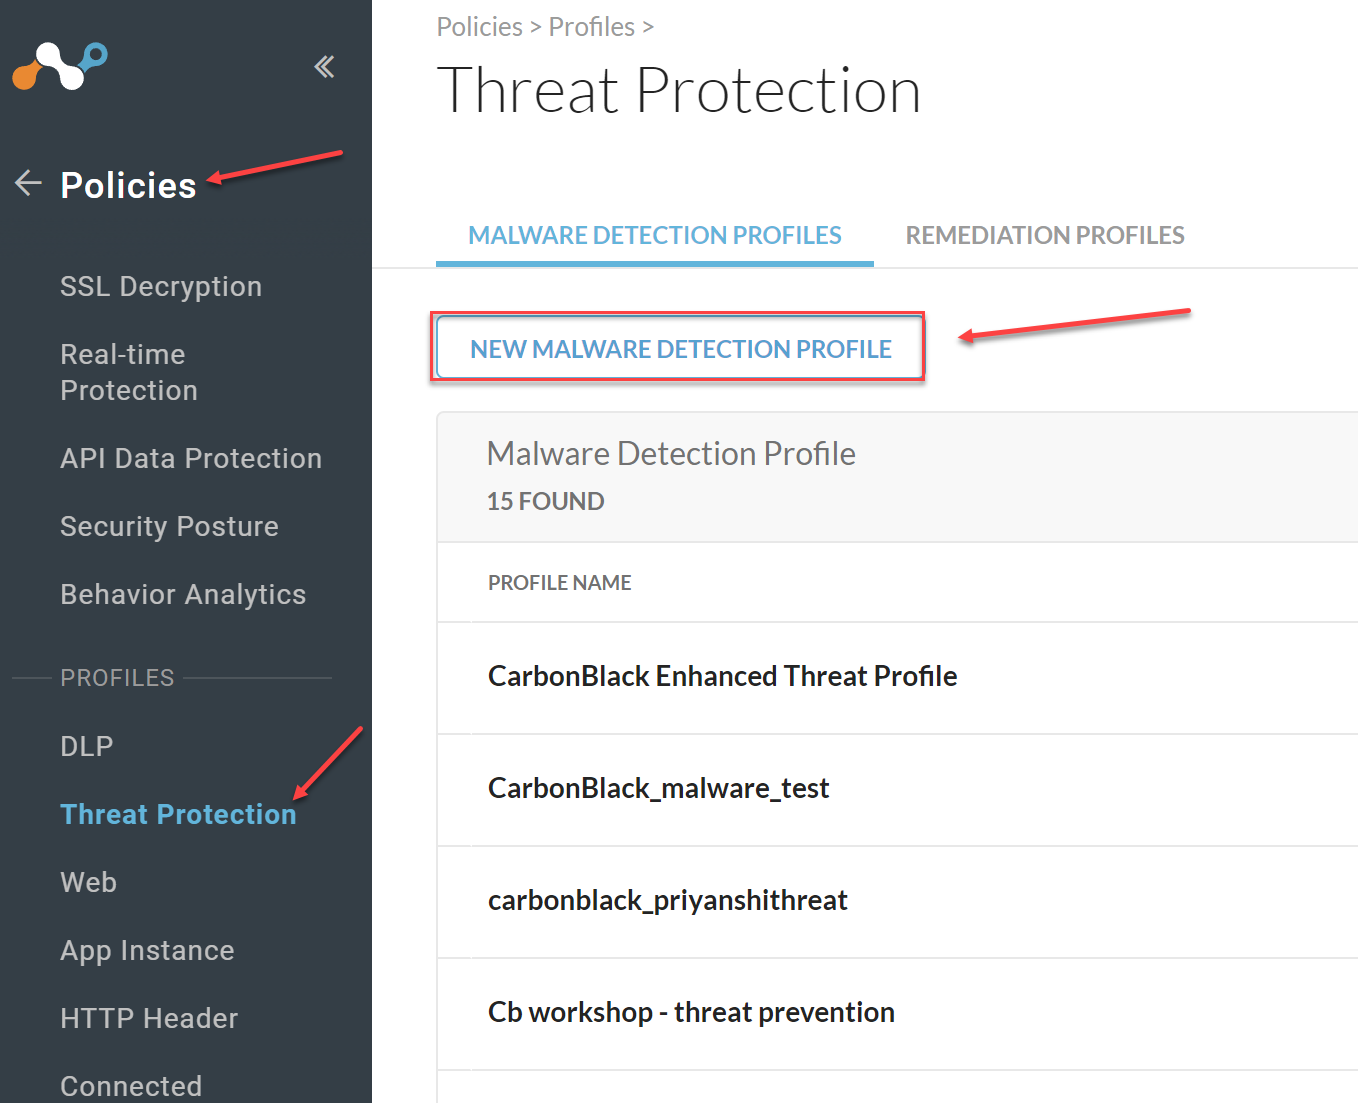
Click Next to get to the Blocklist page and select the File Profile you created. Scroll to the bottom and select Next
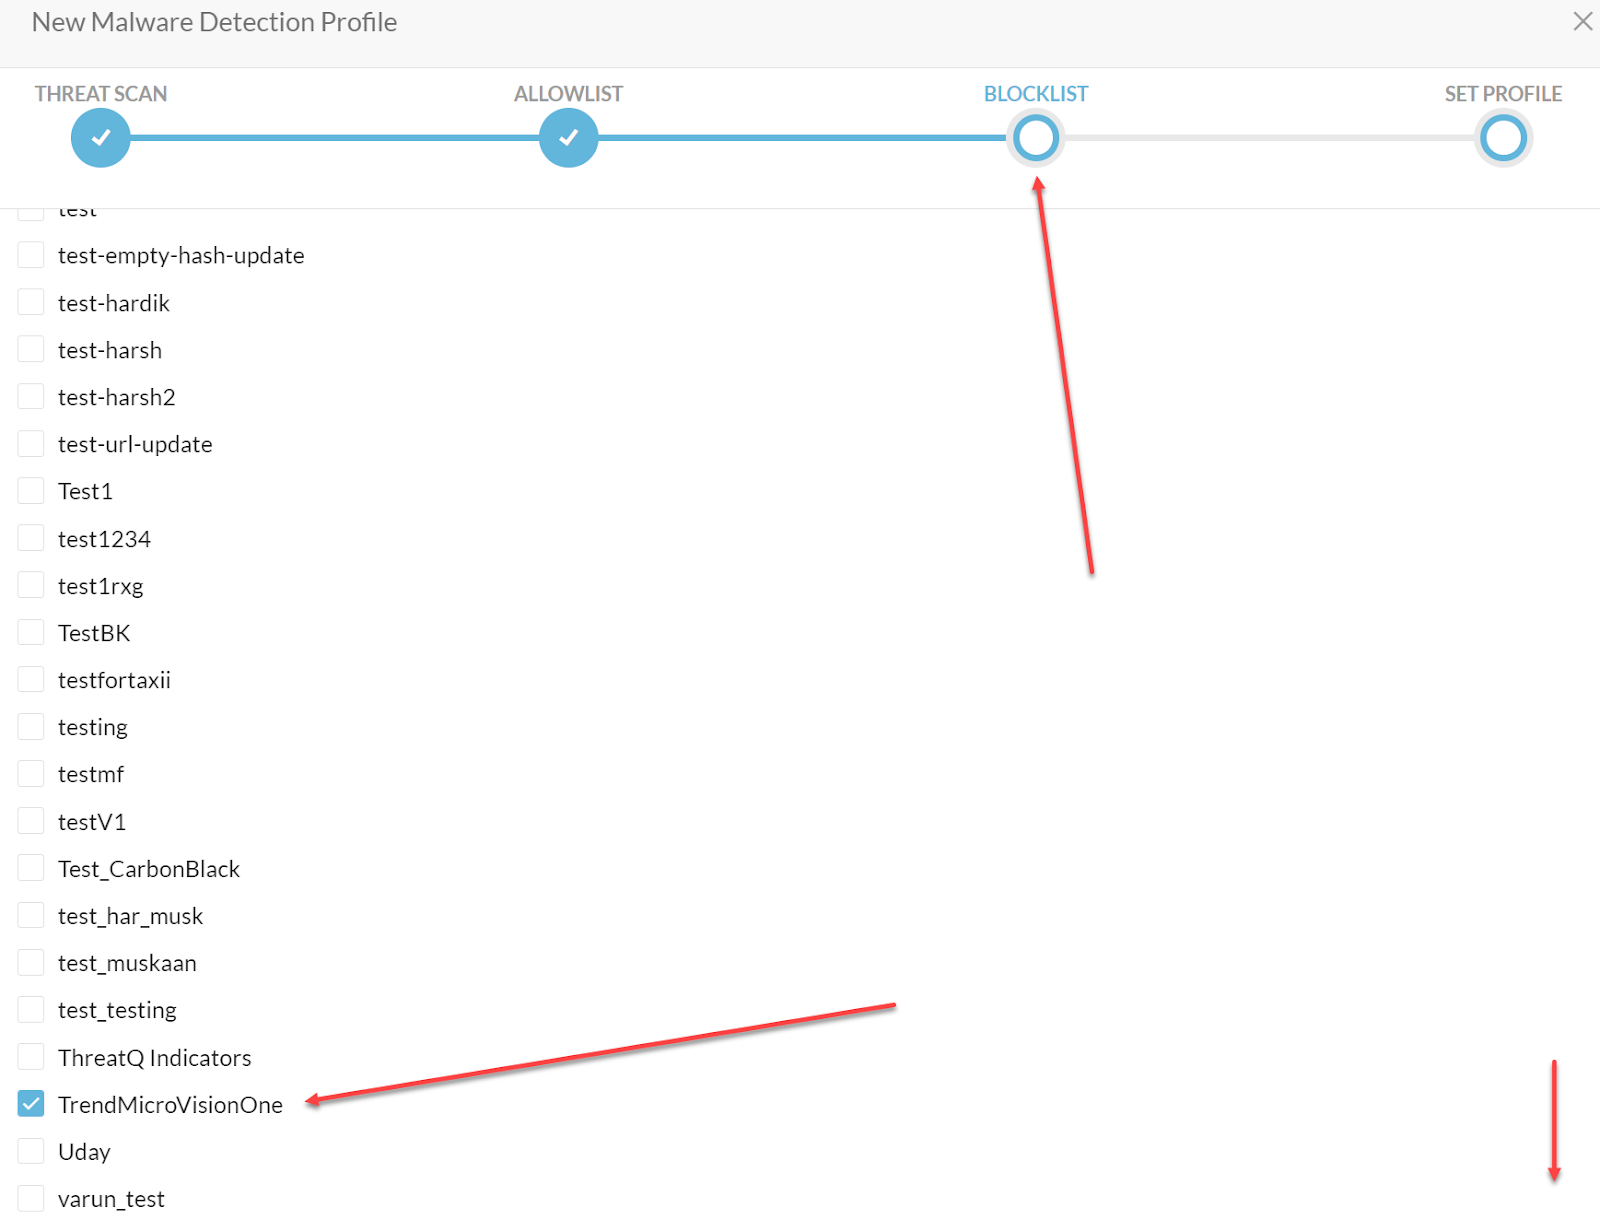
Add a Profile Name, review your blocklist and Save Malware Detection Profile.

Add a Real-time Protection Policy
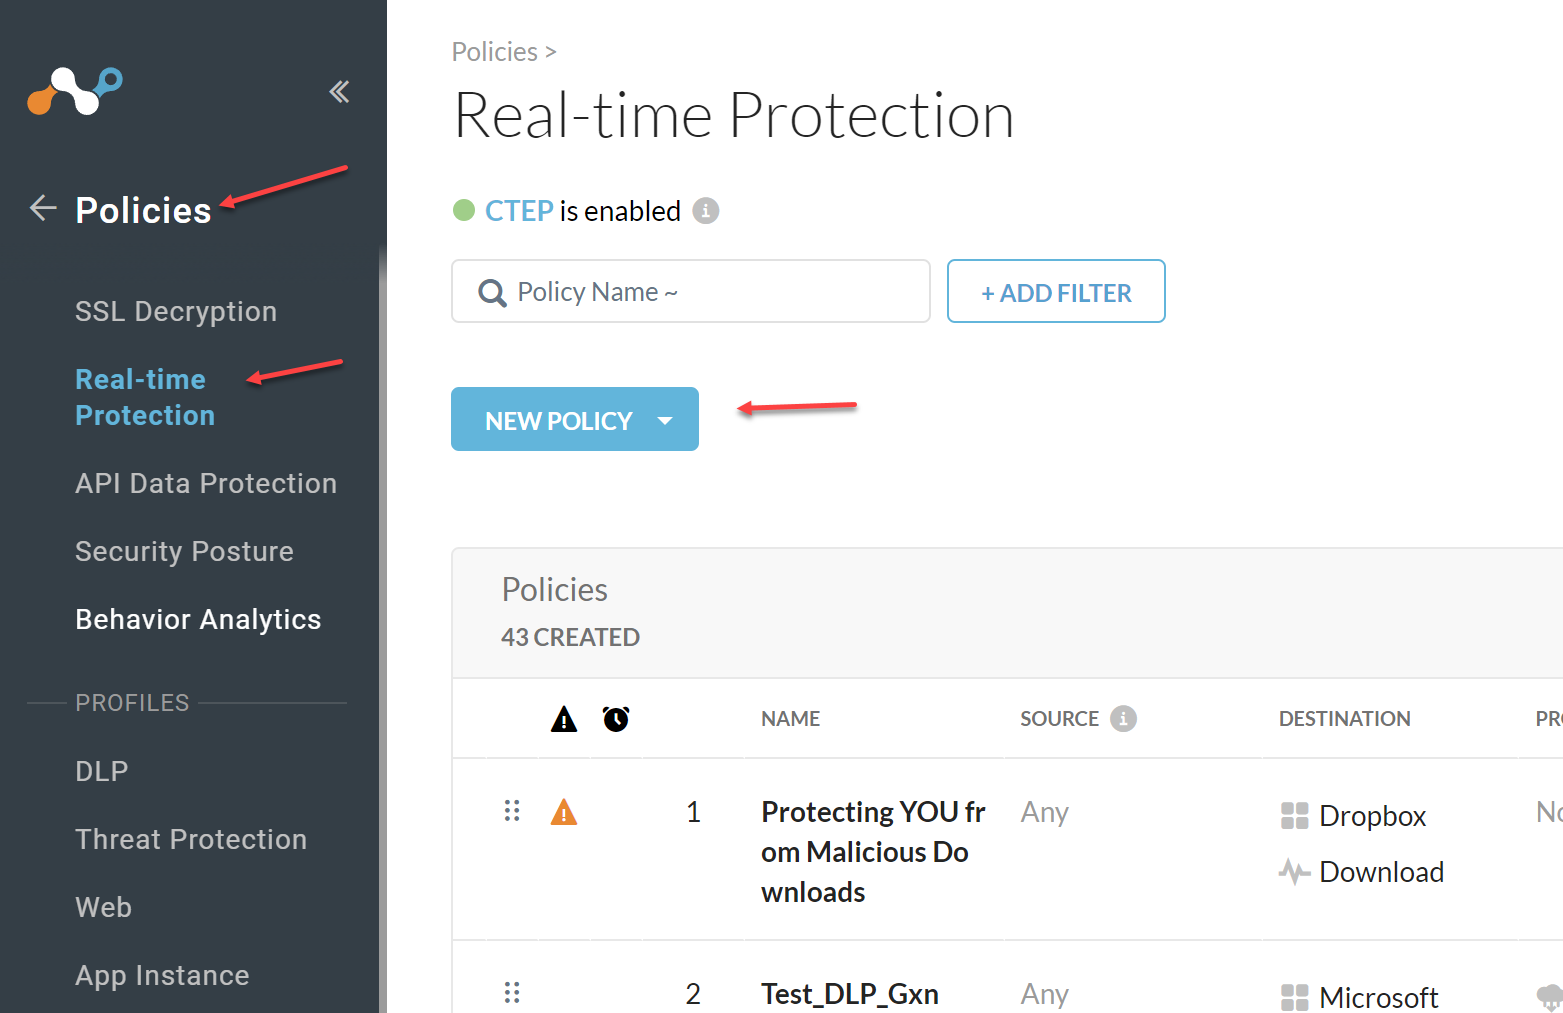
Go to Policies > Real-time Protection > New Policy
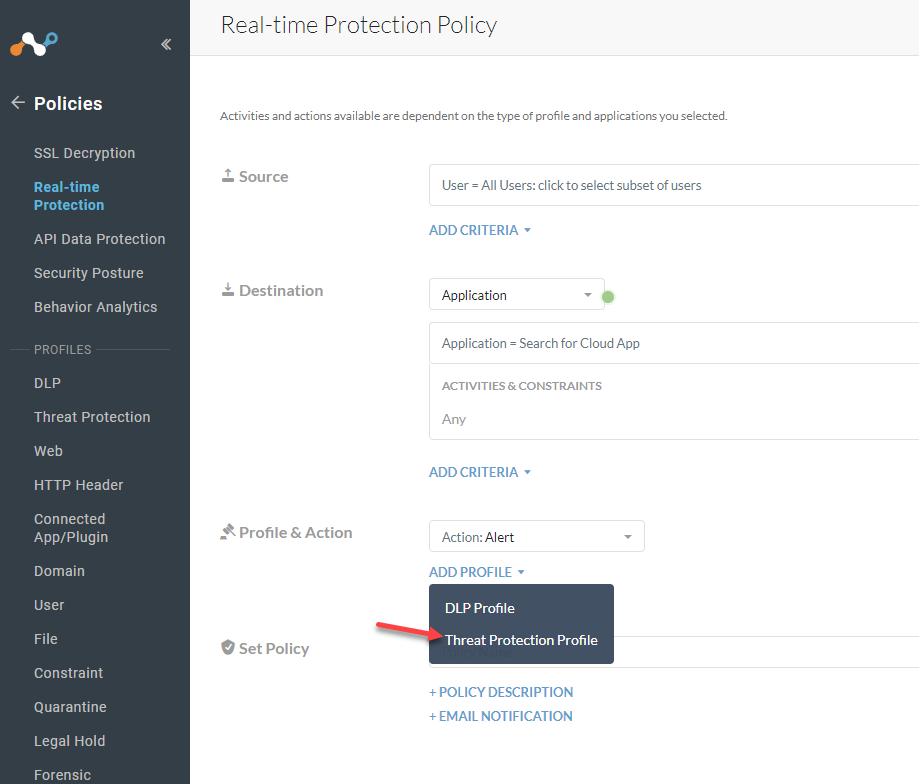
In my example, I selected a Threat Protection policy
Under Profile & Action select Add Profile > Threat Protection Profile
For the Action you will want to Block and select a template of what the user will see when the file is blocked.
Select the Threat Protection Profile you created. Adjust the Severity-Based Actions as needed for your configuration.
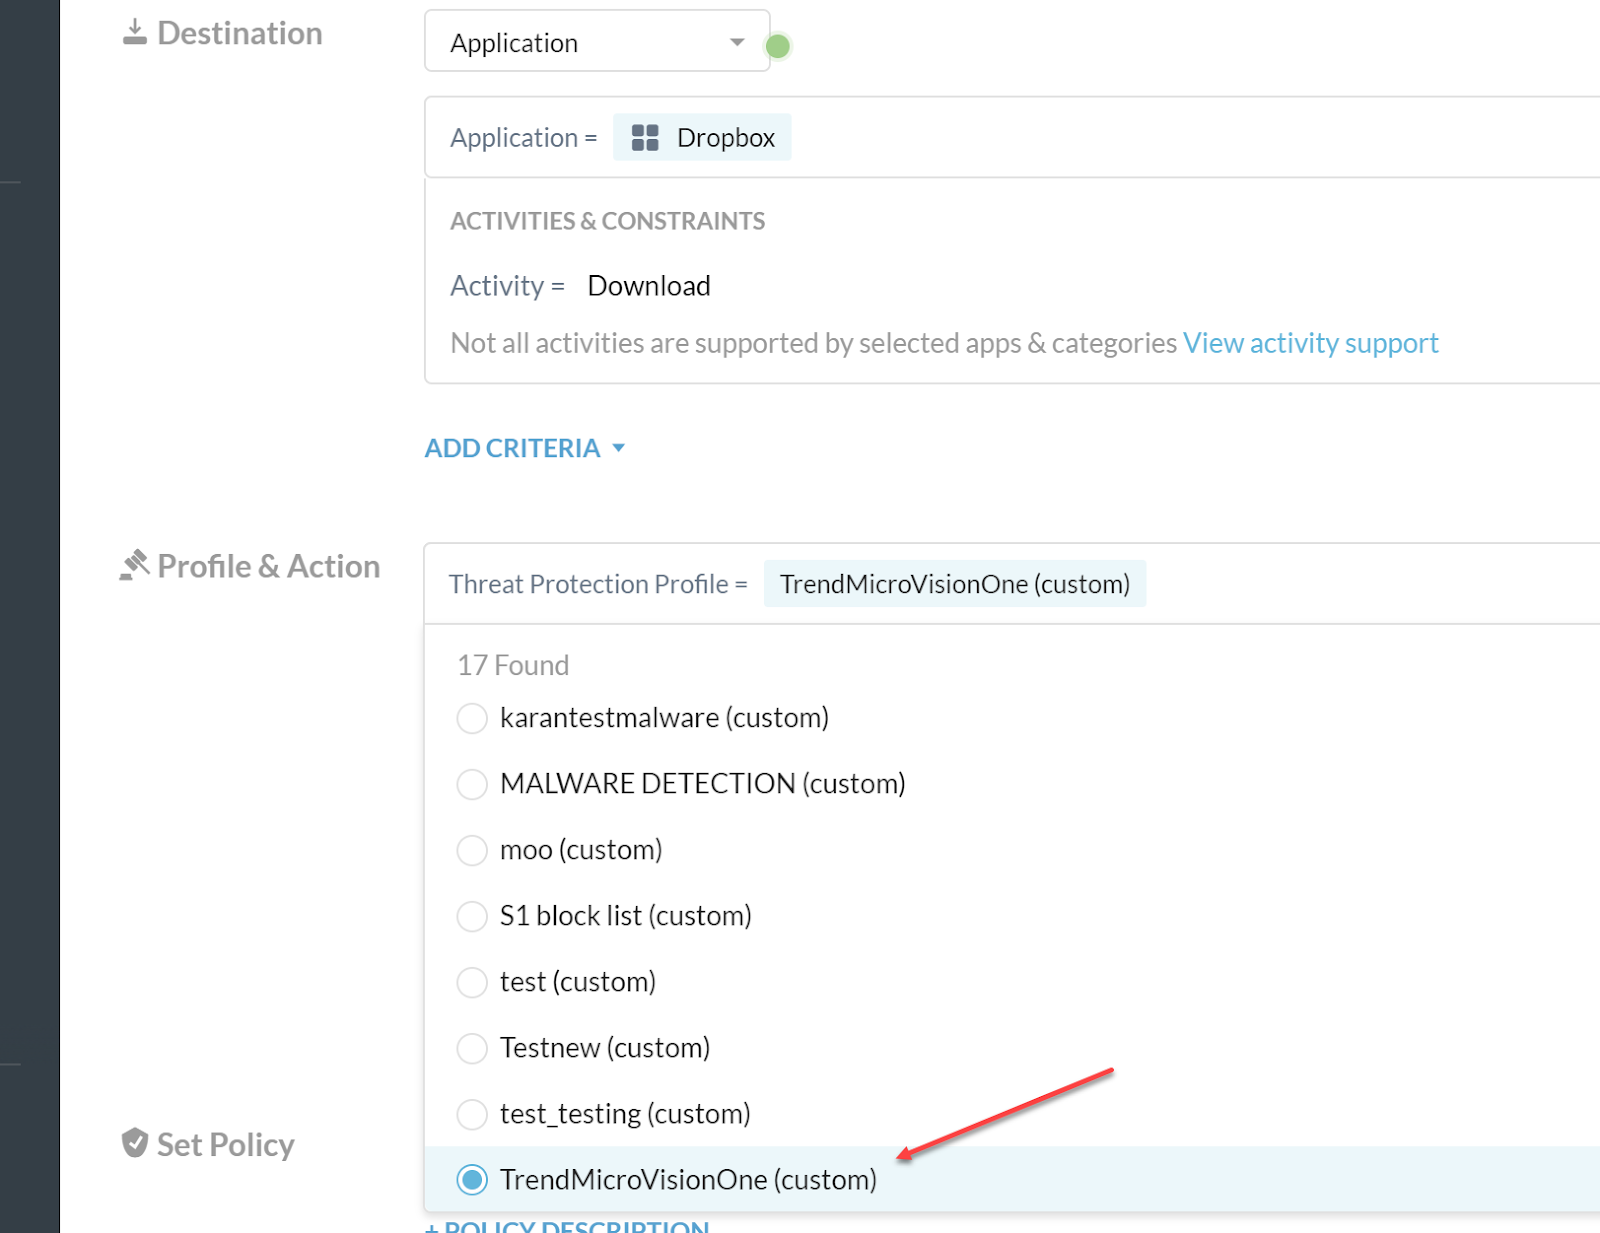
Give your policy a name (Set Policy) and Save
Verify Integration
Verify Sharing of IoCs.
Go to Threat Exchange > Threat IoCs.
On this page you will see a list of all IoCs that are coming into Cloud Exchange. If they have come from Netskope they will be counted on the Total Netskope Hits and if they came from a 3rd party plugin (like Trend), they will be counted until Total Other Hits. To see additional details click the arrow on the right. You will be able to see things like when it was seen and which 3rd party plugin came from.
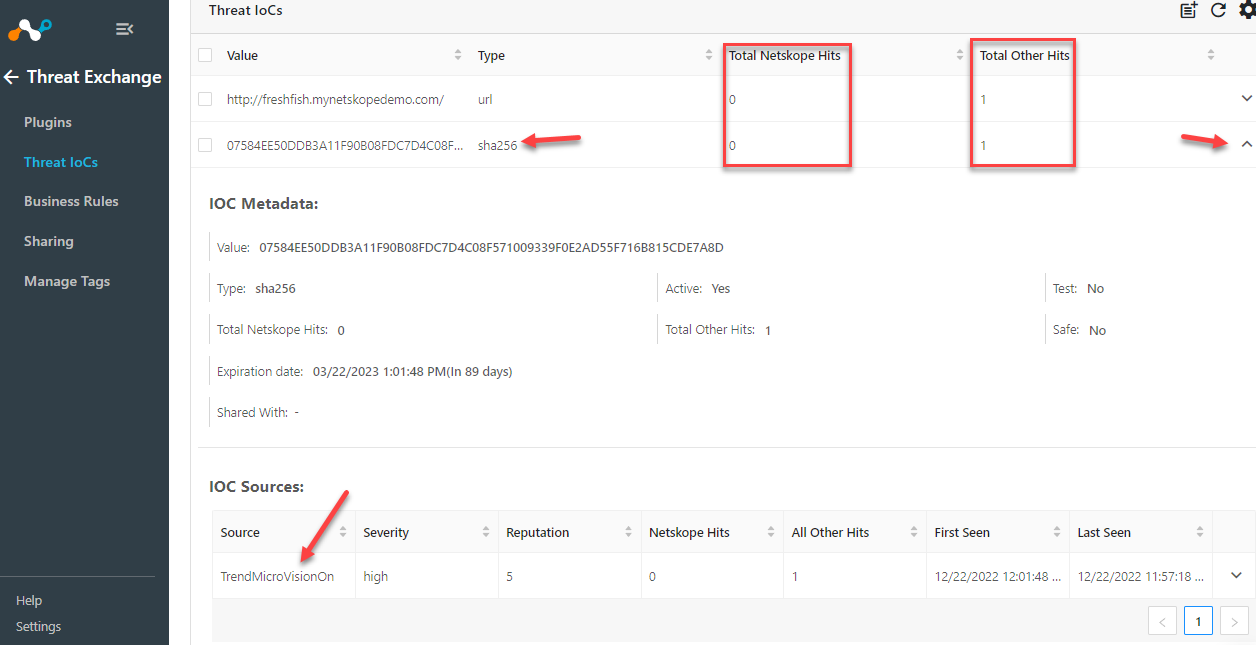
Trend has a cool feature that lets you easily add an IoC. Go to Threat Intelligence > Suspicious Object Management > Add. If my above Netskope picture is clear enough, you will notice that the two IoCs I created below are the ones showing up in Cloud Exchange.

On your Netskope Tenant go to Policies > File and then to the File Profile you created and you should see your file hash under the File Hash tab.