Netskope API integration with Aruba EdgeConnect SD-WAN
Overview
This integration enables you to automatically configure tunnels from Aruba EdgeConnect SD-WAN routers to Netskope’s security service edge (SSE). Aruba’s SD-WAN will build tunnels to the closest primary and secondary Netskope POP with the ease that you would expect from Aruba SD-WAN Orchestration.
SSE defines the set of security services that help deliver on the security vision of SASE. These security services include firewall-as-a-service (FWaaS), secure web gateway (SWG), cloud access security broker (CASB), zero trust network access (ZTNA) and related security functions such as remote browser isolation (RBI), data loss prevention (DLP) and cloud & SaaS security posture management (CSPM/SSPM).
Requirements
- Netskope tenant with API tunnels enabled
- Aruba SDWAN Orchestrator running >9.3
Setup steps
Netskope
- Pre-requirements
- Generate API token
Aruba
- Tunnel Setup
- Traffic Steering / Business Intent Overlays
Verify
Netskope setup
Pre-requirements
As of writing this document, you will need to contact your sales team to have the automatic tunnels API enabled.
Generate API token
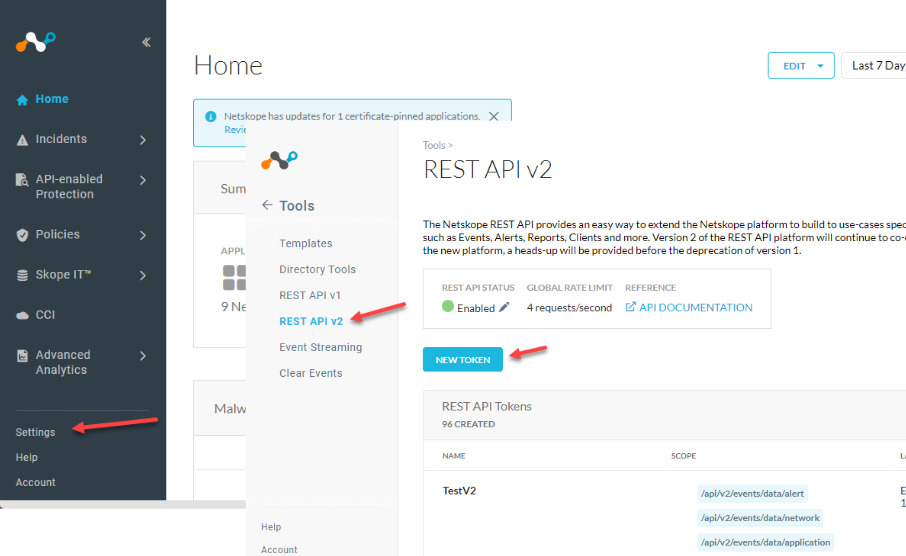
In your Netskope tenant go to Settings > Tools > REST API v2 > New Token
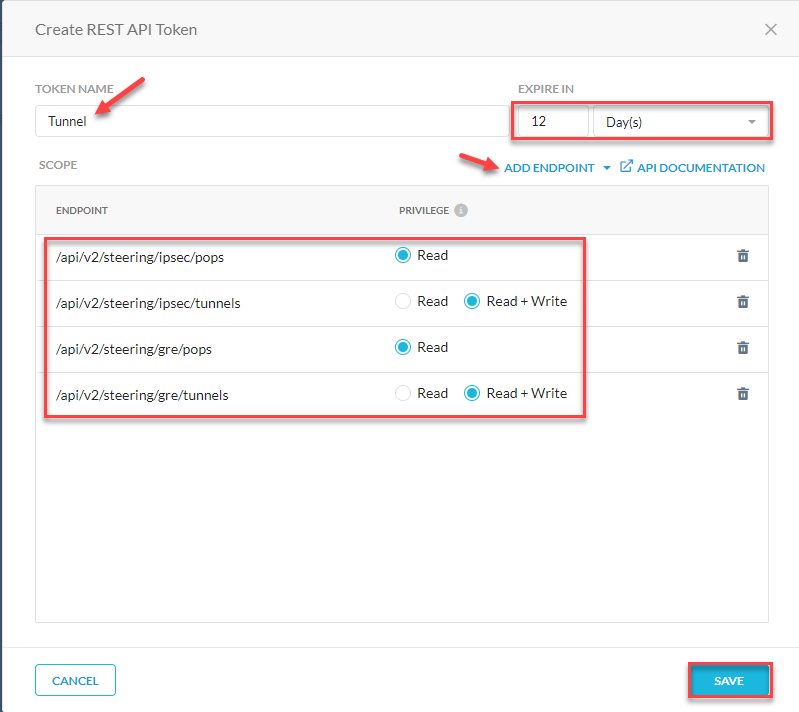
Add permission scopes to the token. You may not need both IPSec and GRE depending on your deployment.
Give your token a name, and expiration period.
Use the following scopes
- /api/v2/steering/ipsec/pops
/api/v2/steering/ipsec/tunnels
And/or - /api/v2/steering/gre/pops
/api/v2/steering/gre/tunnels
Save and copy your token.
Aruba setup
Aruba Tunnel Setup
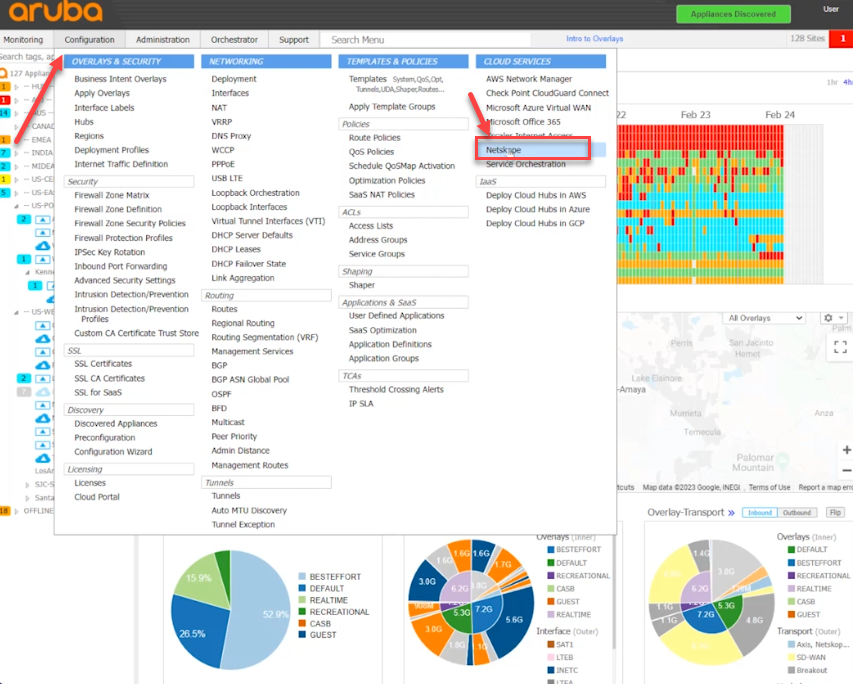
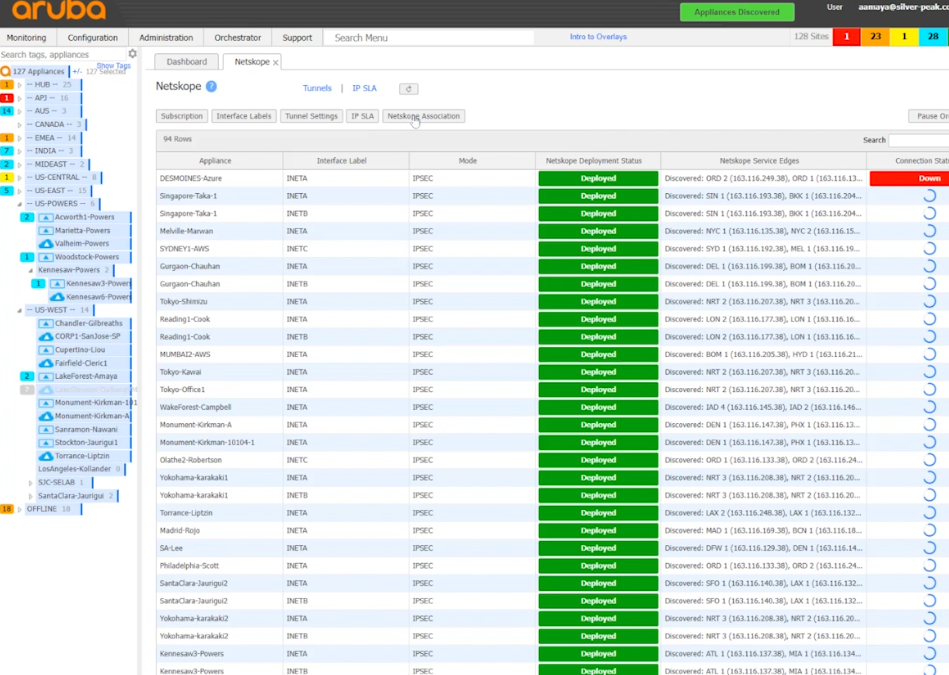
Log into your Aruba Orchestrator and go to Configuration > Cloud Services > Netskope
Select Subscription
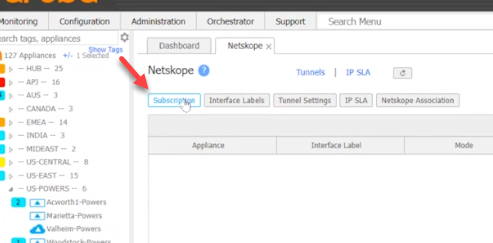
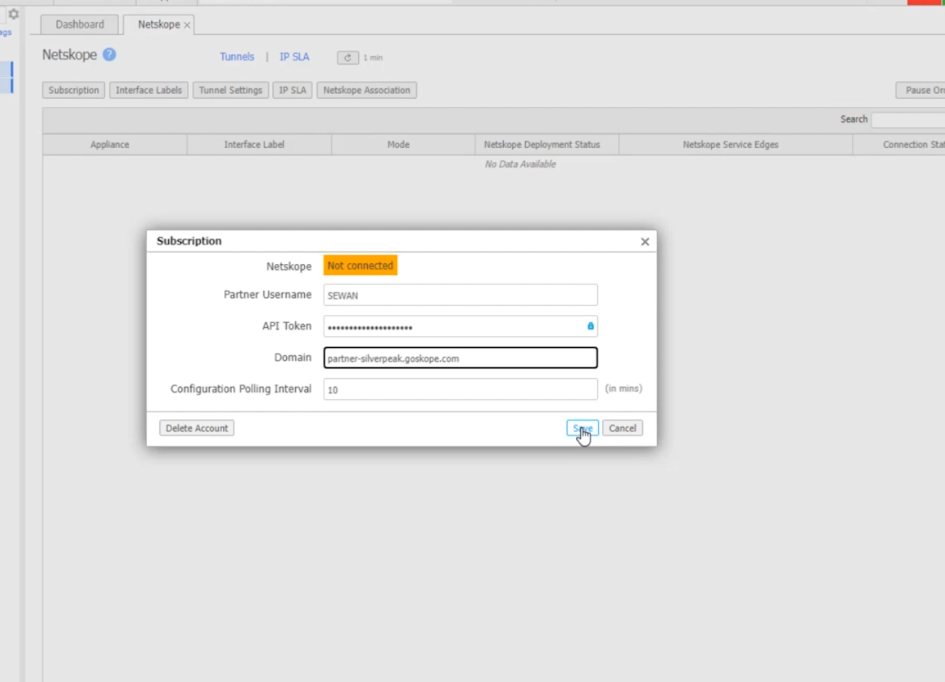
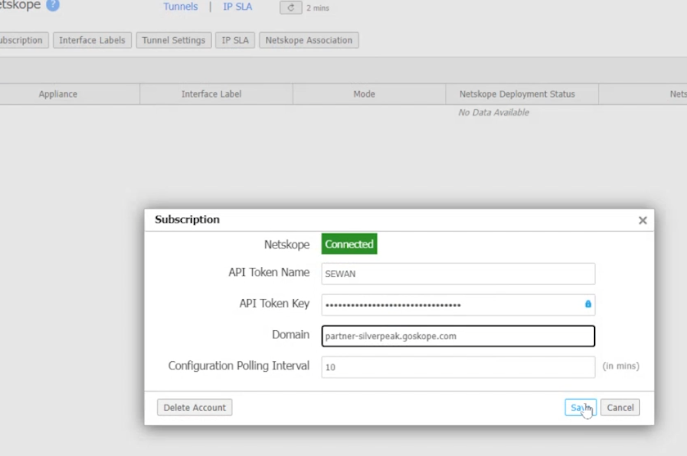
Add the following information
Partner Username: <Locally used name to identify this token>
API Token: <Netskope APIv2 Token>
Domain: <Netskope Tenant URL>
Polling: <Default>
Save
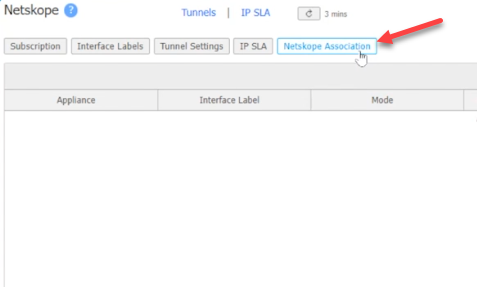
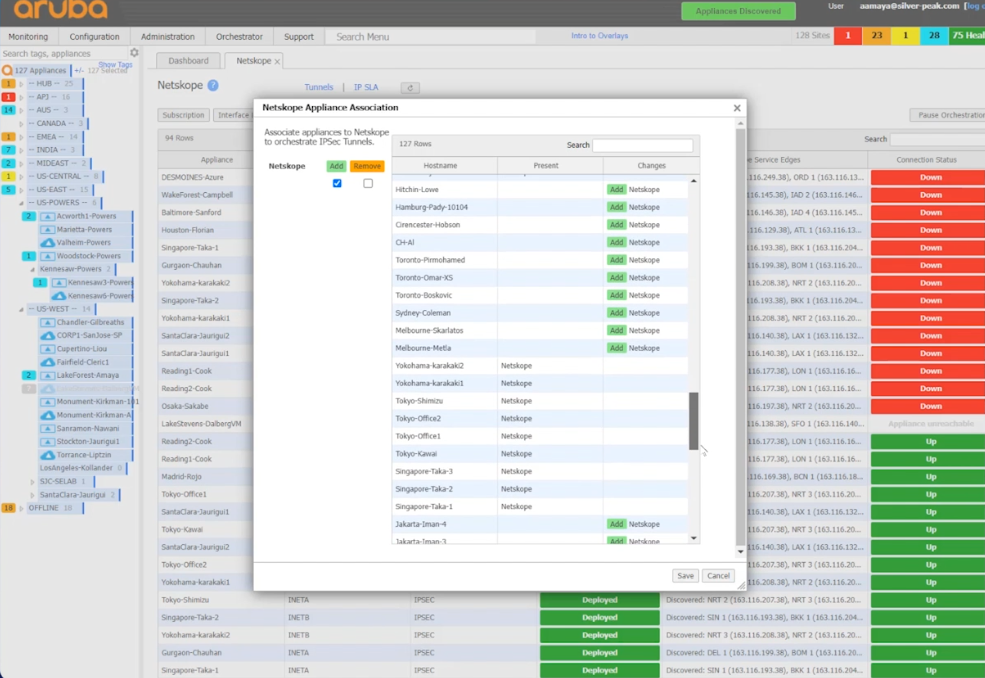
Add Netskope Association to the sites that you would like to use tunnels to Netskope with.
Select the site and Add.
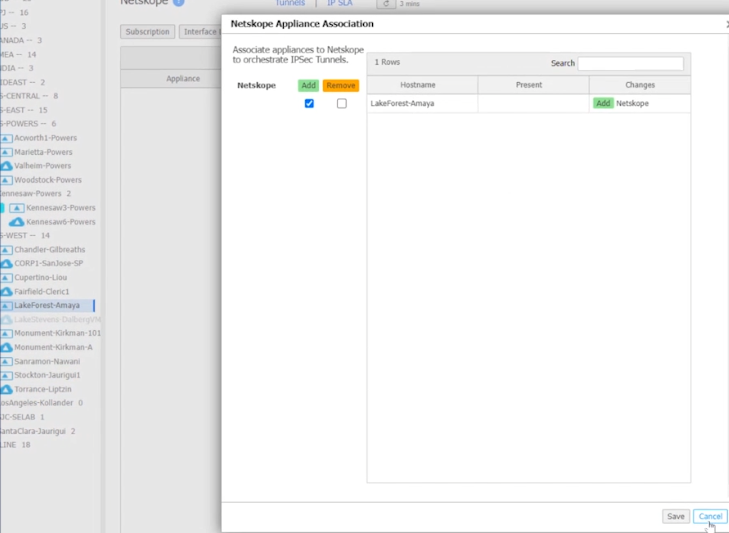
Or add all of them by selecting the top of the tree.
The red ones below are being set up and they all turned green after a few seconds.
Traffic Steering / Business Intent Overlays
Now that the tunnels are configured, edit the Business Intent Overlays to send traffic through them.
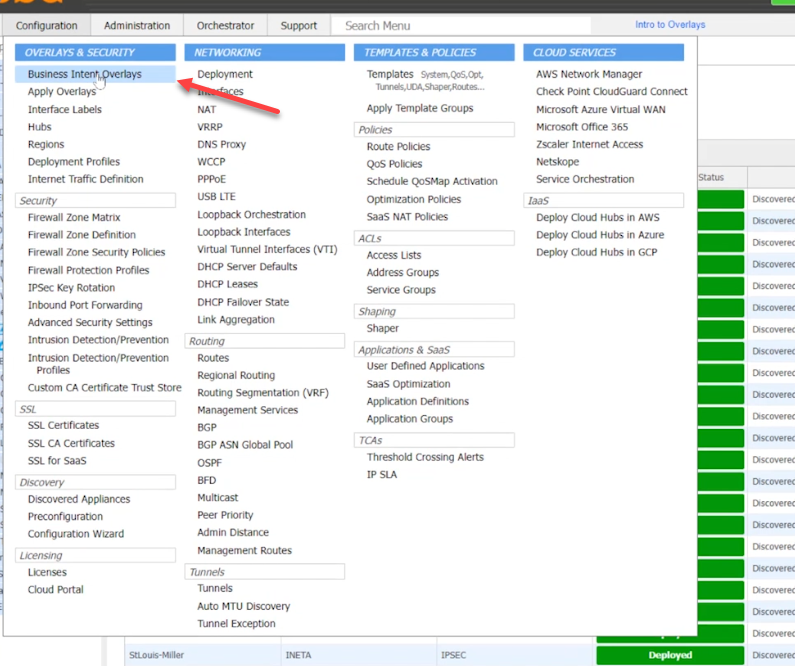
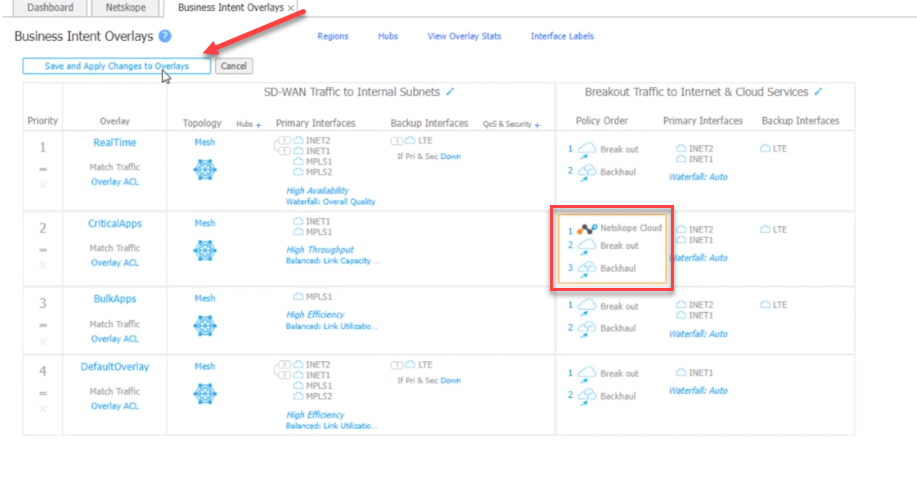
Select Configuration > Overlays & Security > Business Intent Overlays
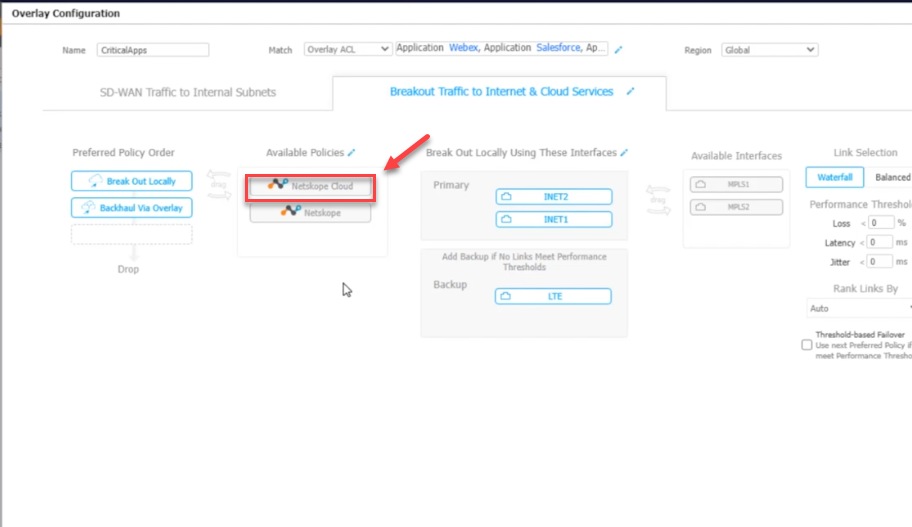
Select which traffic type you want to go into the tunnel. In my example, I am selecting CriticalApps
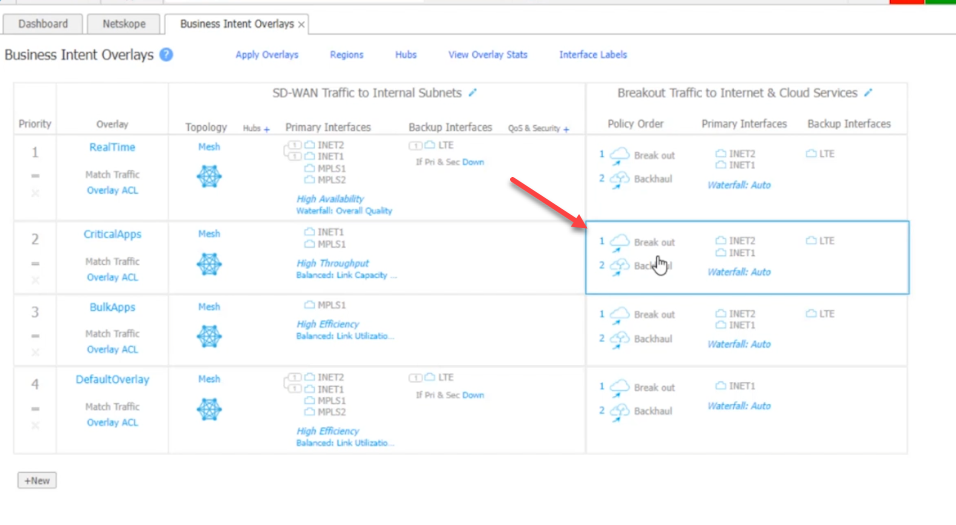
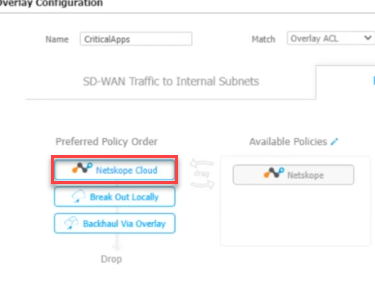
From the Available Policies, move the Netskope Cloud icon to the Preferred Policy Orders top spot.
It should look like this.
Save and Apply for the policy to take effect.
Verify
Status should change to Connected after applying the API token.
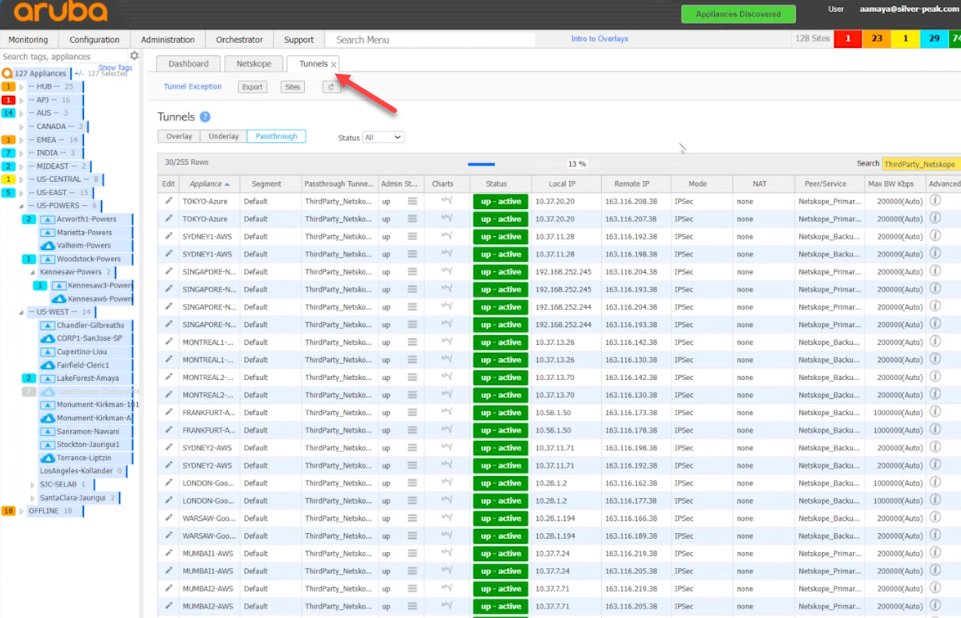
You can see the status of the tunnels by selecting tunnels. In this view you can see the primary and secondary tunnel status and where they were built to.
