Overview
Cloud Exchange CRE’s integration with CrowdStrike gives you the ability to change a device’s status from Managed to Unmanaged (or vice versa) based off of the CrowdStrike Zero Trust Assessment (ZTA) score. This is helpful to give devices real time policy changes to protect your network when a device is seen as risky from the CrowdStrike sensor running on the device.
Requirements
- CloudExchange 4.2 or newer
- Basic Cloud Exchange setup (Netskope tenant API v1 and v2 setup)
- Netskope plug - Netskope CRE
- CrowdStrike CRE plugin version 1.1.0 or greater
- CrowdStrike agent
Setup Steps
CrowdStrike
- Deploy CrowdStrike Falcon Sensors to your end devices
- Setup API clients and keys
Netskope Cloud Exchange
- Setup Netskope Plugins
- Netskope CRE Plugin
- CrowdStrike CRE v1.1.0 or greater
- Create Business Rules
- Create Action
Netskope Policy
- Create Device Classification Rule
Verify
CrowdStrike Setup Steps
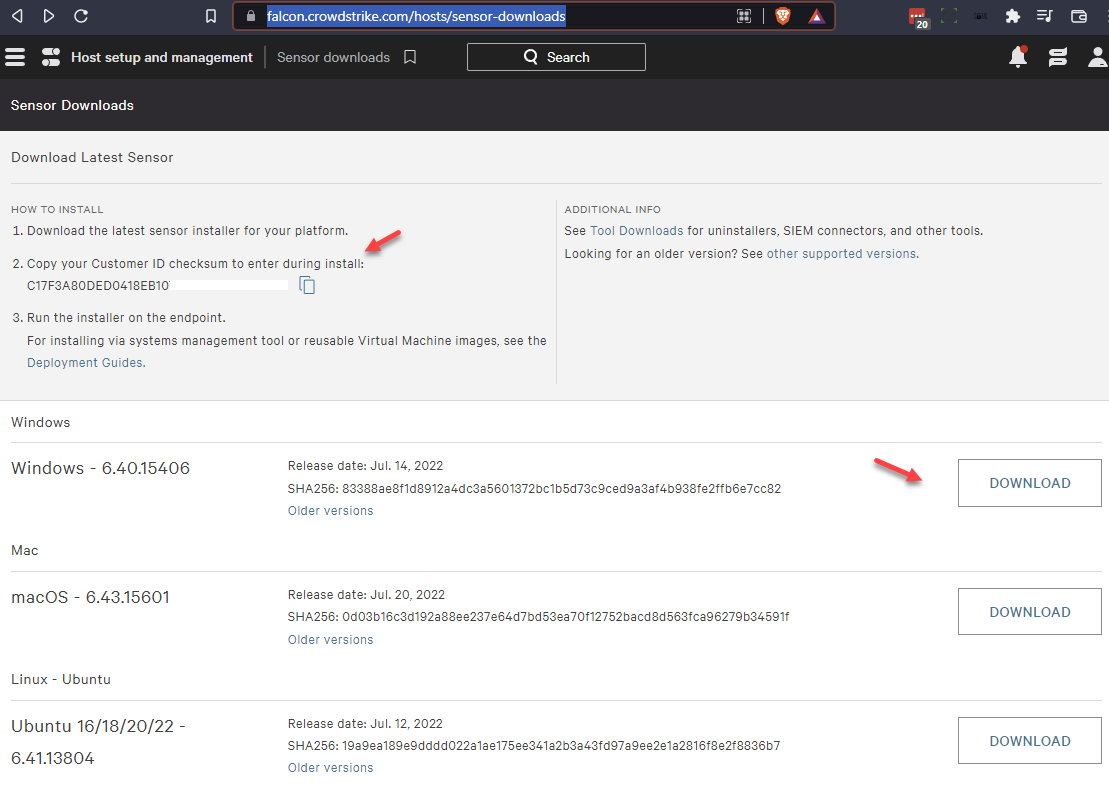
Deploy CrowdStrike Falcon Sensors to your end devices
Please follow the instructions in the CrowdStrike documentation. Basically you just need to grab your Customer ID and download the appropriate OS version of the installer. During the setup of the installer, you will be asked for your Customer ID.
https://falcon.crowdstrike.com/documentation
Setup API clients and keys
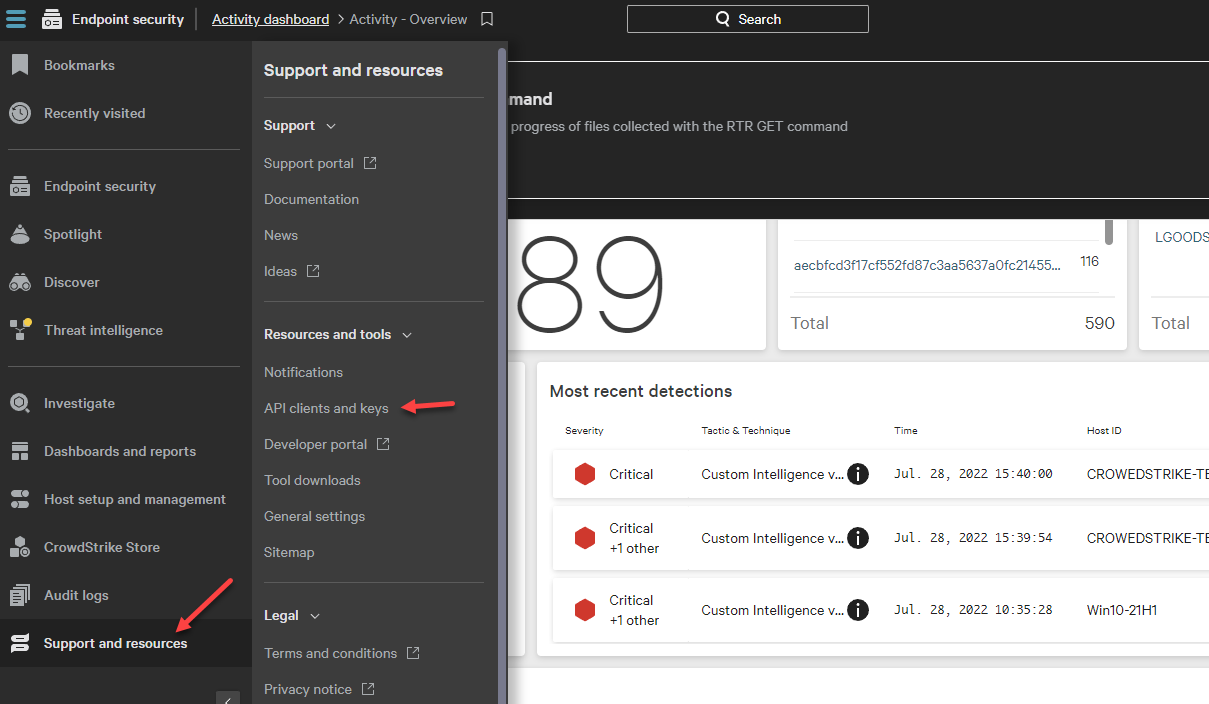
In your CrowdStrike portal go to Support and resources > API clients and keys
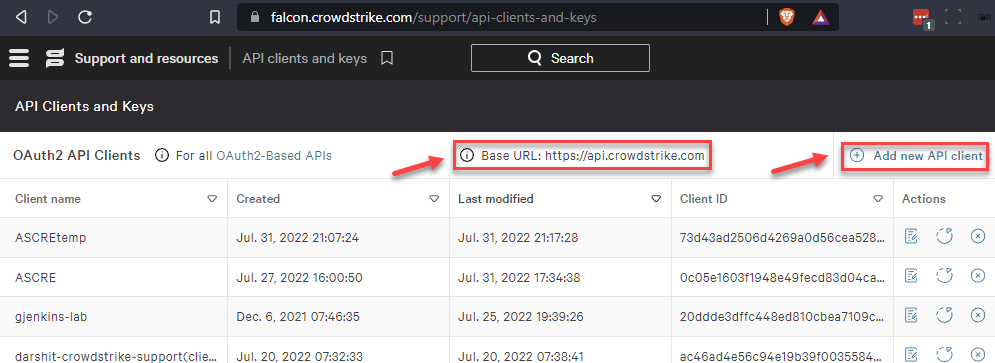
Note down your Base URL and then select Add new API Client
Give your API client a name and select the following Read API scopes
Scopes- Read
Alerts
Detections
Device control policies
Host
Host groups
Incidents
IOC Manage APIs
IOC (Indicators of Compromise)
User management
Zero Trust Assessment
Scopers Read - Write
Real time response
Netskope Cloud Exchange setup steps
Cloud Exchange Plugins
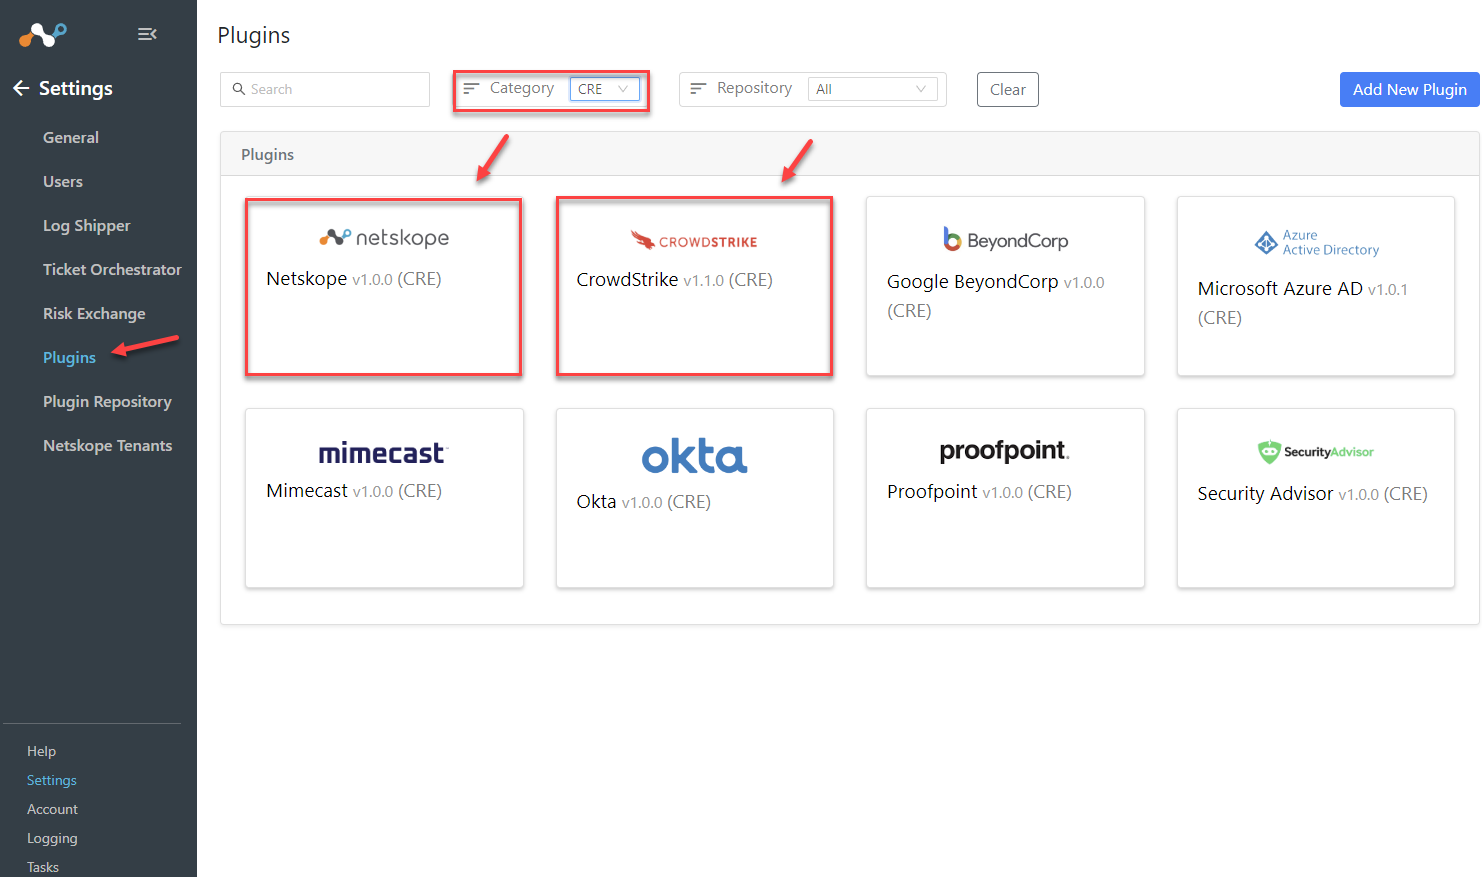
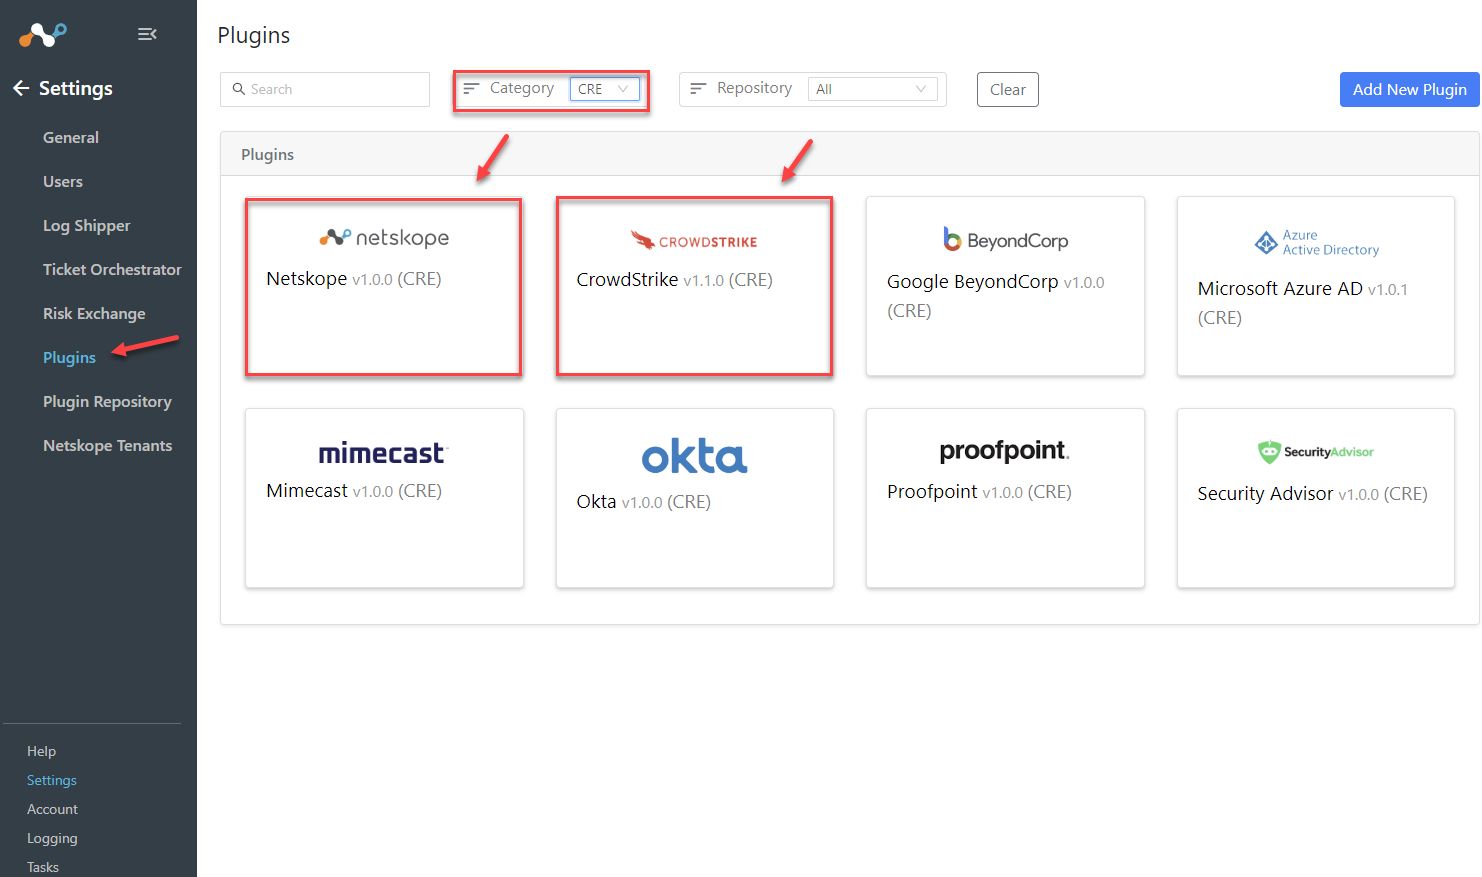
On your Netskope Cloud Exchange go to Settings > Plugins
You will need two plugins configured for this solution. The Netskope CRE plugin and the CrowdStrike v1.1.0 CRE plugin. If you need to update your plugins go to the Plugin Repository tab and select ‘check for updates’.
Configure Netskope CRE plugin
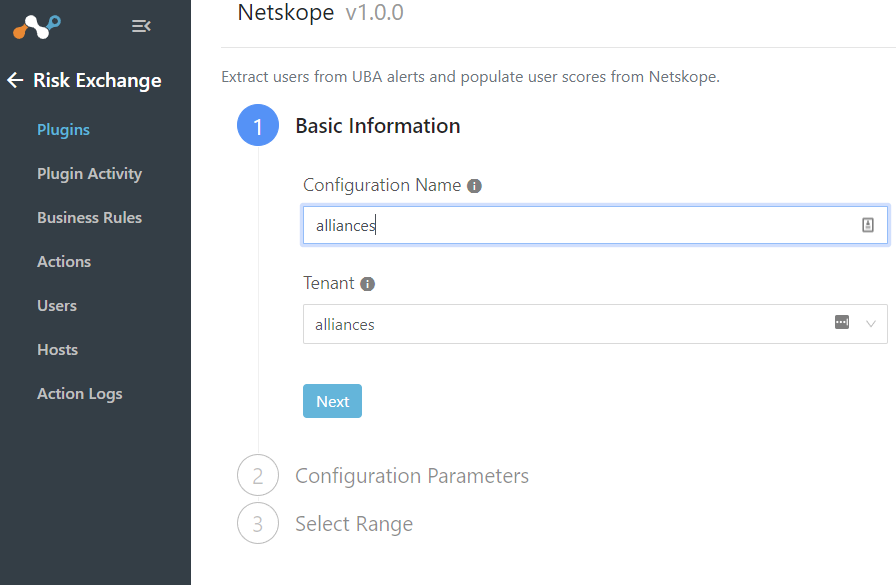
Select Netskope CRE
Name our plugin and select your Tenant
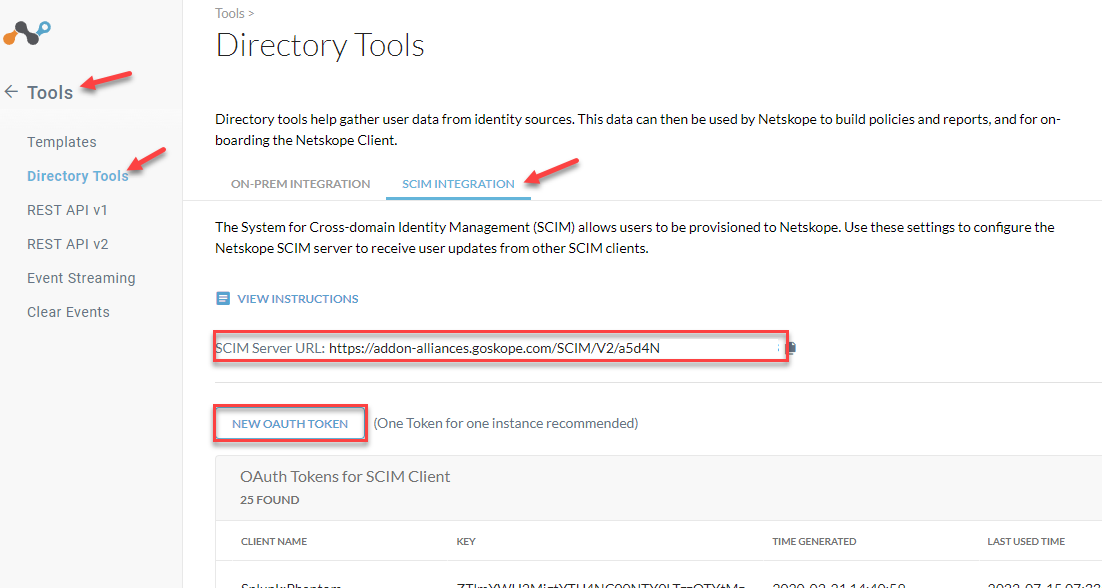
Since we will be making a call to the Netskope tenant about users, we will need a SCIM token setup on your tenant.
On your Netskope Tenant go to Settings > Tools > Directory Tools > SCIM integration.
Copy your SCIM Server URL
Create a New Oauth Token and copy the token.
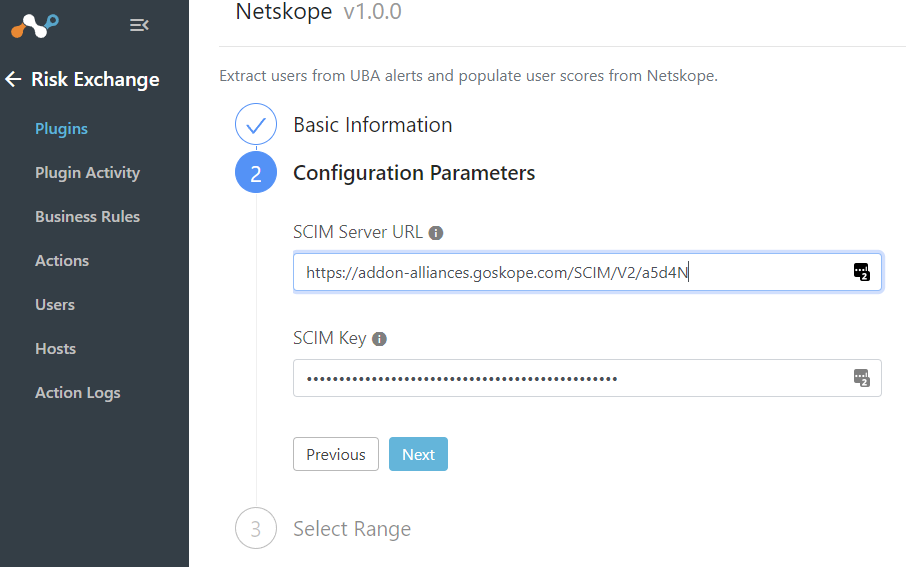
Back on Cloud Exchange, paste the SCIM URL and Key into your plugin.
Configure CrowdStrike CRE plugin
From the plugin page select CrowdStrike CRE v1.1.0 or greater.
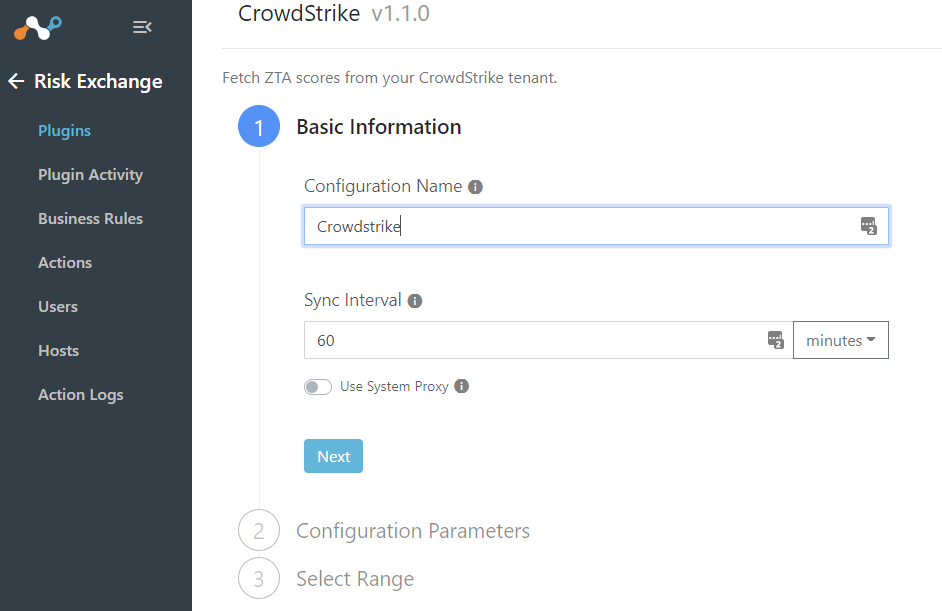
Give it a Configuration Name
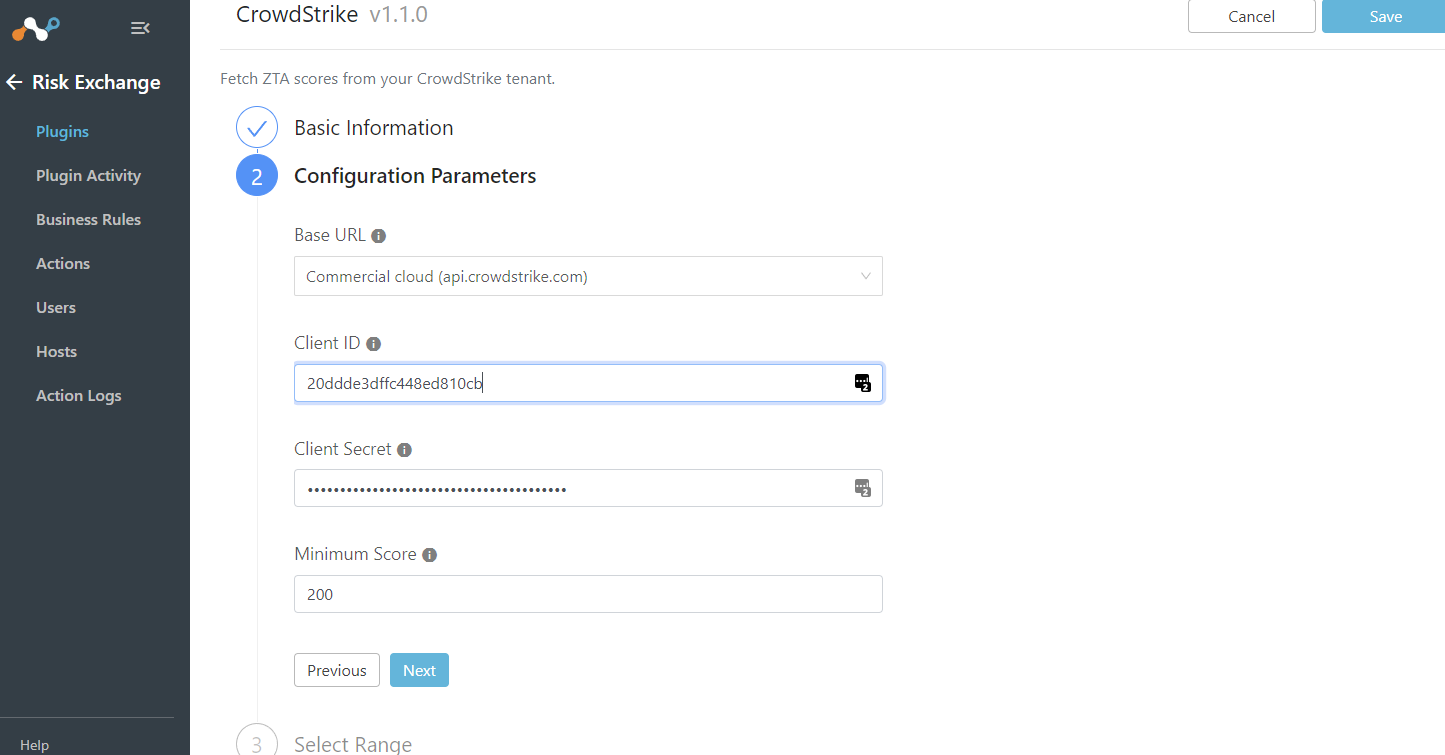
Fill in the information you obtained while configuring the above step on the CrowdStrike API Client.
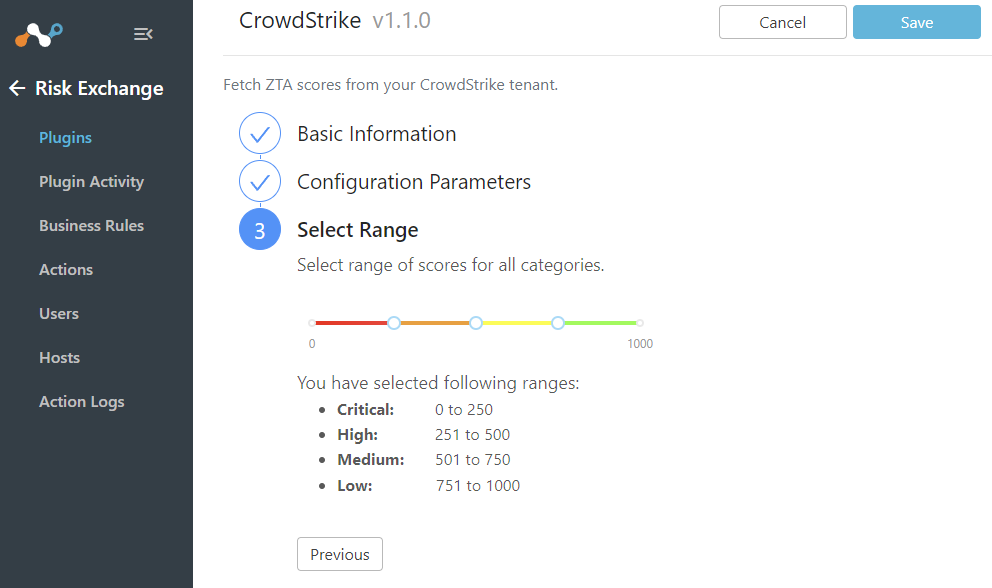
You can adjust the ranges for what the different risk scores are. Leave this default. You can see device risk scores under Plugin Activity.
Save your plugin.
Create a Cloud Exchange Business Rule
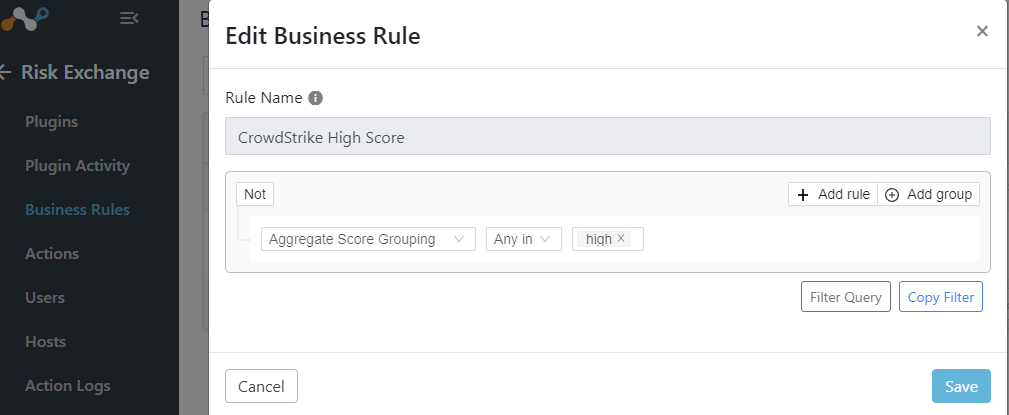
On your Cloud Exchange go to Risk Exchange > Business Rules and Create New Rule

A basic rule can be that anytime a user/device’s score reaches an aggregated high risk to map to ‘CrowdStrike High Score’
Create an Action
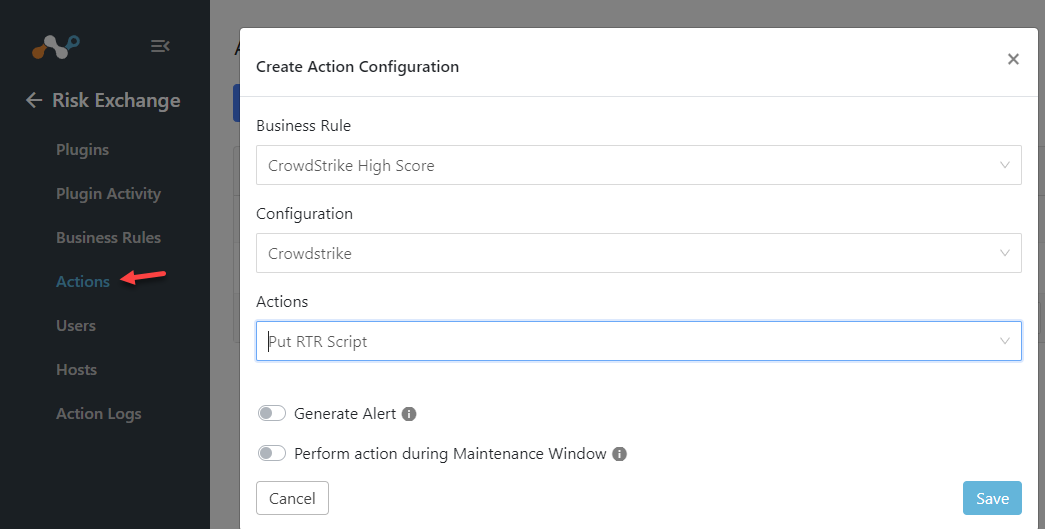
In this example the action will be used to trigger the CrowdStrike Real Time Response (RTR) script for any user that has a high score.
Business Rule: select the business rule you just created
Configuration: select your CrowdStrike plugin
Actions: Put RTR Script
Netskope Policy Setup Steps
Device Classification Rule
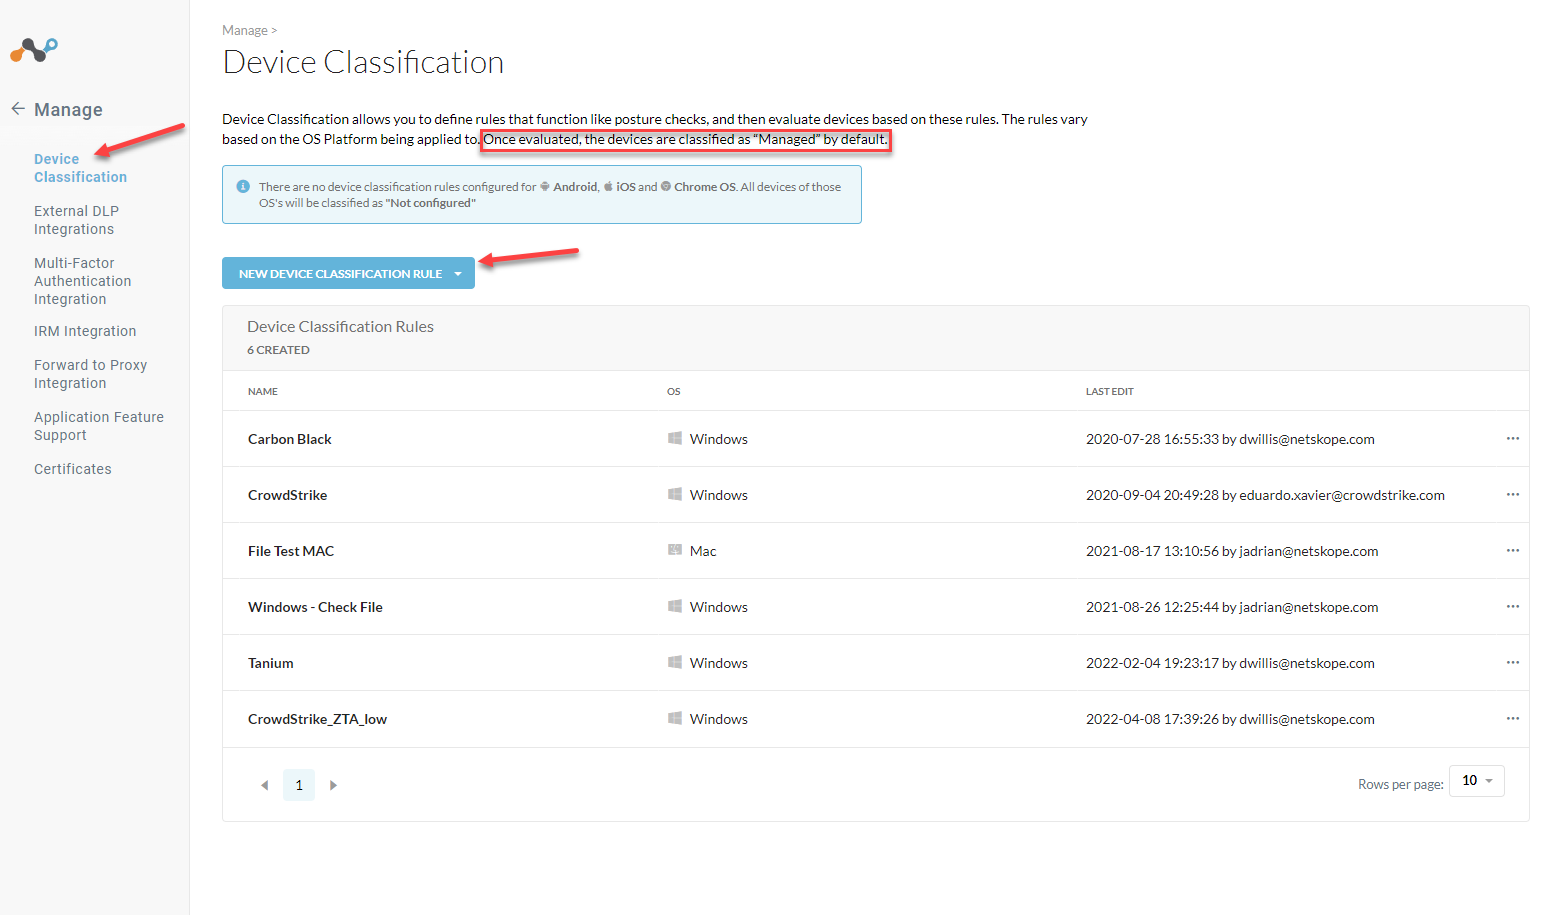
In your Netskope Tenant go to Settings > Manage > Device Classification > New Device Classification Rule
When matched with the score from the CrowdStrike client the device will be marked as Managed and policy will be applied.
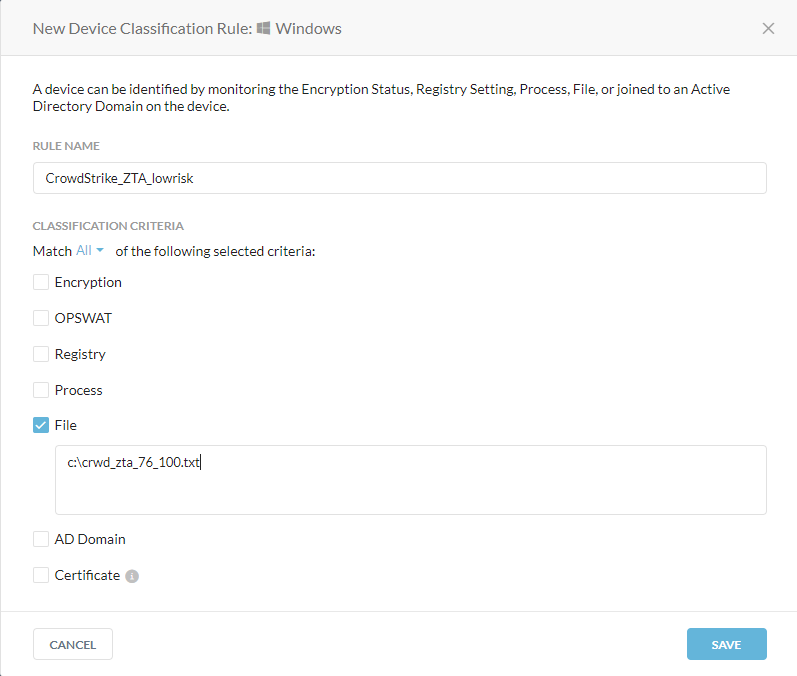
Give your policy a rule name and select file. In the box put the following available values.
See note below on what these scores equal.
"c:crwd_zta_1_25",
"c:crwd_zta_26_50",
"c:crwd_zta_51_75",
"c:crwd_zta_76_100"
Note on scores
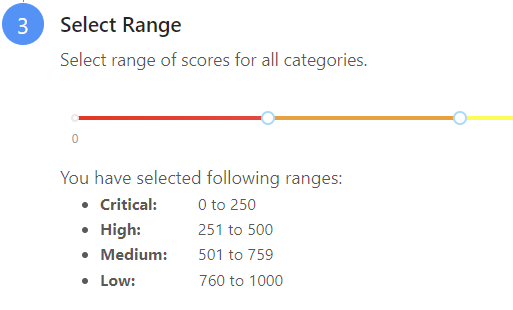
Netskope uses scores from 0 to 1000 as shown in the below table. These scores map to CrowdStrike’s user scores but are different by one decimal place. When creating the device classification rule using my example of c:crwd_zta_76_100.txt. I am that any user that is considered as a low risk user should be placed in the managed device category.
Verify
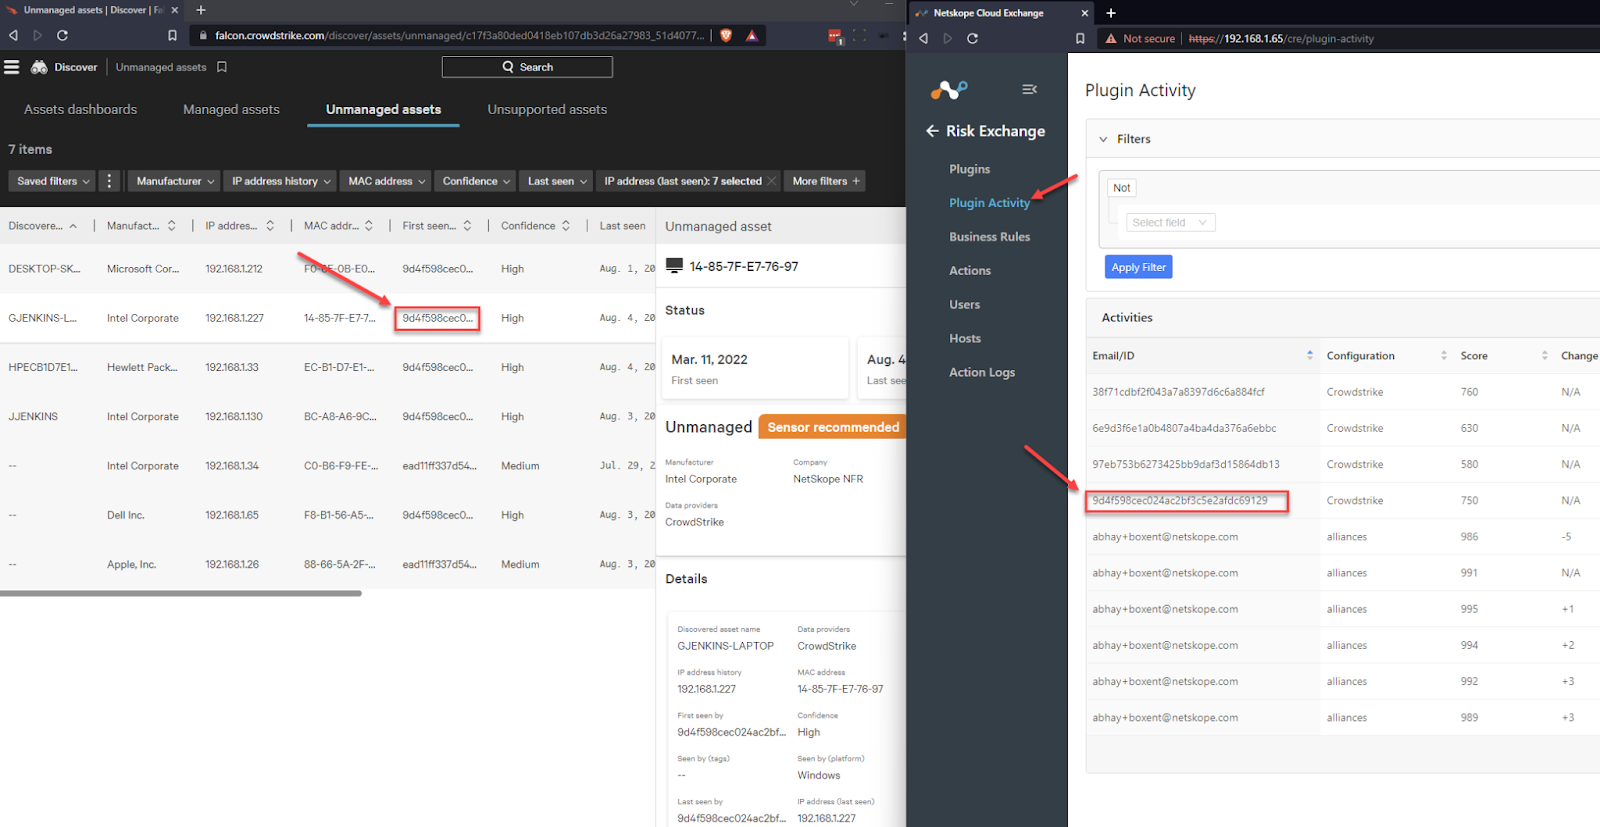
In Cloud Exchange go to Risk Exchange > Plugin Activity. You will see the feed coming in from CrowdStrike of your deployed sensors. I went into CrowdStrike and found my test device by the sensor id. To test I change my Action Rule to match the score of my test device and have it move the user based off of the score I already have. This is easier than doing bad things on your devices and changing the score.
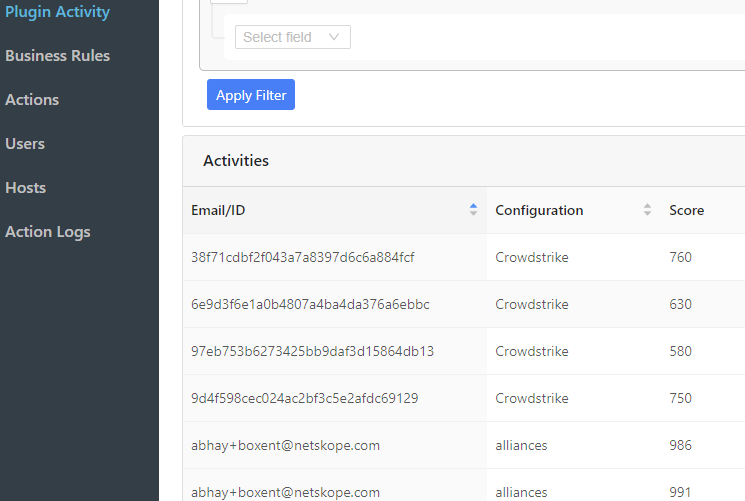
Here is a closer view of Cloud Exchange. The Configuration column is the name of the plugin that the information came from.
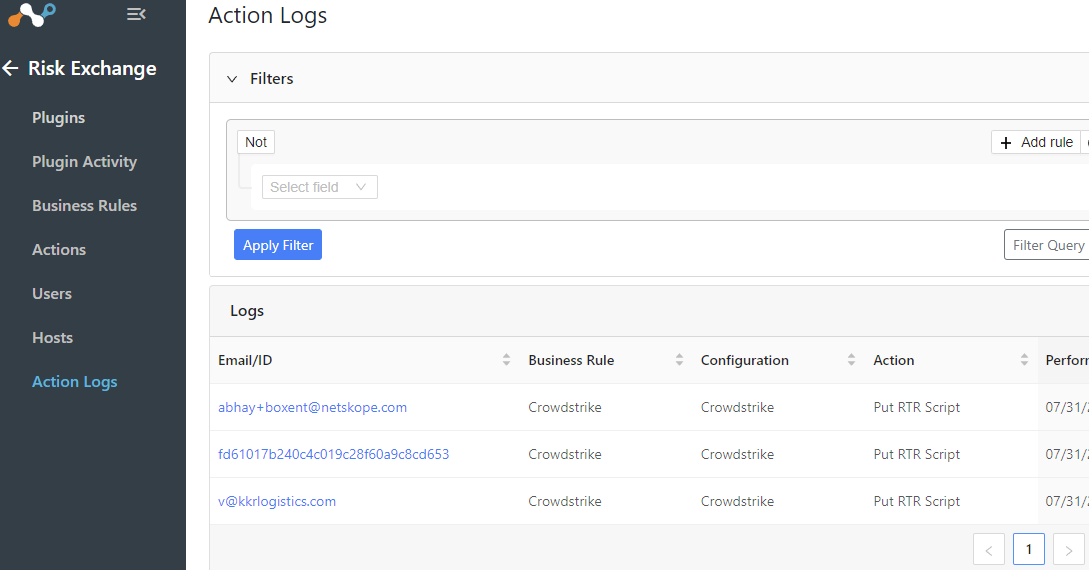
To view which devices have triggered the RTR script to fire go to Action Logs
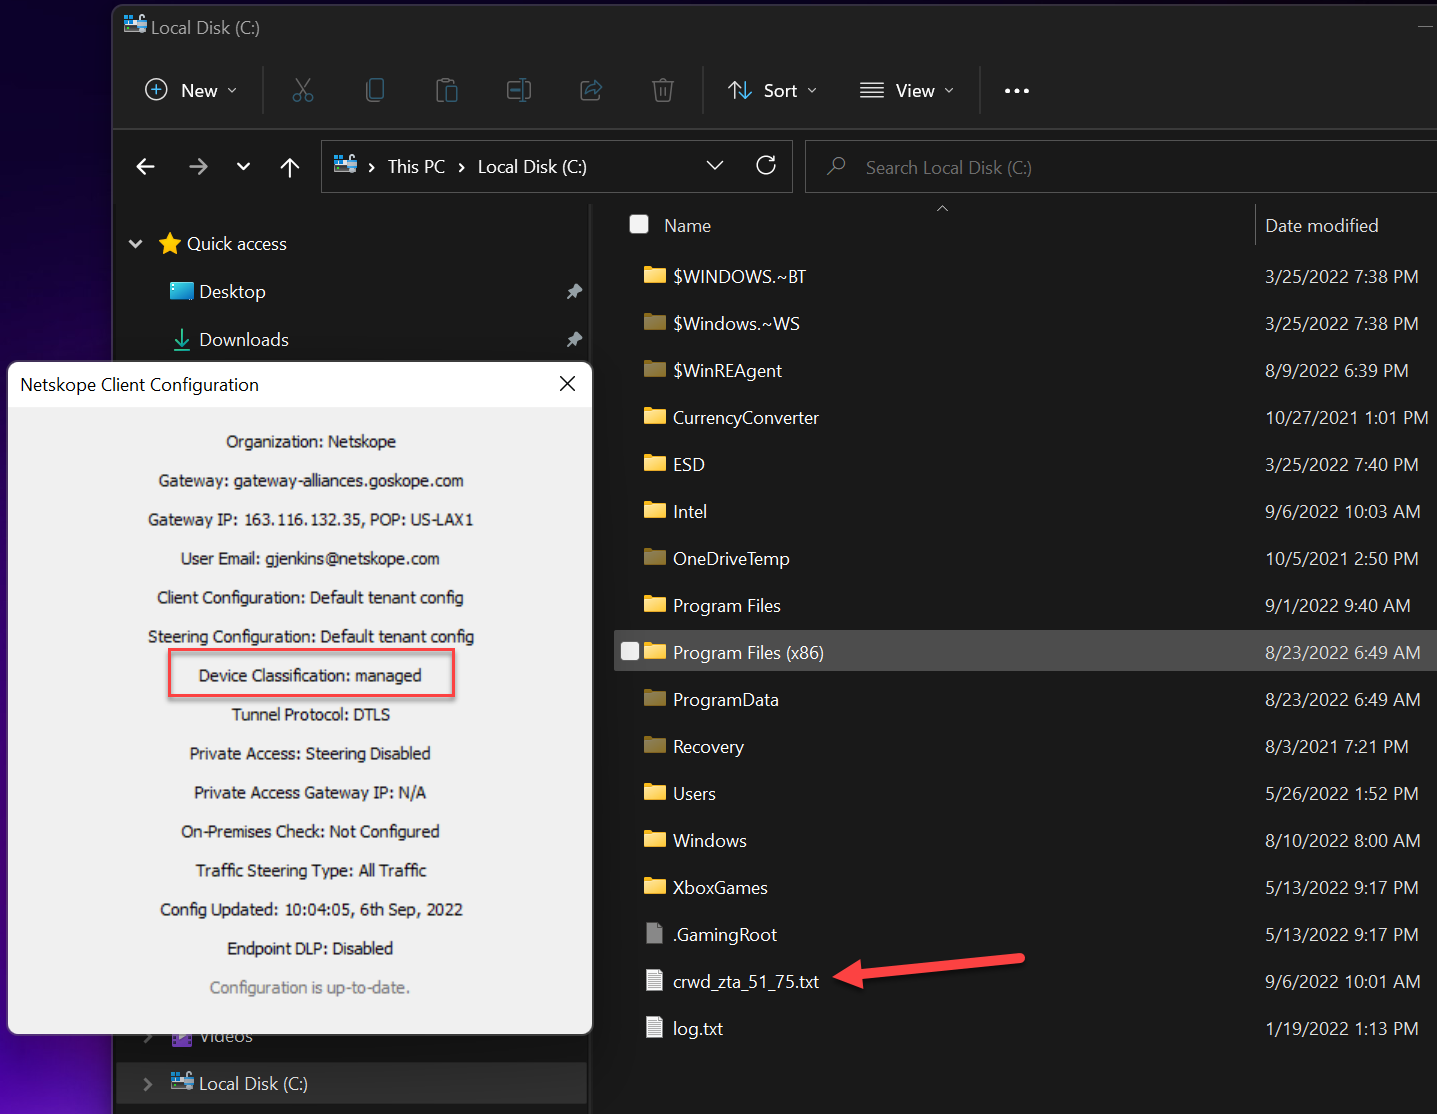
On the client you will see the text file get placed on the c: drive and your client will be marked as managed if it matches the Netskope Device Classification Rule, and Unmanaged if it doesn’t match the rule.
