Overview
Cloud Exchange CLS’s Syslog forwarding gives you the ability to send Netskope Event, Alert, and WebTx messages to any Syslog server. Using the Microsoft Incoming Webhook application from the Admin center Cloud Exchange will send messages to a configured Teams channel to notify you when an Alert was seen from Netskope.
Requirements
- CloudExchange 4.2 or newer
- Basic Cloud Exchange setup (Netskope tenant API v1 and v2 setup)
- Netskope plug - Netskope CLS
- Any Syslog server
Syslog Server
For testing and writing this document, I am running a Ubuntu 20 LTS Compute Engine on GCP with Docker and Graylog running in a container. Leave a comment if you would like me to write up that setup.
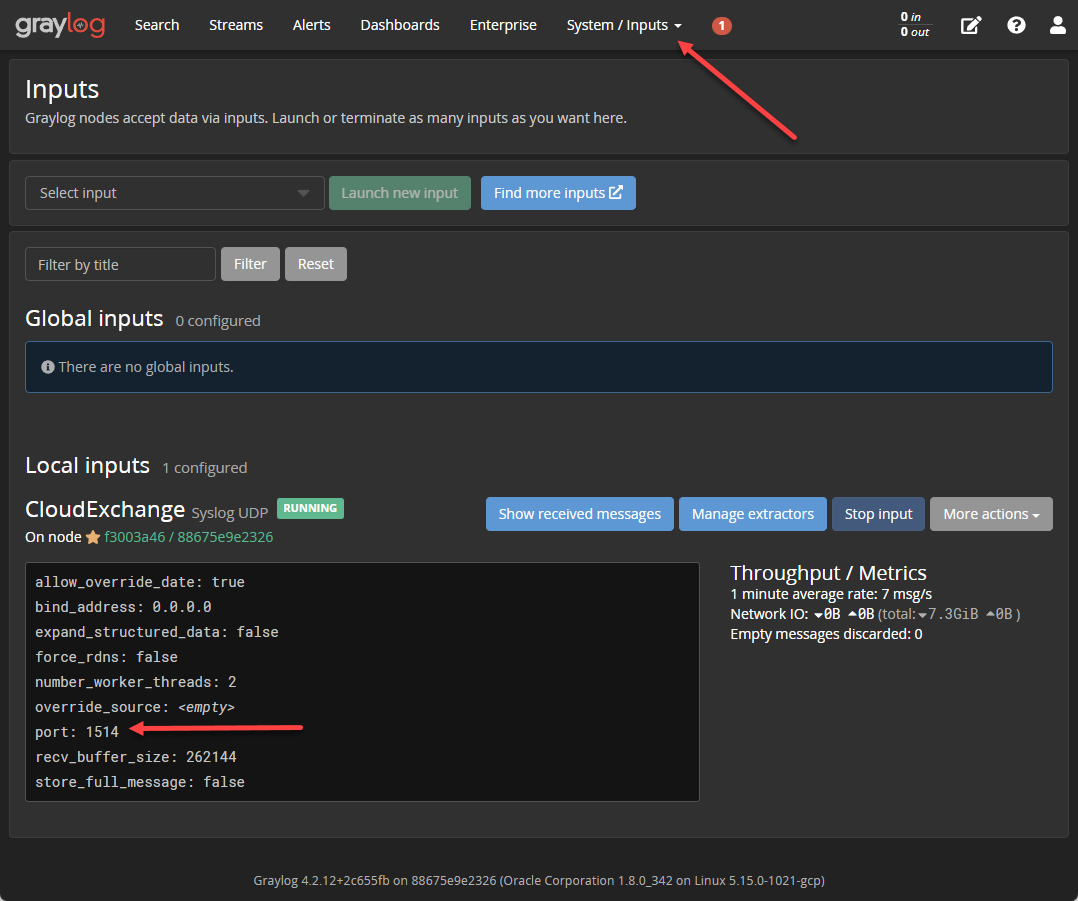
Verify url/ip and port of your Syslog server
In Graylog you can see the input port by going to System > Inputs
Netskope Cloud Exchange setup steps
Cloud Exchange Plugins
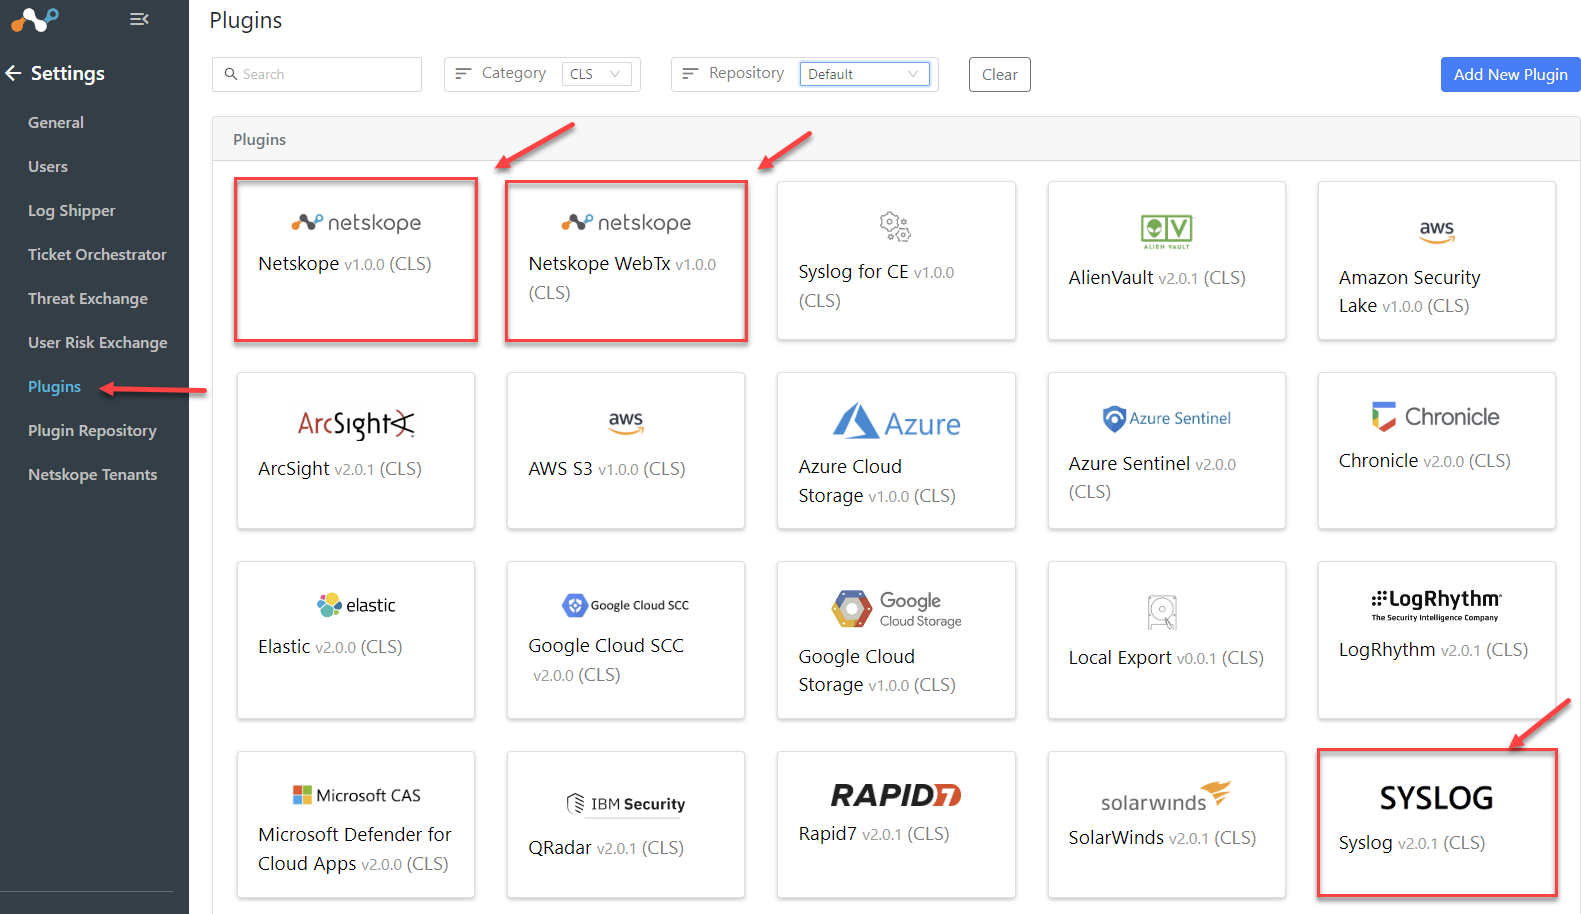
On your Netskope Cloud Exchange go to Settings > Plugins
You will need two plugins configured for this solution, sending WebTx logs is optional. The Netskope CLS plugin and the Syslog CLS plugin. I ran this test with Syslog CLS plugin version 2.0.1. If you need to update your plugins go to the Plugin Repository tab and select ‘check for updates’.
Configure Netskope CLS Plugin
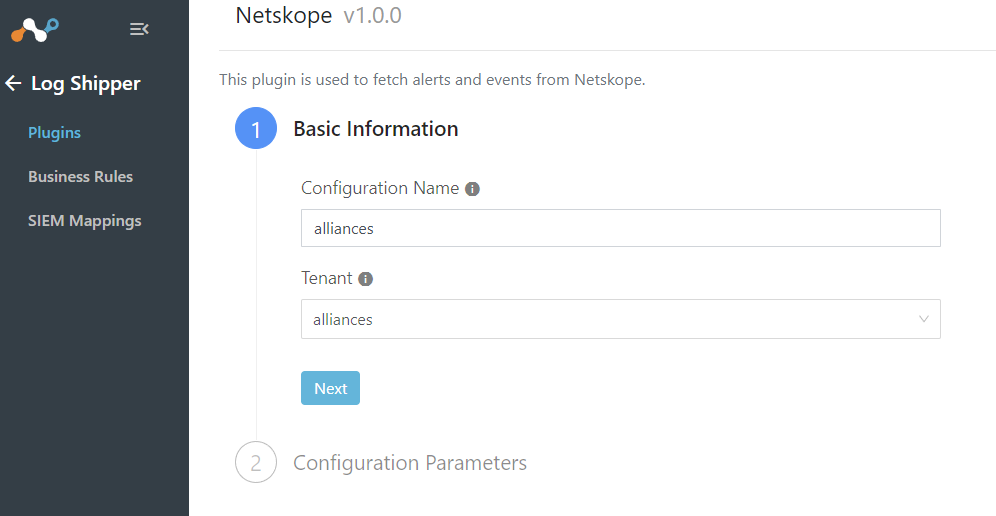
Select Netskope CLS
Name our plugin and select your Tenant
Next
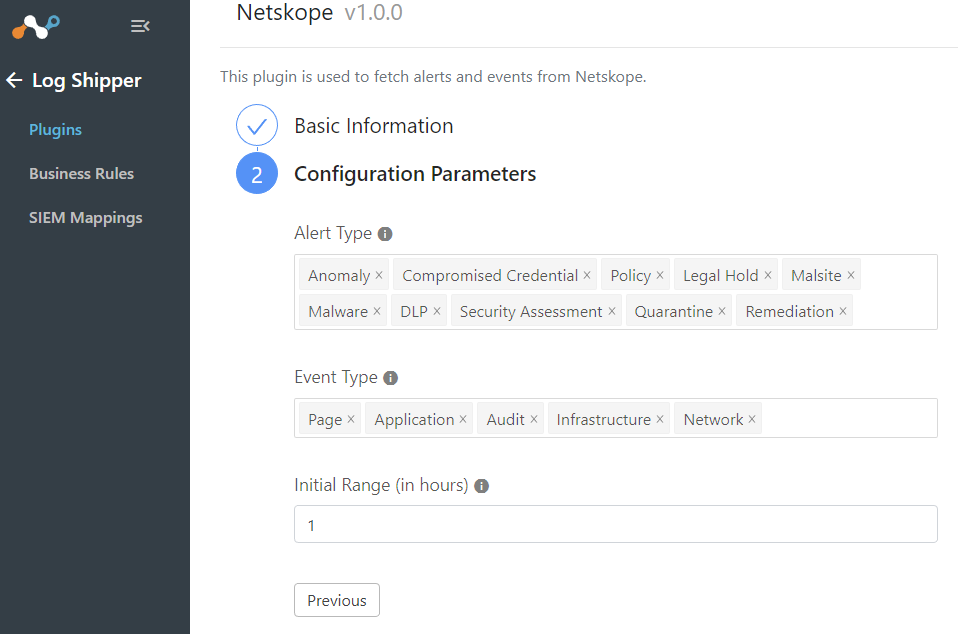
Select which Alert and Event Types you want and Initial Range. Most of the time I leave these as default.
Configure Netskope WebTx CLS Plugin Optional
WebTx logs will track every web packet your users send. This can generate a large amount of data, so it may be necessary to scale up your Cloud Exchange to handle the increased load. Additionally, you should verify that your Syslog server can handle the increased traffic. Event streaming must be enabled on your tenant to support WebTx.
https://docs.netskope.com/en/webtx-plugin-for-log-shipper.html
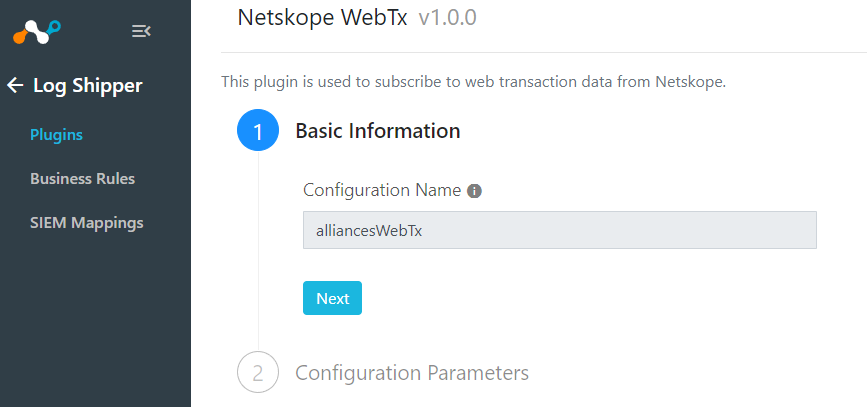
Select Netskope WebTx CLS
Name our plugin and select your Tenant
Next
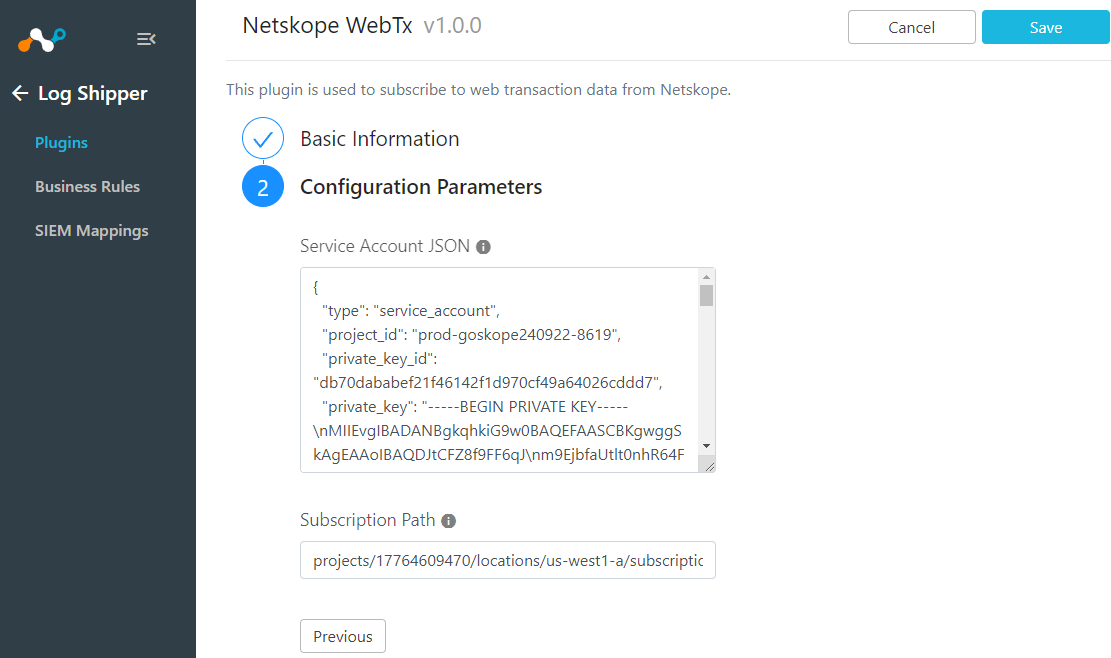
Add your Configuration Parameters which includes your Service Account JSON and Subscription Path. See below on where to find those.
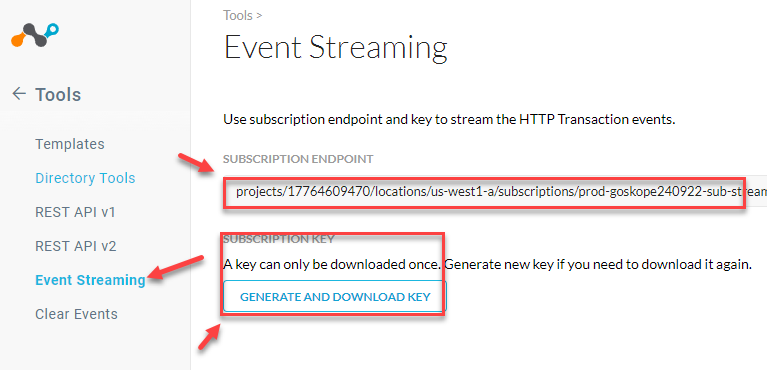
You can find the needed Event Streaming in your Netskope tenant, log into your tenant with a Tenant Admin account and go to
Settings > Tools > Event Streaming
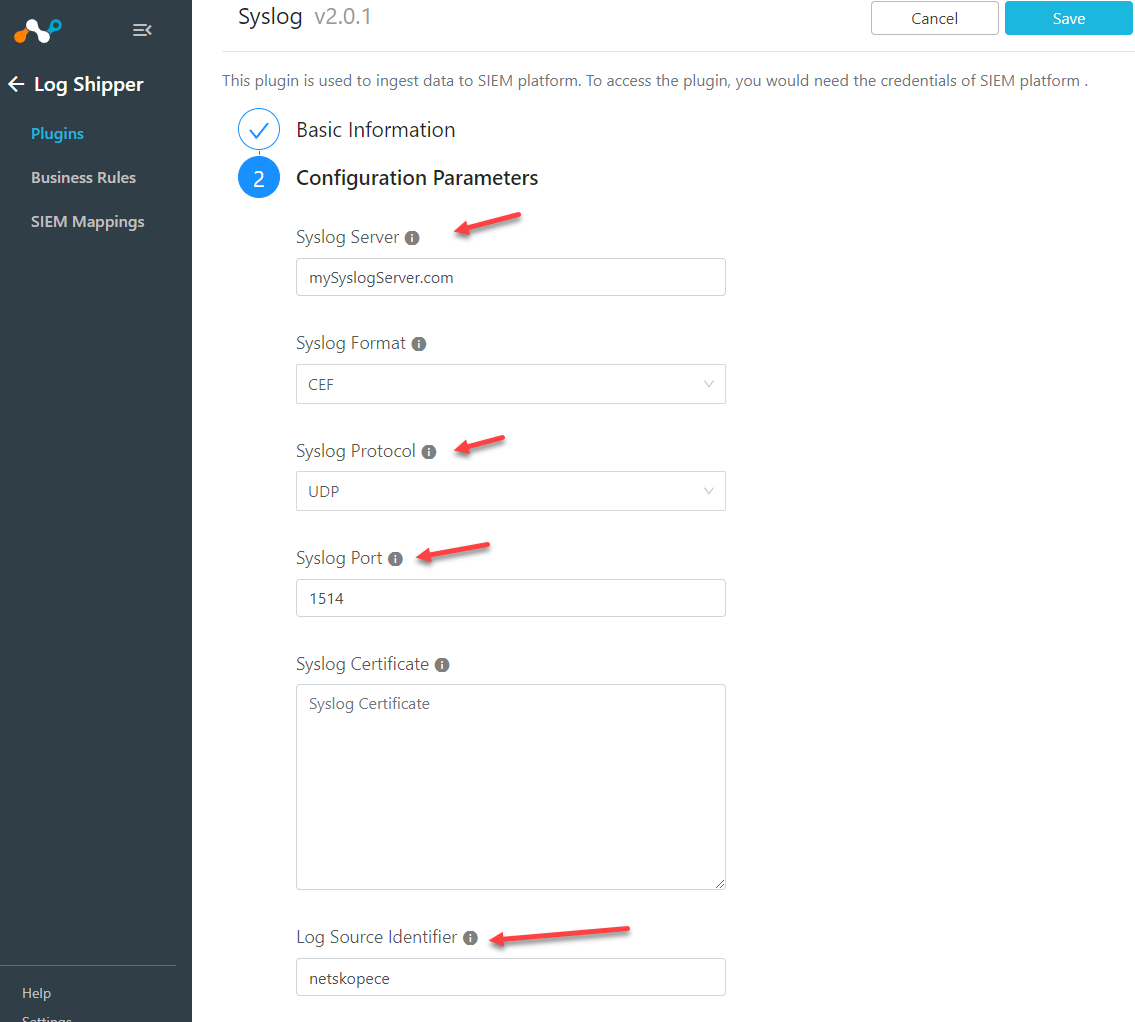
Configure Syslog CLS Plugin
From the plugin page select Syslog v2.0.1(CLS) or greater.
Give it a Configuration Name and select a Mapping
Note: The mapping file will transform the data into the format you want. Some of the names of fields may be different from other products. For example, some products call applications apps. You can use the mapping file to map the names as you would like. Here is our documentation page on it. https://docs.netskope.com/en/log-shipper-syslog-mapping.html
Next

Add your Configuration Parameters
The Log Source Identifier will be sent in the message and is a good keyword to filter with on your Syslog server.
Save
Create a Cloud Exchange Business Rule
On your Cloud Exchange interface go to Log Shipper > Business Rules
A pre-configured rule is here for sending all events and alerts
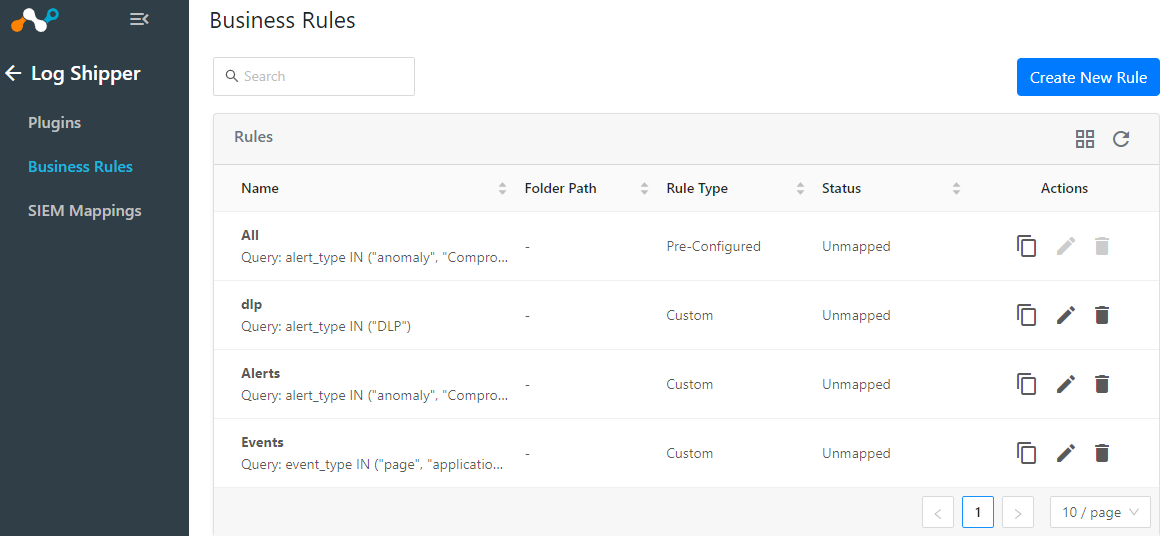
If you would like to create your own select Create New Rule
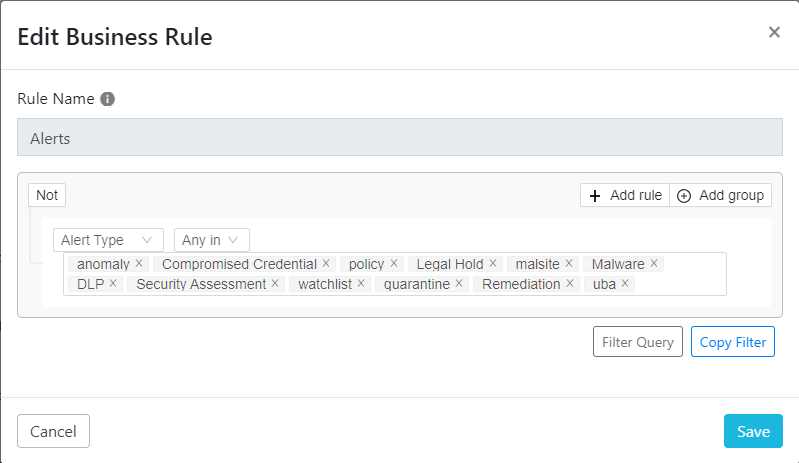
Here is an example of one that will match all Alerts coming from Netskope.
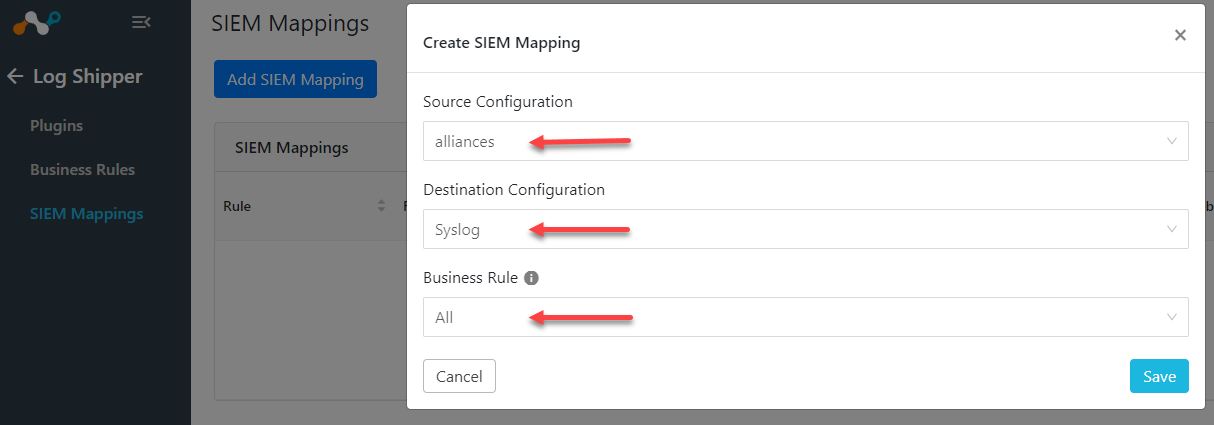
Add a SIEM Mapping
Log Shipper > SIEM Mappings
The SIEM mapping will control which source you are sending to which destination and include the business rule as a filter. You will need a new SIEM mapping rule for each source and/or business rule you want to apply.
If you are sending WebTx logs the only business rule that can be used is All.
Save once you are done.
Verify Integration
At this point you should have Cloud Exchange plugins sending Alerts, Events, and maybe WebTx logs to your Syslog server.
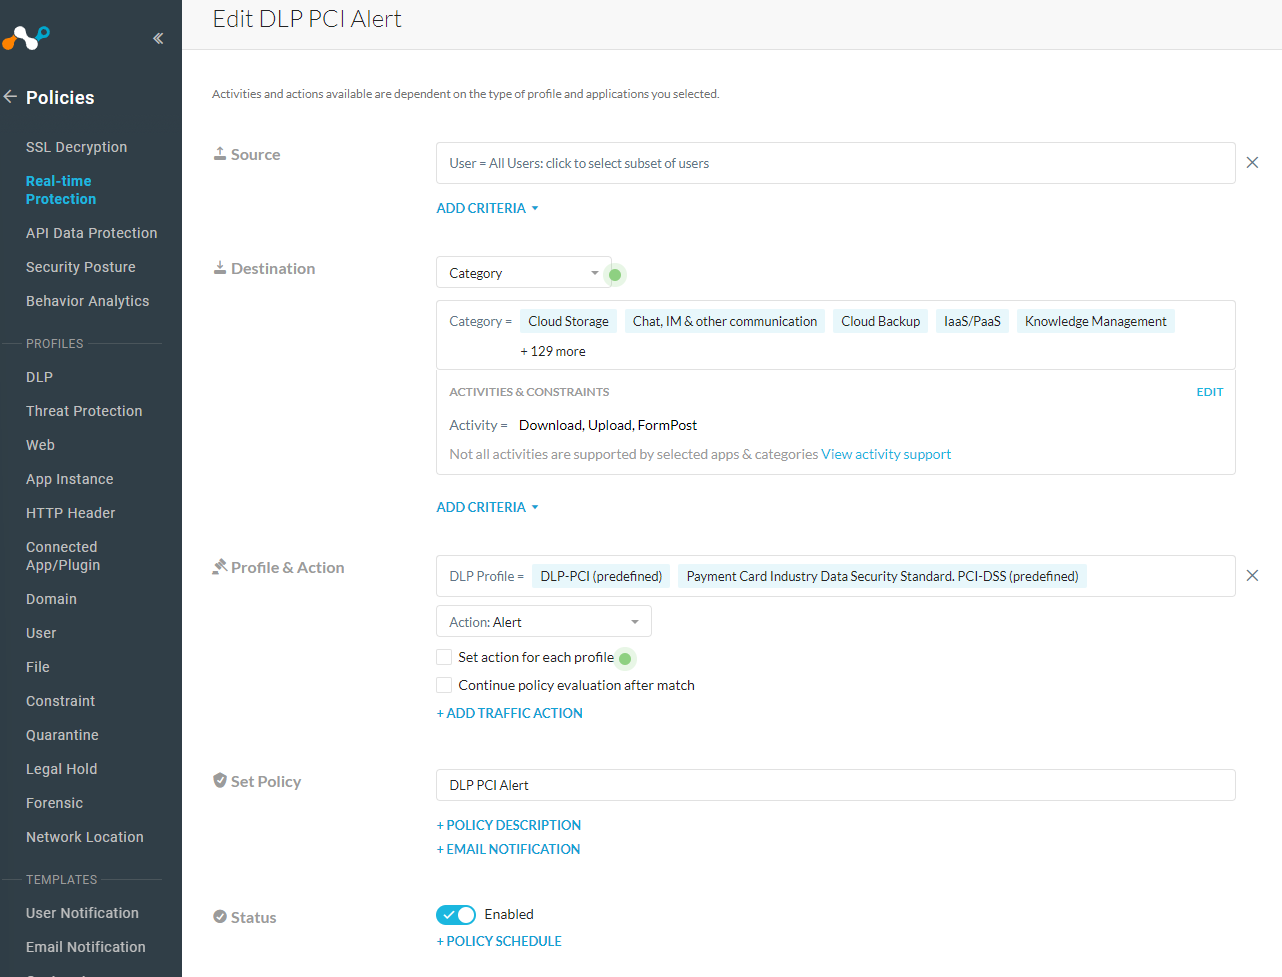
To test this in my environment, I created a Real-time Protection policy to trigger an Alert if I upload credit card information to a cloud storage account. I used the action of Alert and left it for all users but you could also tie it to just your test use by including your test username as the Source. This is what my policy looks like.
Real-time Protection Policy
Source - <test client username>
Destination - Category - All Categories
Activities & Constraints - Download, Upload
Profile & Action - Action:Alert
Set Policy - Name your policy
Upload test credit card data to cloud storage.
Note: if you need test credit card data you can find it by searching for “dlp test credit card file” on the internet.
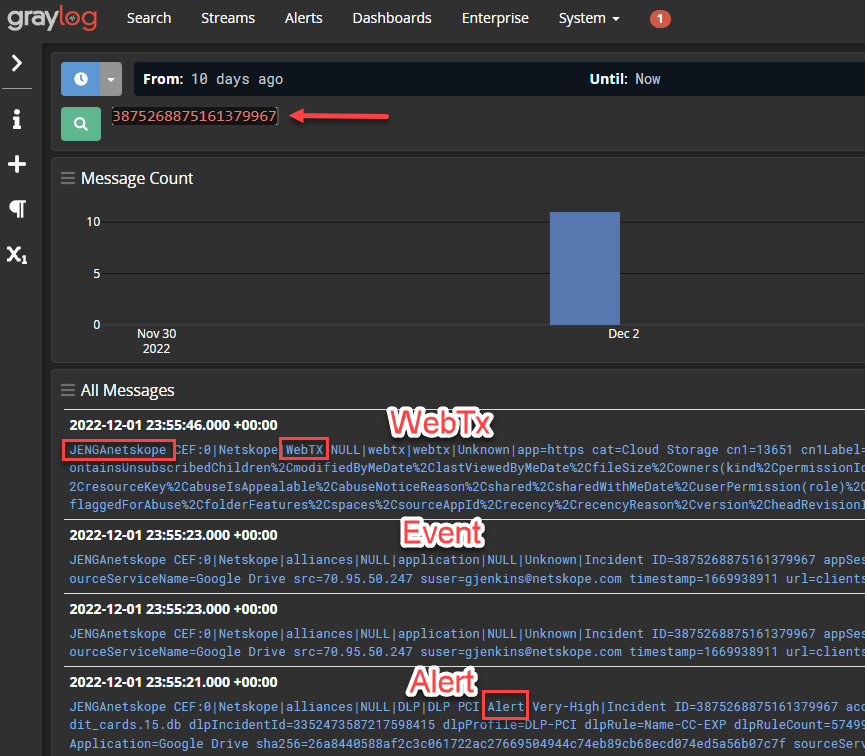
Verify that you are seeing the Alerts in SkopeIT.
Copy the Incident Id and search for it on your Syslog server.
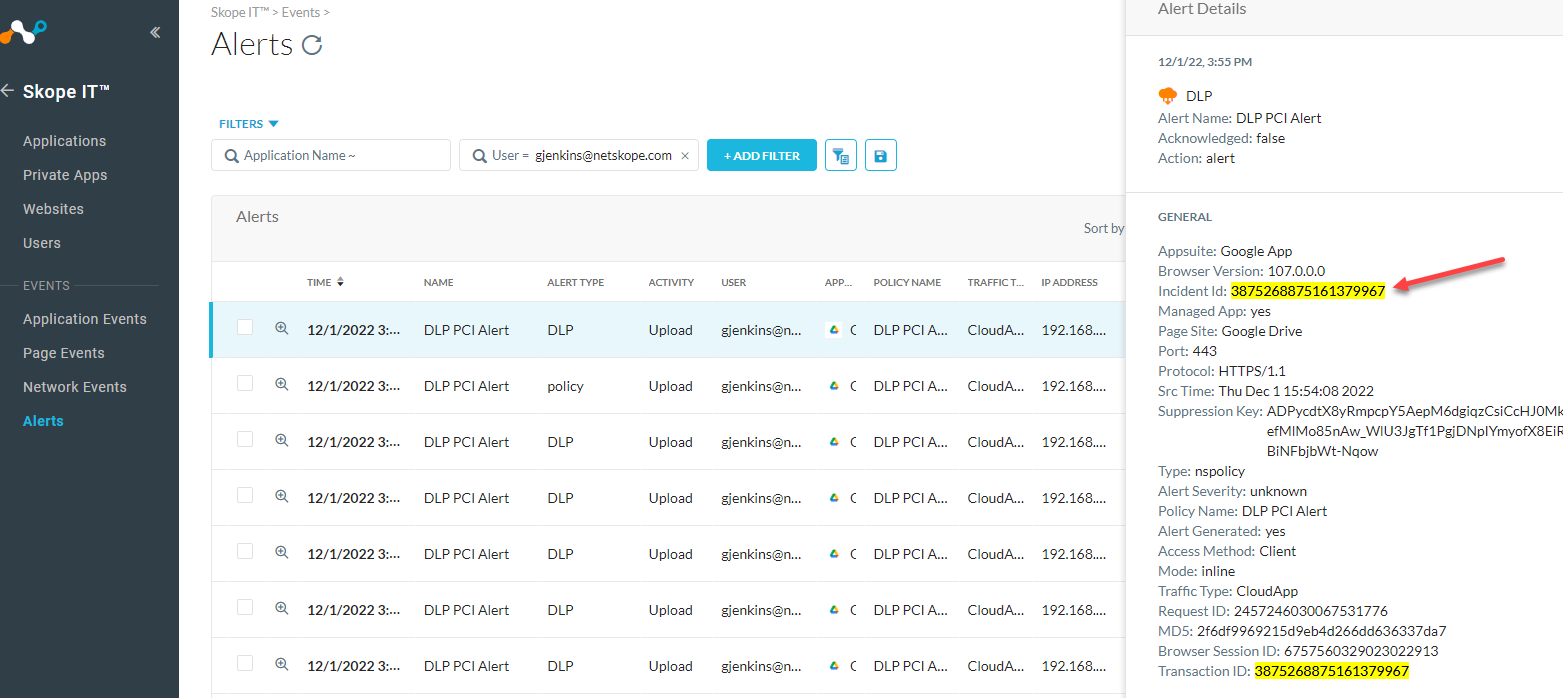
Checking Syslog server
Add your Incident Id to your search field to see all records from that incident.
I had used JENGAnetskope in my Log Source Identifier of my Syslog plugin. You will see that at the beginning of each record.