


Netskope Global Technical Success (GTS)
EPDLP - Content Control USB Storage Devices
Netskope Cloud Version - 113
Objective
Netskope's current abilities to apply content to USB storage devices
Prerequisite
Netskope Endpoint DLP license is required
Context
In this knowledge base article, we'll explore Netskope's capabilities regarding Endpoint DLP Content control. We'll go through a use case to provide insights into its capabilities.
Do You Know?
Endpoint DLP allows you to manage and govern endpoints to prevent sensitive content from being transferred to USB storage devices or printers. You can:
- Govern endpoint devices by creating device control, content control, and file origin policies.
- Monitor endpoint activities and block or trigger alerts when users insert or remove USB storage devices, transfer sensitive files to USB storage devices, set up and configure printers, and print documents.
- Respond to incidents and alert the user of their actions.
- Coach the user through custom notification messages by allowing them to justify their actions or cancel them.
Use Case 1 Block all Device Storage Accees
Step 1: Go to Settings >> Security Cloud Platform >> Client Configuration >> Select The client configuration where you want to enable Endpoint DLP >> go to Endpoint DLP>> Check the Endpoint DLP Checkbox and Save.
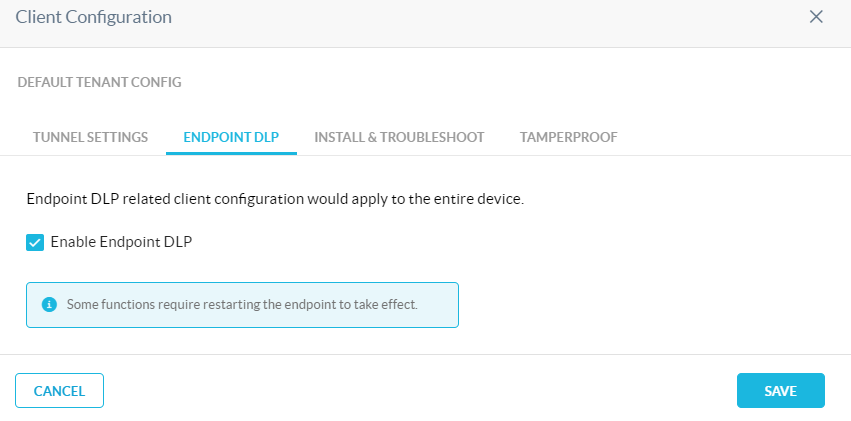
Note: make sure to restart the device after the EPDLP activation.
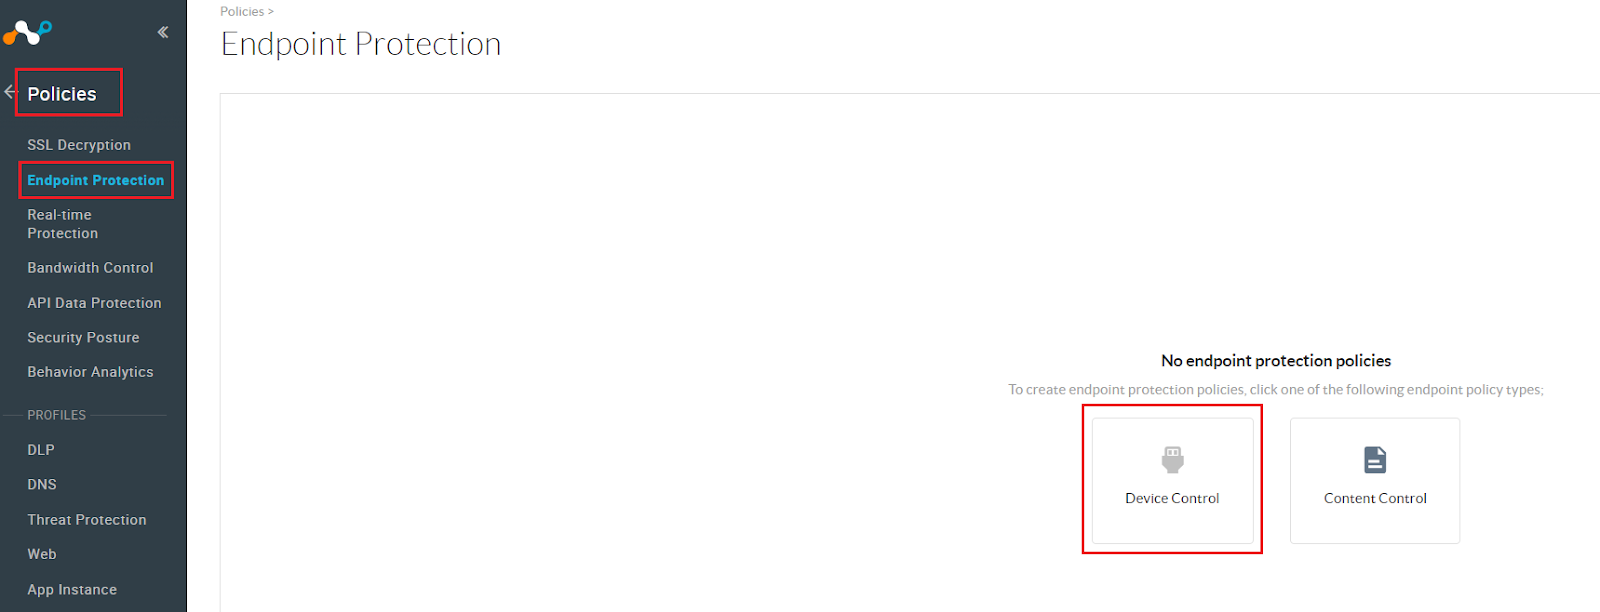
Step 2: Go to policies >> Endpoint Protection >> Select Device Control
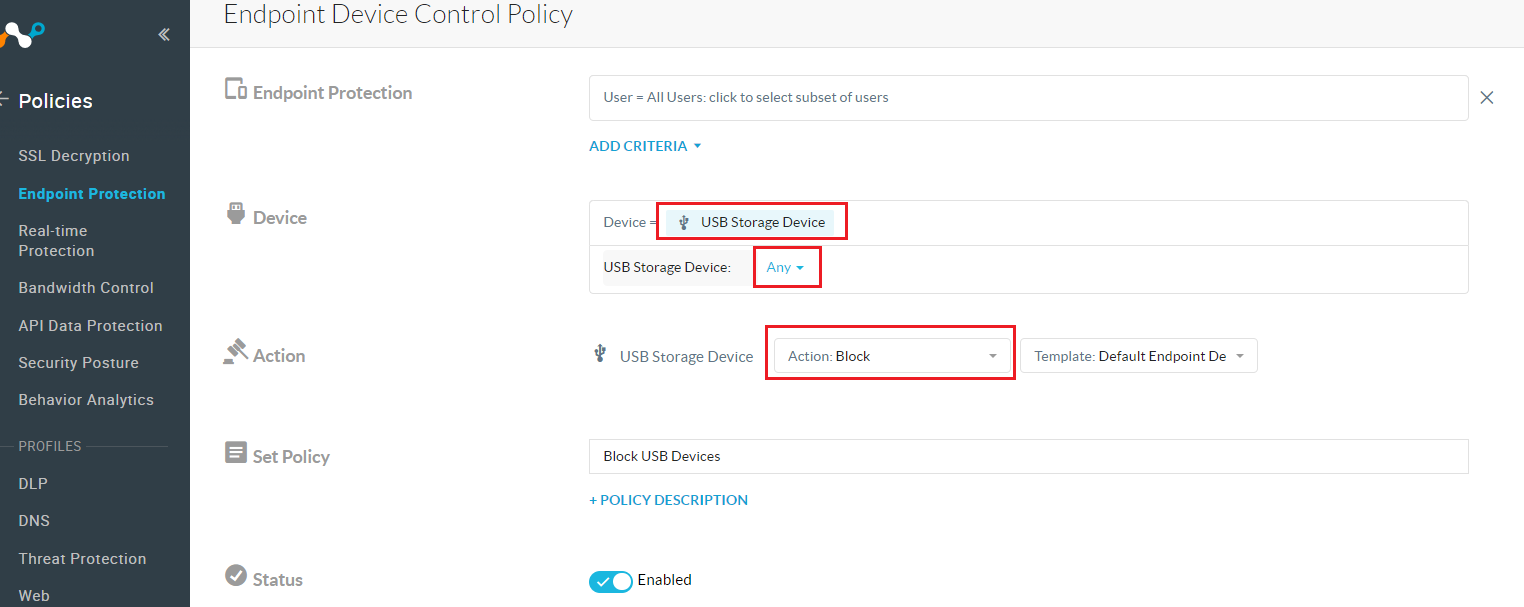
On Devices, select USB Storage Devices, On USB Storage Devices select Any and select action Block click Save.

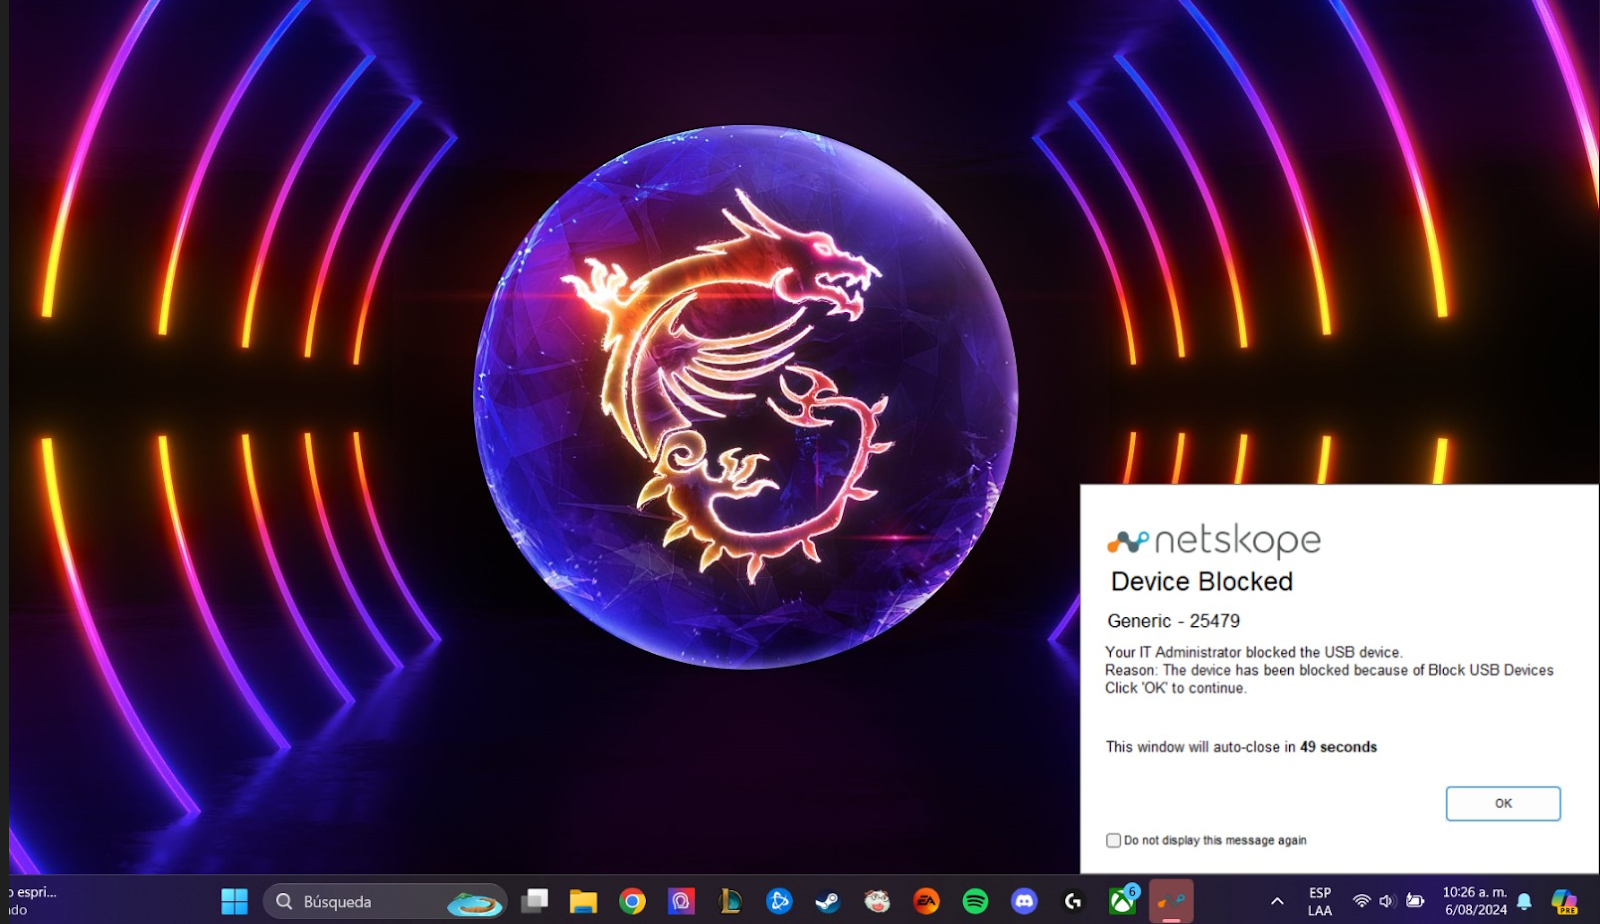
Verification
Insert any USB storage device and a blocking message will appear.
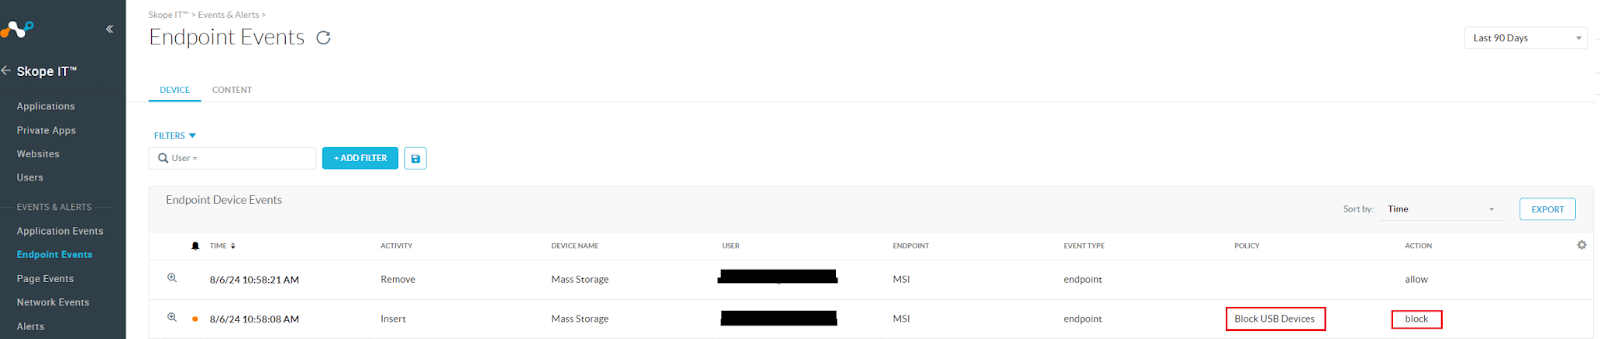
Go to SkopeIT >> Endpoint Events and confirm the block is logged.
How can I confirm the block action in NSlogs?
A: After downloading the NS logs, you will notice a file named “epdlp-diagnostics.zip.log.” Please remove the “.log” part, and the file will now appear as a zip file. Once you unzip the file, you will find a log folder inside, and the logs are located in the “epdlp_sys_log.txt” file.
Sample
2024/08/22 15:17:04.781 PolicyWorker.cpp:1456 7816 24792 [info] PolicyWorker 7: evaluated event 60ceb07f-3a1b-4b9d-880b-a4ec433b8a3f with result "match" with action "block" for rule "USB storage Block"

Use Case 2 Make Read-Only
Follow Use Case 1 Step 1 and Step 2 but on step 2 change the USB storage device Action to Make Read-Only
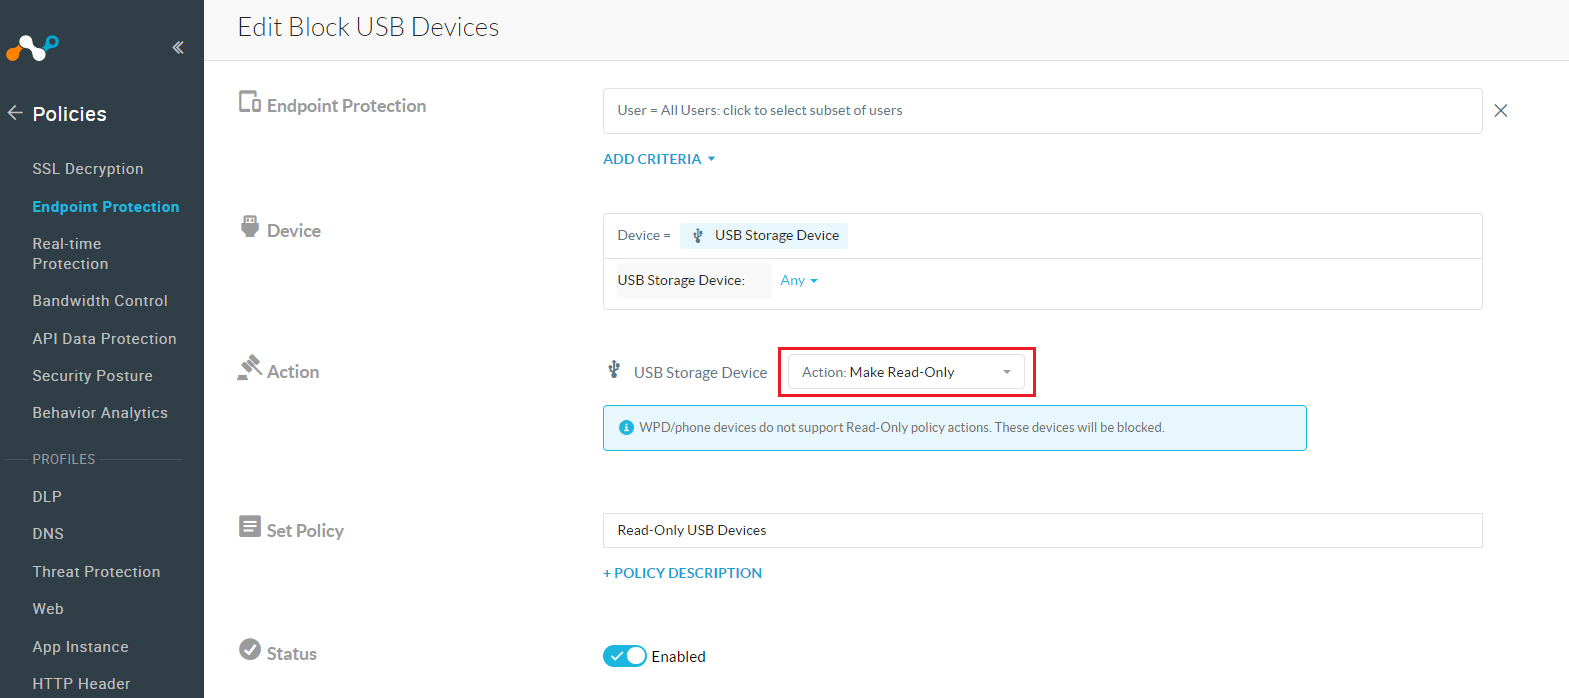
Note: WPD/phone devices do not support Read-Only policy actions. These devices will be blocked.
Verification
Go to SkopeIT >> Endpoint Events and confirm the Read only events are logged.

Note: Read Only prevents modify the USB content or add content to the USB, Its allowed extract from content from the USB to your device.
How can I confirm the block action in NSlogs?
A: After downloading the NS logs, you will notice a file named “epdlp-diagnostics.zip.log.” Please remove the “.log” part, and the file will now appear as a zip file. Once you unzip the file, you will find a log folder inside, and the logs are located in the “epdlp_sys_log.txt” file.
Sample
2024/08/22 16:49:44.429 PolicyWorker.cpp:1456 7460 11716 [info] PolicyWorker 0: evaluated event a289ce88-6911-4984-93f8-ae07babad753 with result "match" with action "readonly" for rule "USB storage Make-Read-Only"

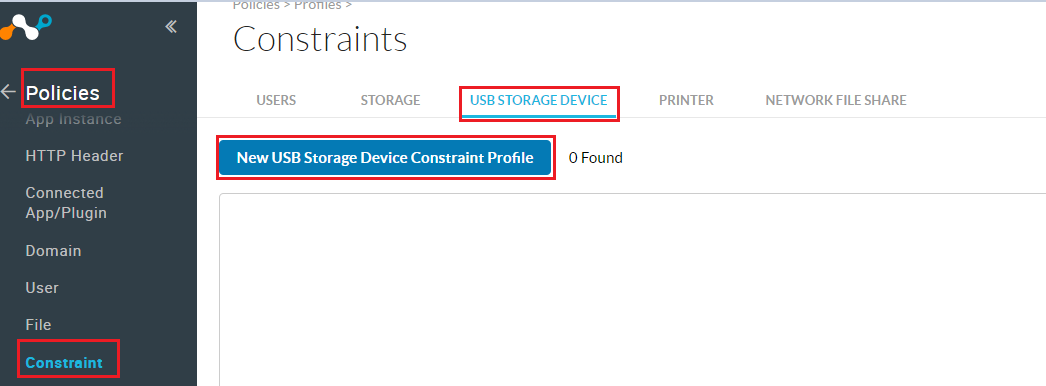
Constraints
In the Netskope UI, go to Policies > Profiles > Constraint and select the USB Device tab >> In the USB Storage Device tab, click New Device Constraint Profile
In the New USB Device Constraint Profile window, enter a profile name.
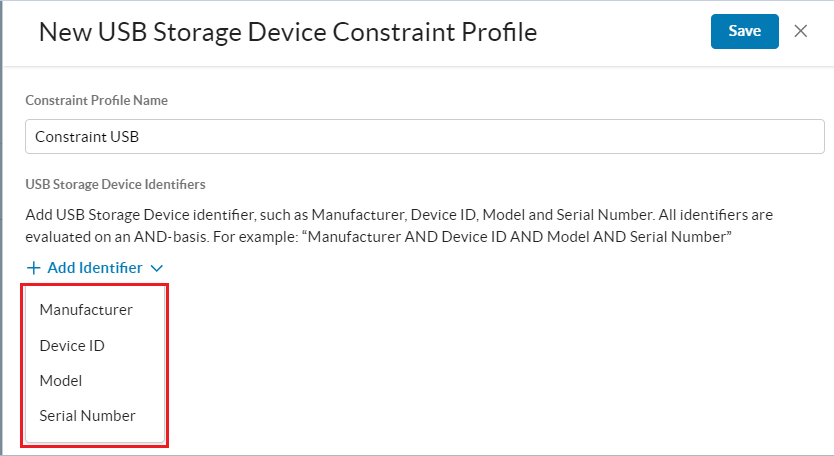
Provide the list of USB storage device manufacturers, IDs, models, and serial numbers. Select each tab and enter the values or upload a list as a CSV file. You can upload a maximum file size of 6 MB in each tab. Ensure the following:
Manufacturer and Model are partial matches. For example, enter “Sandisk” as the manufacturer to match USB device names such as “Sandisk”, “ Sandisk USB”, “Sandisk Electronics, INC”, etc.
The ID must be in the format idVendor+idProductiSerialNumber.
Serial_Number and ID are exact match fields.
Note: Device Control, policies are prioritized first, followed by Content Control. For example, when it comes to USB devices, if Device Control determines that a device is not allowed on an endpoint, it will block the device. This means the filesystem is never mounted, and the user has no opportunity to copy files to the device, effectively preventing any data transfer.
Terms and Conditions
- All documented information undergoes testing and verification to ensure accuracy.
- In the future, it is possible that the application's functionality may be altered by the vendor. If any such changes are brought to our attention, we will promptly update the documentation to reflect them.
Notes
- This article is authored by Netskope Global Technical Success (GTS).
- For any further inquiries related to this article, please contact Netskope GTS by submitting a support case with 'Case Type – How To Questions'.


