
Why control access based on versions?
In recent times, it’s well known that there are multiple vulnerabilities cropping up every single day for different applications and operating systems. Applications and operating systems creators are trying their best continuously to patch these vulnerabilities with newer and updated versions of their softwares. In an enterprise defensive setup, making sure that all applications and operating systems are up to date has become more important than ever. The two main entities which need to be monitored for updates aggressively should be Browsers and Operating Systems as a lot of internet access for users traverses via Browsers and every user would be on a machine which has to run an Operating System.
There are several tools which help an organization to force-update their browsers and operating systems within a specific time & date. The forced-update method is an effective solution but is kind of an aggressive route as it might lead to unintentional loss of productivity and accidental deletion of unsaved work. A better passive alternative would be to restrict access to certain websites/pages for users who haven’t updated their Browsers or Operating Systems. In this post, let us discuss how one could control access to specific websites/pages based on the Browser and Operating System version with the help of Netskope’s Real-Time protection and HTTP Header policies.
HTTP Headers
It is evident that most of the transactions that happen through the browsers are based out of HTTP (HyperText Transfer Protocol). HTTP is used extensively for web based traffic and applications, usually for communication between a Client (Browser) and Server (Web Server). HTTP transactions are in the format of a request and response. Every request or response will have a dedicated field which passes contextual information and metadata and the field is called ‘HTTP Header’. So of the information which is transmitted via the HTTP header would be
- Method
- Path
- Accept
- Cookies
- User-Agent
- and much more.
The Netskope cloud proxy is able to intercept and interpret these headers and allows the admins to create HTTP Header profiles which can be used to create real-time policies based on the HTTP Headers fields present in the web transaction.
Identify HTTP Headers in a request
The admin should first understand the header fields which are being sent from a Browser to a specific webpage. There are certain fields which are sent for all the pages and certain fields which are sent only for specific pages. The best method to identify the current fields sent to a particular webpage is to inspect the network traffic. It must be noted that different browsers send out different header fields, so the output would differ between browsers as well. In the below example, we’ll discuss on how to identify the header fields sent for any webpage
- Go to the required webpage and wait till it finishes loading
- Right click anywhere on the page and navigate to ‘Inspect’
- In the newly opened section, go to the ‘Network’ tab
- Now refresh the webpage and you could see the opened section populating with the requests
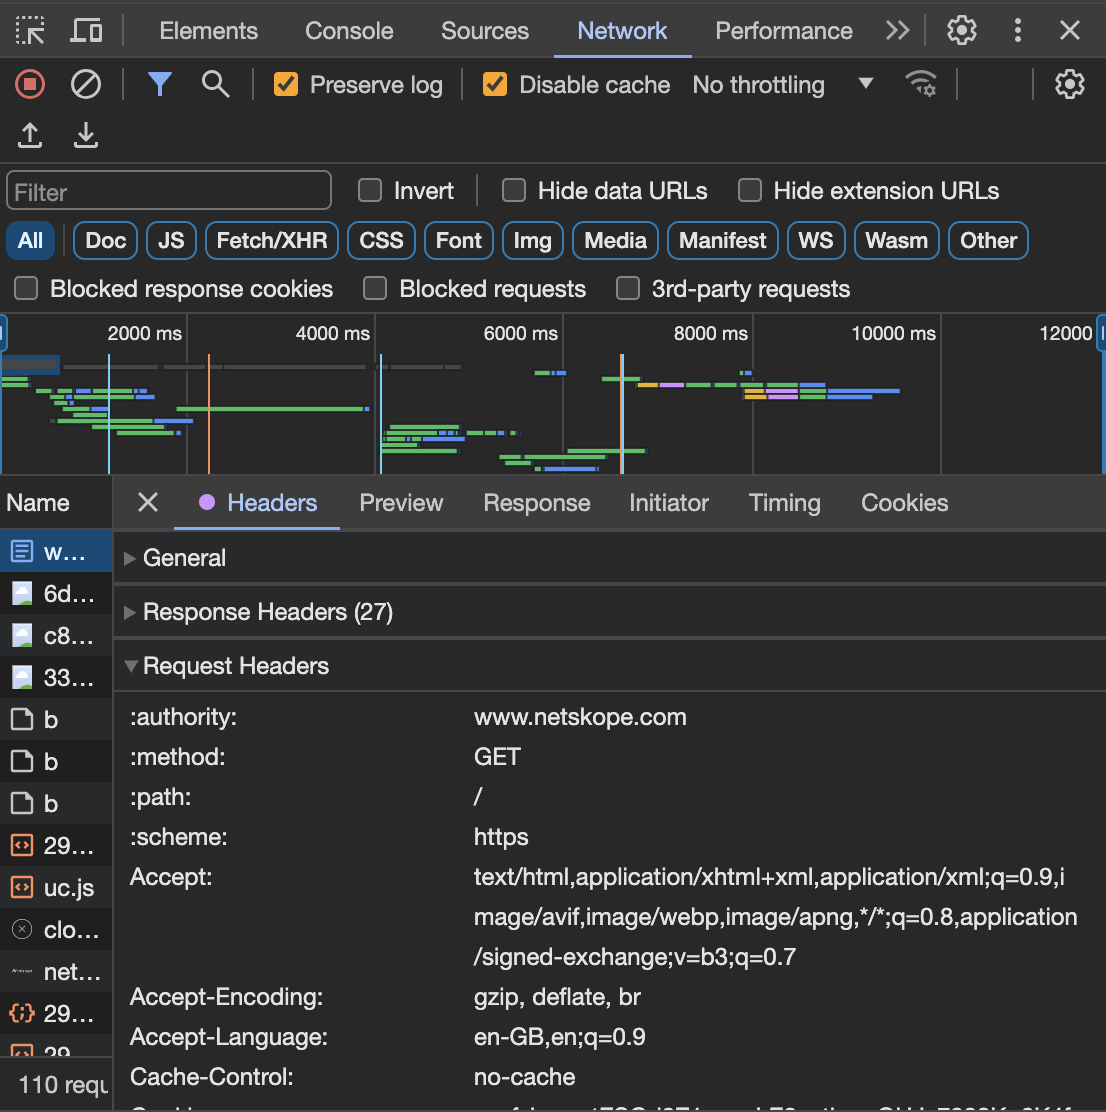
- Identify the main request for the page which usually has the highest size and is of the type ‘document’
- Scroll down in the request to find the ‘Request Headers’ section and the fields populated. Attaching screenshot below for reference.
Access Control using User-Agent field
Out of the many HTTP Header fields, the ‘User-Agent’ field should be present across all browsers and sent to all the webpages. An example of the User-Agent field is attached below for reference.

The User-Agent field contains information about your Operating System, Browser version, the webkit version and general Mozilla token. The biggest advantage of using this field is that it would be present on all browsers and for all web pages. The disadvantage is that it does only provide the major version number of the Browser and vague information about the operating system.
To create a policy in the Netskope tenant which checks the information from the ‘User-Agent’ field to check if Chrome is on version 120, follow the below steps
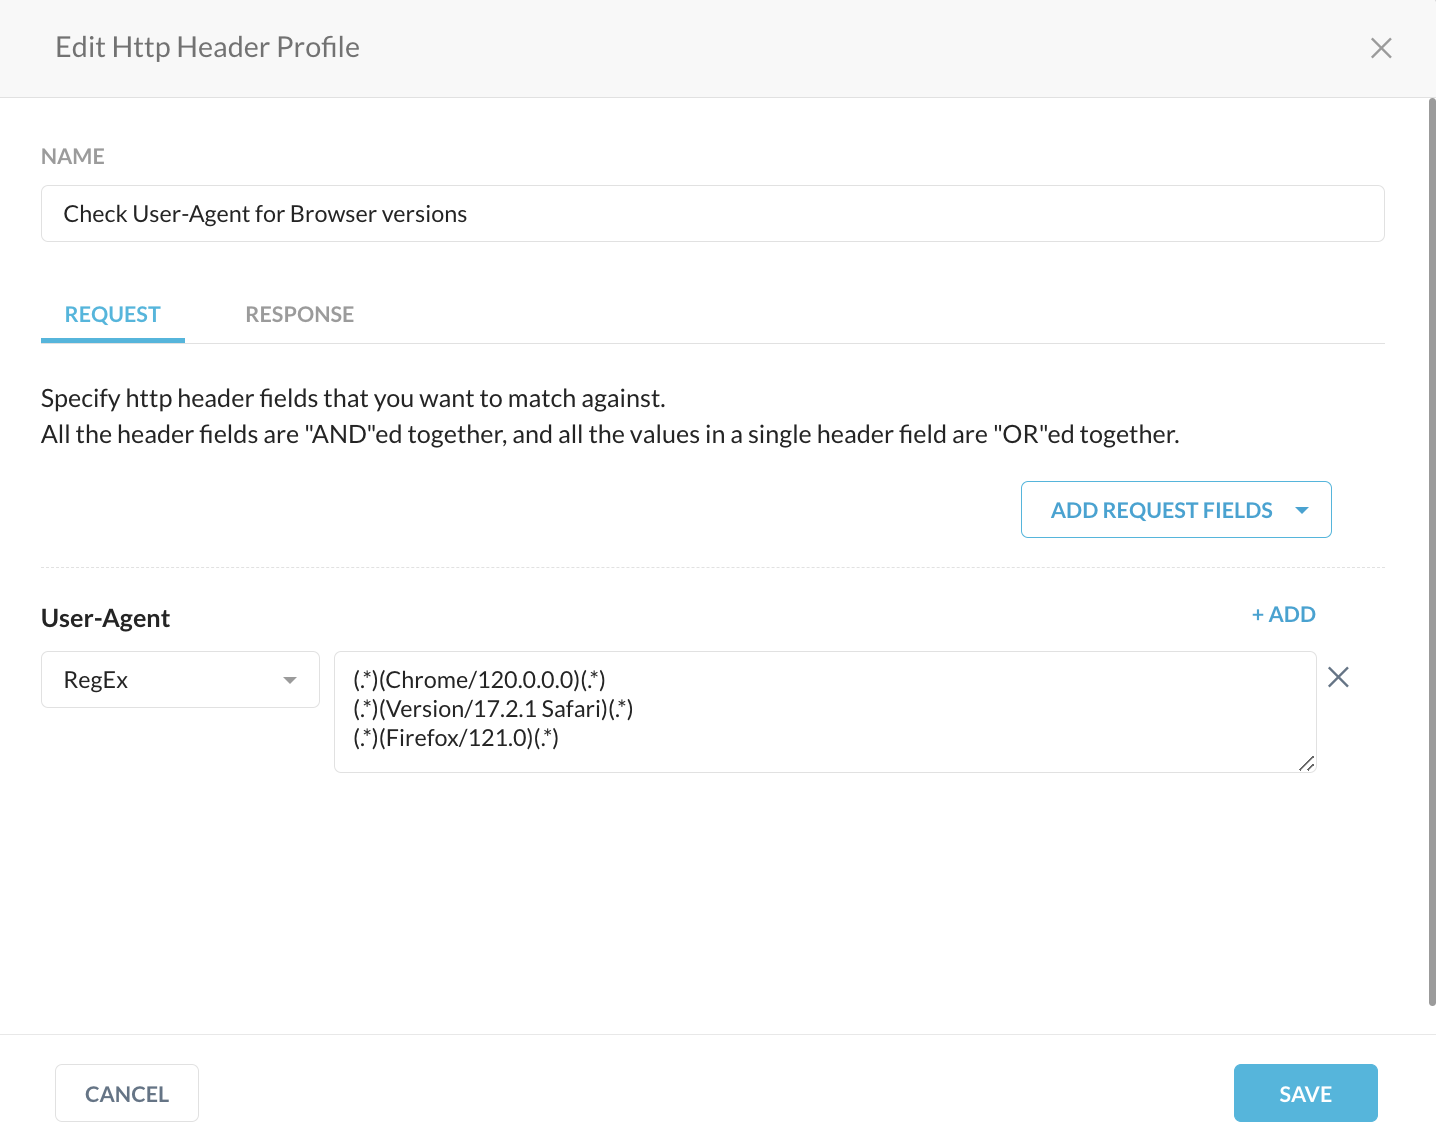
- Create a HTTP Header Profile by going to Home → Policies → Profiles → HTTP Header → New HTTP Header Profile
- Click on ‘Add Request Field’ and navigate to ‘User-Agent’
- You could use a regex or an exact match string to identify the content of the User-Agent field. An example to identify specific Chrome 120.0.0.0, Safari 17.2.1 and Firefox 121.0 versions is attached below in the screenshot.
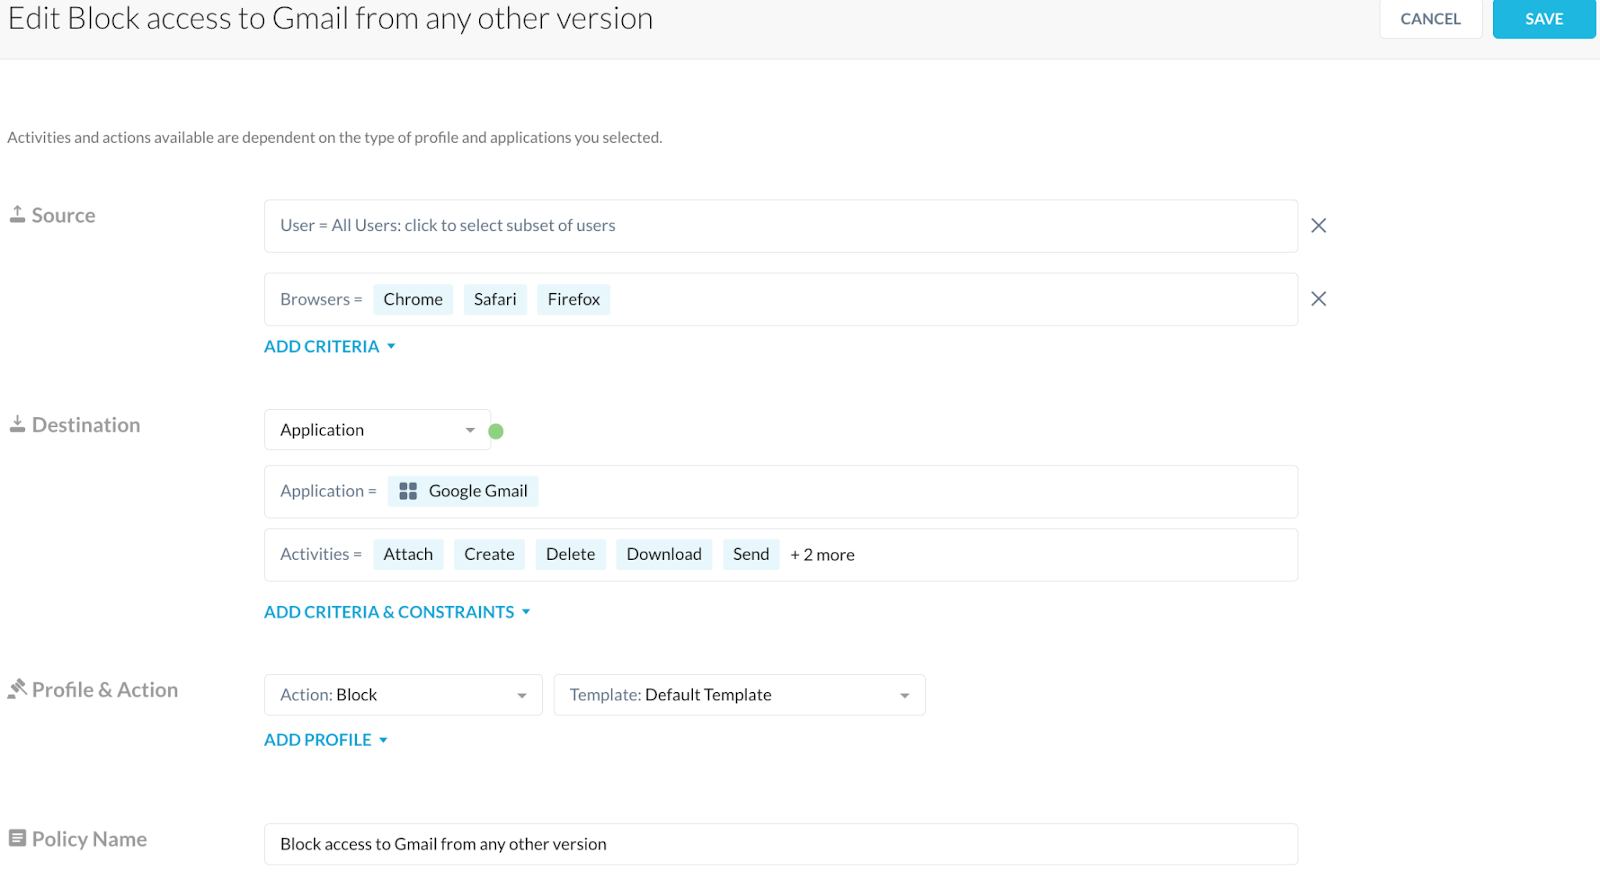
- Save the profile and navigate to Policies → Real-Time Protection → New Policy → [Select the type]
- Make sure to select all the browsers to be evaluated against this policy to be allowed for the specific versions.
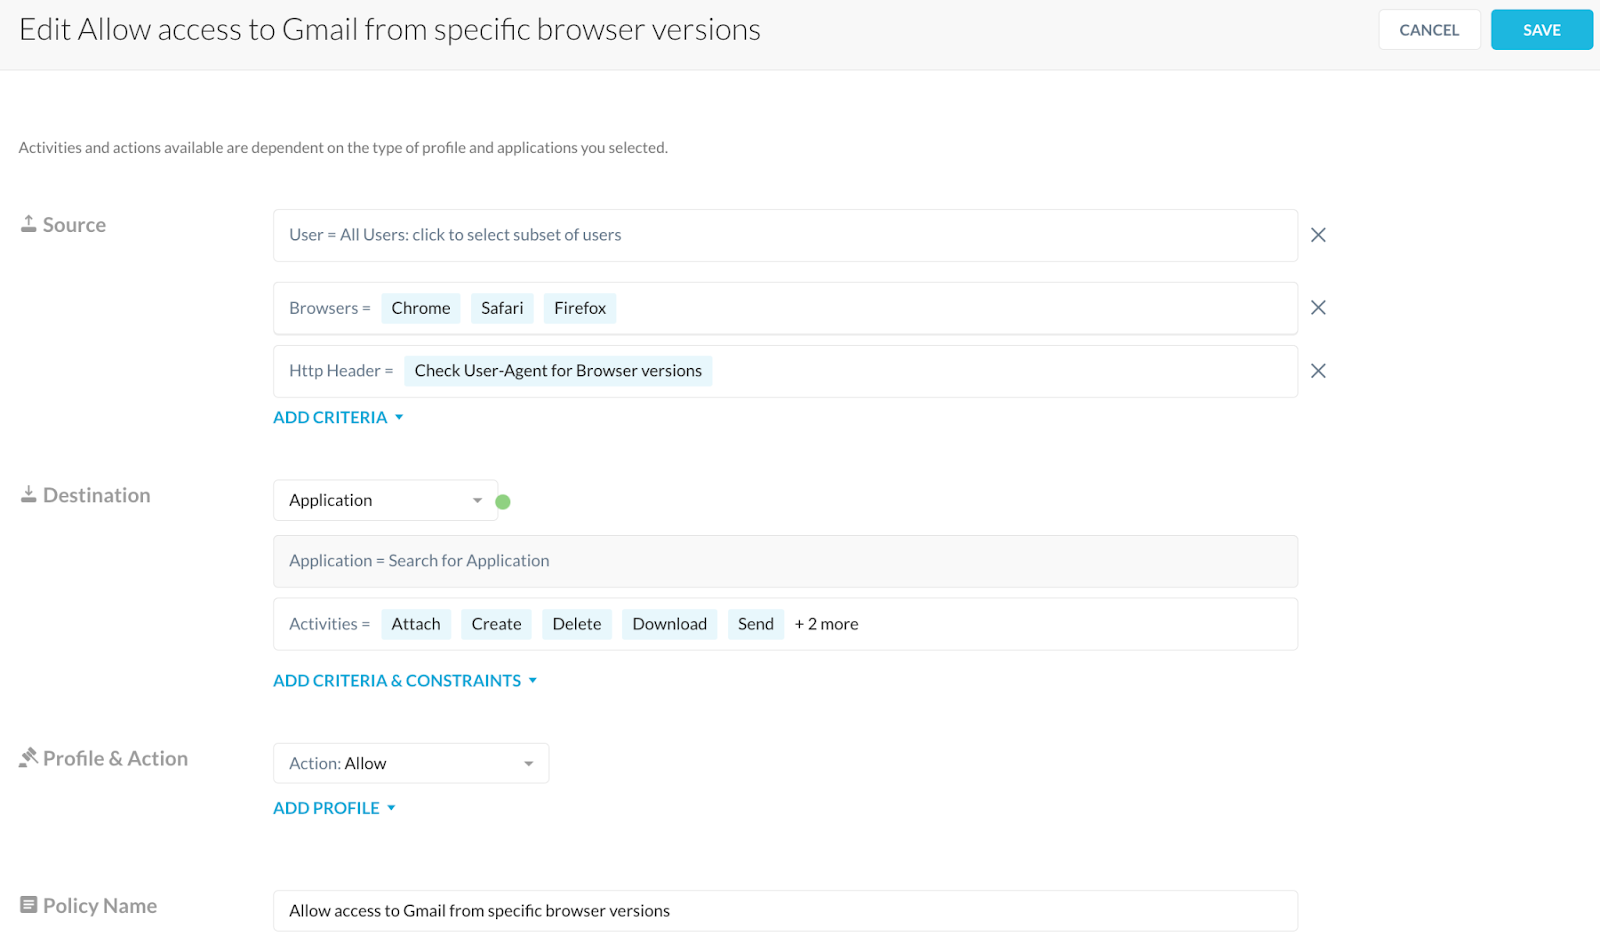
- Save the policy and create a ‘Block’ policy for the denied application for the same Browsers just below the allow policy, this will ensure all other versions of the browsers are blocked from visiting the application.
- Save the policy and apply both the changes.
The above mentioned method can be used for any number of browsers and any application to deny access based on the version of the browser or the operating system configuration. The action taken need not be ‘block’, but also could be a ‘user alert’ pop-up which is displayed every time when a user visits a particular website.
Access Control using other fields [Sec-Ch-Ua-Full-Version]
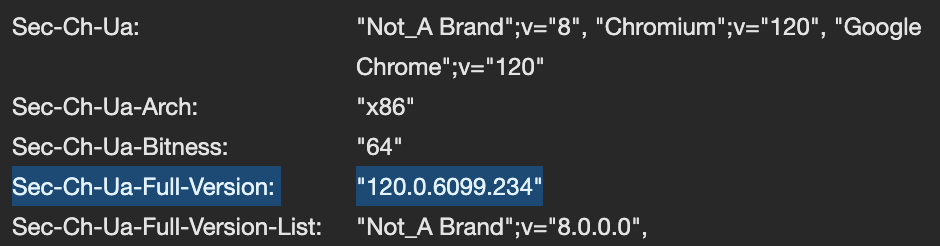
Let us now discuss how we could use other headers which are not available on all the websites but are available on a select few to moderate access to such websites. One such header is the Sec-Ch-Ua-Full-Version header which displays the full version of the Chrome browser and not just the major version. Major release version would be 120 but the full release version might be 120.0.6099.234 and there might be use cases where the organization would require to update their Chrome to the latest version to stay compliant and secure. To use this header, let us create a HTTP Header profile like in the previous section and in the place of ‘User-Agent’, we replace it with a custom request field and name it as ‘Sec-Ch-Ua-Full-Version’ and enter the required version and save the profile. Now a Real-Time policy could be created like discussed in the previous section with the help of this HTTP Header profile and moderate access to applications based on the version. Please note that this header field is not available in all websites, currently we could observe this being used in all of Google's websites and applications.

Access Control using other fields [Sec-Ch-Ua-Platform-Version]

Another less used header field which could be used to moderate access based on the version of the operating system would be ‘Sec-Ch-Ua-Platform-Version’. This field would display the current operating system version on which the browser is being run. Similarly like in the previous section, one could create a HTTP Header profile with a custom request field which would mention ‘Sec-Ch-Ua-Platform-Version’ and populate it with the operating system version of their choice. If multiple request fields are entered, they are ‘AND’ed with each other and entries within a single field are ‘OR’ed with each other. With the help of this profile, like in the previous two sections, one could create a Real-Time policy which moderates access to websites based on their operating system version.

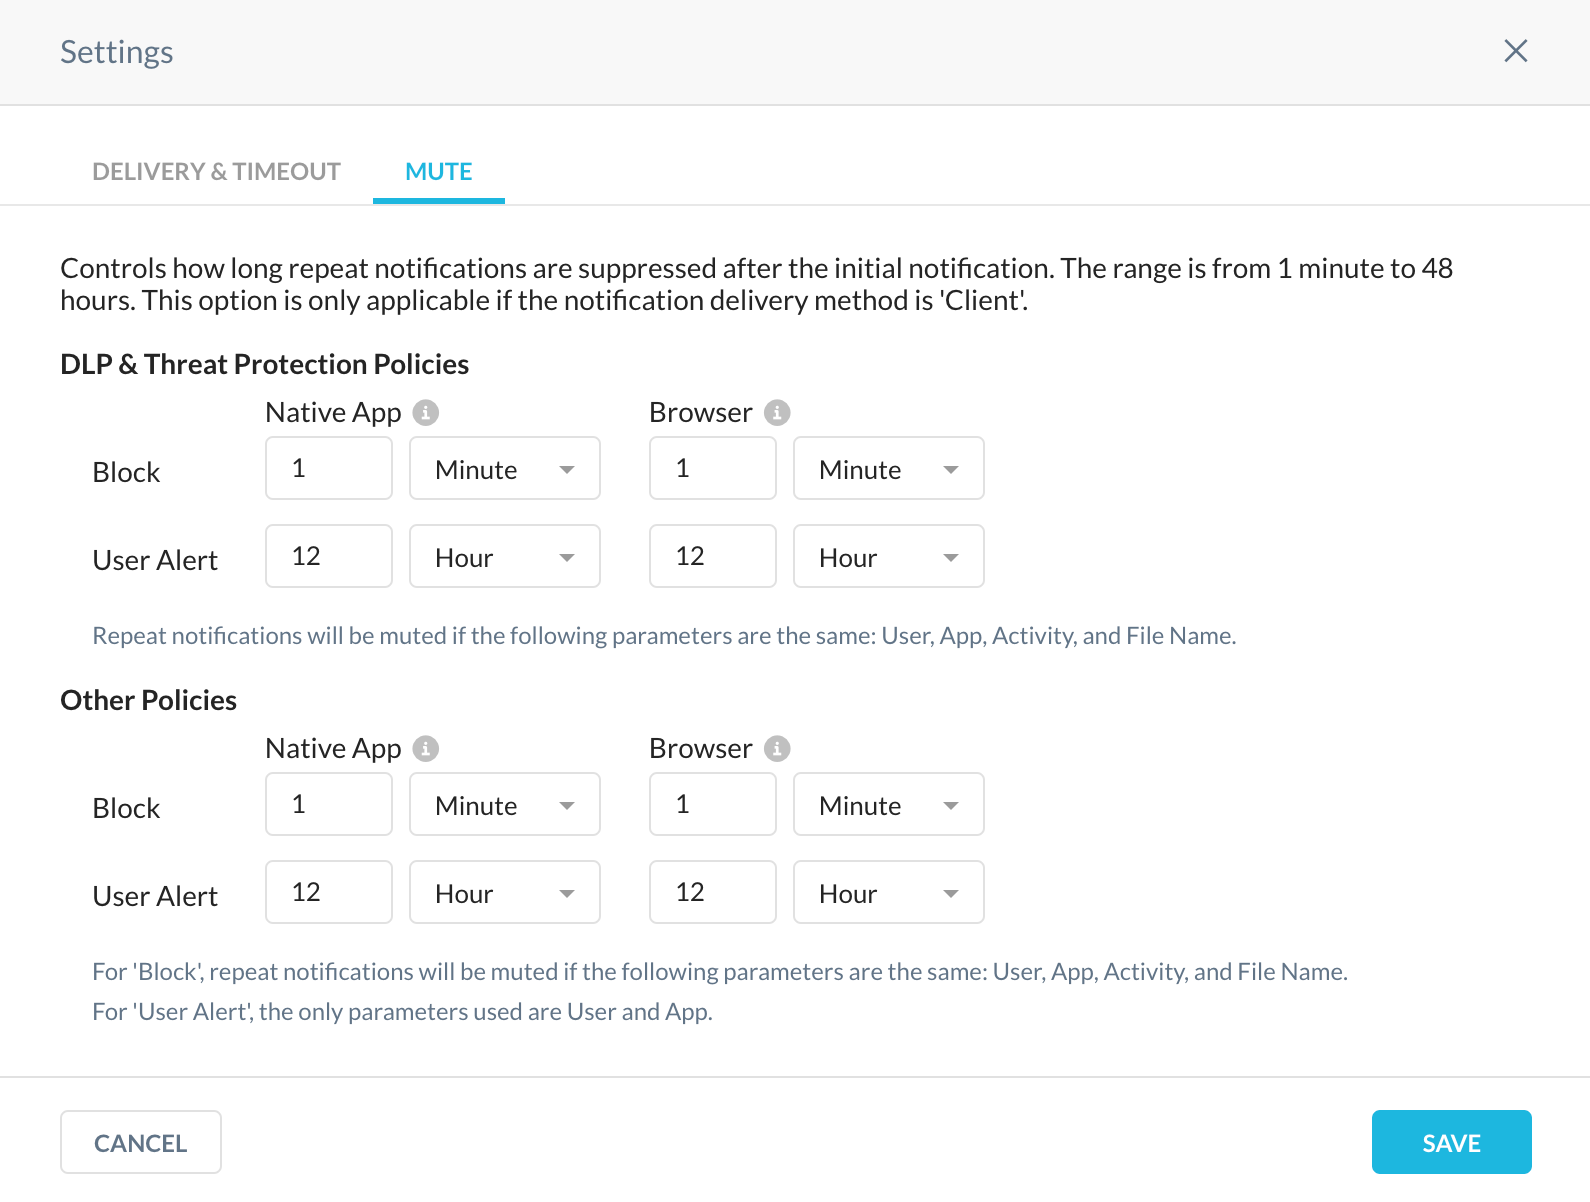
Creating User Alerts for Browsing
In case you feel that Blocking the access is aggressive, Netskope has the option to give a user alert pop-up everytime they do or visit a specific website. The users can continue with the intended activity after acknowledging the pop-up. The pop-ups can also be snoozed for a particular time until they are next displayed to the user. For example, if the user acknowledges the pop-up, it can be snoozed for 3 hours and after the set 3 hours when they visit the website, they would get the same pop-up again. To create user alerts within policies, follow the below steps:
- Navigate to Policies → Web → URL Lists → New URL List
- Add the required URLs to the URL list and save the same
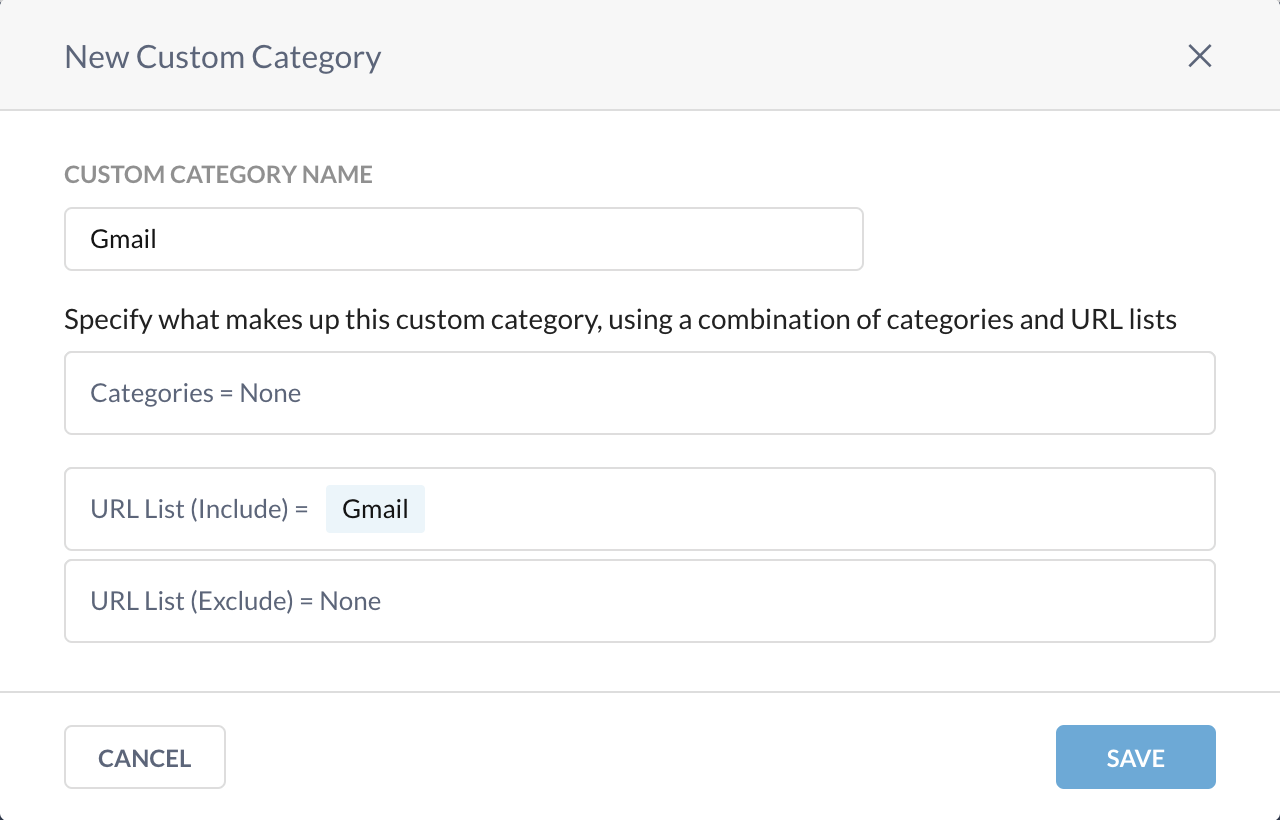
- Navigate to the ‘Custom Categories’ tab and click on ‘New Custom Category’
- Add the newly created URL list to the category with the help of ‘URL List (Include)’ section and save it.
- Now to create a policy based on this, navigate to Policies → Real-time Protection → Web Access
- In the categories section, add the newly created category, set the action below to ‘User Alert’ and select the required activities to be alerted on.
In summary, having the flexibility to allow selective access to websites based on the version of the user’s Browser or Operating System will be a really handy method in order to passively urge the users to keep their Operating Systems and Browsers updated. As mentioned earlier, the actions always need not be ‘Block’ but also could be a ‘User Alert’ pop-up which notifies the user each time they visit a website. There is no doubt that this setup would help organizations keep their Browsers and OS updated and compliant as per their security requirements.