Background
Q. How do you enforce Netskope Client adherence without impacting SAML flows after authentication?
A. Netskope Client Enforcement.
Netskope Client Enforcement is used to “enforce” the compliance of having a Netskope client enabled and connected to a tenant for accessing SaaS applications using Identity Providers (IdP) such as Okta. This includes IdP or Service Provider initiated connections, i.e. logging into Okta to access a SaaS application or logging into the SaaS application directly.
Netskope Client Enforcement should be differentiated from other methods of steering real-time traffic to the Netskope tenant for the processing of policies; policies such as Next-Generation Software Web Gateway (NG-SWG), Data Loss Prevention (DLP), Netskope Private Access (NPA), User Enhanced Behavior Analytics (UEBA), Cloud FireWall (CFW), and so on, all of which are designed to protect an organization. Netskope Client Enforcement also enables end users to protect corporate resources through compliance.
NOTE: Other methods of steering real-time traffic to Netskope may be used as well to accomplish the same goal as using the Netskope Client for Netskope Client Enforcement, i.e. Cloud Explicit Proxy. However, we are going to cover using the Netskope Client for simplicity.
Netskope Client Enforcement does not:
- Steer real-time traffic to Netskope for policy processing, i.e. Netskope Client or Reverse Proxy;
- Act as a Security Assertion Markup Language (SAML) proxy sitting between an IdP and SaaS application; and,
- Alter data flow after authentication processing in Okta and subsequent hand-off to the SaaS application.
Netskope integrates with Okta to allow an organization to enforce steering cloud application traffic to Netskope for analysis. This is accomplished through access control to the Okta tile representing a SaaS application in the IdP. Access control is met by using an Access Control List (ACL) composed of IP addresses owned by Netskope, either the shared address space utilized across tenants or IP addresses unique to each customer, a new feature offering called Egress IP.
The ACL is then applied to the SaaS application Okta tile to allow access if originating from a Netskope IP address. If the remote user is not originating from a Netskope IP address, the user will not be able to access the Okta tile, which will have a lock on it.
NOTE: The Egress IP feature is a service offering which requires an organization to reach out to their Customer Experience team or reseller to purchase.
Practical Application
Use Case
We are restricting access to SaaS applications regardless of IdP or SaaS initiated authentication. We want to limit access to those resources originating from specific IP addresses which are part of the Egress IP feature mentioned earlier. Egress IP addresses are typically two IP addresses per dataplane; and, of this writing there are 63 dataplanes which is 126 unique IP addresses.
Prerequisites
There are two prerequisites for Netskope Client Enforcement.
- Users provisioned in the tenant.
- Netskope Client installed on the user's machine.
Configuration
High-Level Steps
- Define a SAML 2.0 Application in Okta
- Enable Netskope Client Enforcement
- Define a Sign-On Policy per SaaS Application
- Edit Download Templates
Define a SAML 2.0 Application in Okta
- Login to Okta and navigate to Applications.
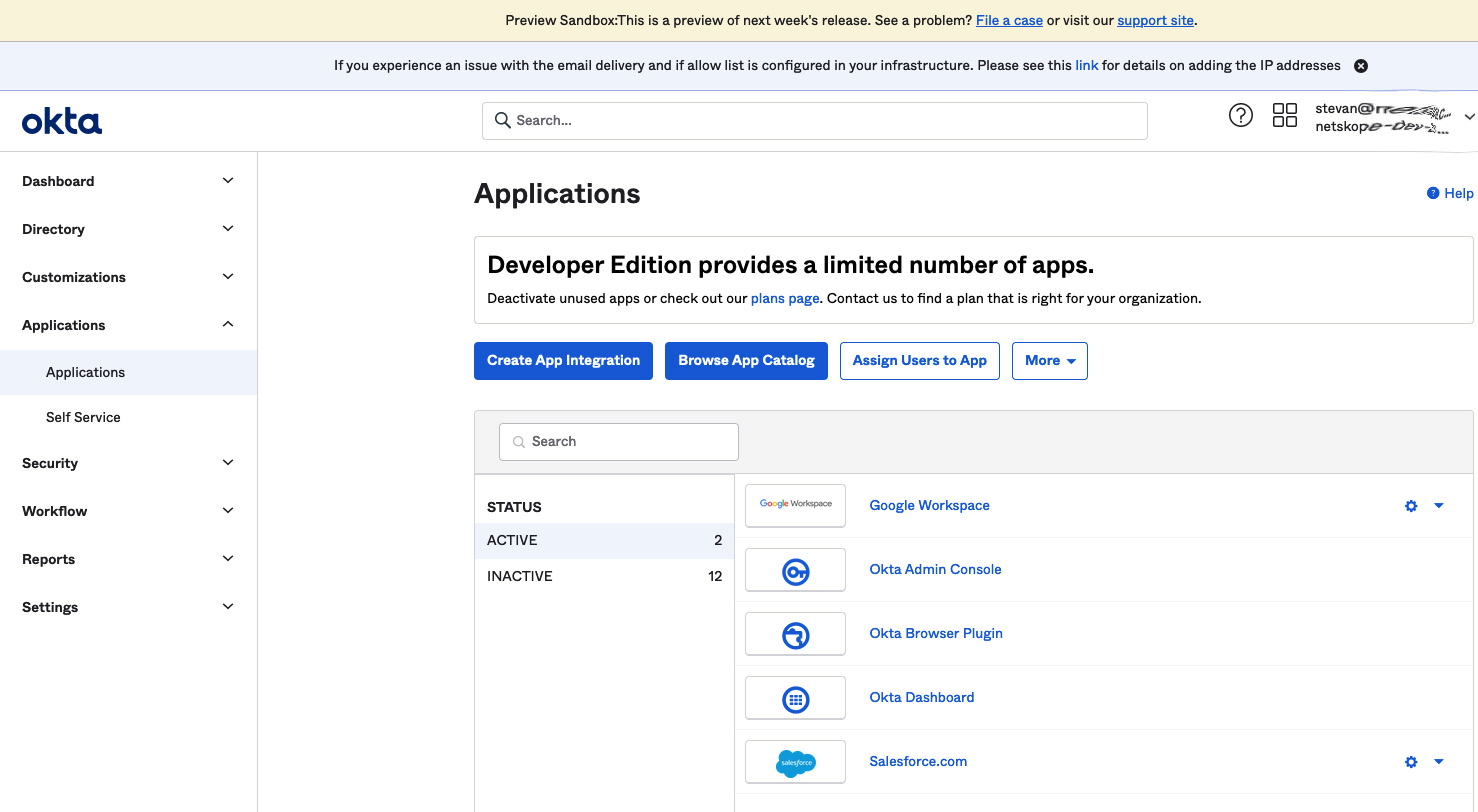
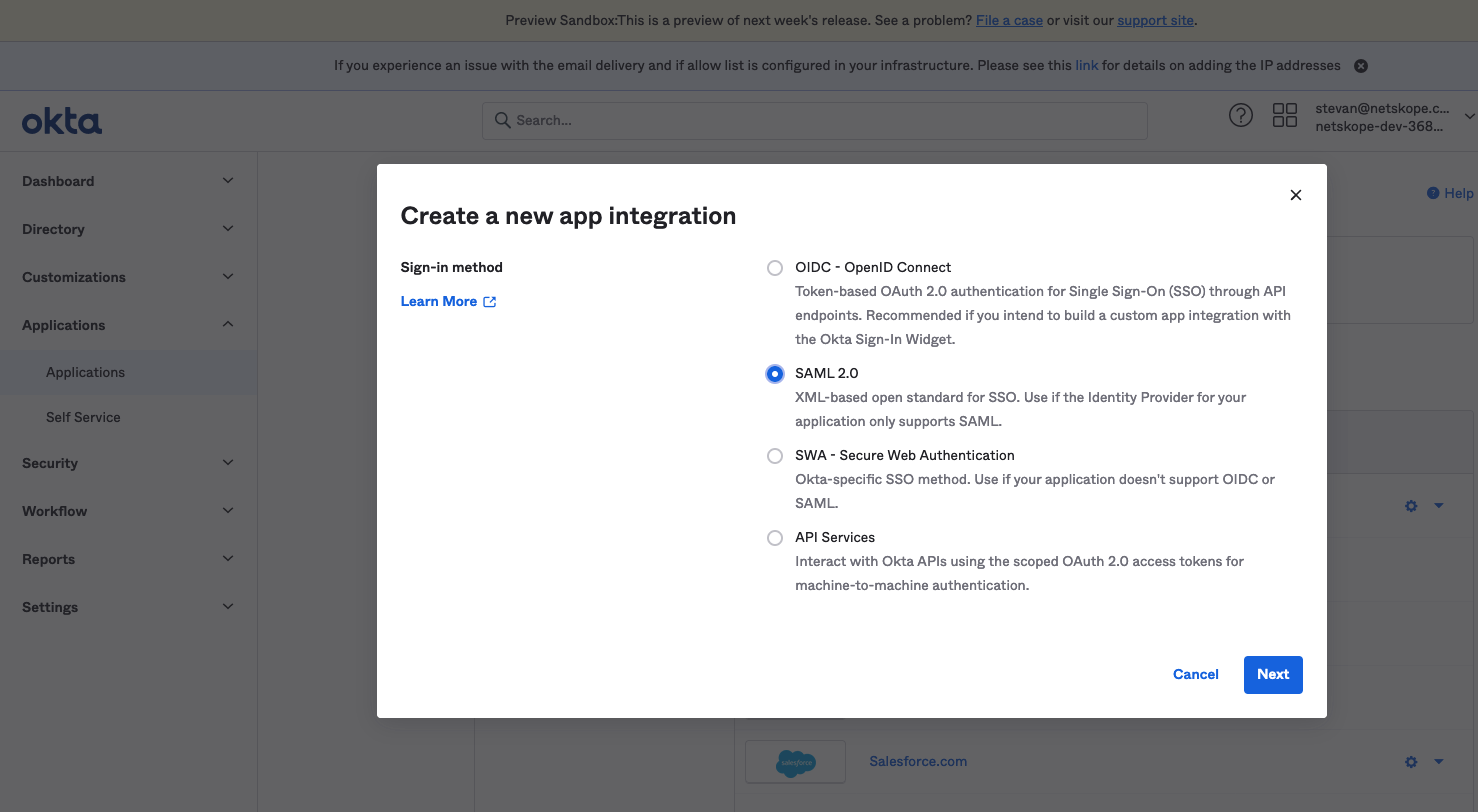
- Click on the Create App Integration button. The Create a new app integration window will appear. Use the radio button to select SAML 2.0 and click the Next button.
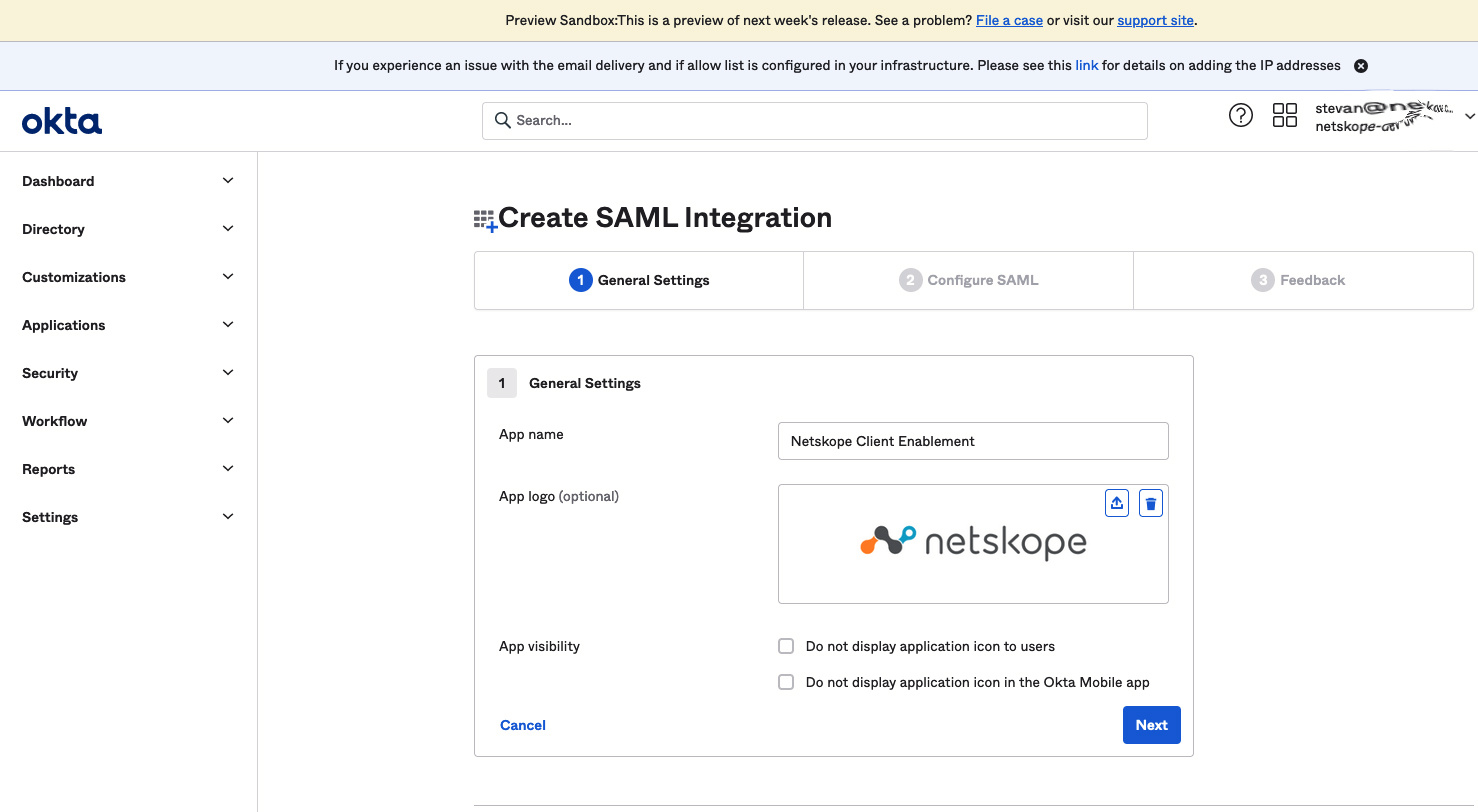
- On the Create SAML Integration page, enter an application name in the App Name dialog form and upload a logo for easy identification. (For this example we have chosen Netskope Client Enablement to help differentiate it from other forms of enforcement.)
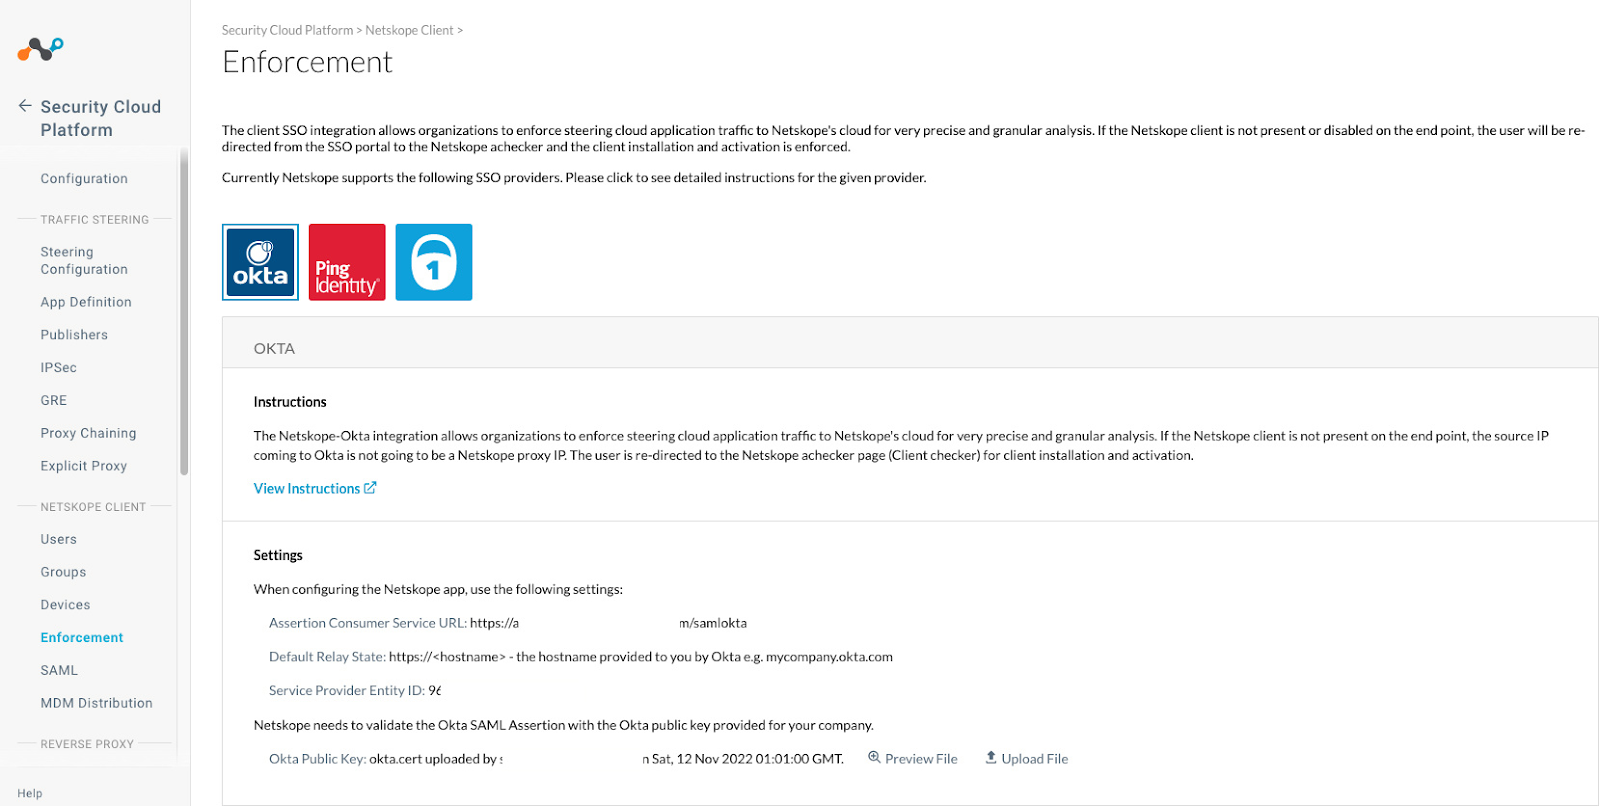
- The next page to be displayed in Okta is the Create SAML Integration page. Login to the Netskope Tenant and navigate to Settings, Security Cloud Platform, Netskope Client, and Enforcement.
Click on the Okta tile to display settings and copy the following information.
Assertion Consumer Service URL.
Service Provider Entity ID.
Default Relay State and how it is defined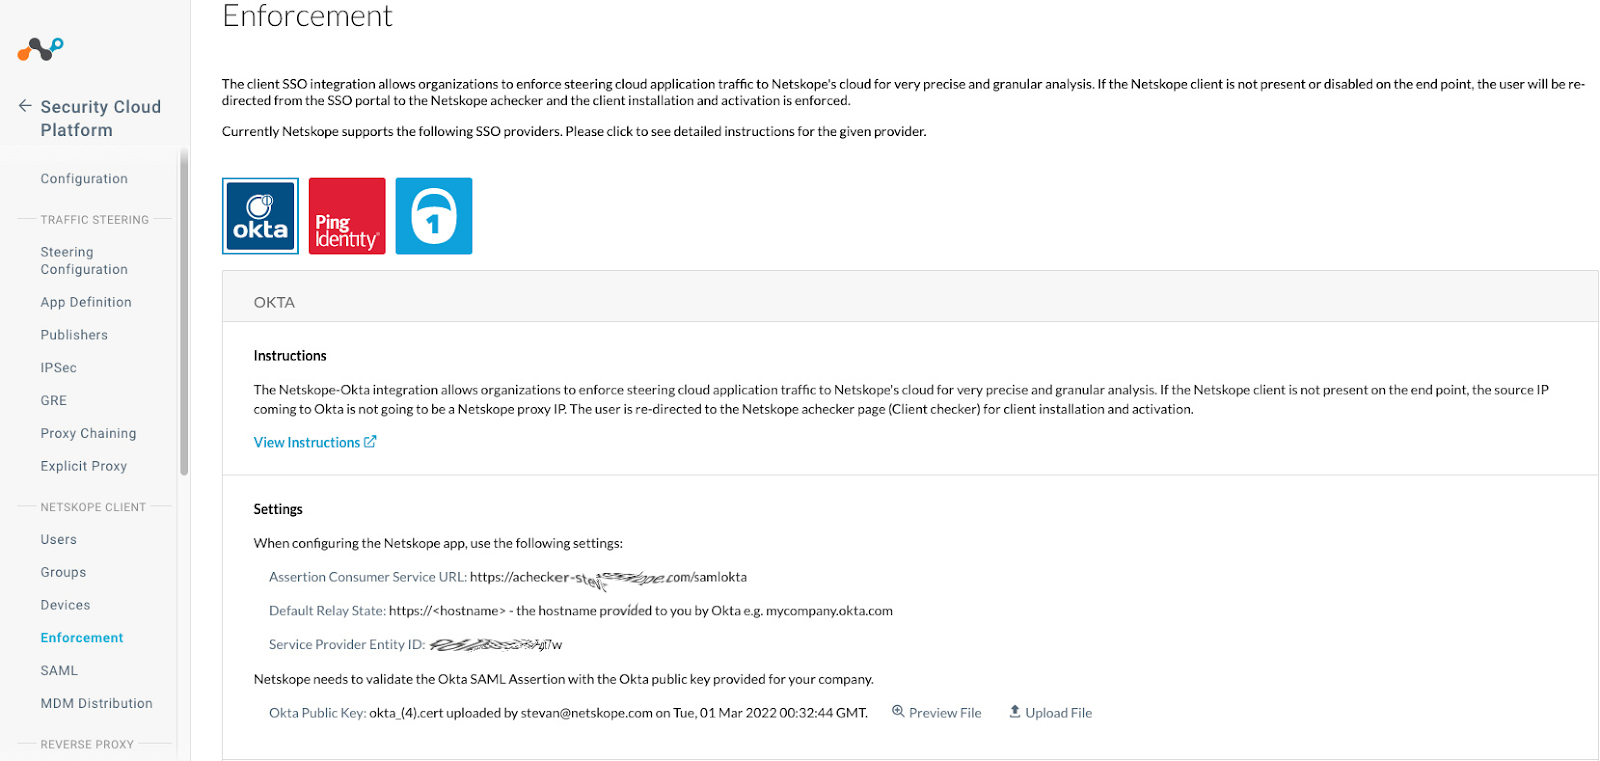
In the Proxy IP Address section, click on Netskope IP Ranges. The Netskope IP Ranges page will be displayed. Copy the IP addresses from the Dedicated IP Ranges tab. This will be used later in Okta to create Network Locations. 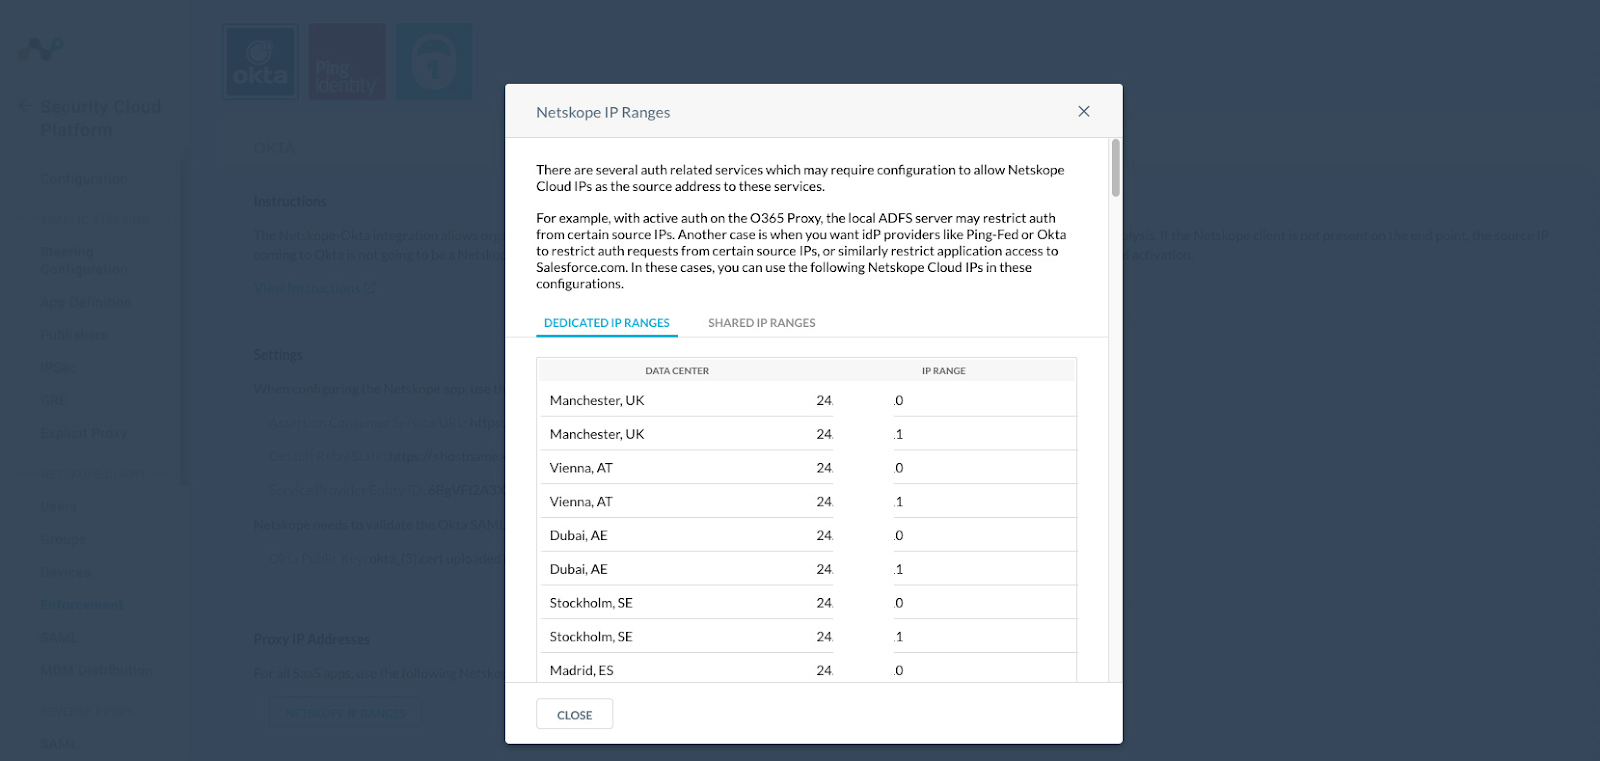
- Go back to the Okta page for Create SAML Integration and enter the following information.
-Assertion Consumer Server URL from above is used in the Single sign-on URL dialog box.
-Service Provider Entity ID from above is used in the Audience URI (SP Entity ID) dialog box.
-https://<hostname> - the hostname provided to you by Okta e.g. mycompany.okta.com will be used in the Default RelayState dialog box.
-Email Address is selected from the Name ID drop-down menu.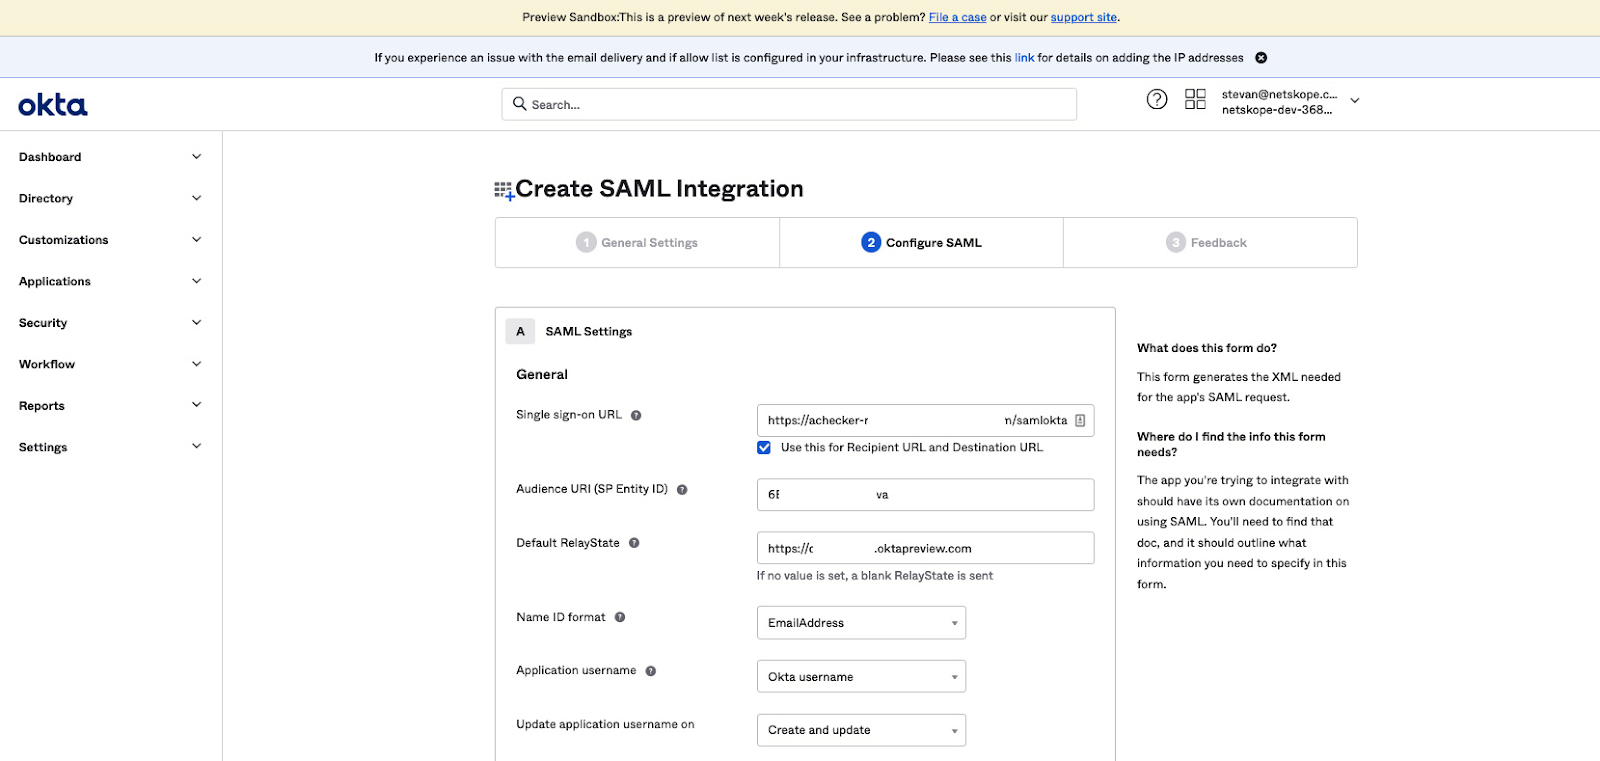
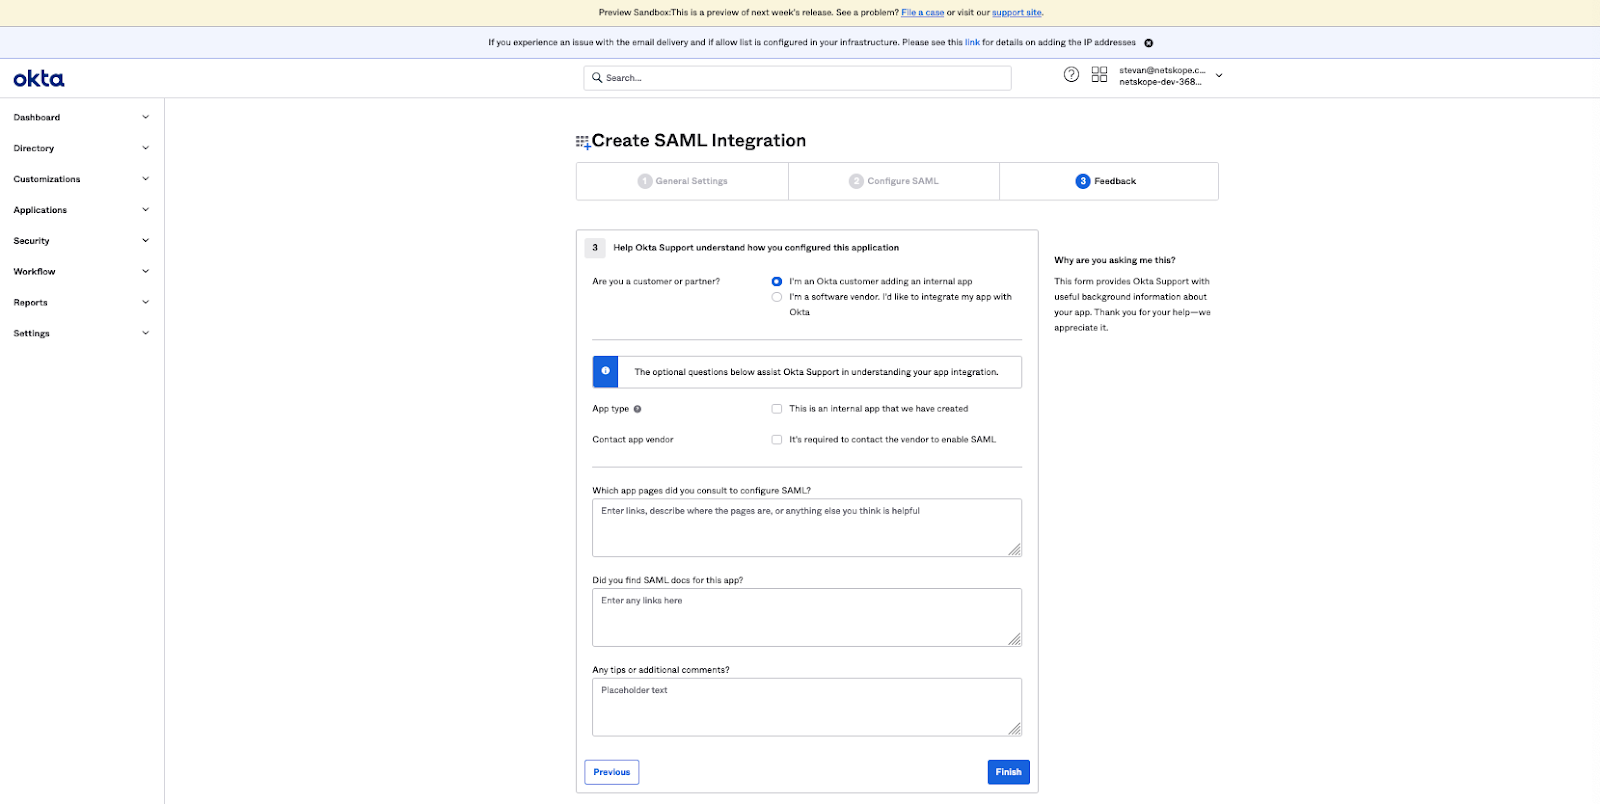
- Click Next. The Create SAML Integration page will be displayed. Select the radio button for I’m an Okta customer adding an internal app. Then click Finish.
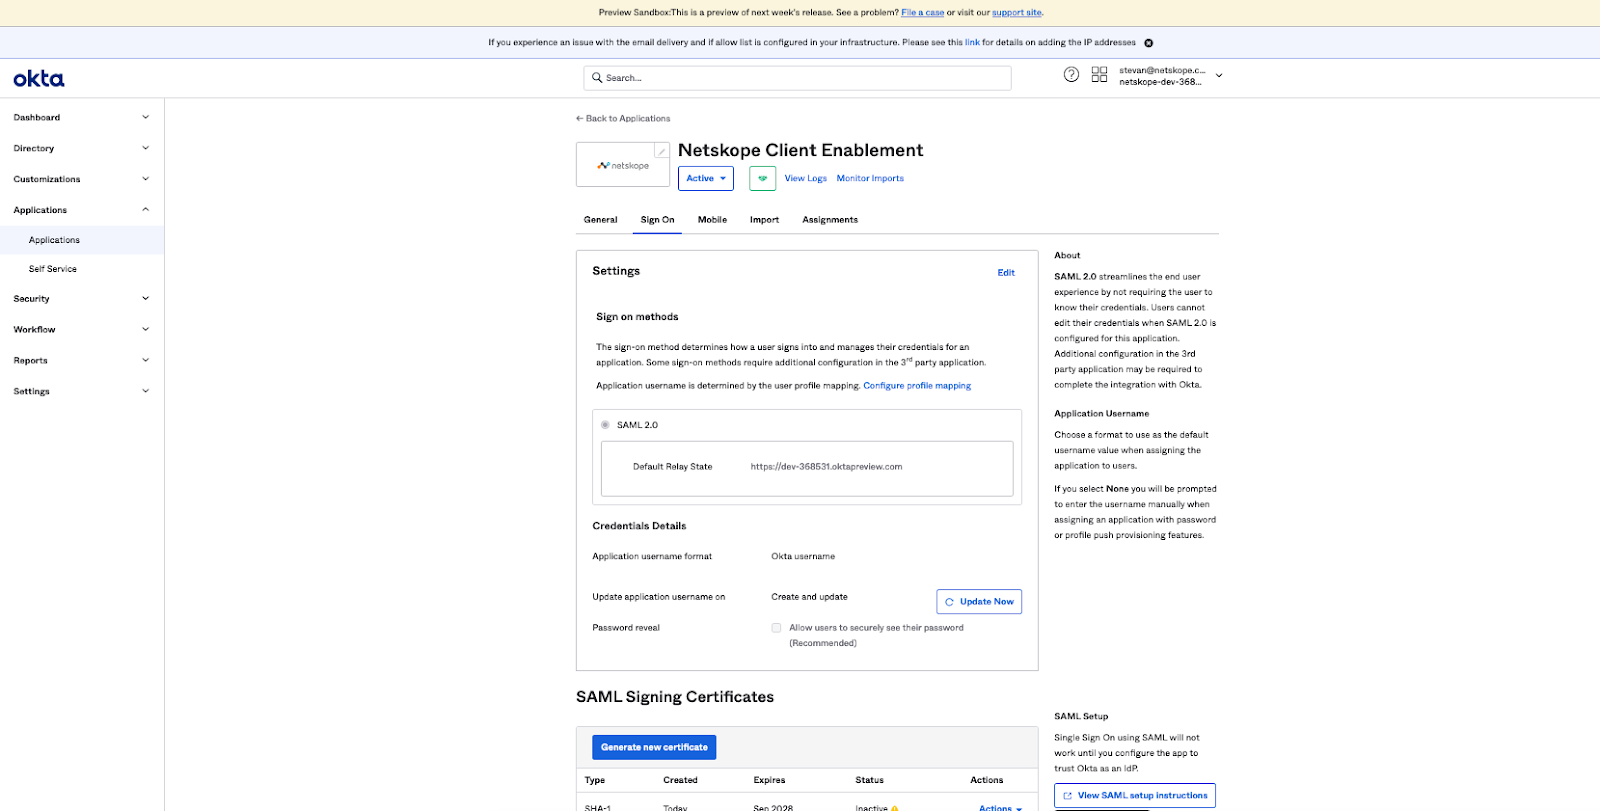
- The Netskope Client Enablement application page will be displayed. Click on the View SAML setup instructions button located to the lower right.
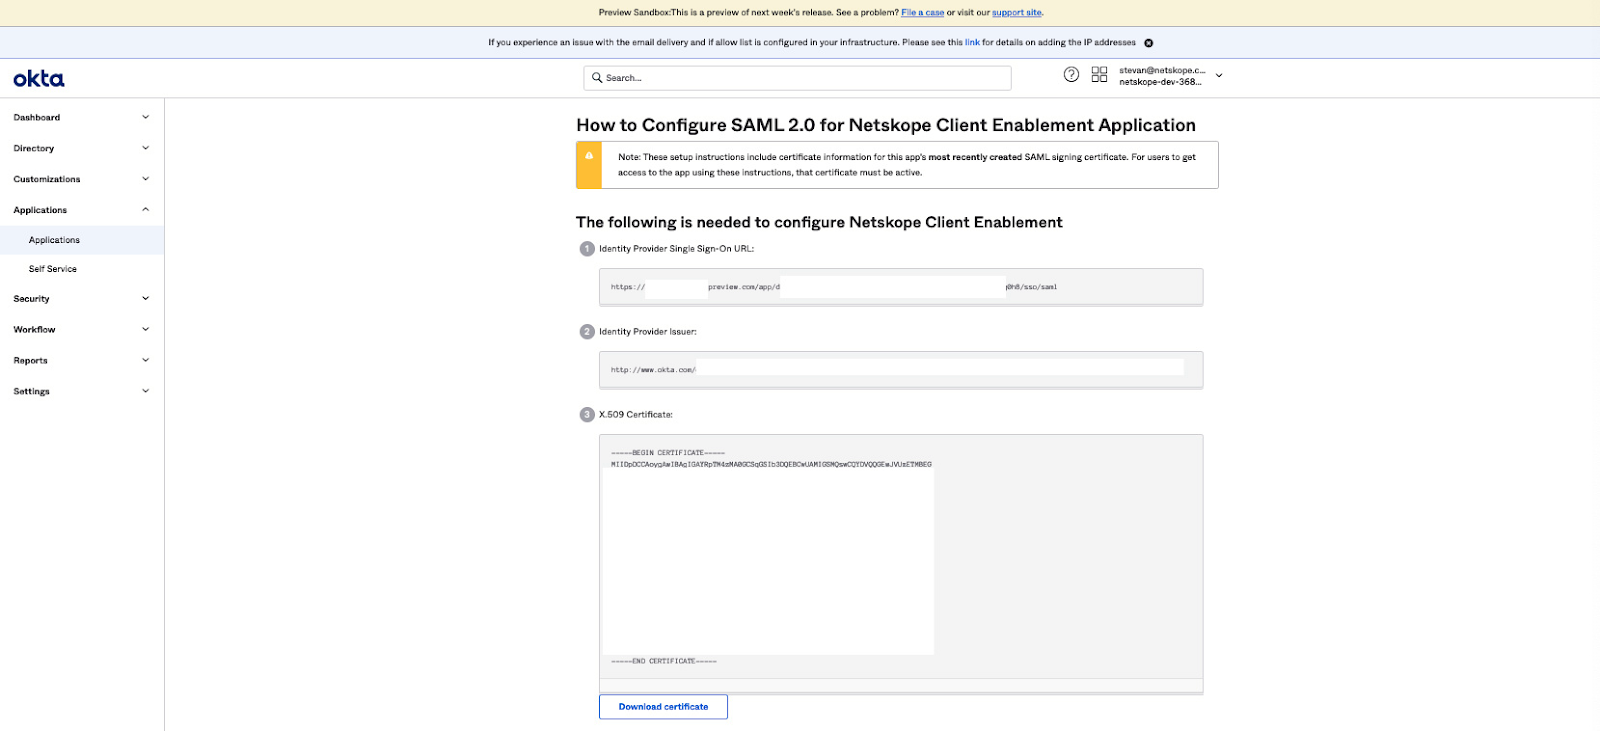
- The How to Configure SAML 2.0 for Netskope Client Enablement Application page will be displayed. In section 3 X.509 Certificate, click on the Download certificate button.
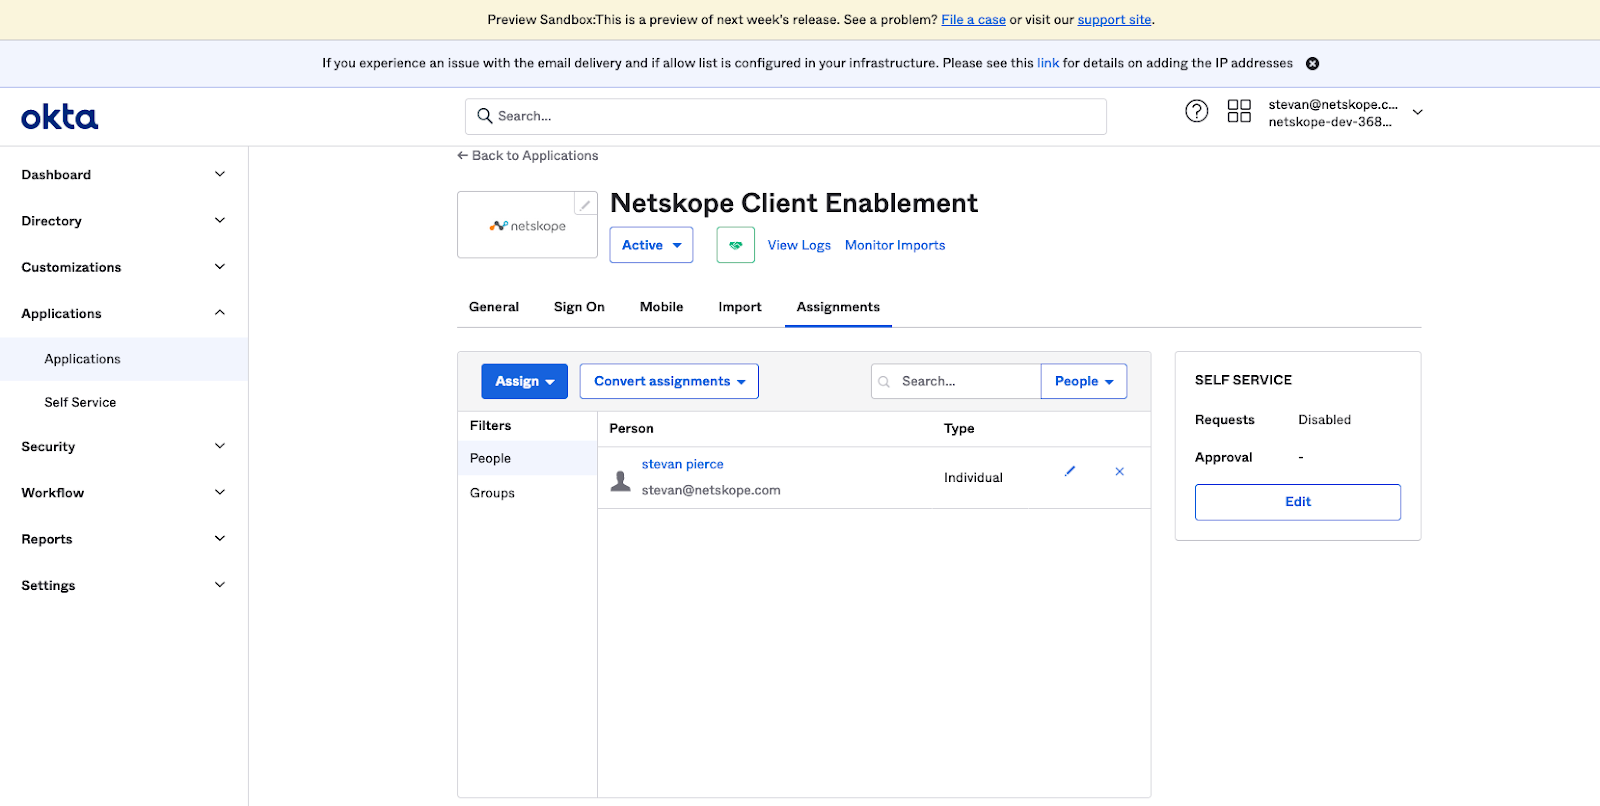
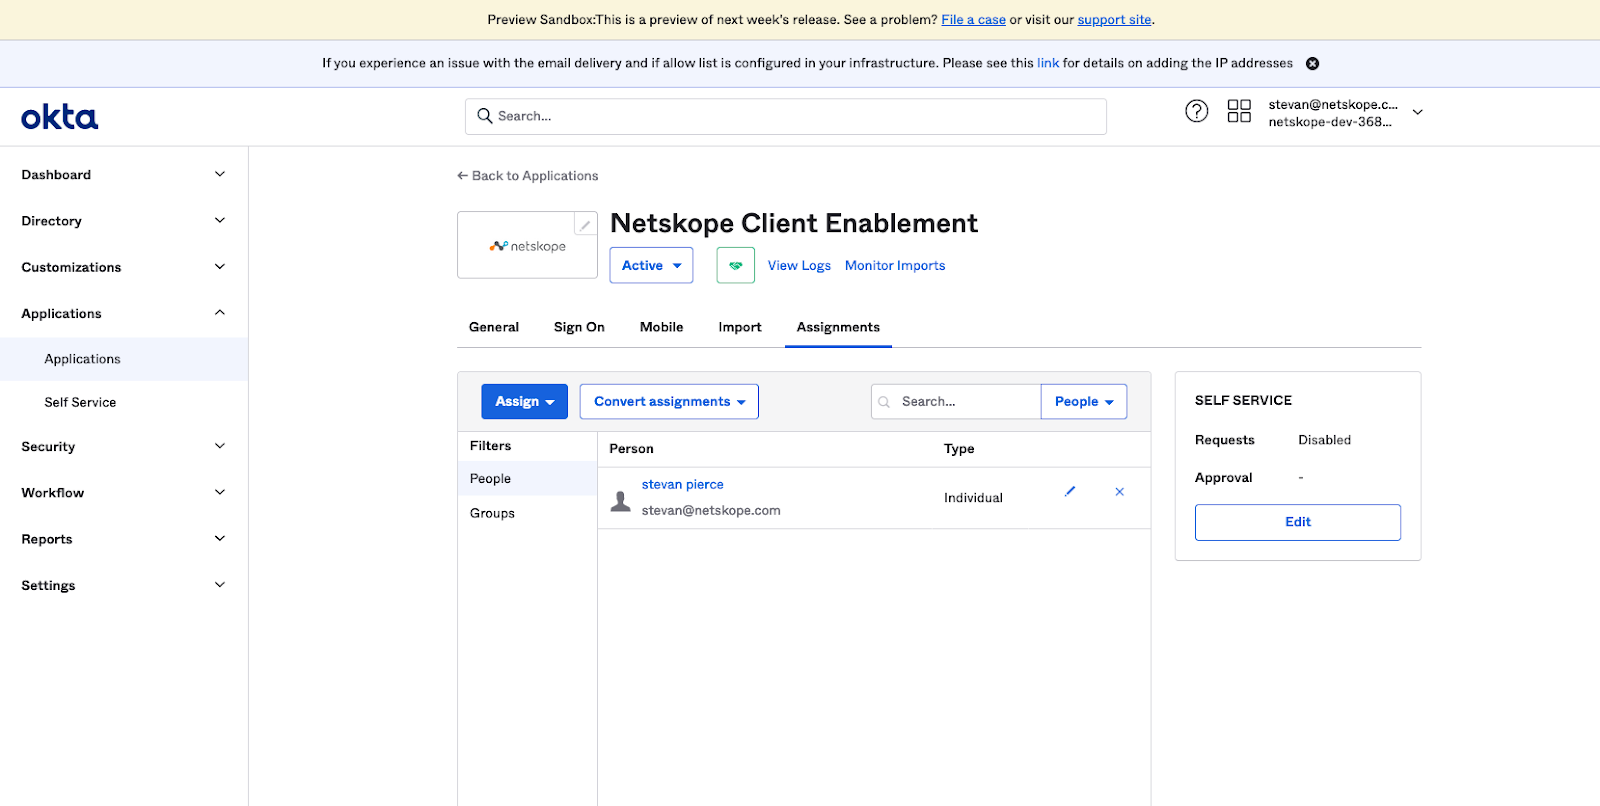
- Click on the Assignments tab. The Assignments page will be displayed. Assign the application to users or groups who will need to access restrictions placed on them when accessing SaaS applications defined in Okta.
Enable Netskope Client Enforcement
Open the Netskope Client Enforcement page and locate the Setup section, upload the Okta.cert file downloaded above. Click on Preview File to confirm this is the correct certificate.
Define a Sign-On Policy per SaaS Application
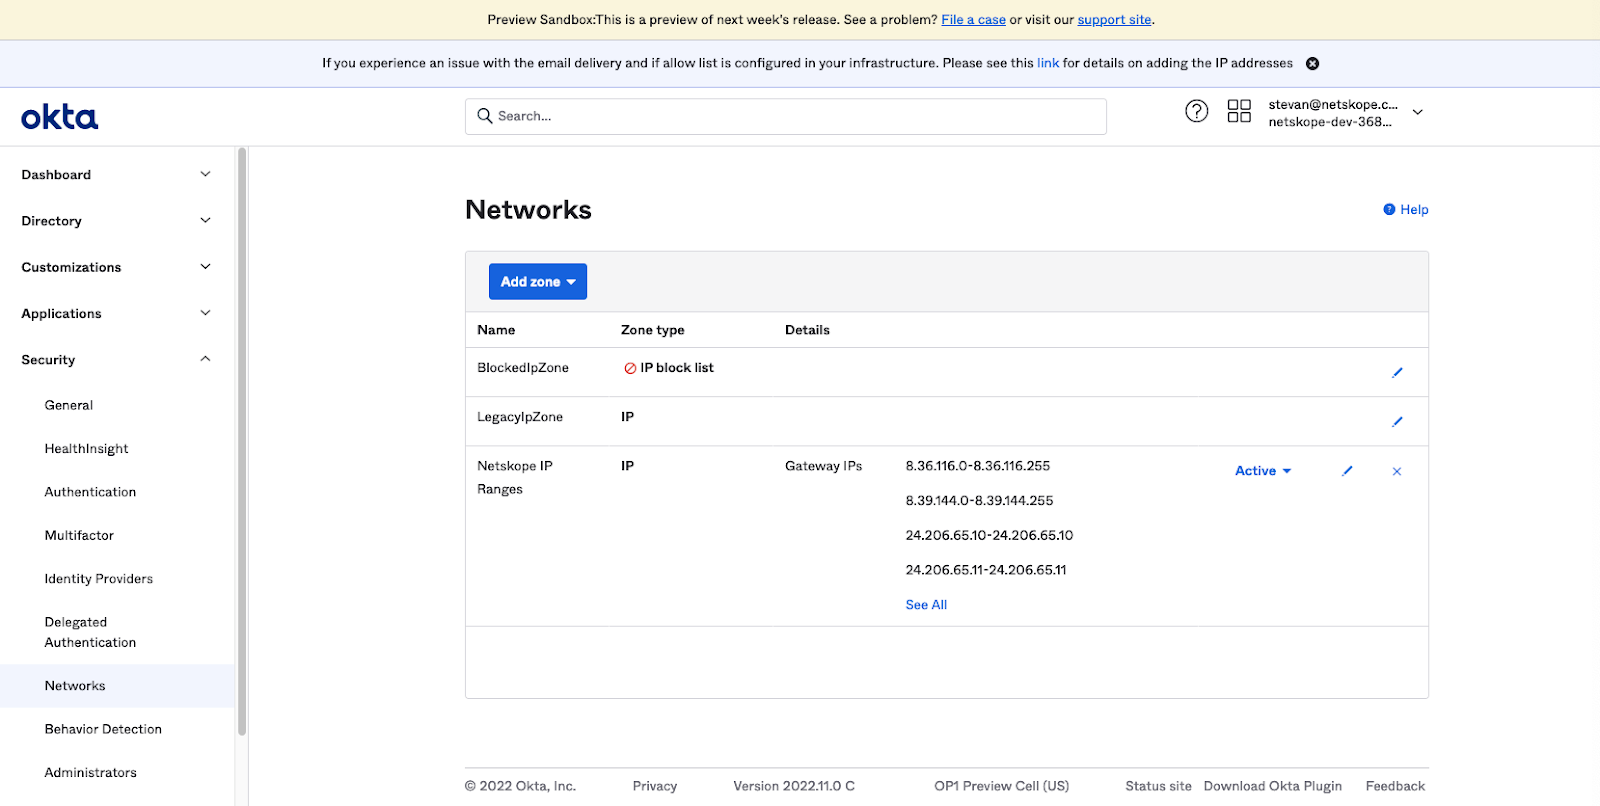
- Open the Okta administration page, go to Security Networks. The Networks page will be displayed.
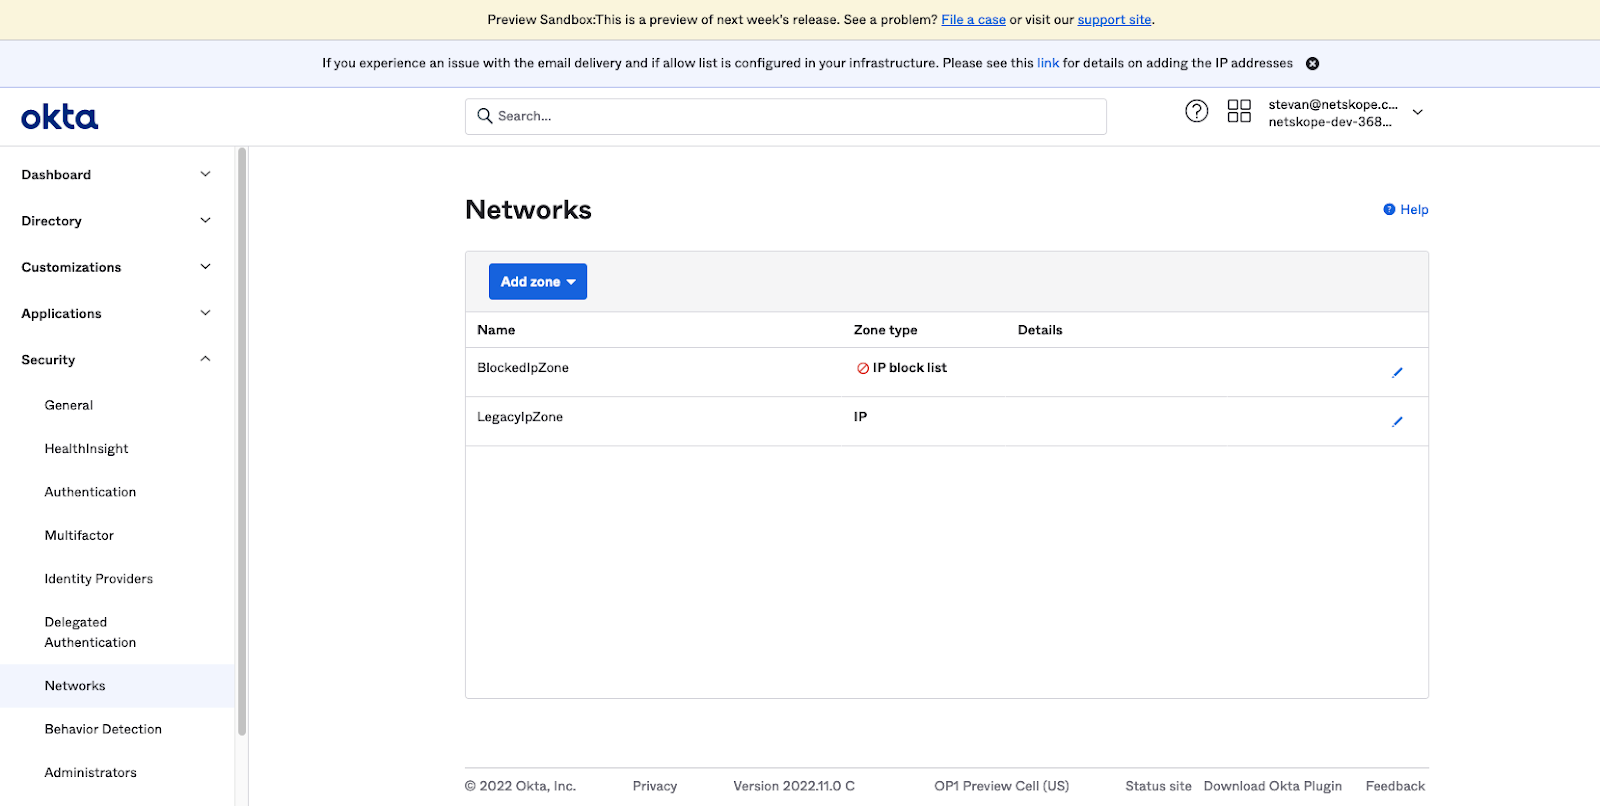
- Click the Add Zone drop-down menu and select IP Zone. The Add IP Zone window is displayed.
- Enter Netskope IP Ranges in the Zone name dialog box.
- In Step 4 of “Define a SAML 2.0 Application in Okta” above, locate the Dedicated IP Ranges copied and enter them in the Gateway IPs dialog box.
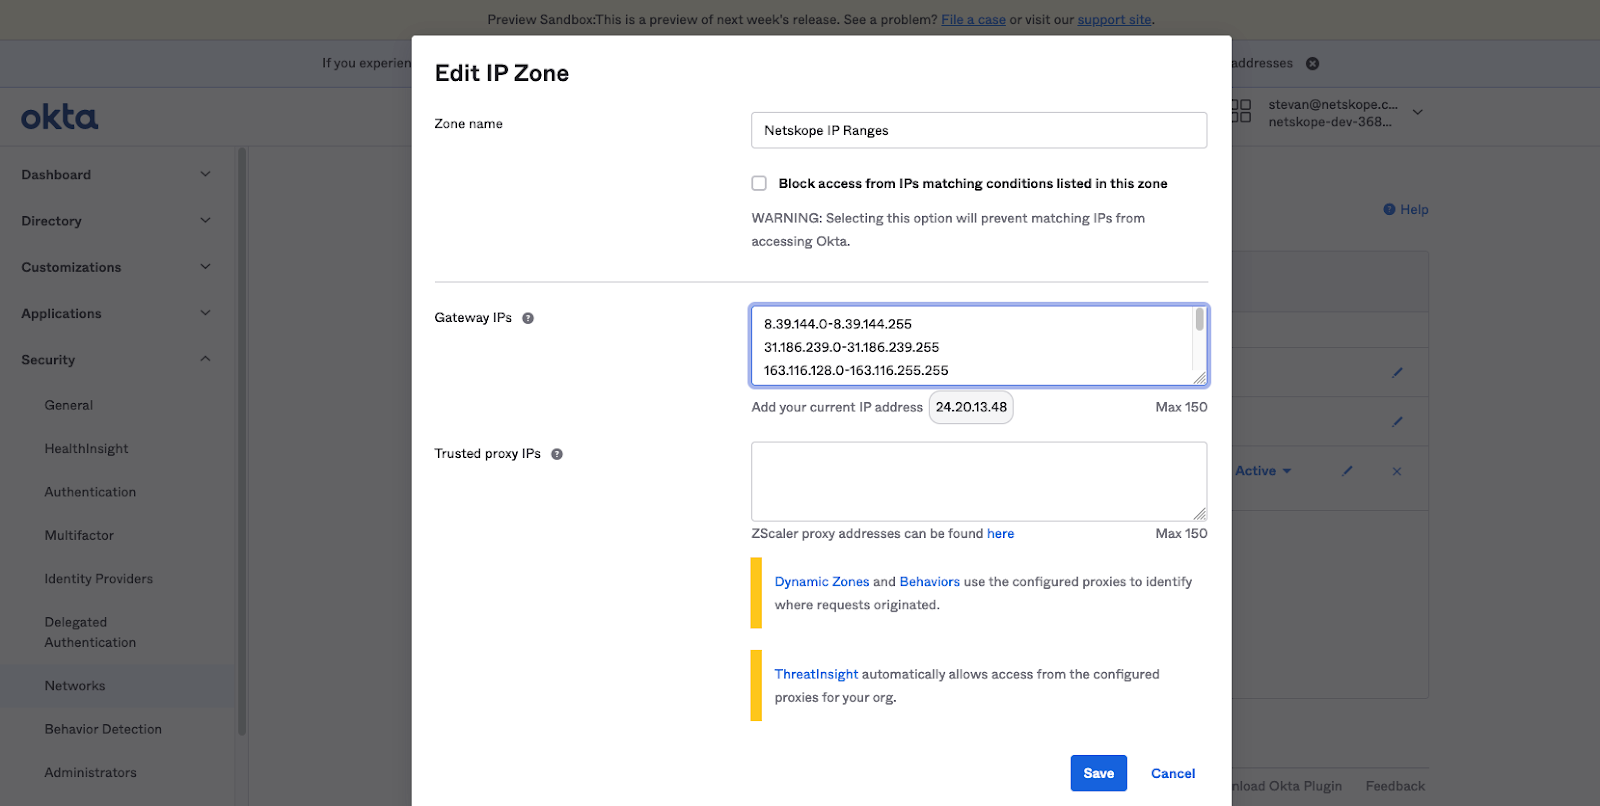
NOTE: If there are going to be persons provisioned to multiple tenants accessing the SaaS application, then also enter the Shared IP Ranges. This also may be necessary when transitioned to the Egress IP feature, part of an enhanced service offering. - Click Save. The Networks page will be displayed.
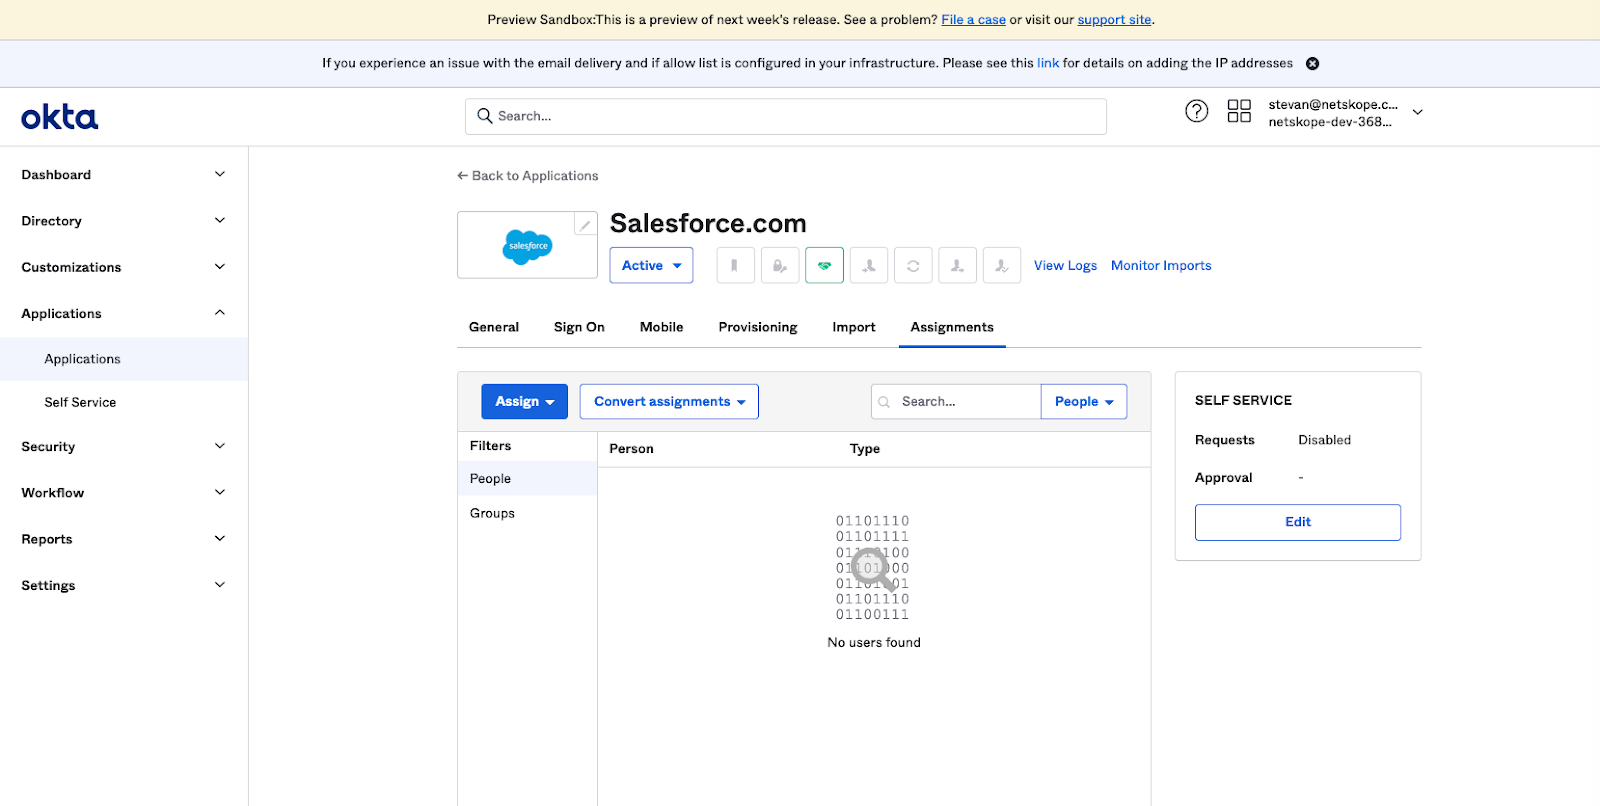
- Go to Applications and click on the SaaS application to be protected by Netskope Client Enforcement, for instance Salesforce.com The Salesforce.com application page is displayed.
- Click on the Sign On tab. The Sign On page is displayed.
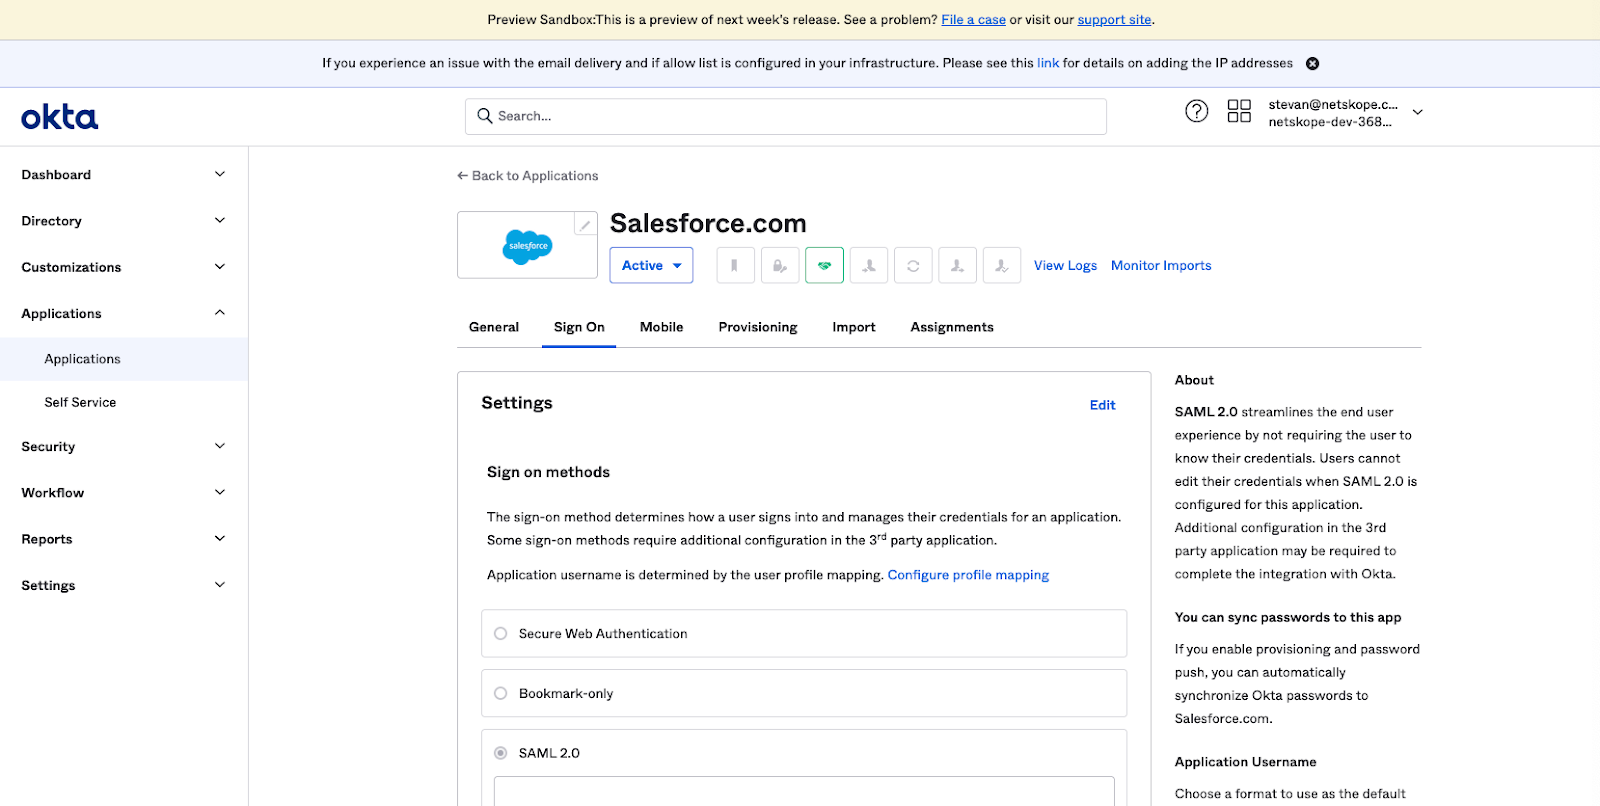
In the Salesforce.com Sign On Policy, access to the application will be denied if the source IP address is not originating from Netskope. - In the Sign On Policy section, click on the +Add Rule button. The App Sign On Rule window is displayed. In the Location section, select the radio button for Not in Zone. The Network Zones dialog appears. Enter Netskope IP Ranges in the dialog box.
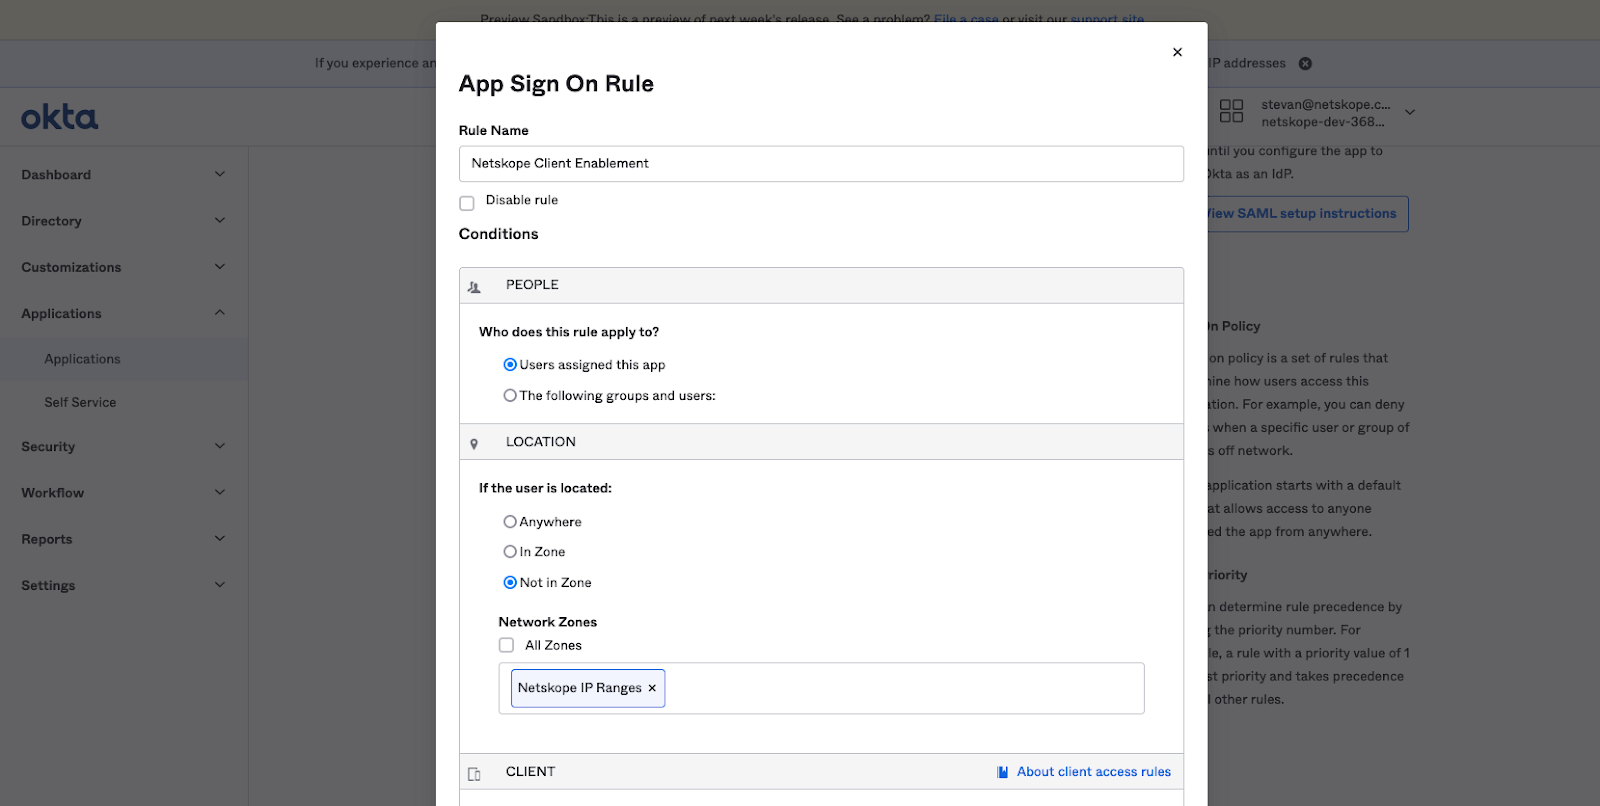
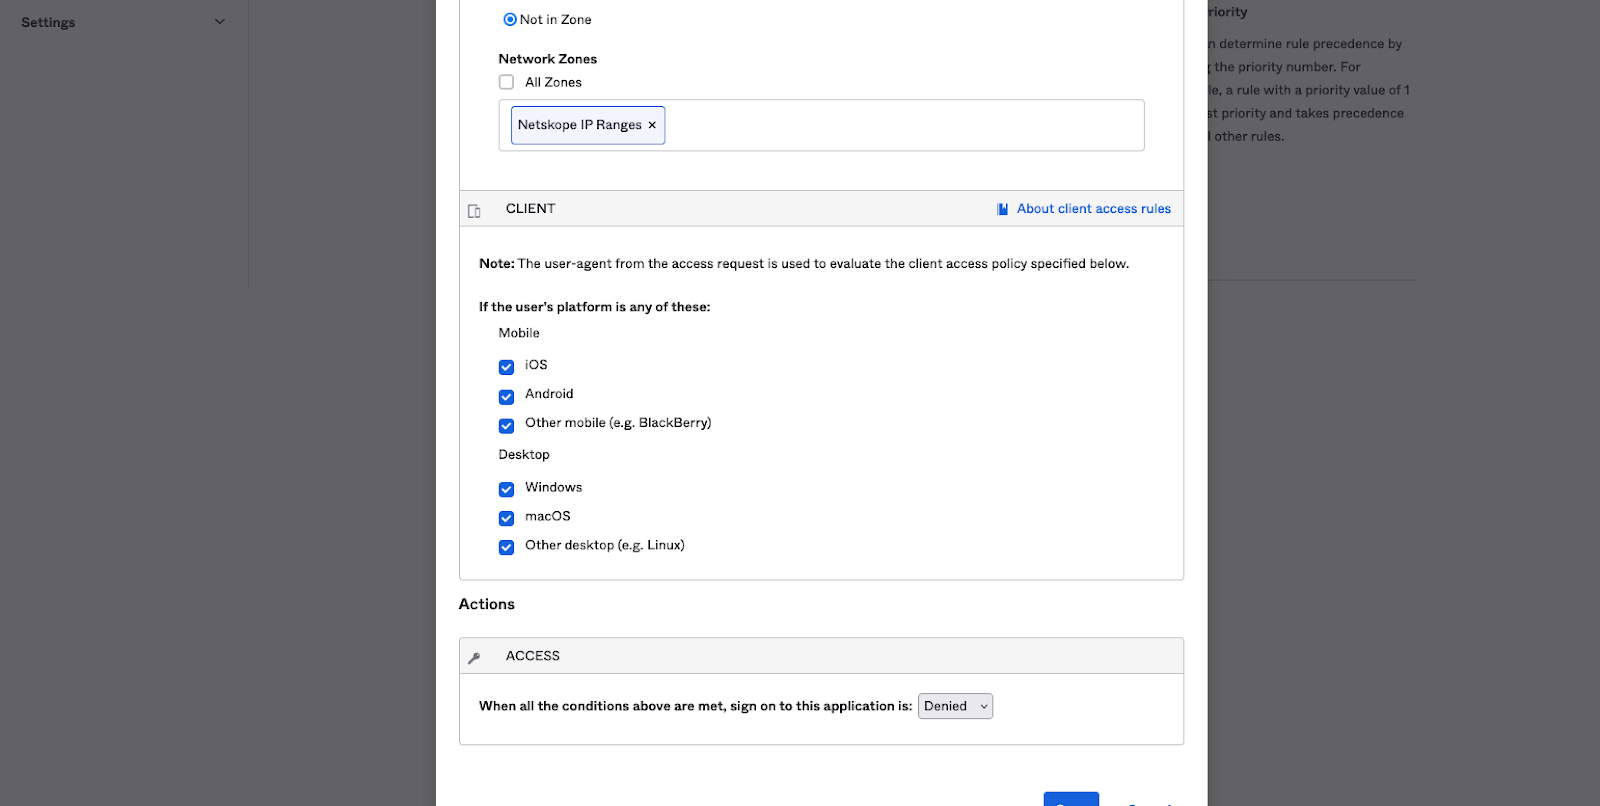
- In the Client section, we are going to use Netskope Client Enforcement regardless of mobile device or desktop.
- In the Actions Access section, select Denied from the drop-down menu and click Save.
- Go to Applications and click on Netskope Client Enablement. The Netskope Client Enablement application page is displayed.
- Click on the Sign On tab. The Sign On page is displayed.
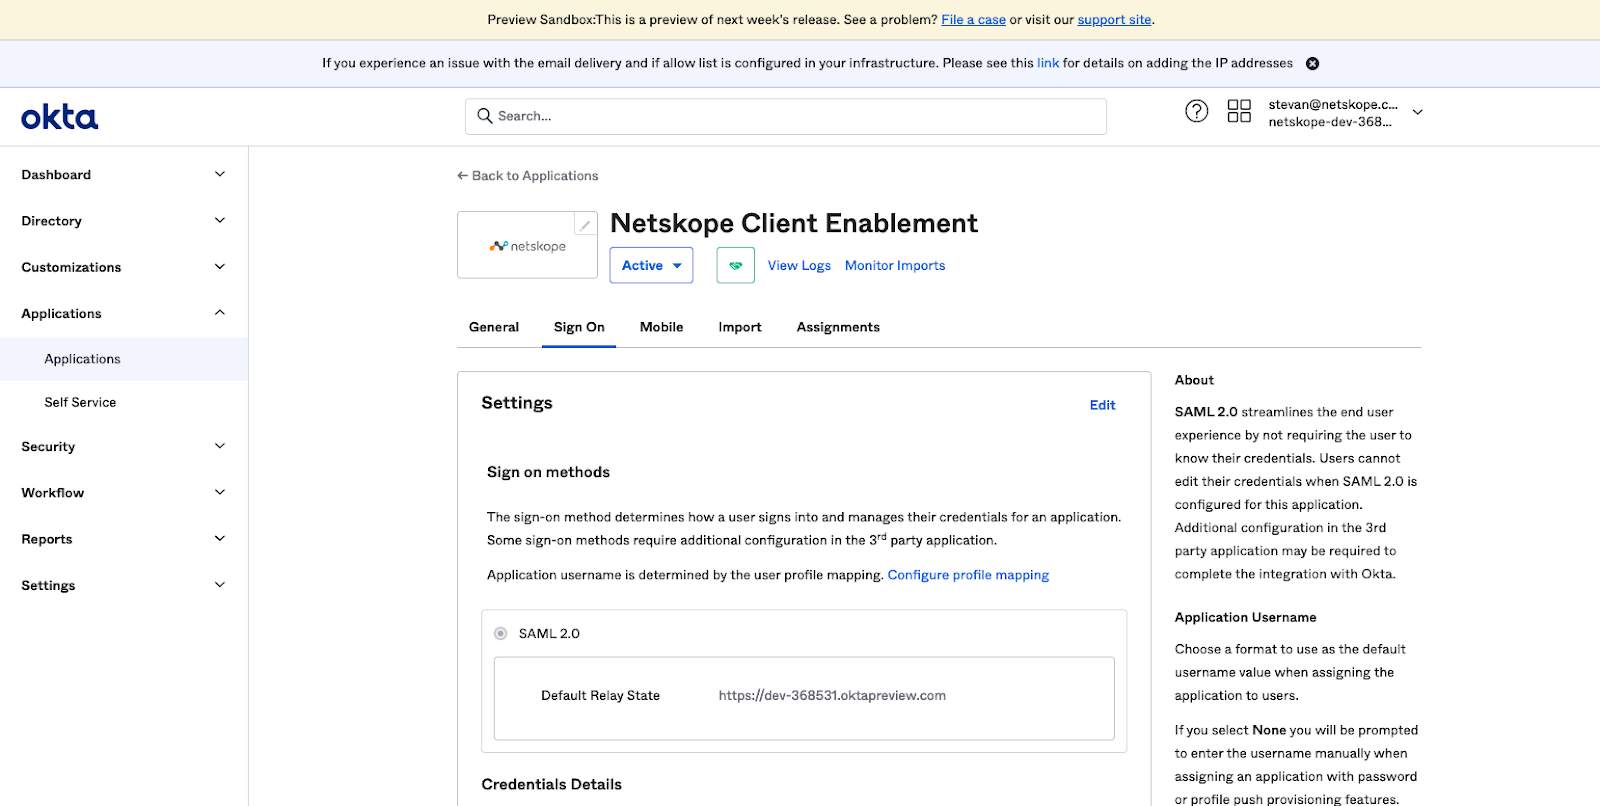
In the Netskope Client Enablement Sign On Policy, access to the application will be denied if the source IP address is originating from Netskope. - In the Sign On Policy section, click on the +Add Rule button. The App Sign On Rule window is displayed. In the Location section, select the radio button for In Zone. The Network Zones dialog appears. Enter Netskope IP Ranges in the dialog box.
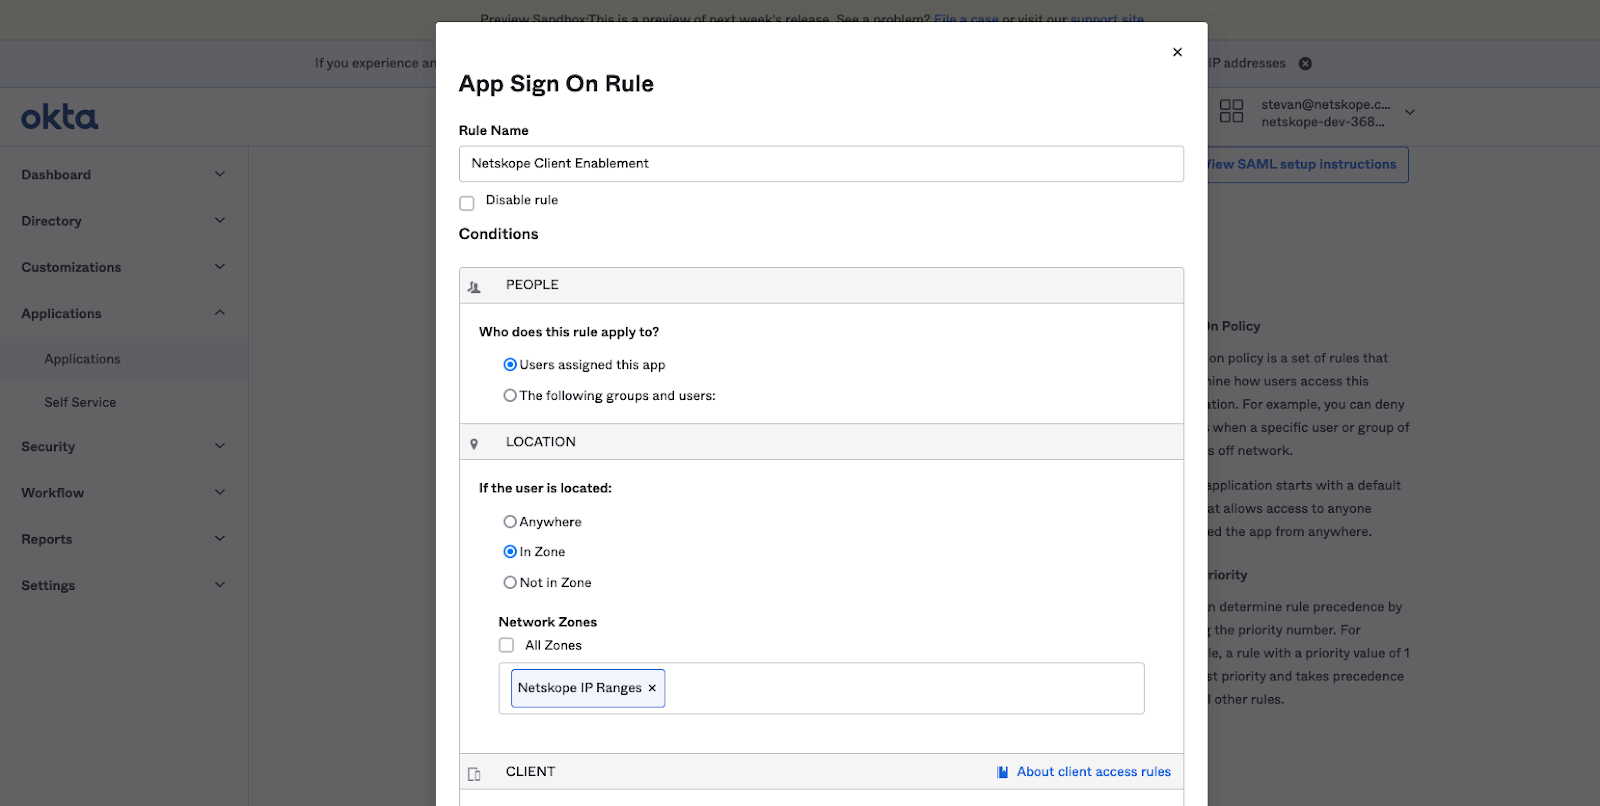
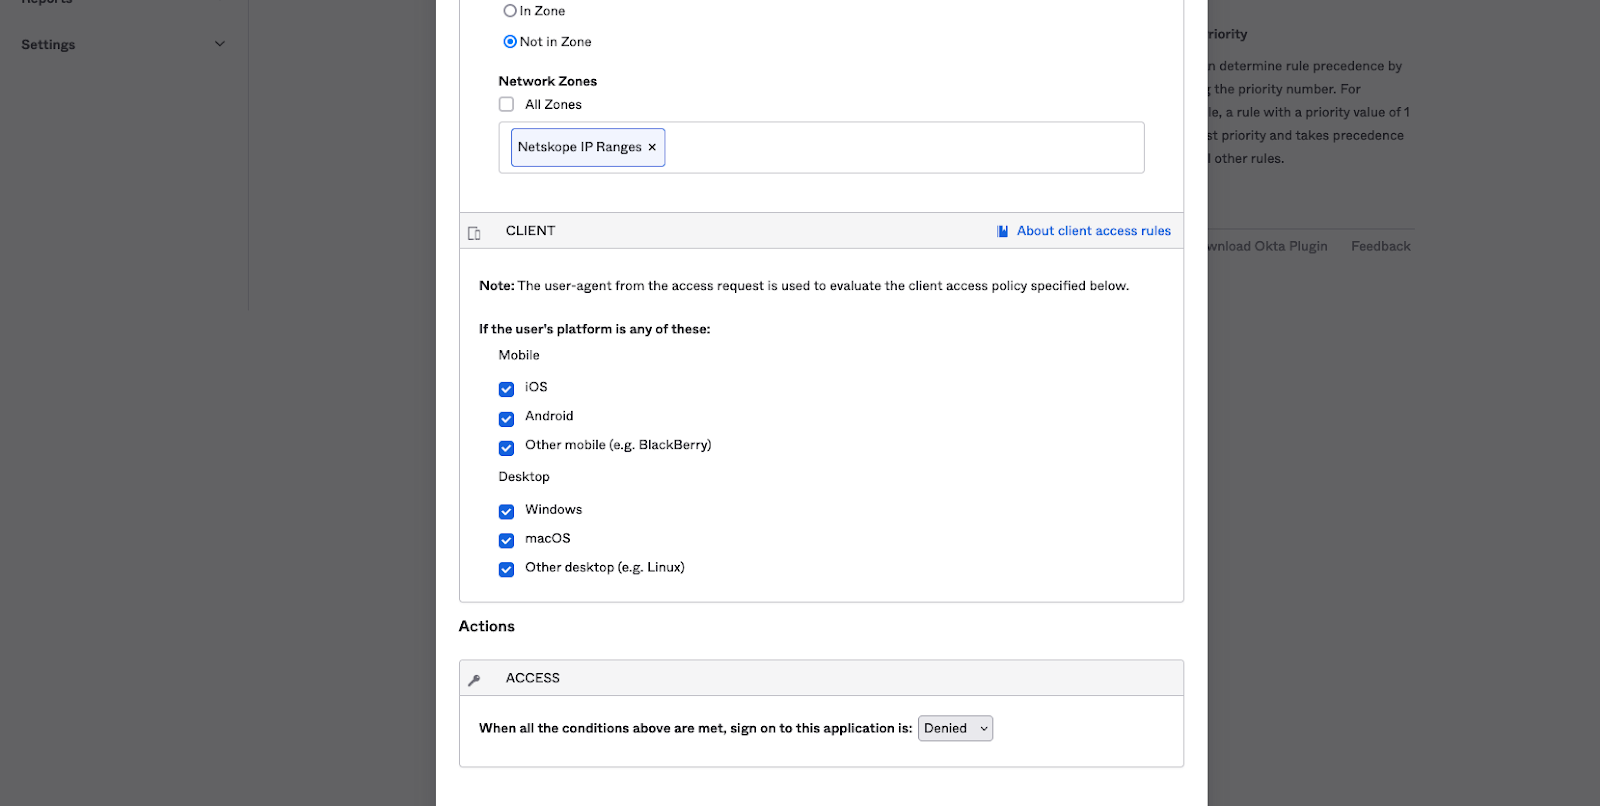
- In the Client section, we are going to use Netskope Client Enforcement regardless of mobile device or desktop.
- In the Actions Access section, select Denied from the drop-down menu and click Save.
Edit Download Templates
It is necessary to edit templates for Download Request for operating systems currently in use within the organization.
- Login to the Netskope tenant and go to Settings, Tools, and Templates.
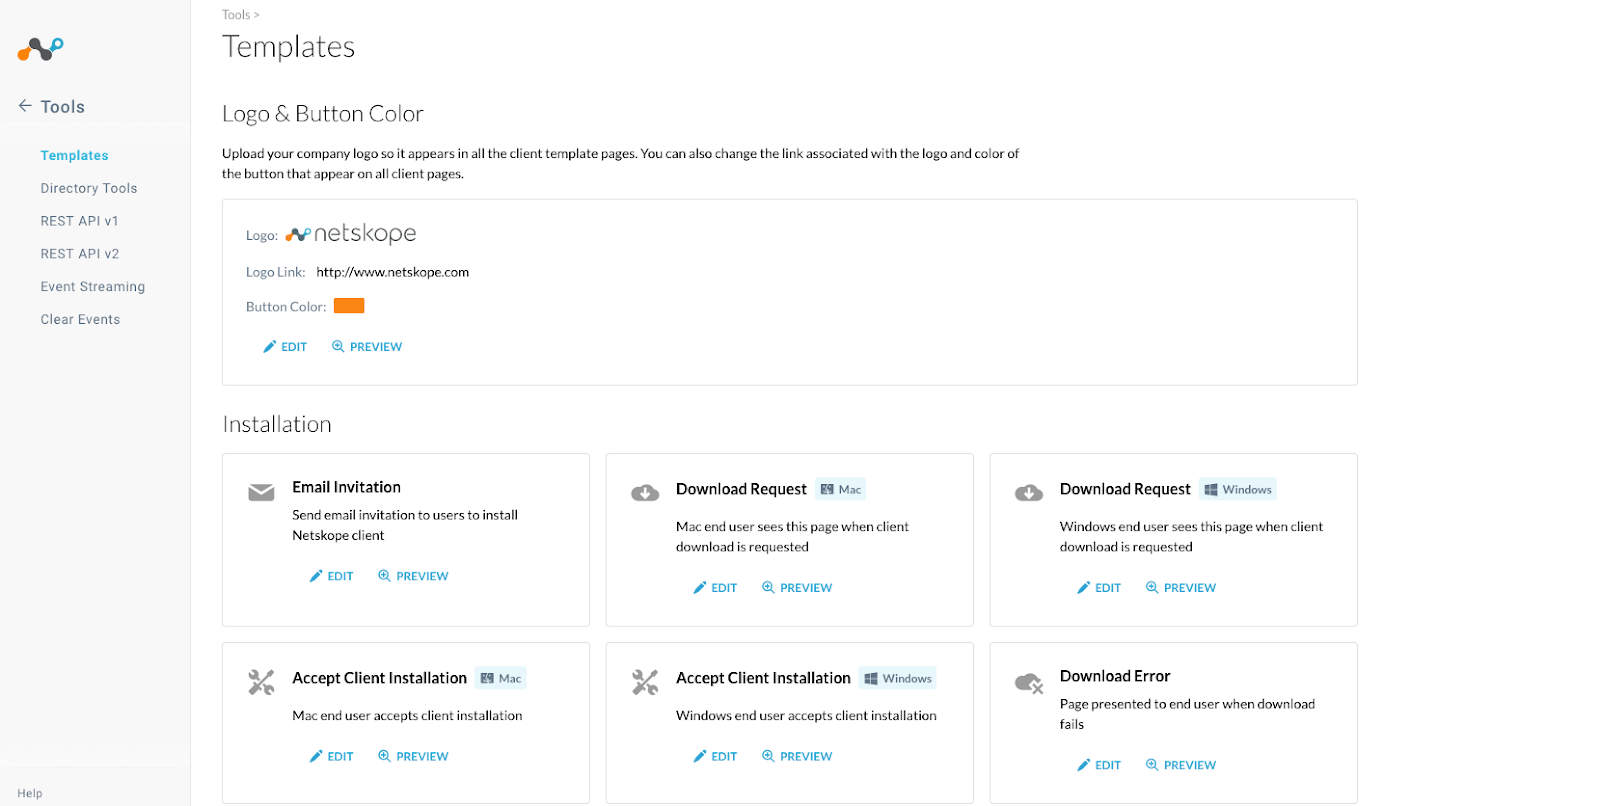
- Click on EDIT and the Edit Download Request window will be displayed.
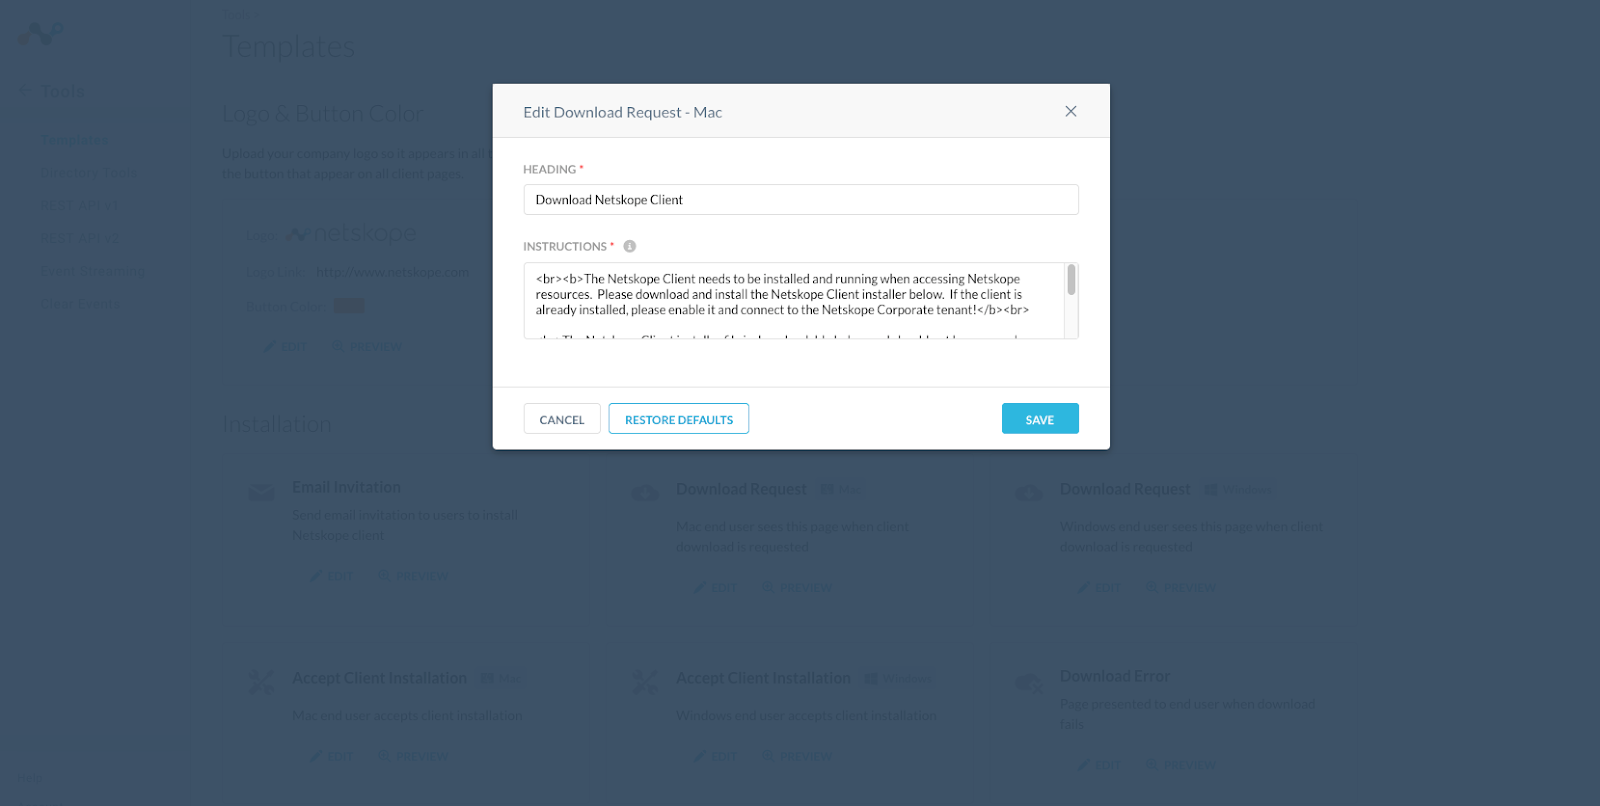
Here is an example of what might be used to notify users when they encounter the download page.
<br><b>The Netskope Client needs to be installed and running when accessing Netskope resources. Please download and install the Netskope Client installer below. If the client is already installed, please enable it and connect to the Netskope Corporate tenant!</b><br>
<br>The Netskope Client installer file is downloadable below and should not be renamed. Please run it as is!<br>
<br>If you feel that you have reached this page in error, please open a support ticket.<br>
User Experience
Initial Login
Once the Netskope Client Enablement application is configured in Okta, assign users the application and those applications to have access restricted to only those IP addresses assigned to them by Netskope proxies.
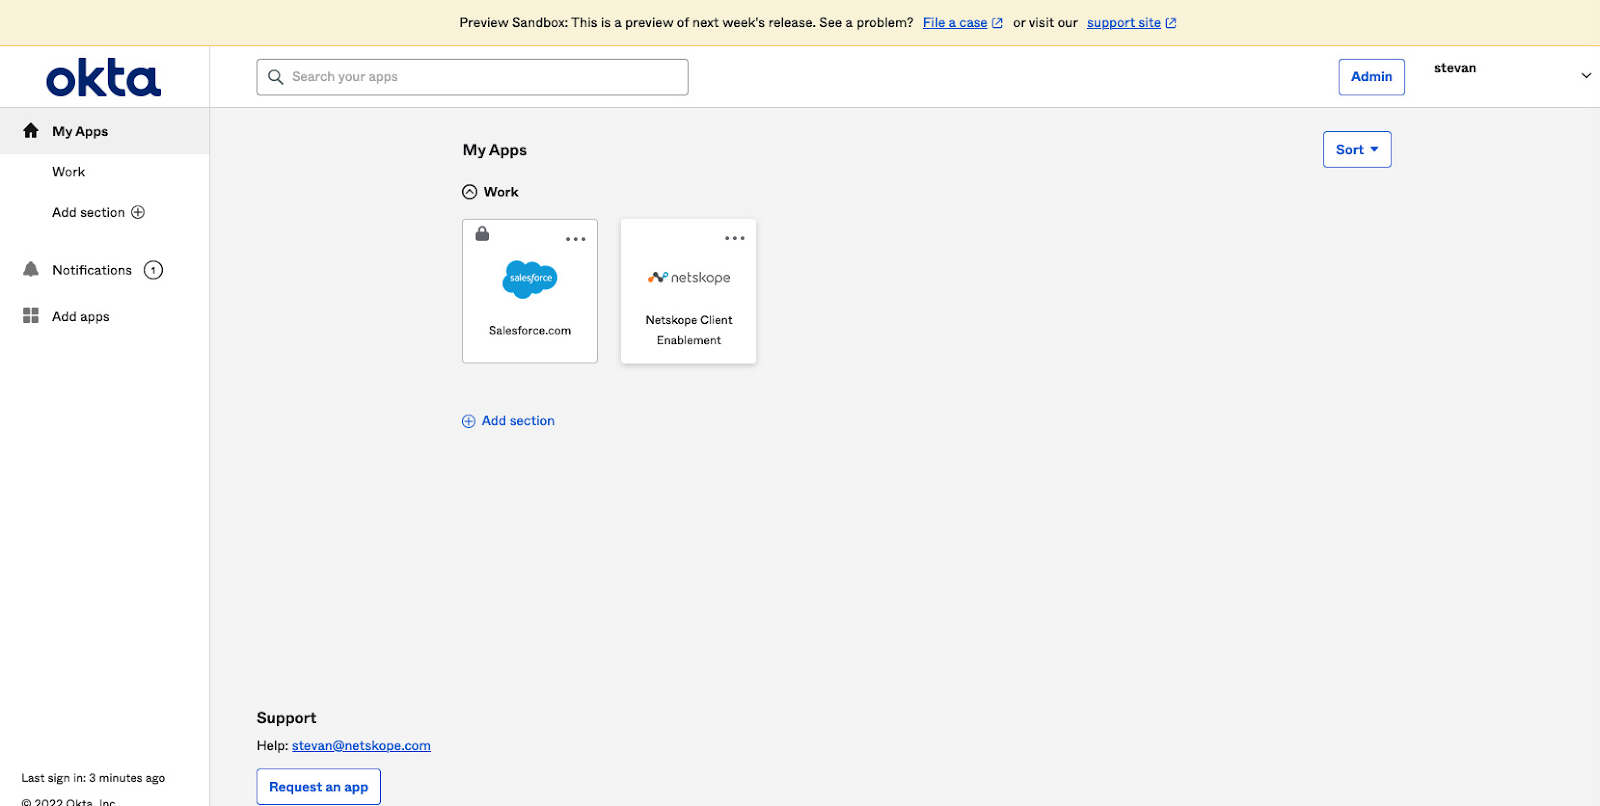
When a user logs into Okta they will be presented with the applications assigned to them. If they have the client on, applications assigned to them and which are being protected will not have a lock on them; the Netskope Client Enablement application will have a lock on it.
NOTE: Using Cloud Explicit Proxy will also yield the same result as the Netskope Client enabled and connected to a tenant, sourced from Netskope proxies. However, that is outside the scope of this document.
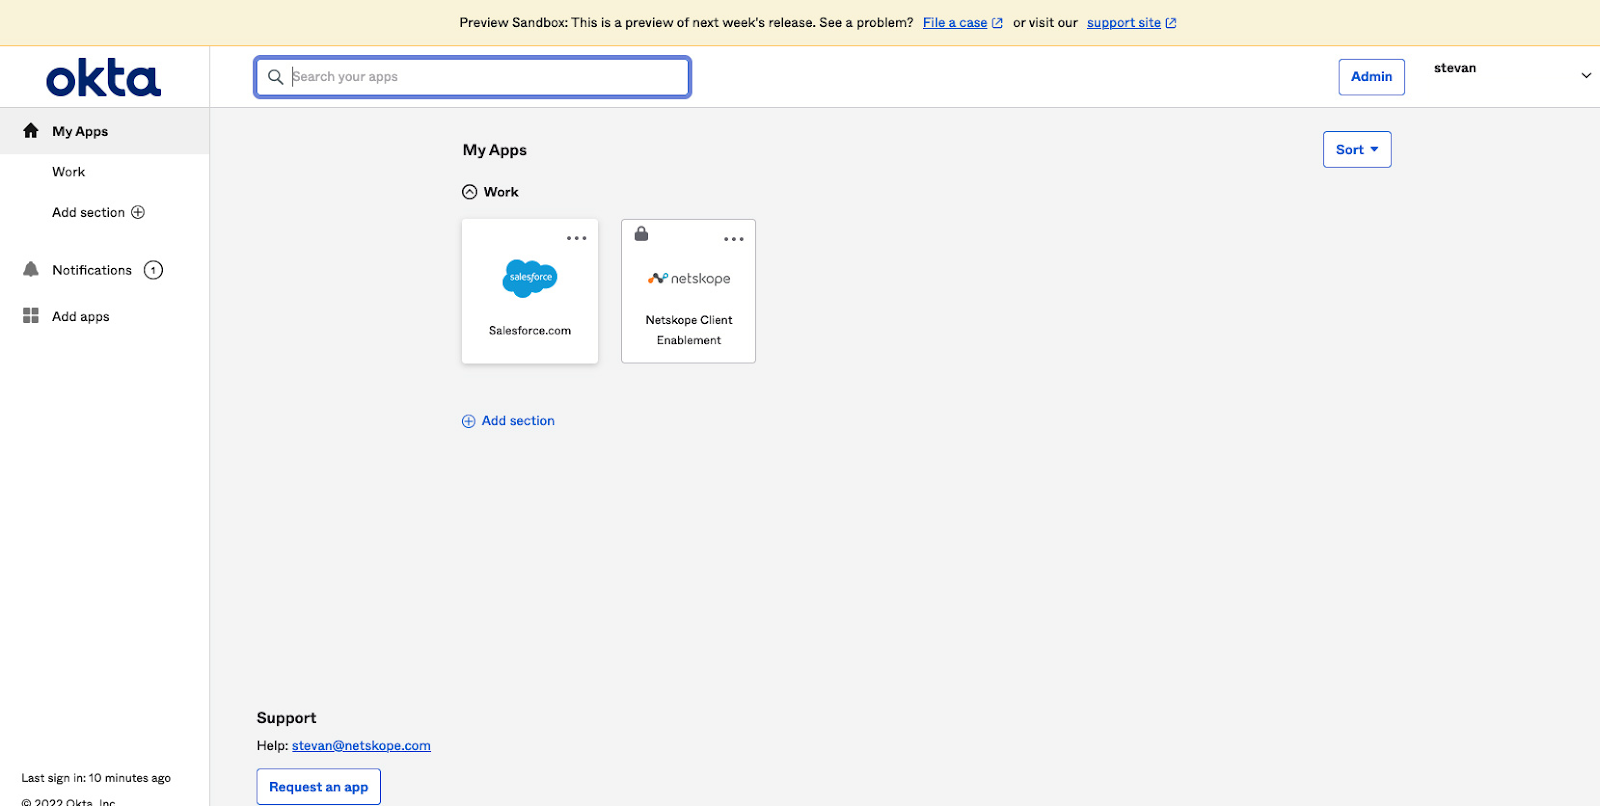
When a user does not have the enabled and connected to a tenant, the Netskope Client Enablement application will be unlocked; all applications which have access restricted to them will be locked.
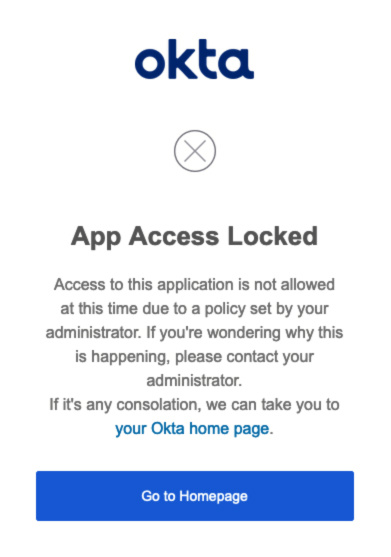
Locked Application Access
When a user accesses a locked application, a page will be displayed indicating that application access has been locked.
Netskope Client Enablement Application Access
When a user accesses the Netskope Client Enablement application when it is unlocked, they will be redirected to the Netskope tenant to verify they have been provisioned.
Troubleshooting
If users encounter locked Okta applications after enabling the Sign On policy or policies, the issue might be related to the Sing On policy itself. Check to see if access to the application is denied if the end user is not coming from a Netskope IP address, Not in Zone and Deny access is the action set.
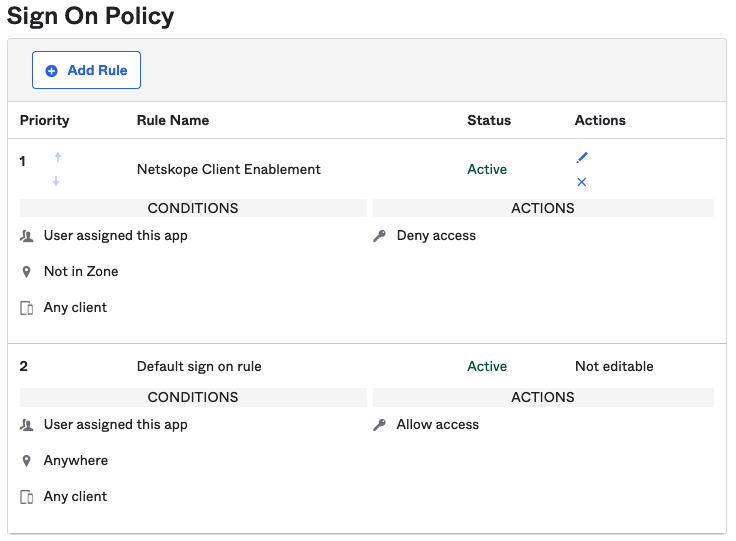
If users encounter a locked Netskope Client Enforcement application after enabling the Sign On policy, check to see if access to the application is denied if the end user is coming from a Netskope IP address, In Zone and Deny access is the action set.
If they are still seeing a lock on the applications, check to see if the IP addresses from which the user is sourced is in the Networks Zone IP address list.
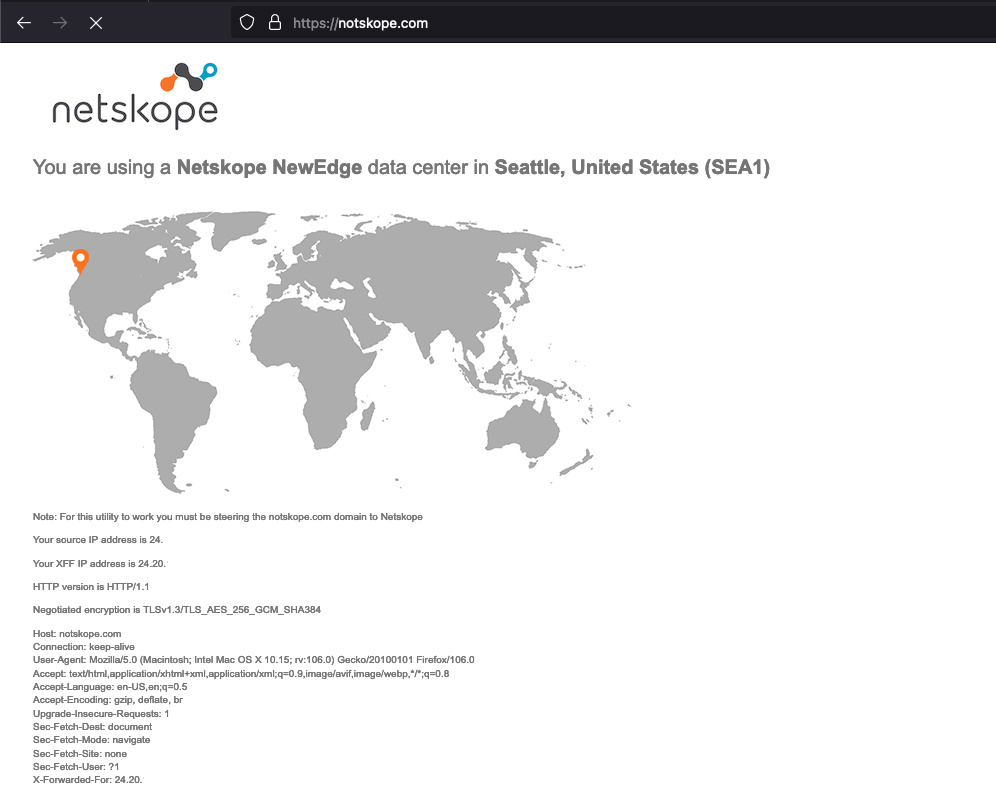
Go to https://notskope.com examine the section “Your source IP address is <insert IP address>”.
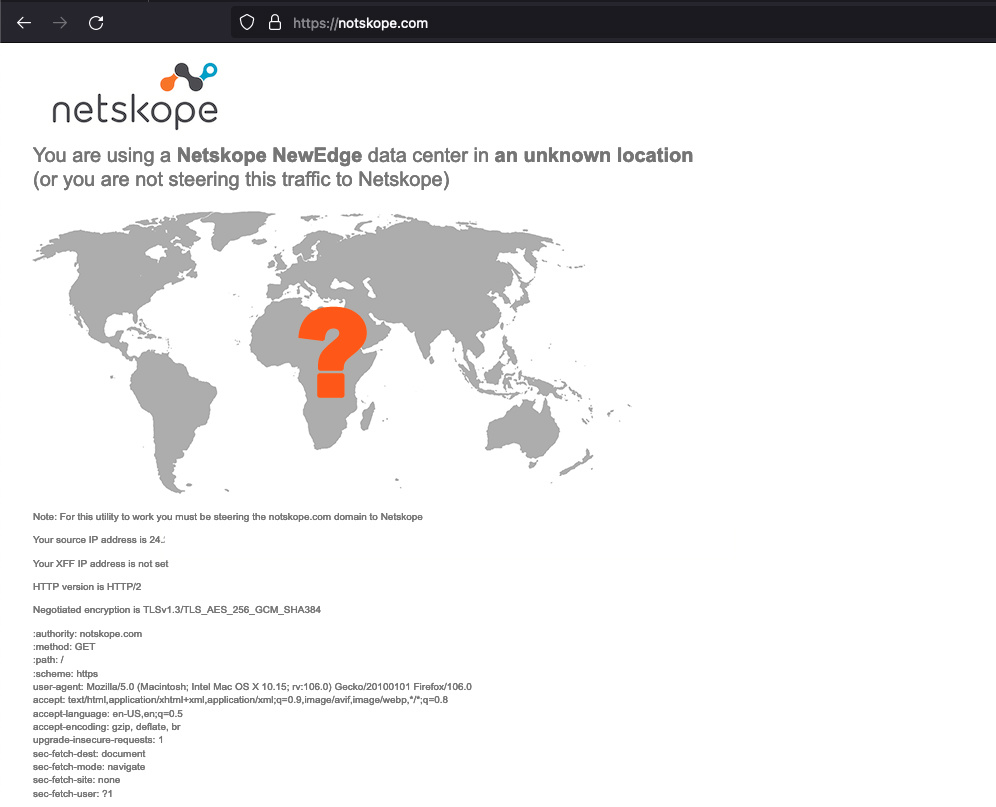
If the client is enabled and connected to a tenant, there will be an indicator on the map for the dataplane from which the user is sourced. The X-Forward-For (XFF) IP address will be that of the ISP to which the user is located.
�onus Content: A Self-Service Option for Netskope Client Deployment🎁
The Netskope Client Enforcement application in Okta may be used as a self-service option in Okta to deploy the Netskope Client. It is possible to create an additional Netskope Client Enforcement application and name it “Netskope Client Self-Service Install” or instruct users to use the same application for both purposes.


