

VMWare's Workspace ONE platform enables IT teams to manage any app on any device by integrating access control, application management, and unified endpoint management. In this guide you will learn how to perform a completely silent installation of the Netskope Client for supported MacOS versions.
High-Level Process
From a high-level, the process is as follows:
- Configure Device Profile to deploy Pre-requisites
- Configure Workspace ONE Sensor to push pre-install file
- Push Netskope Client
Before you start, make sure to have
- Access to a Netskope tenant.
- Access to a Workspace ONE tenant with Intelligent Hub licensing.
- A MacOS device running MacOS 11.x or newer that has completed enrollment with Workspace ONE and has the target user's e-mail populated accurately.
- Downloaded the attached .zip file and extracted the script attached to this post.
- Downloaded the desired NSClient.pkg file from the Netskope Support Portal (login required).
Now... onto the deployment!
Download Netskope Tenant Certificates
- Login to your Netskope tenant and navigate to Settings > Manage > Certificates > Signing CA
- Download the Root and Intermediate certificates to your local system
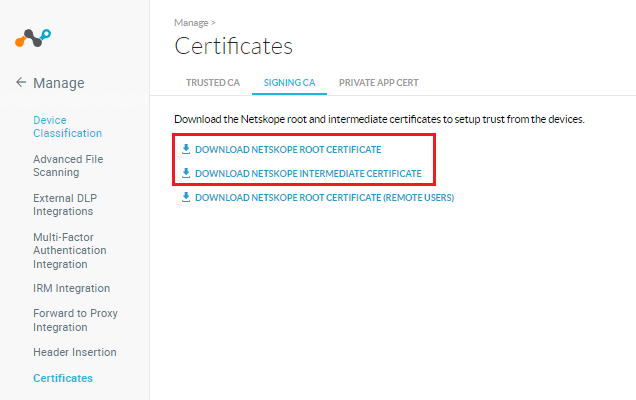
- Change the extension on both files from .pem to .cer
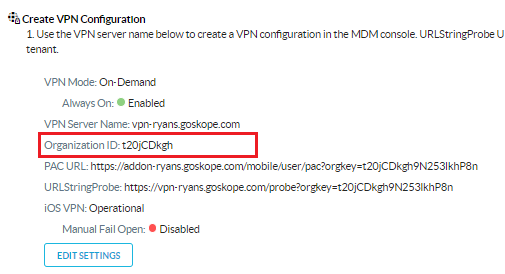
Get your Netskope Org ID
Navigate to Settings > Security Cloud Platform > MDM Distribution and make note of your Organization ID (you will need this later)
Prepare the Netskope WS1 Sensor Script (attached)
- Download the attached .zip file
- Extract the file and open the ws1_netskope_sensor.sh in your preferred code editor
- Update the following values
Line # Modification 16 TENANT=addon-yourtenant.goskope.com (ex: addon-acme.goskope.com) 17 ORGID = Your Netskope Organization ID 18 Do not modify - Save your changes and close your code editor
Create a Device Profile to Deploy the Netskope Client Pre-requisites
Failure to complete these steps correctly will result in the end user being prompted to approve one (1) or more changes to their device.
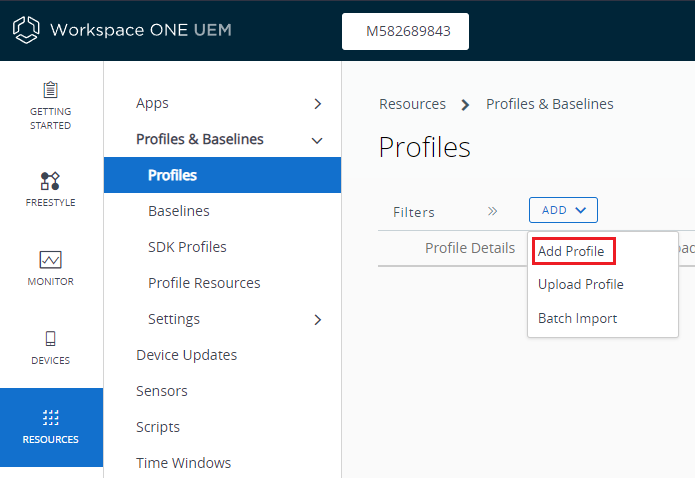
- Login to your Workspace ONE console
- Navigate to Resources > Resources & Baselines > Profiles
- Click the Add button > Add Profile
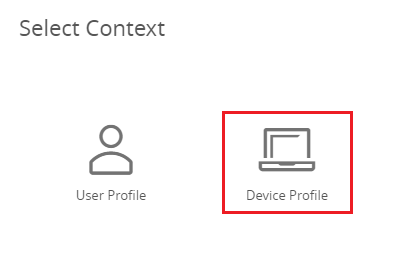
- Select macOS on the Add Profile screen
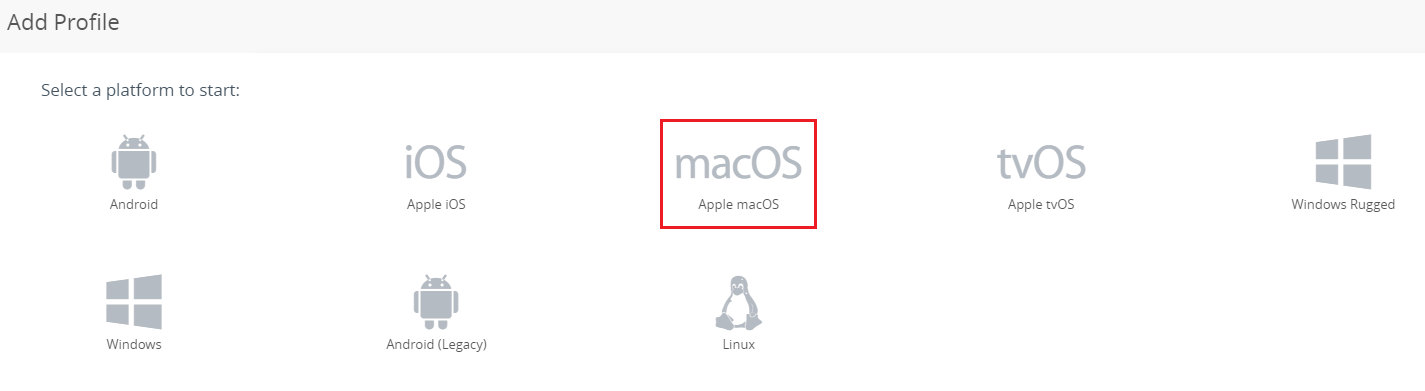
- Select Device on the Select Context screen
- Give the new profile a name (Ex: Netskope Pre-requisites)
Configure the Payloads
As part of the device profile, you must configure several payloads. Follow the steps for each payload.
Payload - Certificates
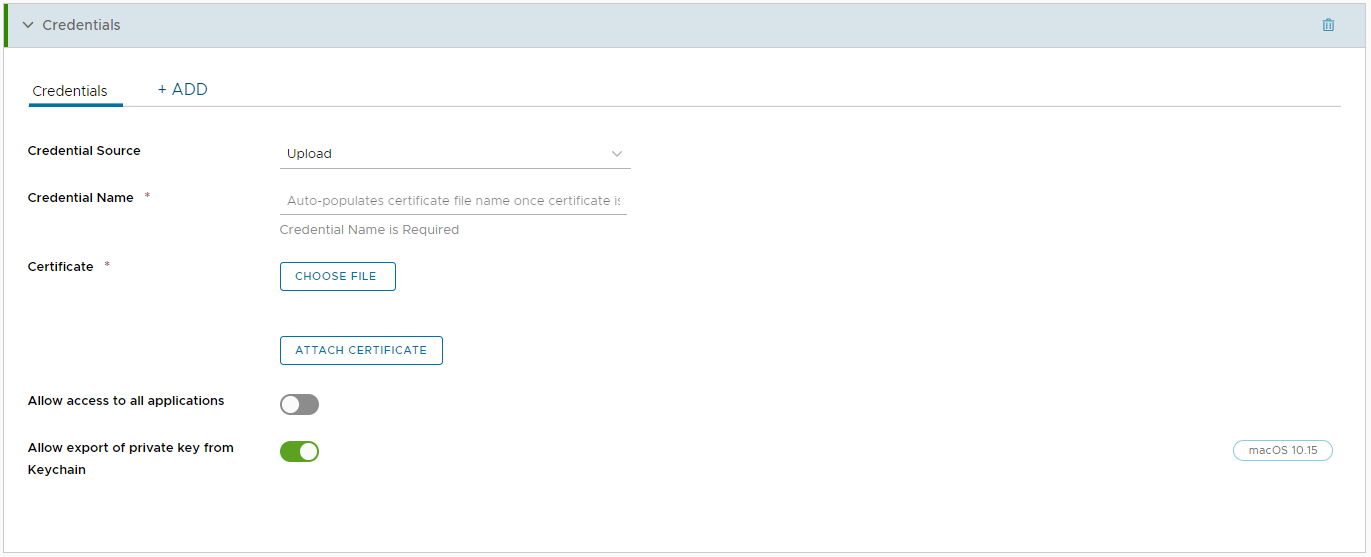
- Scroll down to the Credentials section and click the small Add button to the right to enter configuration mode
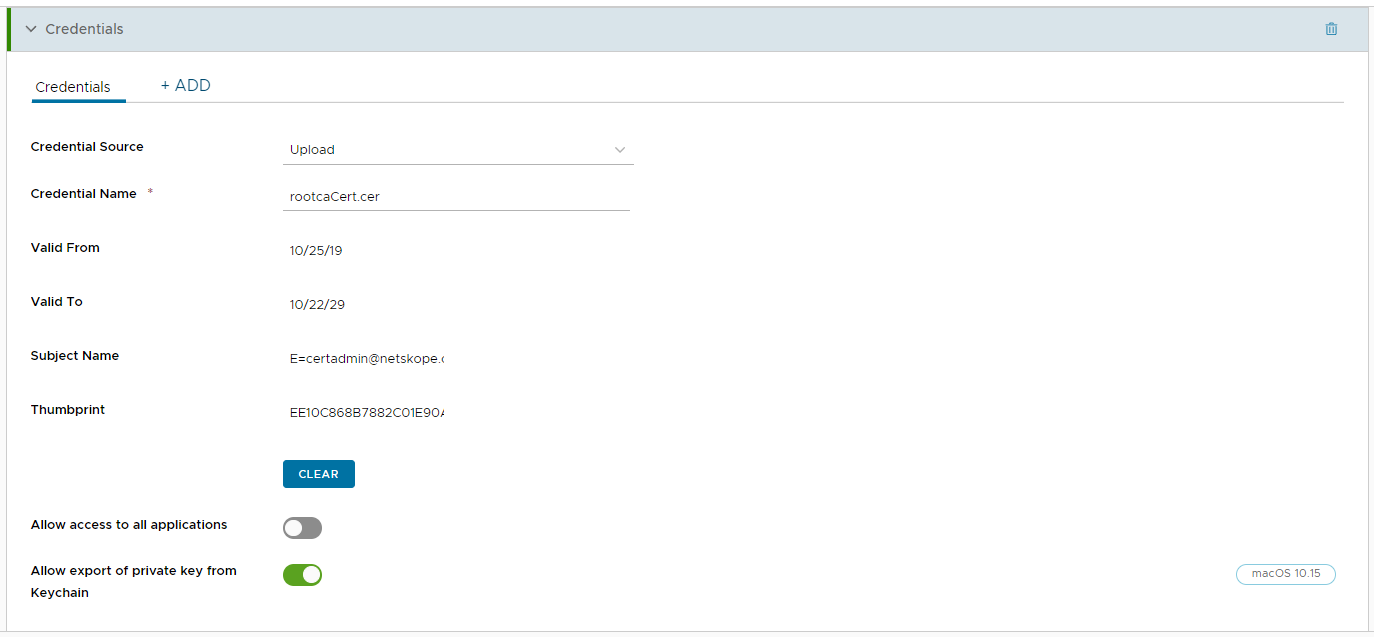
- Click Choose File > Browse for the rootcaCert.cer file you downloaded from the Netskope tenant > click Attach Certificate
- Click the +ADD button above the certificate details to add another certificate
- Click Choose File > Browse for the caCert.cer file you downloaded from the Netskope tenant > click Attach Certificate
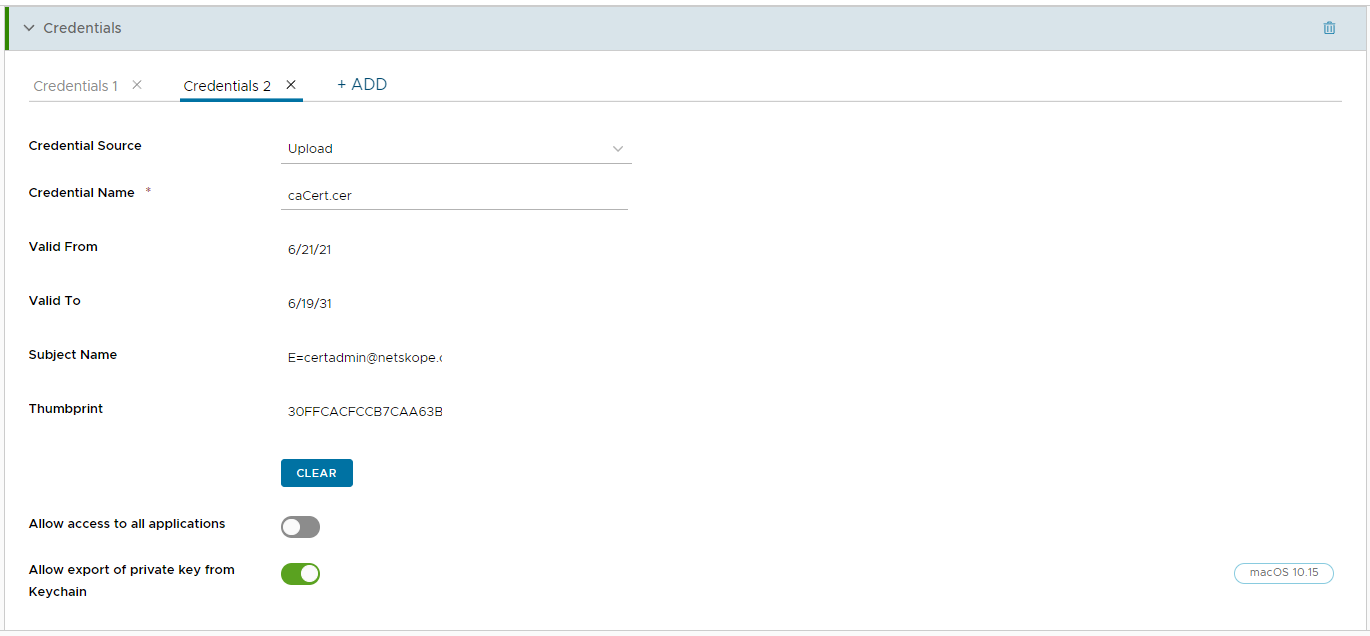
- You should now have two (2) Credentials tabs in your Credentials payload
Payload - System Extensions
- Scroll down to the System Extensions section and click the small Add button to the right to enter configuration mode
- Enable the Allow User Overrides option

- Scroll to the Allowed System Extension and add the required Team and Bundles Identifiers
Team Identifier Bundle Identifier 24W52P9M7W com.netskope.client.Netskope-Client.NetskopeClientMacAppProxy 24W52P9M7W com.netskope.client.Netskope-Client.NetskopeClientMacDNSProxy 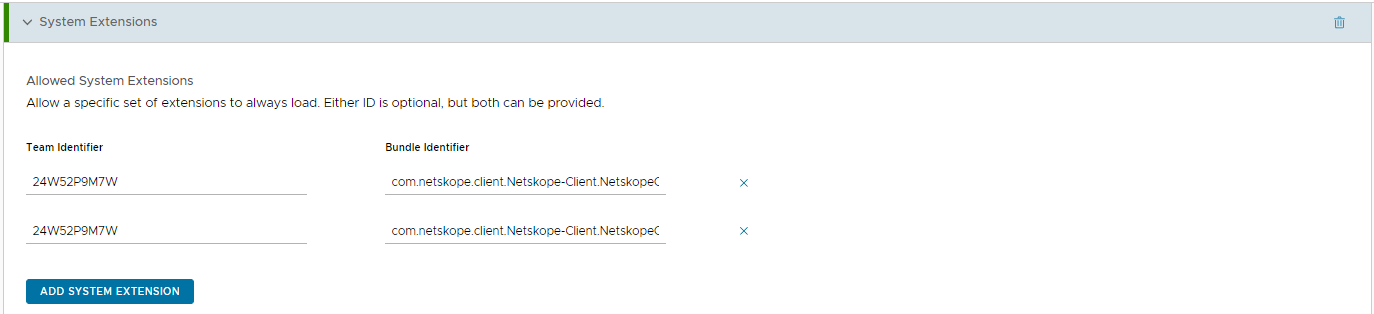
Payload - VPN
- Scroll down to the System Extensions section and click the small Add button to the right to enter configuration mode
- Configure the following information
Parameter Value Connection Name Netskope Connection Type Custom SSL Identifier com.netskope.client.Netskope-Client Server gateway-yourtenant.goskope.com Provider Designated Requirement anchor apple generic and identifier”com.netskope.client.Netskope-Client” and (certificateleaf[field.1.2.840.113635.100.6.1.9] /* exists */ or certificate1[field.1.2.840.113635.100.6.2.6] /* exists */ and certificateleaf[field.1.2.840.113635.100.6.1.13] /* exists */ and certificateleaf[subject.OU] = “24W52P9M7W”)
This completes the payload configuration, you should see four (4) total payloads listed in the Summary pane to the right of the profile configuration section.

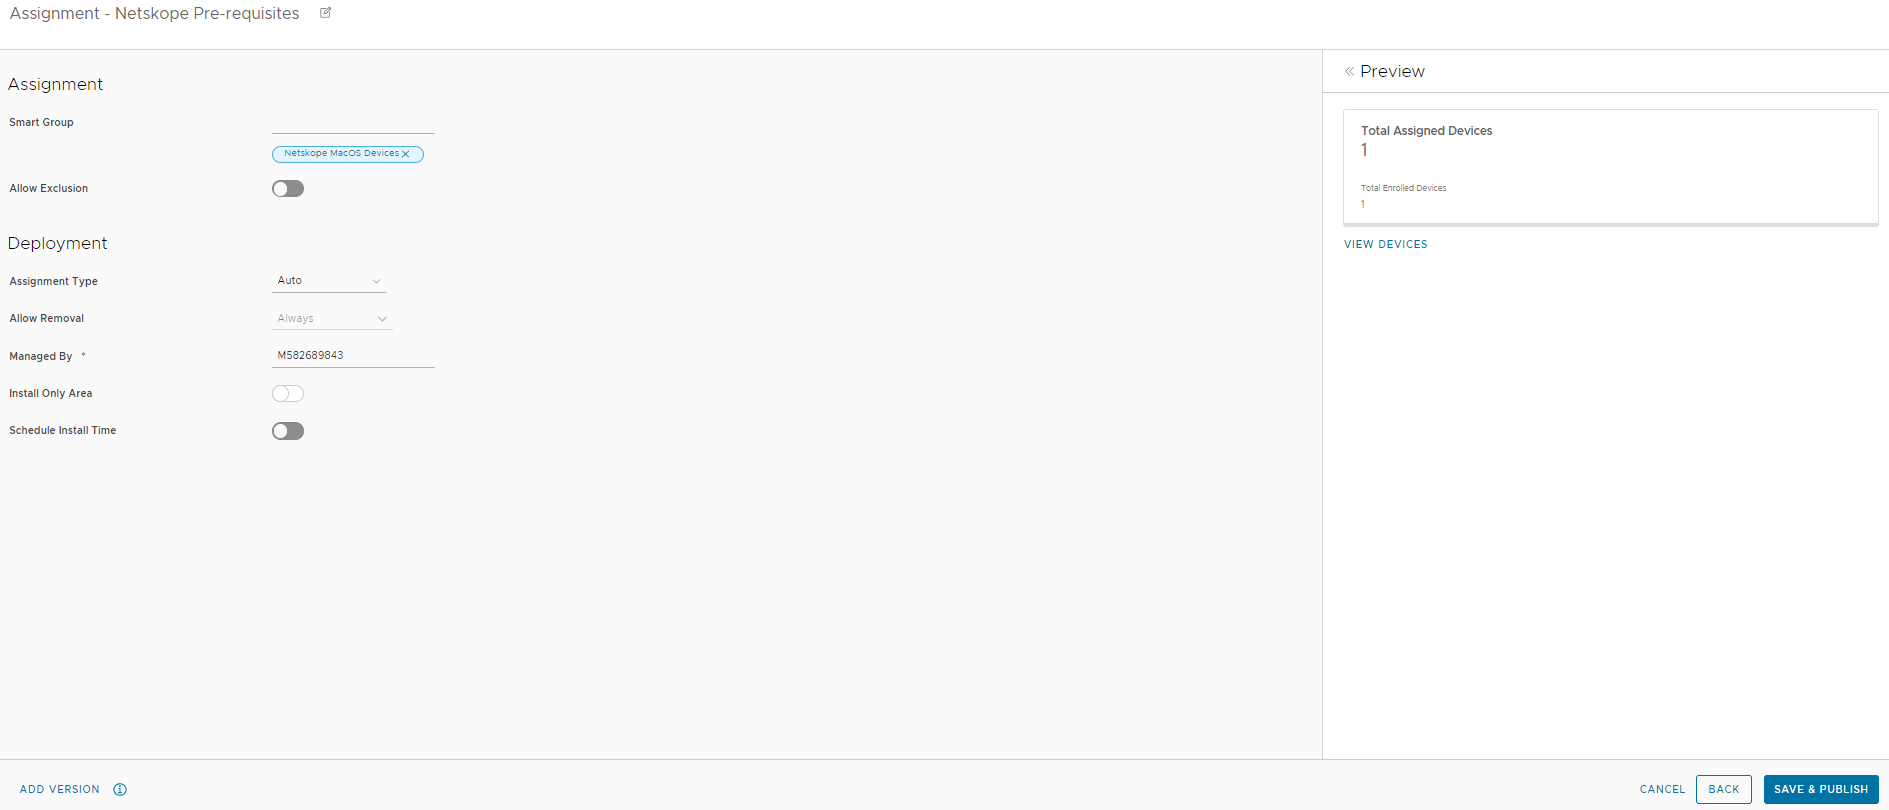
Click Next to continue and assign the profile to a Smart Group that contains your MacOS devices which will receive the Netskope Client.
Configure the Netskope Pre-Install Sensor
The ws1_netskope_sensor.sh script is used to create a Workspace ONE Sensor that will create a file on the local MacOS device to be ready by the NSClient.pkg during installation. The content of the file will provide the installer with all it needs to complete the silent install and not prompt the user for any information.
Sensors require Workspace ONE Intelligence licensing. If you do not have this feature, contact your VMware rep to add it or work with your Netskope account team on possible alternative installation methods.
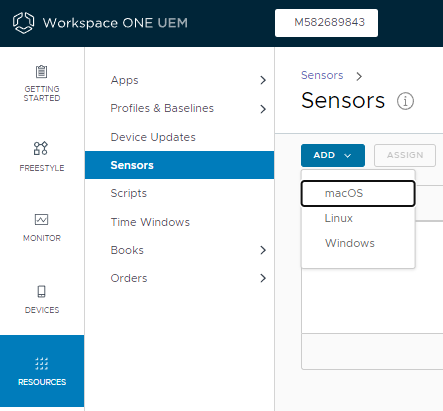
- In Workspace One, navigate to Resources > Sensors
- Click the Add button > choose macOS from the drop-down menu
- On the General tab New Sensor dialog, give the sensor a name (Ex: netskope_sensor) - note that the name must begin with a lowercase letter; spaces and special characters other than underscores are not allowed
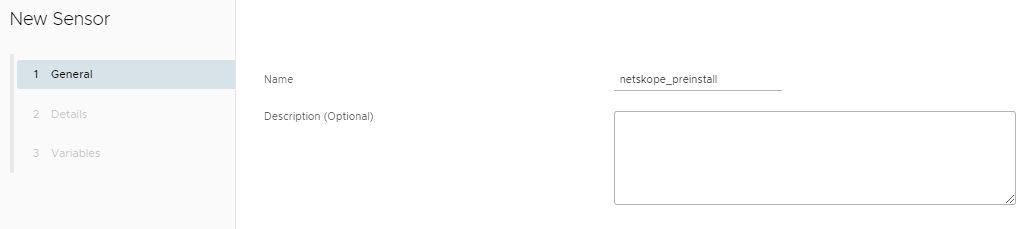
- Click Next
- On the Details tab of the New Sensor dialog, leave the Language, Execution Context and Response Data Type fields at their default values
- Click Upload and browse for the ws1_netskope_sensor.sh script you previously modified earlier in the guide
- Validate that the script contents are displayed correctly
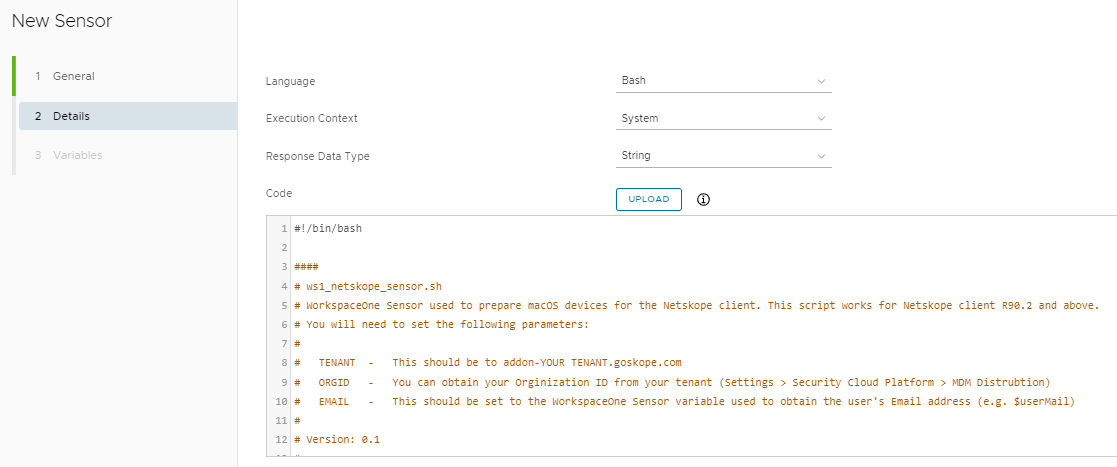
- Click Next
- On the Variables tab of the New Sensor dialog, specify the following
Key Value email {EmailAddress} 
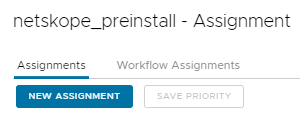
- Click Save & Assign
- Click the New Assignment button
- Set an Assignment Name and Select a Smart Group -- this should be the same group that you assigned to the Device Profile earlier in the guide.

- Click Next
- Set the deployment triggers you wish to use for distributing the sensor -- using "Periodically" will help with testing since forcing a sync or check-in will execute the sensor vs. logging out and logging back in.

- Click Save
Configure the Netskope Package for Install
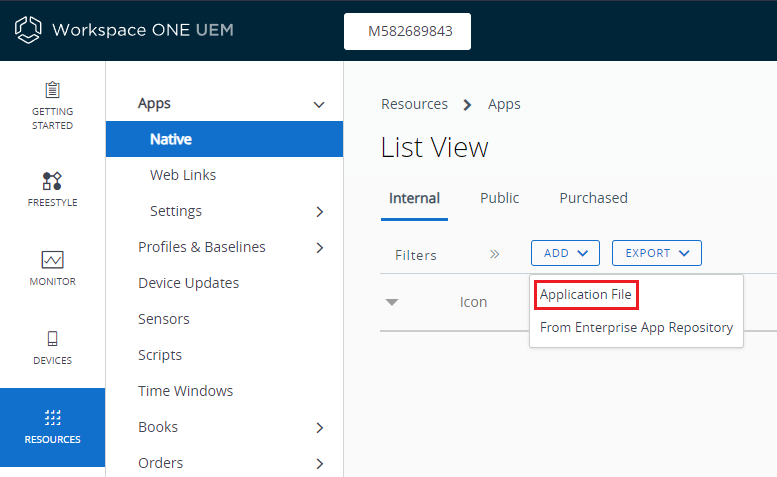
- In Workspace ONE, navigate to Resources > Apps > Native
- Click the Add button > select Application File
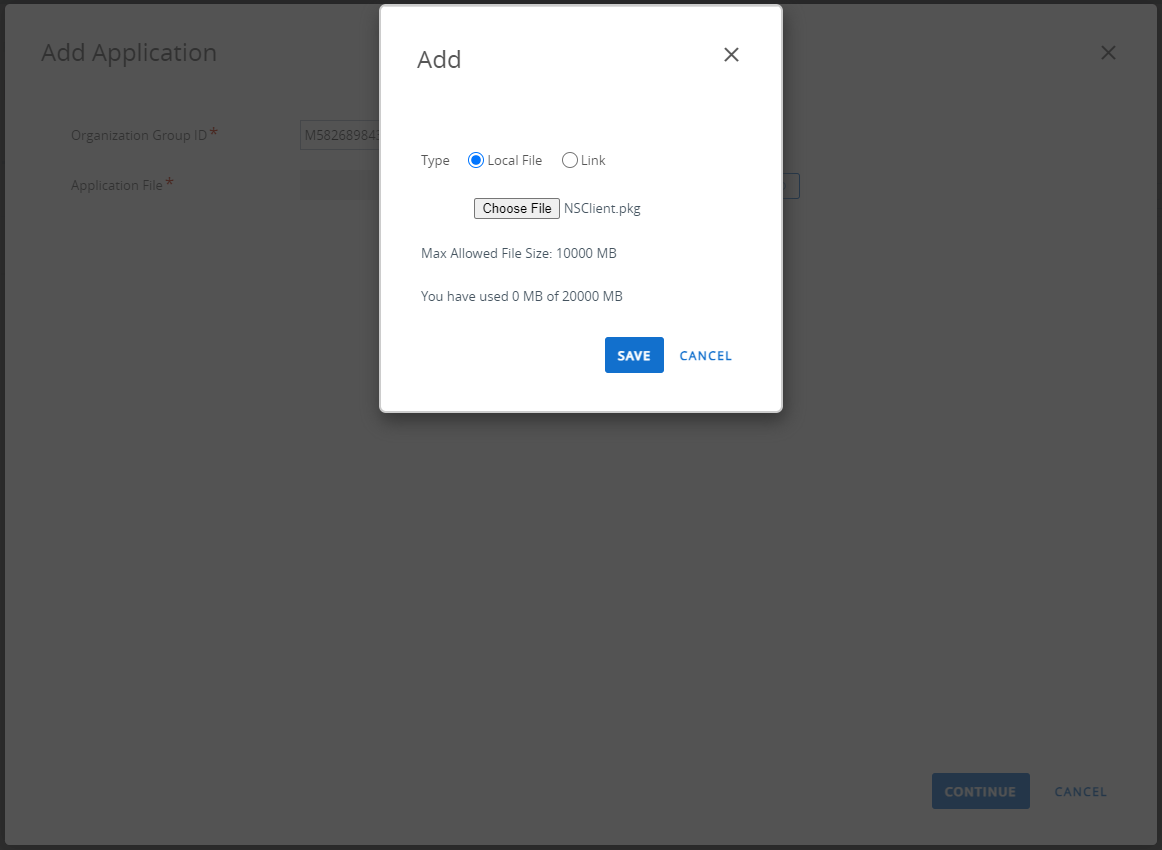
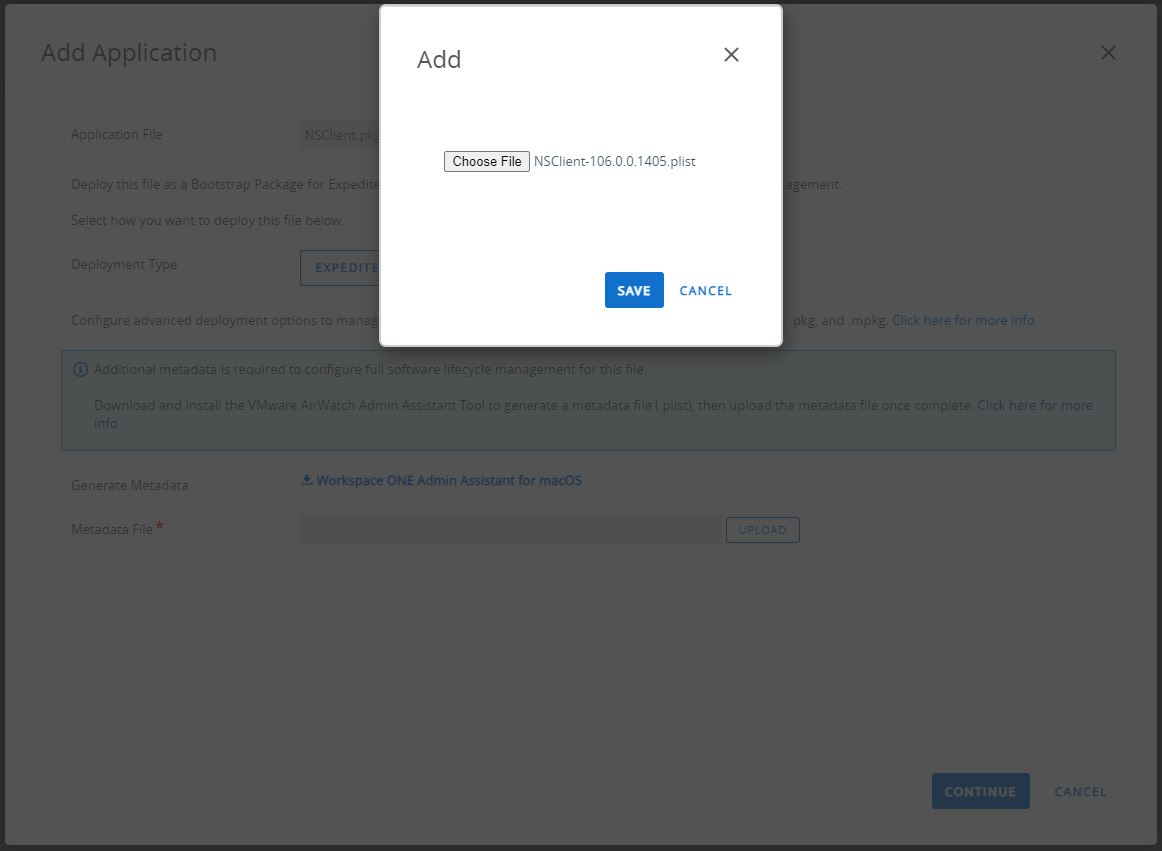
- On the Add Application dialog, click Upload and choose the NSClient.pkg you downloaded at the beginning of the guide
- Once uploaded, click Save and Continue
- Set the Deployment type as Full Software Management and upload the required metadata file -- you will need to follow the steps provided on-screen to generate this file
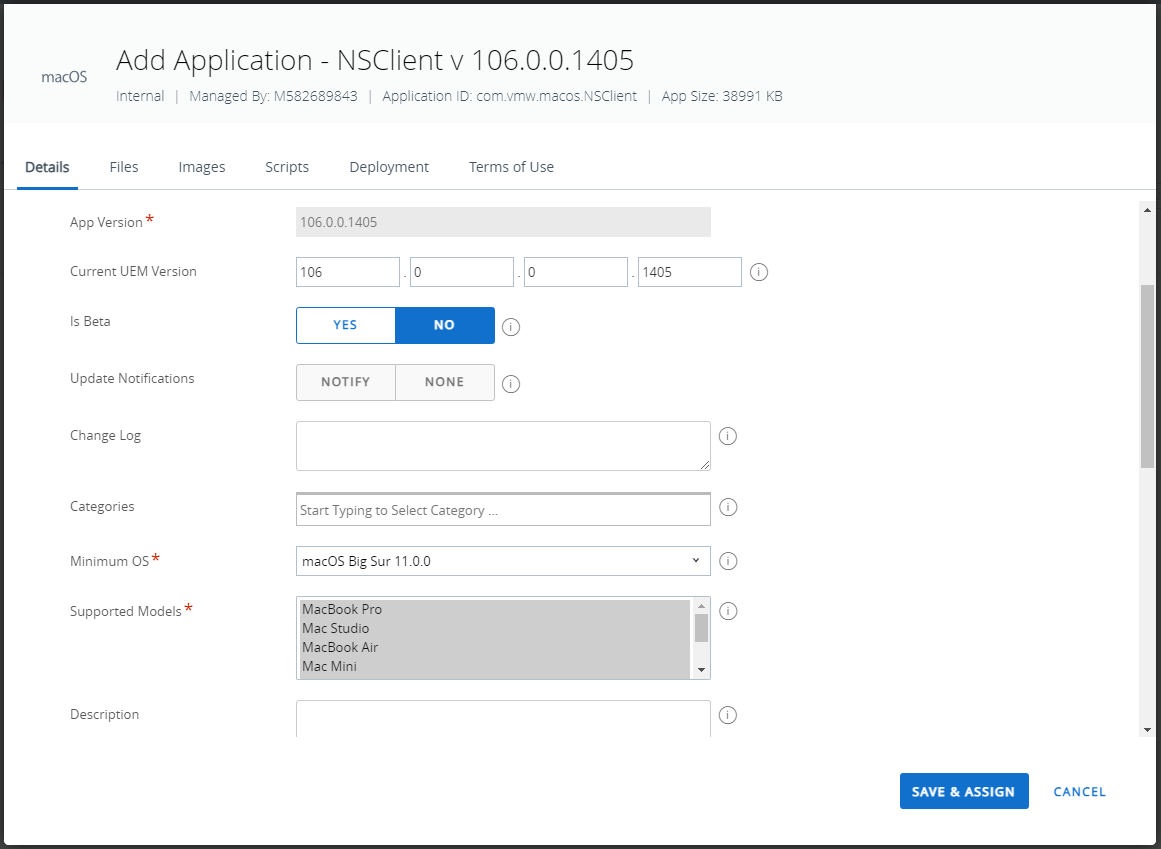
- Click Continue
- Review the application information displayed and set the Minimum OS along with the supported platforms -- refer to Netskope Client Supported OS and Platform for more
- Click Save & Assign to choose the Smart Group that will be used for targeting the install
Congratulations! You've built out all of the needed parts to successfully deploy the Netskope client silently to your MacOS devices.
Testing
- Ensure your device is a member of the correct Smart Group to receive the Device Profile and the Sensor
- Validate that the Device Profile is present on the machine by going to System Preferences > Profiles and looking for the profile you created.
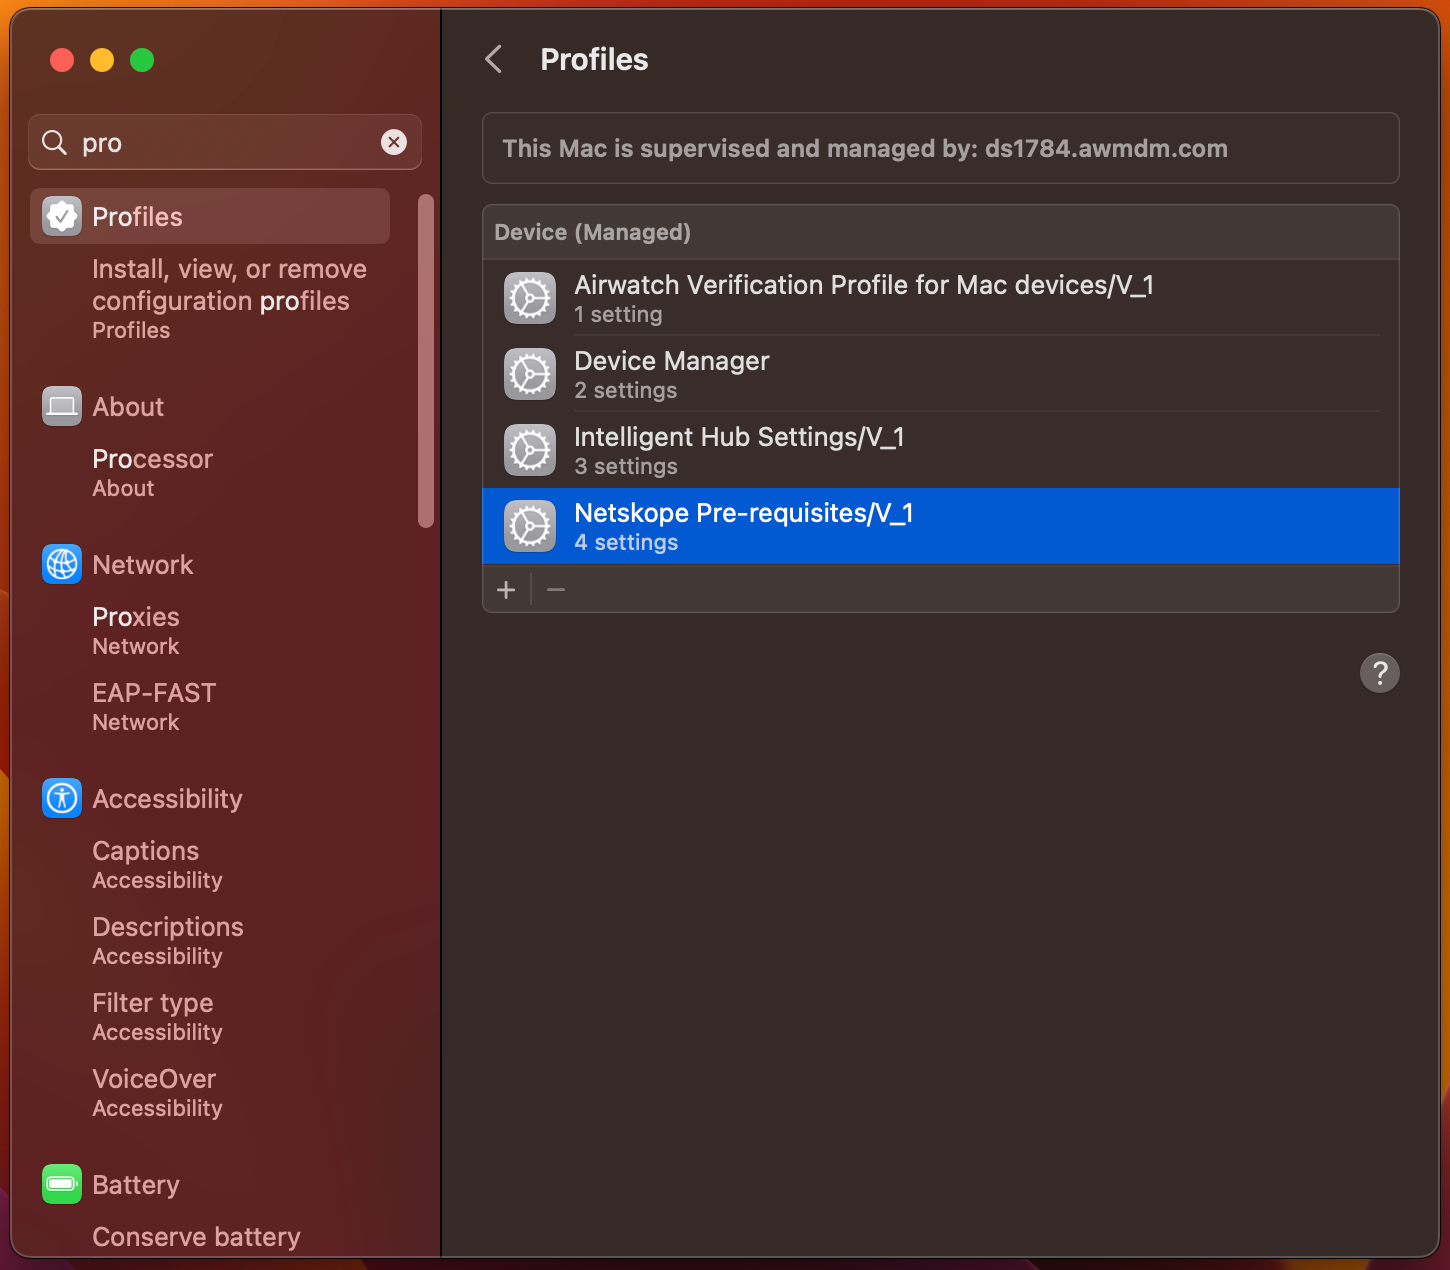
- Validate that the sensor has executed by creating the /tmp/nsbranding/nsinstparams.json file on the MacOS device
- If the above items are present, assign the package to the computer and verify the agent installs silently and the tunnel establishes without any user interaction
Notes and Considerations
- The Pre-requisites Device Profile and the Sensor must successfully deploy before you attempt to push the Netskope package. To ensure proper order of operations, some customers many customers will use one smart group for the Device Profile and the Sensor and a separate group for the application install.. Depending on your level of expertise with Workspace ONE, you may use additional checks to validate that the pre-reqs are in place and then dynamically add the systems to the Smart Group used for application install.


