
We are really excited to introduce the next phase of the Wiz and Netskope app instance integration.
Overview
The risk of unauthorized data movement is very real and something we see security administrators often having to deal with - this includes the need to identify what’s going on, understand where data is moving to, and ultimately implement policies to limit this data movement and this is where instance controls can be very effective, giving administrators immense control over what to allow and what to ‘inspect’(for data loss prevention policies) and what to outright block.
Netskope’s industry leading Secure Access Services Edge (SASE) offering provides not only control of access to your SaaS and IaaS apps and environments, but this control extends to “instances” of these apps and environments.
What does this mean? Netskope not only has the ability to identify and control(block uploads, downloads etc.) the usage of AWS S3(say), you can also implement these controls to be specific to your instance of AWS S3, and block access to all other instances of S3, thus limiting which S3 bucket users access and upload data, and subsequently minimizing the risk of data movement to unsanctioned instances of S3.
Joint Solution
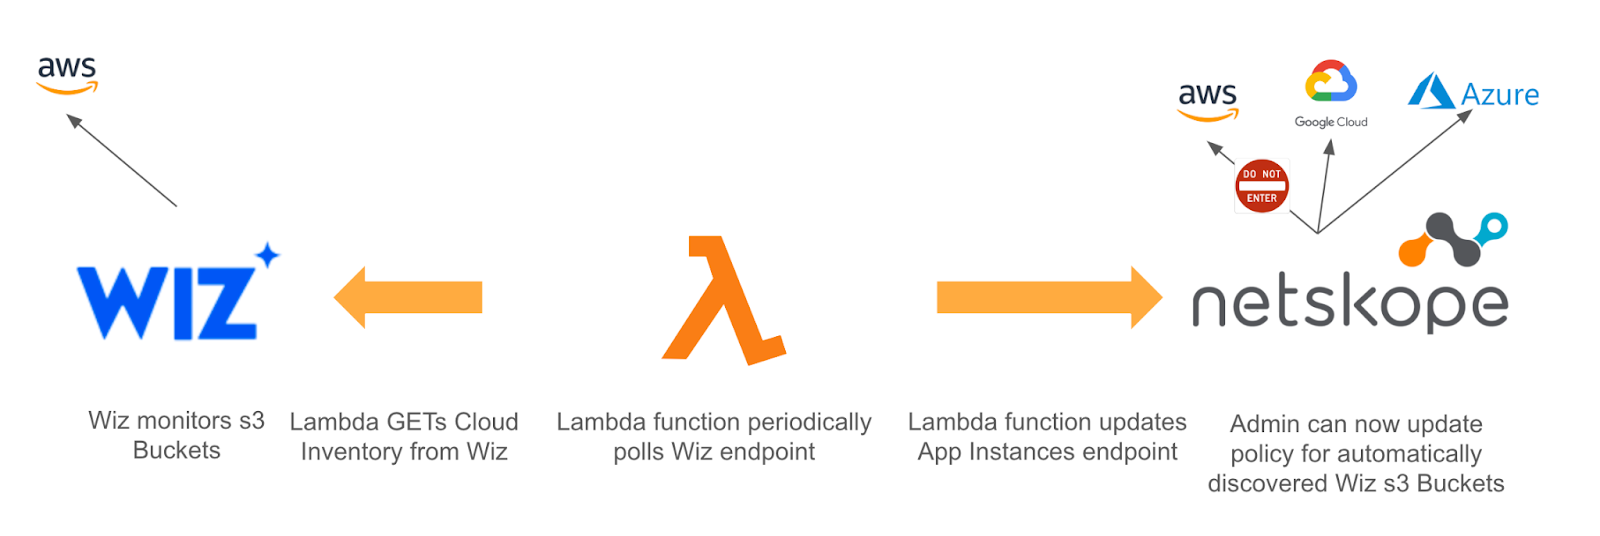
This integration takes advantage of the deep visibility that Wiz has into your cloud environments and
The solution leverages Wiz Cloud Inventory API along with the Netskope App Instance API.A lambda function is deployed in the customer tenant to broker API calls between the two platforms.
Wiz provides a list of storage accounts across your AWS and GCP environments. This insight allows this integration to automatically create App Instances in the Netskope platform for each bucket. This simplifies policy and allows for more granular CASB and DLP capabilities on the Netskope platform.
Deployment Steps
- Obtain your Wiz Client ID and Client Secret for your tenant. In addition you will also need your Wiz Graphql URL.
- Additionally, you will need to generate a REST API v1 (v2 is on the roadmap) token from your Netskope tenant. You will need the following endpoints added to your scope:
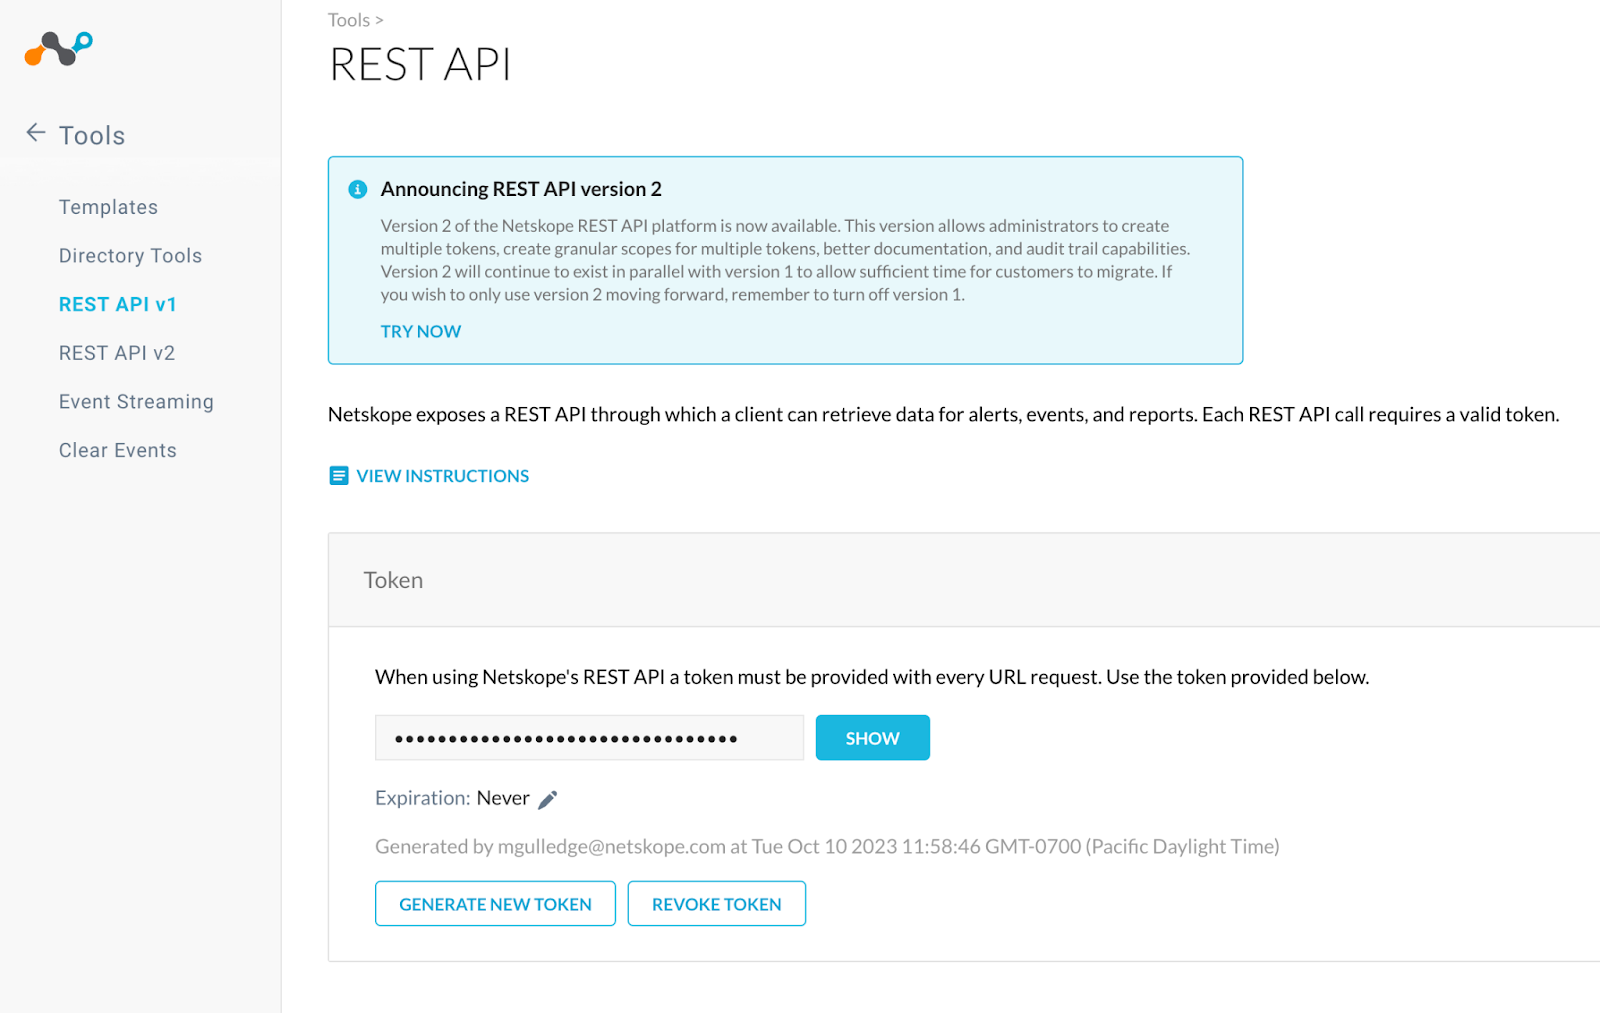
For more information on creating a Netskope API token and adding endpoints to the scope please reference: https://docs.netskope.com/en/netskope-help/admin-console/rest-api/netskope-platform-rest-apis/manage-app-instances-for-inline-enforcement/
Once you have the following credentials we can now deploy the lambda function in your AWS tenant.
- Log into your AWS console (https://console.aws.amazon.com/)
- Navigate to the AWS service Lambda:

- Next Select Create function and select Use a blueprint at the top and have the Blueprint name as the Python 3.10 Schedule a periodic check of any URL
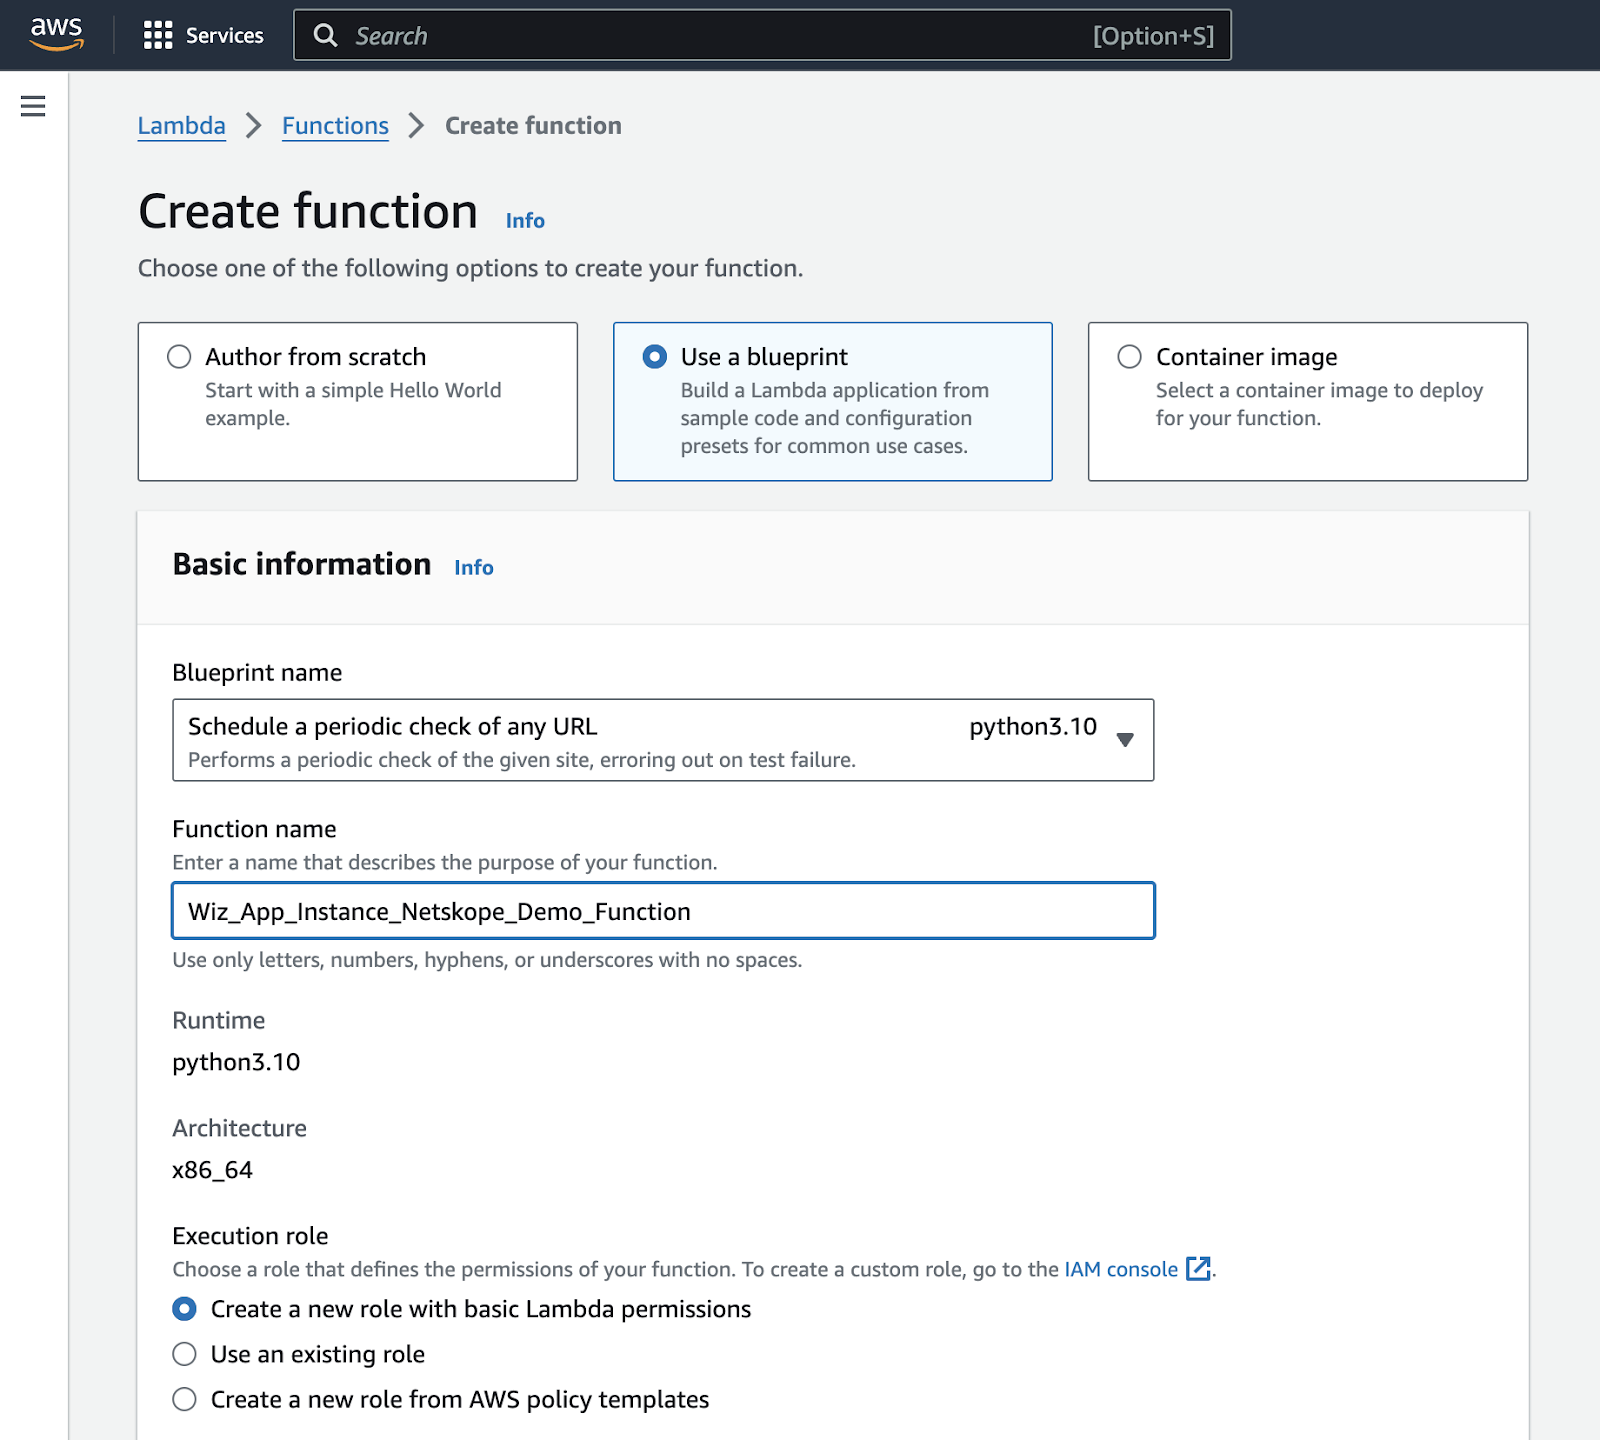
- Provide a function Name and role information. (Recommended to Create a new role with basic Lambda permissions)
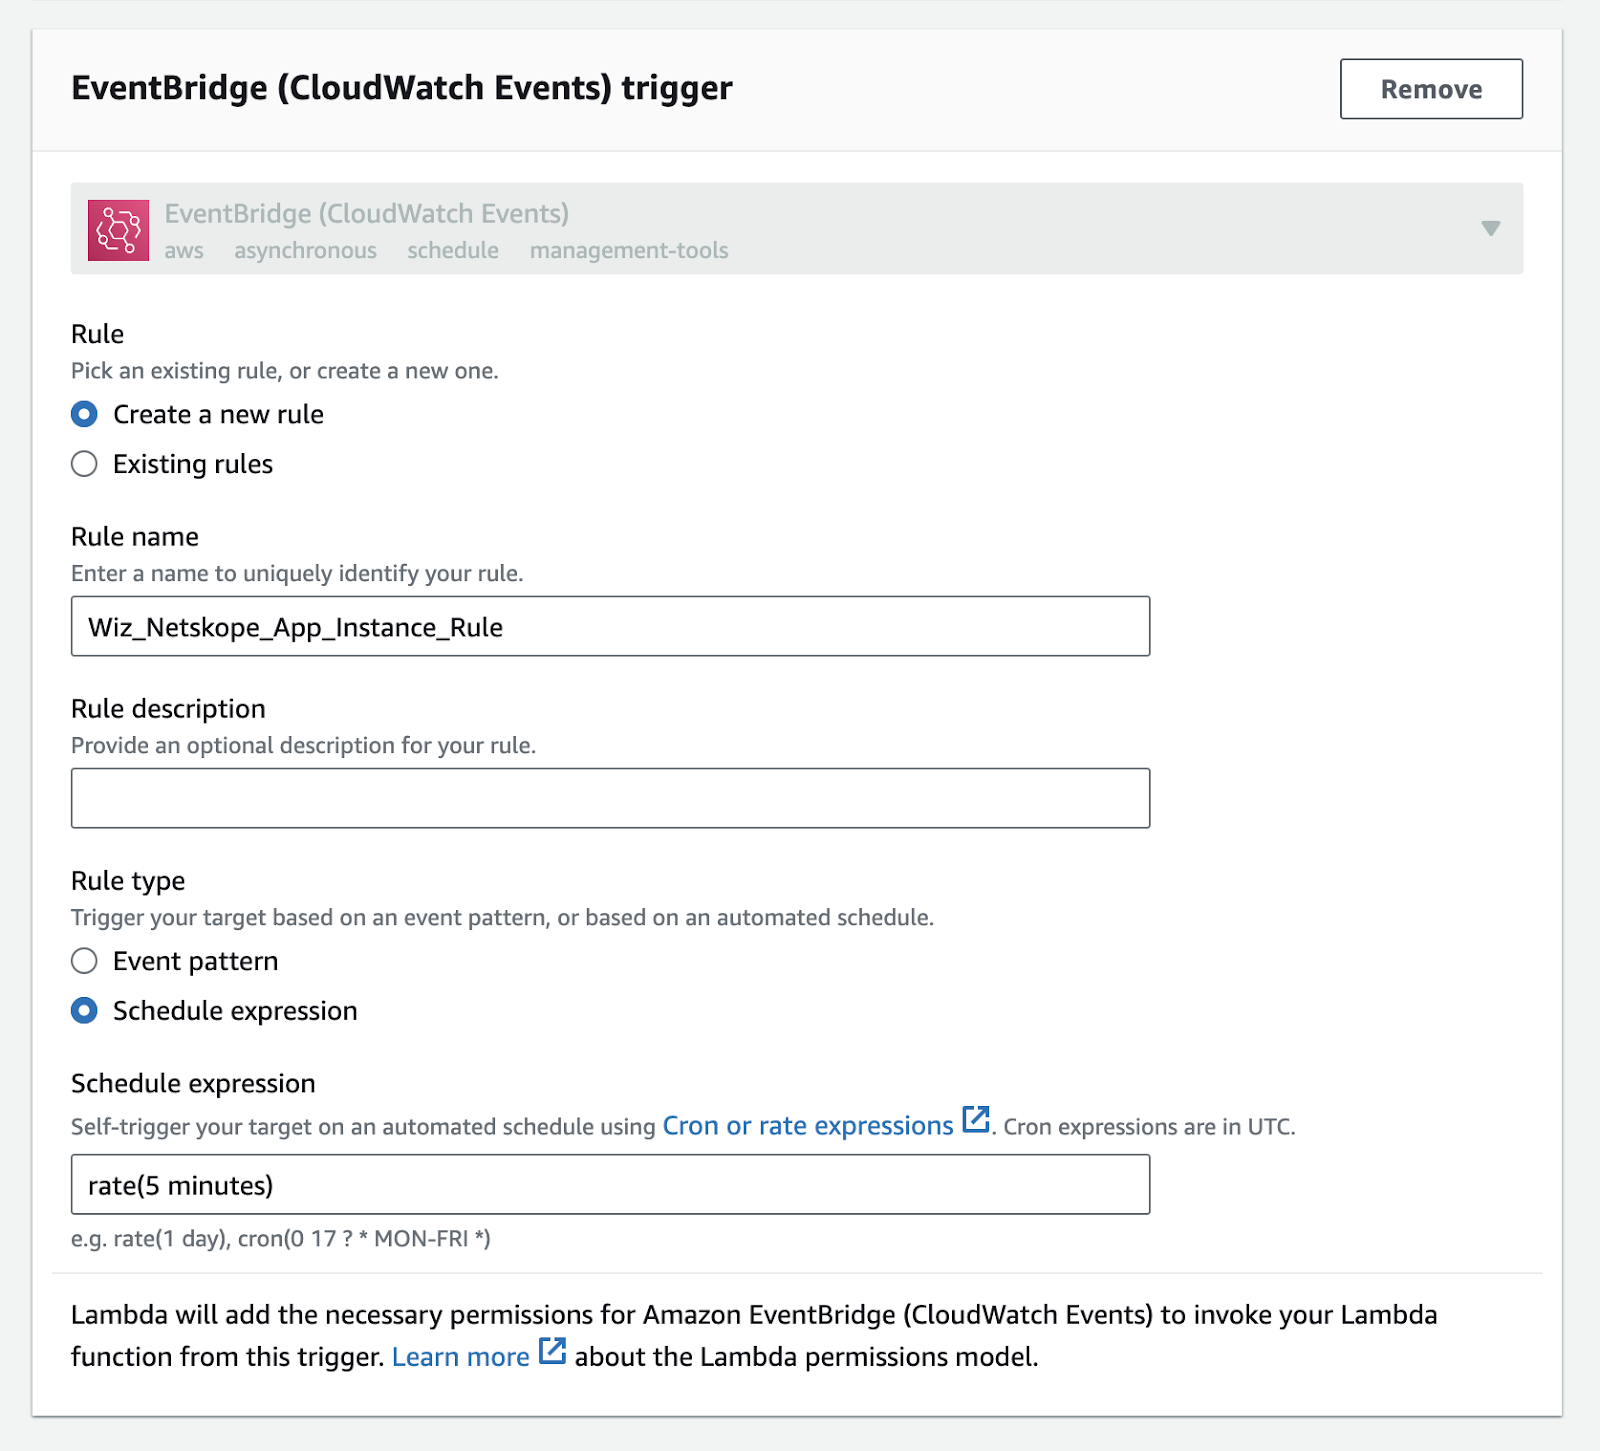
- Then we will need to define the EventBridge information including the frequency (Rate) that the function is invoked. This integration is configured for 5 minutes. You will need to fill out the following information as highlighted in the screenshot:
- Additionally, Environmental variables will need to be set:
client_id
client_secret
netskope_api_token
netskope_tenant
wiz_graphql_url
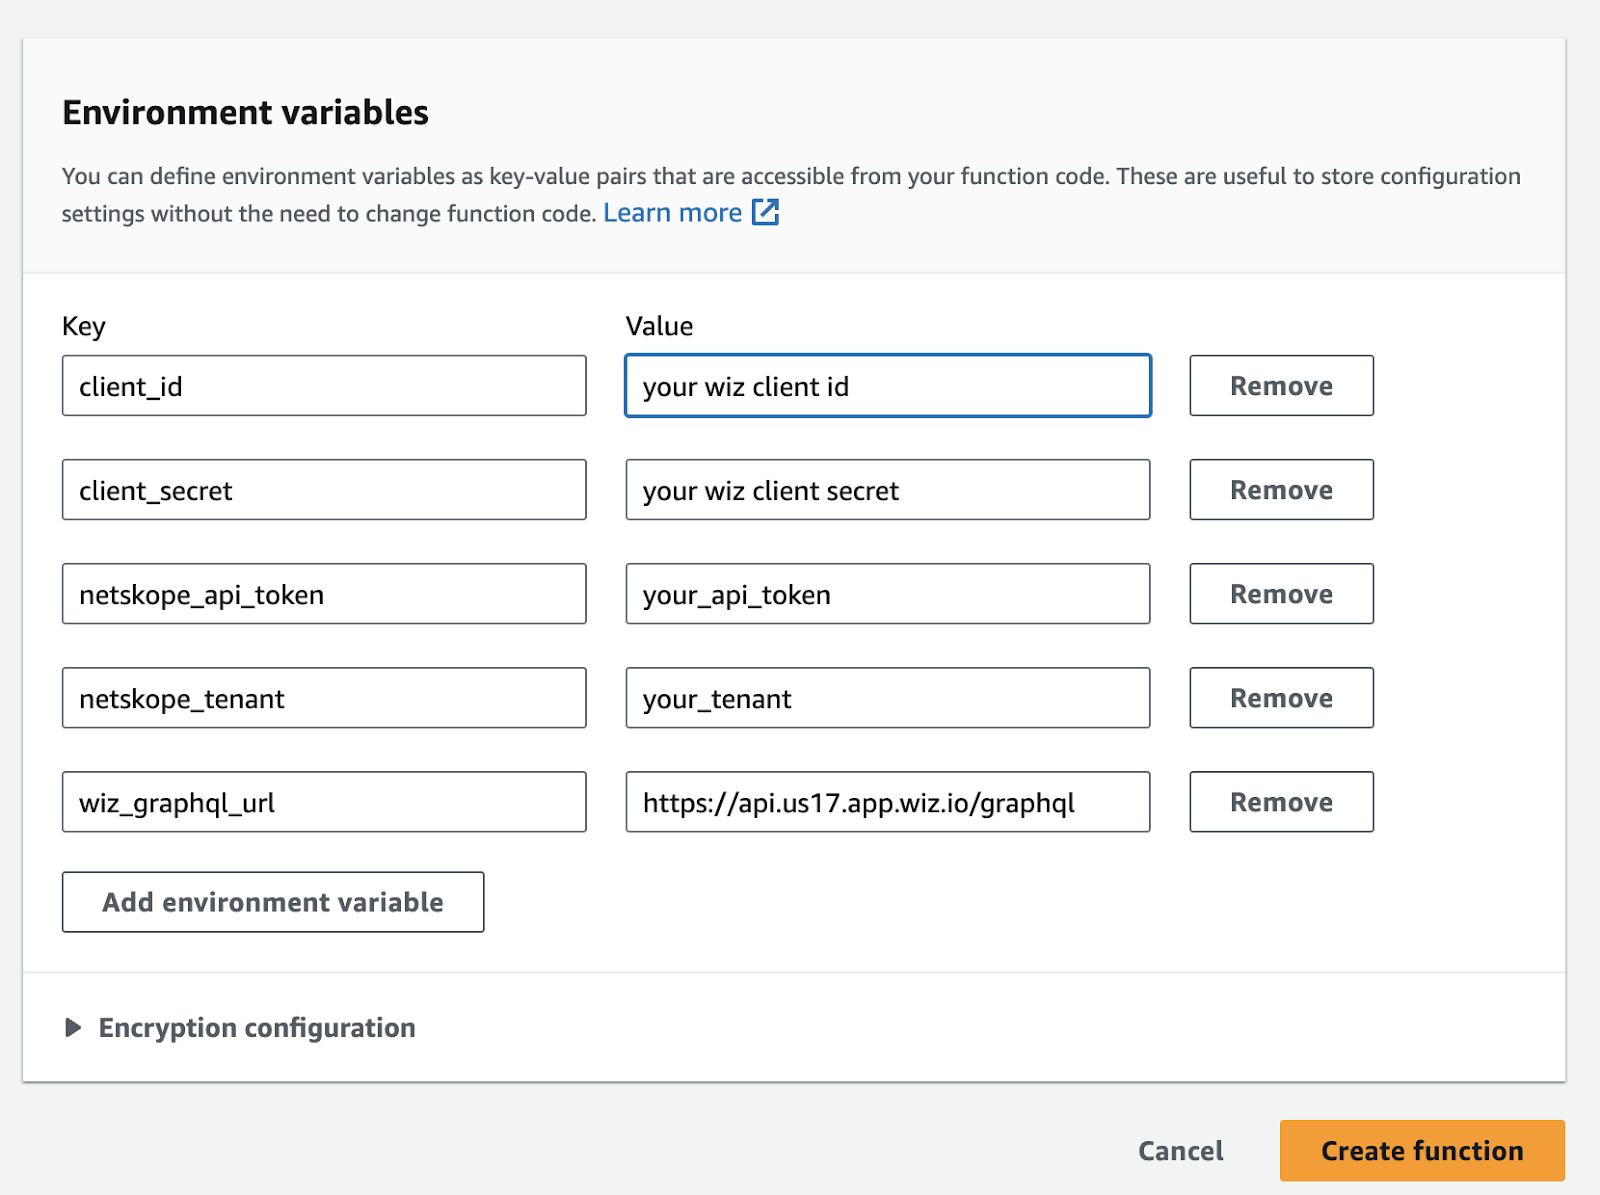
- Finally scroll down to the bottom and select Create function
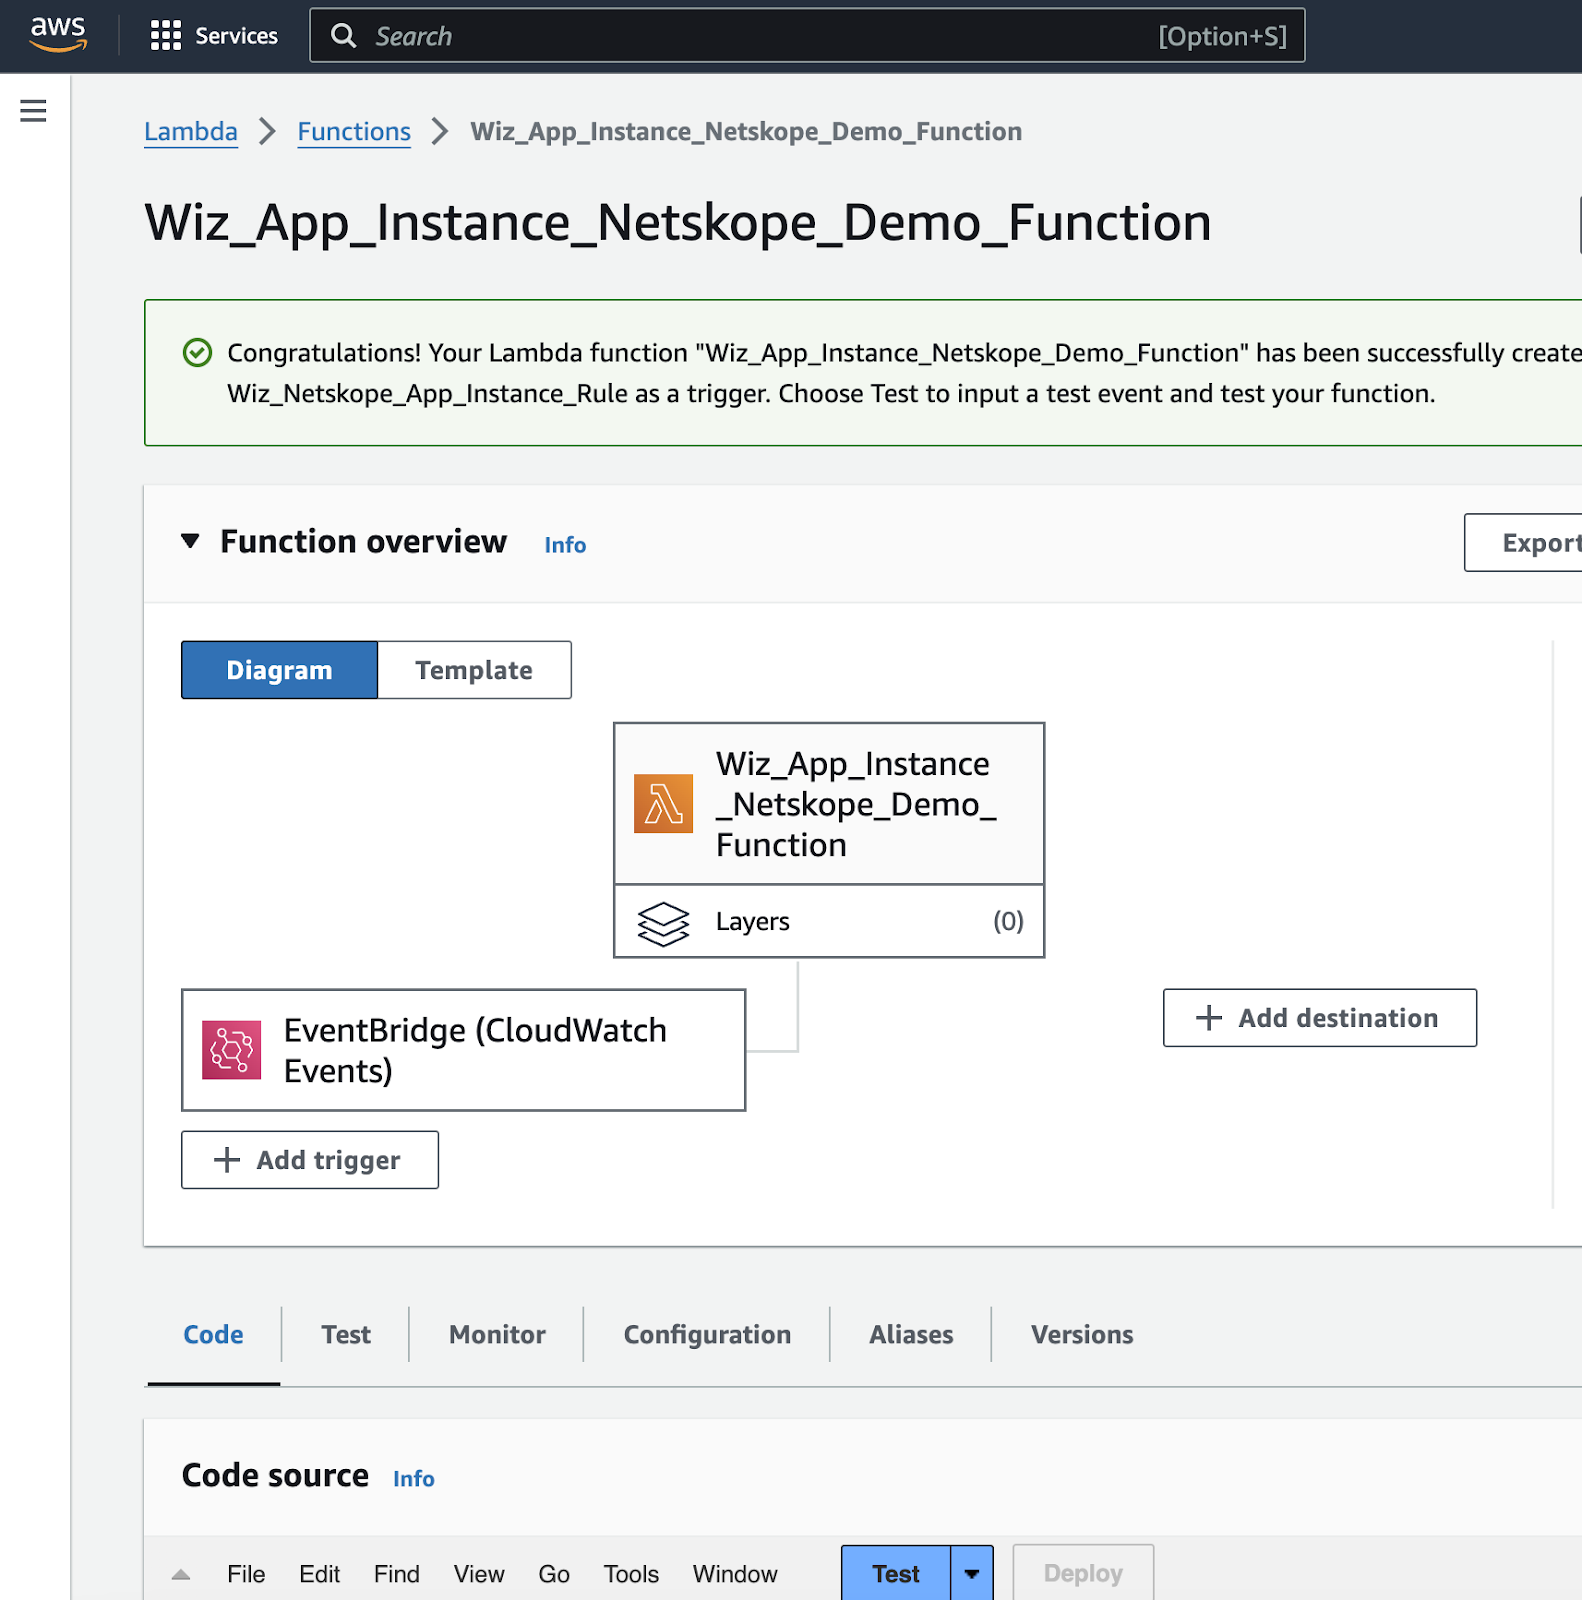
Once you have the Lambda deployed we can upload the code.
- Navigate to the code tab for your function:
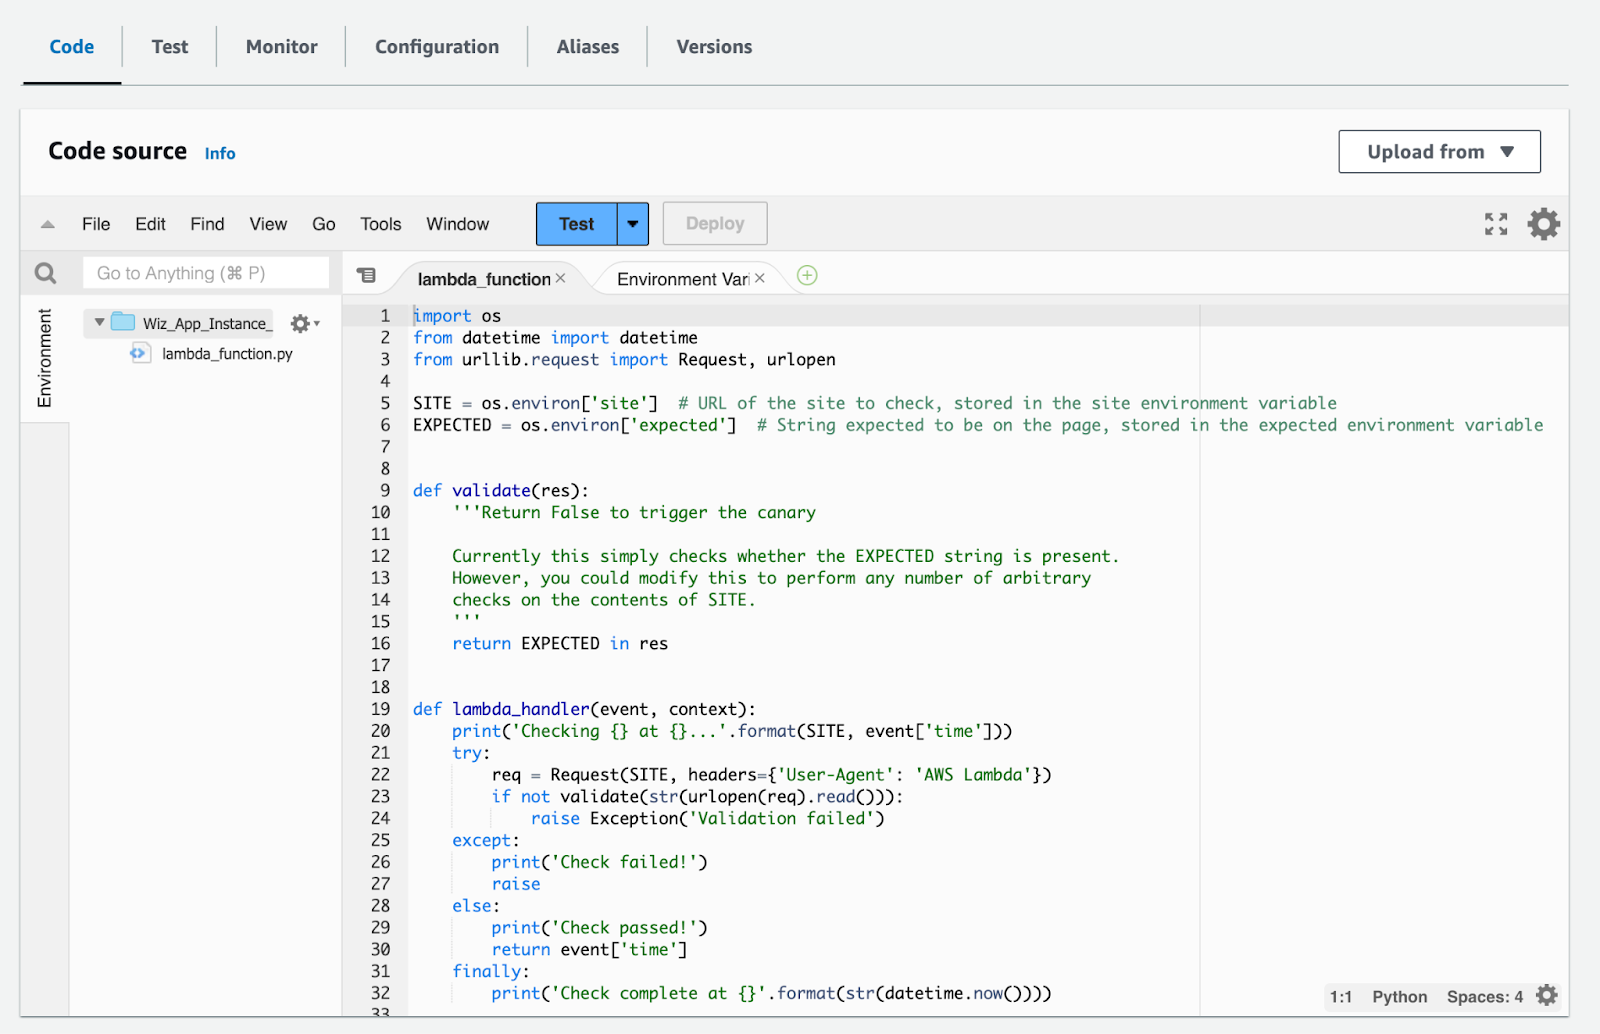
- Remove all the existing python code and paste the code from this GIST into your function and click Deploy.
And that's it! You are up and running and should be able to verify Wiz monitored buckets


