


Netskope Global Technical Success (GTS)
Using AWS CLI with Netskope: Handling SSL Certificate Errors in Windows 11 with AWS CLI V2
Netskope Cloud Version - 126
Objective
Provide the necessary steps to resolve the SSL error when using AWS CLI V2 on Windows 11 with the Netskope client enabled.
Prerequisite
Use AWS CLI V2 through CMD and PowerShell on Windows 11. NGSWG must be enabled as part of the licensing. Netskope Client should be enabled.
Context
SSL certificate errors occur when running AWS CLI commands with the Netskope agent active.
Configuration
With the Netskope client enabled, certificate errors occur when using AWS CLI with certain commands, as shown below:

If the agent is disabled, the errors disappear and the tool works correctly. The process is based on the Netskope documentation article:
https://docs.netskope.com/en/addressing-ssl-error-while-accessing-aws-services-via-the-aws-cli-with-the-netskope-client-enabled/
The first step is to download the scripts that generate the .PEM file required to load the certificate into AWS CLI. To do this, please visit the following support link and download the necessary files.
- https://support.netskope.com/s/login/?ec=302&startURL=%2Fs%2Farticle%2FAddressing-SSL-error-while-accessing-AWS-services-via-the-AWS-CLI-with-the-Netskope-Client-encryption-enabled
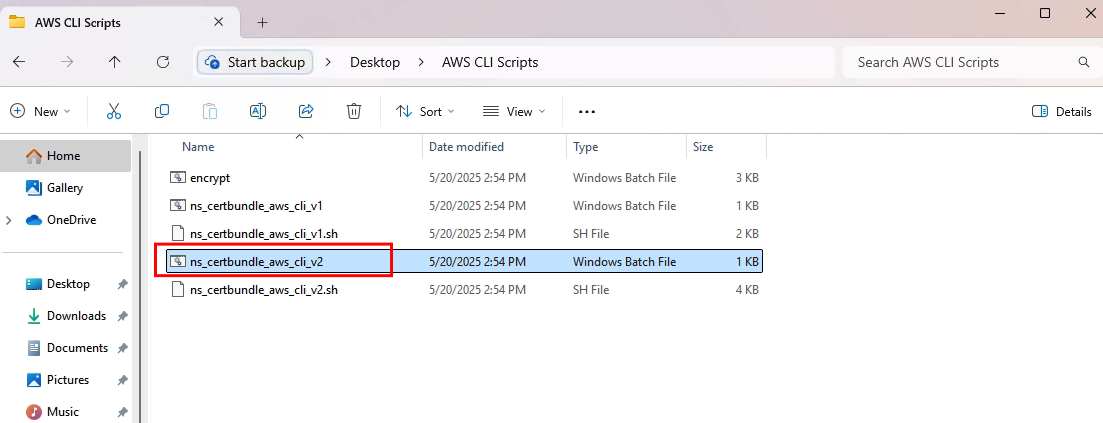
For this specific case, download the ns_certbundle_aws_cli_v2.bat file and place it in any location on the test device:
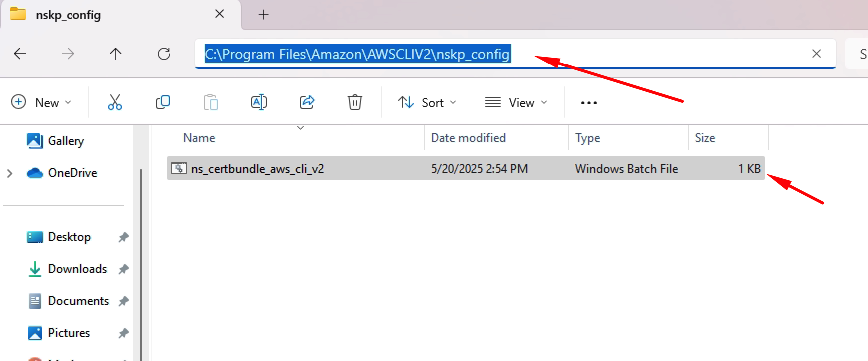
The next step is to navigate to the path C:\Program Files\Amazon\AWSCLIV2\ and create a new directory using the command: mkdir nskp_config

Next, the previously referenced script should be placed in this new directory:
C:\Program Files\Amazon\AWSCLIV2\nskp_config
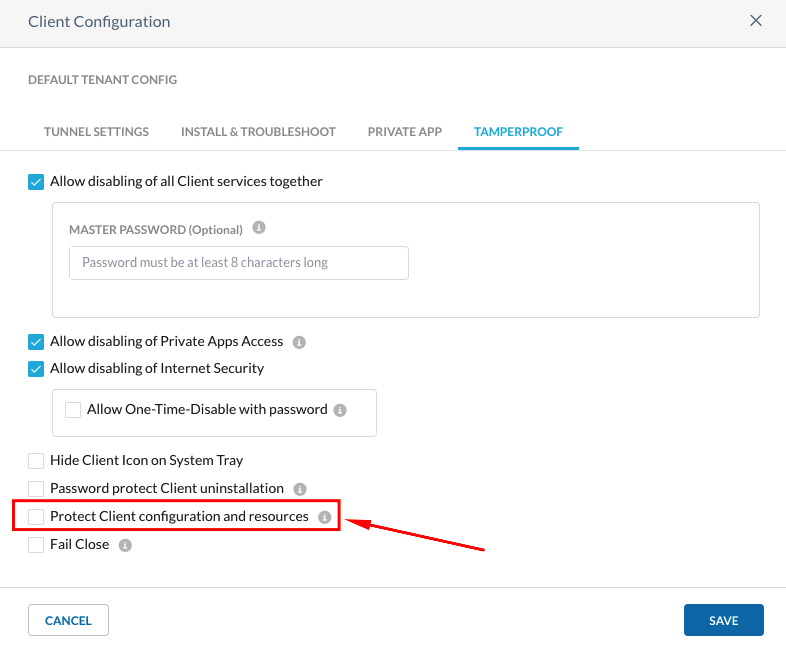
The next step is to run the script. It is important to note that the “Protect Client configuration and resources” option under the tamperproof settings must be disabled for this step.
This is necessary because the script references files that are protected by that specific setting.
To do this, go to your tenant:
- Settings > Security Cloud Platform > Client Configuration,
- Open the Client Configuration associated with the device you are working on,
- and under the TAMPERPROOF tab, disable the option:
- “Protect Client configuration and resources”.
After disabling this option, make sure the client updates its configuration. Once that’s confirmed, proceed to run the script in the current directory.
This will generate a .pem file in the same location, as shown below:

Once the file is in place, run the following command to load the certificate and ensure AWS CLI functions correctly:
aws configure set default.ca_bundle "C:\Program Files\Amazon\AWSCLIV2\nskp_config\netskope-cert-bundle.pem"

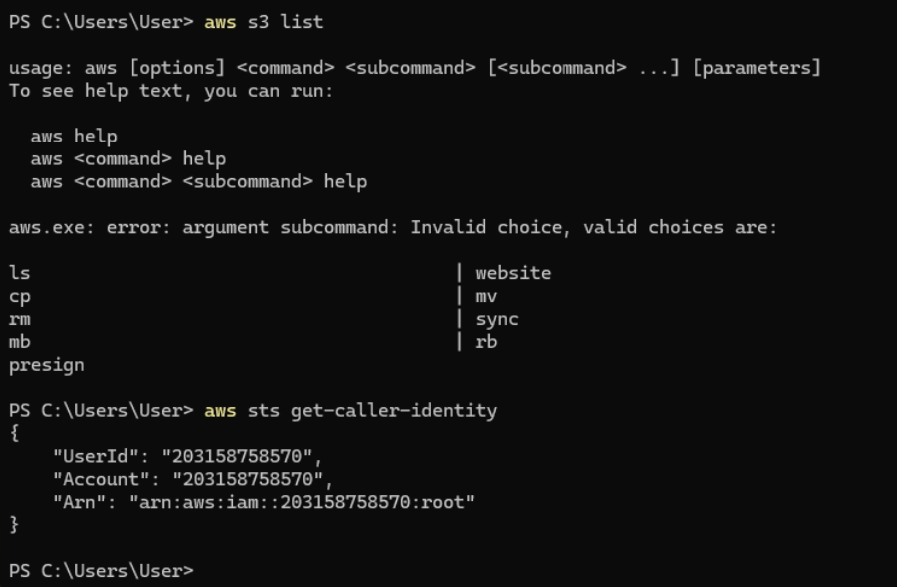
Next, tests should be performed with the Netskope agent enabled to confirm that certificate errors no longer occur.

Test from PowerShell:
Note: Once the configuration is complete and functionality is confirmed, it is highly recommended to re-enable the “Protect Client configuration and resources” option under the Tamperproof settings to maintain the security posture of the Netskope Client.
Terms and Conditions
- All documented information undergoes testing and verification to ensure accuracy.
- In the future, it is possible that the application's functionality may be altered by the vendor. If any such changes are brought to our attention, we will promptly update the documentation to reflect them.
Notes
- This article is authored by Netskope Global Technical Success (GTS).
- For any further inquiries related to this article, please contact Netskope GTS by submitting a support case with 'Case Type – How To Questions'.


