Introduction
I am super excited to announce that the Netskope security cloud can now be managed as code. "How is this possible?", you might ask. The answer is by using the newly released Terraform provider for Netskope. This has been in the works for some time now and is the first time our SSE platform has been integrated directly into an Infrastructure as Code tool. This will allow customers and partners to automate deployment of Netskope resources using Terraform. By taking a "Netskope as Code" strategy customers will be able to easily create, modify, and delete infrastructure inside of the platform. This first release has support for our ZTNA solution (Netskope Private Access or NPA) and includes resources and data sources for Private Access Publishers and Applications. Get ready to supercharge your NPA deployment by creating a simple, repeatable automated configuration.
What is "Infrastructure as Code" and why Terraform
Infrastructure as Code (IaC) is the idea that resources can be deployed, changed, destroyed, etc in the form of code rather than via a GUI or other manual process. In reality this means that infrastructure is defined in text files that are then used by an IaC tool like Terraform. The power of IaC is the fact that these files can easily be created, edited, and reused. By storing them in a code repository such as GitHub, they are also automatically versioned and backed up. With some careful planning IaC can even be automatically documented.
Terraform was chosen for Netskope's first foray into IaC because it is a very popular open source tool that is extensible. This extensibility allowed us to not only create a custom provider, but to also take advantage of the many existing providers to deploy Netskope publishers with ease in AWS, Azure, GCP and more. While there are other IaC tools, Terraform is already used by many of our customers and partners so it was a natural choice.
The Architecture
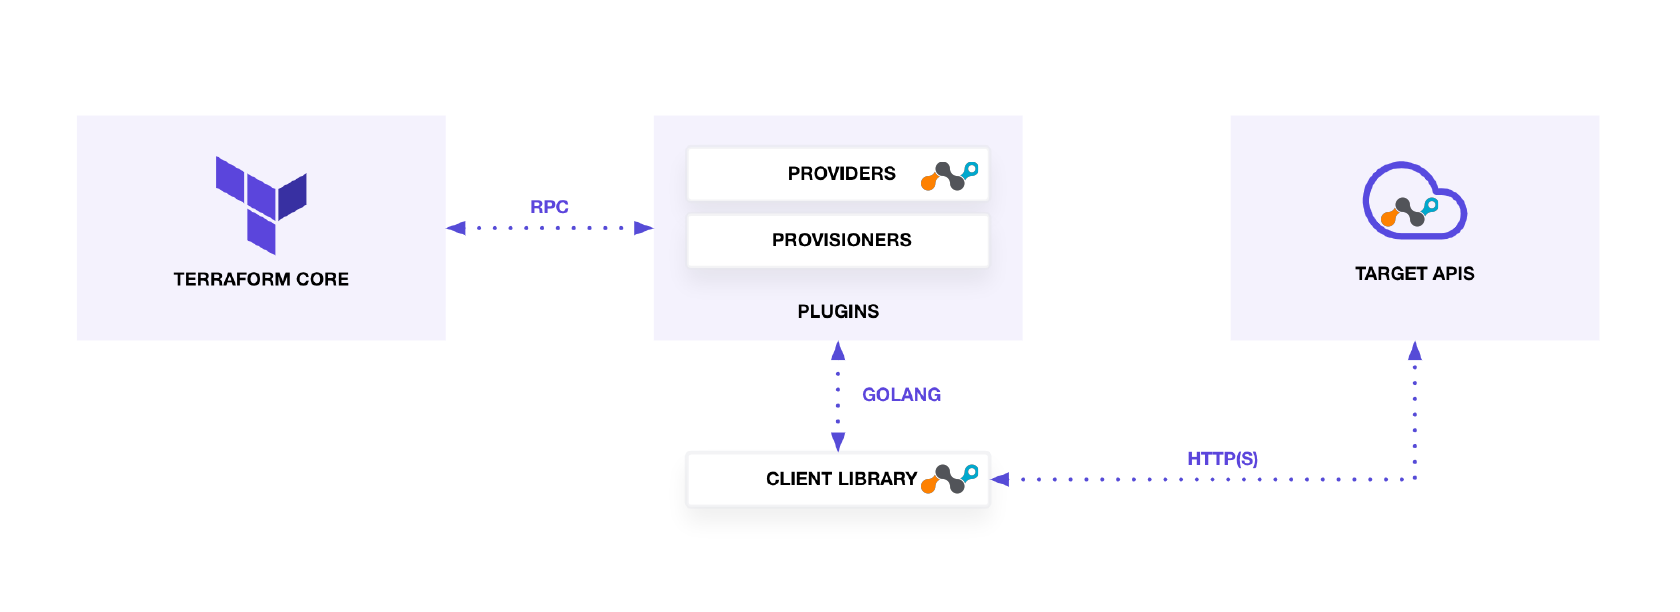
I have mentioned providers a few times so let me take a minute to explain what this looks like. First Terraform Core is the main component that is used to orchestrate infrastructure. In order to do this, Terraform Core relies on "Providers" which use an API client to act as a middleware between Terraform Core and the target API. As you can see in the image, Netskope is actually using a Go API client in the Netskope Provider to reach our APIs. This is also how other Providers like AWS work.
Prerequisites
Before you can start playing with the provider you will need to ensure you have Terraform installed. To be exact, I recommend Terraform 1.1.7 or greater. If you have an older version of Terraform, it should work, however it has not been tested or documented. This is all that you need to get started, assuming you plan to use the Provider from the Terraform Registry.
If you prefer to build the Provider from source, you will need to install the GO programming language. The Netskope Provider is written in GO and can be installed from source by running a command or 2. It is recommend that you use the Provider from the registry, but if you may want to deploy using source if you are planning to develop some additional code for the provider or something along these lines.
Getting Started
Now that the Provider is in the Terraform registry, you can skip the "Getting Started" section and jump straight to "Using the Provider". If you want to install from source you can follow the steps below, however I recommend using the latest provider from the Registry instead.
Now that you have Terraform and GO installed, it's time to get the provider installed. First you will need the Provider code which is stored in github. Use the command below to clone the repository. Then change directory to the repository directory
git clone https://github.com/netskopeoss/terraform-provider-netskope.git
cd terraform-provider-netskope
Next you will be compiling the provider. If you have never compiled code or you have had trouble in the past, I promise this will be a breeze. Just run the commands for your OS below.
Mac or Linux
make install
Windows
go build
xcopy terraform-provider-netskope.exe %AppData%	erraform.dpluginsgithub.com
etskopeoss
etskope.1.0windows_386 /Y
That's it, 1 command if you are compiling the provider on a Mac or Linux machine, and 2 if you are a windows user.
Using the Provider
Now that you have the provider installed, let's get started deploying some infrastructure. In this section we will create a new Terraform configuration that requires the Netskope provider, deploys a new publisher and private application. You will need a text editor to modify the configuration files. I will be showing VS Code, but any editor will work.
New Project and Terraform configuration
I will walk through the steps to create this project so that you can get a feel for all of the pieces, but you can also refer back to the introduction repository here to see it all put together.
First, create a new project folder and open the file in your editor.
mkdir netskope-tf-intro
cd netskope-tf-intro
code .
Next, add a file named main.tf to the directory.
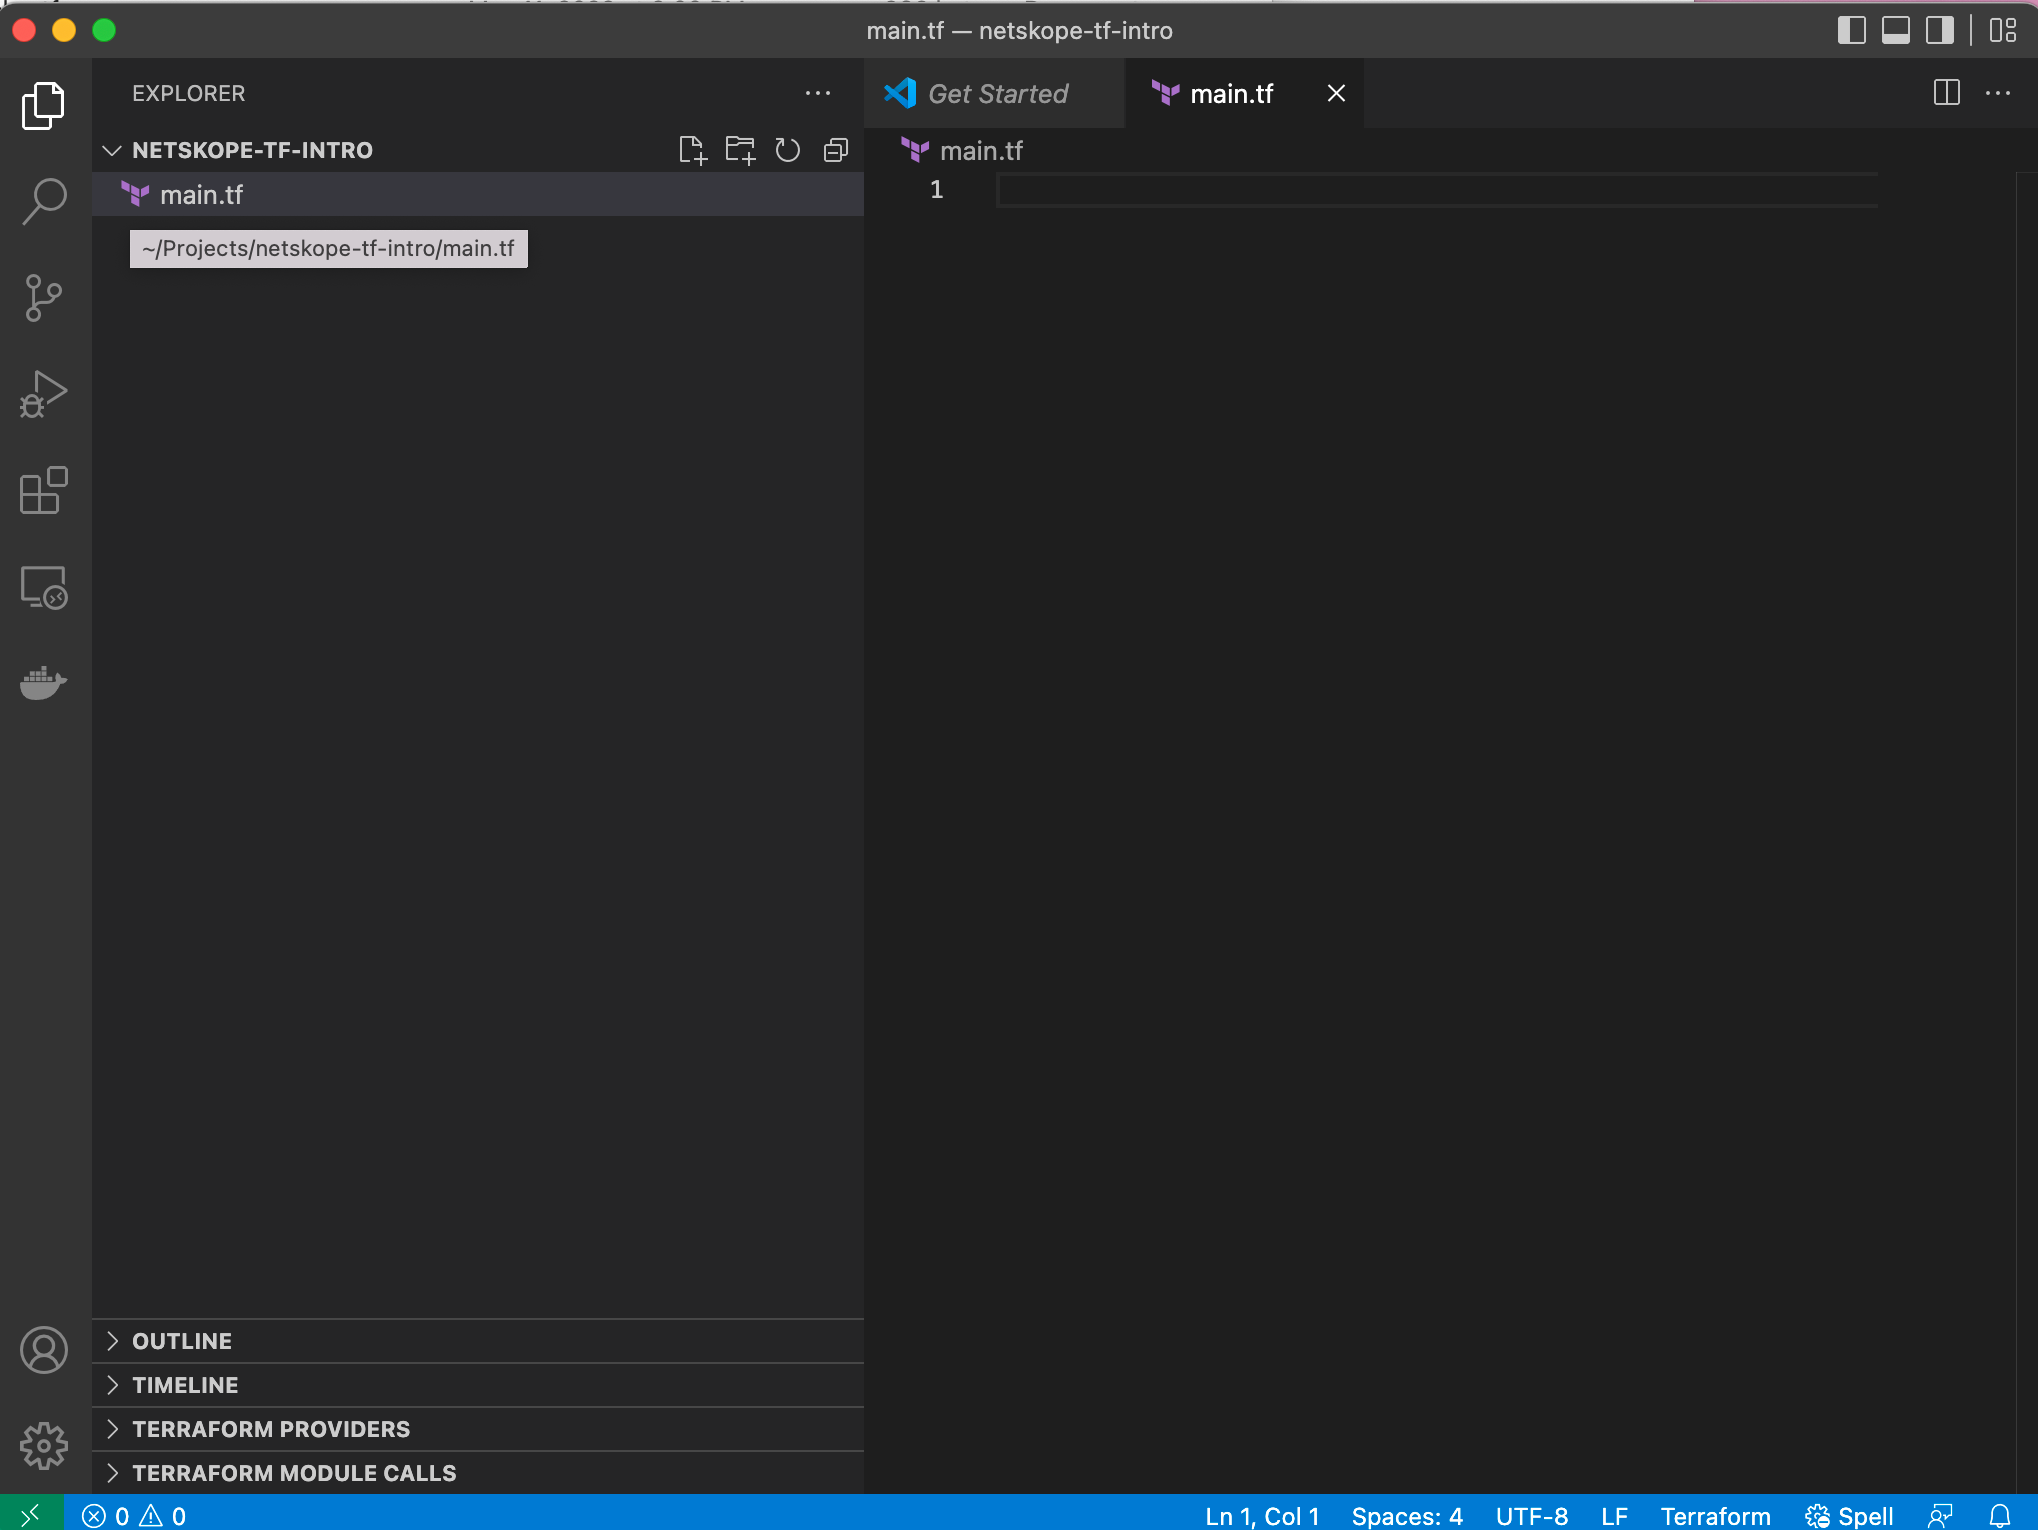
Now, add Required Provider Block into main.tf file.
terraform {
    required_providers {
        netskope = {
        version = "0.2.1"
        source  = "netskopeoss/netskope"
        }
    }
}
When you are done, the configuration in main.tf should look like the image below.

Test the Provider
Here we will initialize the newly created main.tf file. This will confirm that the Provider is installed correctly.
- Navigate to the project directory.
- Initialize the Terraform configurations
terraform init
Notice that the provider is added to the project. If you look close says it is finding "netskopeoss/netskope", then it downloads the provider from the registry and verifies the signature.
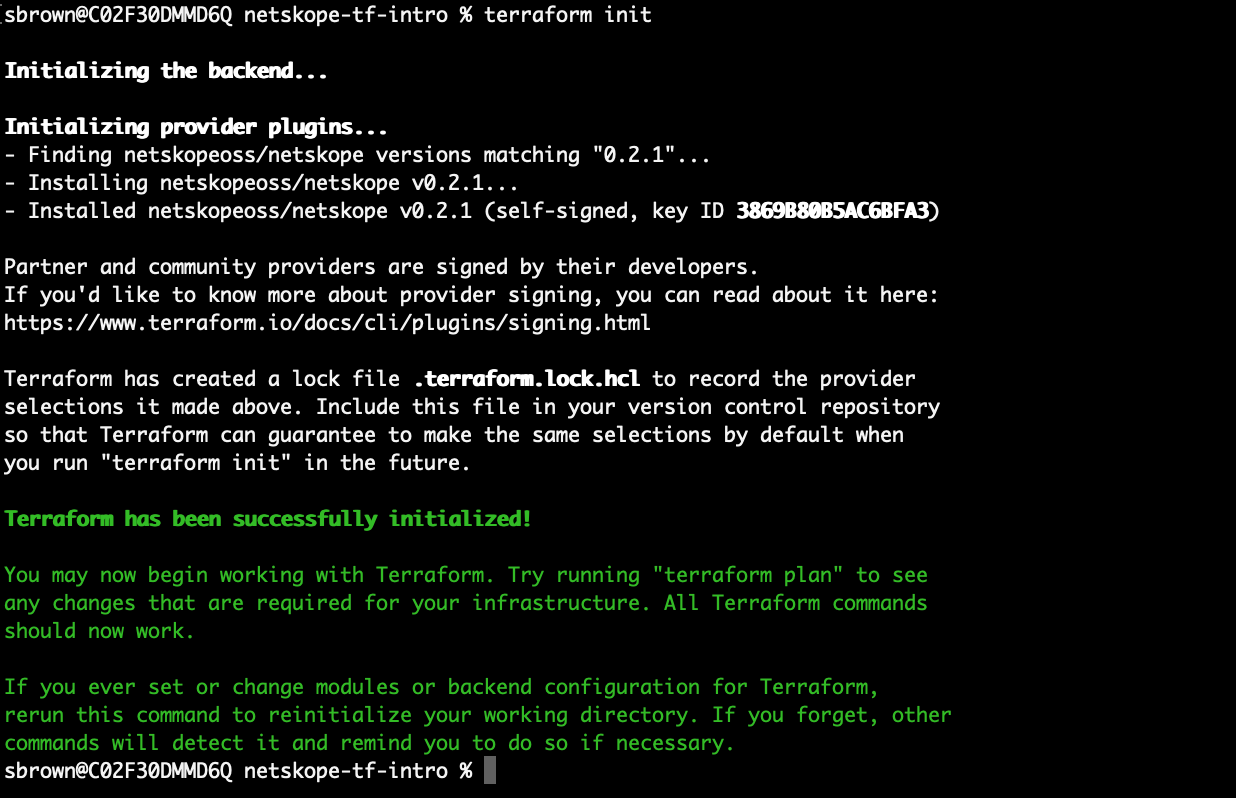
Congratulations, assuming you see the "Terraform has been successfully initialized!" message, then the provider has been installed properly and can now be used to create infrastructure in Netskope.
Using the Provider to deploy Netskope NPA Publisher
Now that you have installed the Provider and verified that it is usable, it’s time to deploy some Netskope resources. Well, almost, we have to do a little more work so that we can authenticate to the Netskope Tenant.
Netskope Tenant Tasks
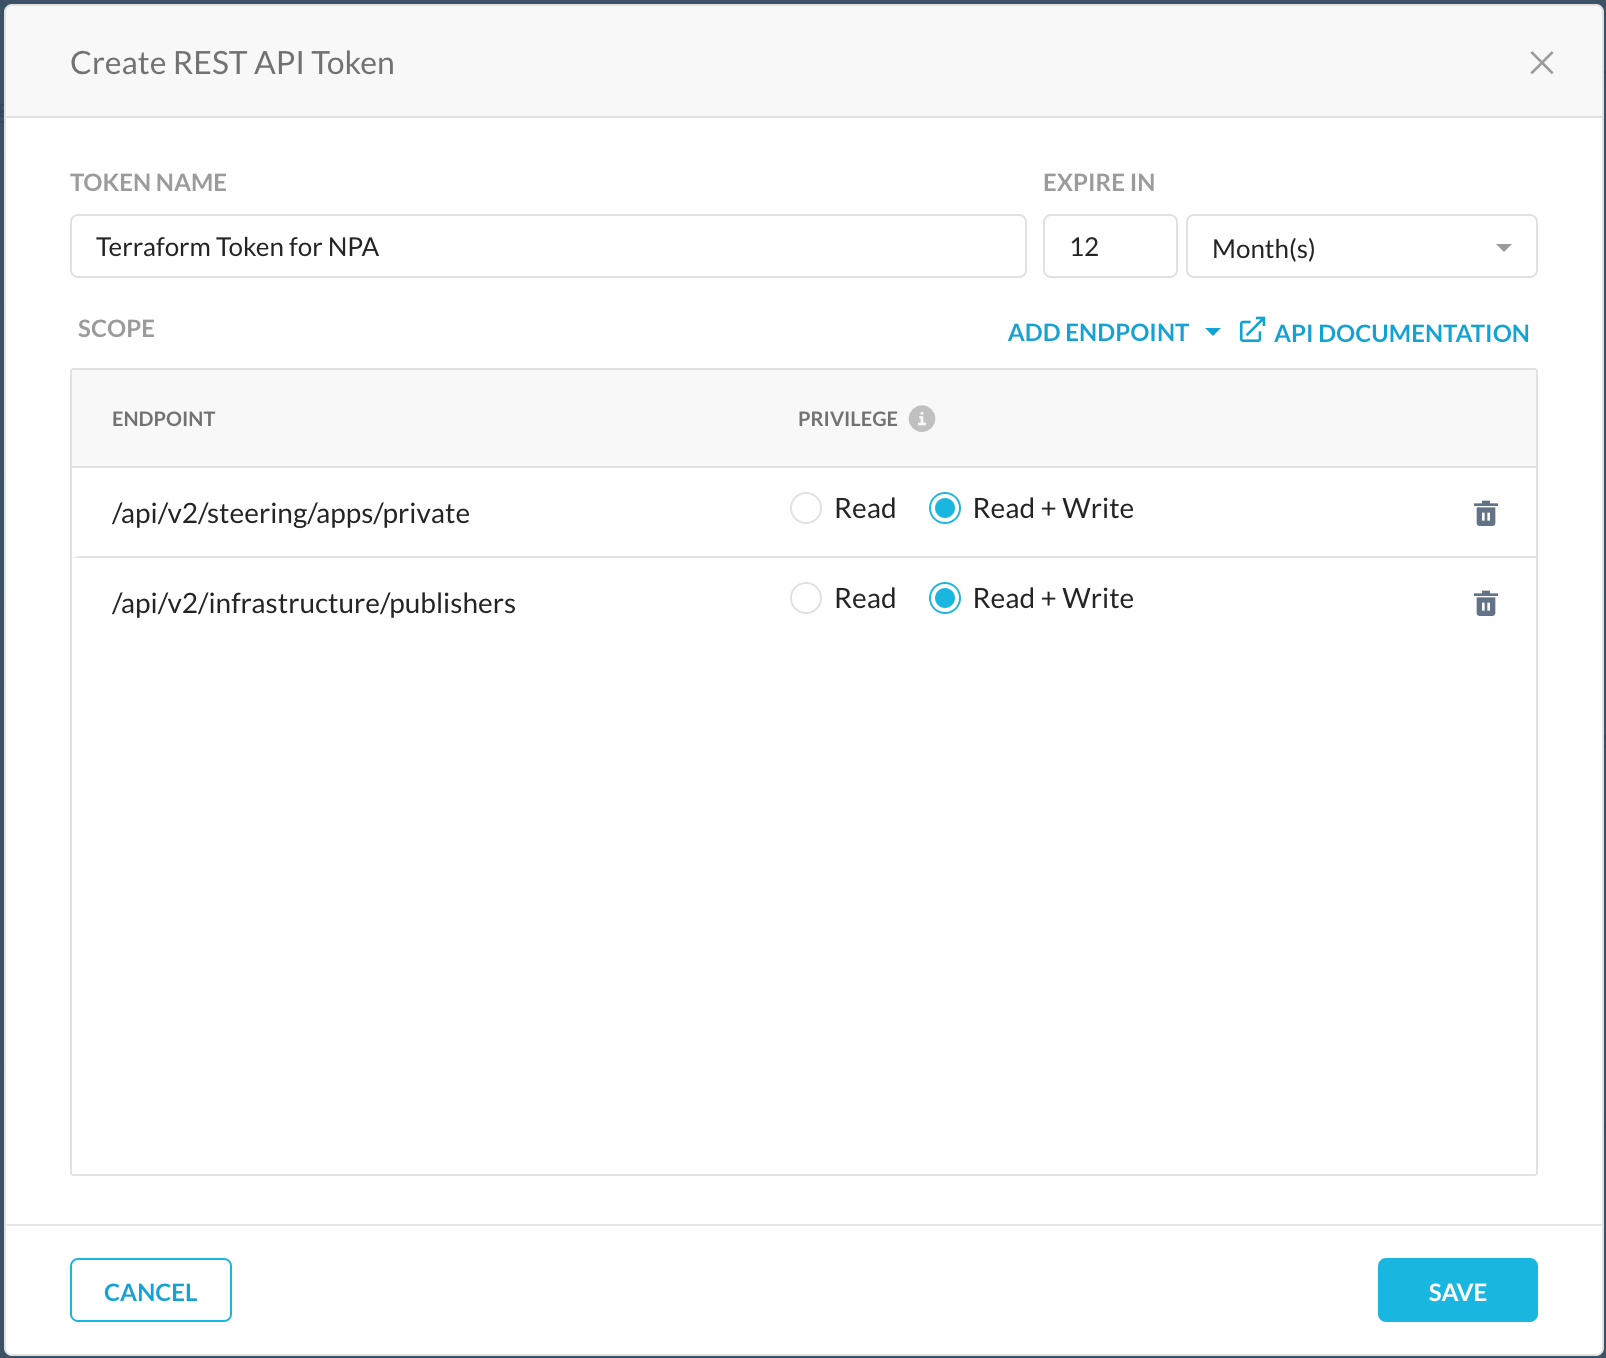
You will need the <tenant-name>.goskope.com Tenant URL and APIv2 Token in order to use the provider. Make sure to save the details gathered below, they will be needed soon. In order to generate a token, follow the steps below.
- Identify the "Base URL" for your Netskope tenant.
- This will be the URL used to manage your Netskope tenant
- For example: https://example.goskope.com
- Follow the REST APIv2 Documentation to create an API Token
- /api/v2/steering/private
- /api/v2/infrastructure/publisher
- Required "Read+Write" Endpoints For NPA:
Add Netskope Credentials
You have 2 options on how to provide credentials to Terraform. I will detail both, but I strongly encourage the use of environment variables. I will be taking a look at using password/secrets managers in a future post which can provide even more security.
Create Environment Variables
This is highly recommended over using a provider block.
Mac or Linux
export NS_BaseURL=<Base URL>
export NS_ApiToken=<API Token>
Windows
set NS_BaseURL=<Base URL>
set NS_ApiToken=<API Token>
Configure Provider Block
The provider block within main.tf can also be used to pass credentials to the provider. This is not recommended for what I assume are fairly obvious reasons. If you choose to do this, DO NOT store main.tf in a public repo or other location where your API token can be stolen.
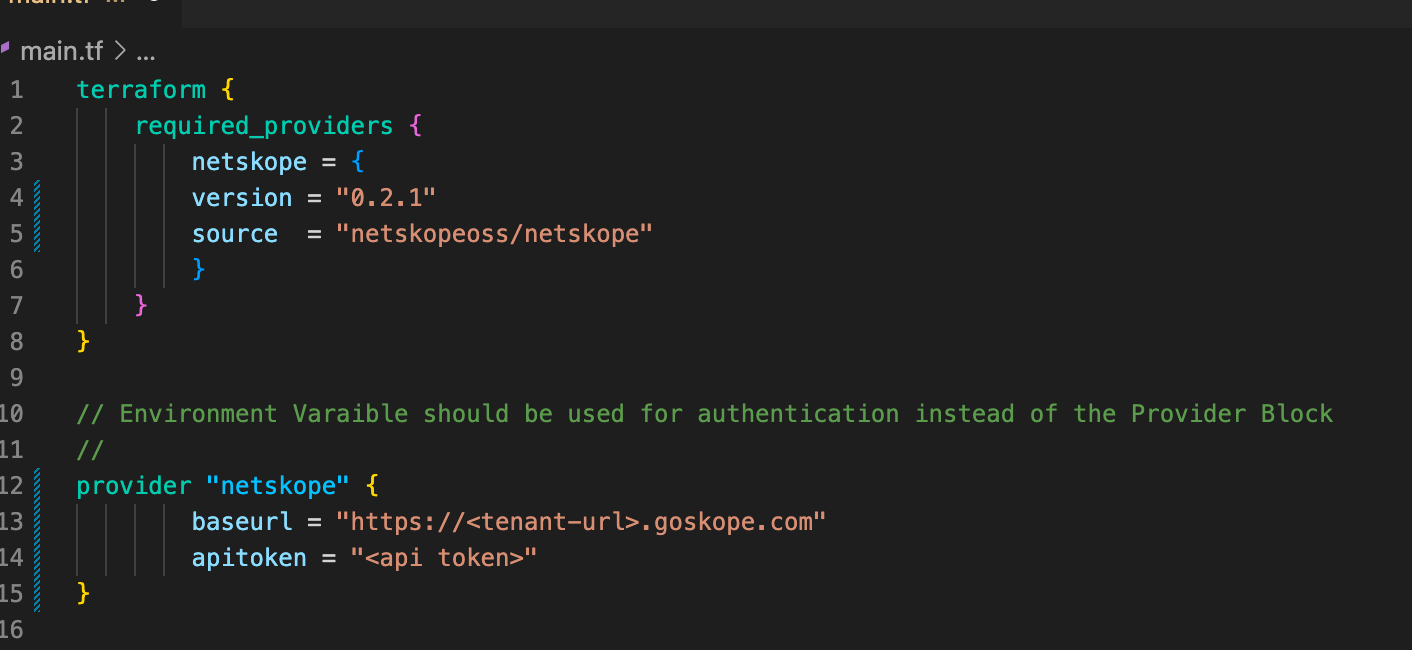
A provider block would include the text below.
Provider "netskope" {
    baseurl = "https://<tenant-url>.goskope.com"
    apitoken = "<api token>"
}
If using a provider block the main.tf file should now look like the image below.
Time to get excited, because now that the credentials are in place you can move on to creating infrastructure inside the Netskope tenant.
Create a Netskope Publisher
In this section you will add a netskope_publishers block to the main.tf configuration file . This will be used to create a publisher. When you are done Terraform will be used to apply the configuration to Netskope. We will also be adding an output block to display the details of the deployment, but this is not required to create the publisher.
Start by adding the netskope_publishers block to main.tf
resource "netskope_publishers" "Publisher" {
    name = "Example-Publisher"
}
This is all that is needed to create a publisher, but we will be adding output in step 2 so that you can see what was created without opening the Netskope tenant.
Add the Output block below to ensure we can see what was created.
output "publisher_details" {
    value = {
            name  = "${netskope_publishers.Publisher.name}"
            token ="${netskope_publishers.Publisher.token}"
    }
}
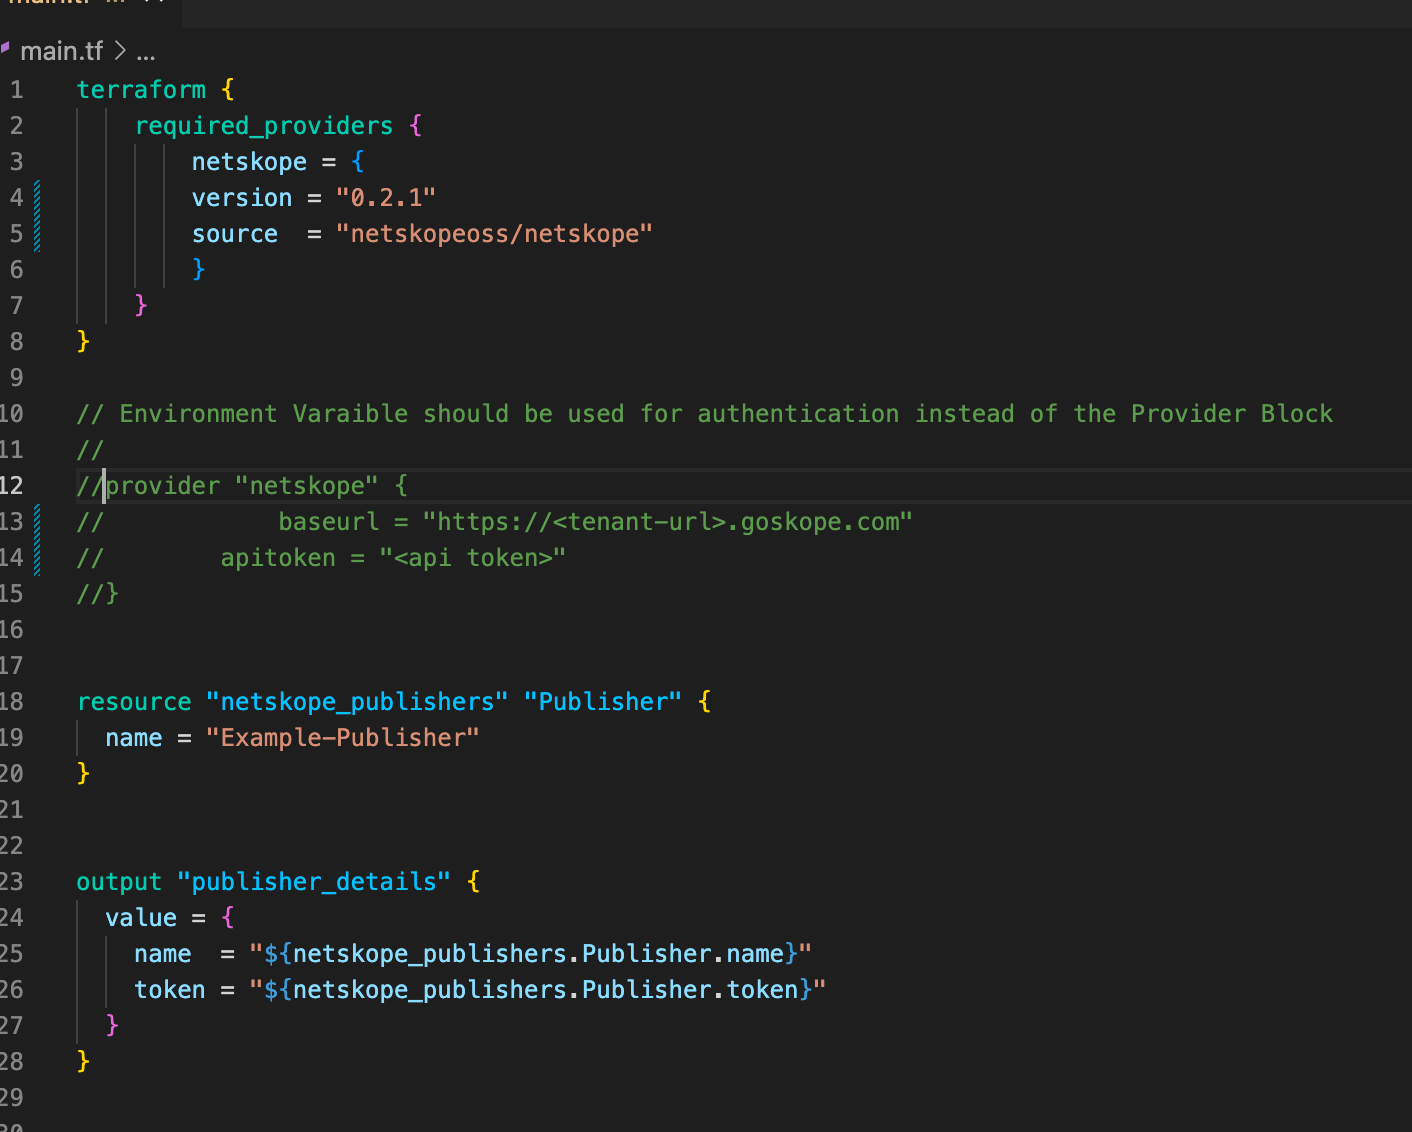
The main.tf configuration file should look like this now.
Finally, apply the configuration by following the steps below.
- Navigate to the project directory in the CLI
- Run Terraform apply:
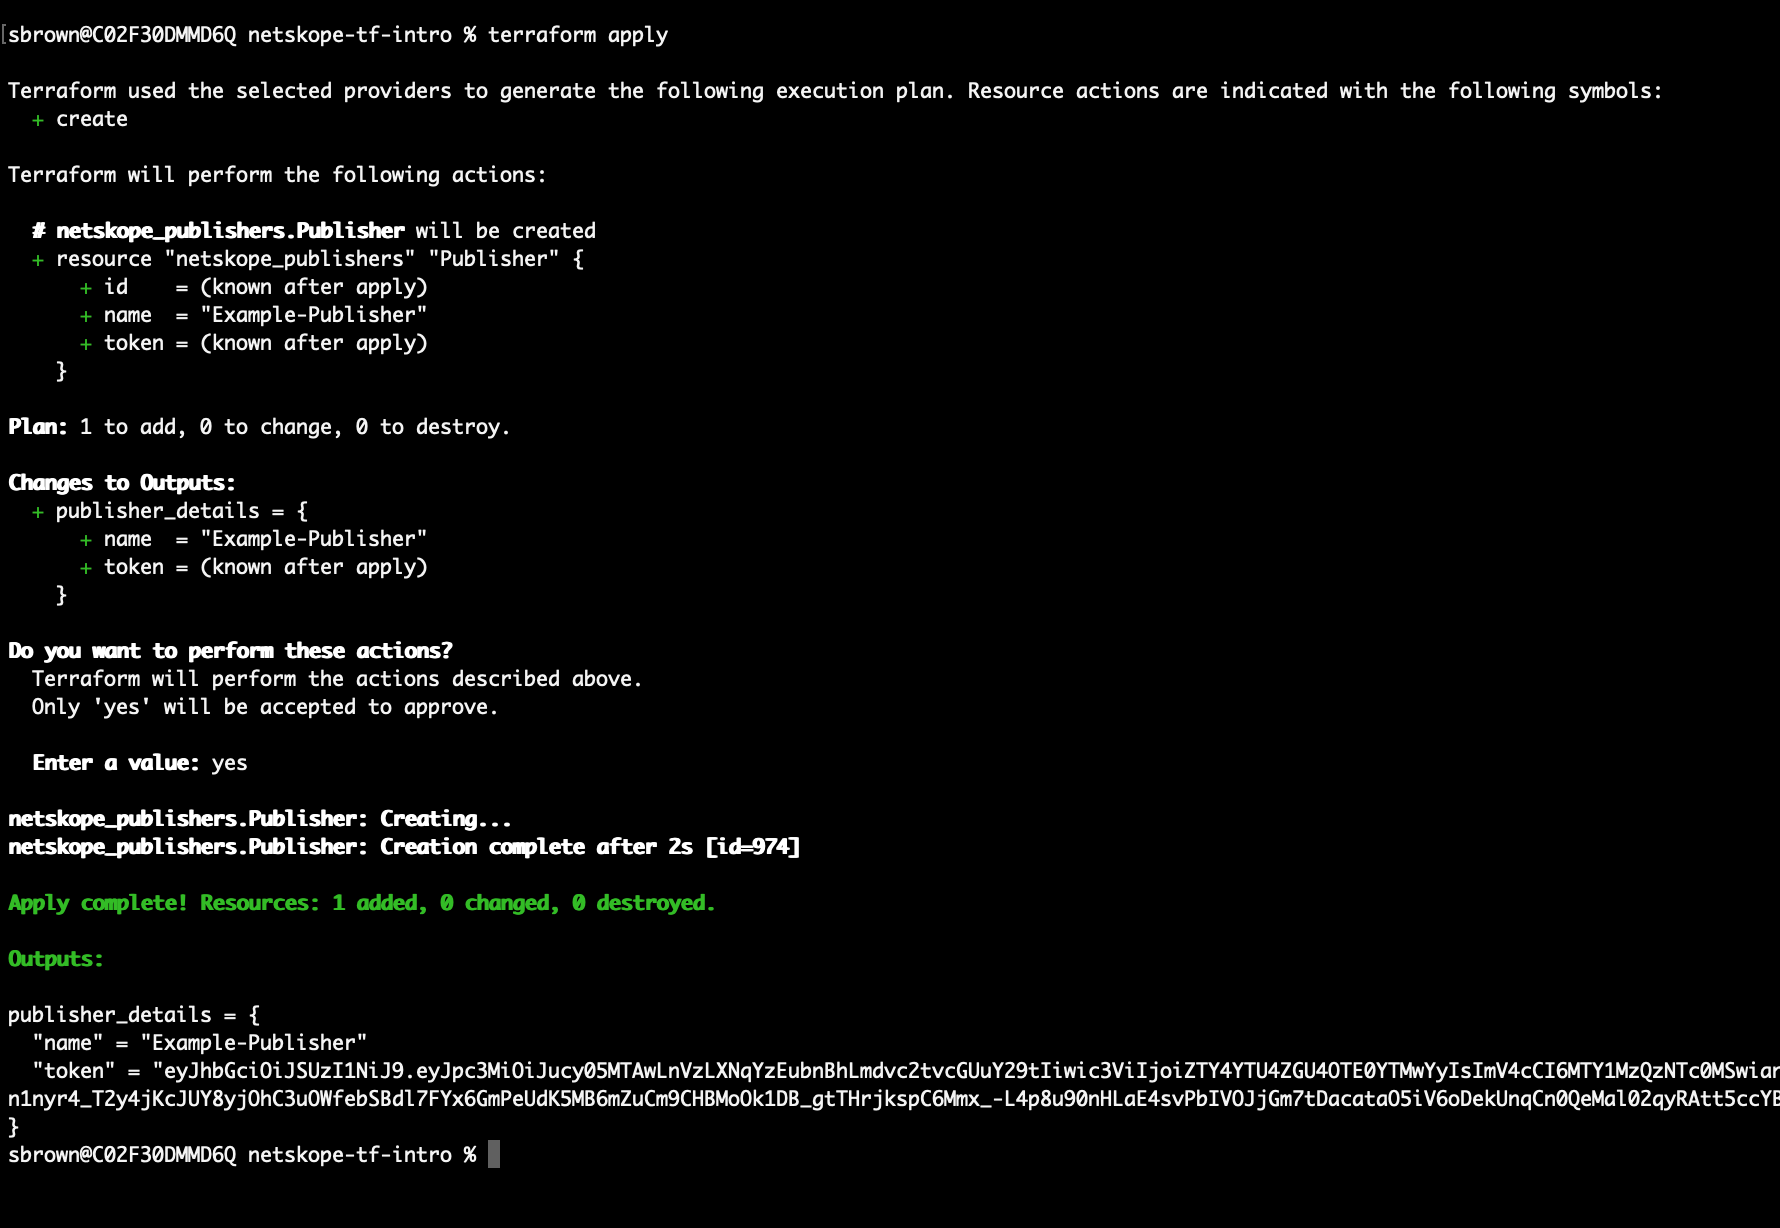
terraform apply - Note that Terraform should have identified 1 resource to create
- Type yes to create the resource
SUCCESS!
Notice that in the Output you have the Publisher Name and Token. This is what was created in Netskope and is the token that can be used to register the virtual instance to Netskope. In a future blog I will show you how use Terraform to create both the Netskope side and an AWS instance, registering it automatically.
Creating a Private Application
For our final trick of this post, we will be creating a Netskope Private Application that uses the publisher you just created. Follow along below to complete this in your environment. This will add a private application to the Netskope tenant that will steer "site.example.internal" on tcp ports "80, 443, 8080-8081" using the publisher we just created.
First add the netkope_privateapps block to main.tf.
resource "netskope_privateapps" "PrivateApp" {
    app_name = "Example-Private-App"
    host     = "site.example.internal"

    protocols {
            type = "tcp"
            port = "22, 443, 8080-8081"
    }

    publisher {
            publisher_id   = netskope_publishers.Publisher.id
            publisher_name = netskope_publishers.Publisher.name
    }
}
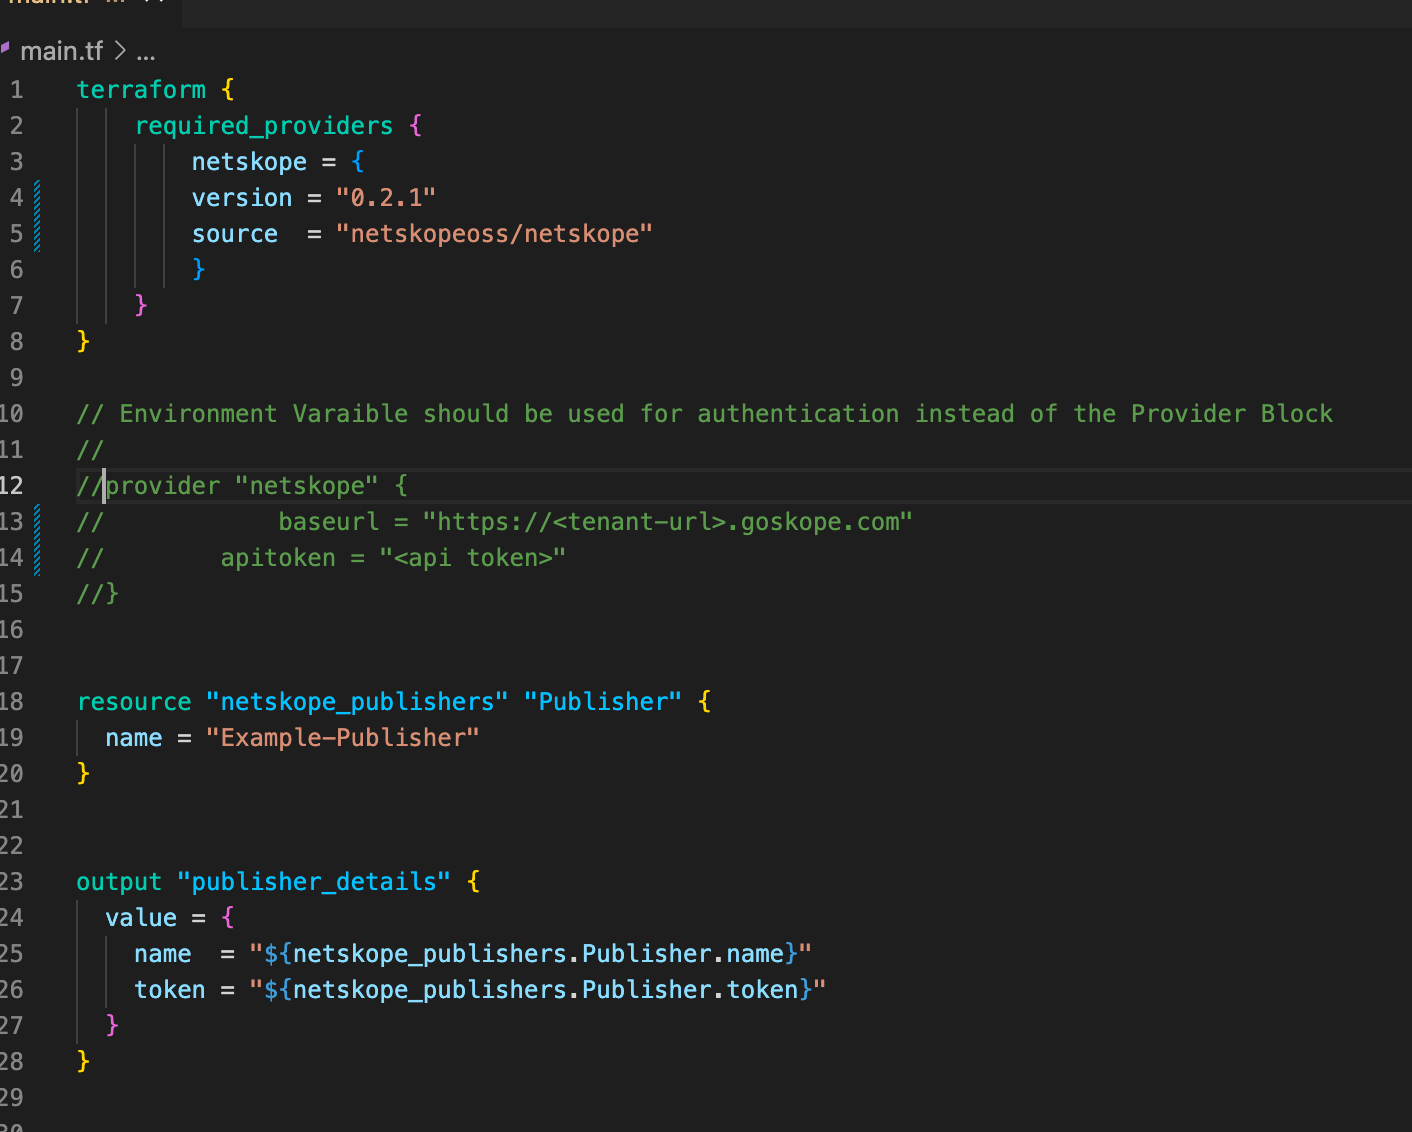
Main.tf should now look like the image below. We will simply add the application to the same file without making any other changes. Also notice that we are referencing the publisher id and token using variables that were created when the original configuration was applied.
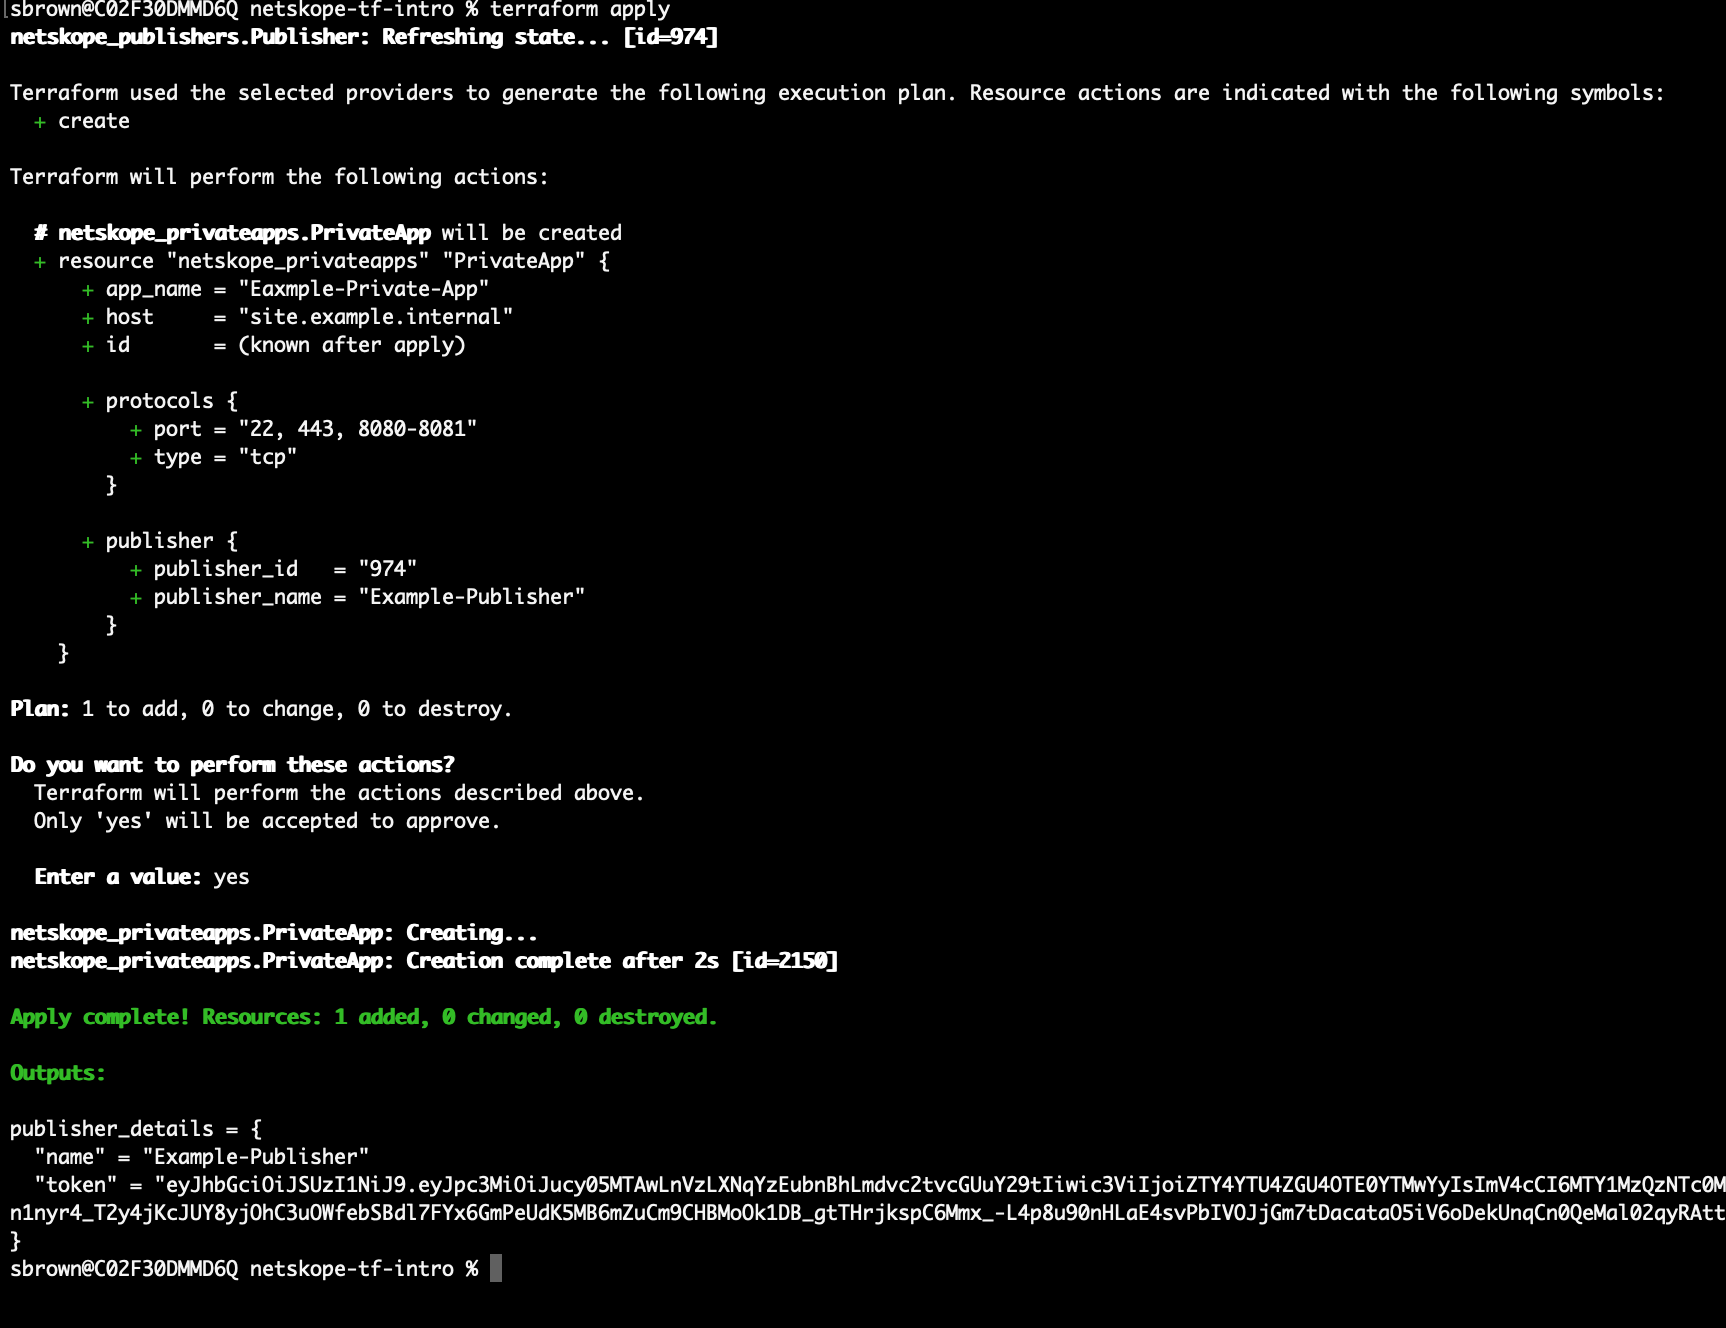
Like before we will apply the configuration using Terraform CLI
terraform apply
This time it will create the Private Application and also re-send the output that went un-changed. To use the new Application simply add it to a Netskope policy.
Cleaning Up
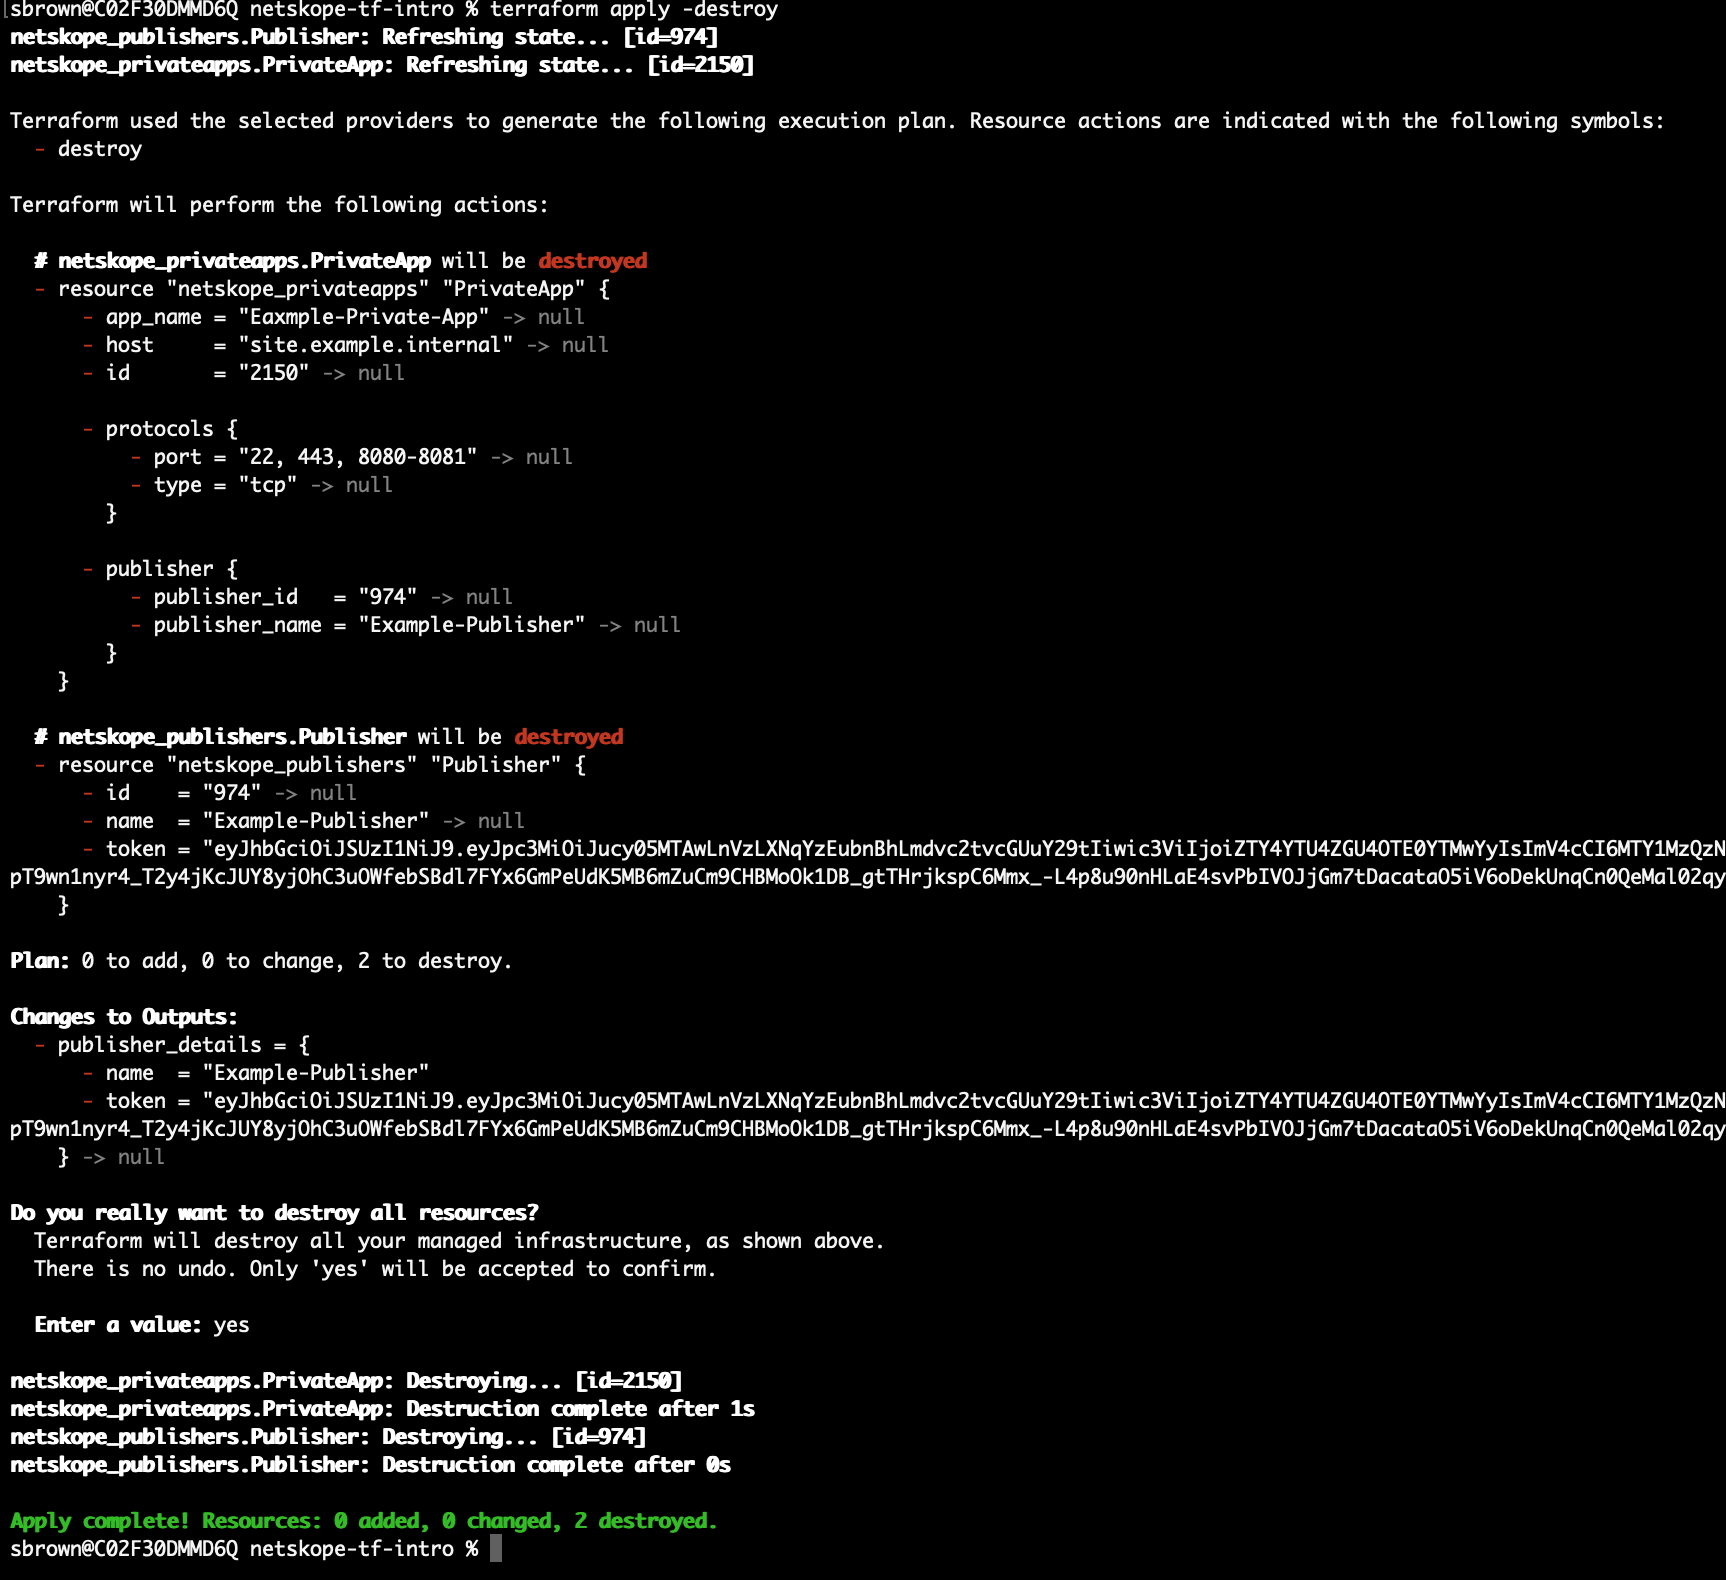
To remove everything we just created simply type:
terraform apply -destroy
This will remove all of the resources from Netskope.
Conclusion
As I said in the beginning of this post, I am extremely excited about our new capabilities, and I will be following this up shortly with more detailed posts on how to combine our provider with other providers like AWS, Azure and GCP to fully automate both sides of the deployment. I hope you at least start testing this in your environment and if you find any issues, please feel free to post an issue in the Github repository or engage in the discussion on the Netskope Community.


