Netskope Alerts via Slack Messages
Prerequisites:
- Slack channel with a webhook.
https://slack.com/help/articles/115005265063-Incoming-webhooks-for-Slack - Cloud Exchange version 3.2 and above.
- Netskope Tenant added to Cloud Exchange.
Procedure:
Step 1. Netskope ITSM (CTO) Plugin Setup (skip to step 2 if already setup):
- Login to Cloud Exchange as a user with admin privileges.
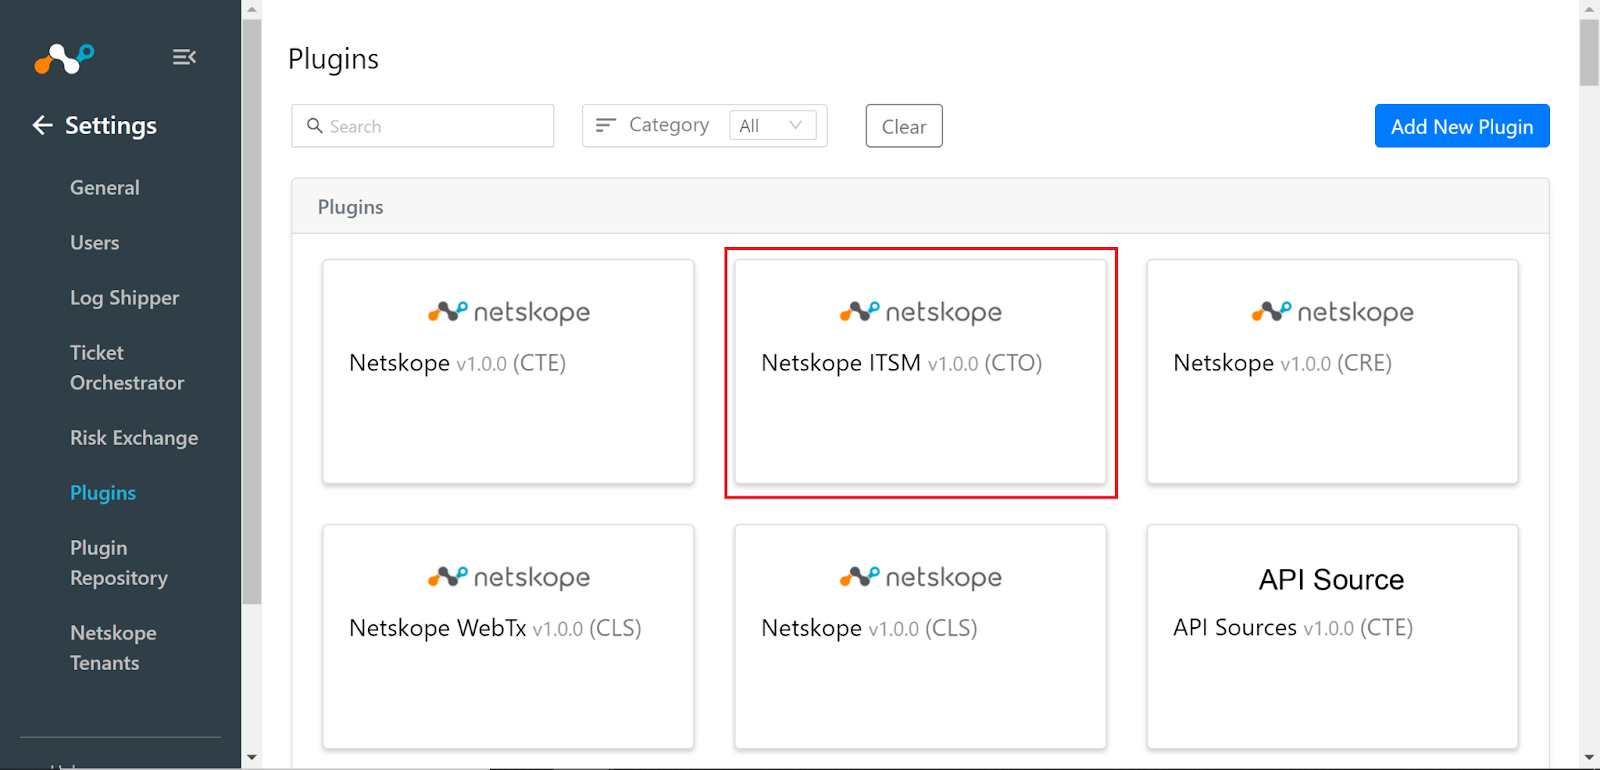
- Navigate to Settings > Plugins.

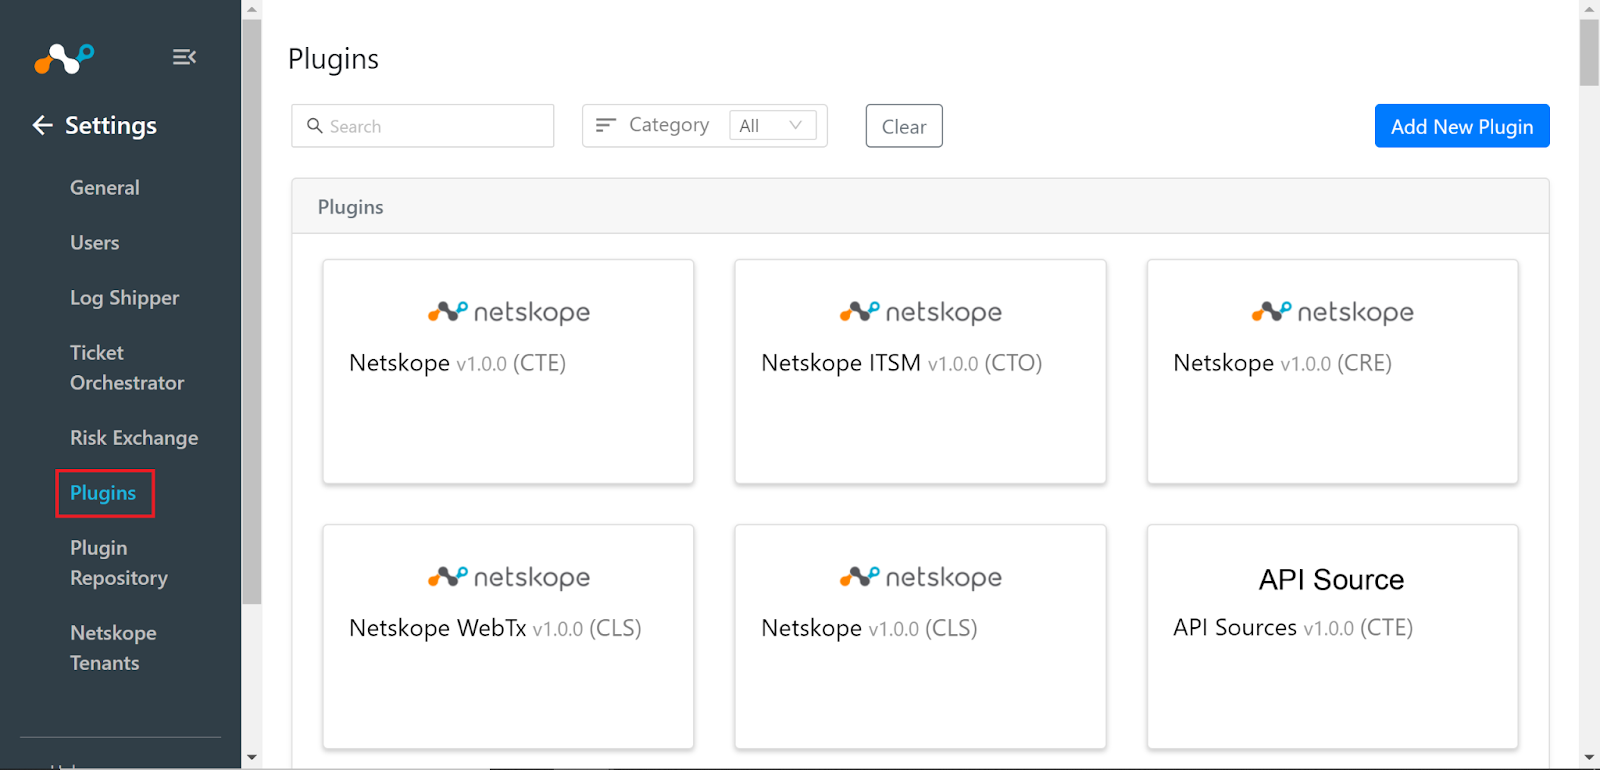
- Click on the Netskope ITSM (CTO) plugin.
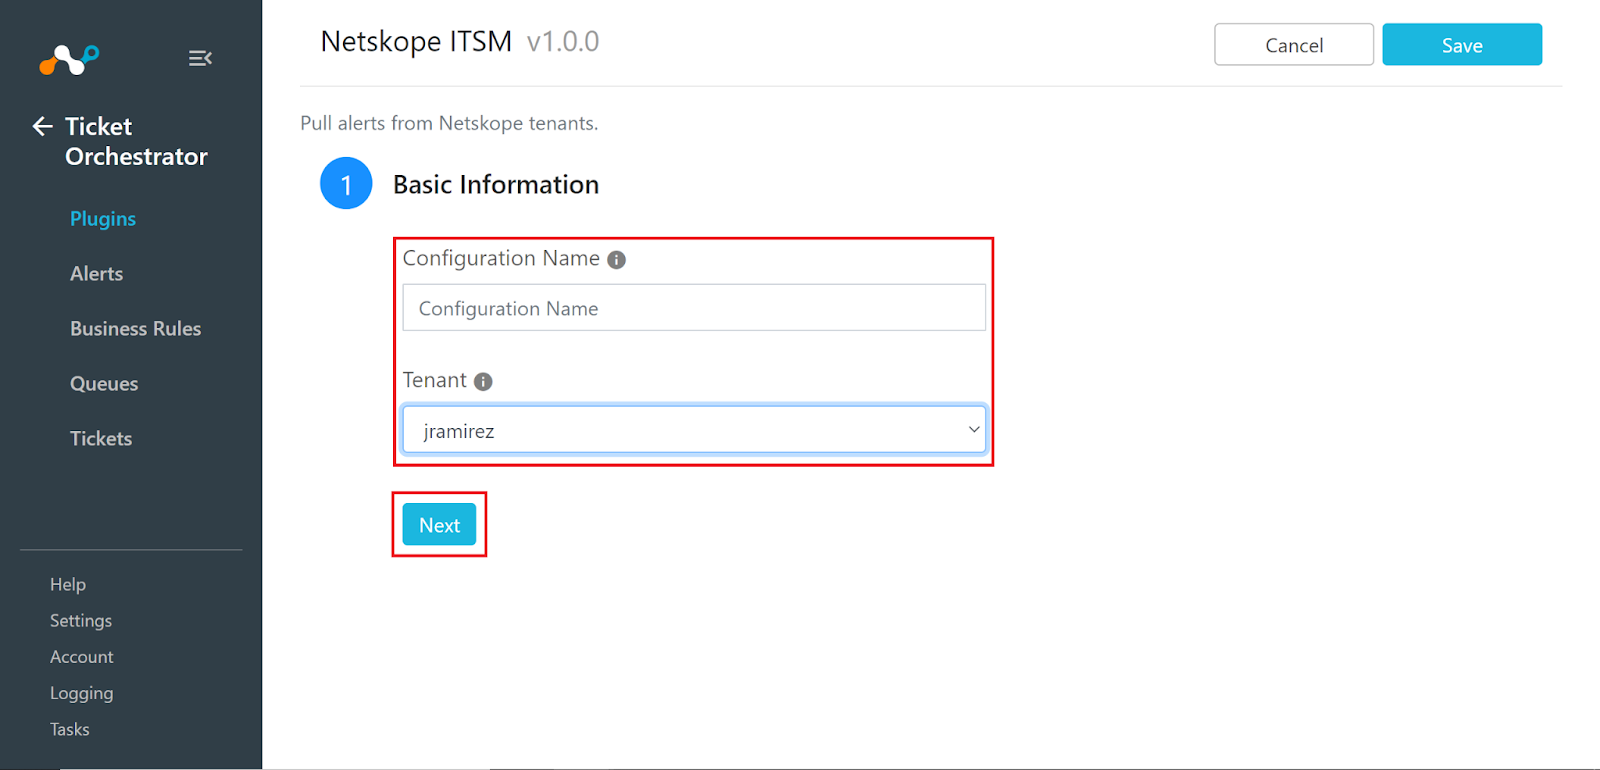
- Name the configuration and set the tenant field to the Netskope tenant you want to receive alerts from. Click Next.
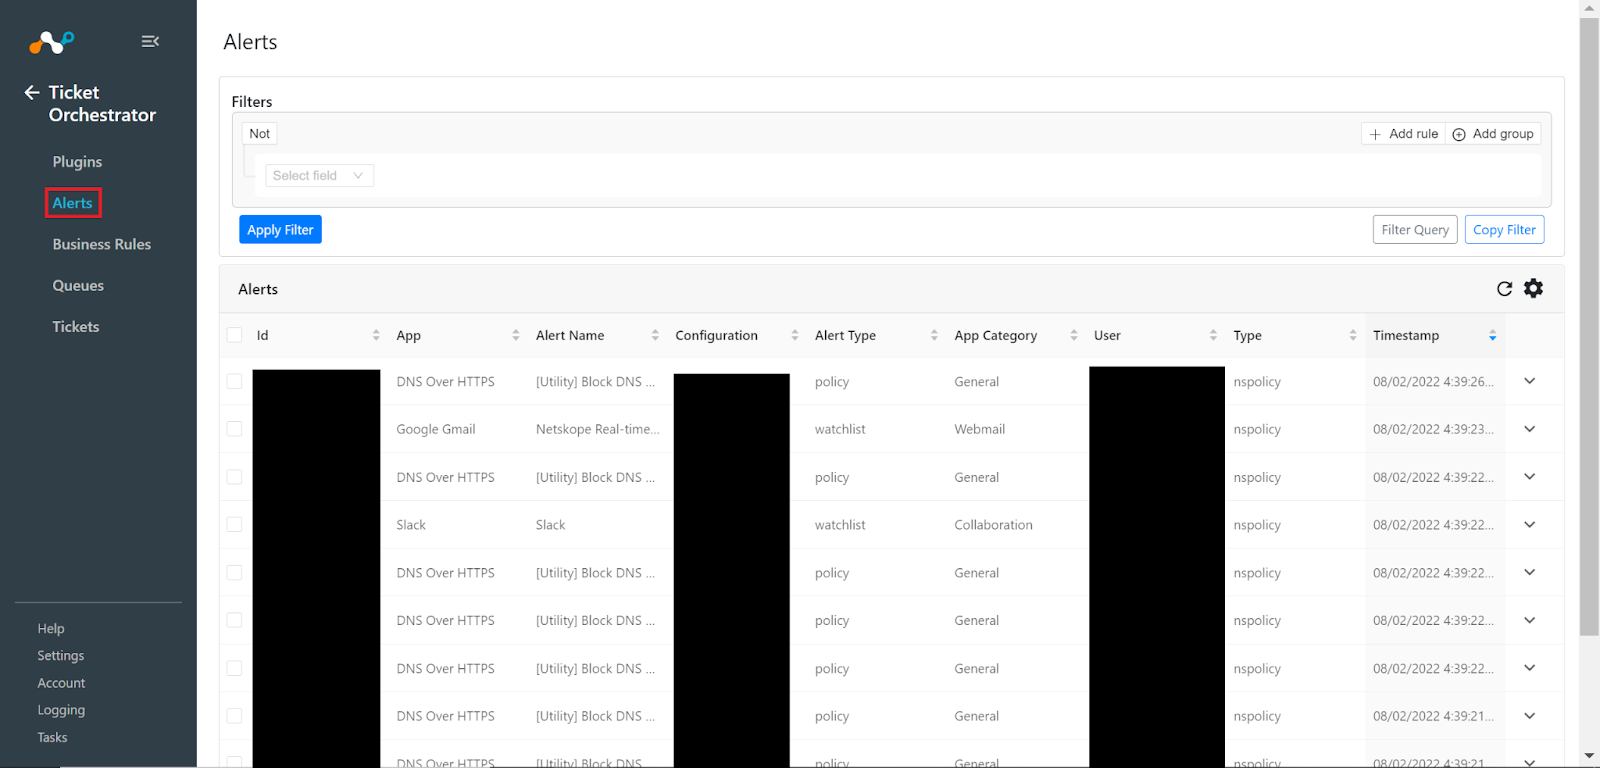
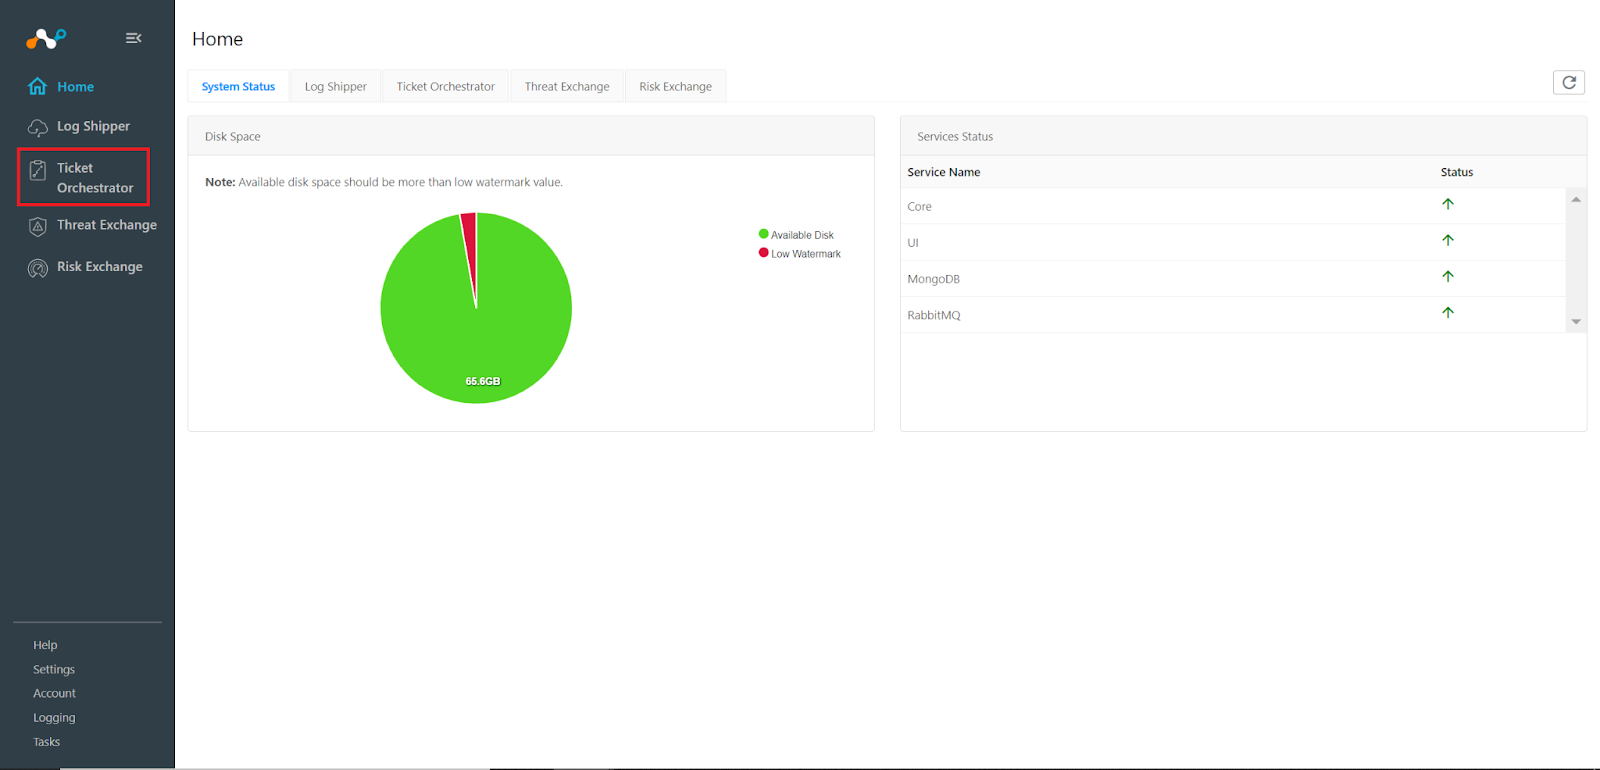
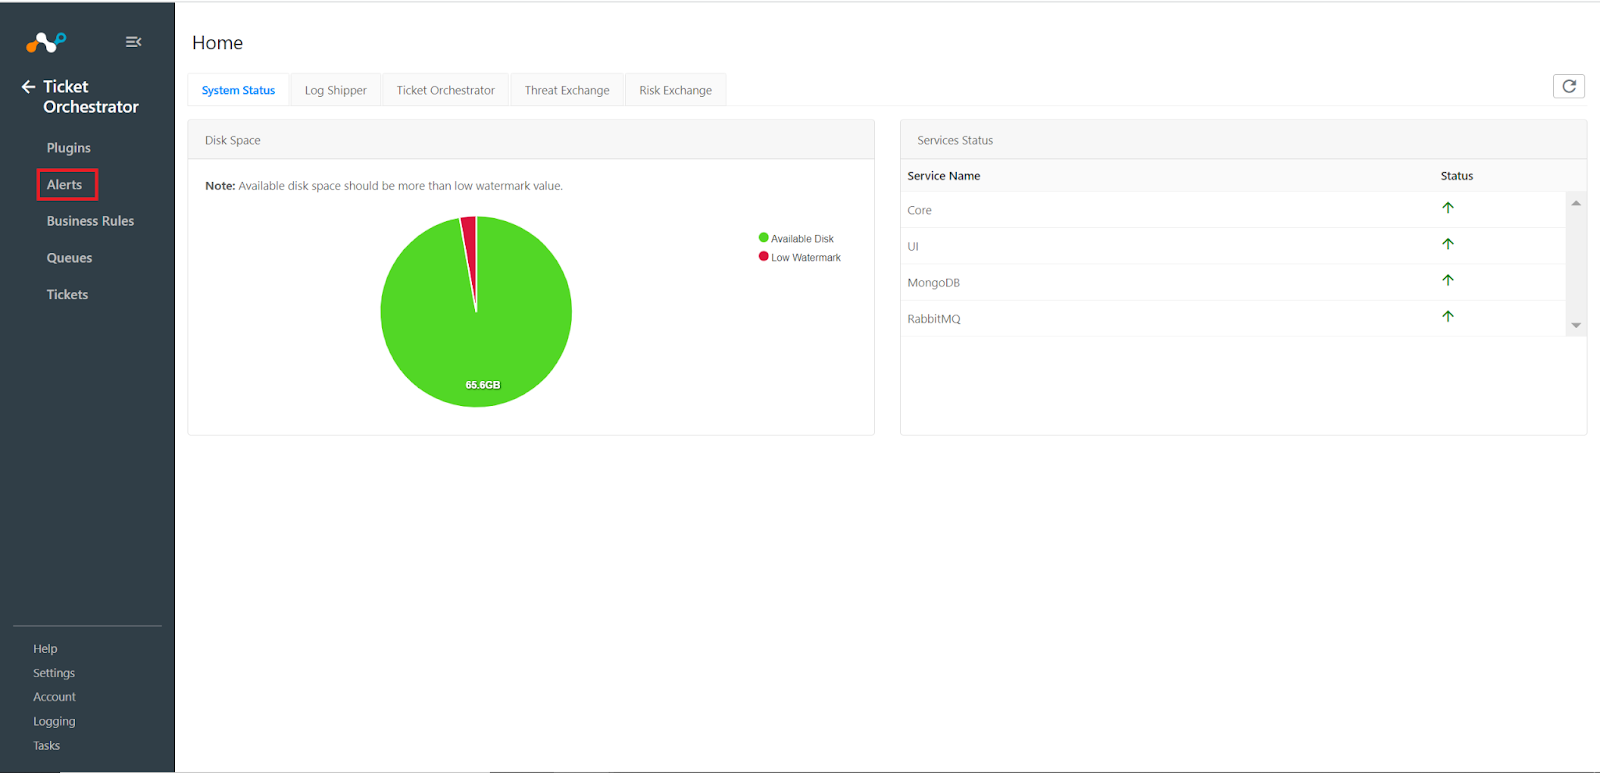
- Navigate to Ticket Orchestrator and click on Alerts. Make sure the section is being populated with alert data from the configured tenant.
Step 2. Notifier Plugin for Slack Webhook (CTO) Setup:
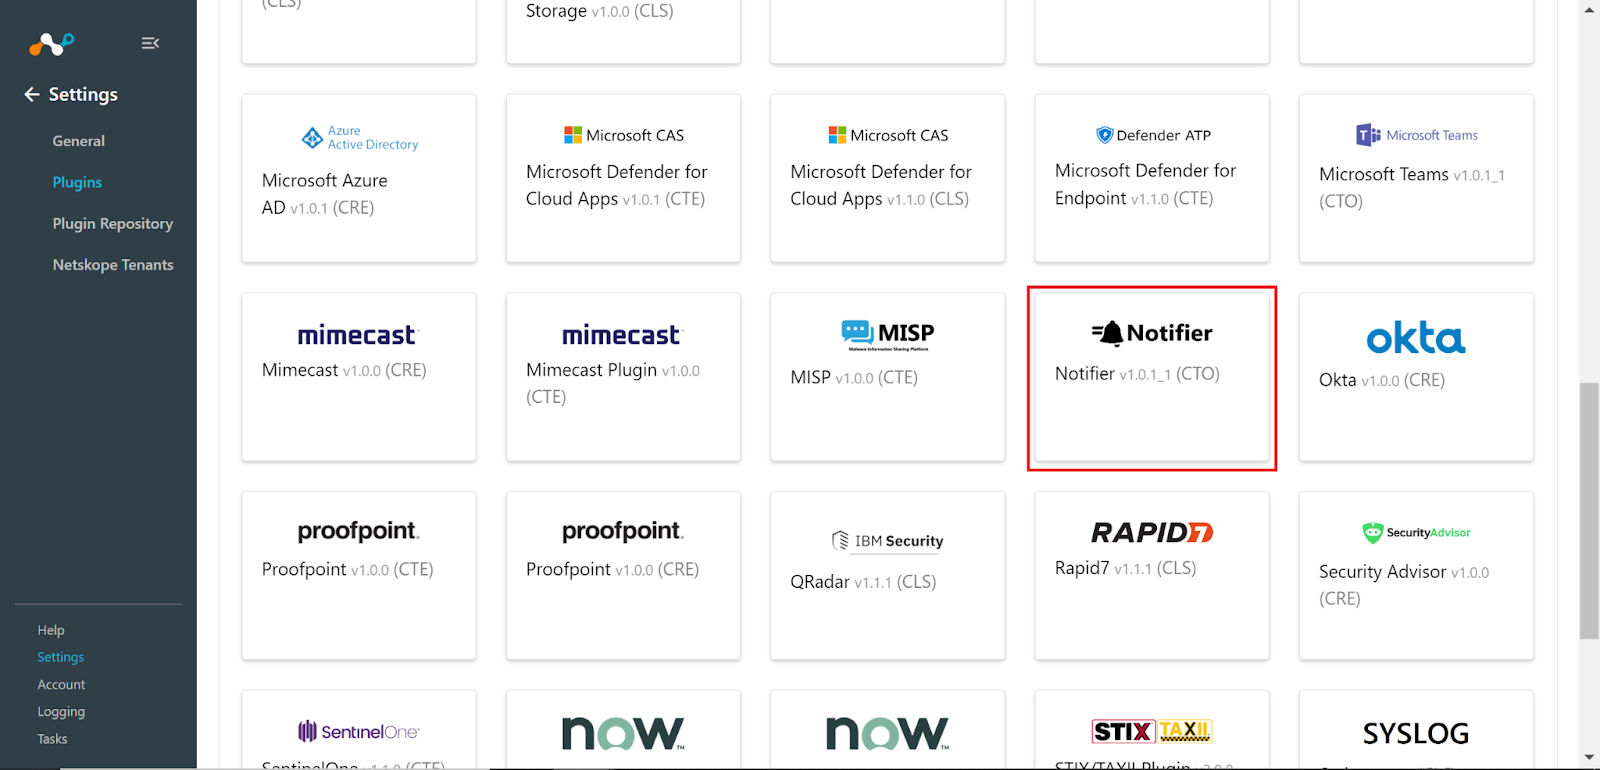
- Navigate to Settings > Plugins.


- Click on the Notifier (CTO) plugin.
- Name the configuration and set the sync interval. The default of 60 minutes is recommended, but for testing purposes you can set it to 30 to 60 seconds for faster results. Click Next.
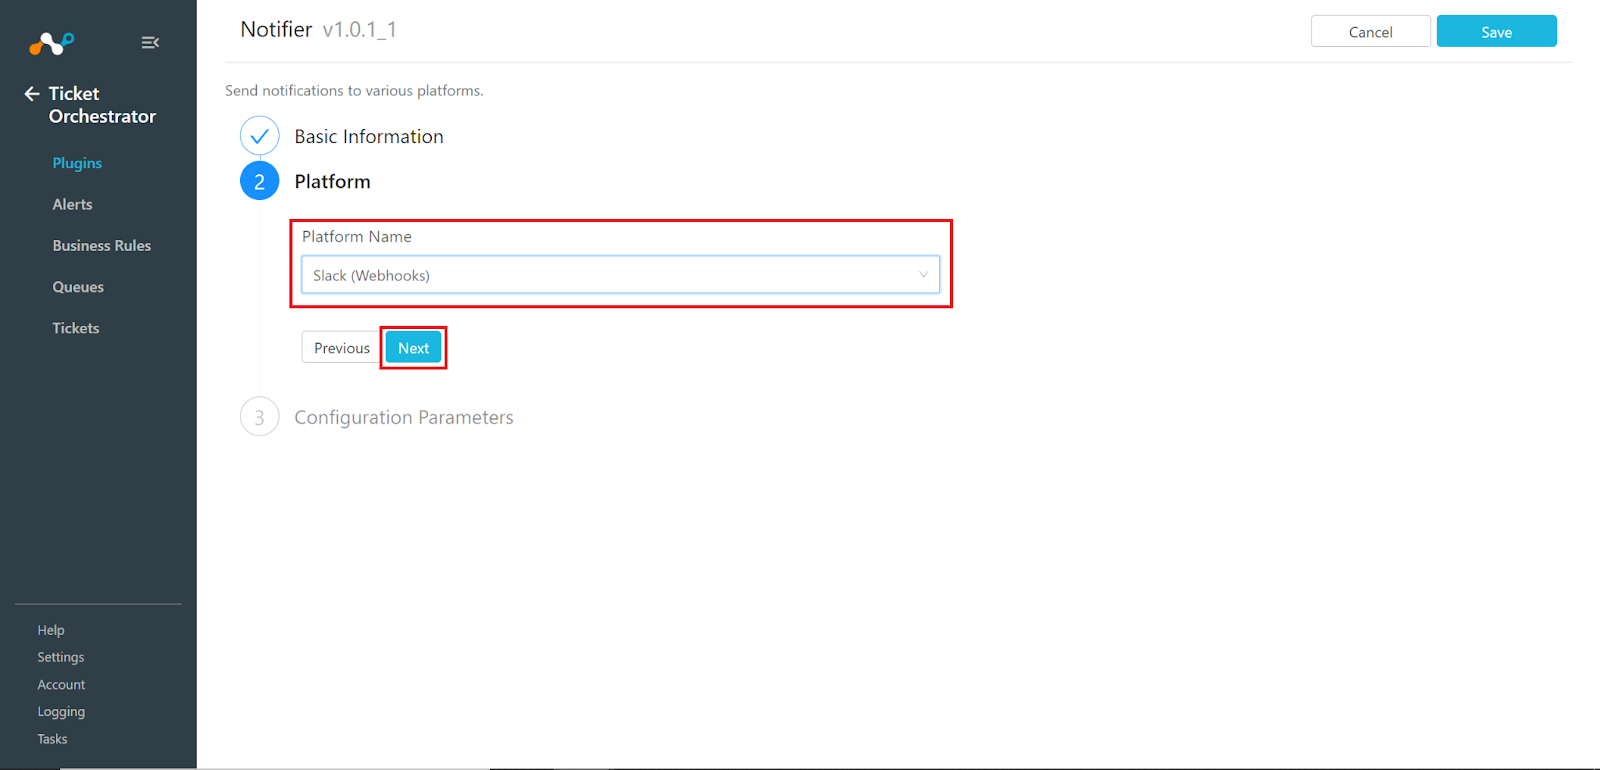
- Set the Platform Name to Slack (Webhooks) and click Next.

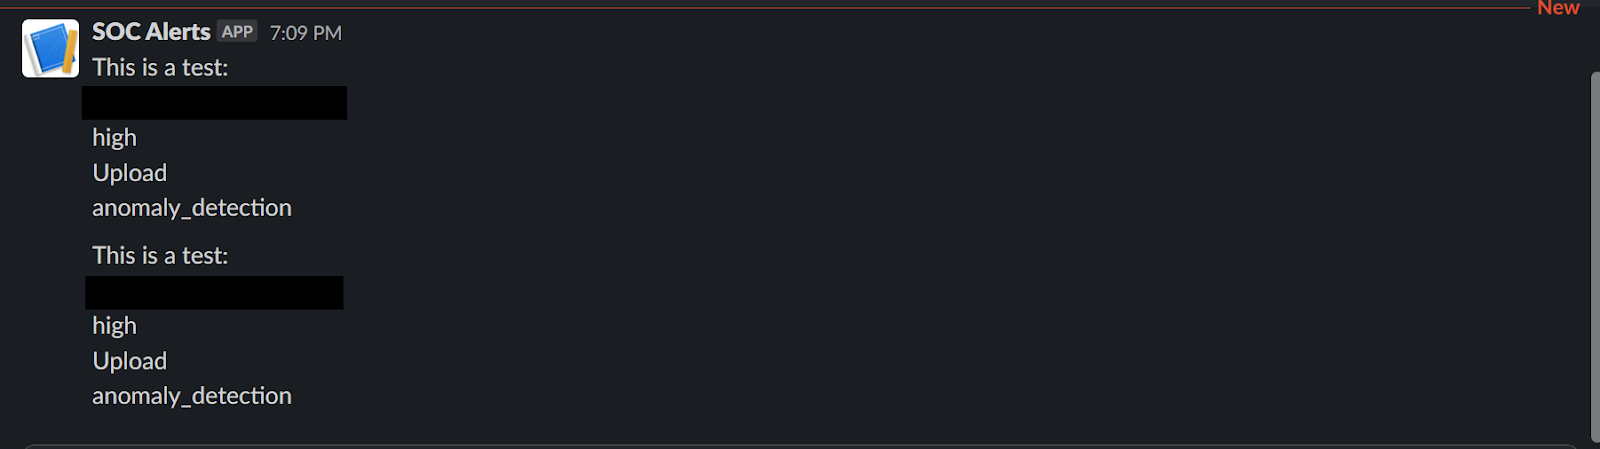
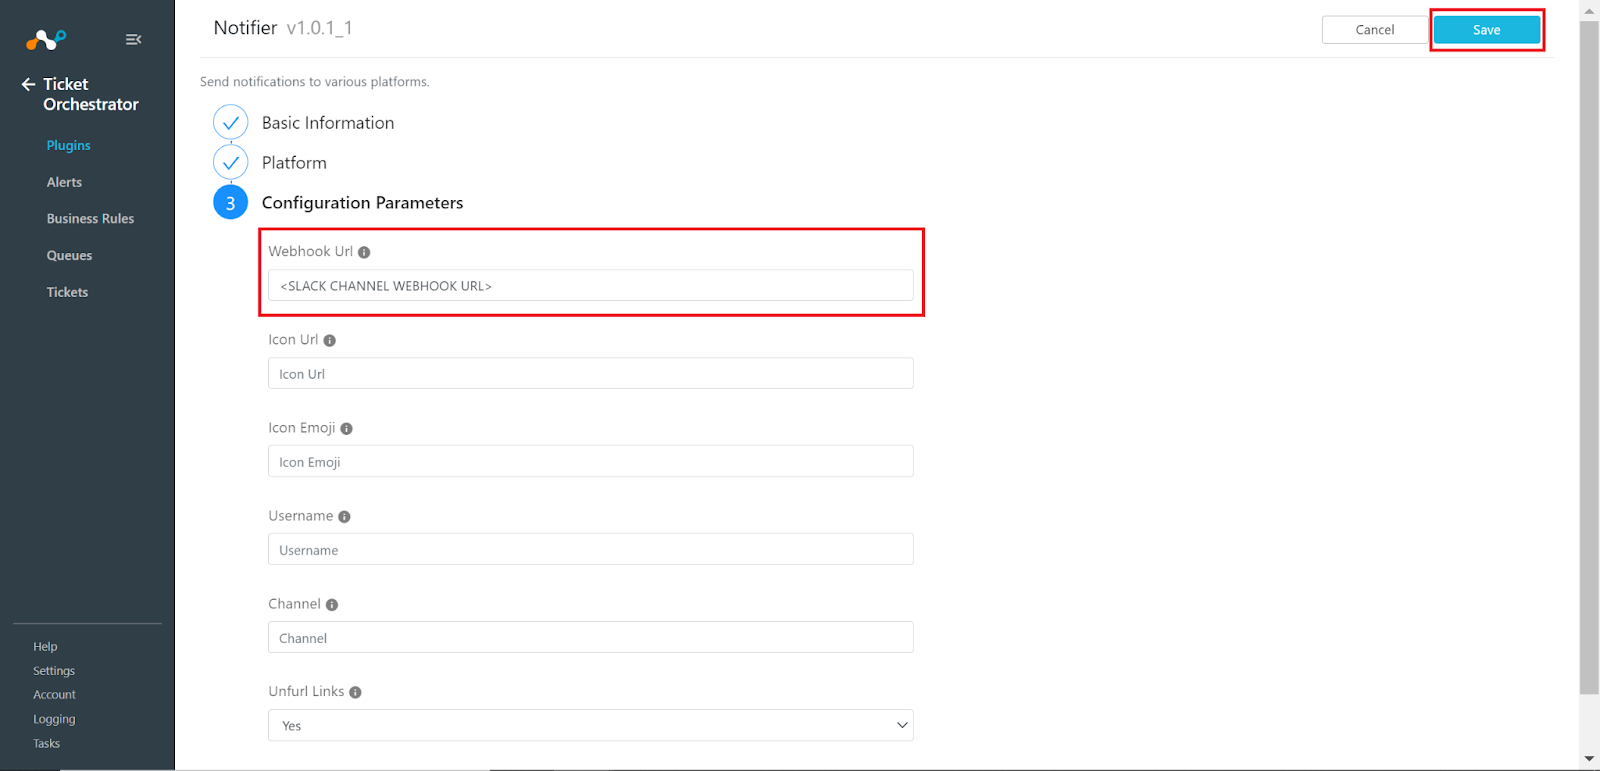
- Enter the channel’s webhook URL into the Webhook URL field. The other fields within the setup are optional. More information on each can be found by hovering over the gray “i” next to each field. Click Save on the top right of the page.
Step 3. Setup Business Rules:
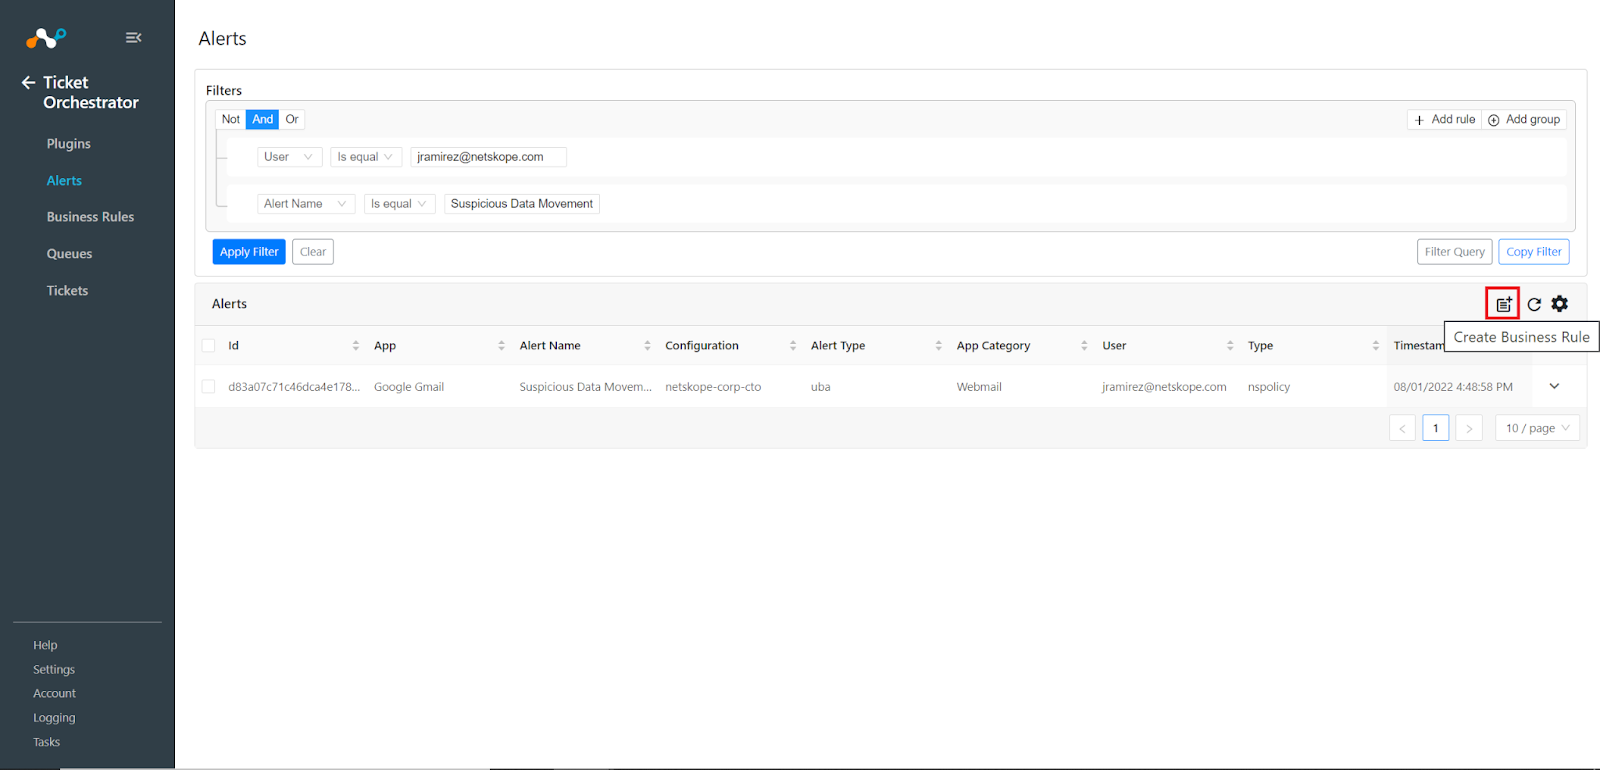
- Navigate to Ticket Orchestrator > Alerts.
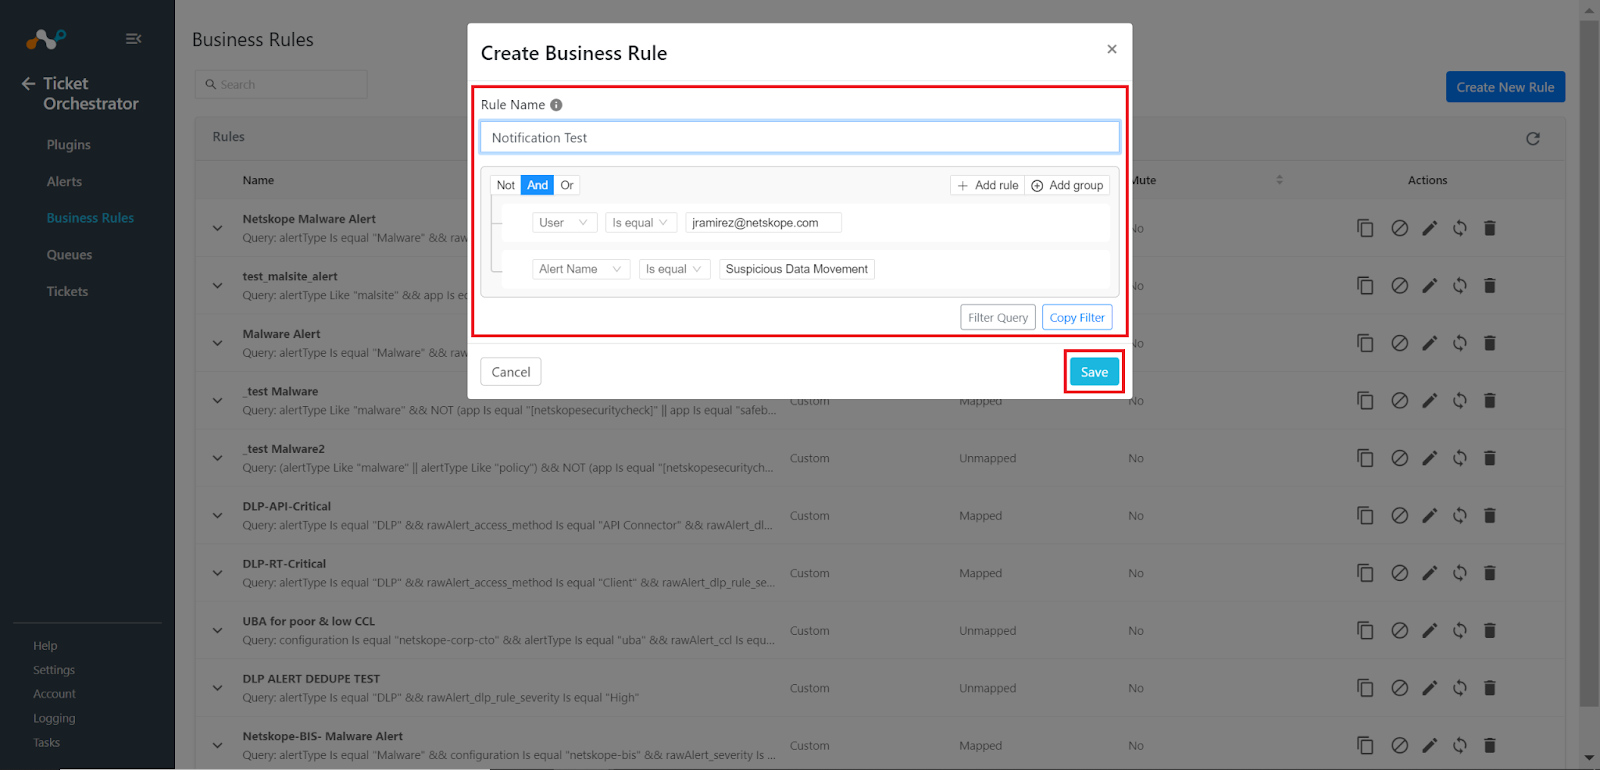
- Use the filter section to create a useful query for a business rule you wish to receive notifications for. Once your query is set, click on the Create Business Rule button. Give the rule a name and click on Save.
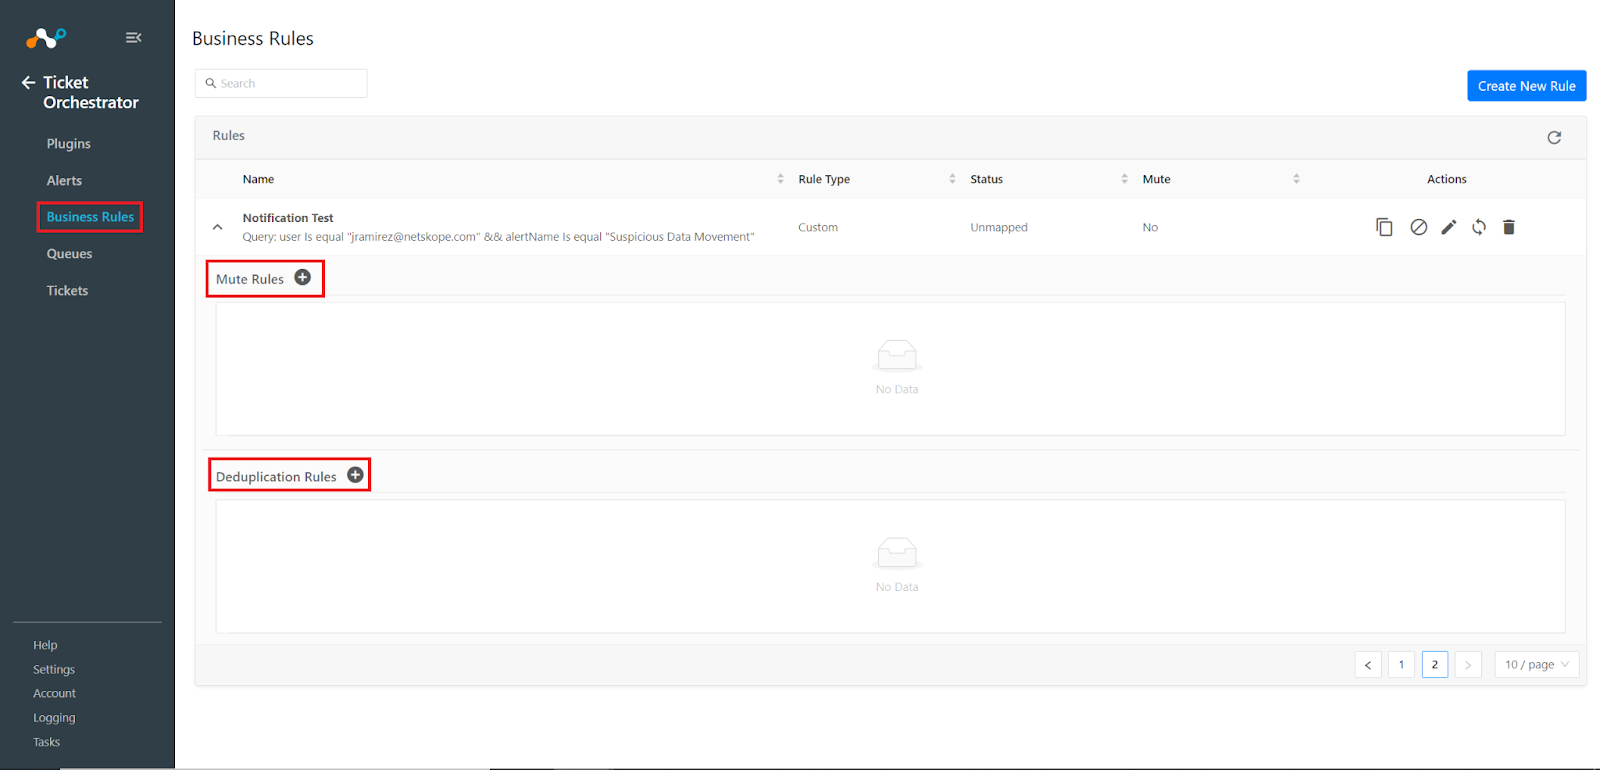
- (Optional) Navigate to Business Rules and click on the business rule created. You can create deduplication rules and mute rules to help manage the amount of alerts generated.
- Follow steps 1-3 for any other business rules you need notifications for.
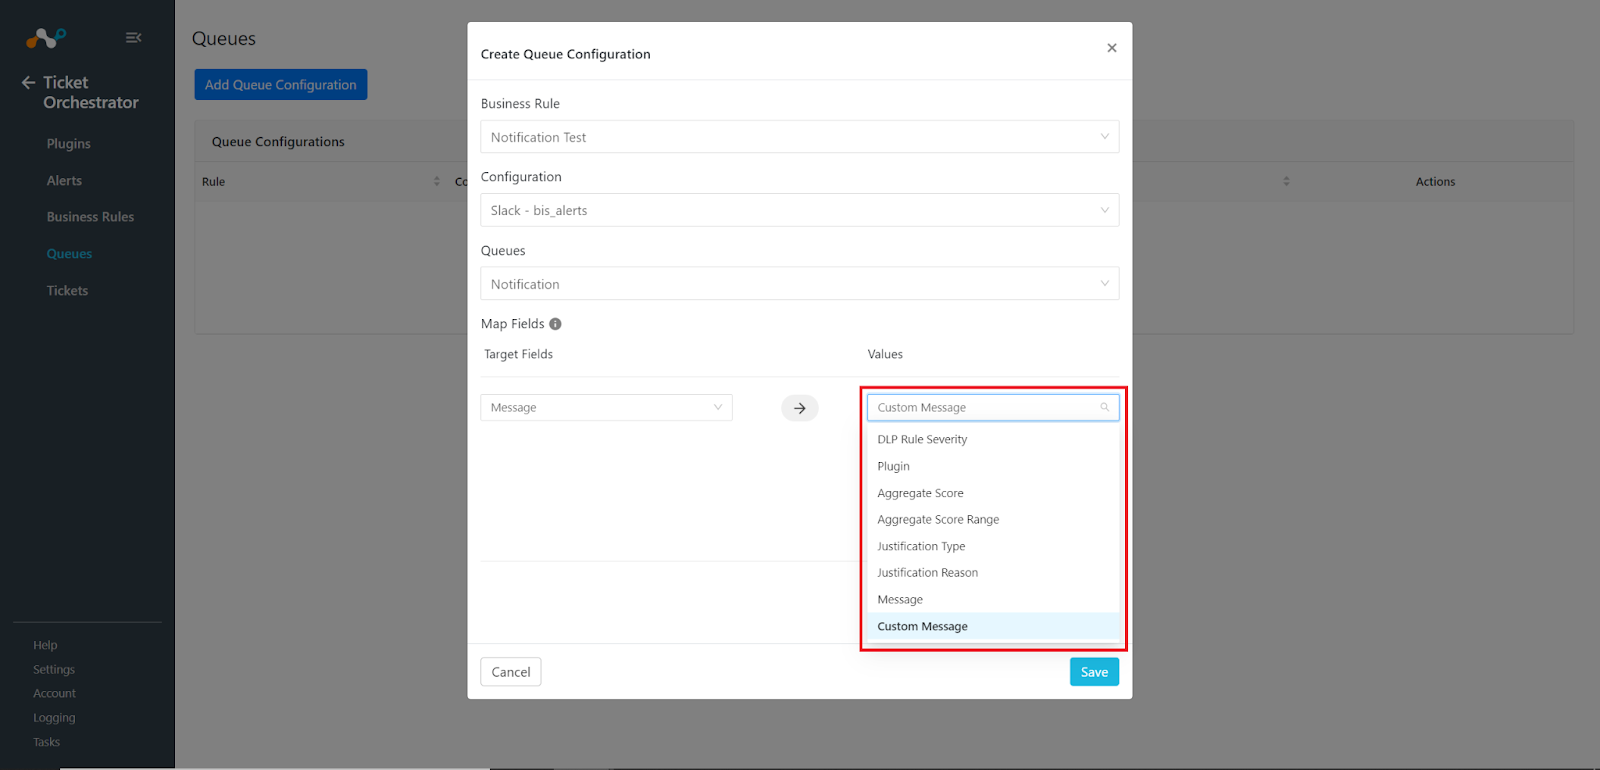
Step 4. Create the Slack Notification Queue:
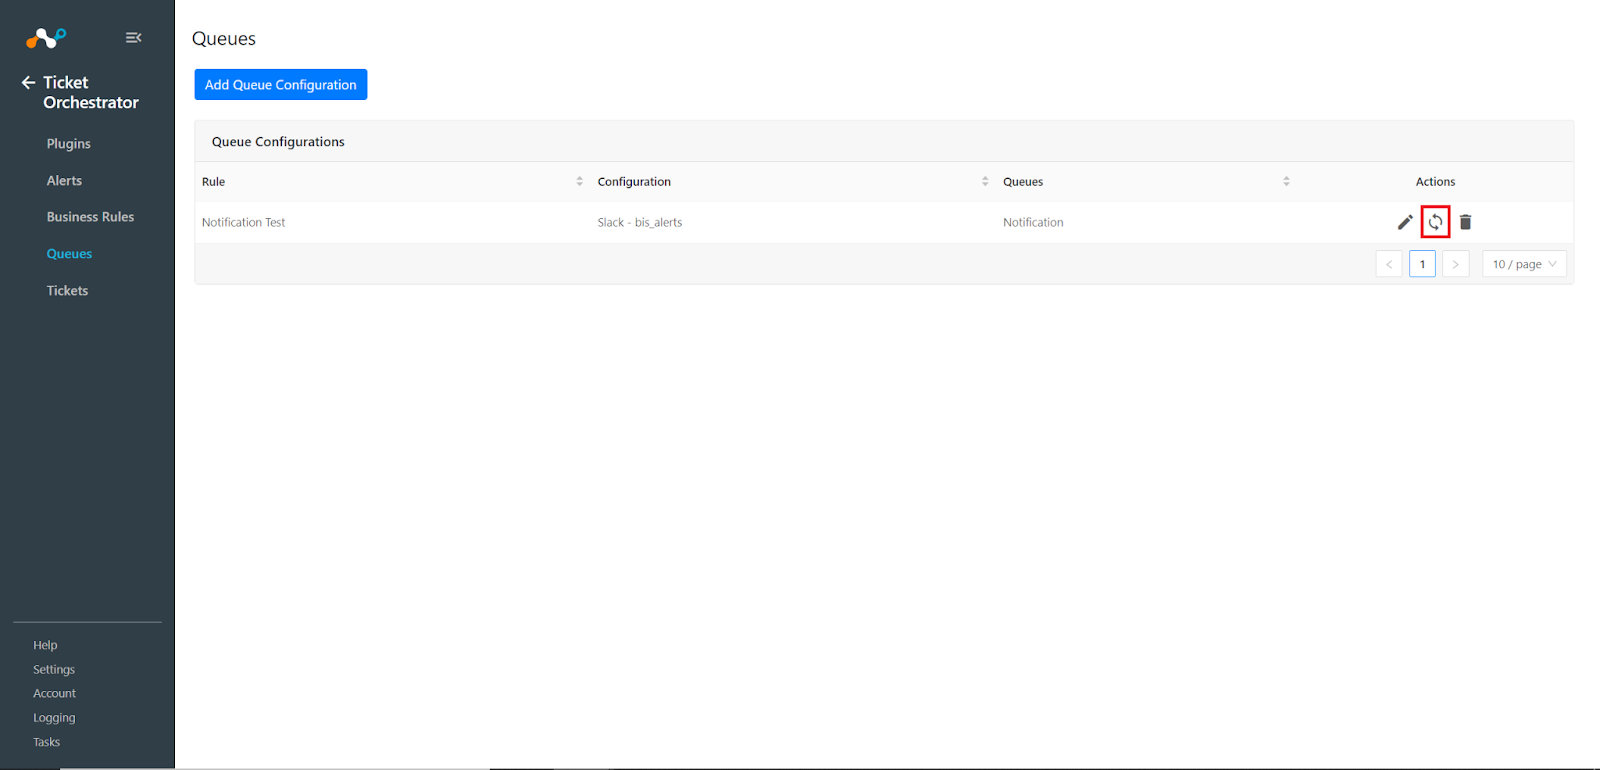
- Navigate to Ticket Orchestrator > Queues.


- Click on Add Queue Configuration. Select the business rule created in Step 3. Select the Notifier plugin created in Step 2 as the configuration. Set the Queues value to Notification, this will be the only value available.
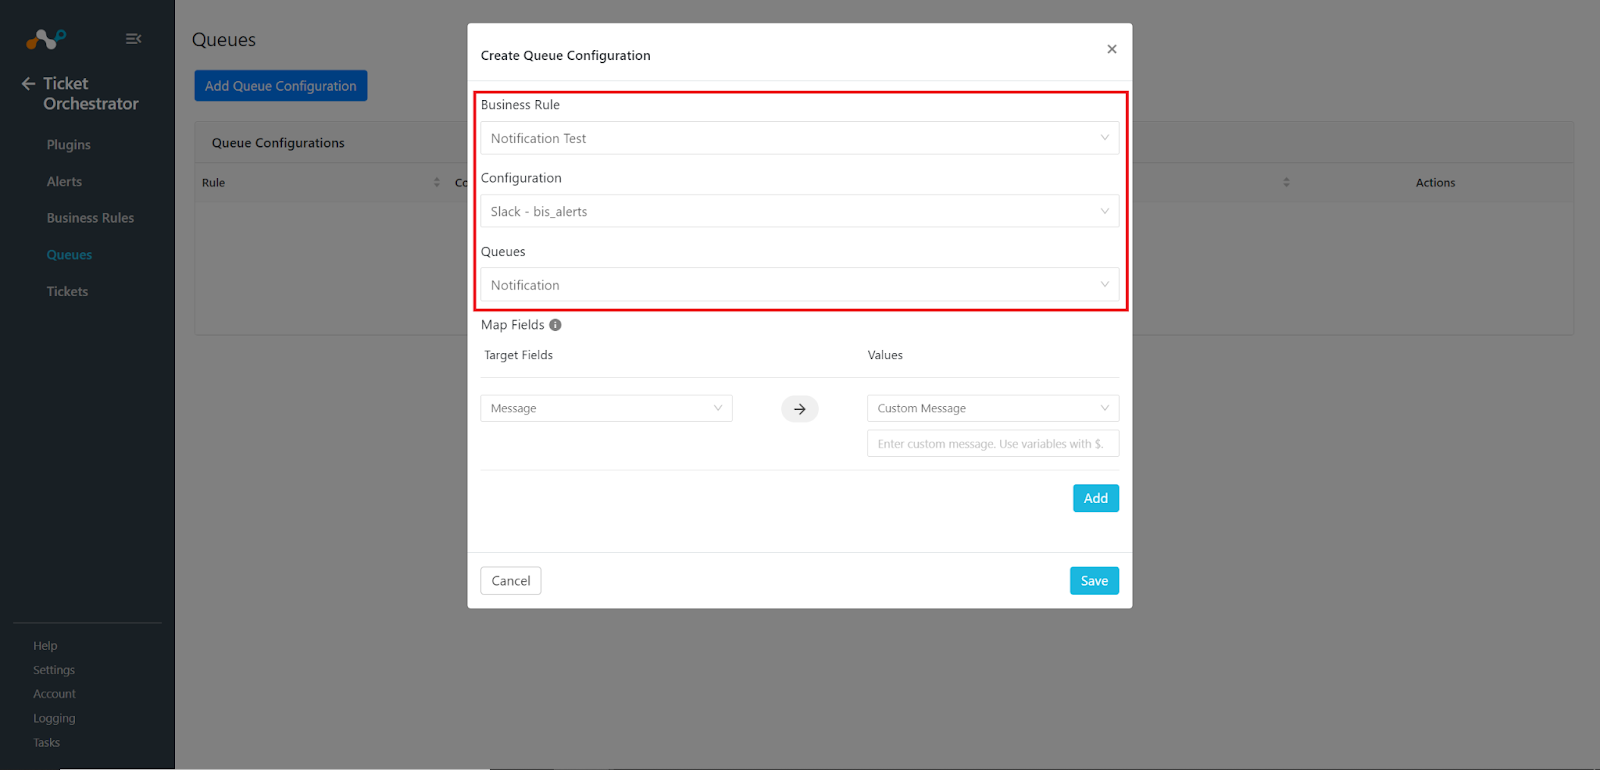
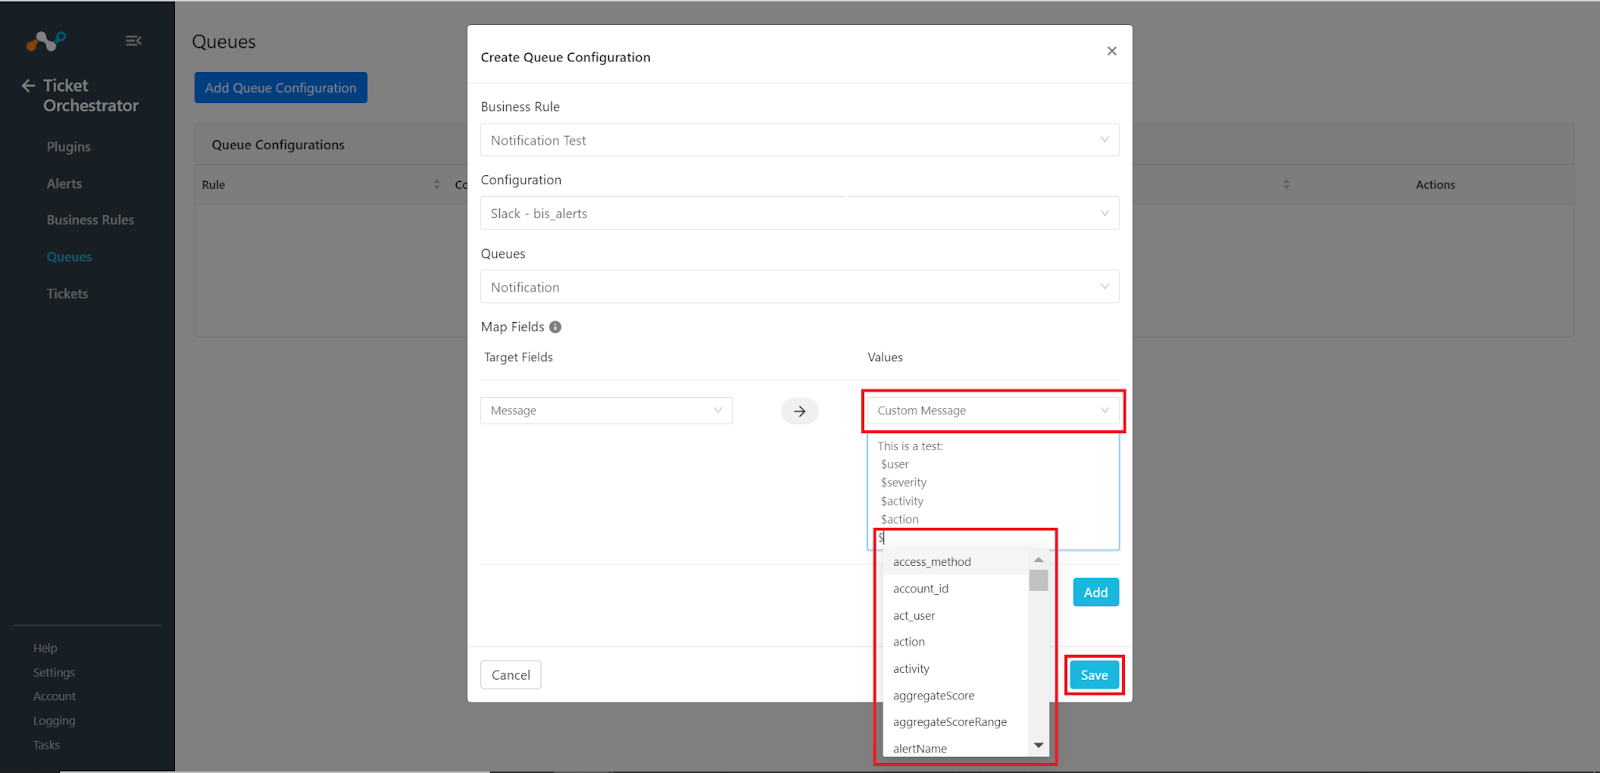
- Create a custom message using alert variables, use a $ symbol to see available variables (variables are based off of alert details, so not all variables will work within your notifications, stick with fields that are seen within the alerts caught by your business rule). Instead of a custom message, you can choose from the same variables as values. Once finished click on Save.
- Follow steps 1-3 for any other business rules that need to be sent as notifications, replacing the original business rule in step 2 with the other business rules.
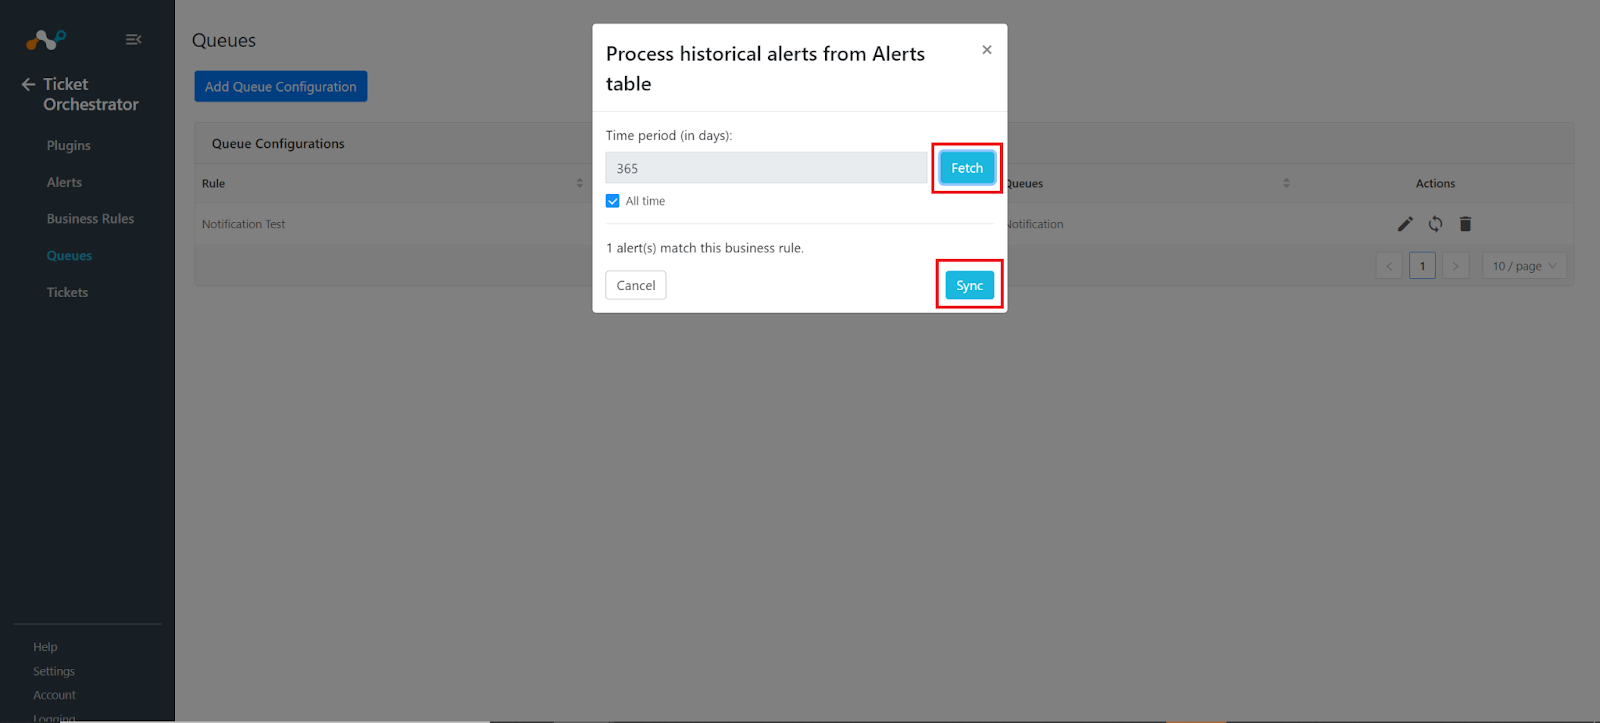
- Once saved, the queue configuration can be tested, the timespan to look back for can be configured depending on the amount of data you want to fetch. The sync button will send any notifications caught by the fetch to Slack. This is usually done automatically by the plugin’s sync period set in Step 2, but it can be forced for testing.