What is CSPM and Why CSPM?
CSPM stands for Cloud Security Posture Management, it is a process to monitor cloud resources that belong to an organization for any potential security misconfigurations or risks which can lead to financial or data loss. The CSPM process scans the public cloud infrastructure continuously to check for violations against a set of predefined rules. The rules are tuned/muted by each organization as per their compliance and security needs. Netskope CSPM also offers a set of comprehensive rules which can be used by customers to improve their compliance and security posture of public cloud. Netskope offers CSPM solutions for Microsoft Azure, Google Cloud Platform and Amazon Web Services at the time of writing this post. Storage scans can also help with DLP and Malware violations. This post explains in an efficient and expeditious method on how to onboard multiple Azure subscriptions into Netskope CSPM.
Making use of Azure Management Groups
Individual Azure subscriptions can be onboarded to the Netskope Tenant and the Netskope documentation would be your best guide to help with it. This post would talk on how an admin could organize the Azure subscriptions and onboard multiple Azure accounts to the Netskope tenant at once with little overhead.
The first step would be to understand and make use of the Azure management groups. A management group helps to organize your Azure subscriptions into relevant groups in order to manage the subscriptions easily and efficiently. The admin must create an Azure management group which ties together all the subscriptions which need to be onboarded to the Netskope CSPM. Any new subscription which is added to the management group in the future is also automatically added to the Netskope CSPM for the same services. The admin could also create different management groups for different use cases like CSPM only, CSPM+DLP, CSPM+DLP+Malware and so on, and add different subscriptions to the respective groups accordingly.

Onboarding Azure Management Groups to the Netskope CSPM
The below steps will walk you through on how to onboard an entire management group to the Netskope CSPM.
- Please follow the steps outlined in this document to
- Create an Azure AD Application
- Get the Directory ID and Application ID
- Get the Authentication Key
- List AD Users
- Assess Key Vault
- Register for Microsoft Event Grid by following this page. Please note this must be done for every single subscription and cannot be done at once for all subscriptions.
- NOTE: This step can be ignored if you do not need to set up DLP Scan and Threat Protection Scan for your Azure Management Group.
- Follow along the steps provided here to create an Azure event grid secure webhook subscriber role. This newly created role must be attached to the Azure AD Application created in Step 1.1
- NOTE: This step can be ignored if you do not need to setup DLP Scan and Threat Protection Scan for your Azure Management Group.
- NOTE: Do not create a new Azure AD App for this step, use the Azure AD Application created from Step 1.1
- NOTE: Do not create a new Authentication key for the Azure AD Application. Use the key obtained from Step 1.3
- Creation of a Custom Role for a Management Group is different from that of for a Subscription which is mentioned in this document. Follow along the post to create a custom role for a Management Group.
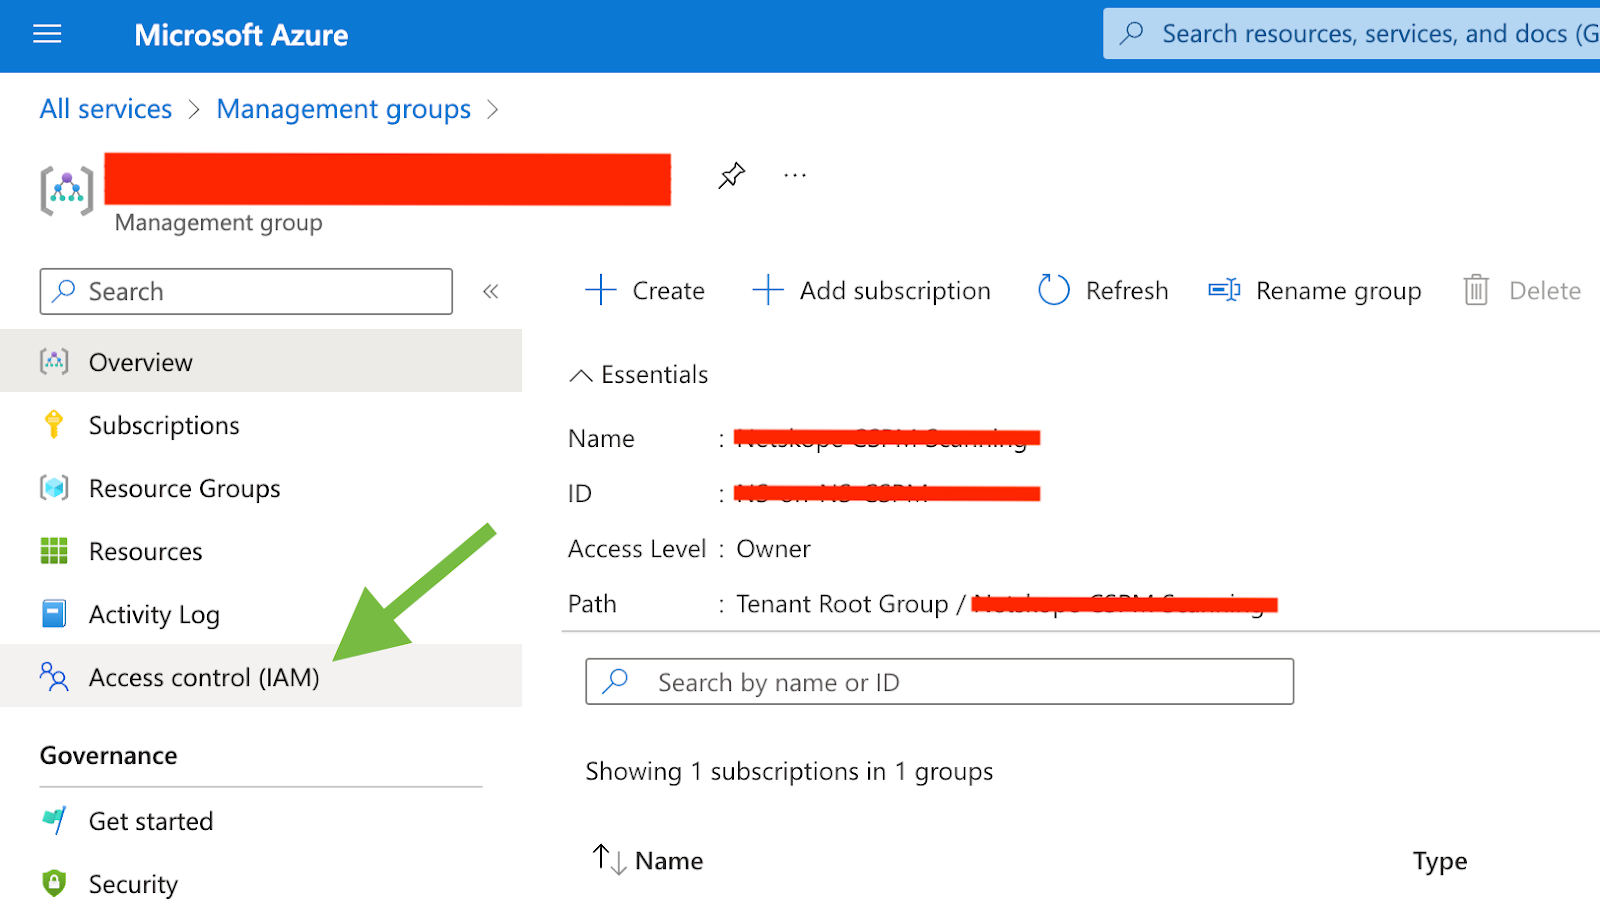
- Navigate to All Services → General → Management Groups.
- Click on the Management Group which is currently being worked on.
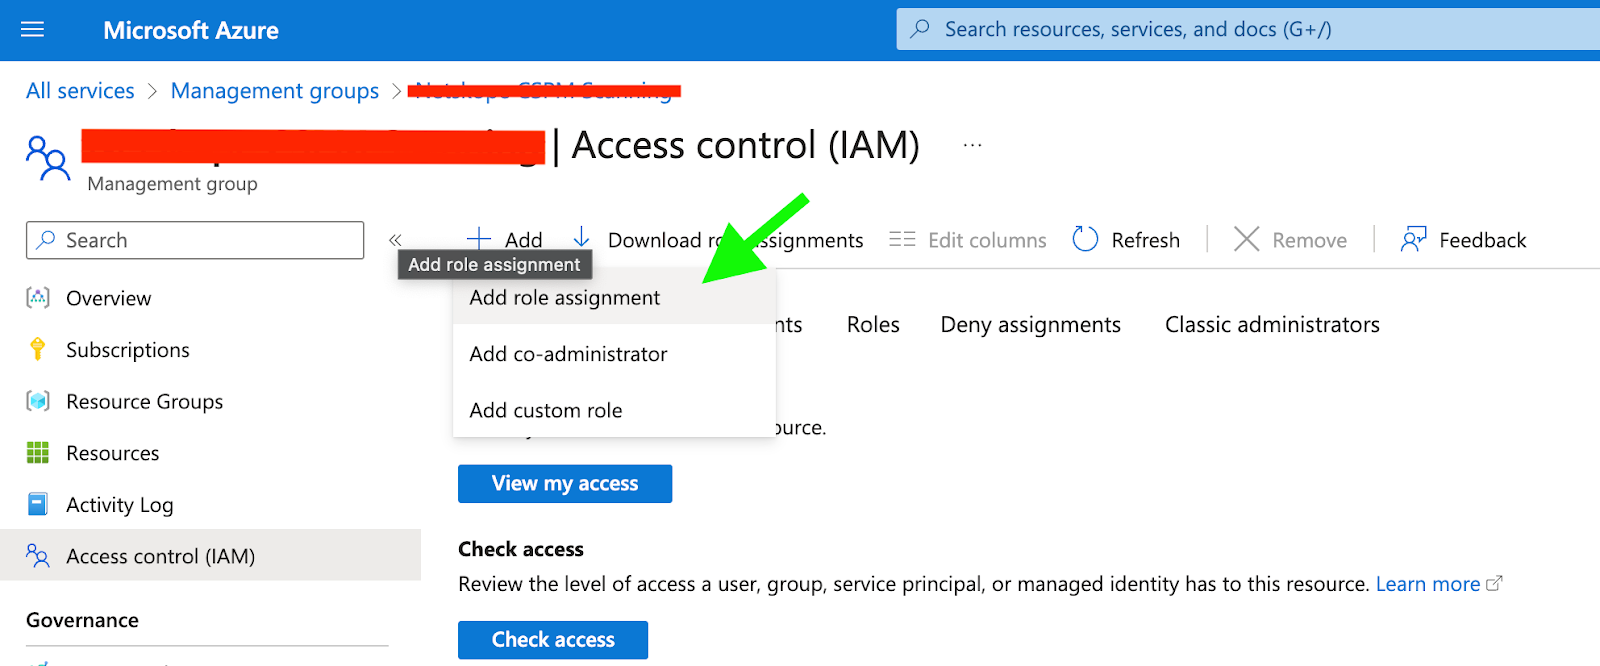
- On the left panel, click on IAM.
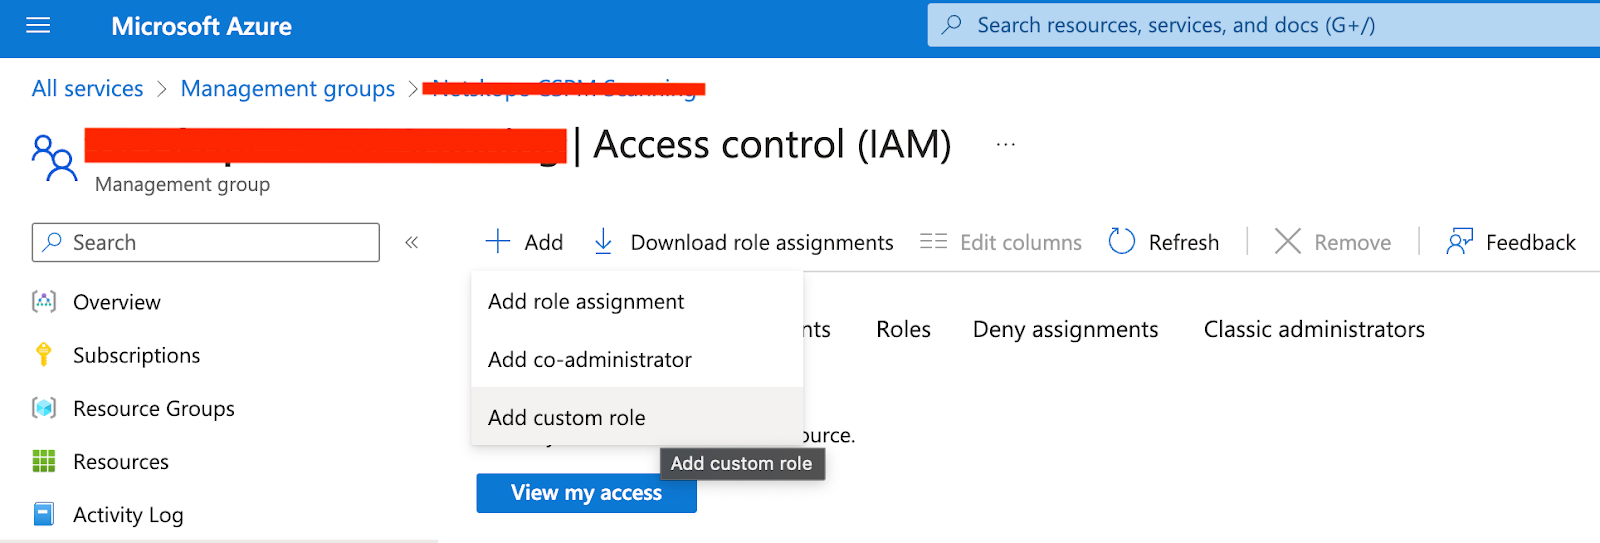
8. On the resulting IAM Page, Click on ‘Add ’ → Add Custom Role
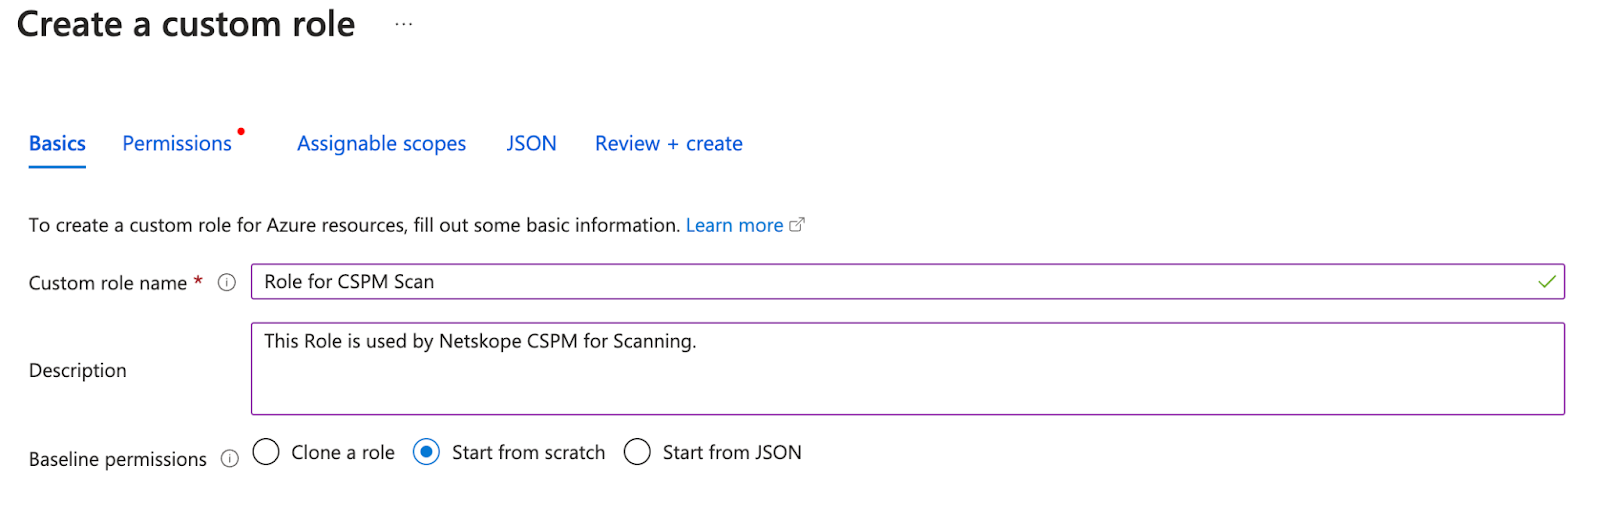
9. Type in a recognisable name and a description for the role which is being created and select the baseline permissions as ‘Start from Scratch’ and click on ‘Next’
10. On the ‘Permissions’ section, add the below mentioned permissions by clicking on ‘Add Permissions’
1. Microsoft.Web/sites/config/list/Action
2. Microsoft.Network/networkWatchers/queryFlowLogStatus/action

11. Click ‘Next’ and check if the assignable scopes has the desired management group mentioned and again click ‘Next’ to view the JSON.
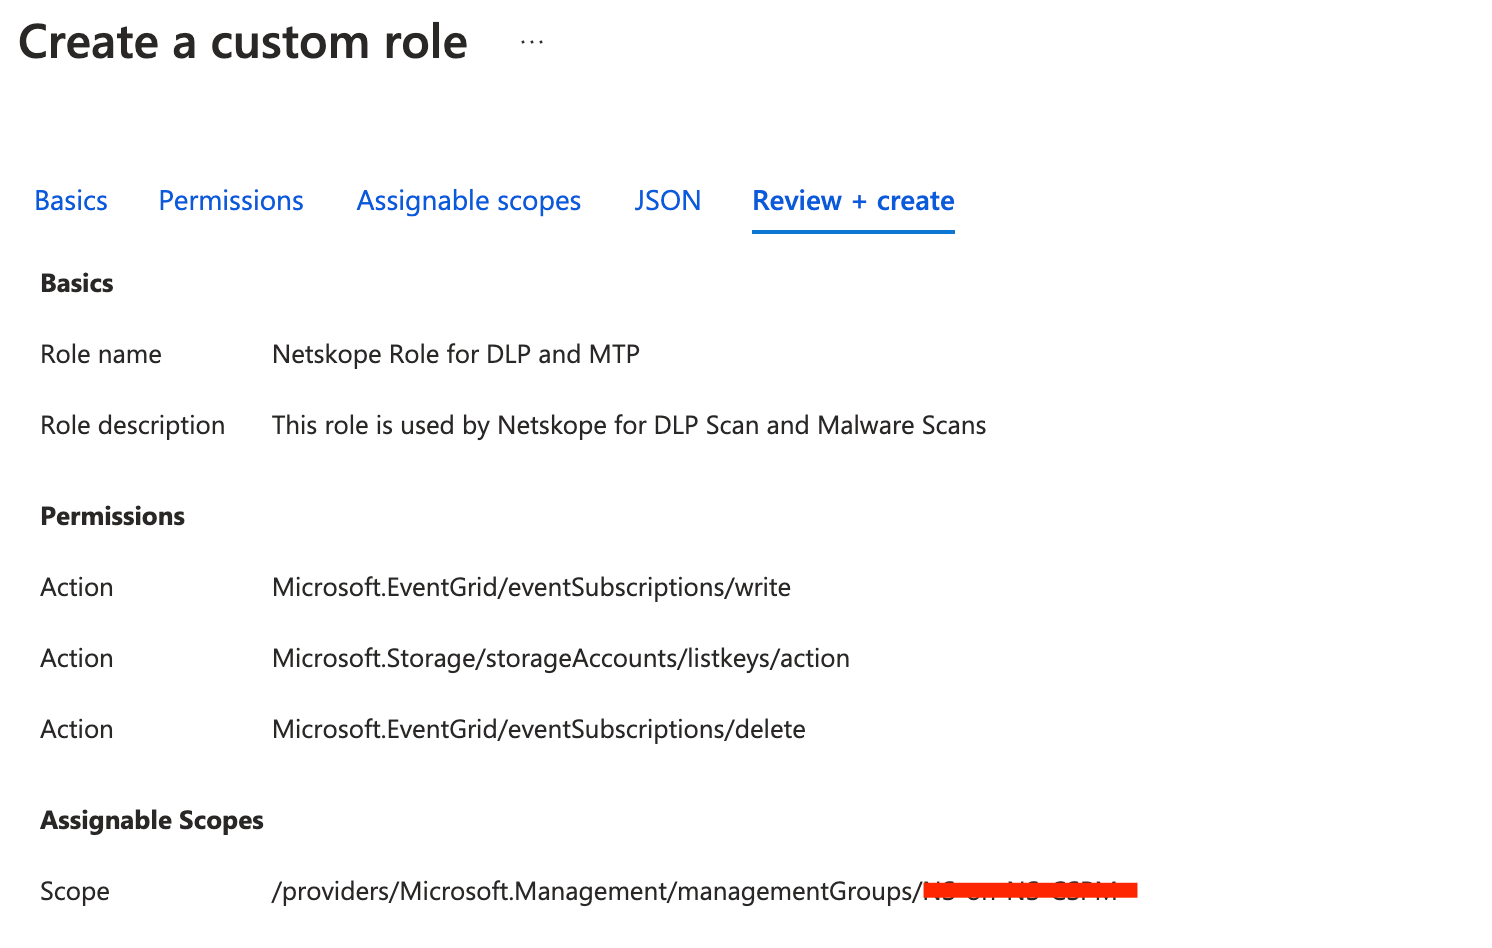
12. The JSON page needs no changes, so click ‘Next’ again to visit the ‘Review + Create’ page and make sure the Action and Scopes are for the above mentioned actions and the appropriate Management Group.
13. Once the is successfully created at the IAM page, click on ‘Add’ → Add role assignment
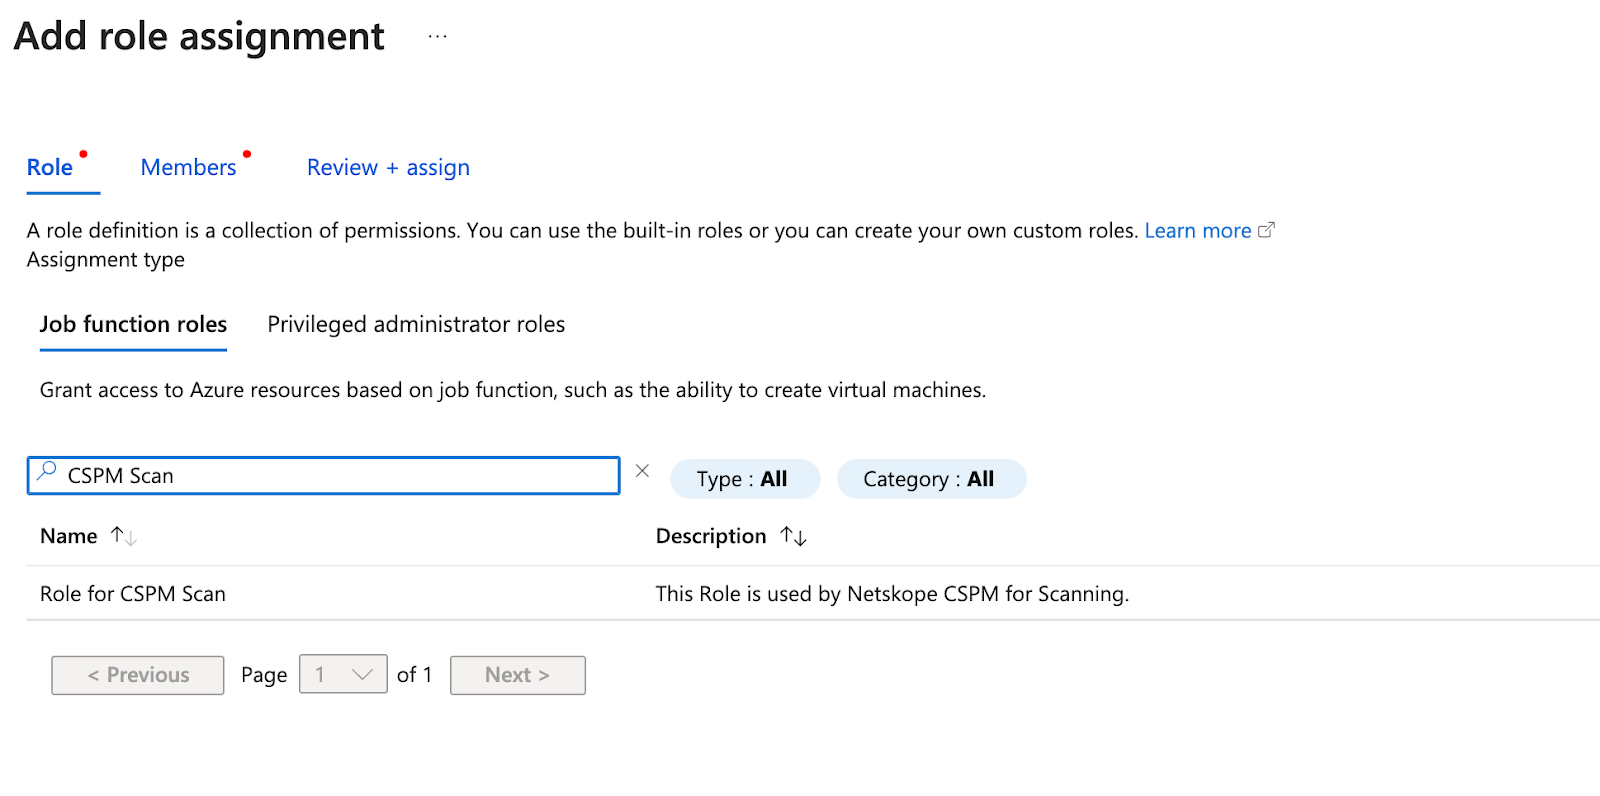
14. Search for the role created in Step 10, select the same on it and click ‘Next’.
15. In the ‘Members’ section, click on ‘Assign access to User, group or service principal’ and click on ‘Select members’.
16. Search for the Custom App which was created in Step 1.1 and select the App and click ‘Next’.
17. Check the ‘Review + Assign’ section for Role, Scope and Members and click on ‘Review + assign’
18. NOTE: Skip this step if you do not need to enable DLP Scan and Threat Protections Scan. Repeat the above steps from Step 5 to Step 17 but for a new role. This new role is used for DLP and MTP Scans. So make sure to add the below mentioned different set of permissions for the new role
1. Microsoft.EventGrid/eventSubscriptions/write
2. Microsoft.Storage/storageAccounts/listkeys/action
3. Microsoft.EventGrid/eventSubscriptions/delete
19. Repeat the above steps from Step 13 to Step 17 and add the ‘Reader’ role instead of the custom role created.
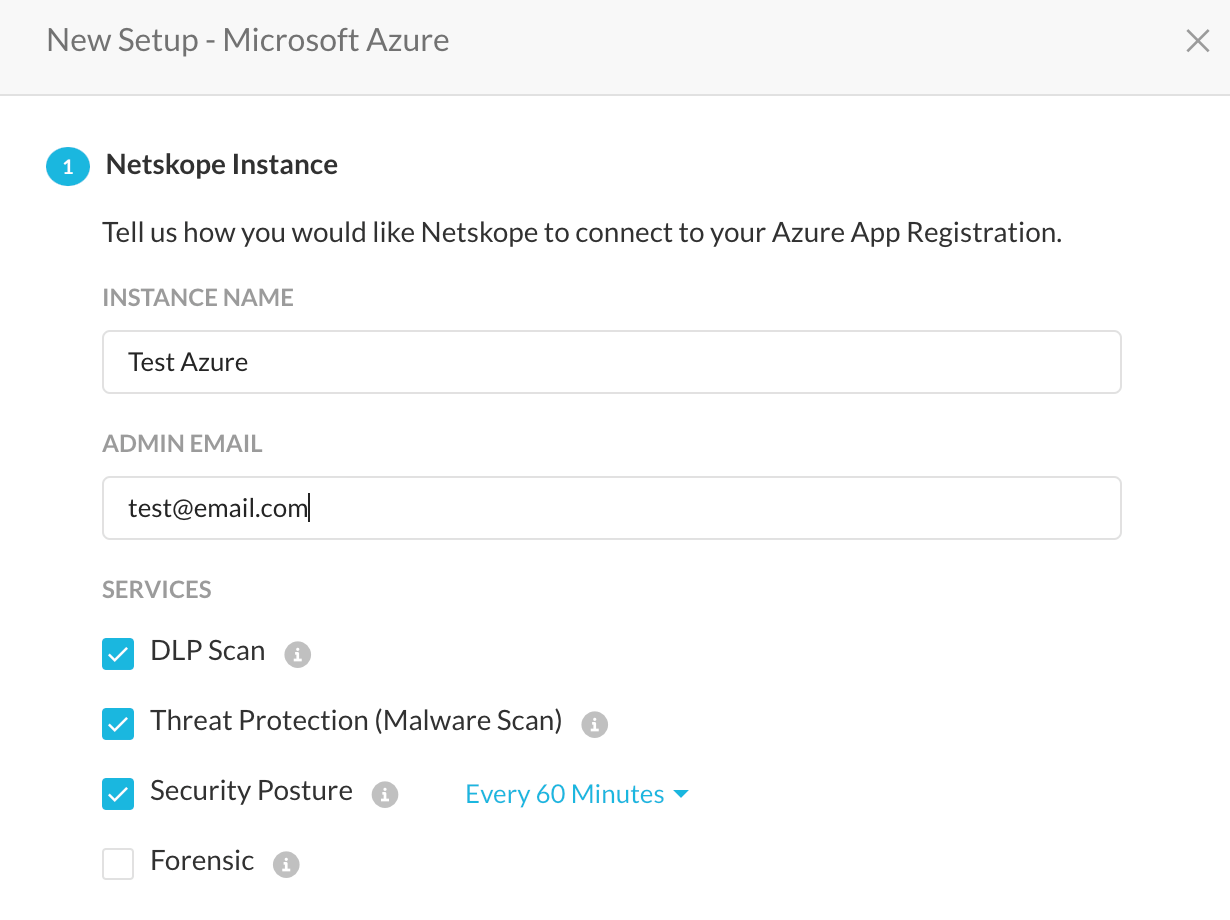
20. Once the assignment is successful, you could check this page to add the Management Group to the Netskope CSPM for scanning. If you had skipped Step 2, Step 3 and Step 18, the setup is only eligible for Security Posture. If you had followed Step 2, Step 3 and Step 18, you can enable DLP Scan and Threat protection along with Security Posture.