I am super excited about this integration. This is our first one that dynamically controls role based access to private apps.
This document explains how to install, configure, and use the Illumio plugin with the Cloud Threat Exchange (CTE) module of the Netskope Cloud Exchange platform.
The Illumio plugin retrieves Workload Labels from the Illumio Zero Trust Segmentation platform (ZTS) and dynamically adjusts access via Netskope’s Private Apps as part of Zero Trust Network Access (ZTNA). These workloads will be hosted in your data center behind a Netskope NPA Publisher. Workload labels like Production, QA, or Quarantine will be brought into Netskope where policies can be applied based off of User Group membership. For example, only users that are part of your AD group QA would have access to workloads with a QA label or no users would be able to get to a Quarantine labeled workload.
Prerequisites
To complete the plugin configuration, you’ll need:
- A Netskope Tenant (or multiple, for example, production and development/test instances).
- A configured ZTNA Gateway installed in front of your workloads.
- A Netskope Cloud Exchange tenant with the Threat Exchange module already configured.
- CTE illumio plugin v1.0.1 or higher. This guide will not work with v1.0.0.
- An Illumio Policy Compute Engine (PCE) version 21.2 or higher.
- Labeled PCE Workloads within the defined policy scope.
- The Netskope CE server must be able to access the PCE over HTTPS.
Workflow
- Create an API key on the Illumio PCE.
- Configure the Illumio plugin.
- Configure the Cloud Exchange CTE Business Rules
- Configure Cloud Exchange CTE Sharing
- Configure Netskope Real Time Policy
- Validate the Illumio plugin.
Create an API key on the Illumio PCE
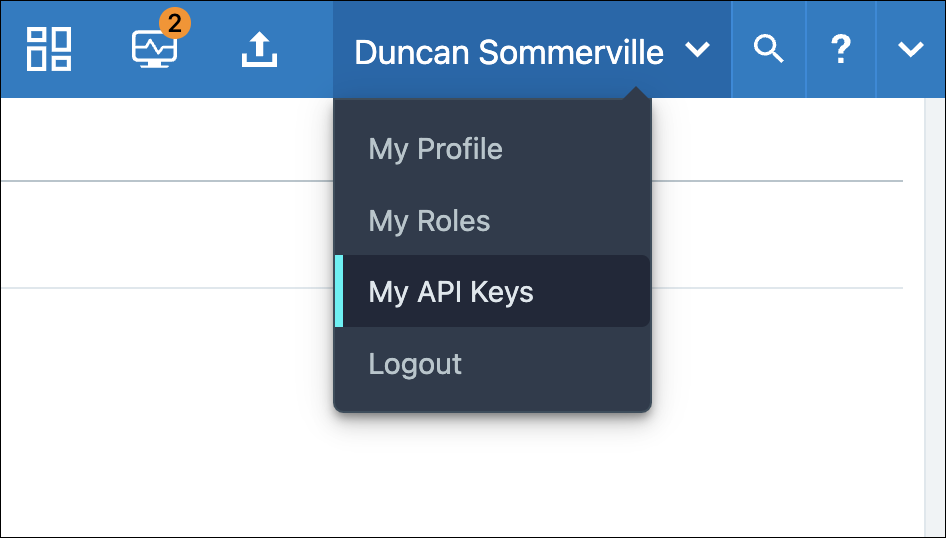
- On the PCE, select My API Keys from the User dropdown in the top-right corner.
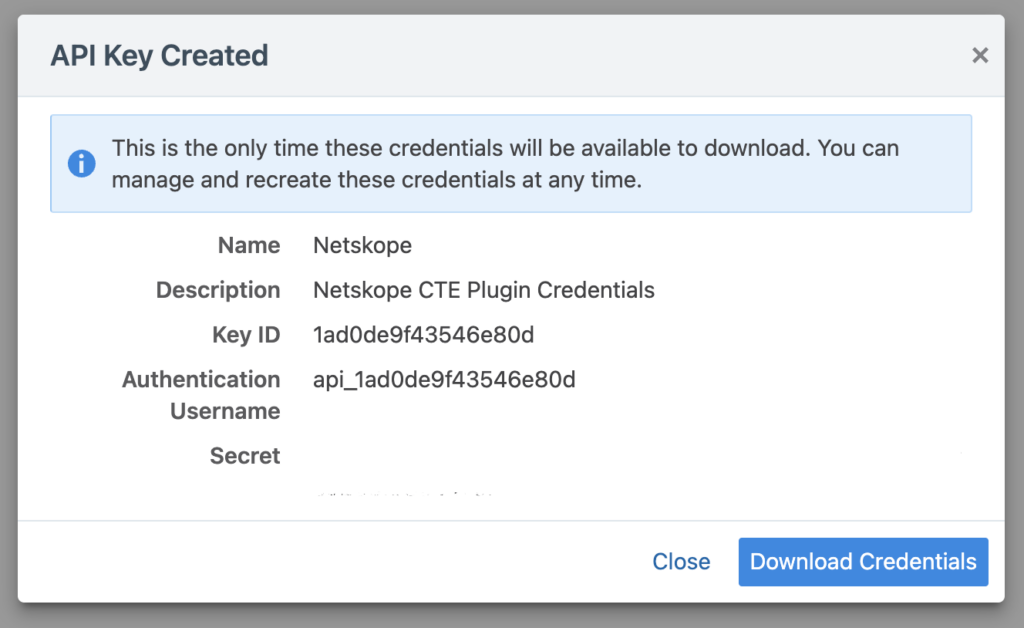
- Click Add at the top-left of the page and enter a name and optional description for the API key.
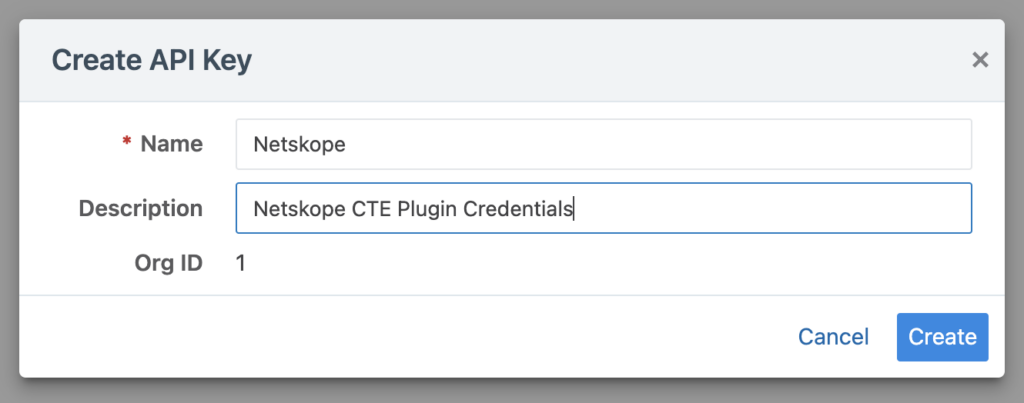
- Click Create and copy the API key Username and Secret as these will be used by the plugin to authenticate to the PCE API. Optionally, download the credentials and store them in a secure location.
Configure the Cloud Exchange CTE Illumio Plugin
- In Cloud Exchange, go to Settings > Plugins.
- Search for and select the Illumio CTE plugin to open to the plugin configuration page.
- Enter the basic information page for the plugin:

- Configuration Name: Enter a valid name for the plugin (alphanumeric and spaces).
- Sync Interval: Adjust the resync interval for the plugin.
- Aging Criteria: Adjust the expiration time for the Threat IoCs created by the plugin.
- Override Reputation: Optionally, set the reputation values for Threat IoCs created by the plugin.
- Enable SSL verification: Toggle TLS certificate verification when connecting to the PCE.
- Use System Proxy: Toggle the use of the HTTP/S proxy configured in Netskope when connecting to the PCE.
- Click Next
- Enter the configuration parameters for the plugin:
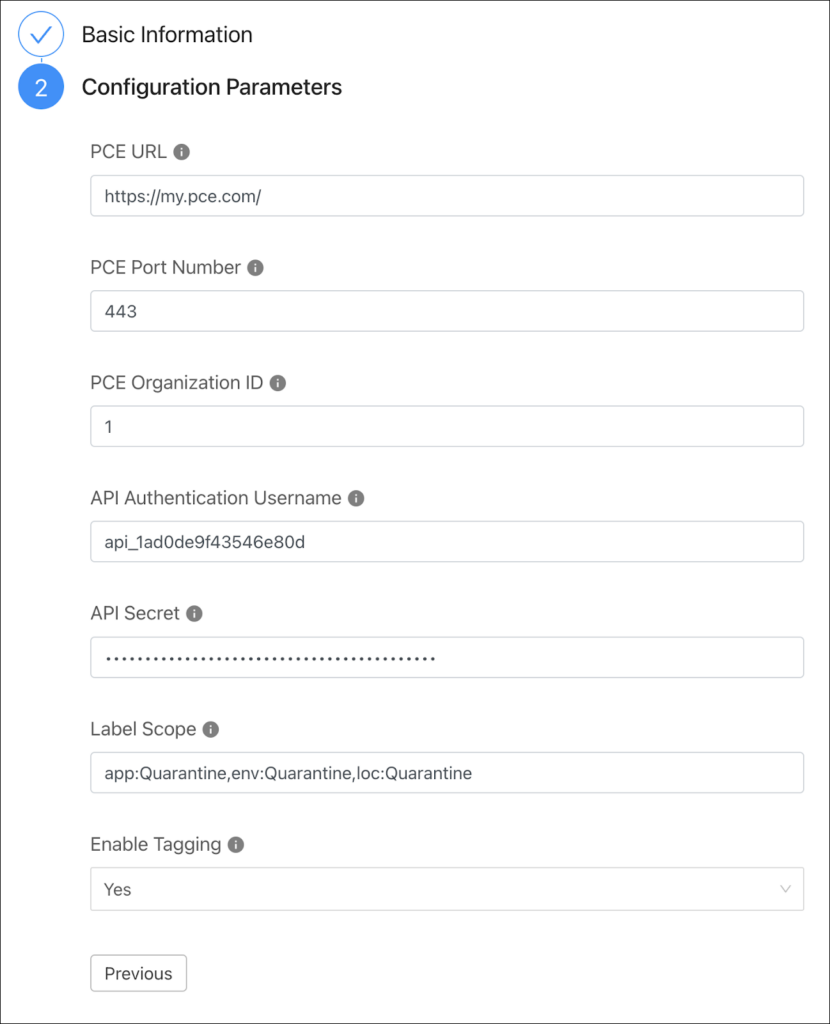
- PCE URL: Enter the PCE FQDN. You can optionally include the scheme.
- PCE Port Number: Enter the port number the PCE cluster is listening on. Defaults to 443.
- PCE Organization ID: Enter the Org ID shown when creating the API key.
- API Authentication Username: Enter the API Username for the key created above.
- API Secret: Enter the API Secret for the key created above.
- Label Scope: Enter a comma-separated list of label keys and values separated with colons. For example: app:Quarantine, env:Quarantine, loc:Quarantine
- Enable Tagging: Toggle whether Netskope tags will be created for labels on Workloads within the defined scope.
Note: See below for information on the Label Scope.
- Click Next
- Click Save in the top-right corner of the page. The configuration will be validated, and the plugin will test the connection to the Illumio PCE. The new plugin can now be viewed under Threat Exchange > Plugins.
Label Scope Note
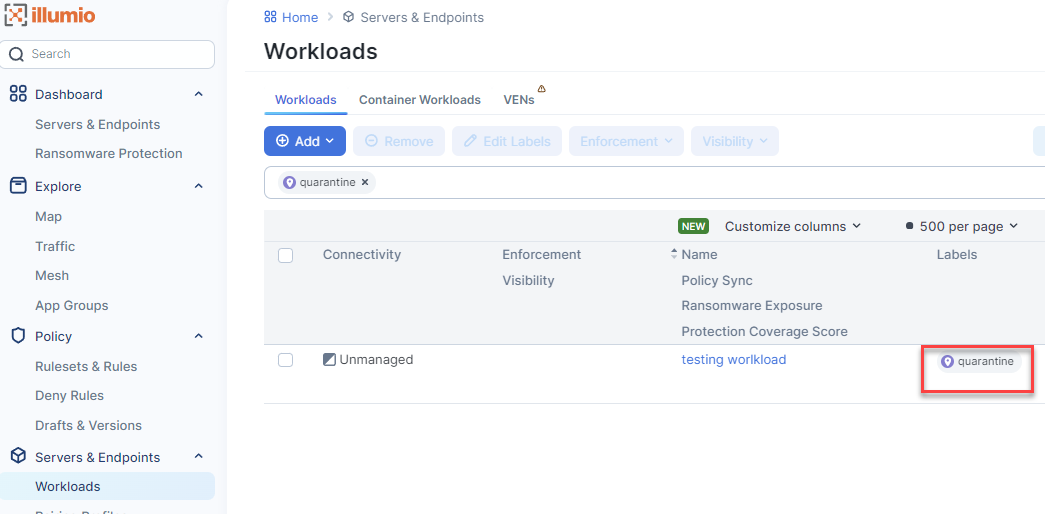
When you bring in a workload that only has the label you added during the Cloud Exchange plugin setup, you will only ingest that one label. If a workload is brought in that has other labels associated with it, those other labels will come into Cloud Exchange also.
For example, when I look at the quarantine label. It is the only label associated with the testing workload. If you hover over the label it will show you what type it is. Location for this one.
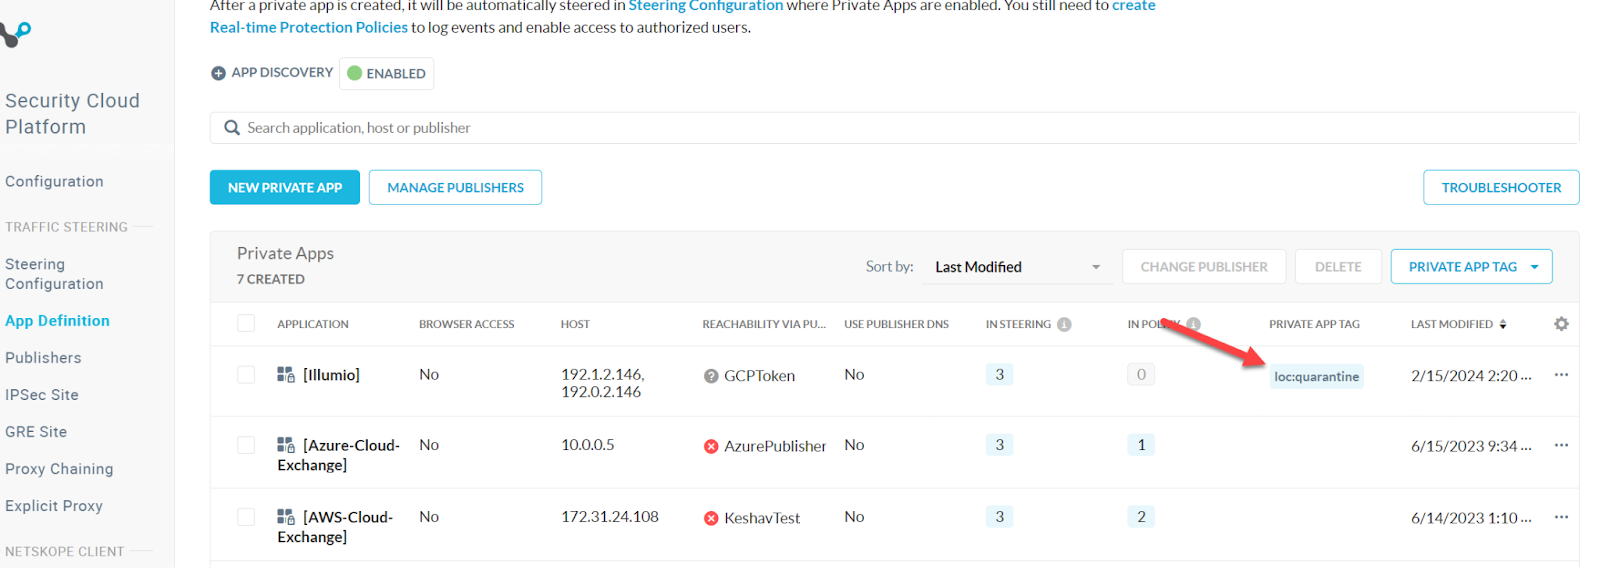
Using loc:quarantine in the Label Scope field during setup will bring in just the loc:quarantine app tag.
If the workloads have other labels, all labels associated with those workloads will be brought in.
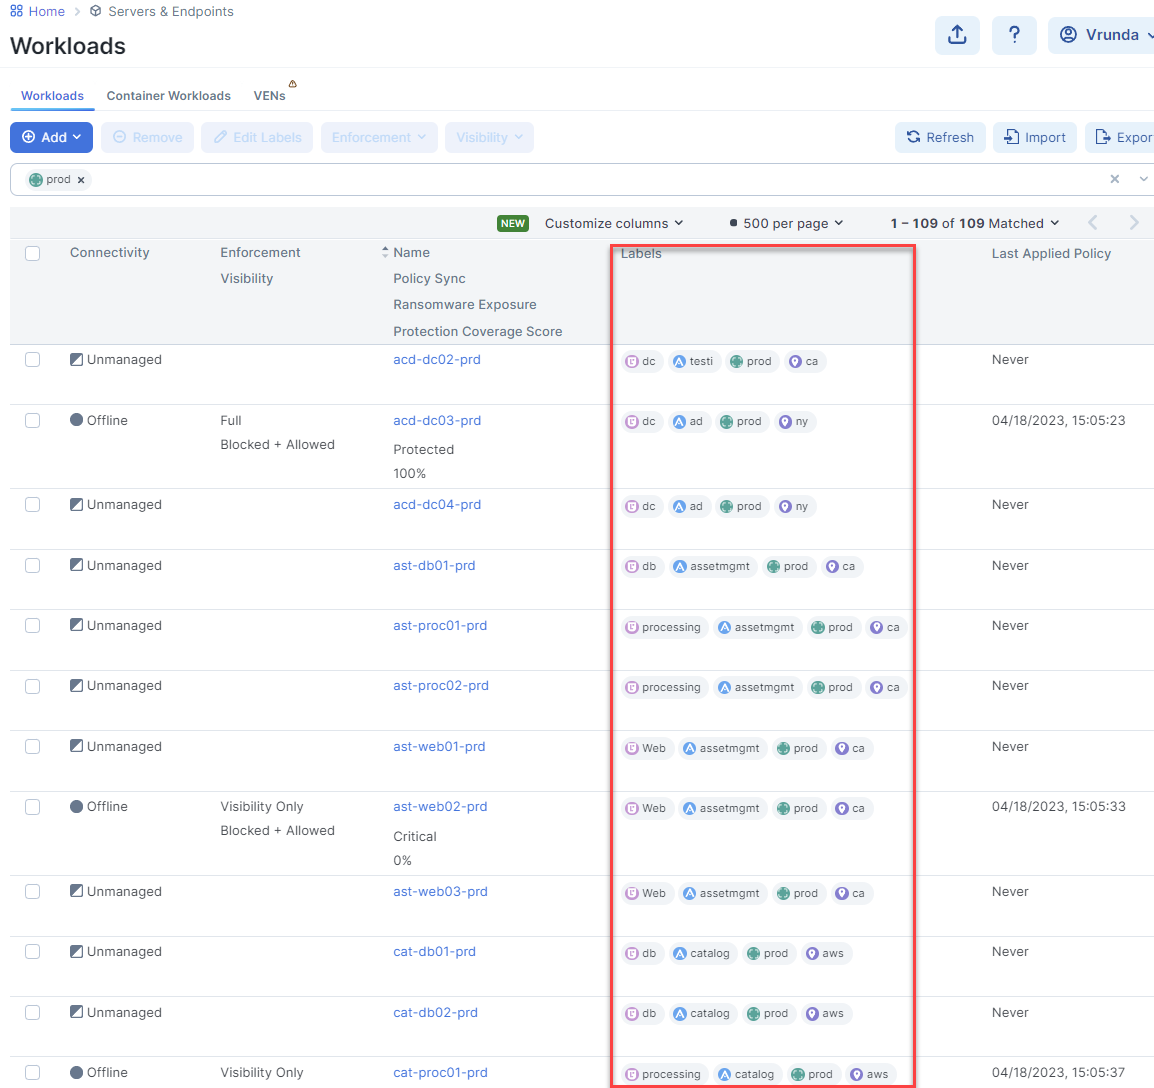
When using env:prod for the Label Scope, Cloud Exchange will bring in all labels associated with those workloads.
Configure the Cloud Exchange CTE Business Rules
In Cloud Exchange go to Threat Exchange > Business Rules > Create New Rule.
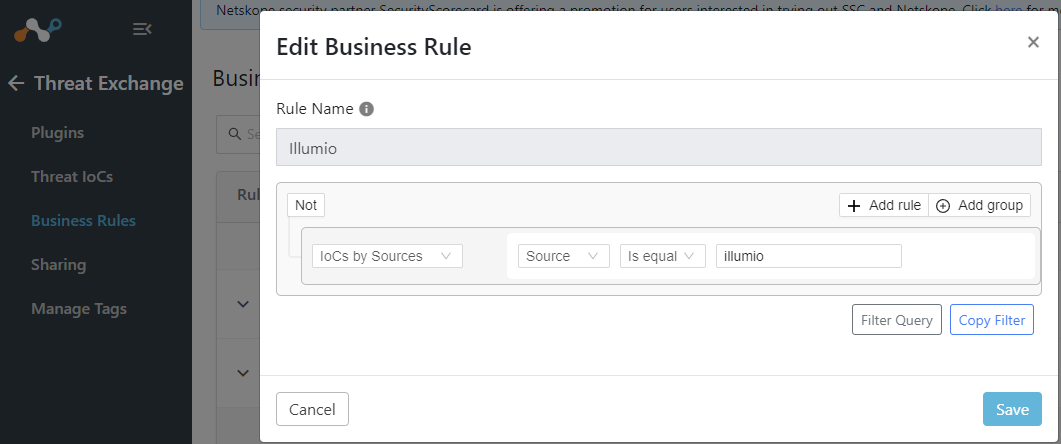
- Rule Name: name your business rule.
- Filter: Add a filter. If you aren’t sure what to put here you can test different rules under the Threat IoCs tab.
I went with a basic one of sources.source Is equal "illumio". Select Filter Query to see it in this format.
Configure Cloud Exchange CTE Sharing
In Cloud Exchange go to Threat Exchange > Sharing > Add Sharing Configuration.
Enter the following for Sharing the labels to your Netskope Tenant.
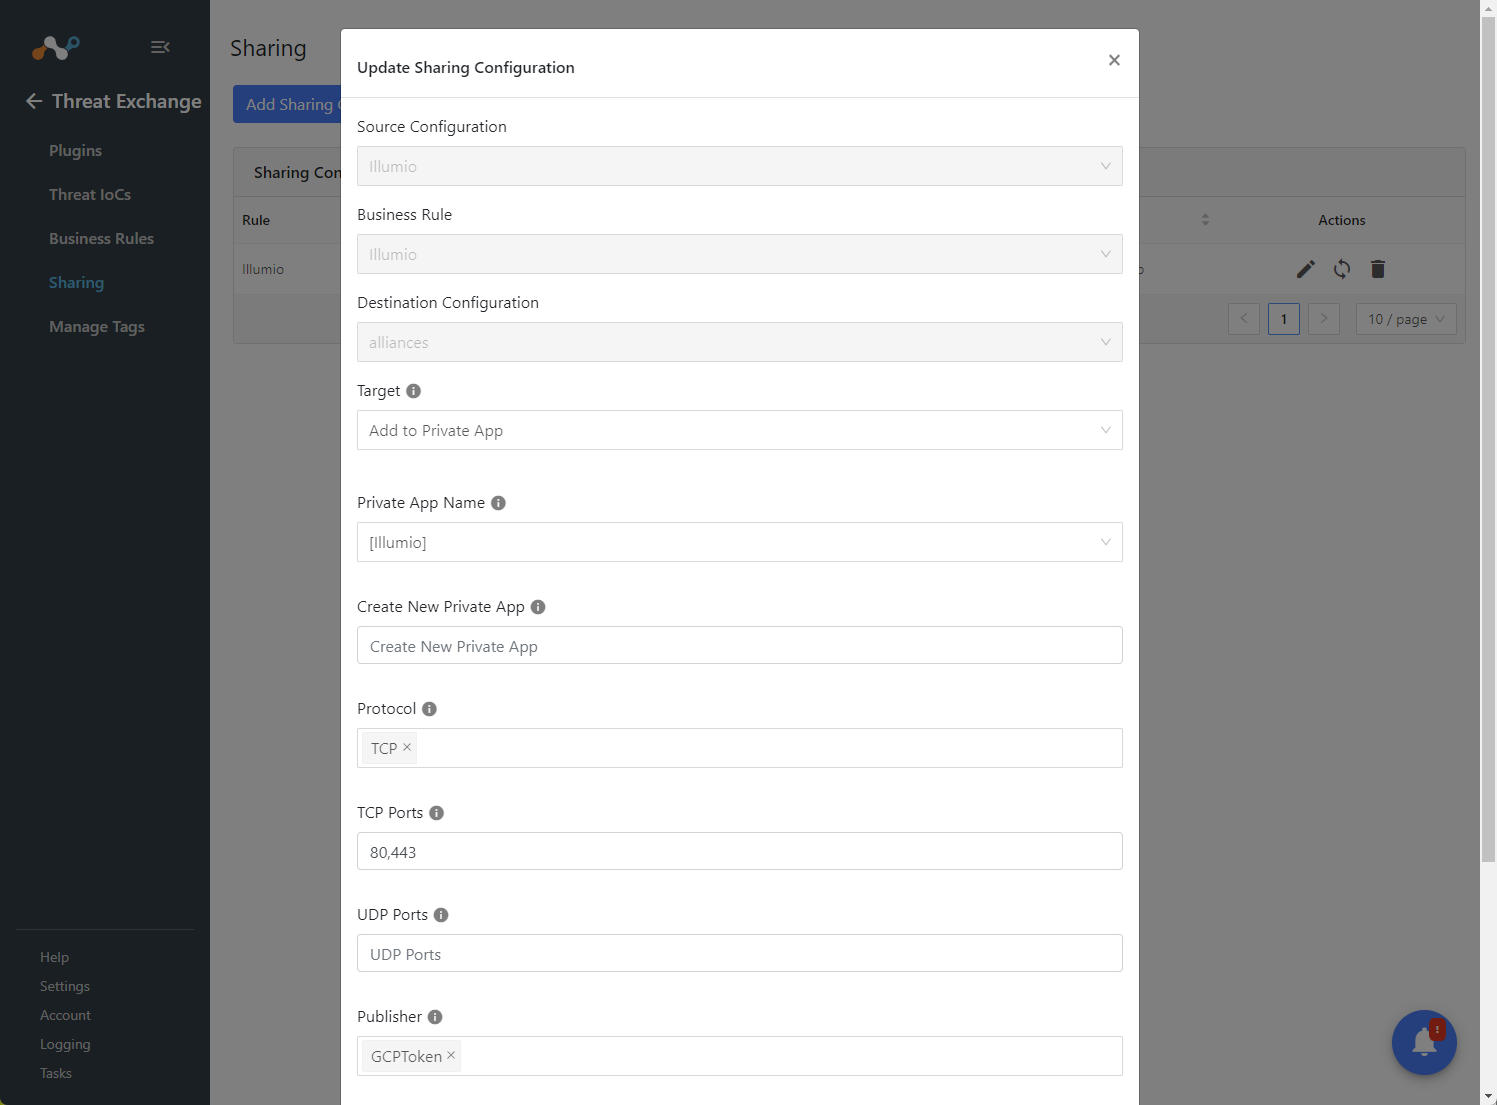
- Source Configuration: Select your Illumio plugin.
- Business Rule: The business rule you created on the last step.
- Destination Configuration: Your Netskope Tenant
- Target: Add to Private App. This option will add the workloads (Host) that match your business rule to your Netskope tenant as Private Apps.
- Private App Name: Either select Create New Private App or select one from the list.
- Create New Private App: The name of your new private app if you selected to create a new one.
- Protocol: Select the protocols that will be able to get to the workloads. If it is a web server you would add TCP and 443 for the TCP ports.
- TCP Ports: add the workload tcp ports.
- UDP Ports: add the workload udp ports. You can leave it blank if there aren’t any.
- Publisher: Select the NPA Publisher that these workloads sit behind.
- Use Publisher DNS: No is default. These are the same settings that are shown in the NPA documentation.
- Default Host: This would be used as a placeholder if no workloads met your label configuration. Netskope can’t have a blank Private Apps field.
Configure Netskope Real Time Policy
- In your Netskope tenant go to Policies > Real-time Protection > New Policy > Private App Access
- Enter the basic information:
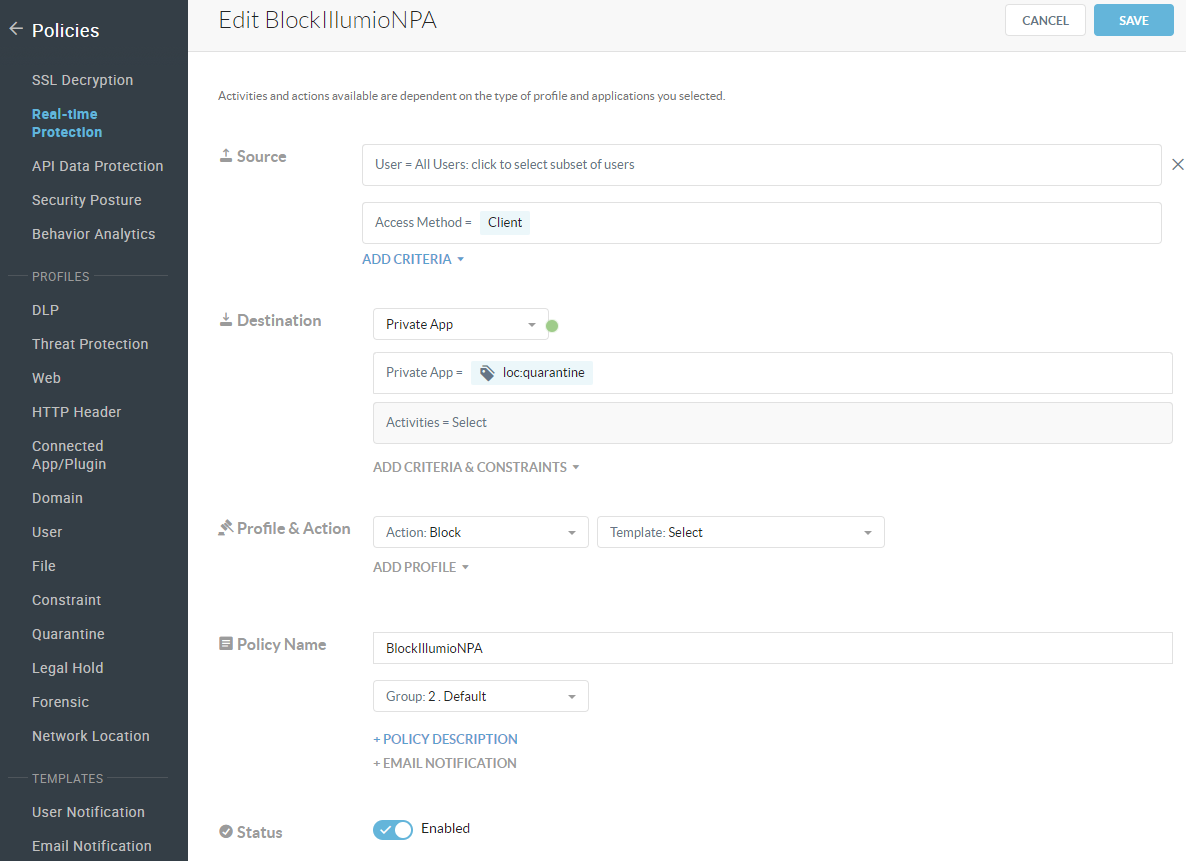
- Source:
- User: For the user source you can select users, or AD user groups
- Access Method: Client
- Destination: Private App
- Private App Tags = Be sure to select TAGS. This will match the labels you brought in from Illumio.
- Profile & Action:
- Action: Block or Allow based on your use case.
- Template: If you are blocking your user from getting to a workload it is always a good idea to add a message (Template) so that they are informed on why they can’t get there.
- Policy Name: Name it.
- Status: Enable.
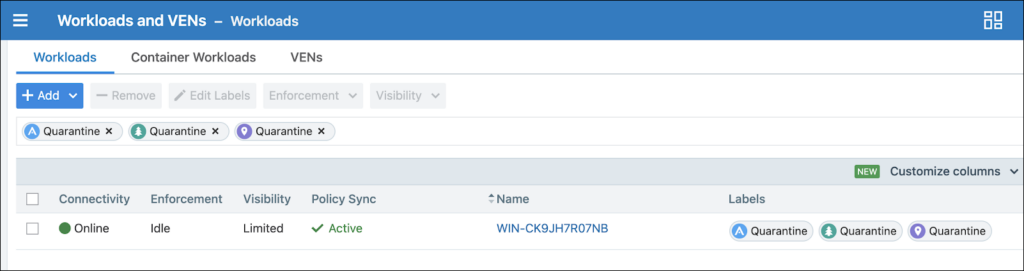
Validate the Illumio Plugin
- Once the plugin runs, verify that Threat IoCs are being created for the Workloads within the defined scope.
- On the PCE, go to the Workloads page and narrow the filter to the Label Scope configured for the plugin.
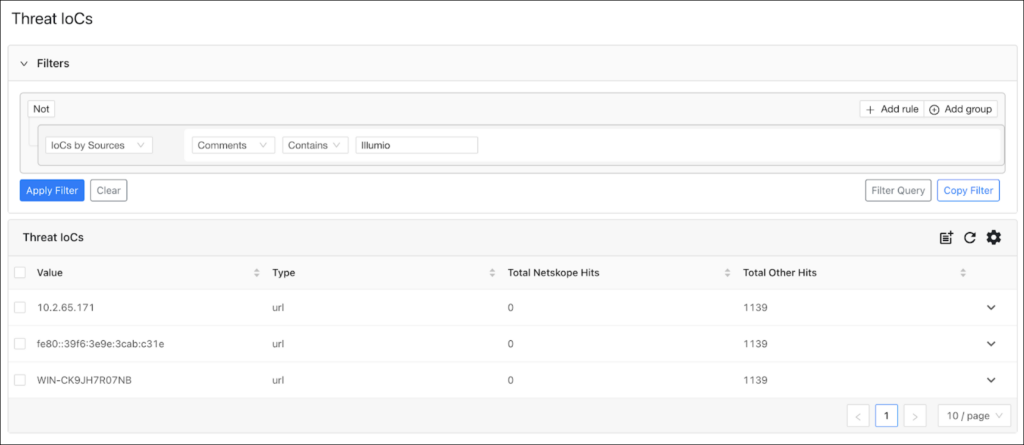
- In Cloud Exchange, go to Threat Exchange > Threat IoCs and narrow the filter to just Illumio Workload entries. This can be done by searching for Illumio in the IoC Comments field, as shown below.
- The Workloads within the configured scope should have IoCs created for their hostnames and interface addresses.
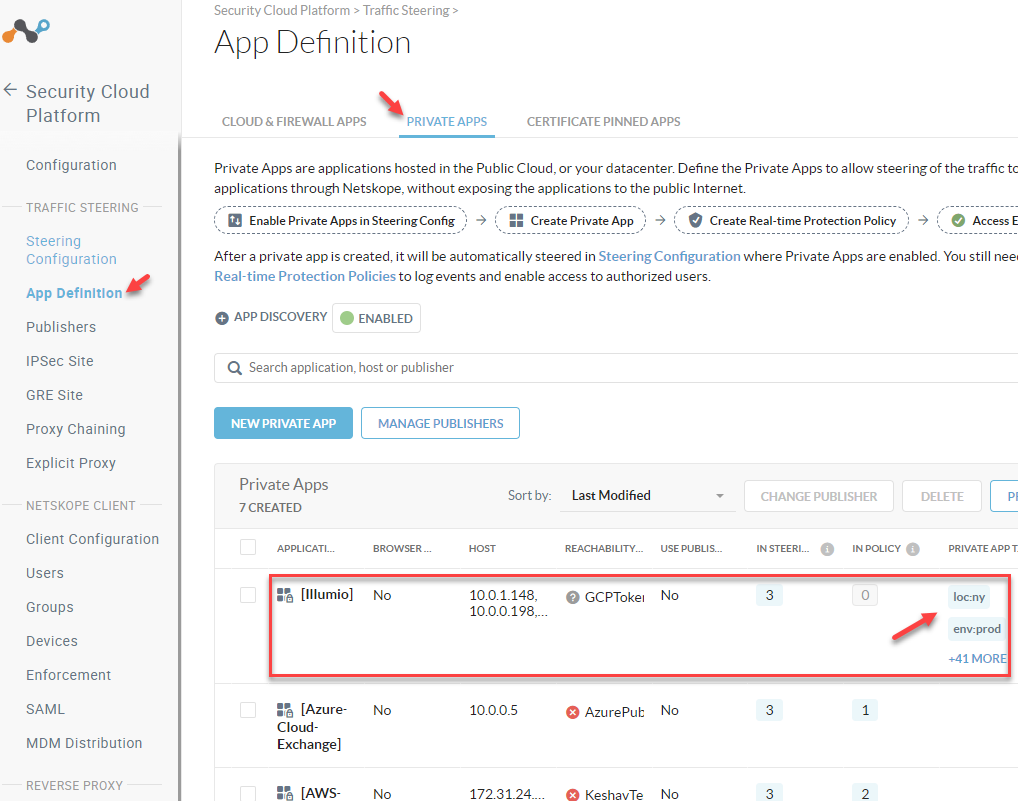
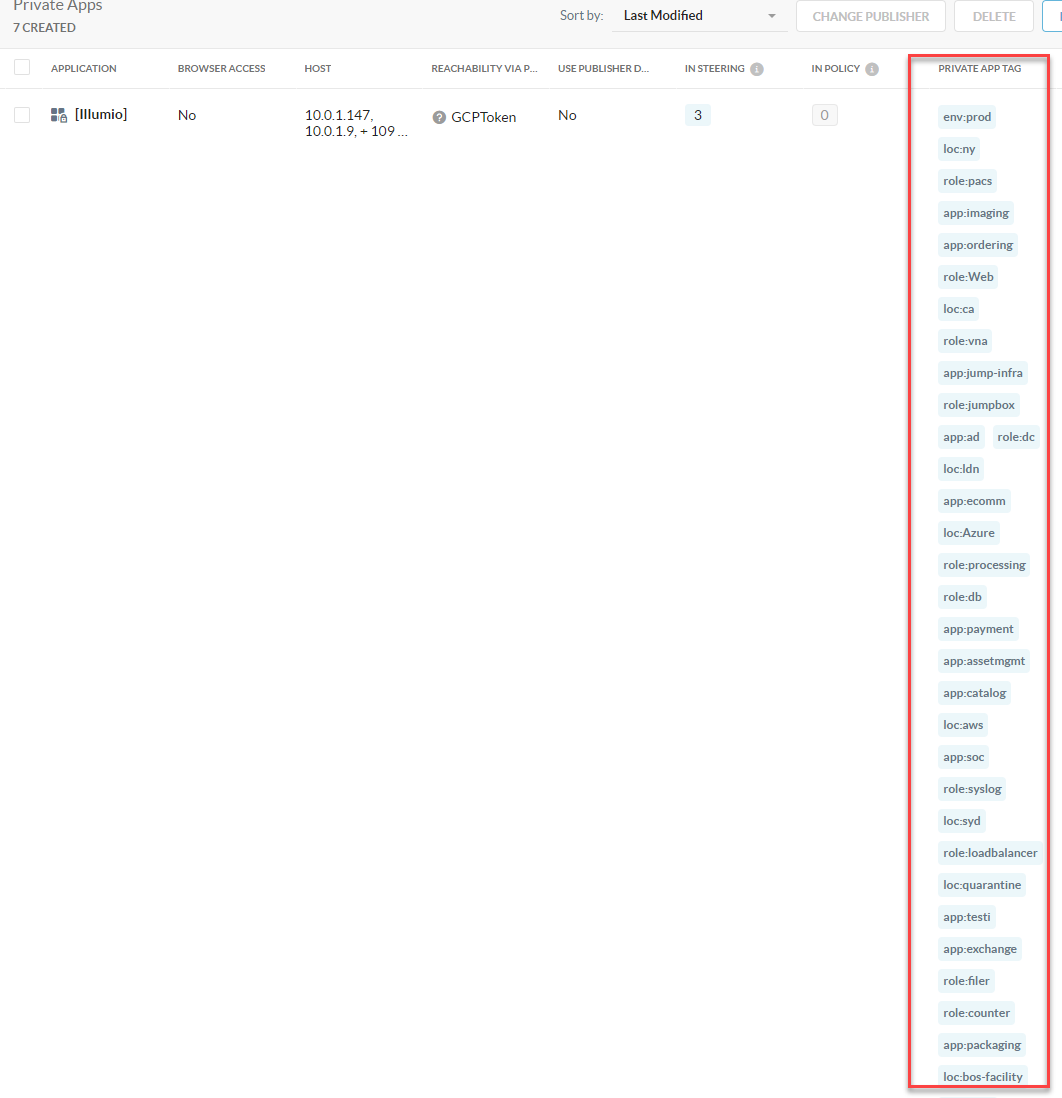
- In Netskope go to settings > Security Cloud Platform > App Definition > Private Apps > the application name you created in the plugin.