

Netskope Global Technical Success (GTS)
Configure Microsoft SharePoint for Netskope Next Gen Forensics with limited permissions
Netskope Cloud Version - 128
Objective
This article provides step-by-step guidance on how to integrate Microsoft SharePoint with Netskope Next Gen Forensics, enabling deep visibility and enhanced data loss prevention through forensic capture of user activities, files, and metadata.
Prerequisites
Before configuring Forensics profile, ensure the following:
- Global admin access to Microsoft 365 account with SharePoint enabled.
- Configure - Forensics Instance (Storage Destination) for Sharepoint.
- Enable Netskope Backend flag - “DLP Incident Forensics: Image Preview and Subfile Download” for testing.
Step-by-Step Configuration
Step #1 - Create a user with “Global administrator” role in Entra ID to grant access to Netskope initially.
Path: Entra ID Tenant UI >>> Users >>> Select User >>>> Assigned Roles
Example User: Alex Wilber

| ℹ️Note: |
Step #2 - Configure Microsoft SharePoint as a Forensic Destination.
- Log in to your Netskope tenant and navigate to Settings >>> Forensics >>> Instances.
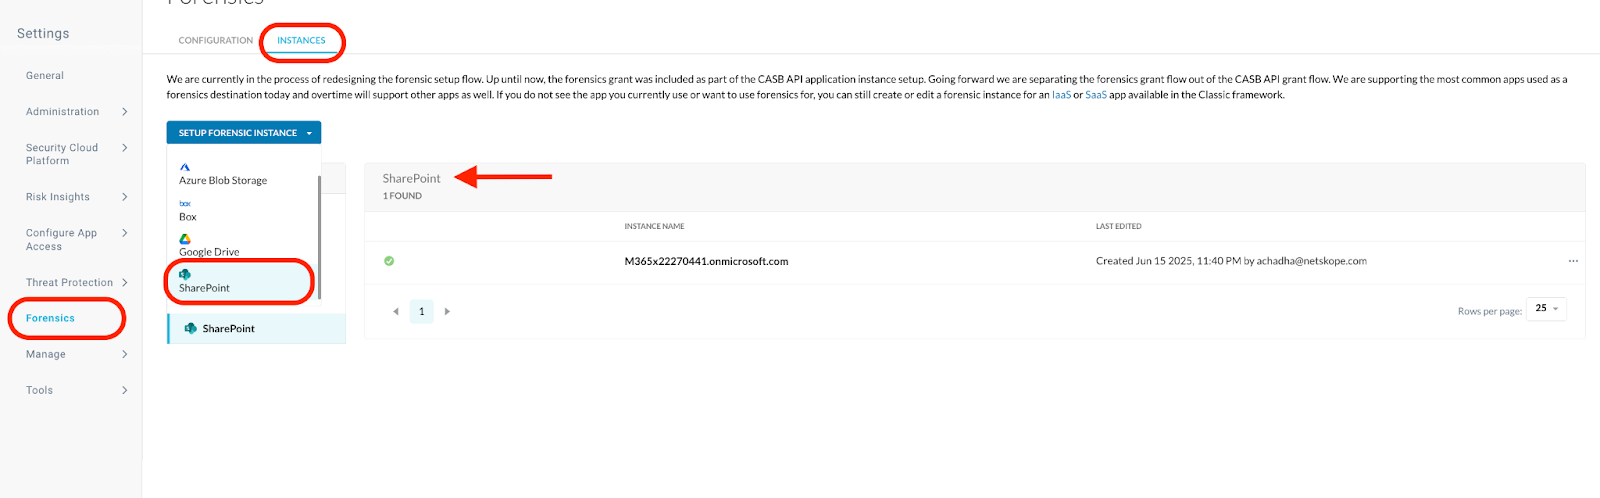
- Under Office 365 Environment, select Commercial or GCC High.
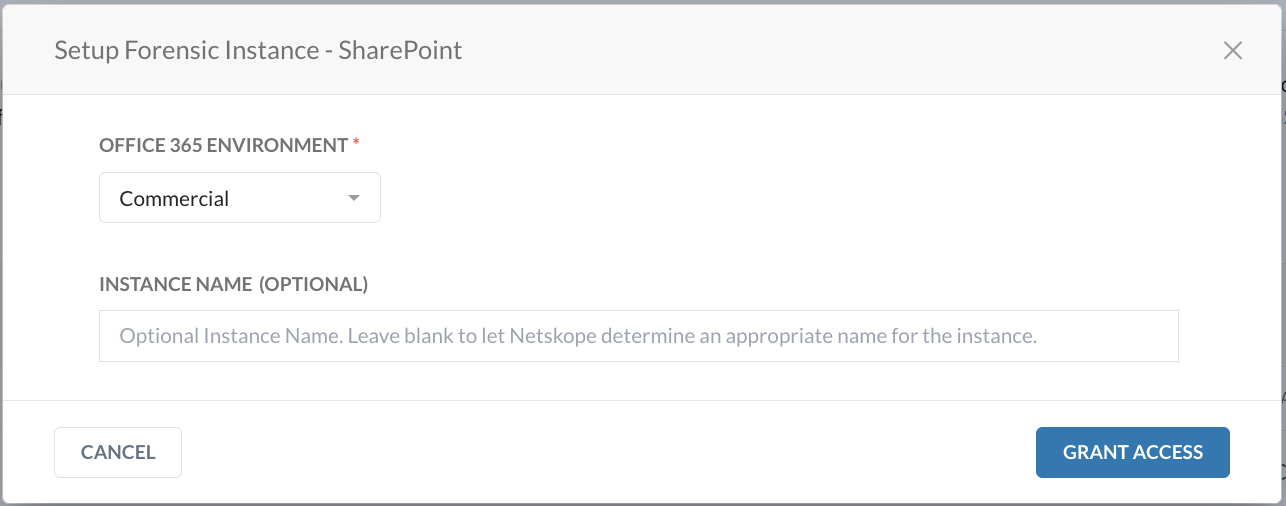
- Under Instance Name, enter the name of the SaaS app instance. This step is optional and if left blank, Netskope will determine the name of the app instance post grant.
After clicking Grant Access, you will be prompted to log in with your global administrator username and password, and then Accept the permissions and click Close.

Here's a detailed explanation of each permission shown in the above image based on the standard Microsoft Graph API permissions and their relevance to Netskope Forensics integration with SharePoint:
| Permission |
|
|
| Files.Read.All | Delegated / Application | Grants read access to all files the signed-in user or app can access across the organization. Netskope uses this to collect forensic details from SharePoint files (like name, path, owner, etc.). |
| Sites.Read.All | Delegated / Application | Allows read-only access to site collections (metadata like site name, URL, and structure). Netskope uses this to map file activity back to SharePoint site details. |
| AuditLog.Read.All | Application | Grants access to unified audit logs in Microsoft Purview / Microsoft 365 Compliance Center. Netskope relies on this to ingest user activity such as file access, download, and sharing events. |
| Directory.Read.All | Application | Provides read access to Azure AD directory objects, including user, group, and device metadata. This allows Netskope to enrich forensic events with user and group context. |
| User.Read | Delegated | Basic profile info (name, email) of the signed-in user. Netskope may use this for session validation or to pull basic user identity when forensic data is collected. |
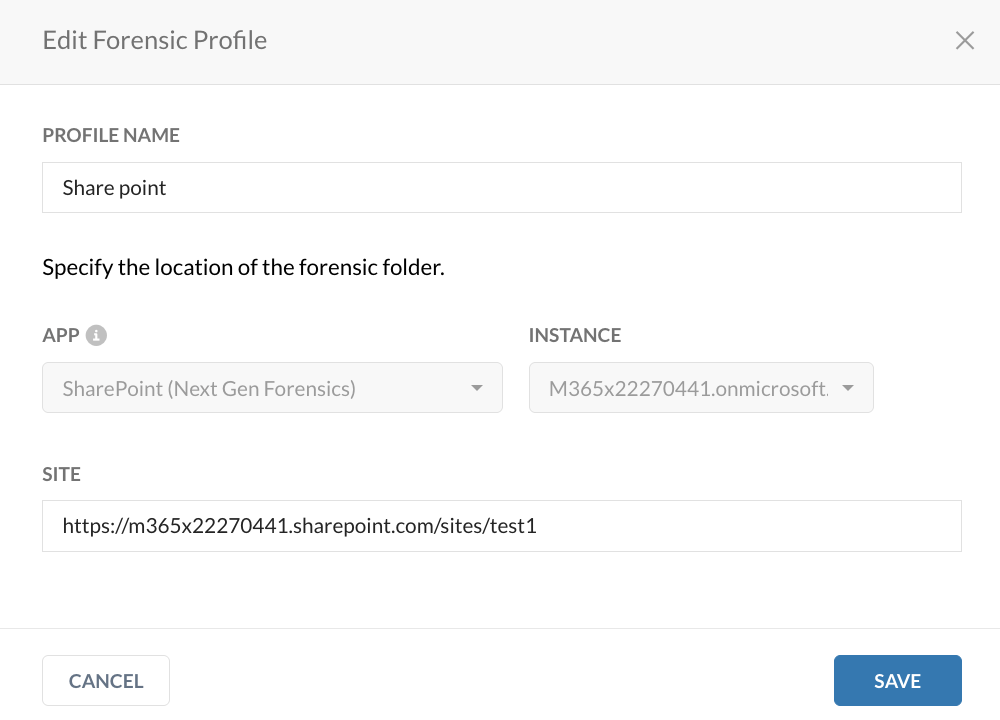
Step #3 - Create a Forensic Profile for SharePoint (Next Gen Forensics),
Site or sub-site URL in this format: https://<account-name>.sharepoint.com/sites/<site-name>.
For example: https://netskope.sharepoint.com/sites/test1
If you have selected a GCC High instance, the format will be https://<account-name>.sharepoint.us/sites/<site-name>
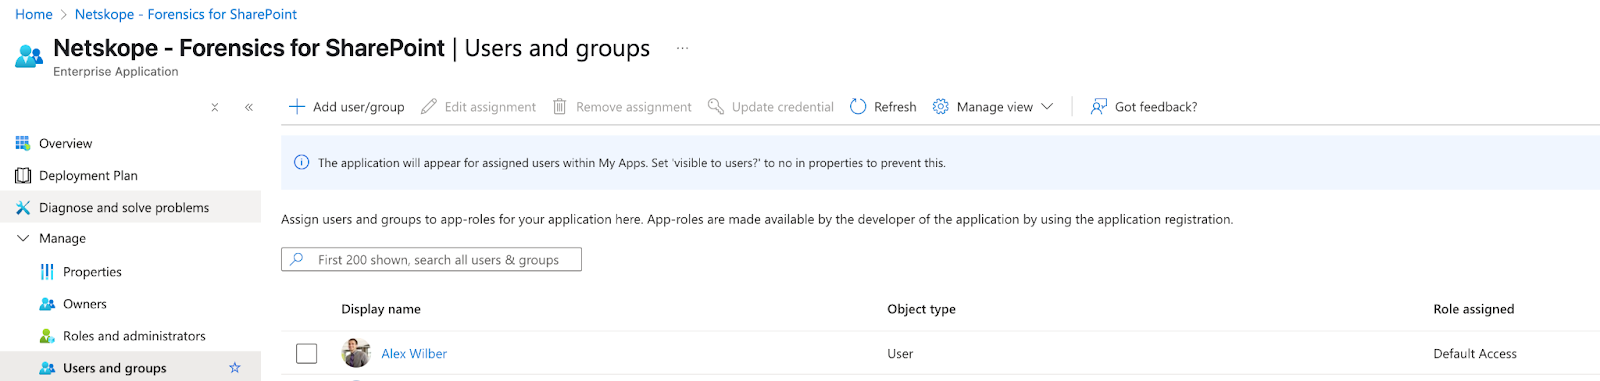
| ℹ️ Make sure the assigned user to application “Netskope - Forensics for Sharepoint” has access to the site mentioned in the Forensic profile. ℹ️ Once access is granted, the admin user — “Alex” in this example — is automatically listed under “Netskope - Forensics for SharePoint” → “Users & Groups.” |
Assigned user: Alex Wilber
Forensic Site: https://netskope.sharepoint.com/sites/test1
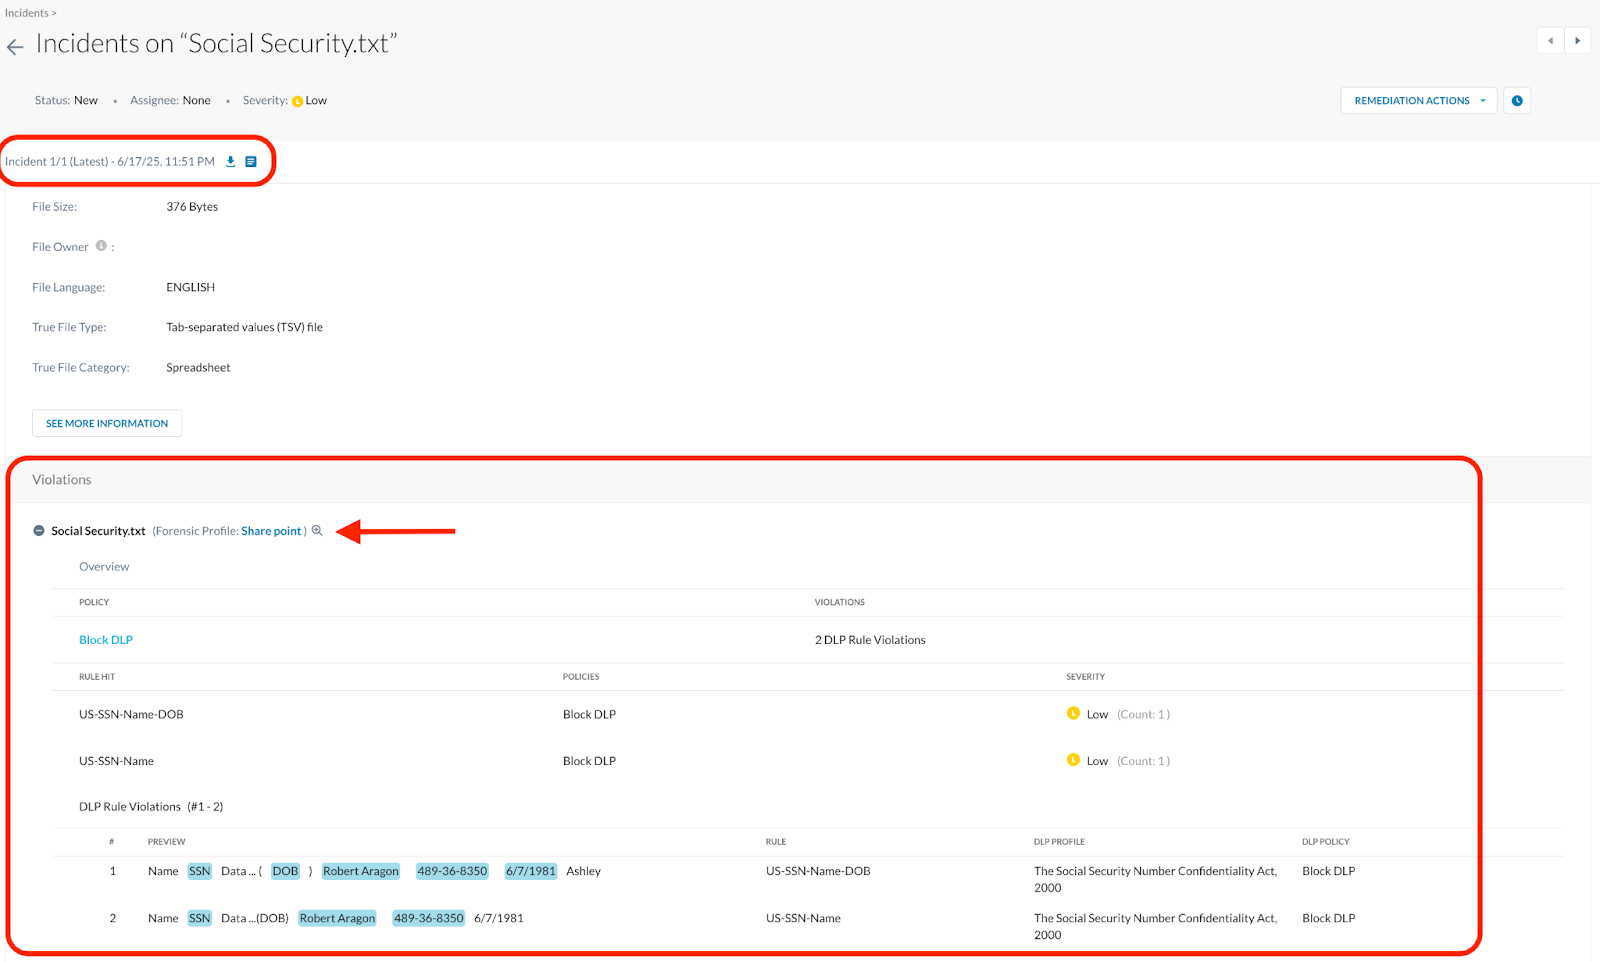
Validation
To validate that the integration is working:
- Perform a DLP violation (e.g., upload a sensitive file to Unsanctioned application)
- Go to Incidents > DLP
- Verify that the forensics log is captured, including:
- Option to download the original file
- Metadata and context details
- Keywords matching DLP rule/profile/policy
Example:
Step #4 - Revoke the permissions assigned to the user, which are not required anymore after testing the working of Forensics.
User: Alex Wilber
- Revoke Files.ReadWrite.All permission in Azure Portal:
Navigate to “portal.azure.com ” → “Enterprise Applications” → Search for the Netskope Common Application & Click on it → “Permissions” → Select “Files.ReadWrite.All” permissions → Click on “Revoke Permissions”. Refreshed token won’t contain the “Files.ReadWrite.All” permission.

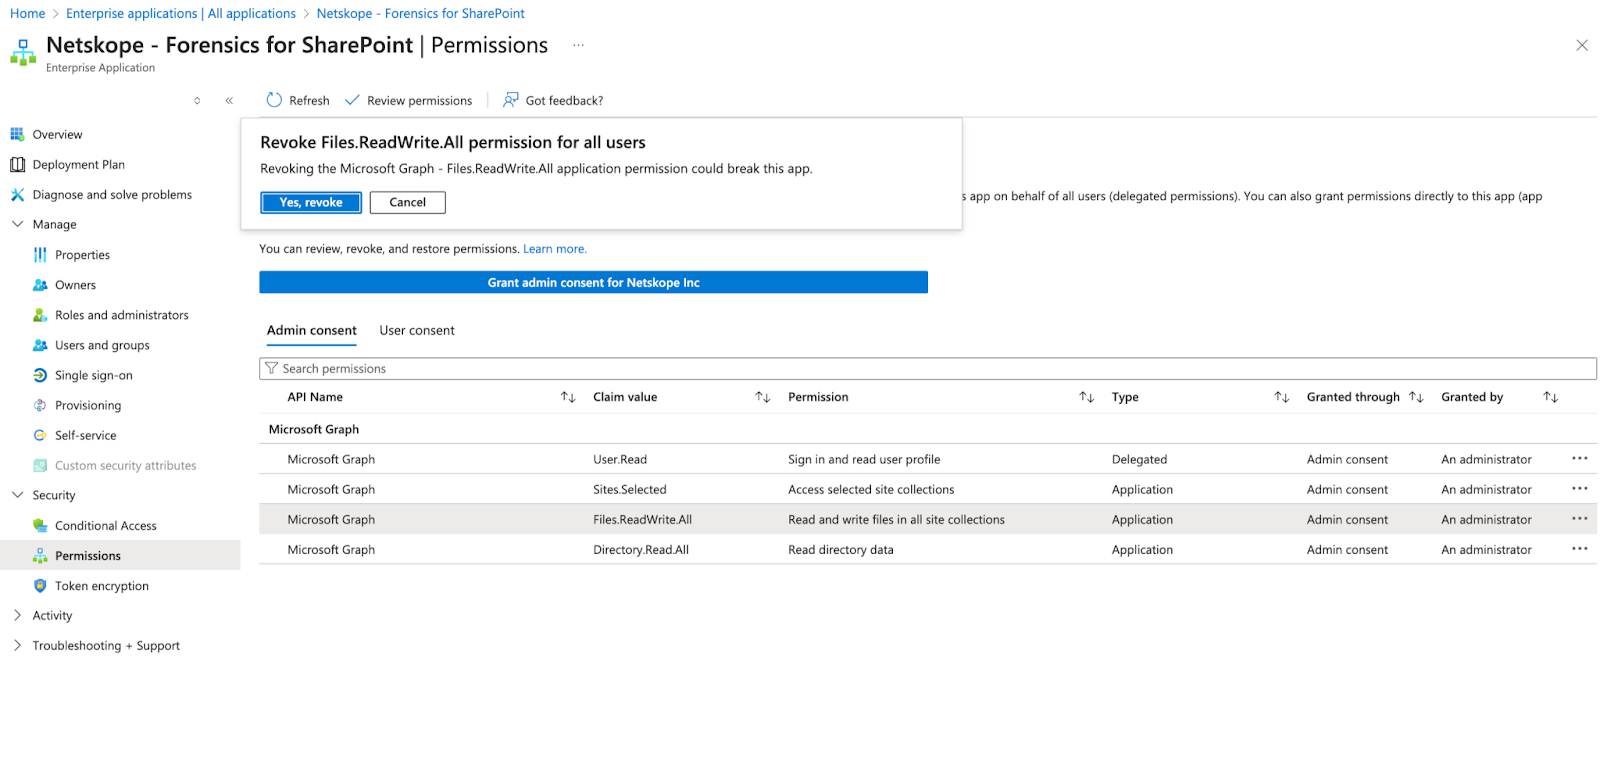
- Once revoked the permissions will be removed
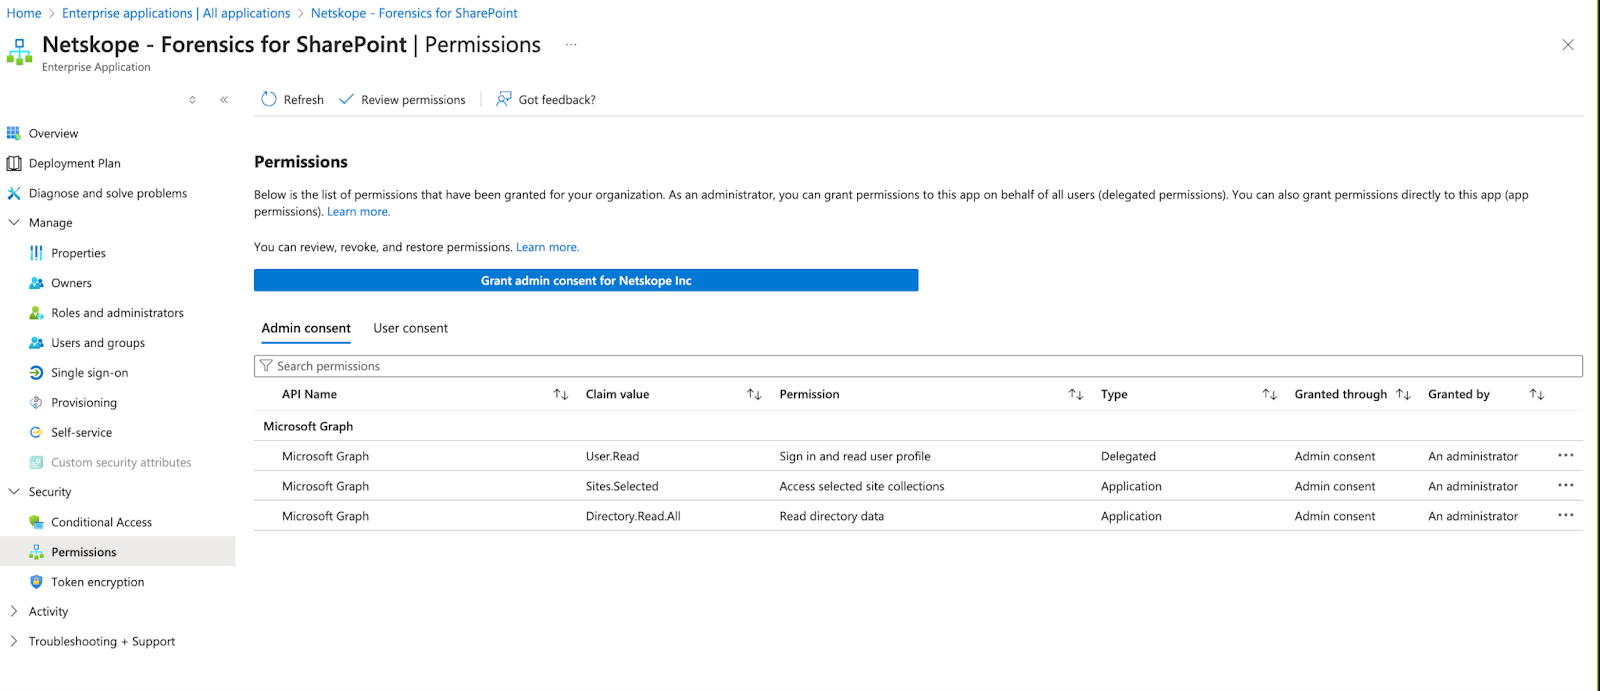
- Manually provide Write permissions to Netskope Common App:
User has to use Graph Explorer (Graph Explorer | Try Microsoft Graph APIs - Microsoft Graph), to make the APIs to provide the permissions. Sample API call & response are below:
- Determining Site ID ("id" in the API response)
- The user has to manually fire the GET API call to determine the site ID. Graph API - doc
https://graph.microsoft.com/v1.0/sites/<instance>.sharepoint.com:/sites/<site name>
Example: GET | v1.0 —>
https://graph.microsoft.com/v1.0/sites/m365x22270441.sharepoint.com:/sites/test1

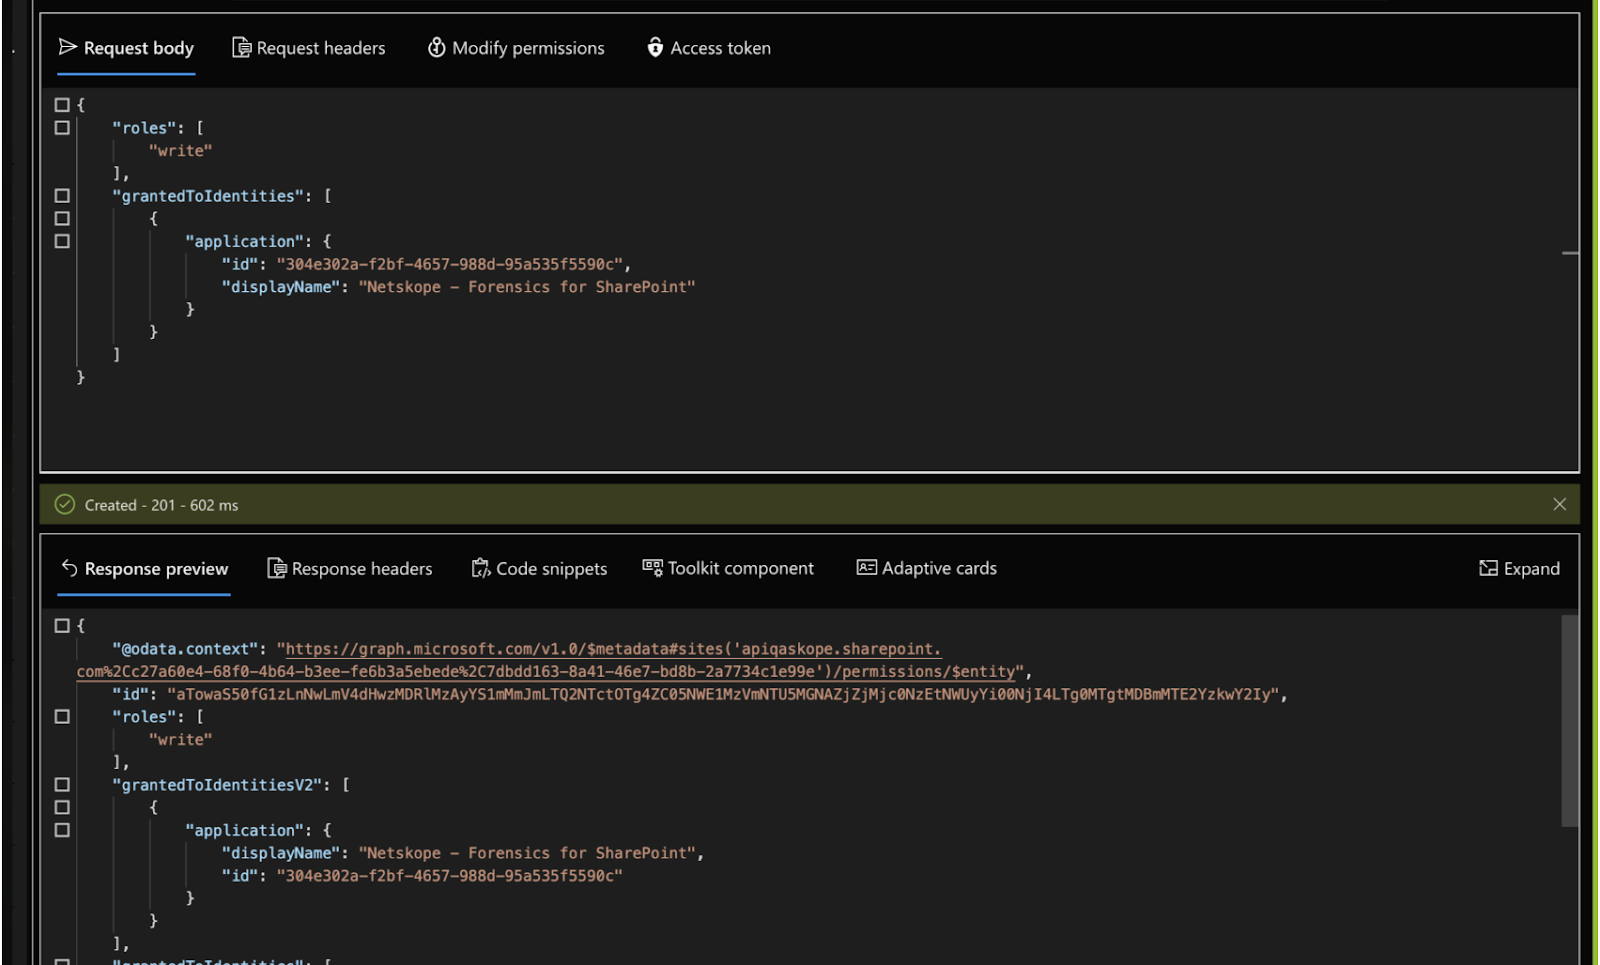
- Custom permission with the forensic site ID
- Users have to manually trigger the POST API call to provide the write permission of the Site for the application “Netskope - Forensics for SharePoint”. Graph API - doc: [Output of previous API will be used here for Site-ID]
https://graph.microsoft.com/v1.0/sites/<site ID>/permissions
Example: POST | v1.0 —> https://graph.microsoft.com/v1.0/sites/m365x22270441.sharepoint.com,a82818ed-ced7-4957-a119-135d1c377279,5ca4a866-7bfa-4994-9cf6-cbd7f9841072/permissions
Explore
|
|
Terms and Conditions
- All documented information undergoes testing and verification to ensure accuracy.
- In the future, If any such platform changes are brought to our attention, we will promptly update the documentation to reflect them.
Notes
- This article is authored by Netskope Global Technical Success (GTS).
- For any further inquiries related to this article, please contact Netskope GTS by submitting a support case with 'Case Type – How To Questions'.


