


Netskope Global Technical Success (GTS)
DLP - Corporate password detection
Netskope Cloud Version - 130
Objective
Leverage Netskope's current abilities to detect corporate passwords and prevent exfiltration.
Prerequisite
Netskope DLP license is required.
Forensic Profile configured.
Context
In this knowledge base article, we'll explore Netskope's capabilities regarding DLP. We'll go through a use case to provide insights into its capabilities.
Do You Know?
Netskope’s Data Loss Prevention (DLP) engine uses advanced context- and content-aware detection to prevent sensitive data from leaking across cloud apps, web traffic, and private apps—all in real time?
With over 3,000 pre-defined data identifiers, file fingerprinting, exact data match (EDM), and ML-enhanced detection, Netskope DLP goes far beyond simple keyword or regex matching.
Use Case
Step 1) Detecting corporate passwords requires a defined password structure.
To detect corporate passwords, the company must provide a password creation structure for the users. Once this structure is defined, we can proceed with the creation of the DLP rule.
Step 2) Regex expression.
Create a regex expression for detecting corporate password structure
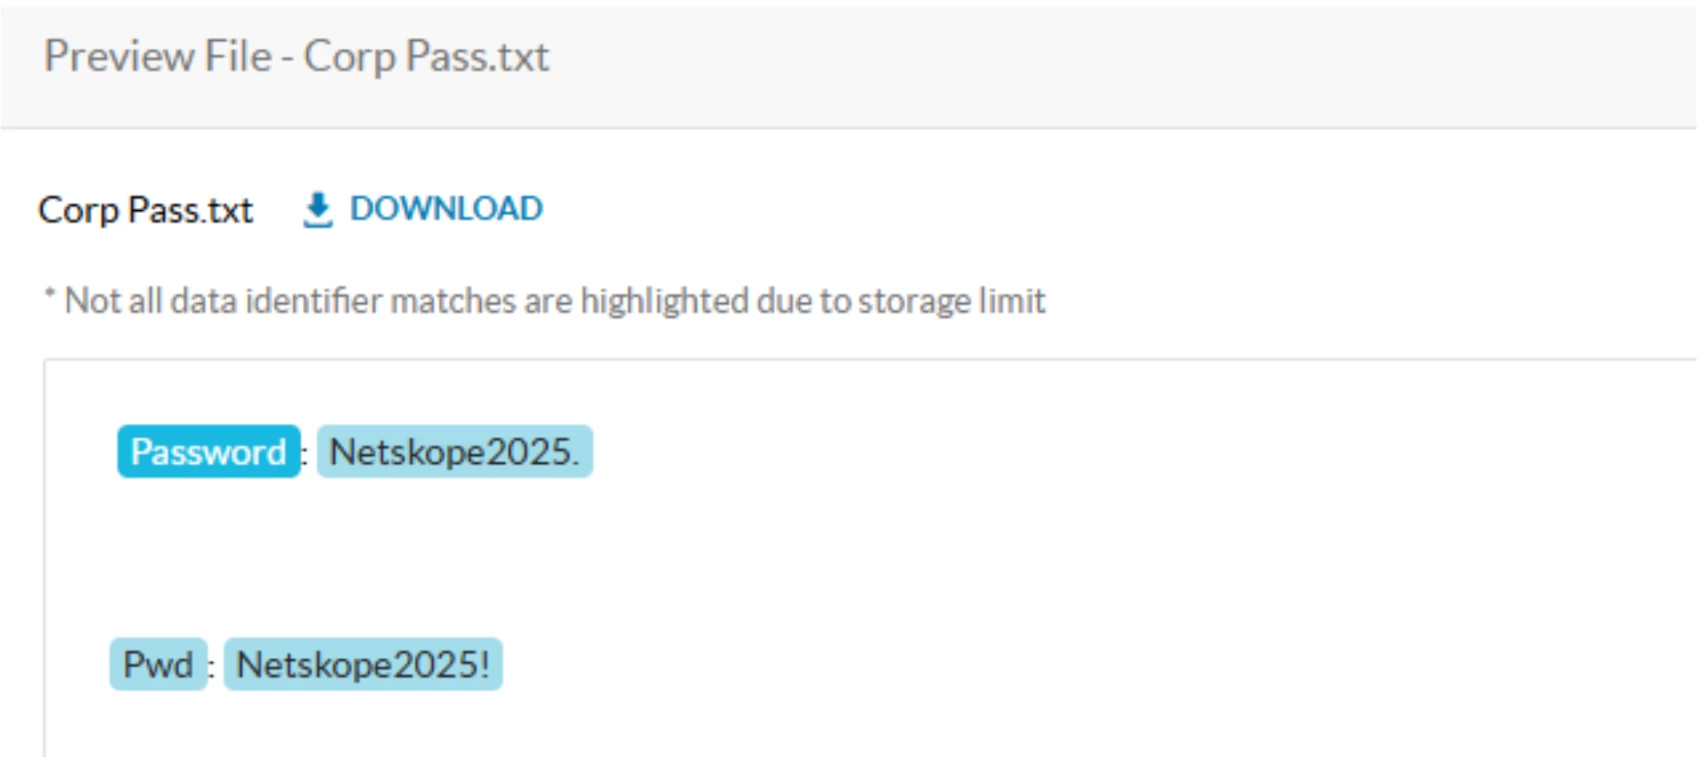
In this example, we are going to use a password structure which begins with a capital letter, contains alphanumerics and end with a special character.
Password Example: Netskope2025!
Regex Example: [A-Z][A-Za-z0-9]{1,14}[^A-Za-z0-9]$
Note: Predefined password entities are aimed to detect general passwords, we do not recommend using these entities for corporate passwords.
Click here for Netskope official regular expressions docs.
Step 3) Custom entity creation
Navigate to >> Netskope UI >> Policies >> DLP >> DLP rules >> Entities >> New Entity
Add the regex expression created, set the data identifier as “Case Sensitive” and validate the regex.
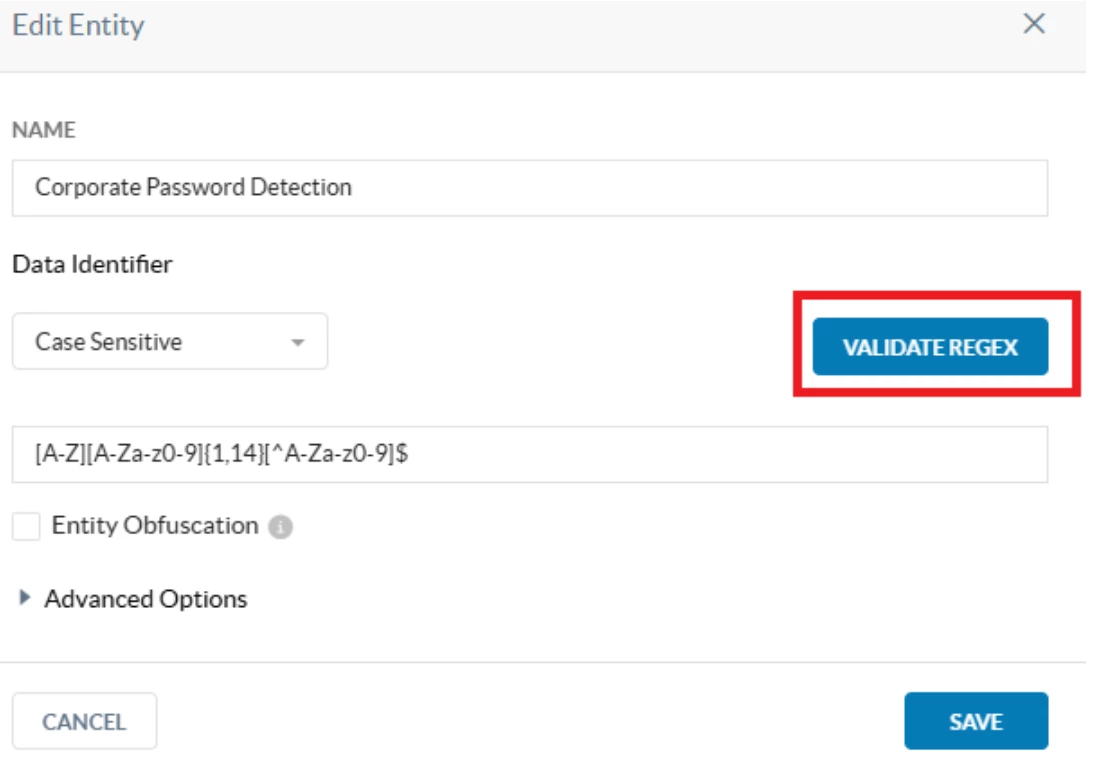
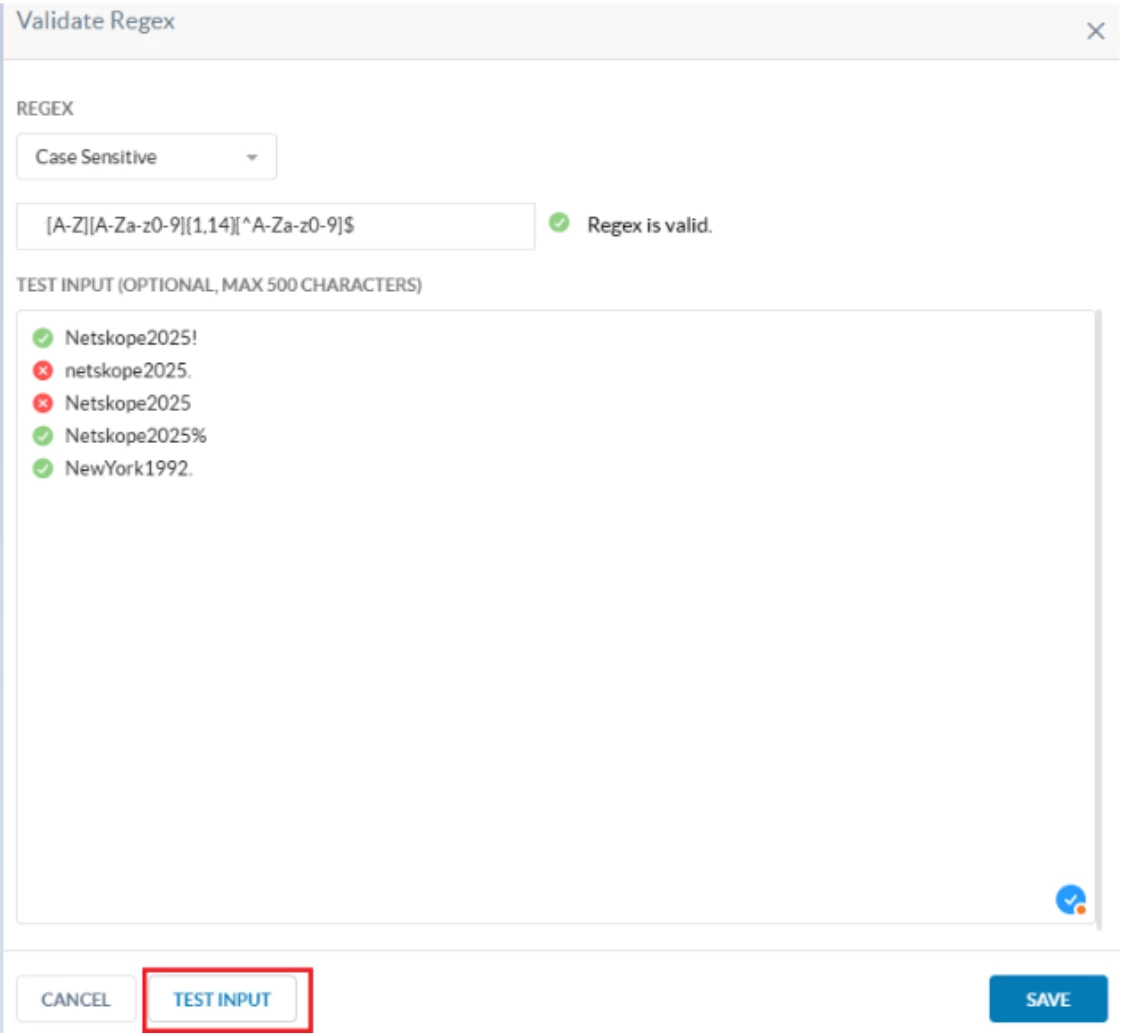
After testing the regex expression, click Save.
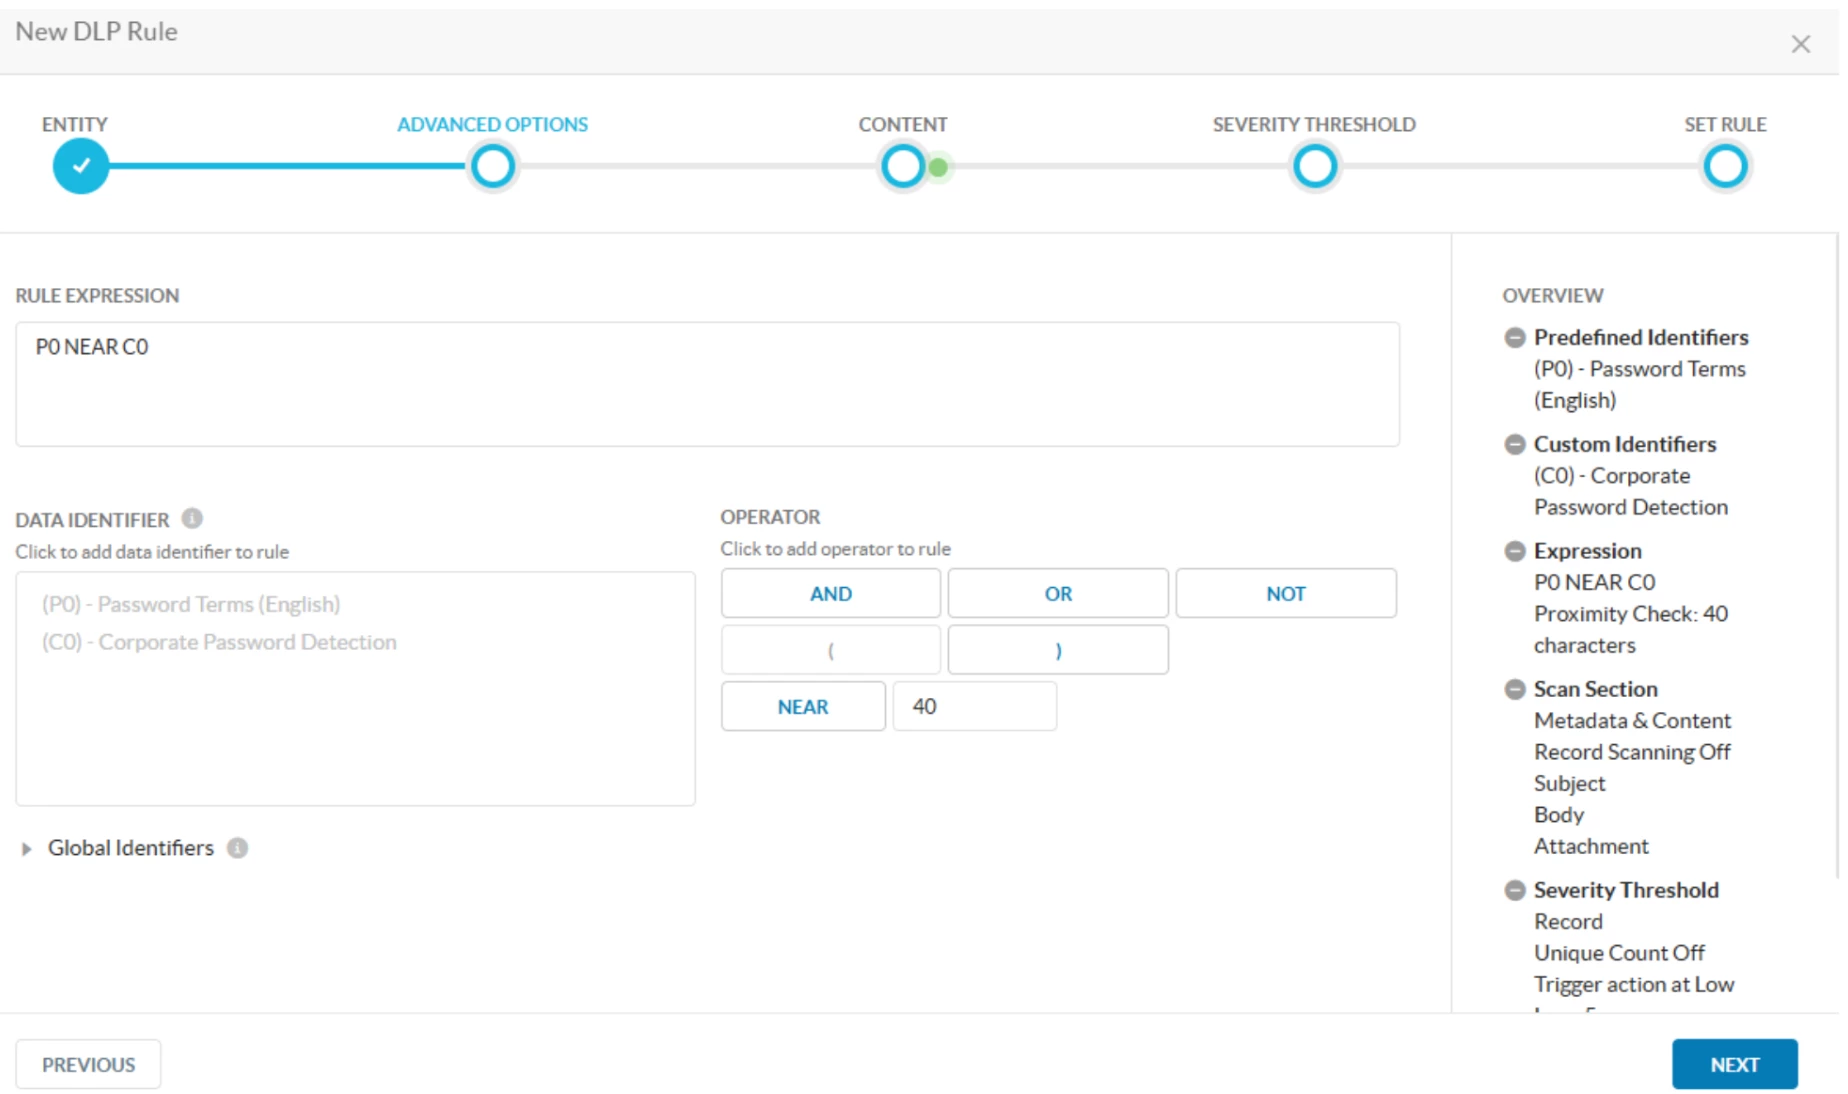
Step 4) DLP rule + expression
Navigate to >> Netskope UI >> Policies >> DLP >> DLP rules >> New Rule
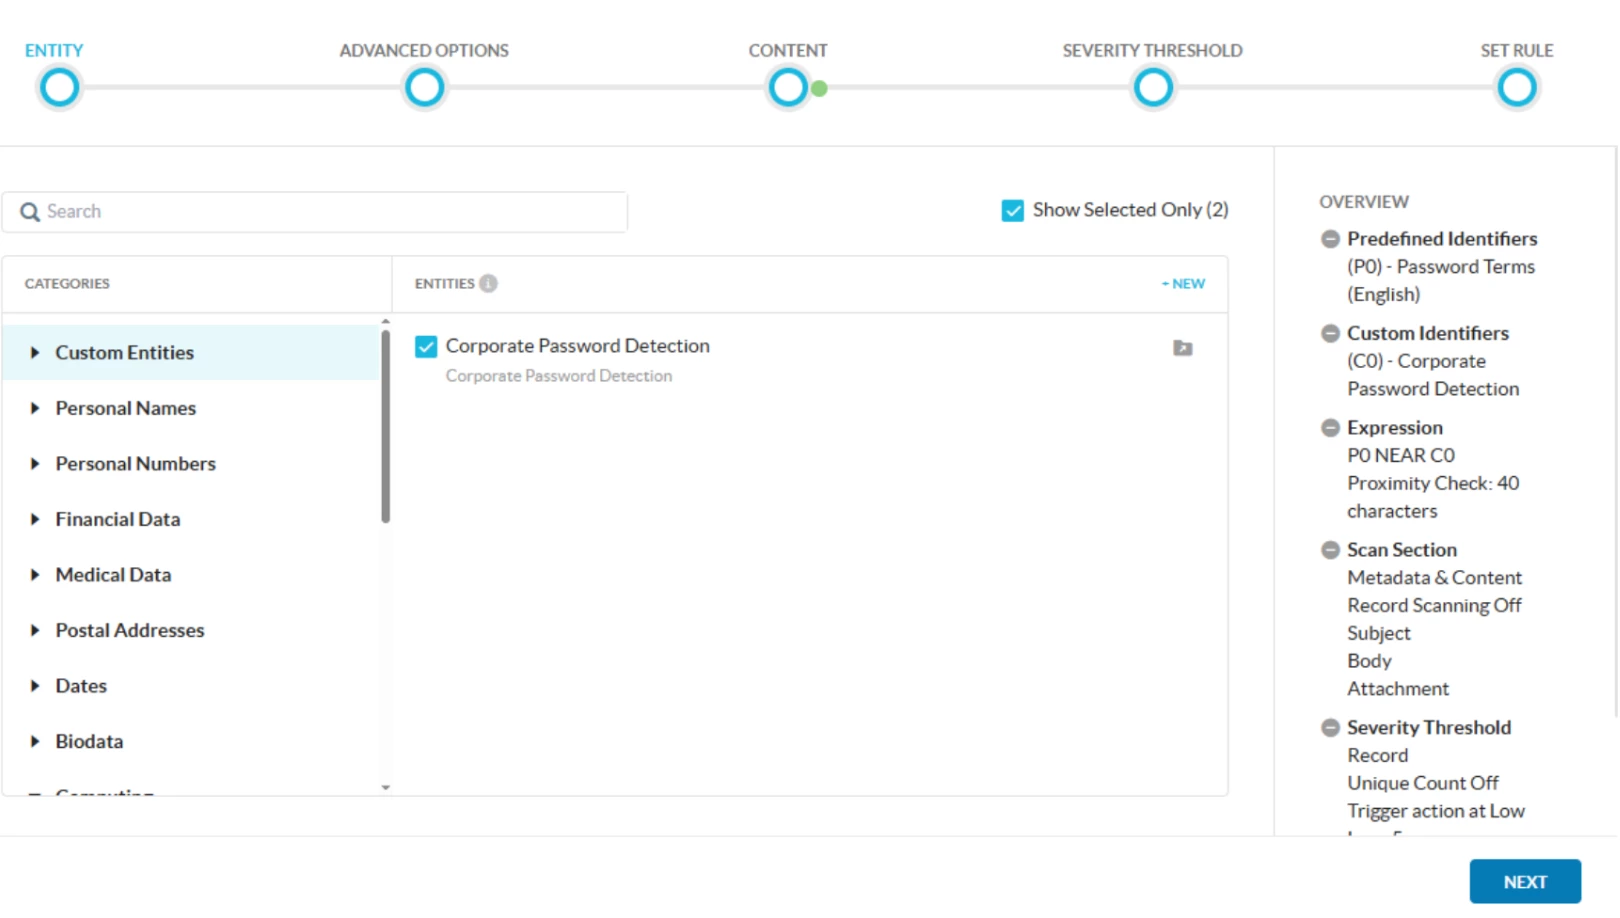
Select the entity created before and the Password Terms (English) entity.
Password Terms (English)
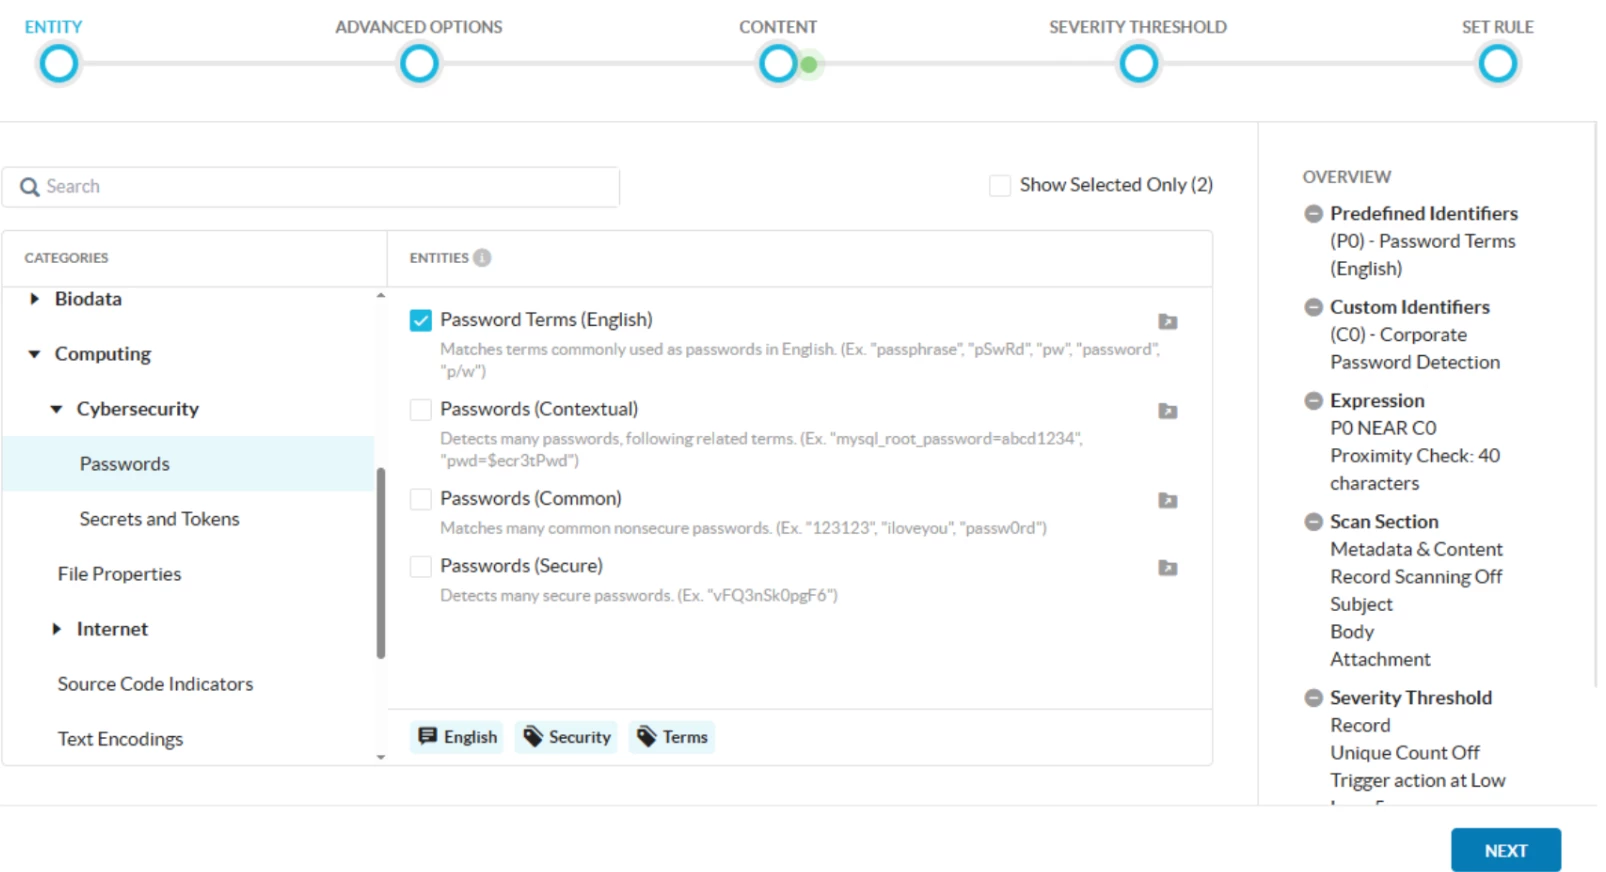
Corporate Password Detection
Click Next,
We must create the Rule Expression where (P0) is password terms (English and (C0) is the custom entity.
Note: Password terms (english) Matches terms commonly used as passwords in English. (Ex. "p/w", "password", "pw", "pSwRd", "passphrase")
The expression logic is the following:
P0 NEAR C0
We recommend setting the NEAR operator length between 30 and 50 characters to minimize the possible false positives.
The logic of the expression allows us to detect passwords that appear close to terms related to credentials, such as ‘p/w’, ‘password’, ‘pw’, ‘pSwRd’, or ‘passphrase’.
Click Next.
Select all the file and email options. Leave record based scan disabled.
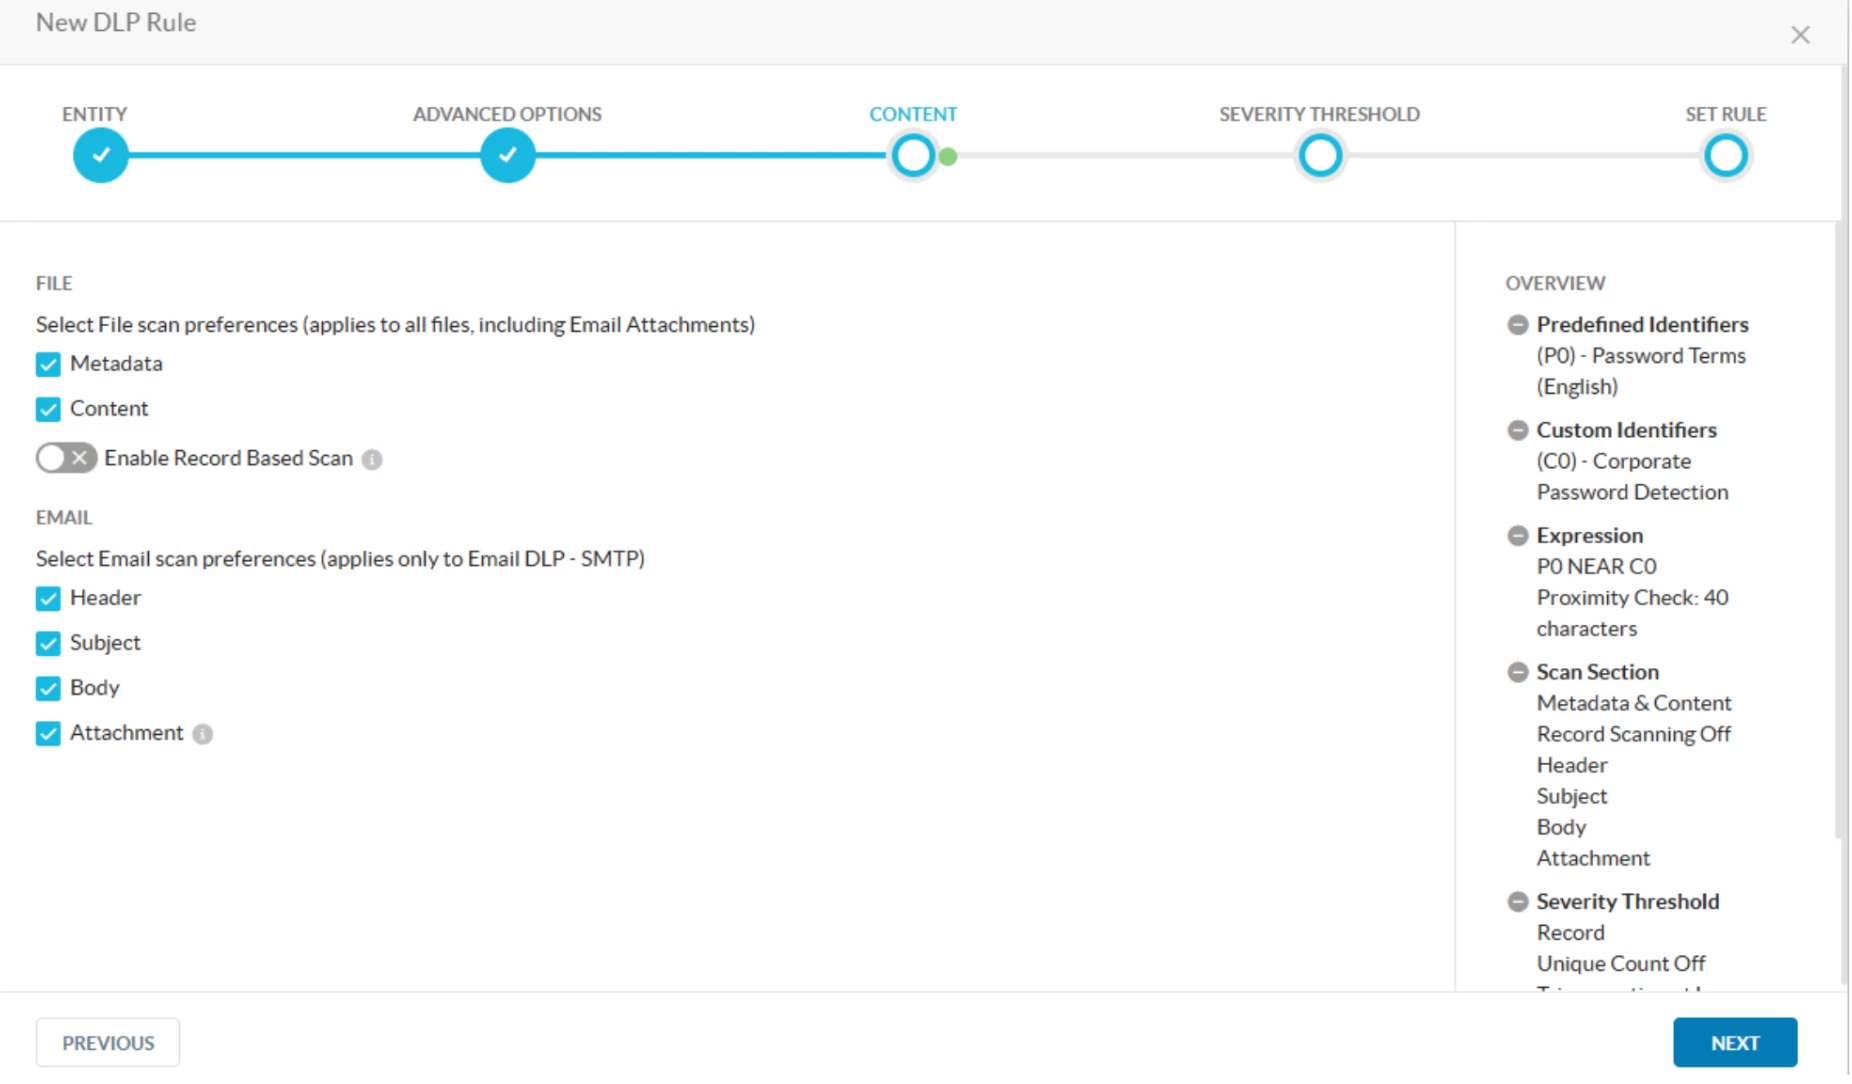
Click Next
Set the Threshold low severity in 1 and take policy action at low.
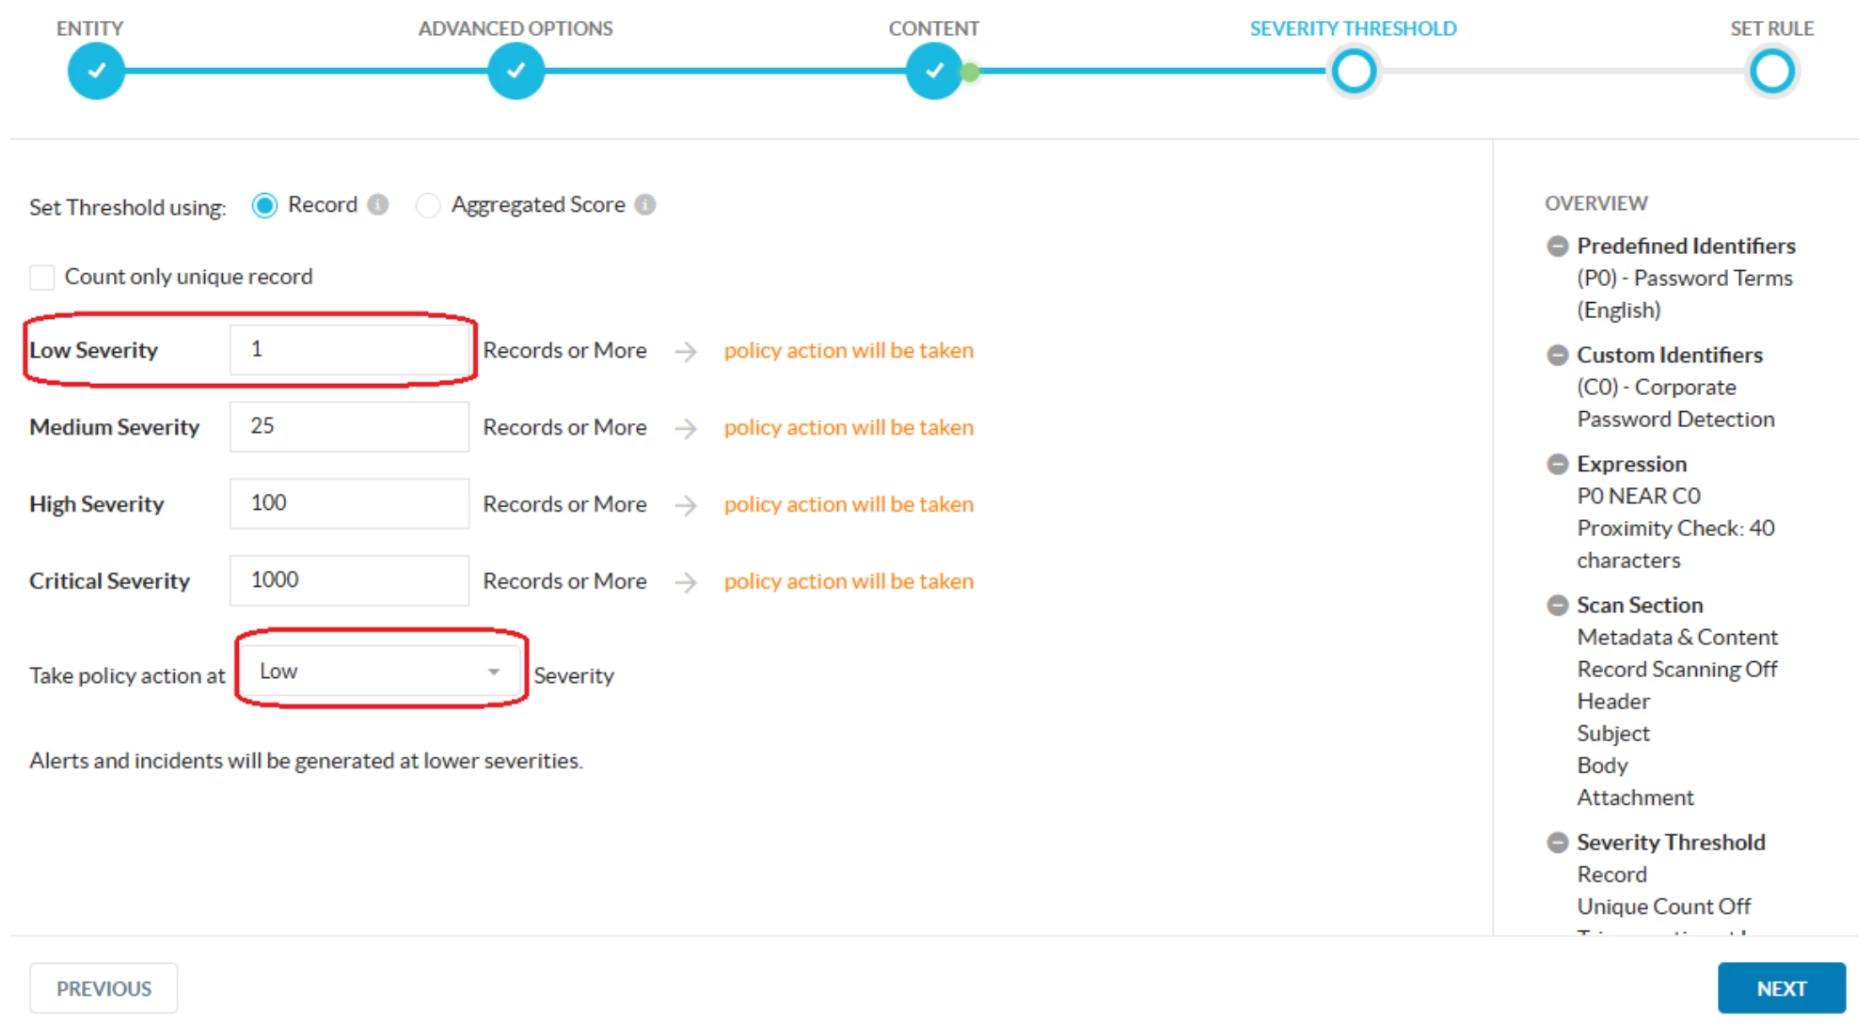
Click Next, add a rule name and save.
Step 5) DLP policy + RTP
Navigate to >> Netskope UI >> Policies >> DLP >> New Profile
Do not select a file profile. Click next.
Select the DLP Rule created in the previous step

Click next, add a profile name and save.
Create a real time protection rule, scoping the users you want to add to this policy.
Navigate to >> Netskope UI >> Policies >> Real-time Protection >> New Policy >> DLP
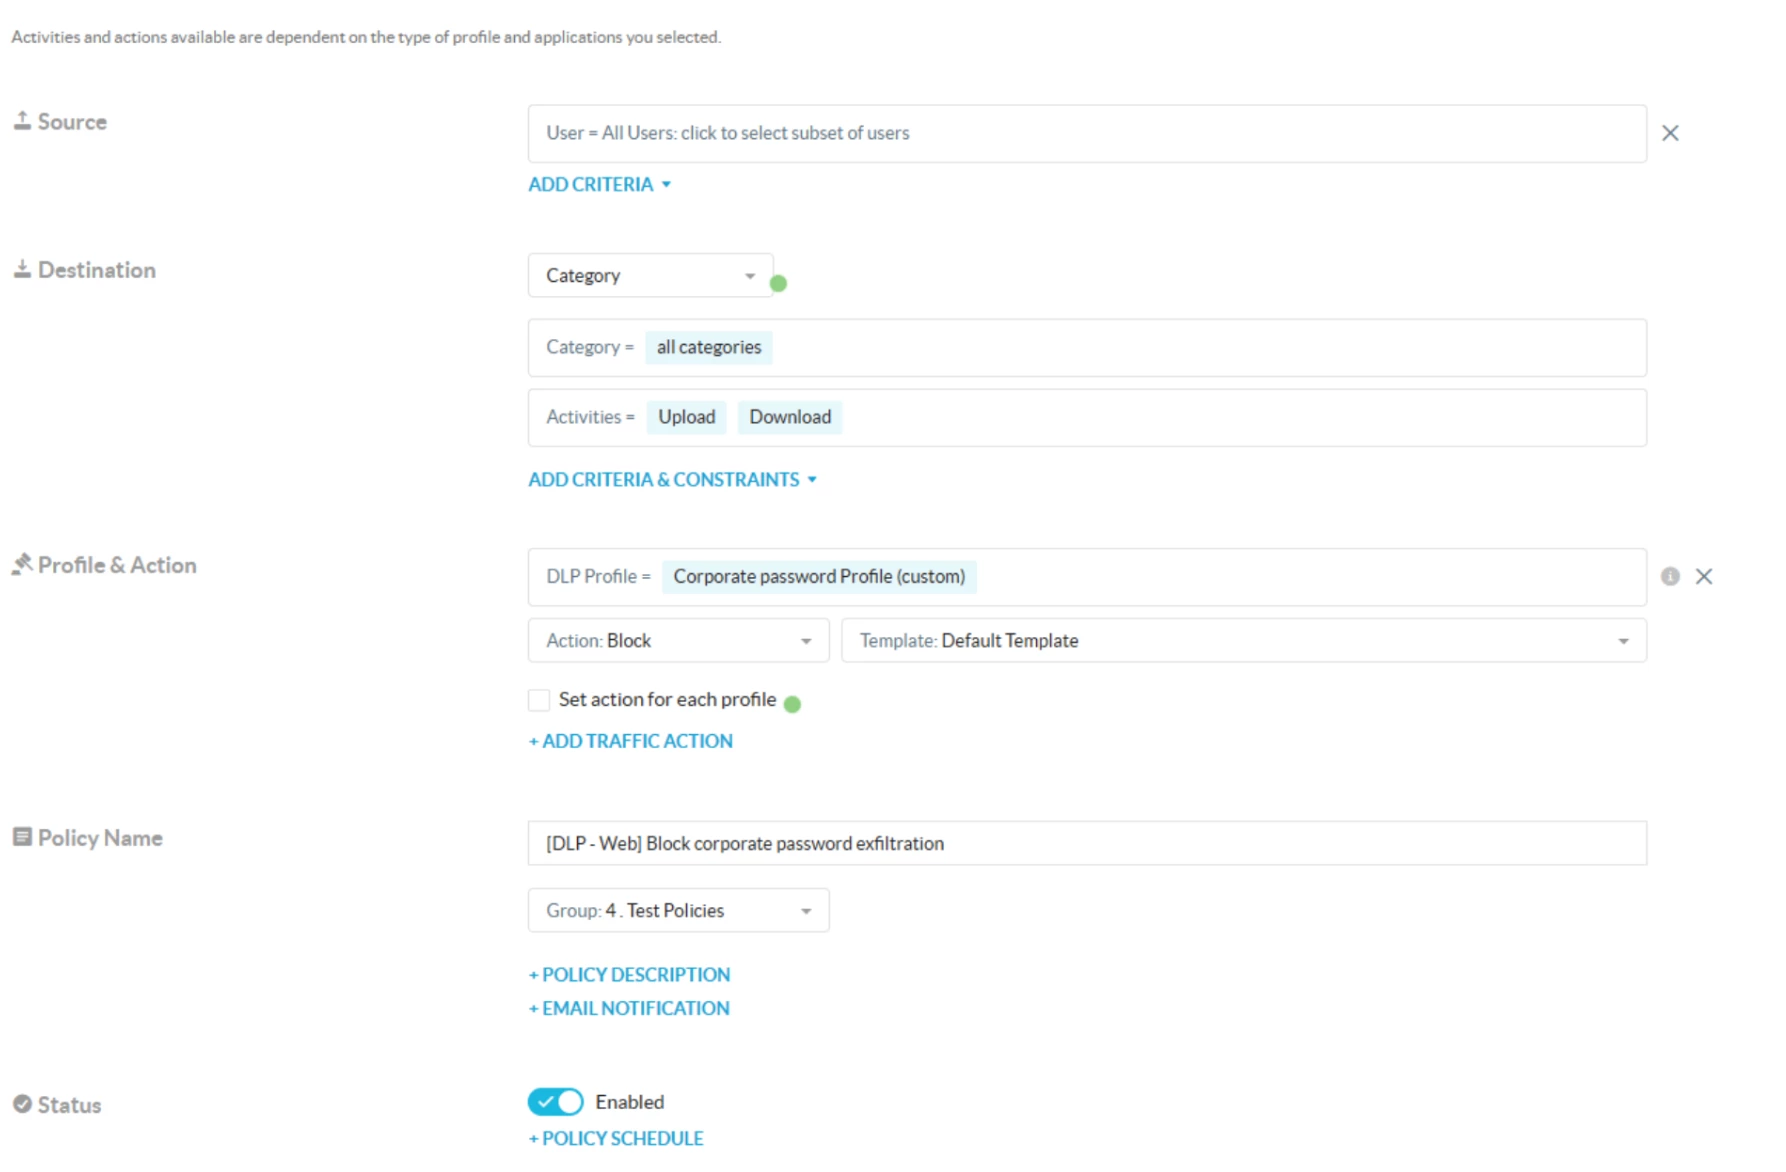
Note*: we recommend setting the policy in alert between 1 and 3 weeks for policy turning in case it is needed.
Note**: For web category–based policies, we recommend applying this rule to an upload related activity like post, share, send, publish, AI post, UploadAndSend, etc. For application-related policies, please refer to the App Catalog to review the activities that support DLP according to the connector.
Netskope UI >> App Catalog >> Cloud Apps >> type the app name and search >> select the application and look for the app activities
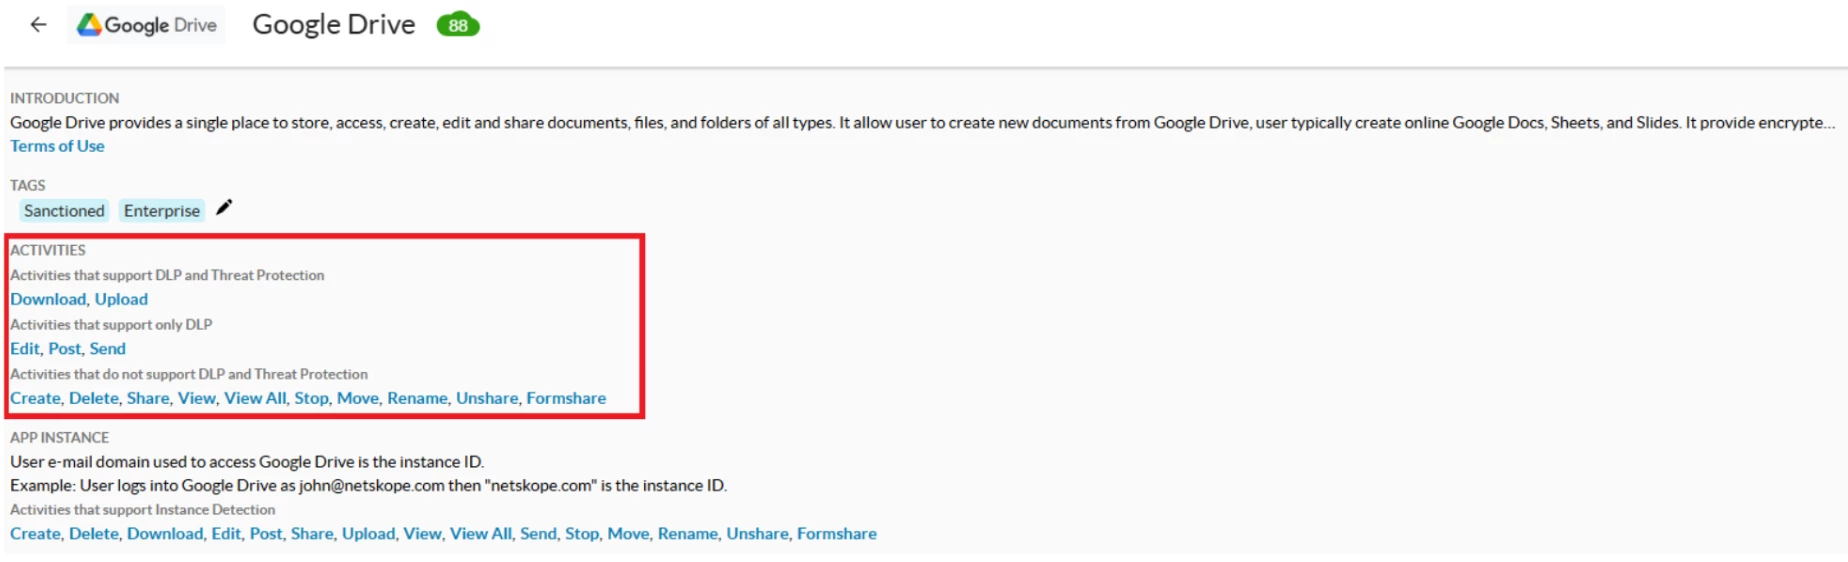
In this case Google Drive support DLP for Download, Upload, edit, post and send, other activities are not supported for DLP detection
Verification
Netskope UI >> Incidents >> DLP >> select the incident related to the policy

The words that triggered the alert will be highlighted, and if you hover your cursor over a word, it will indicate which entity the word belongs to.
Terms and Conditions
- All documented information undergoes testing and verification to ensure accuracy.
- In the future, it is possible that the application's functionality may be altered by the vendor. If any such changes are brought to our attention, we will promptly update the documentation to reflect them.
Notes
- This article is authored by Netskope Global Technical Success (GTS).
- For any further inquiries related to this article, please contact Netskope GTS by submitting a support case with 'Case Type – How To Questions'.


