The Netskope SMTP Proxy can be used as a service to scan outgoing emails over SMTP for DLP violations. In this solution, an email initiated by the user is received by a cloud email service such as MS O365 Exchange or Gmail. The email is then passed through the Netskope SMTP Proxy integrated into your SMTP workflow. Netskope SMTP Proxy verifies the contents of the email against Real-time Protection policies and acts on DLP violations based on the policy configuration. The email is then passed on to an upstream MTA which looks up the DNS of the destination email service and sends the email to the recipient's server.
As the Customer Zer0 team (CISO group), we implement SMTP proxy for our Gmail corporate instance and have been implementing DLP rules to monitor and control the movement of sensitive and confidential internal only emails to non-Netskope email addresses.
Netskope Configuration Workflow
- Ensure SMTP proxy is configured on your Netskope tenant: https://docs.netskope.com/en/netskope-smtp-proxy-use-cases.html
- Choose one type of internal email (ex: Customer entitlement emails) that you would like to protect from being forwarded externally. Invariably, you would find commonly used keywords or fields for each type of email.
- Create a CSV file with all the common keywords from the email like below:
- “Customer"
- “Account Manager”
- “Sales Engineer"
- “Purchase date"
- Navigate to Policies -> Profiles -> DLP -> Data Loss Protection Rules -> Entities -> New Entity -> Dictionary -> Upload the CSV file.
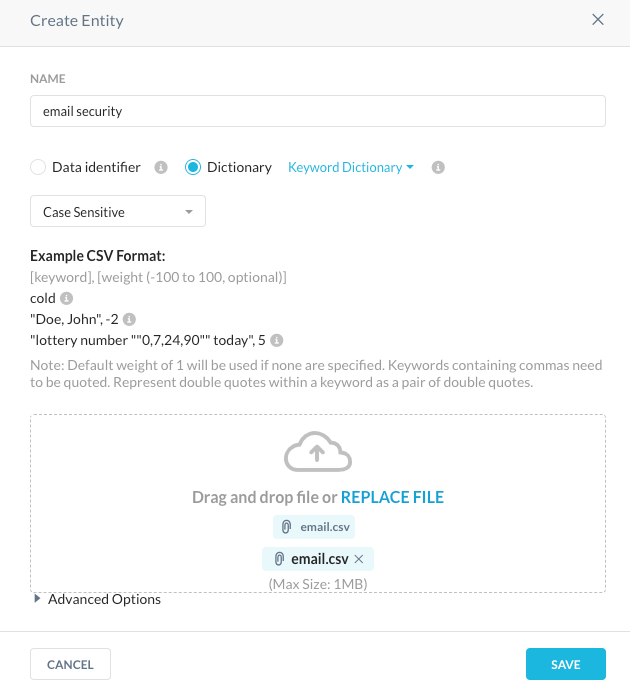
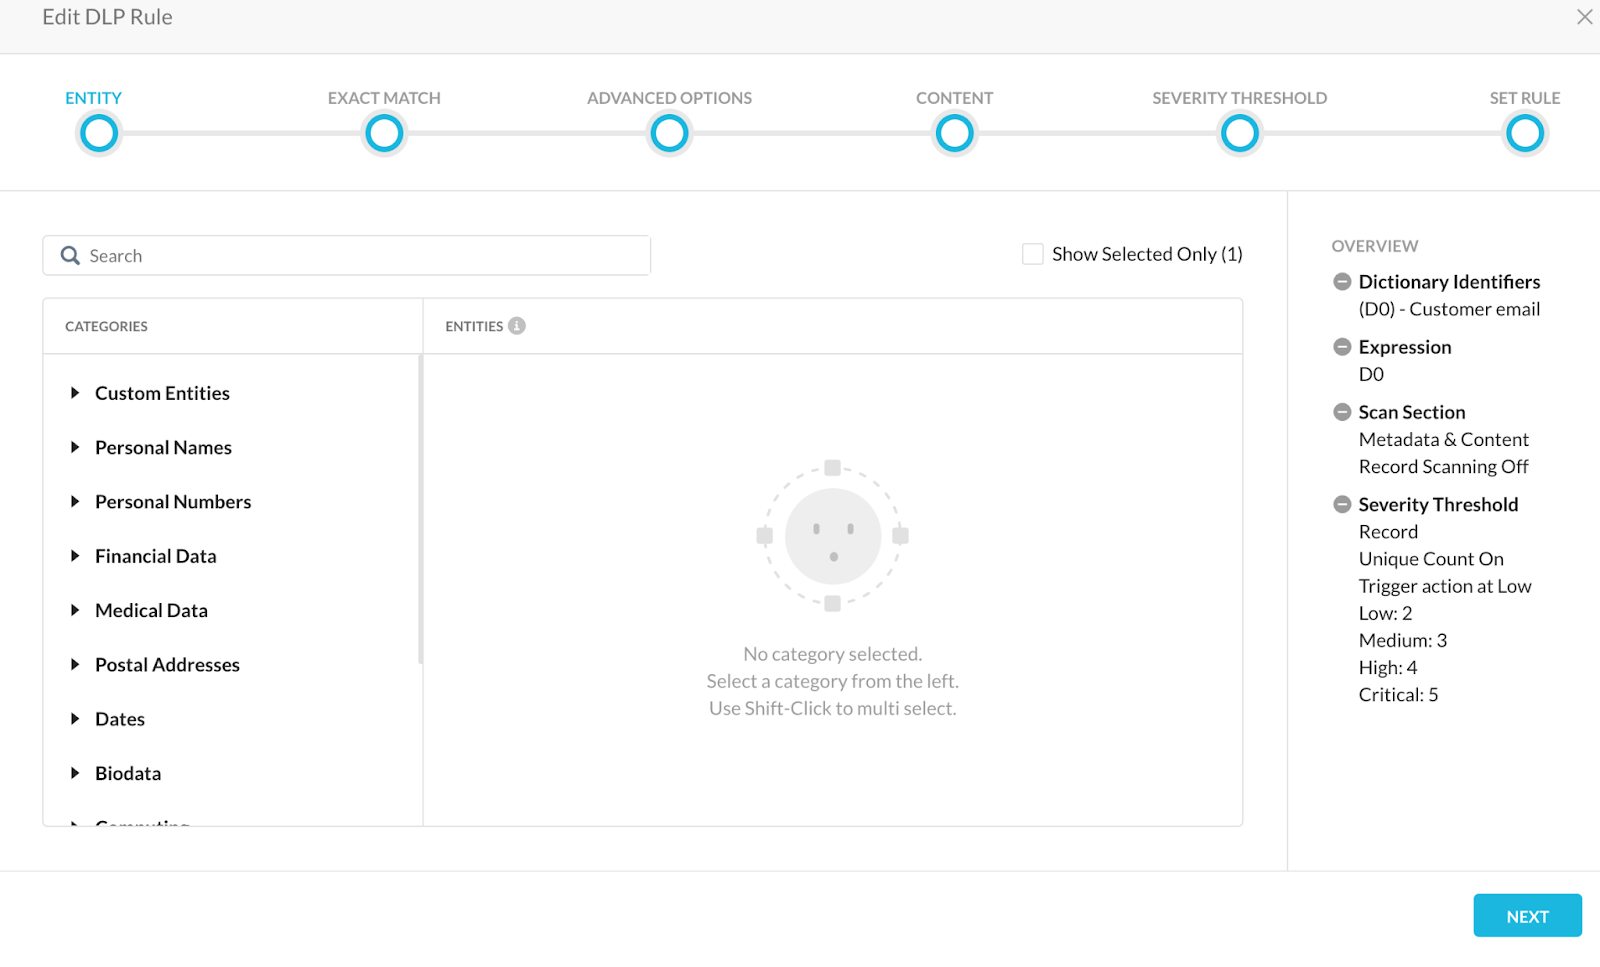
- Then create a DLP rule and include the entity that was just created. It is important to note that when creating the DLP rule, please ensure unique records are selected to avoid false positive detections. Also, low severity should be configured to a value greater than or equal to n/2 where n is the total number of unique keywords included in the dictionary to avoid false positives.
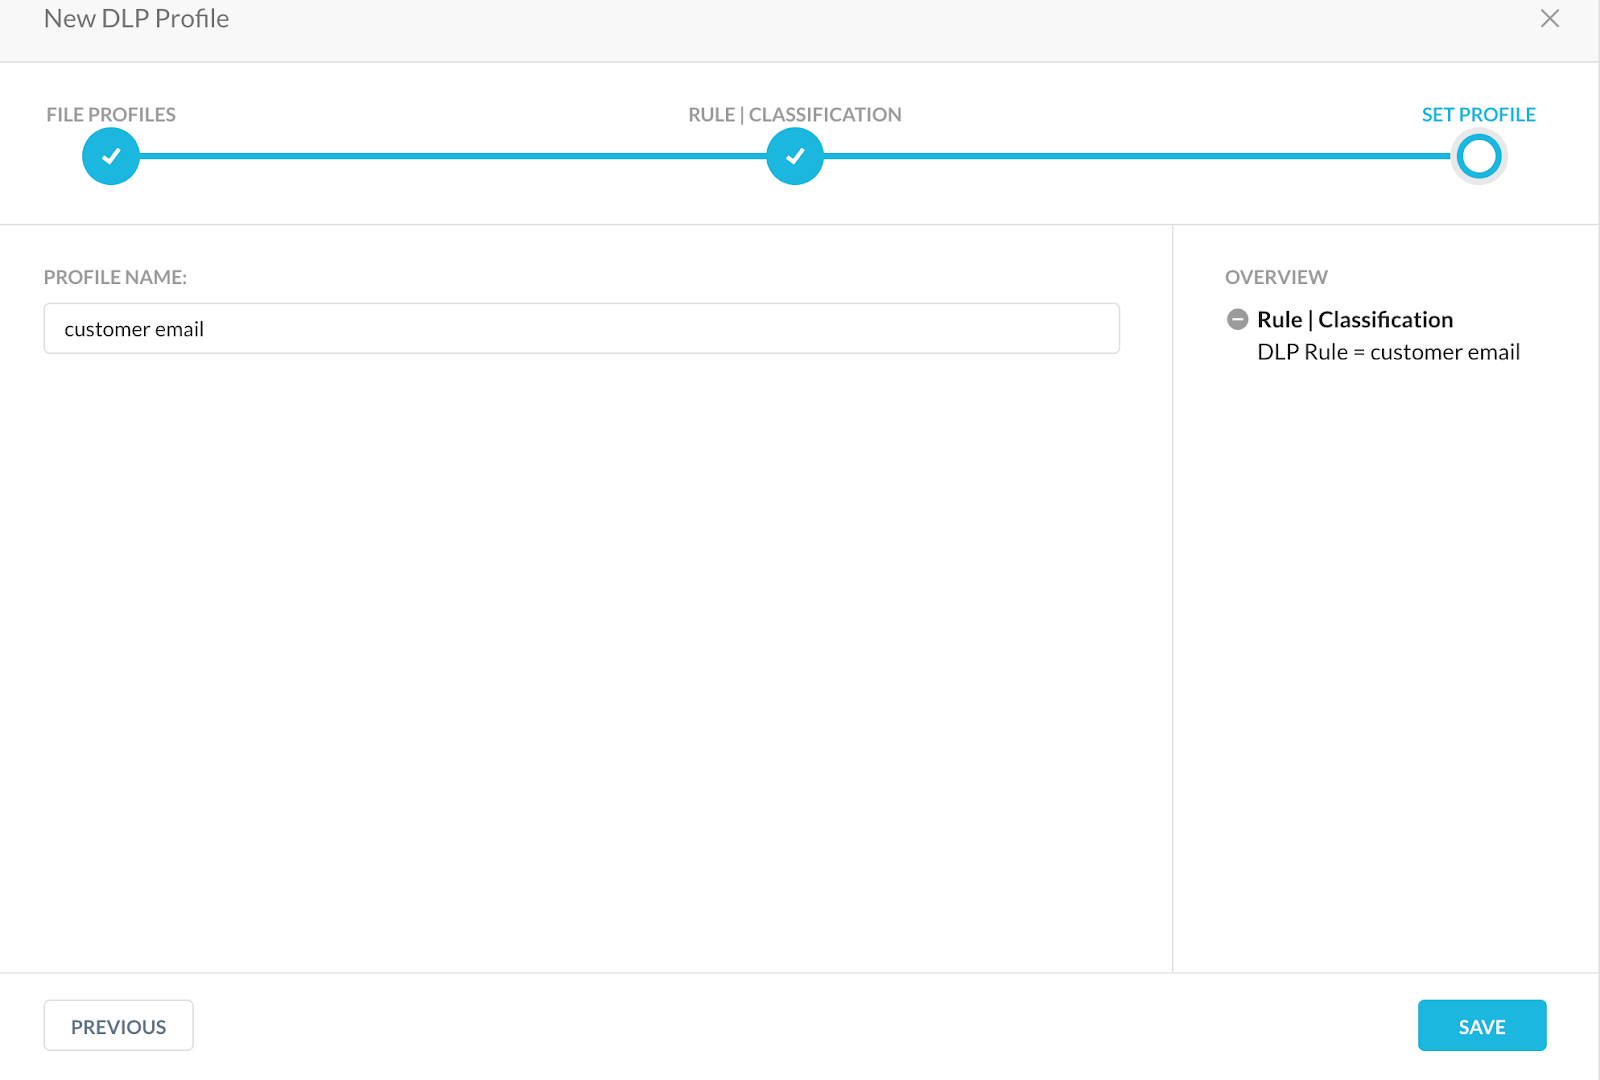
 Create a DLP profile and include the DLP rule name that was created in Step 5.
  Note: You could also create and include DLP fingerprint rule in an SMTP outbound proxy. More details regarding DLP fingerprinting can be found at https://docs.netskope.com/en/create-fingerprint-rules.html
- Create a Real-time Protection policy (type: Email Outbound) with relevant details as shown.
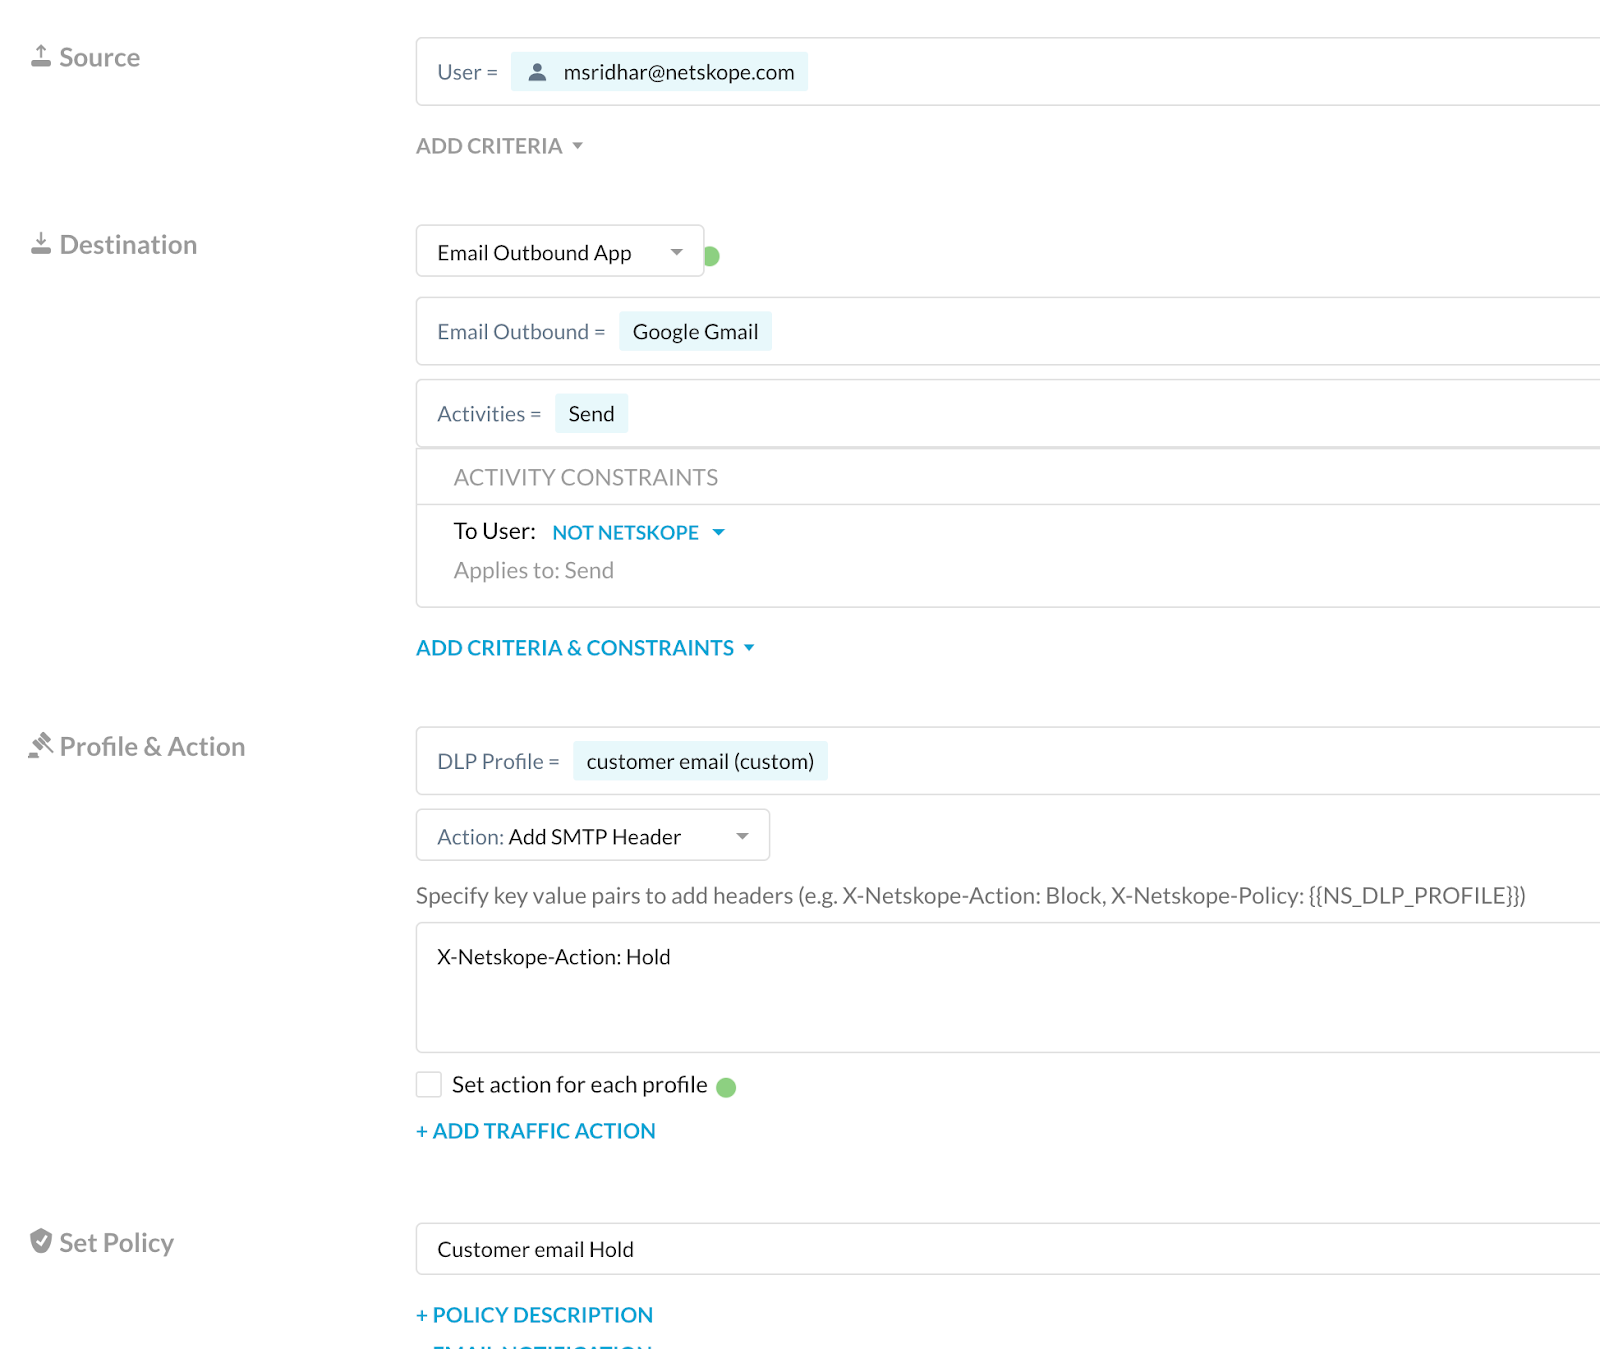
The ‘To User’ constraint can be created in Policies -> Profiles -> Constraints -> Users.
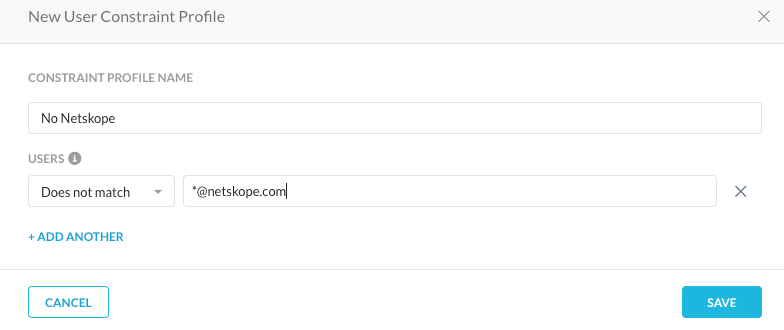
When this constraint is added to the email outbound policy, the SMTP proxy would check for this in every outgoing email and if this condition is met, the DLP engine would then check for the rule match.
With the Add SMTP header action, emails that satisfy the destination and DLP profile of the policy would be added with the SMTP header specified so that they can then be held in our email management server (ex: Mimecast).
This in turn would prevent such confidential and sensitive emails from being sent outside the organization, preventing data leak.
Incident Management
Navigate to Incidents -> DLP in the Netskope tenant and choose the DLP realtime policy that was configured to see incidents specific to this rule.
As long as a Forensics profile is created, the forensics of the email that triggered the DLP profile can be viewed and checked to see if there were any false positives.
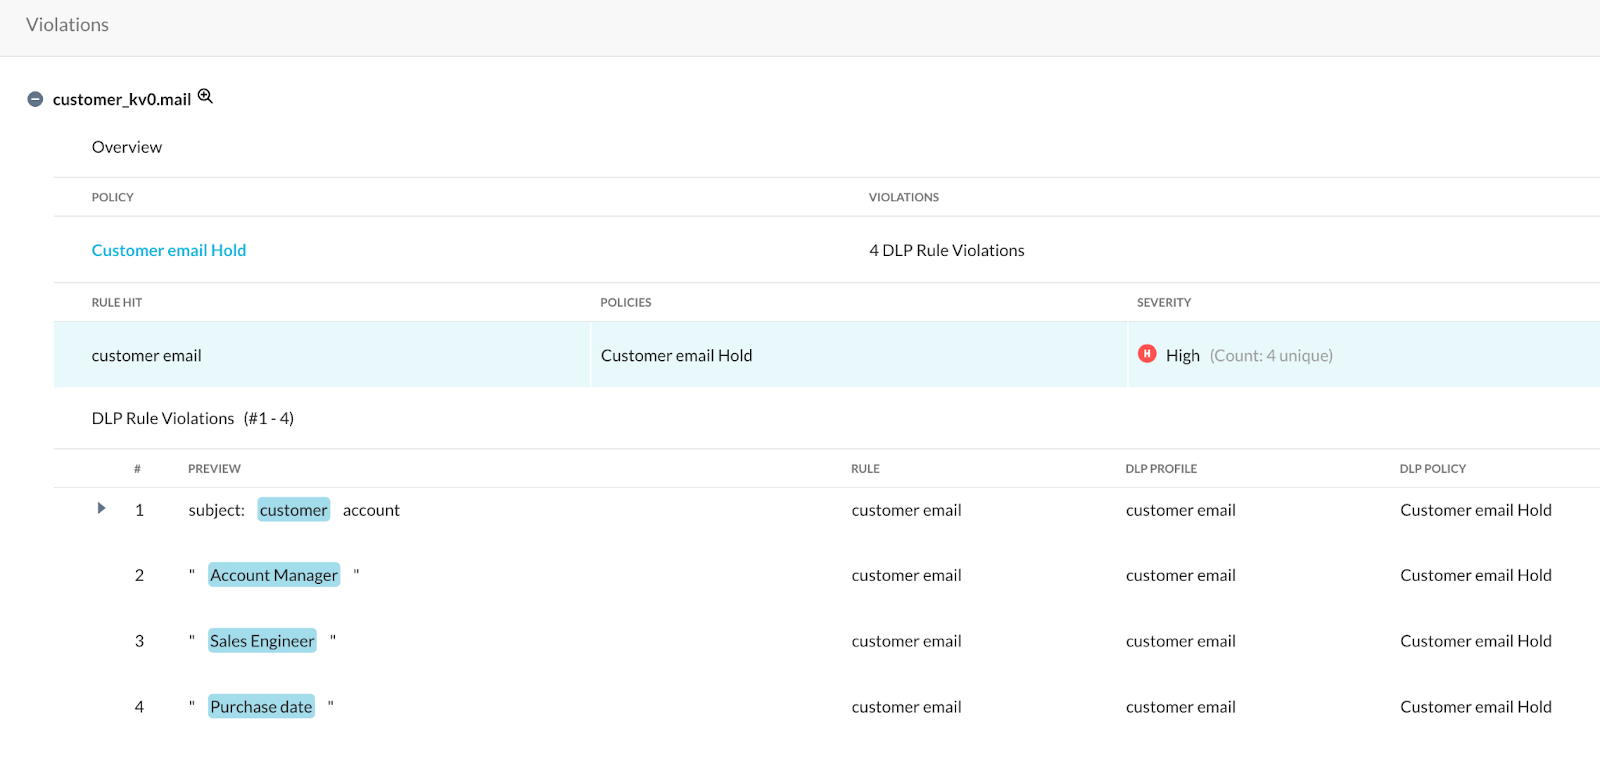
We can then use any automation tool (ex: Tines) to send policy violation notifications to the email sender since there is no notification option available for Outbound Email Policy within Netskope at the moment. This can be done using REST API.
API endpoint: https://<your_tenant>.goskope.com/api/v1/alerts
API payload: {
"token": "<tenant API token>",
"type": "policy",
"query": "(policy%20in%20%5B%20'Customer%20email%20Hold'%20%5D)",
"timeperiod": "3600"
}
The automation story workflow can be something as simple as:
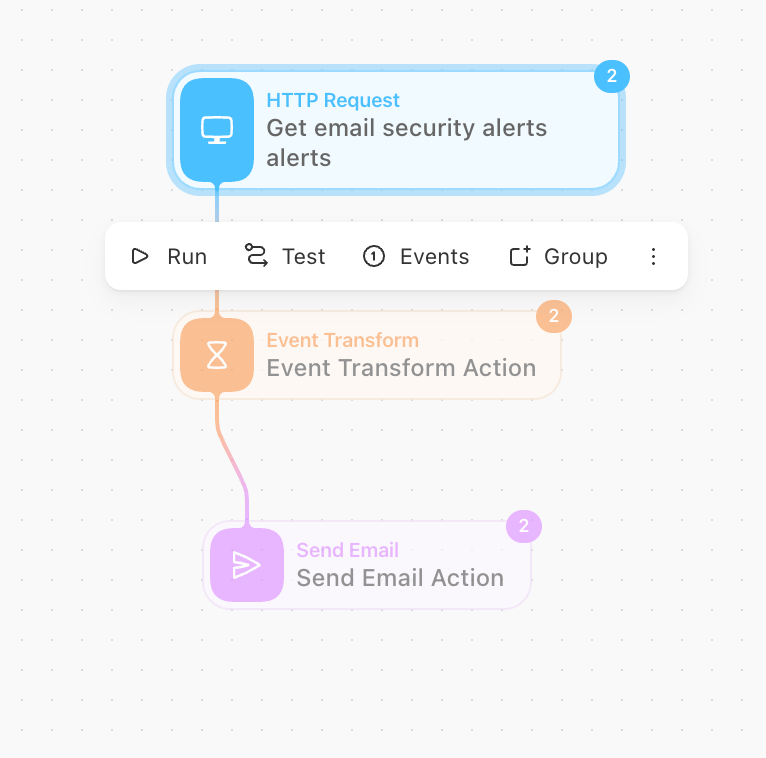
The policy violation email would look like:

We would love to know your thoughts on email security and how you would implement it in your organization. Thanks for giving this a read.


