Copilot with commercial data protection
To help business and educational organizations protect corporate data, Copilot adds commercial data protection when eligible users sign in with their work or school accounts (Entra ID).
Commercial data protection means user and organizational data are protected, prompts and responses are not saved, Microsoft has no eyes-on access, and chat data isn't used to train the underlying large language models. Unlike Copilot for Microsoft 365, Copilot has no access to organizational data in the Microsoft 365 Graph.
Commercial data protection applies to users with eligible work or school accounts wherever Copilot is available. (https://learn.microsoft.com/en-us/copilot/overview#-with-commercial-data-protection)
___________________________________________________________________________________________________
One way to prevent the use of Copilot without commercial data protection is to update the DNS configuration by setting the DNS entry for www.bing.com to be a CNAME for nochat.bing.com. But this will only work when the user is in the company network.
However, we had the demand to prevent the use of Copilot without commercial data protection from anywhere.
I was able to realize this with Netskope as follows:
Note: There is one Prerequisite: 'Commercial data protection for Microsoft Copilot' must be enabled in your Microsoft Tenant to enforce commercial data protection usage.
- Make sure that Netskope does decrypt the SSL Traffic for the following URL’s:
- www.bing.com
- edgeservices.bing.com
- copilot.microsoft.com
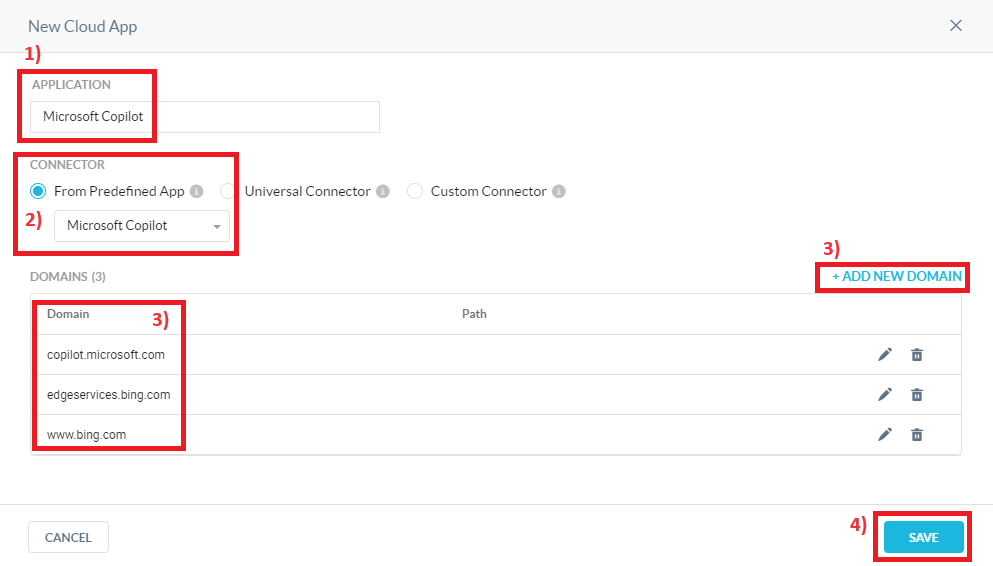
- Create a new Cloud App for Microsoft Pilot
- Go to Settings > Security Cloud Platform > App Definition
- Click “New Cloud App” and configure the following:
- Application Name (can be any name, I used “Microsoft Copilot”)
- Connector
- Add new Domain
- Add the following 3 Domains to the Cloud App:
- www.bing.com
- edgeservices.bing.com
- copilot.microsoft.com
- Add the following 3 Domains to the Cloud App:
- Click Save
-

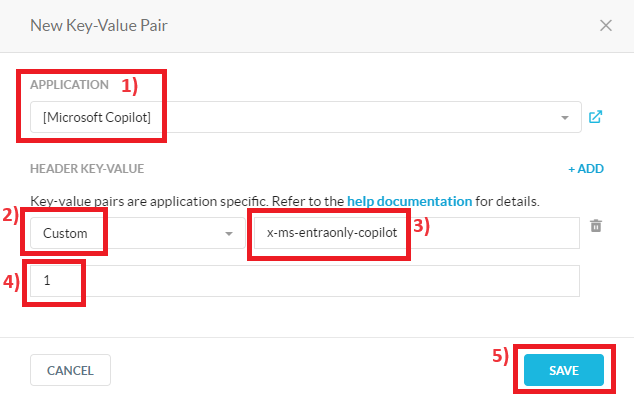
Create a Header Insertion Profile
-
Go to Settings > Manage > Header Insertion
-
Click “New Header Insertion Profile” and configure the following
-
Select the Cloud Application you have created earlier. (In my case it is [Microsoft Copilot])
-
Select Custom as Header-Key-Value
-
Enter x-ms-entraonly-copilot as header key
-
Enter 1 as header value
-
Click Save
-
-
-

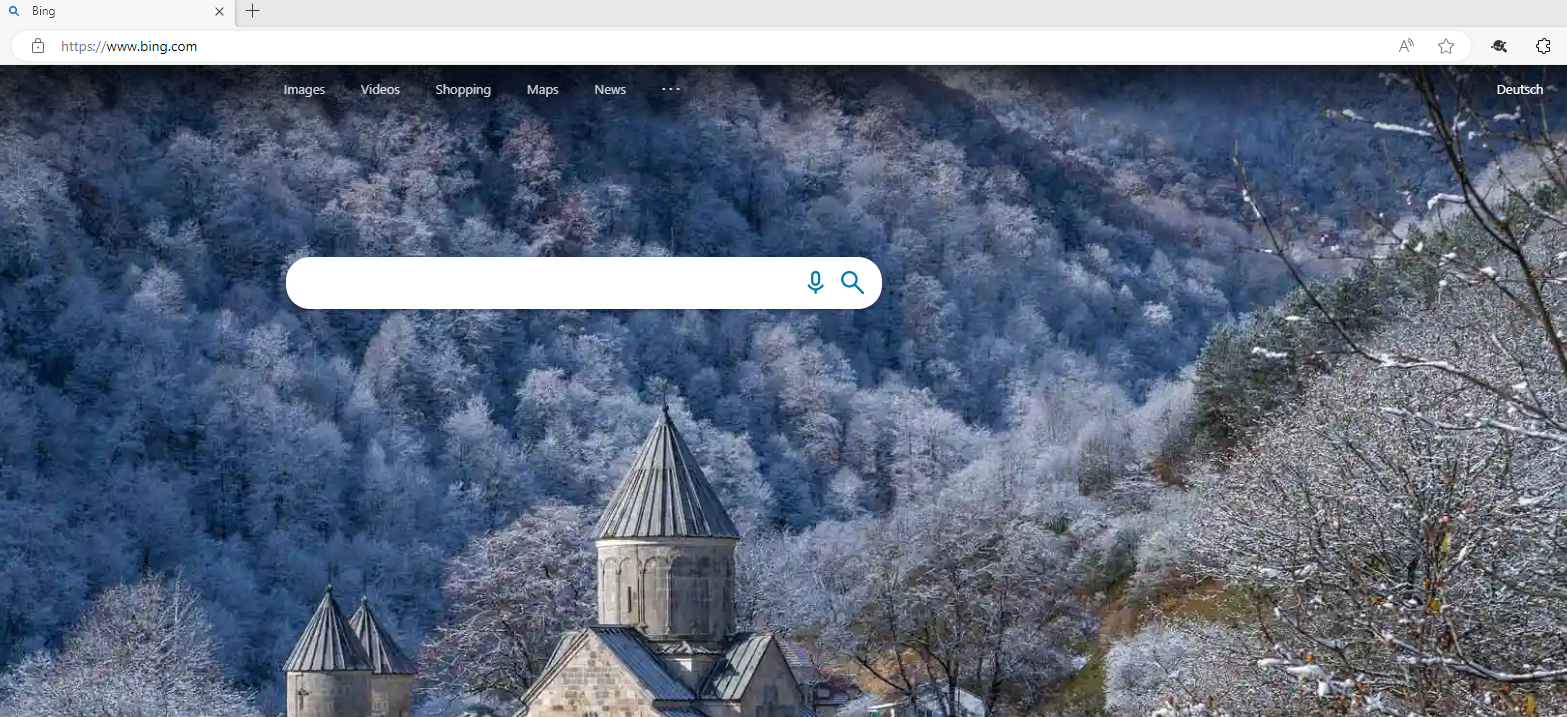
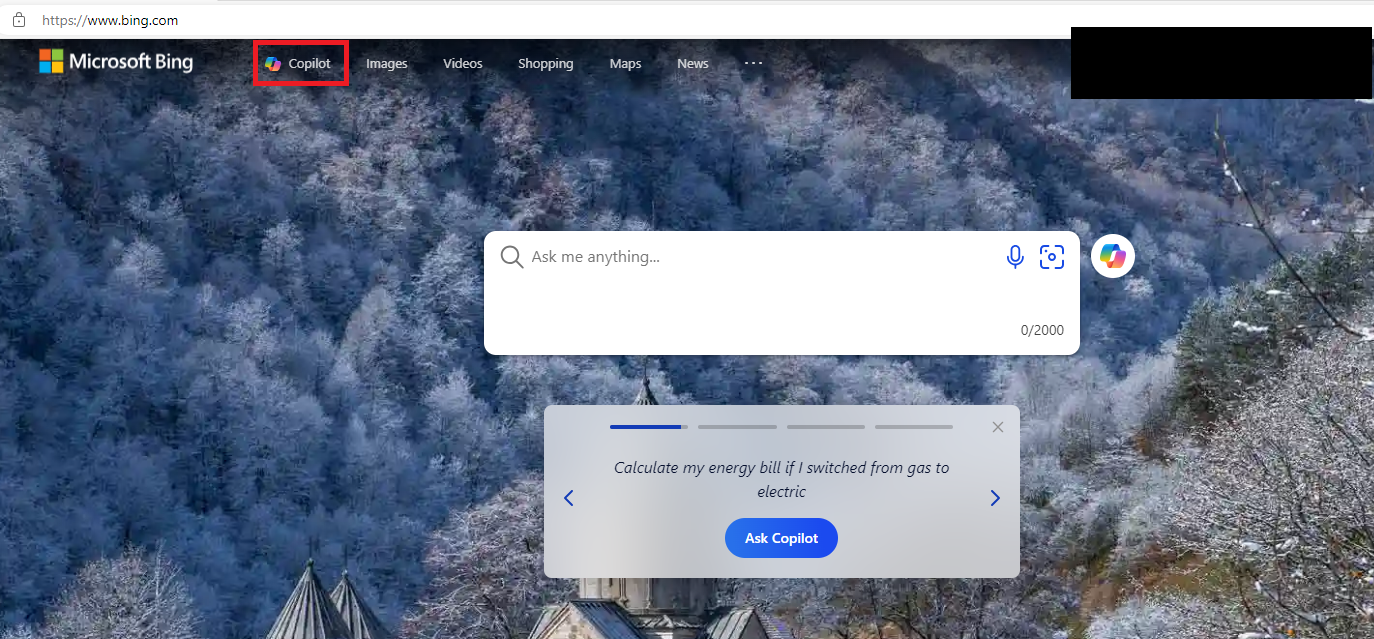
From now on Microsoft Copilot is only available with commercial data protection after login
-
Logged out:
-

Logged in:

-


