

Cribl Netskope Events and Alerts Integration
Netskope’s Events and Alerts can be pulled into Cribl via the Netskope REST v2 APIs. You can use Cribl Stream to filter and redirect to the destination of your liking.
Note: Netskope Steaming Events (WebTx) is supported via Netskope Log Steaming NLS.
There are two Crilb Packs for NLS and one for API based Events/Alerts https://packs.cribl.io/

Requirements
- Netskope tenant with API v2 enabled
- Cribl Stream account
Setup Steps
Netskope
- Generate API token
Cribl
- Create Data Source
Verify
- Save and Run
Netskope
Create Role for API Token
In your Netskope tenant go to Settings > Administration > Administration & Roles > Roles
Create a new role and select Events and Analytics.
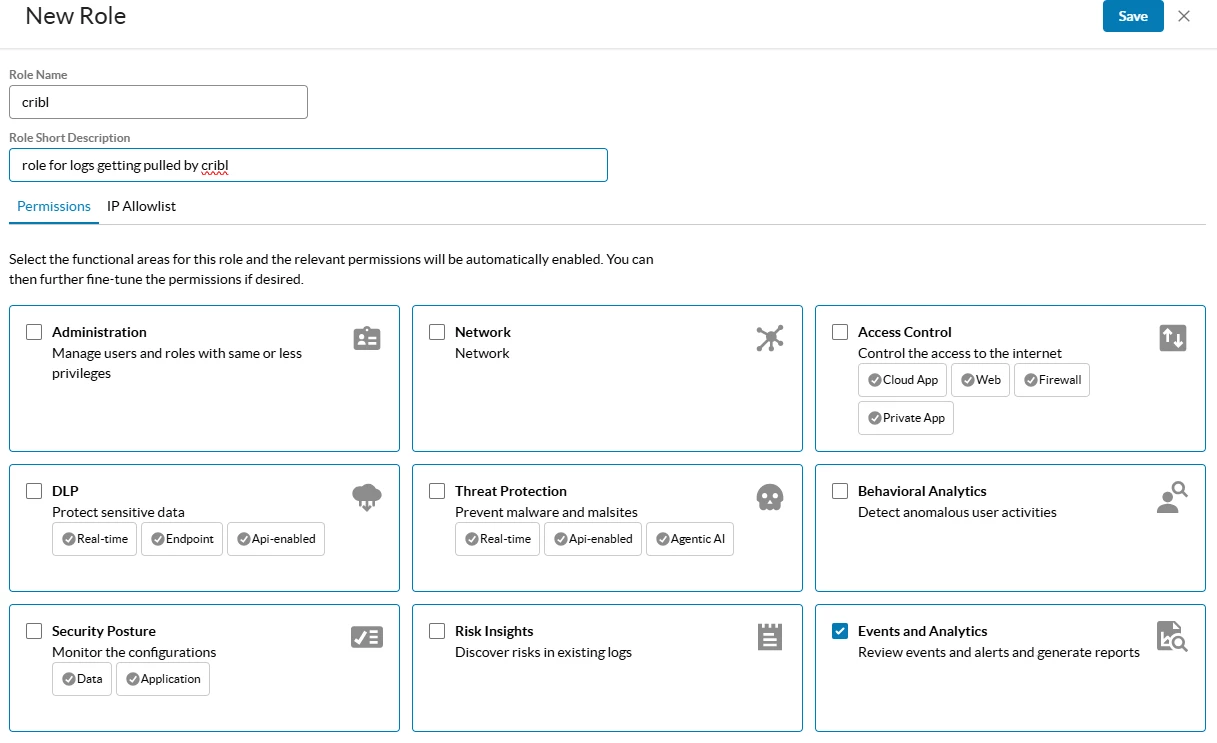
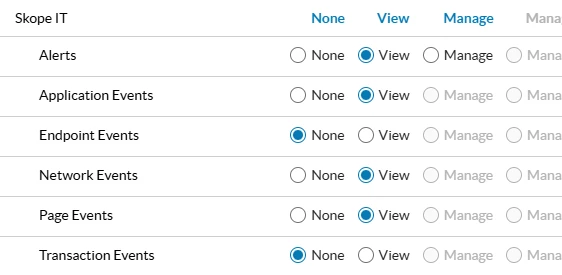
Add the SkopeIT events that you want to pull.
Create a service account with this new role selected. https://docs.netskope.com/en/netskope-rbac-v3-overview
These are the API endpoints that I pull with the above permissions.
Events
/api/v2/events/dataexport/events/application
/api/v2/events/dataexport/events/audit
/api/v2/events/dataexport/events/incident
/api/v2/events/dataexport/events/infrastructure
/api/v2/events/dataexport/events/network
/api/v2/events/dataexport/events/page
Alerts
/api/v2/events/dataexport/alerts/uba
/api/v2/events/dataexport/alerts/securityassessment
/api/v2/events/dataexport/alerts/quarantine
/api/v2/events/dataexport/alerts/remediation
/api/v2/events/dataexport/alerts/policy
/api/v2/events/dataexport/alerts/malware
/api/v2/events/dataexport/alerts/malsite
/api/v2/events/dataexport/alerts/compromisedcredential
/api/v2/events/dataexport/alerts/ctep
/api/v2/events/dataexport/alerts/dlp
/api/v2/events/dataexport/alerts/watchlist
Cribl
Create Data Source
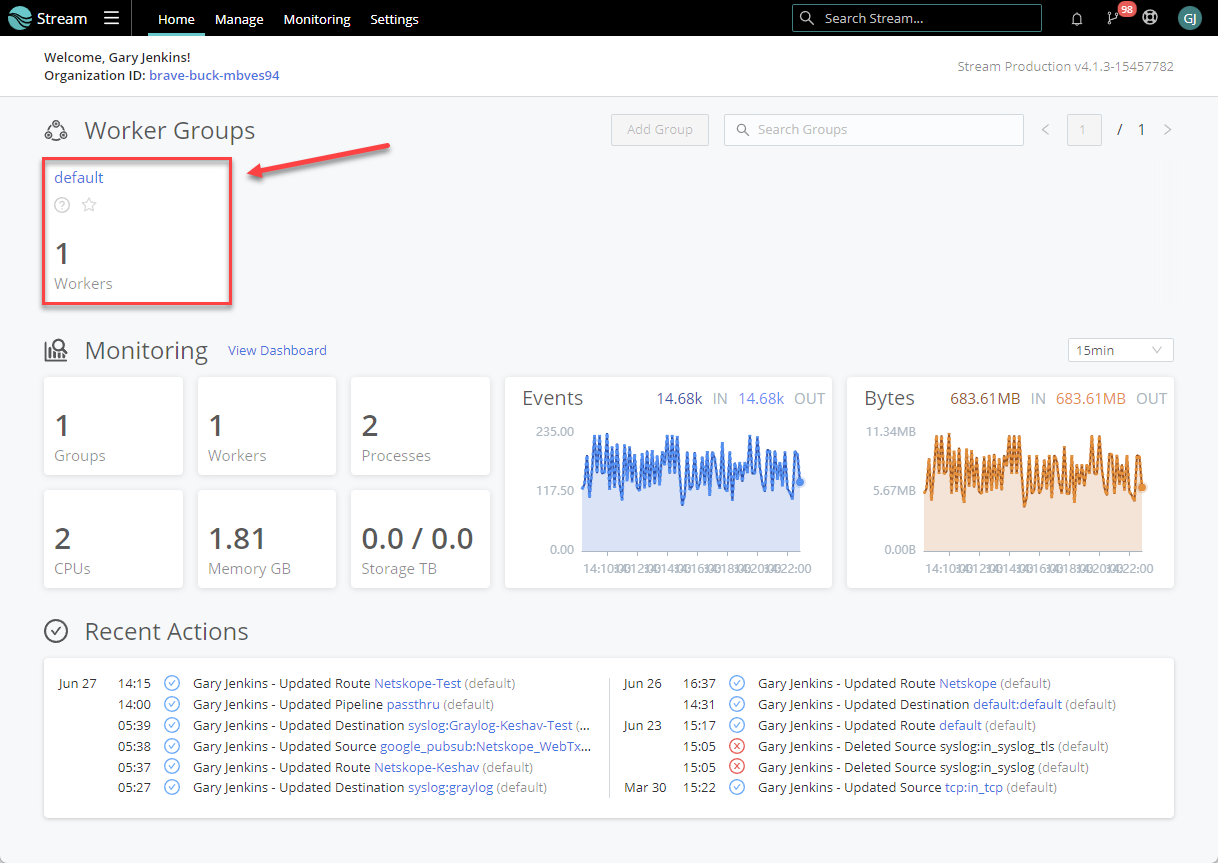
Log into Cribl and go to Stream > Worker Groups and choose the appropriate worker group for the new data source.
Data > Sources
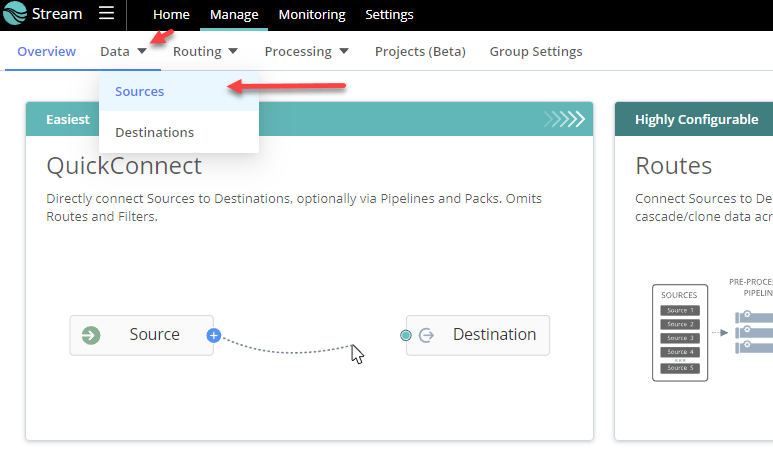
> Collectors REST
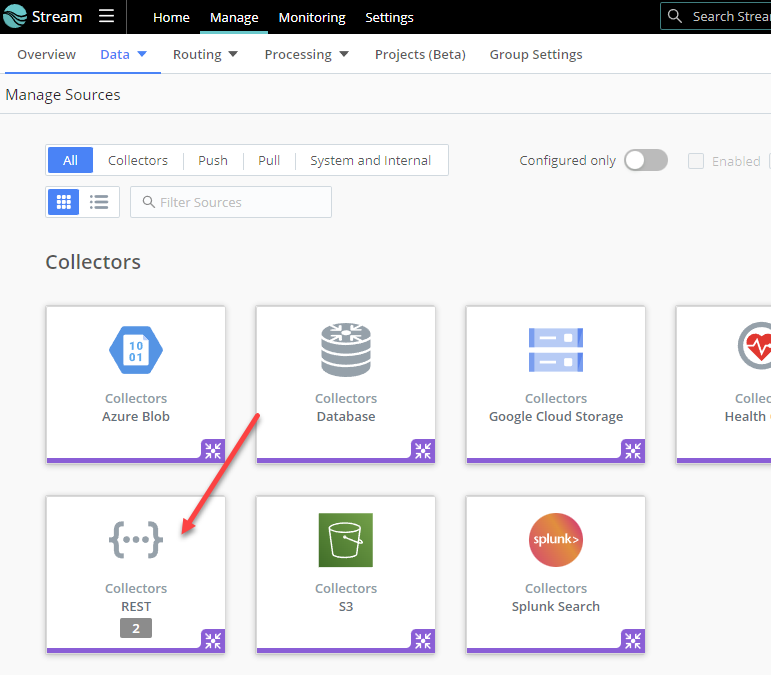
Add Collector
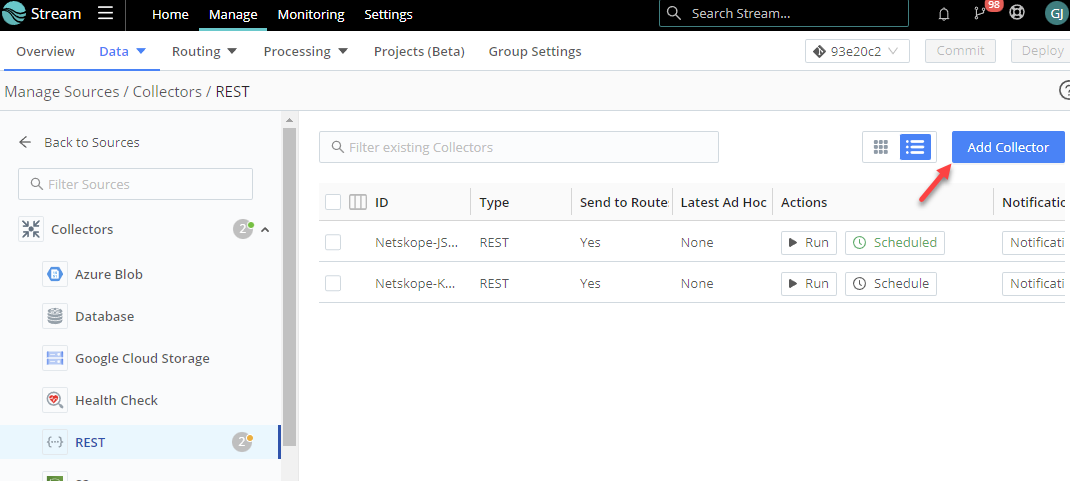
You will need to add a new collector for each alerts and events (two total).
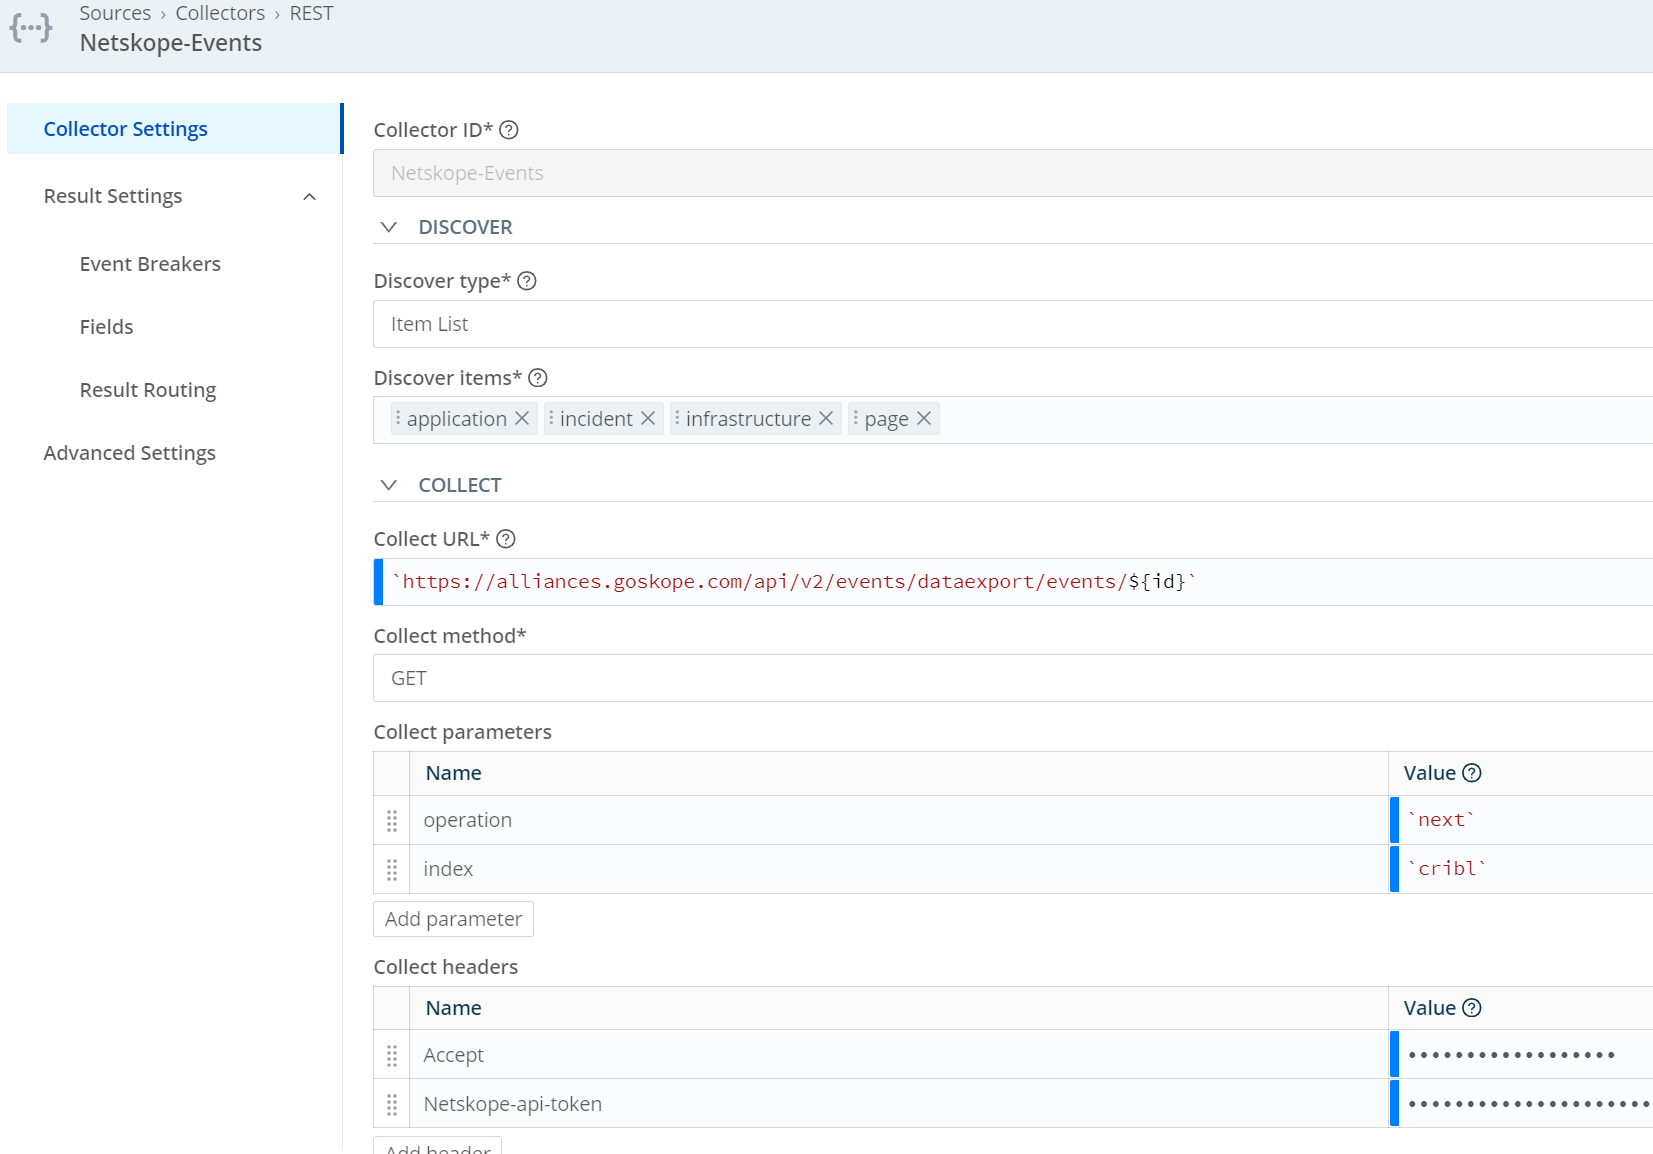
- Give your collector a Name
- Under Discover select Item List. Include all of the items you want to pull with the one call.
- Alerts: uba, securityassessment, quarantine, Remediation, policy, malware, maliste, compromisedcredential, ctep, dlp, watchlist
- Events: application, audit, incident, infrastructure, network, page
Note: The picture below only shows Events. The Alerts fields are listed right above this.
- Collect URL - Add the url to pull. This should be your tenant followed by the base API call you are making, with ${id} at the end. Be sure to place this in `` like : `https://<your tenant name>.goskope.com/api/v2/events/dataexport/alerts/${id}`
- or for events `https://<your tenant name>.goskope.com/api/v2/events/dataexport/events/${id}`
- Collect method = GET
- Collect parameters
- operation `next` (see note for other options)
- index `cribl` (this can be anything BUT if you have something else pulling the logs (like splunk) this field will need to be set with a different index name than the other product. We use this to track which logs have already been pulled)
- Collect headers
- Accept `application/json`
- Netskope-api-token <your v2 token>
Operation note:
Iterator operations supported
-
epoch timestamp - If an epoch timestamp is provided, this informs the Netskope endpoint to begin log consumption starting at this time.
-
next - The next operation value requests the next page of data from the Netskope endpoint.
-
head - The head operation value requests the first page of data stored within the Netskope endpoint.
-
tail - The tail operation value requests the most current page of data stored within the Netskope endpoint.
-
resend - If the consumer is unable to process the page of data provided, resend operation will issue a retry of the last page of data requested.
Note: After having some customers tested this, they found that they needed to make a couple more tweets to get things working correctly.
Make the following changes to the retries. Under the Retry HTTP codes, add 429, 503, and 409.
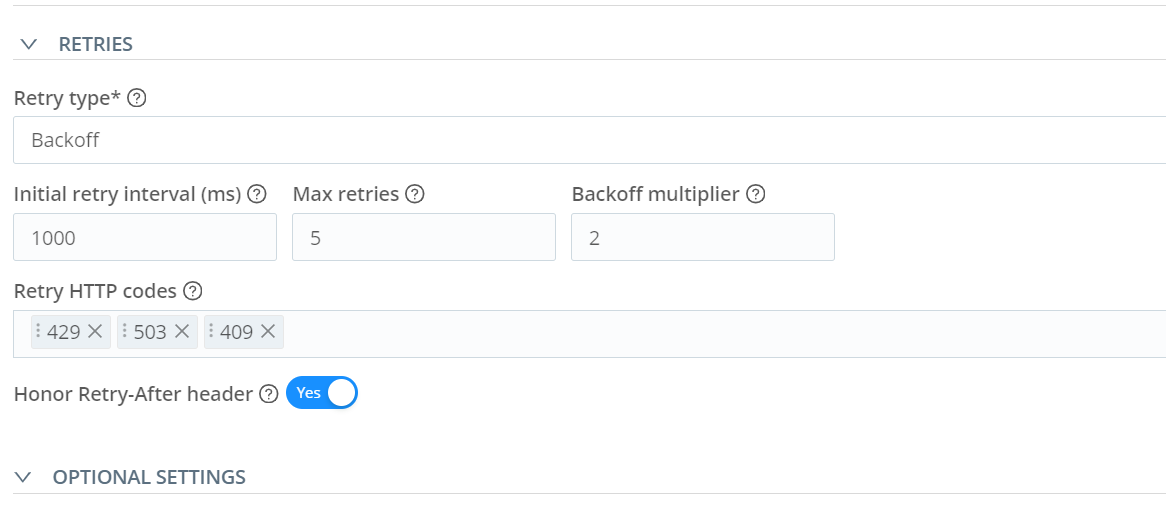
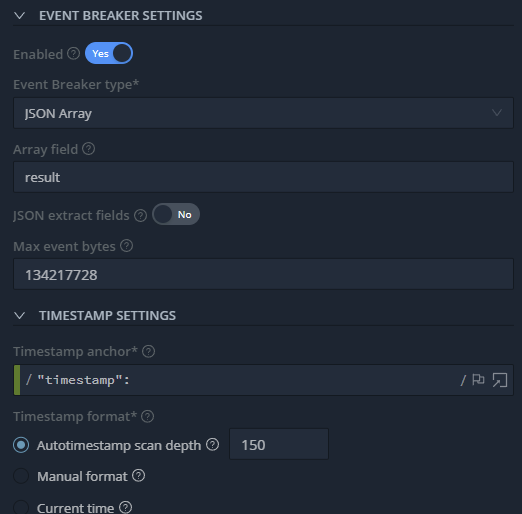
The other thing that needed to be changed is the Max event bytes. Change this to 134217728
https://docs.cribl.io/edge/event-breakers/
At this point, you should be able to Save & Run to verify that everything is working. Once you have verified that it works as expected, you will need to add a Route to send the logs to a destination that you have.


