

Overview
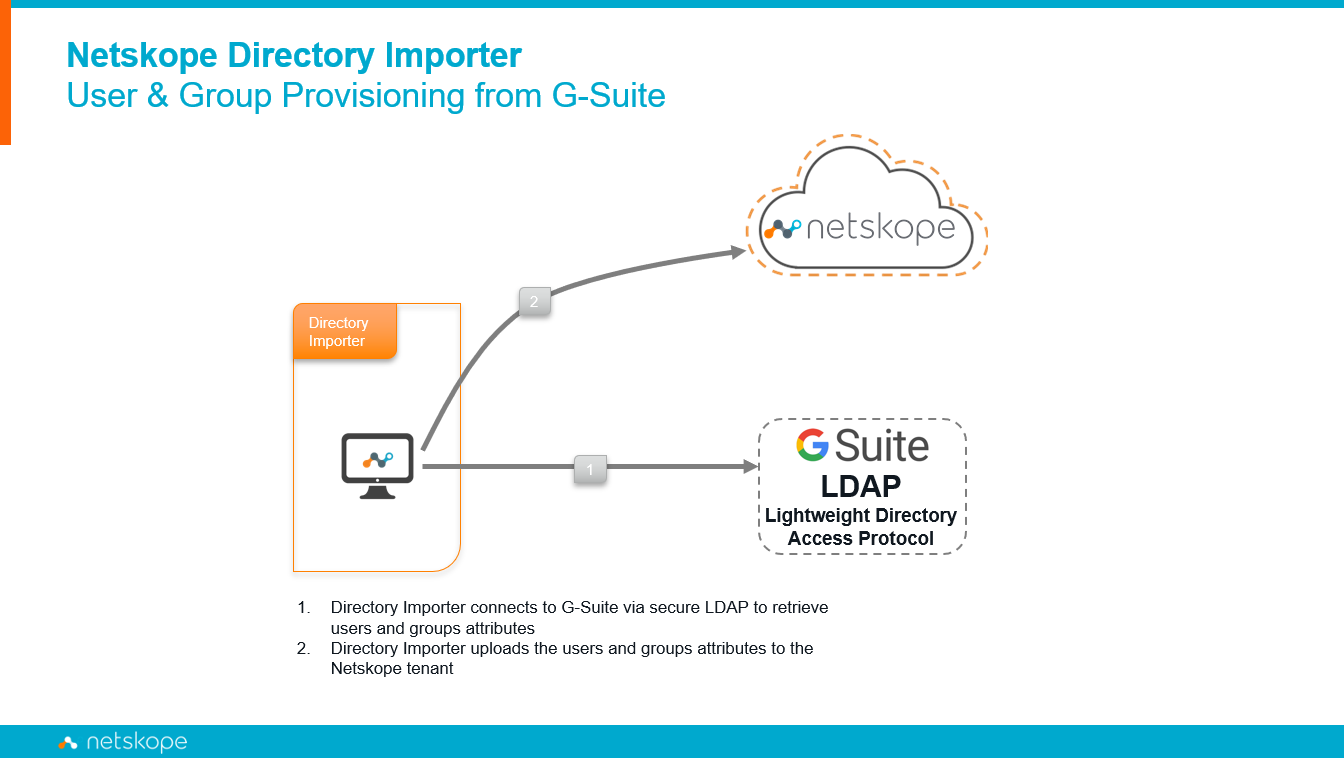
This document will assist customers who do not have Active Directory and want to provision users and groups from Google Cloud automatically and to use them in real-time protection policies. Netskope Directory Importer will be deployed, and service configured to run under a local admin account to connect to Google Cloud LDAP service. The Directory Importer will require user credentials and certificates to be generated in Google Cloud to establish a secure LDAP connection to read user and group information. This applies to both types of Netskope tenant (Cloud App or Web).
Netskope Directory Importer Connectivity Diagram
Instructions
Prerequisites
- Google Cloud Identity Premium or G-Suite Enterprise or G-Suite Education. This is required to enable and configure Secure LDAP feature in G-Suite.
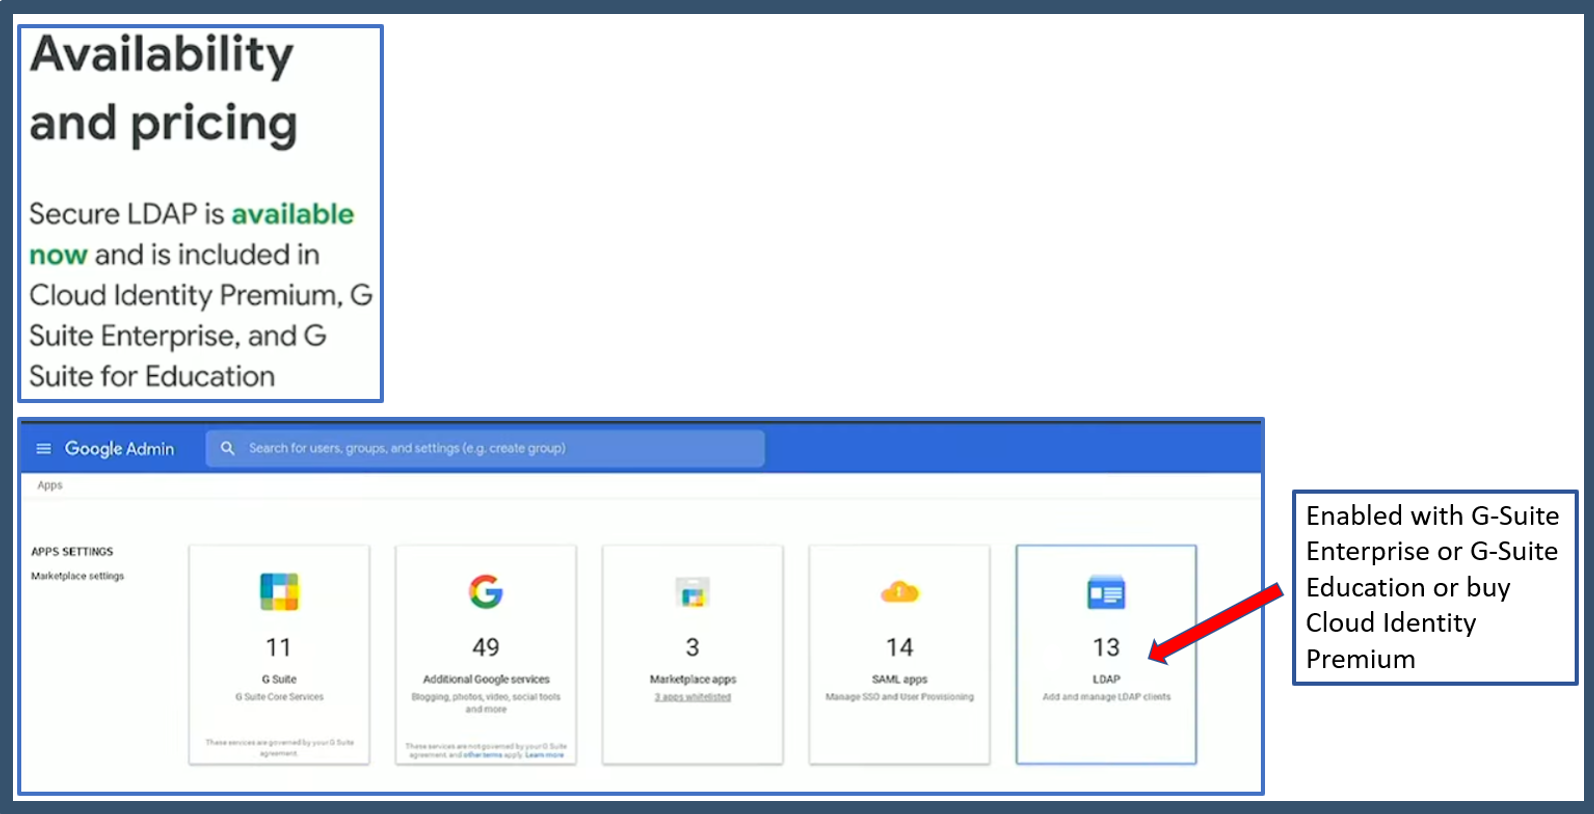
Note: There is also Google Cloud Identity, which is a free version, but this does not support secure LDAP.
- Windows 10 stand-alone/workgroup (optional - Windows Server).
- A local admin account on Windows which will be used to install, configure and run Directory Importer service.
- Microsoft Visual C++ 2010 redistributable w/SP1 (x64).
- Netskope Directory Importer.
- OpenSSL or similar tools for certificate conversion
Directory Importer Connections
| Source | Destination | Port | Direction | Description |
| Directory Importer | addon-<tenant-url> | 443 | Outbound | Upload attributes to Netskope tenant |
| Directory Importer | G-Suite LDAP Directory | 636 | Outbound | Secure LDAP to G-Suite to retrieve user and group attributes |
Steps:
A. Create users and groups in G-Suite
B. Configure LDAP client in Google
C. Convert .crt and .key certificate to .p12 format (requires OpenSSL or similar tools)
D. Import LDAP client certificate into Windows
E. Install Netskope Directory Importer
F. Configure Netskope Directory Importer
G. Appendix
A. Create Users and Groups in G-suite
| Step | Task |
| 1. | Login with your admin credentials to Google Cloud https://admin.google.com 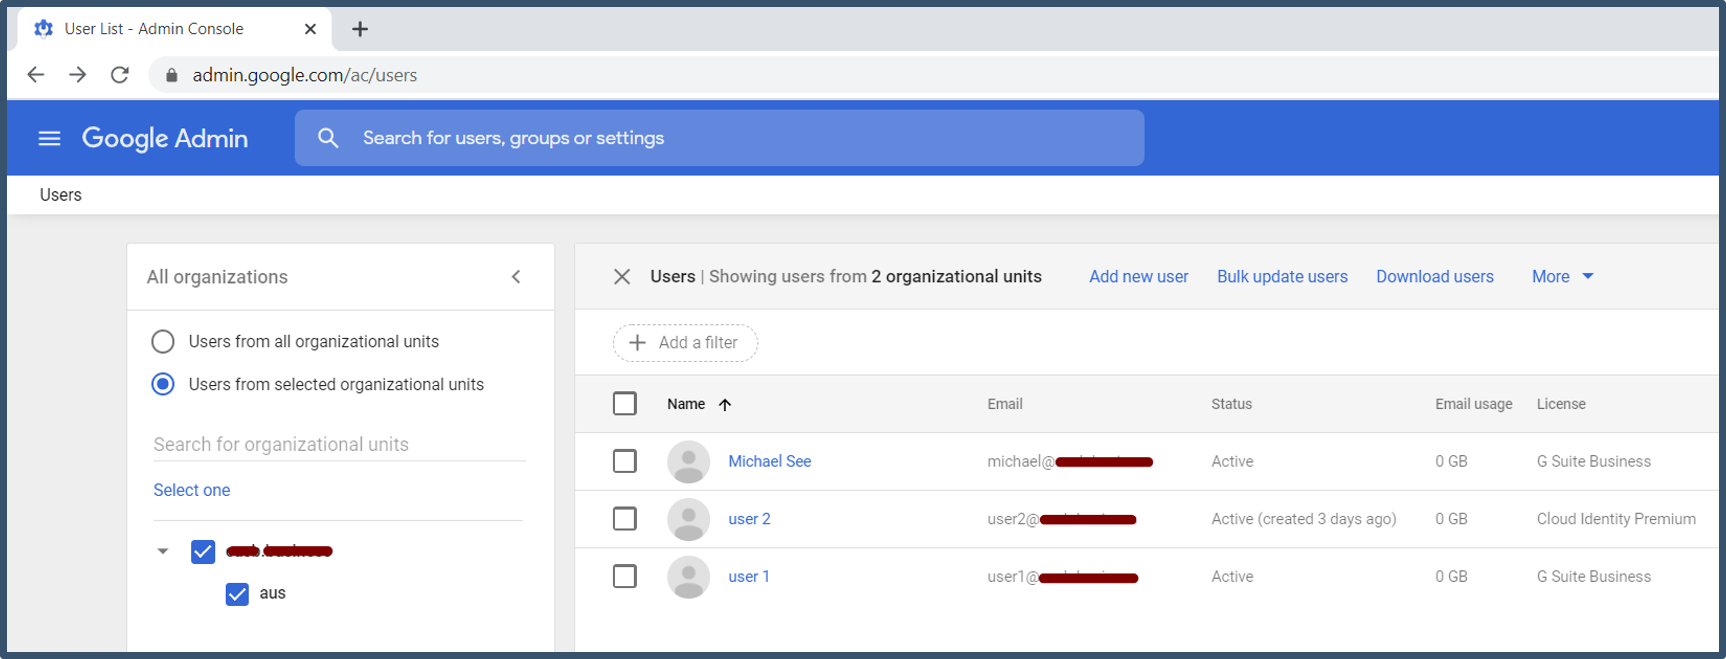
|
| 2. | From the Google Admin menu click on Directory > Groups. 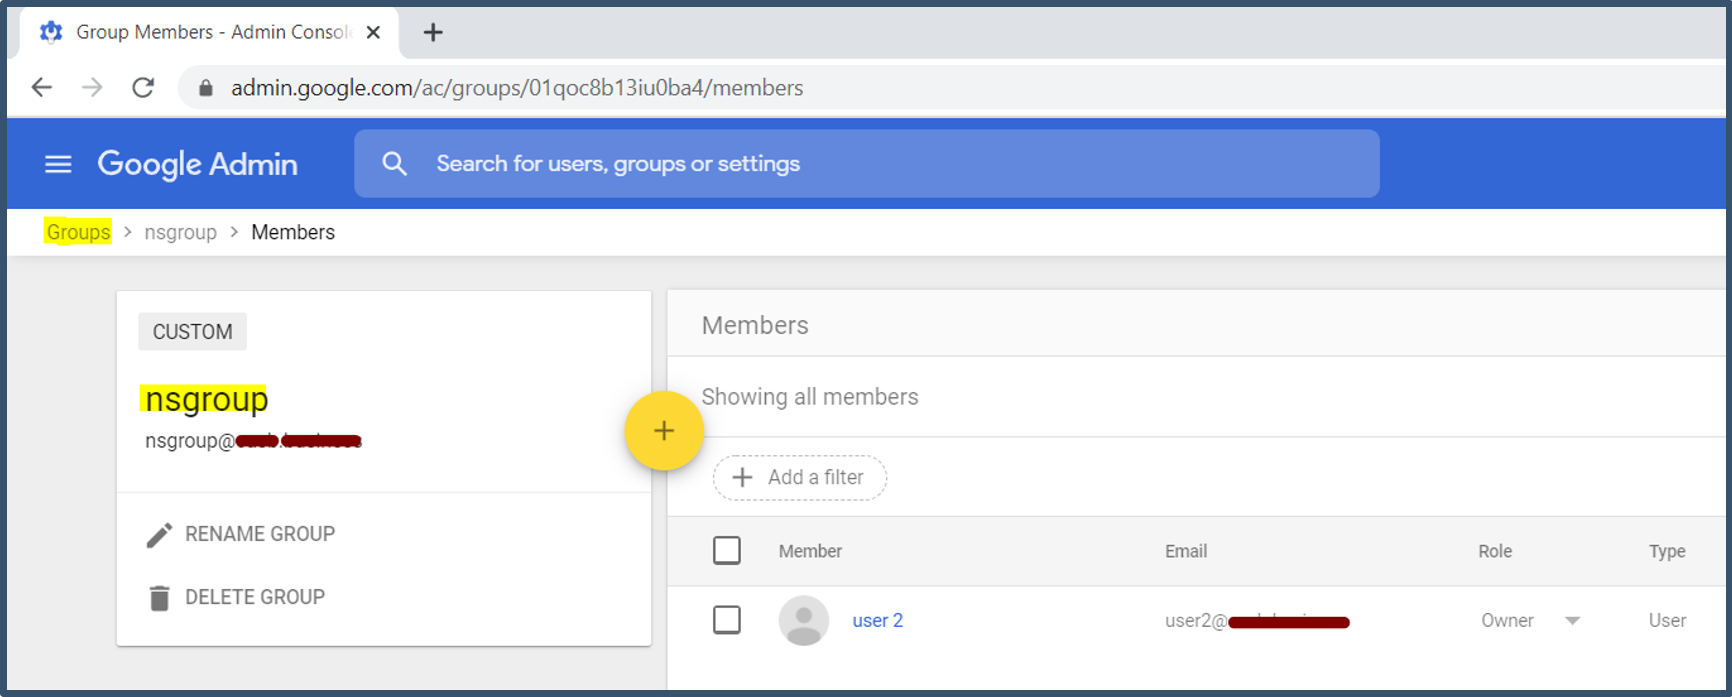
|
B. Configure LDAP Client in Google
| Step | Task |
| 3. | Login with your admin credentials to https://admin.google.com > click on Apps. 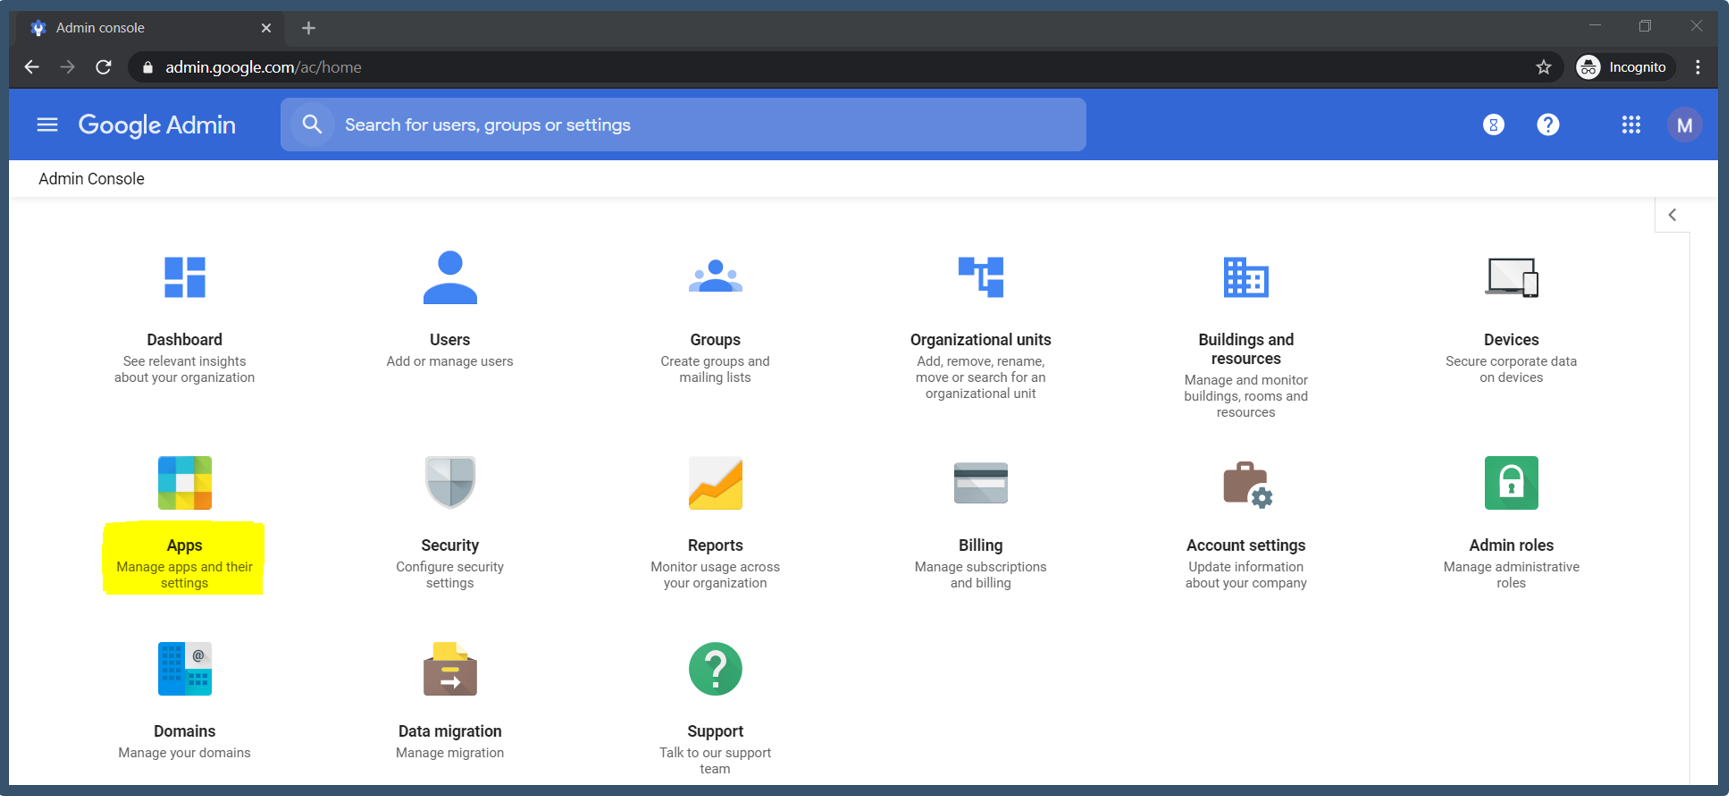
|
| 4. | Select LDAP. 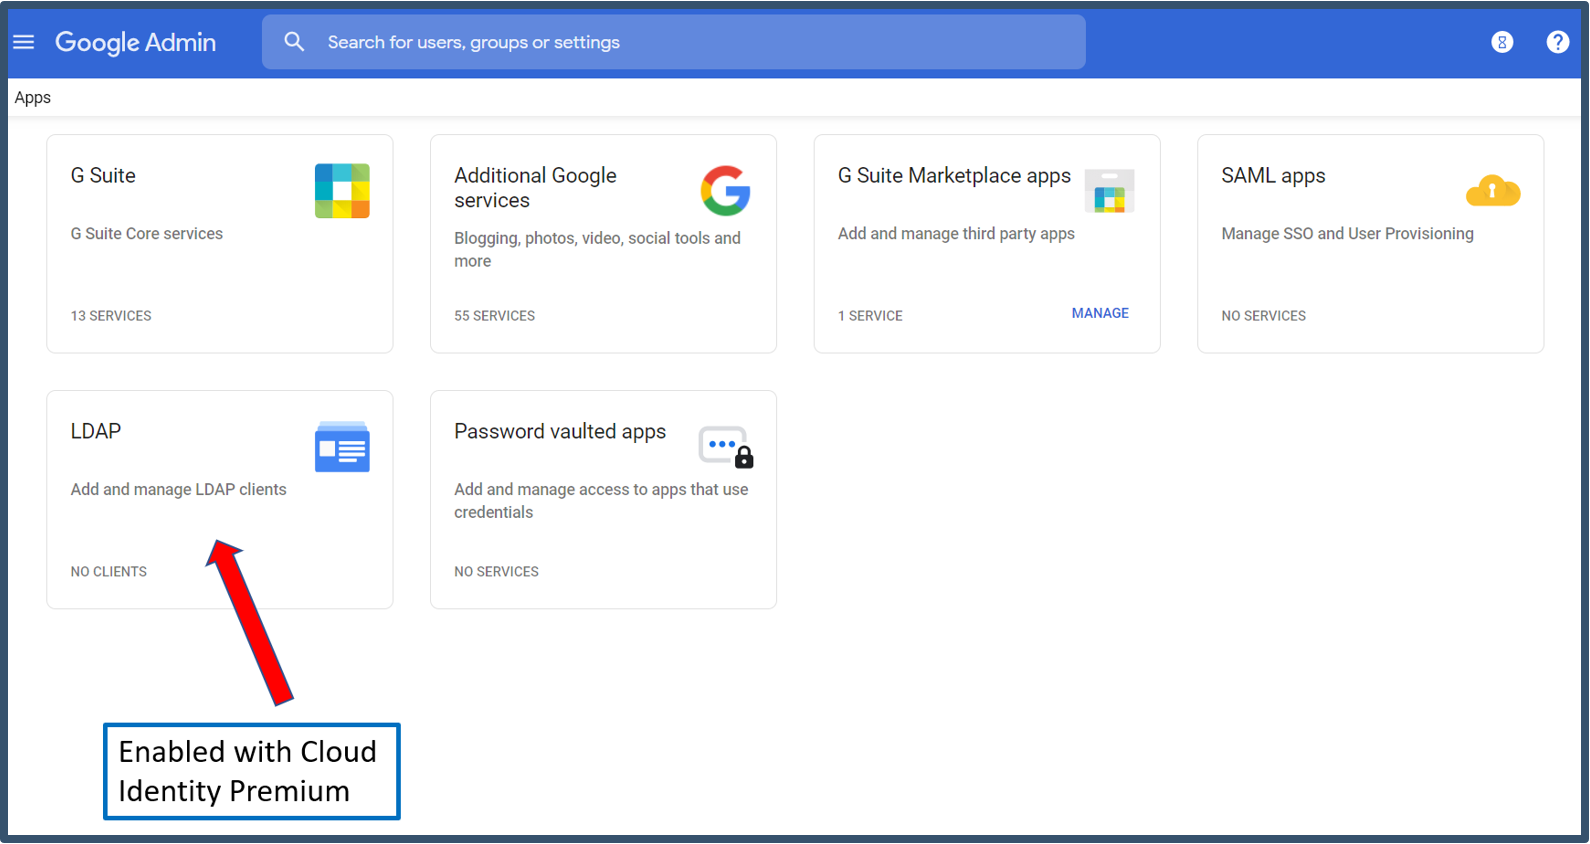
|
| 5. | Select Add LDAP Client. 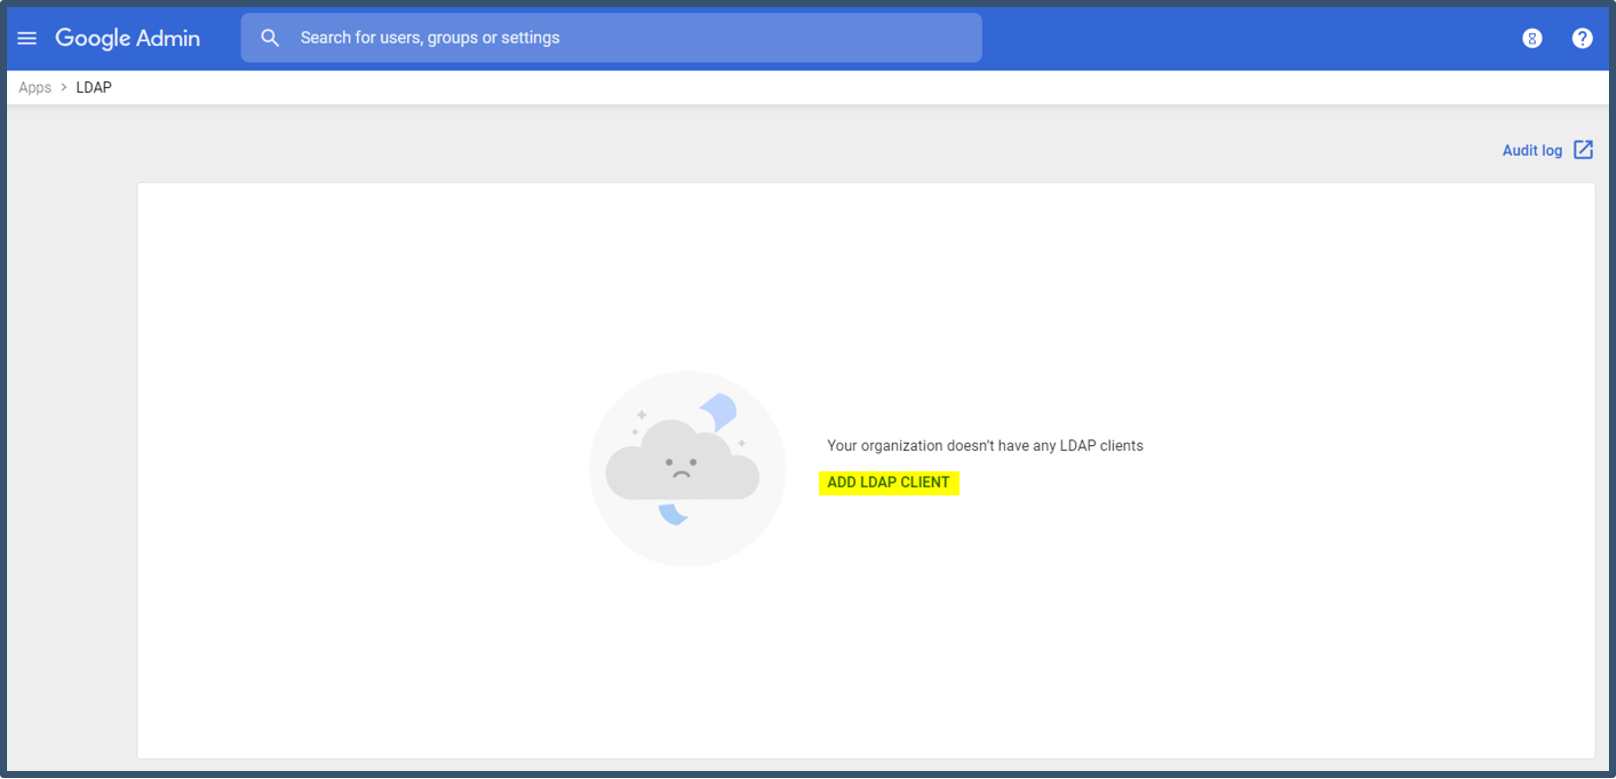
|
| 6. | Enter Name : Netskope Directory Importer. 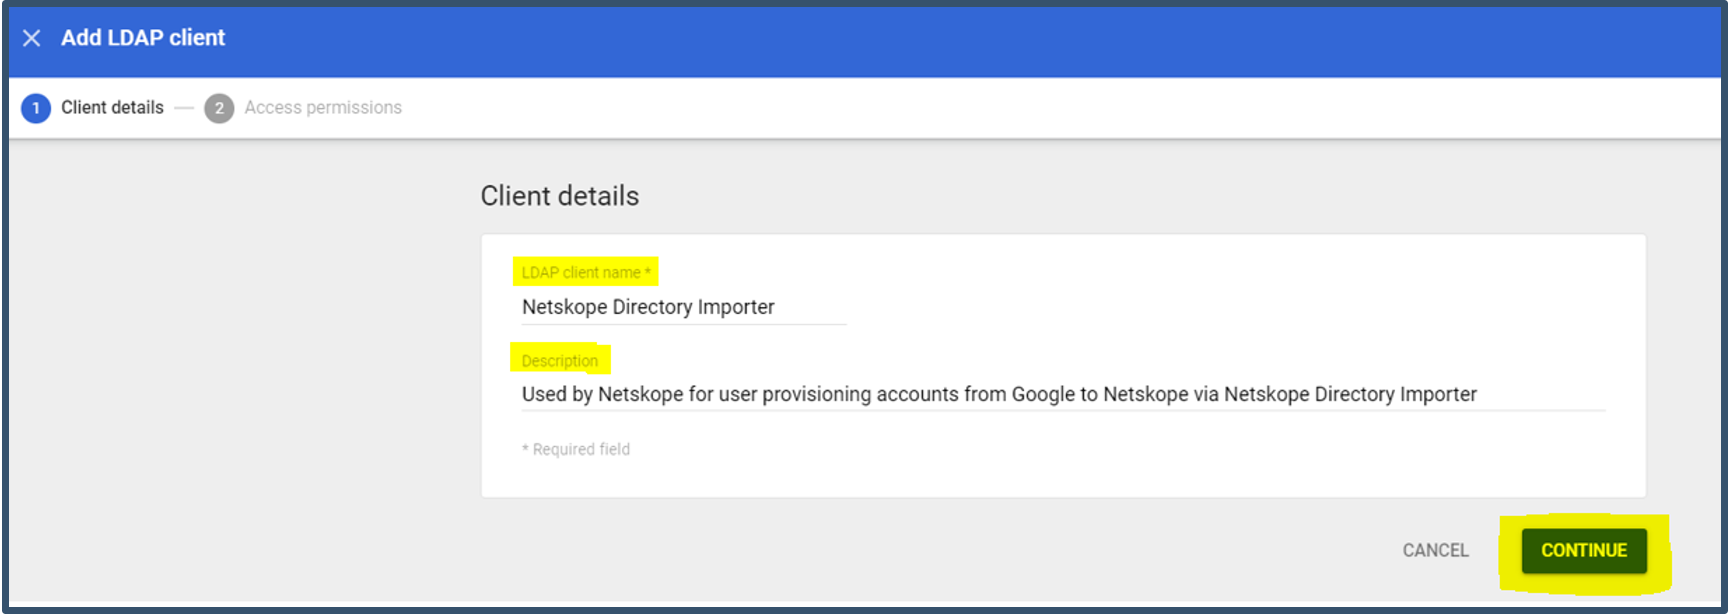
|
| 7. | Grant access to read User information for the Entire domain. 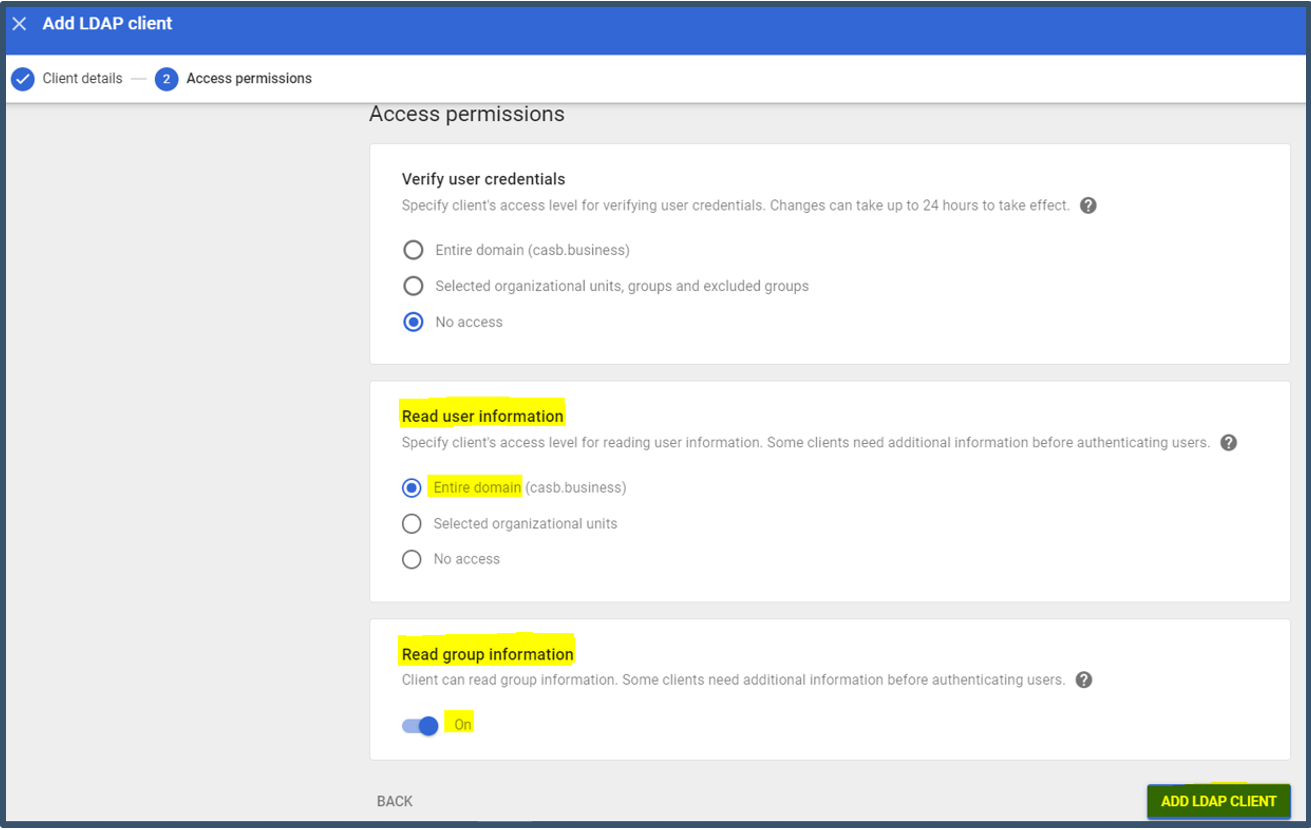 Note:
|
| 8. | LDAP Client was created successfully. 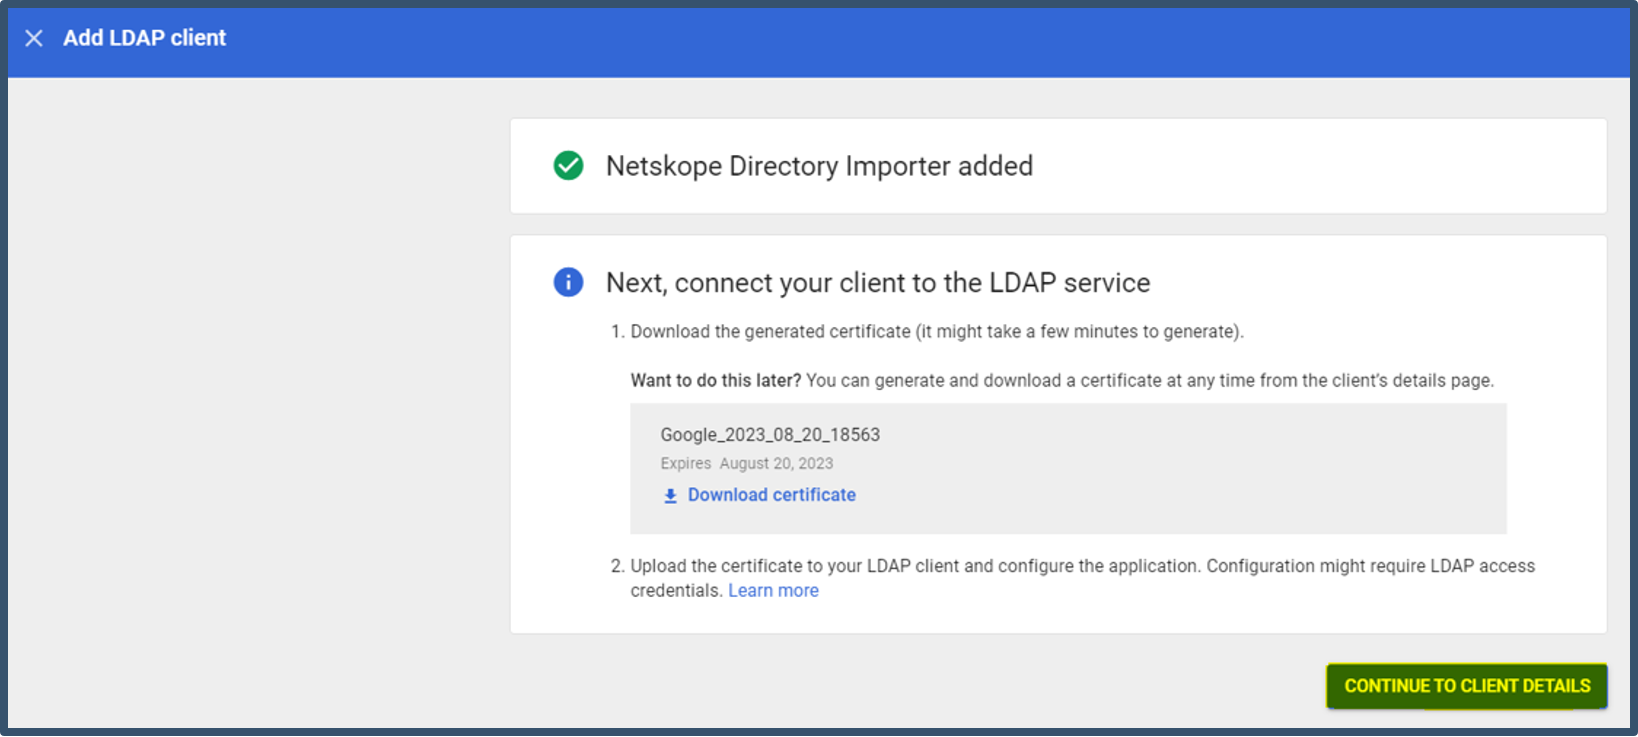
|
| 9. | The LDAP settings are displayed. 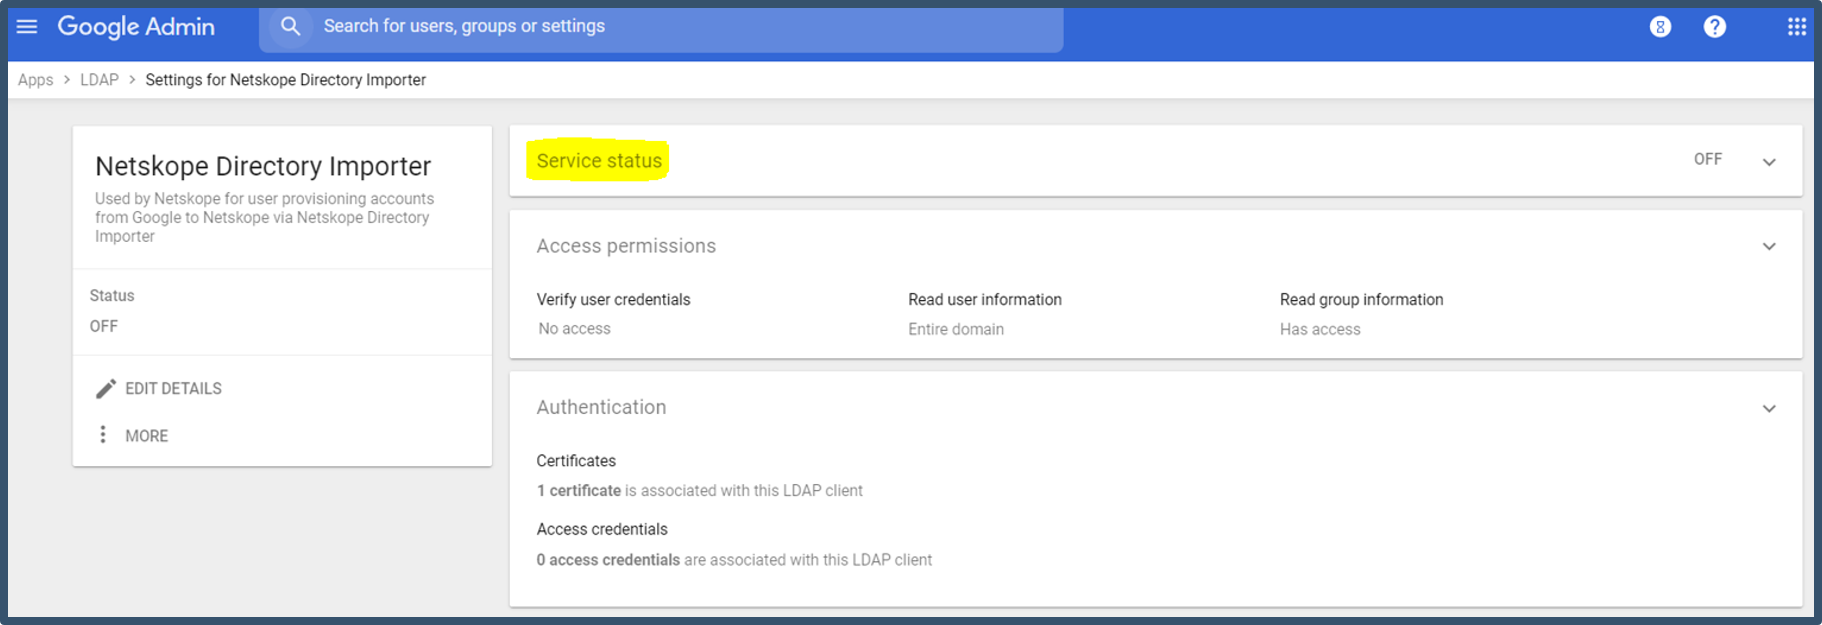
|
| 10. | Select On for everyone. 
|
| 11. | The dashboard will show Service status as ON. 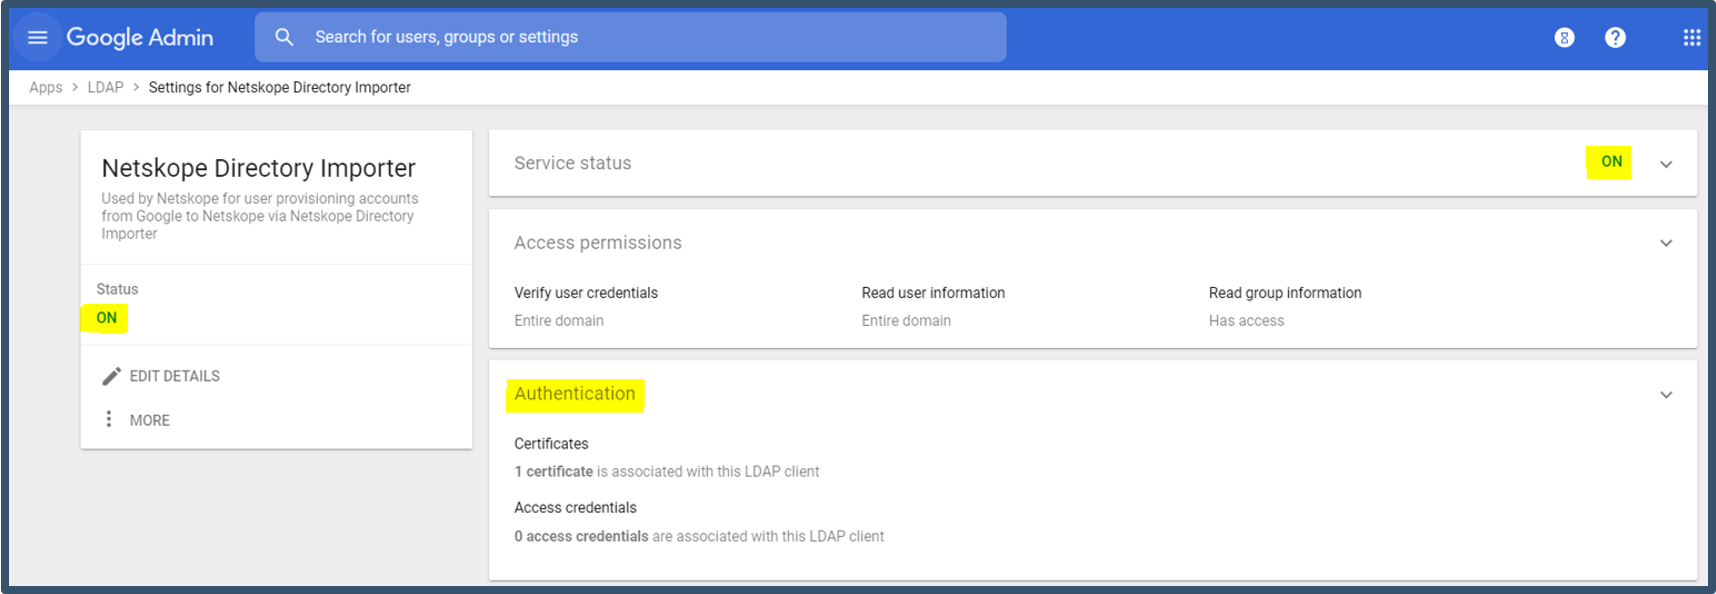
|
| 12. | Click Generate New Credentials. 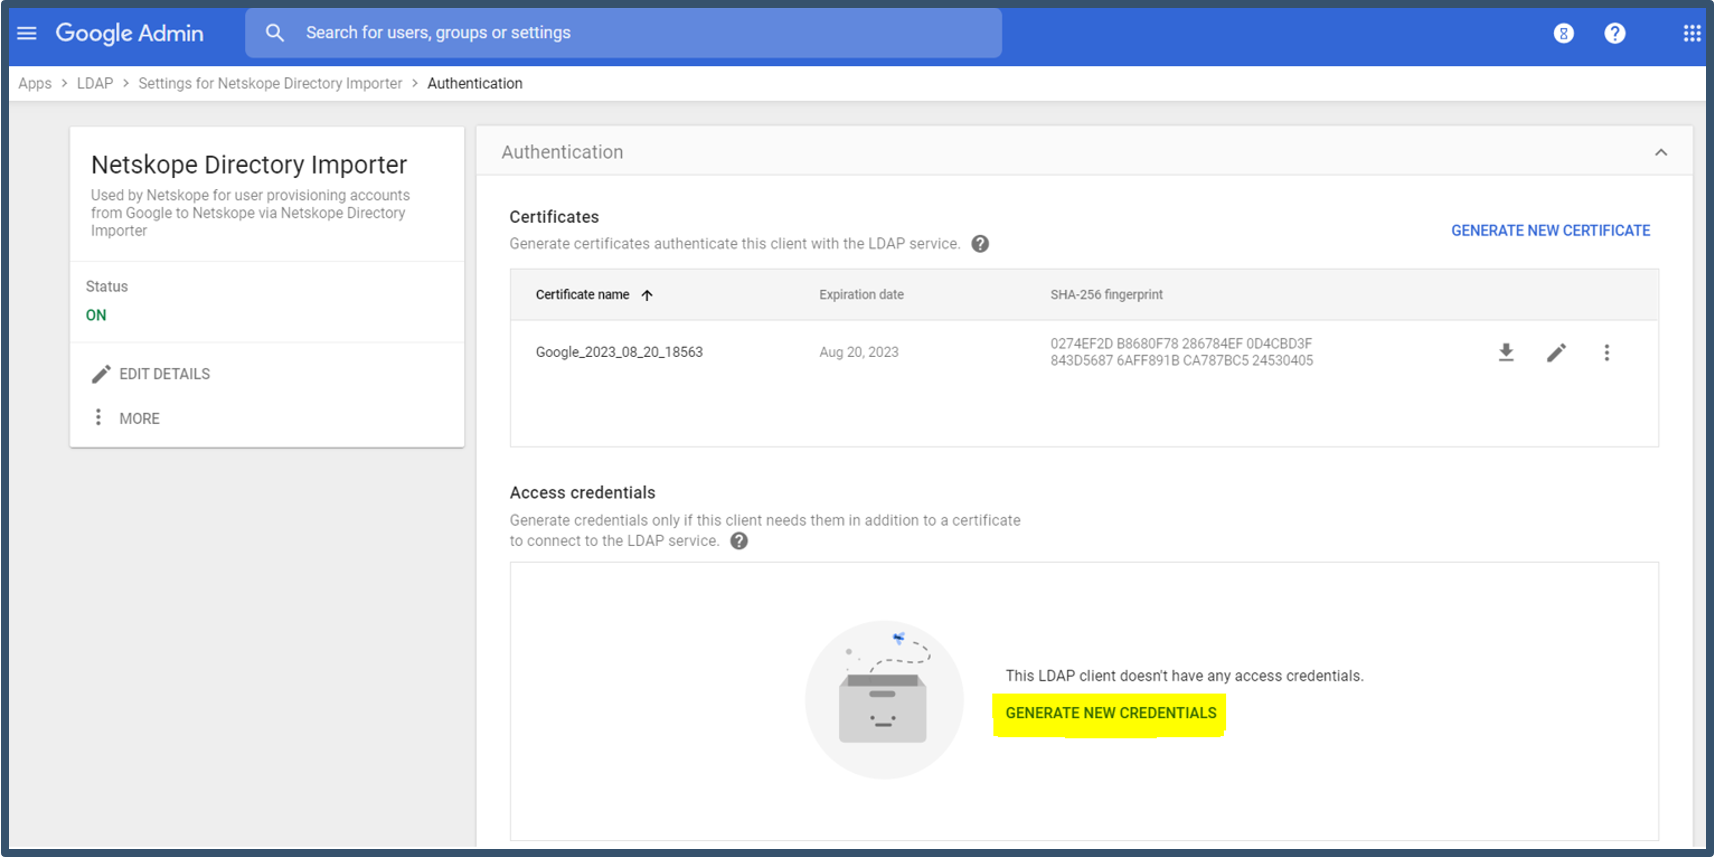
|
| 13. | This will auto generate username and password. 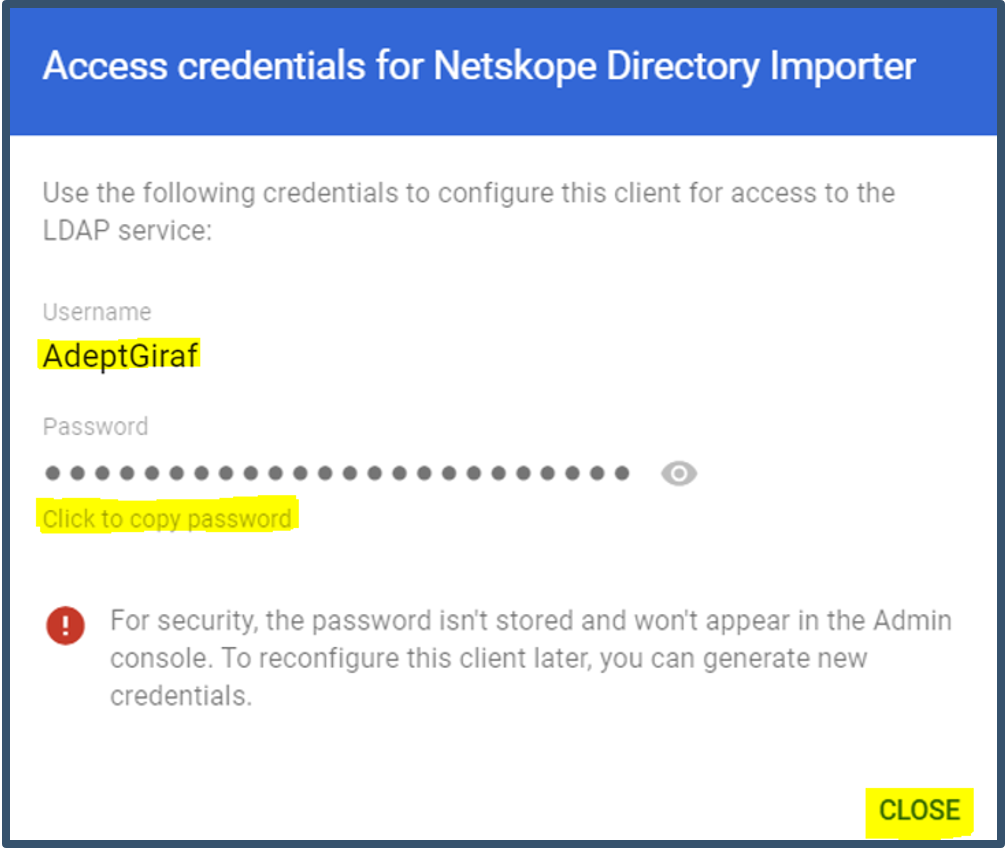
|
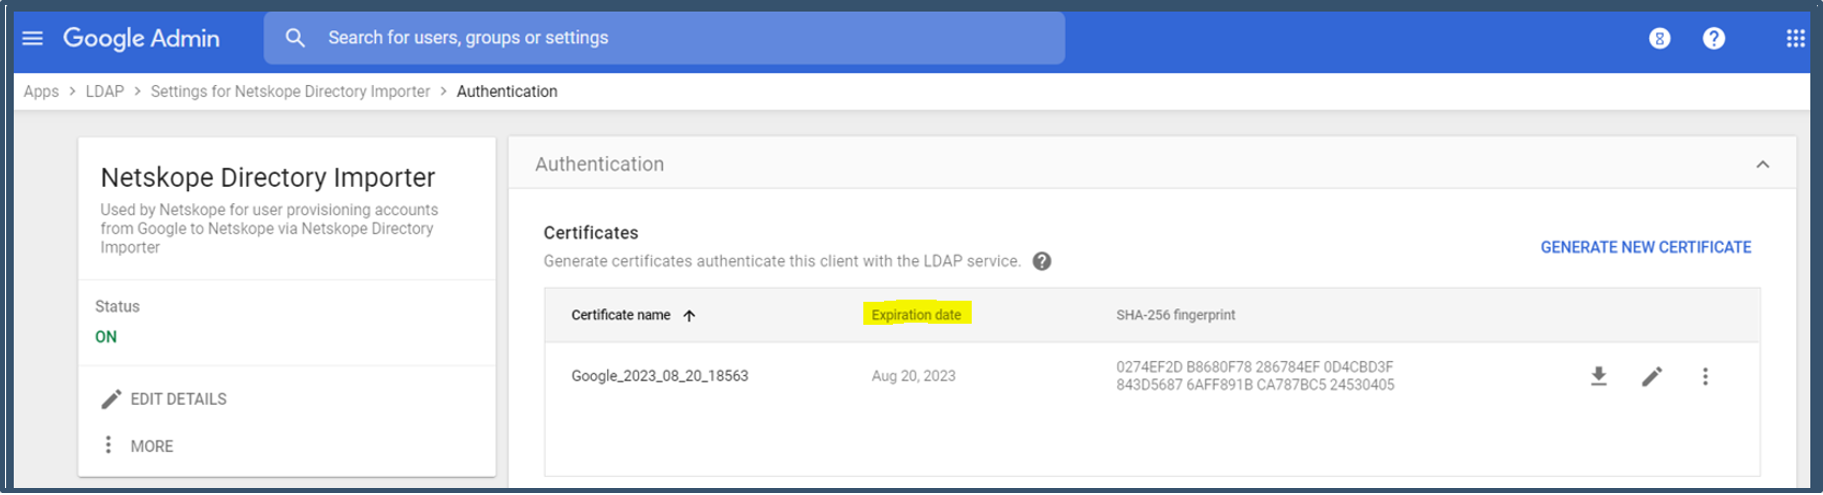
| 14. | It will display settings as shown below. 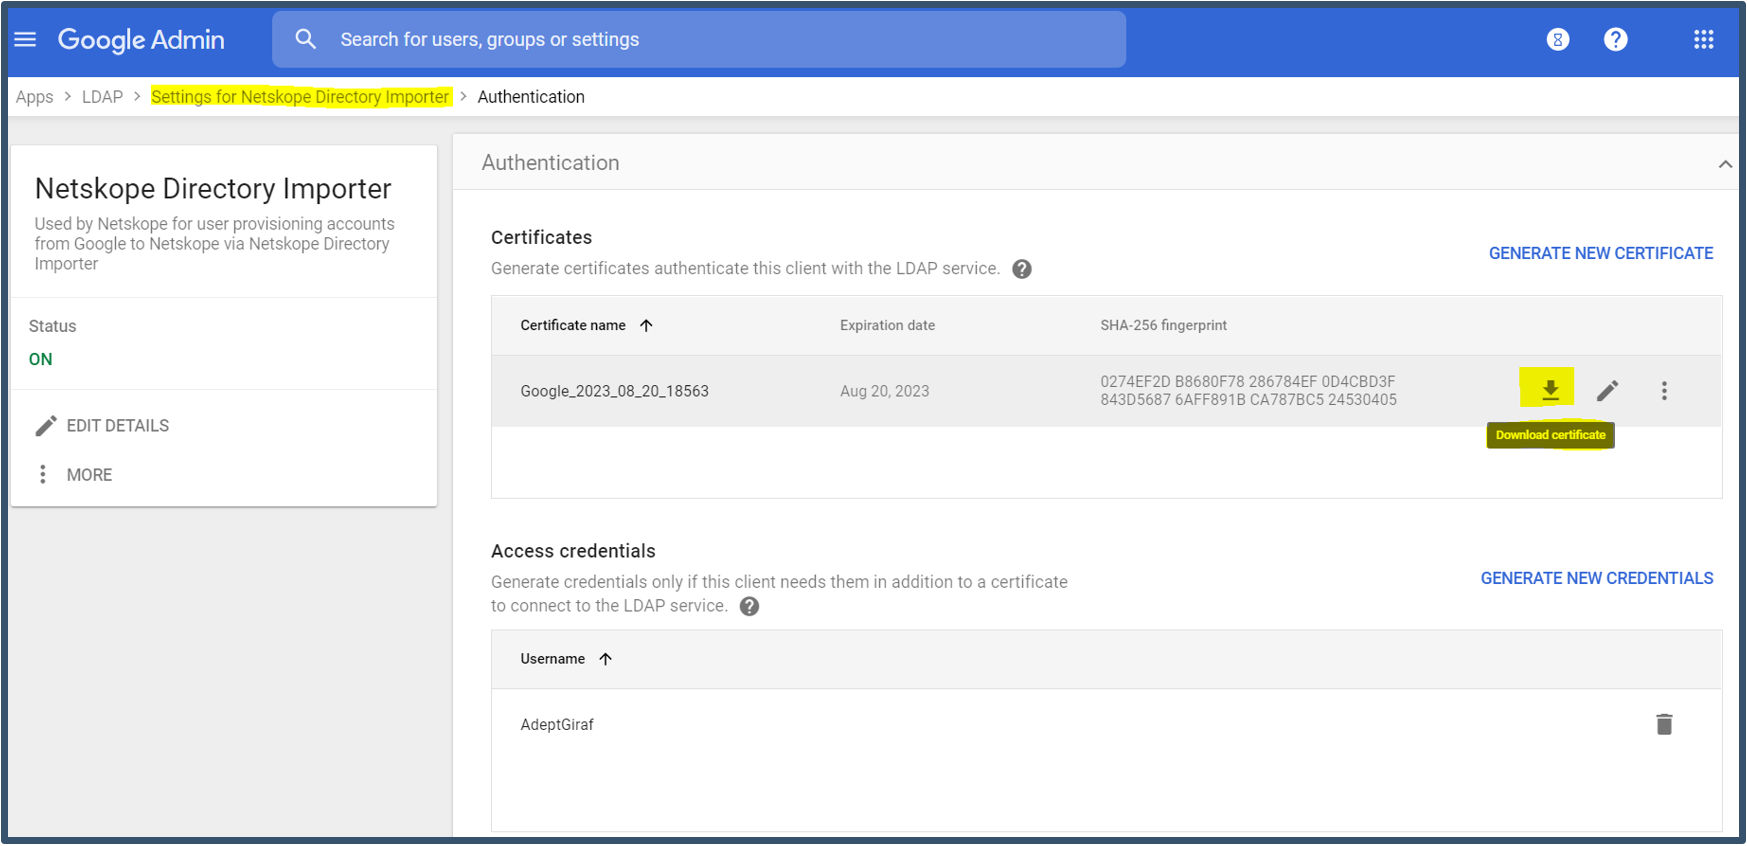 The certificate will contain two files (.crt & .key) 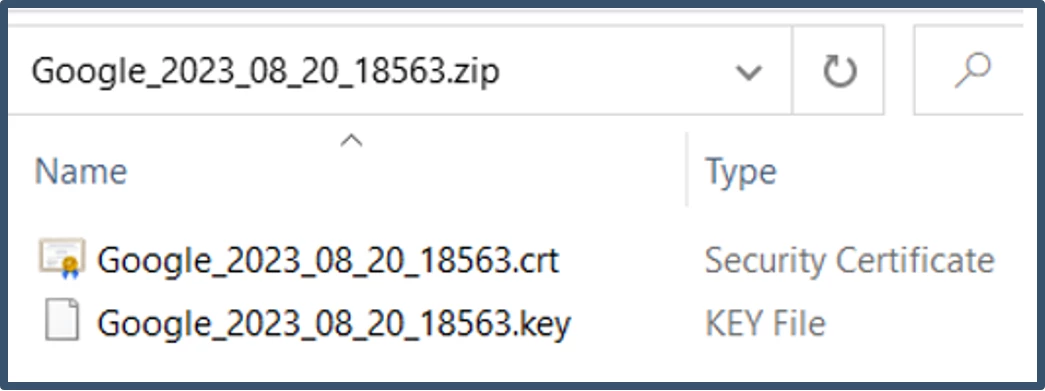 Then go back to Settings for Netskope Directory Importer. |
| 15. | Below is final Settings on the dashboard. 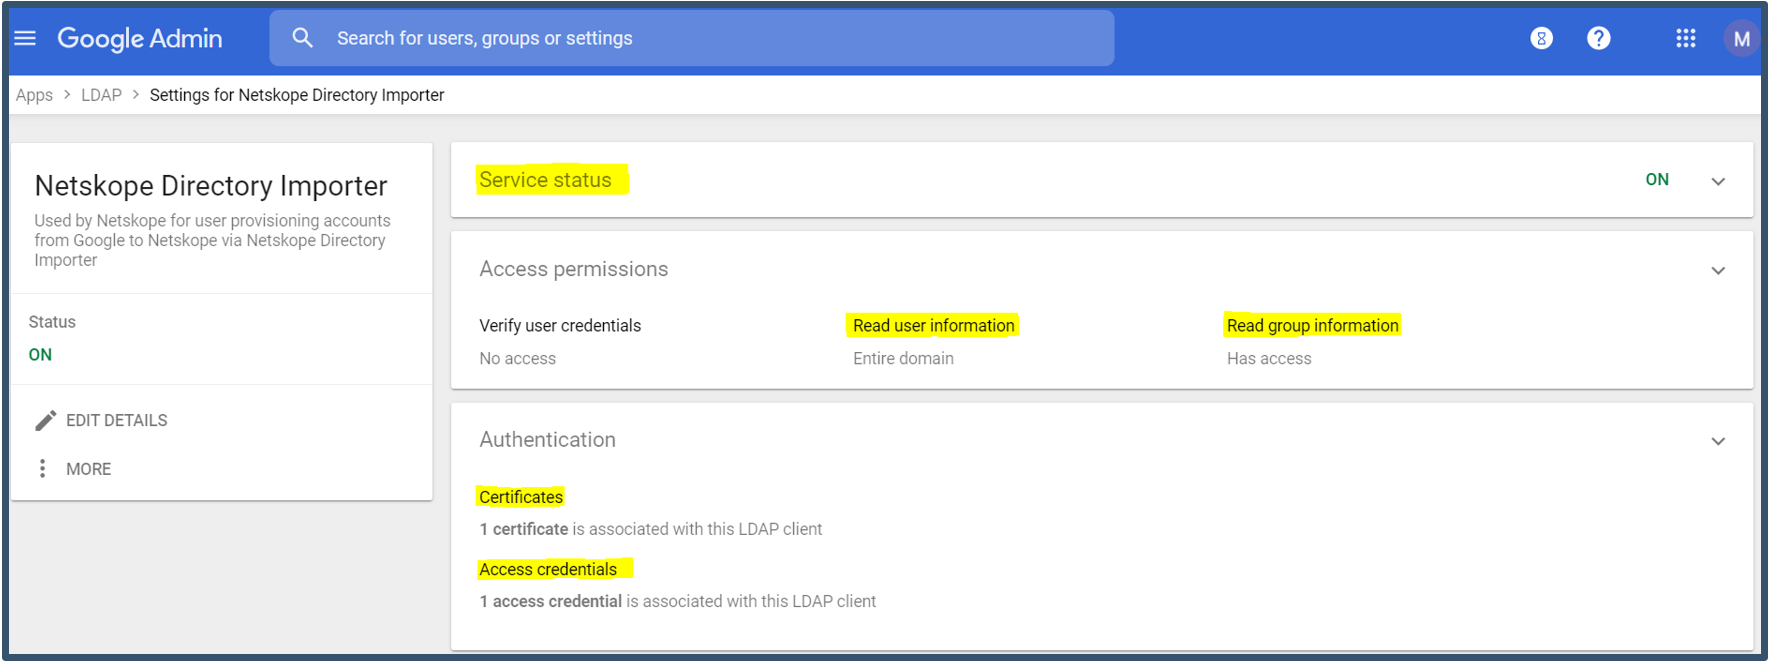
|
| 16. | Secure LDAP configuration on Google Cloud Identity has been completed. |
C. Convert .CRT & .Key Certificate to p12 Format
| Step | Task |
| 17. | This step converts the google certificates into .p12 format which can be imported into a Windows operating system. You need openssl or any other similar tool to convert the google certificates into p12 format. Below shows an example of the certs stored in a folder C:\MyCerts and then executing the openssl command to generate .p12 format certificate.Enter a password to secure the new certificate openssl pkcs12 -inkey C:\MyCerts\gcert.key -in C:\MyCerts\gcert.crt -export -out C:\MyCerts\gcert.p12 
|
| 18. | .p12 certificate generation has been completed. |
D. Import LDAP Client Google Certificates Into Windows
| Step | Task |
| 19. | The Netskope Directory Importer requires the LDAP client certificate to be installed on |
| 20. | Launch mmc.exe > Add/Remove Snap-in. 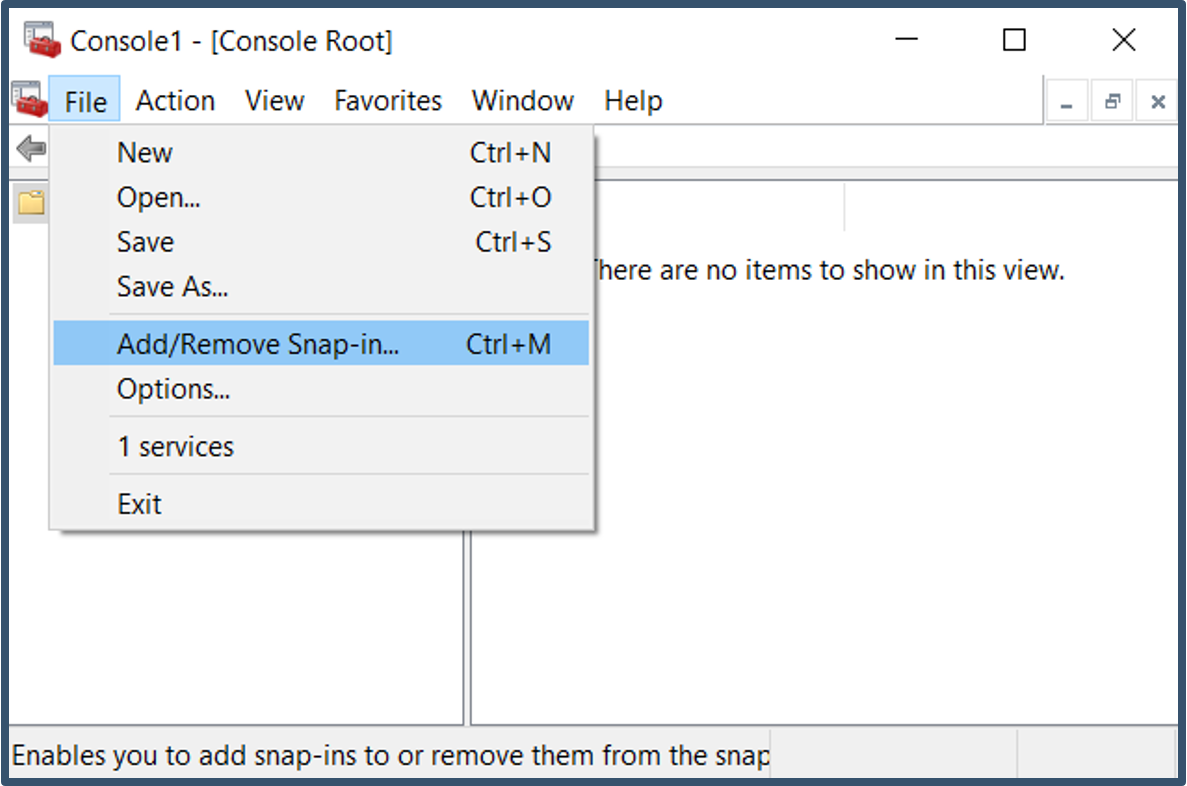
|
| 21. | Select Certificates > Select Add. 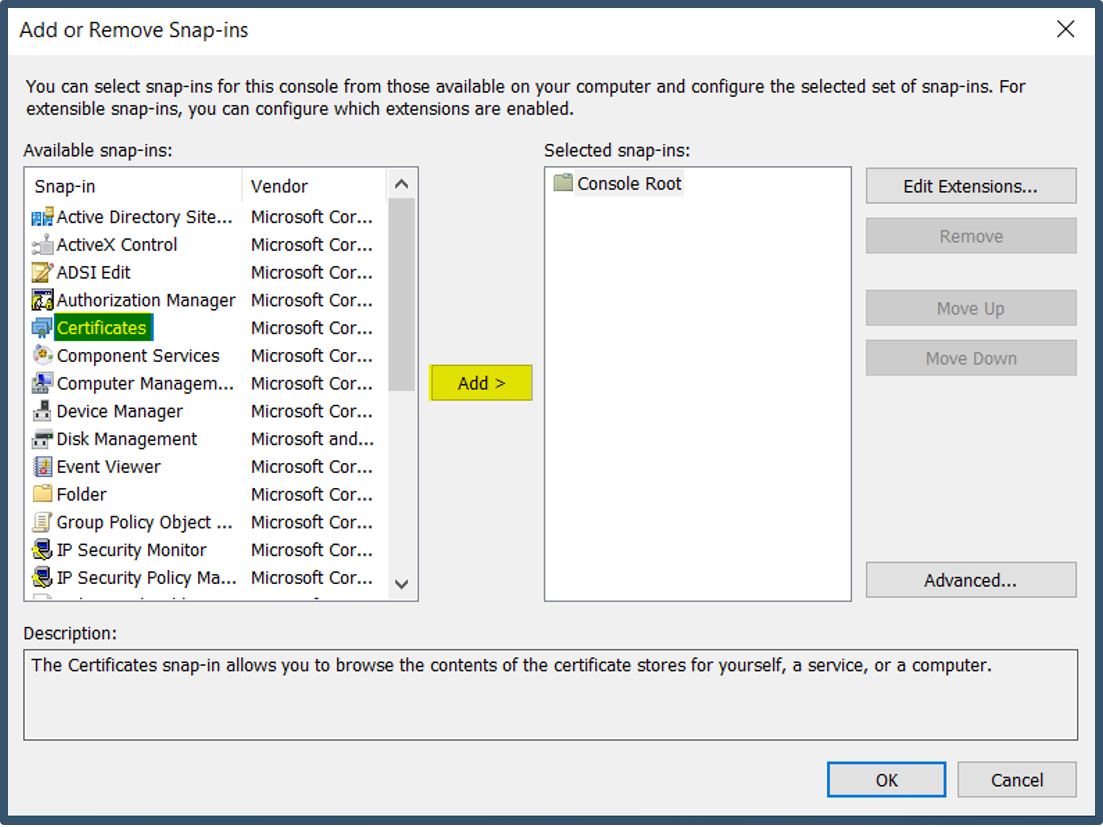
|
| 22. | Add snap-in; select My User account > Click Finish. 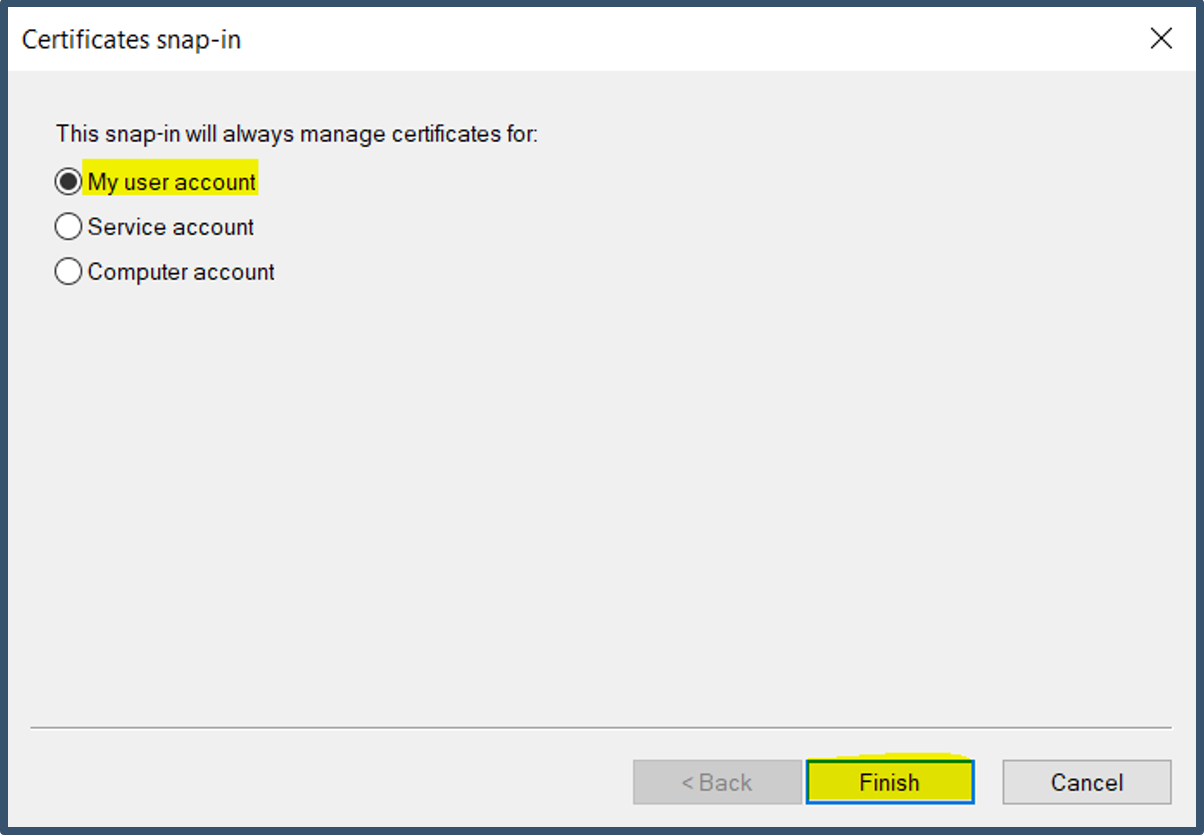
|
| 23. | Snap-ins get added > Click OK. 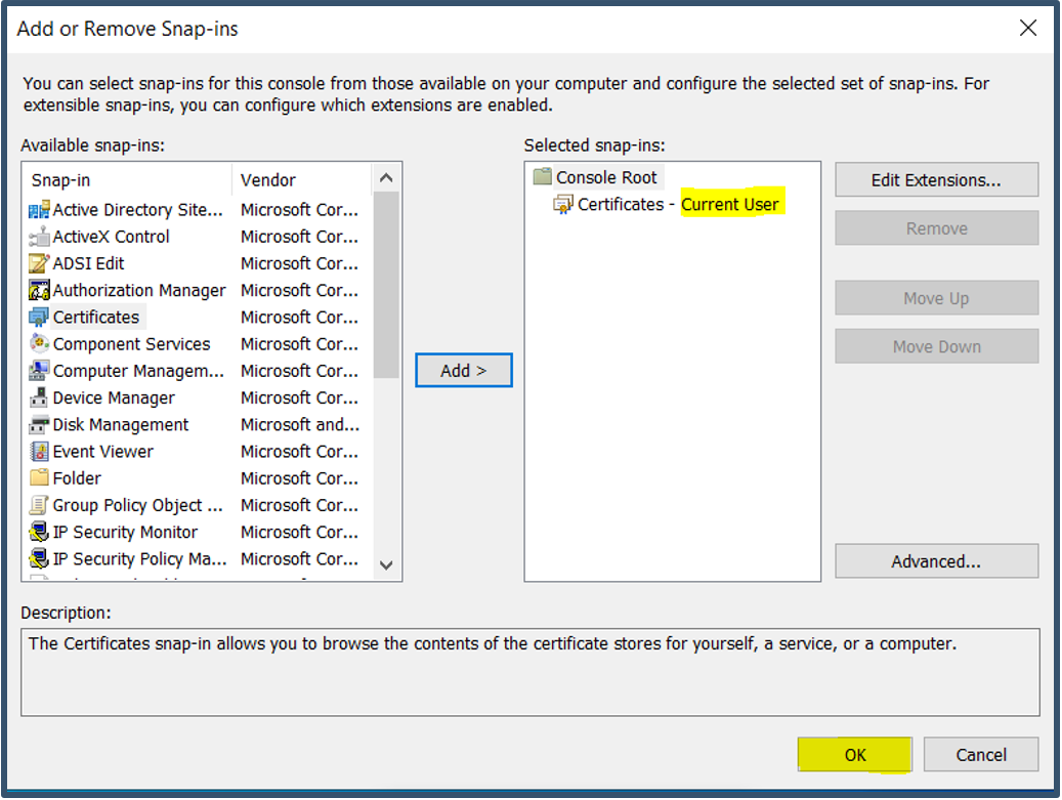 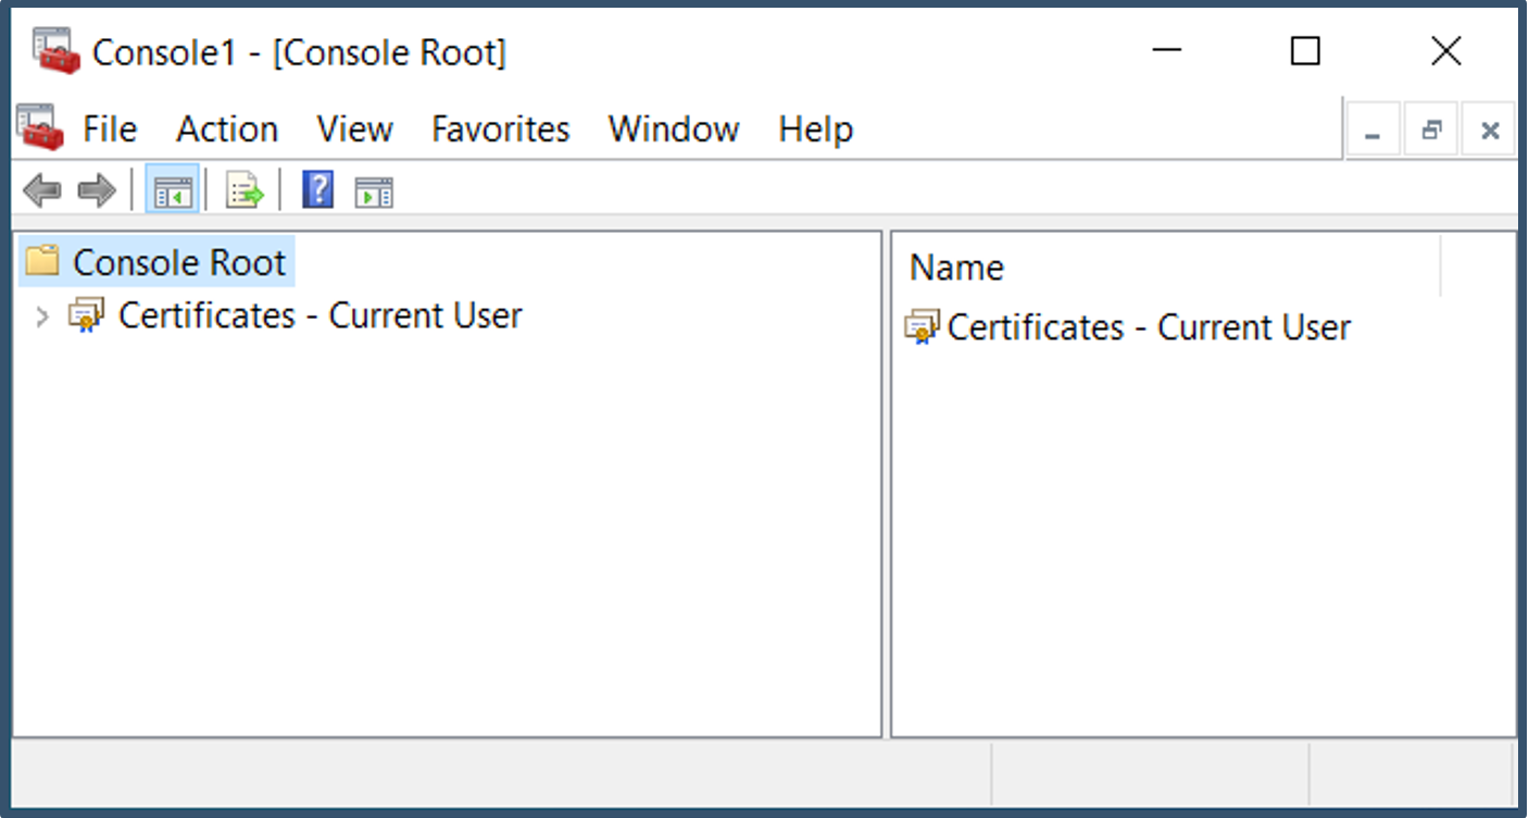
|
| 24. | Go to Certificates – Current User > right-click Personal > All Tasks > Import. 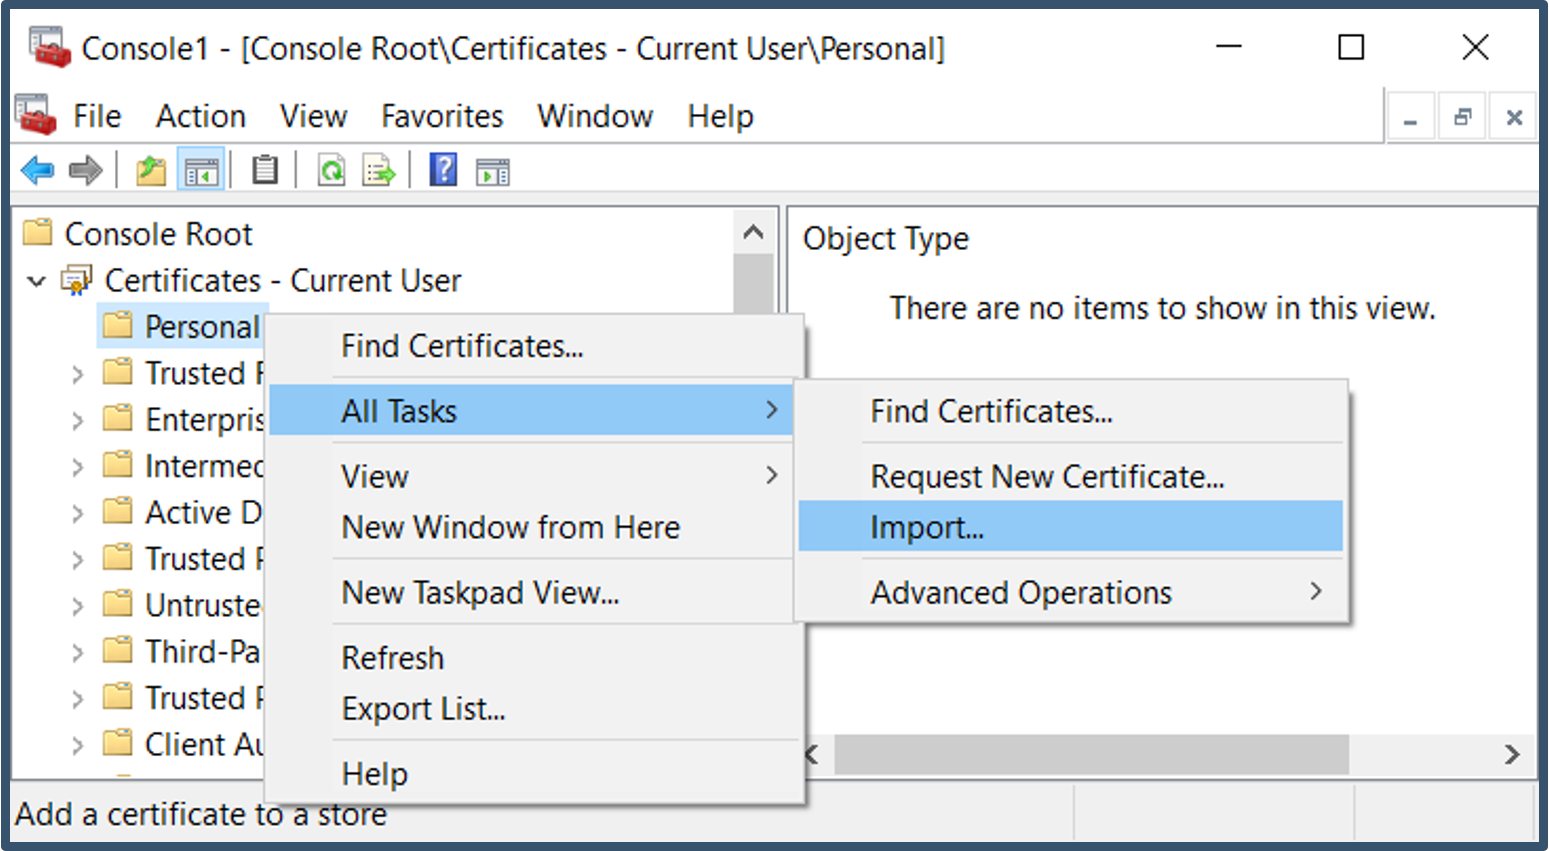
|
| 25. | Current User will be pre-selected > Click Next. 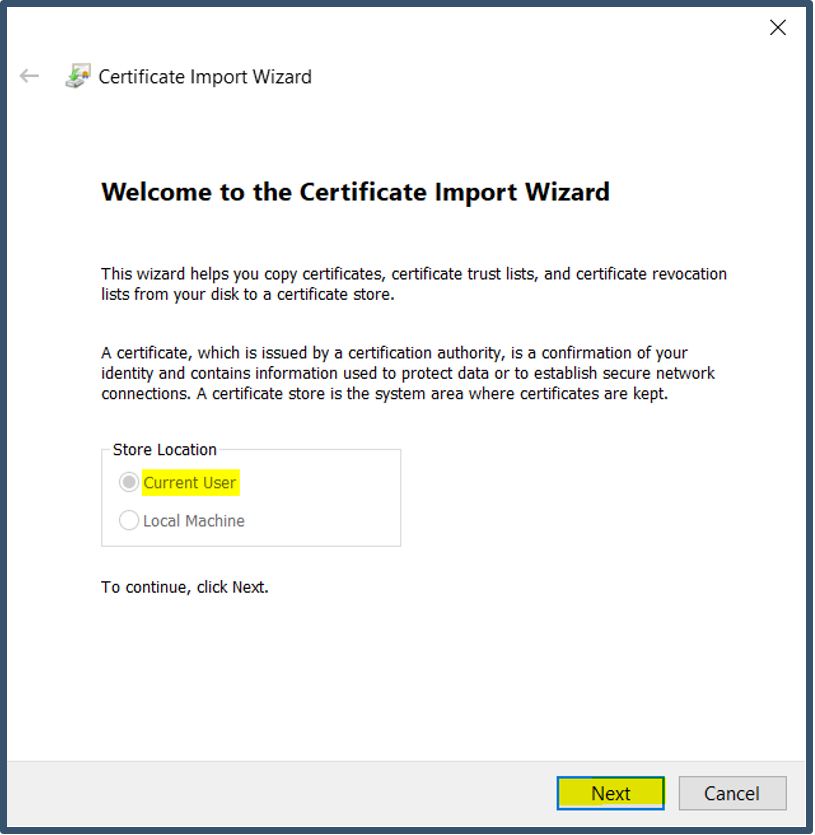
|
| 26. | Browse .p12 google certificate > Click Next. 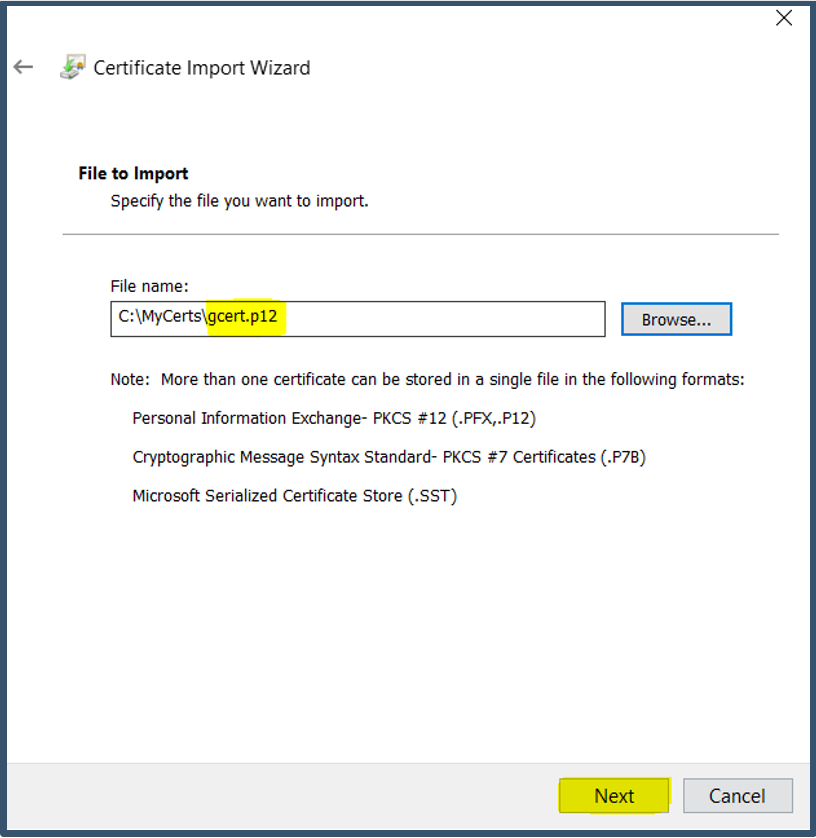
|
| 27. | Enter password for the certificate > Click Next. 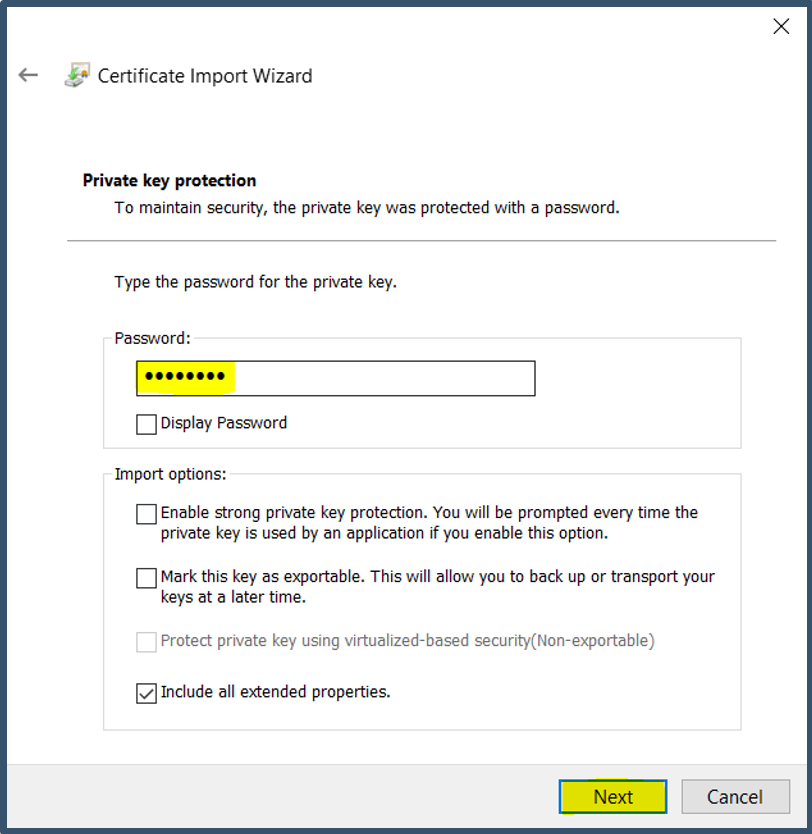
|
| 28. | Select Place all certificates in the following store > Select Personal > Click Next. 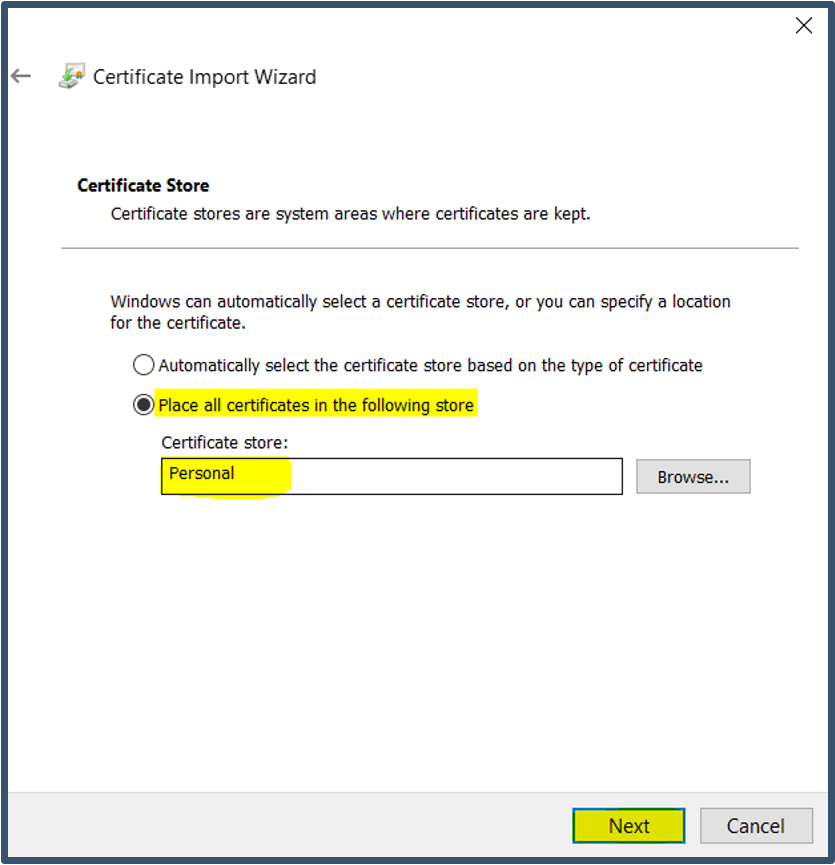
|
| 29. | Click Finish > Click OK. 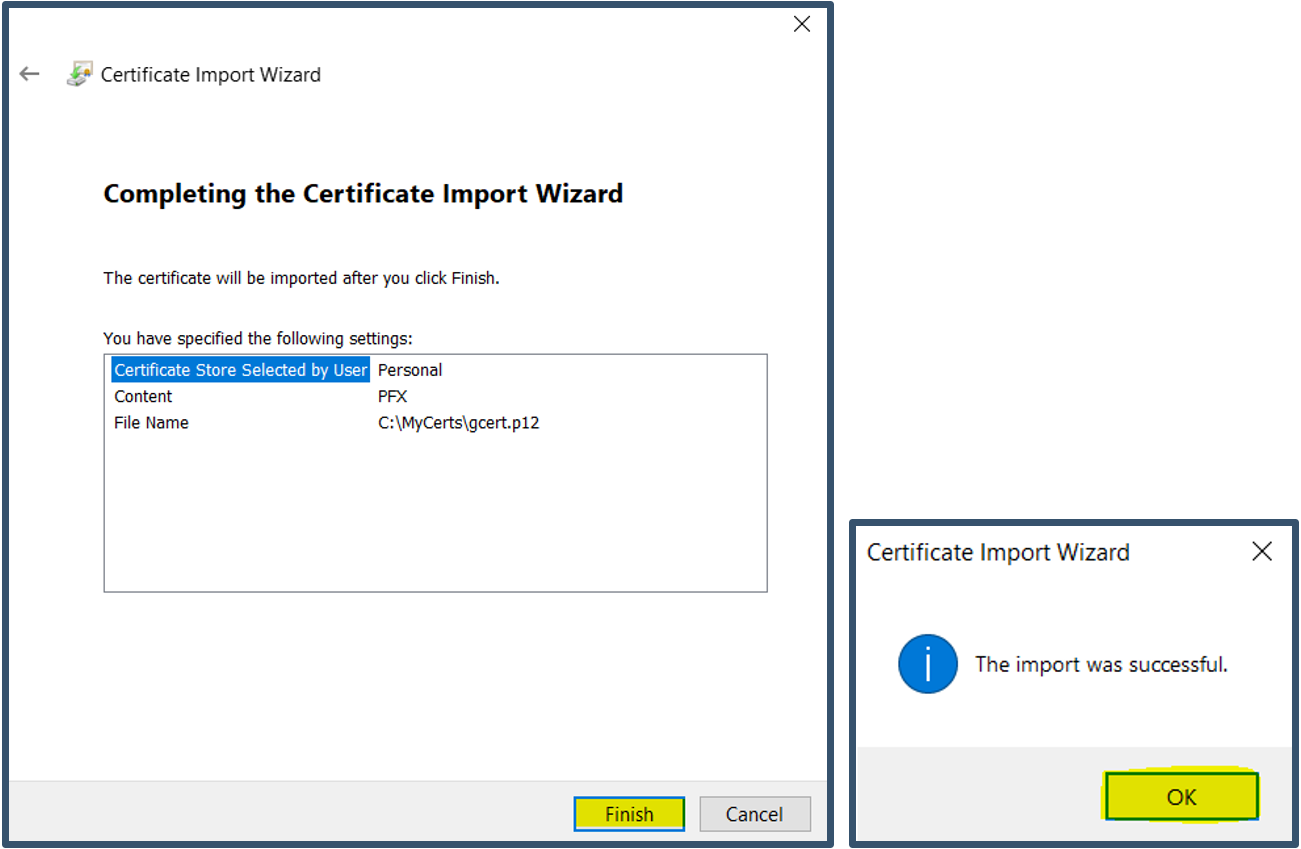
|
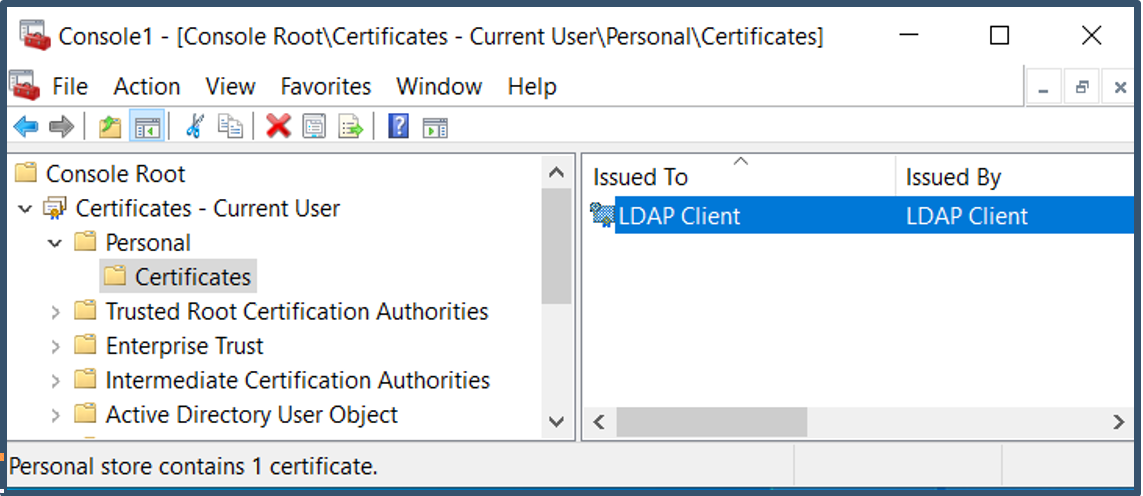
| 30. | LDAP Client certificate will be displayed under Personal > Certificate. 
|
| 31. | Close the console > Click No when prompted. 
|
| 32. | Certificate import completed. a) The Directory Importer service (nsADImporter.exe) and the Directory Importer UI ConfigUtil.exe) will use the LDAP client certificate in the User Personal store to |
E. Install Netskope Directory Importer
| Step | Task |
| 33. | Generate REST API token from the Netskope tenant https://<tenant url> under Settings > Tools > REST API. 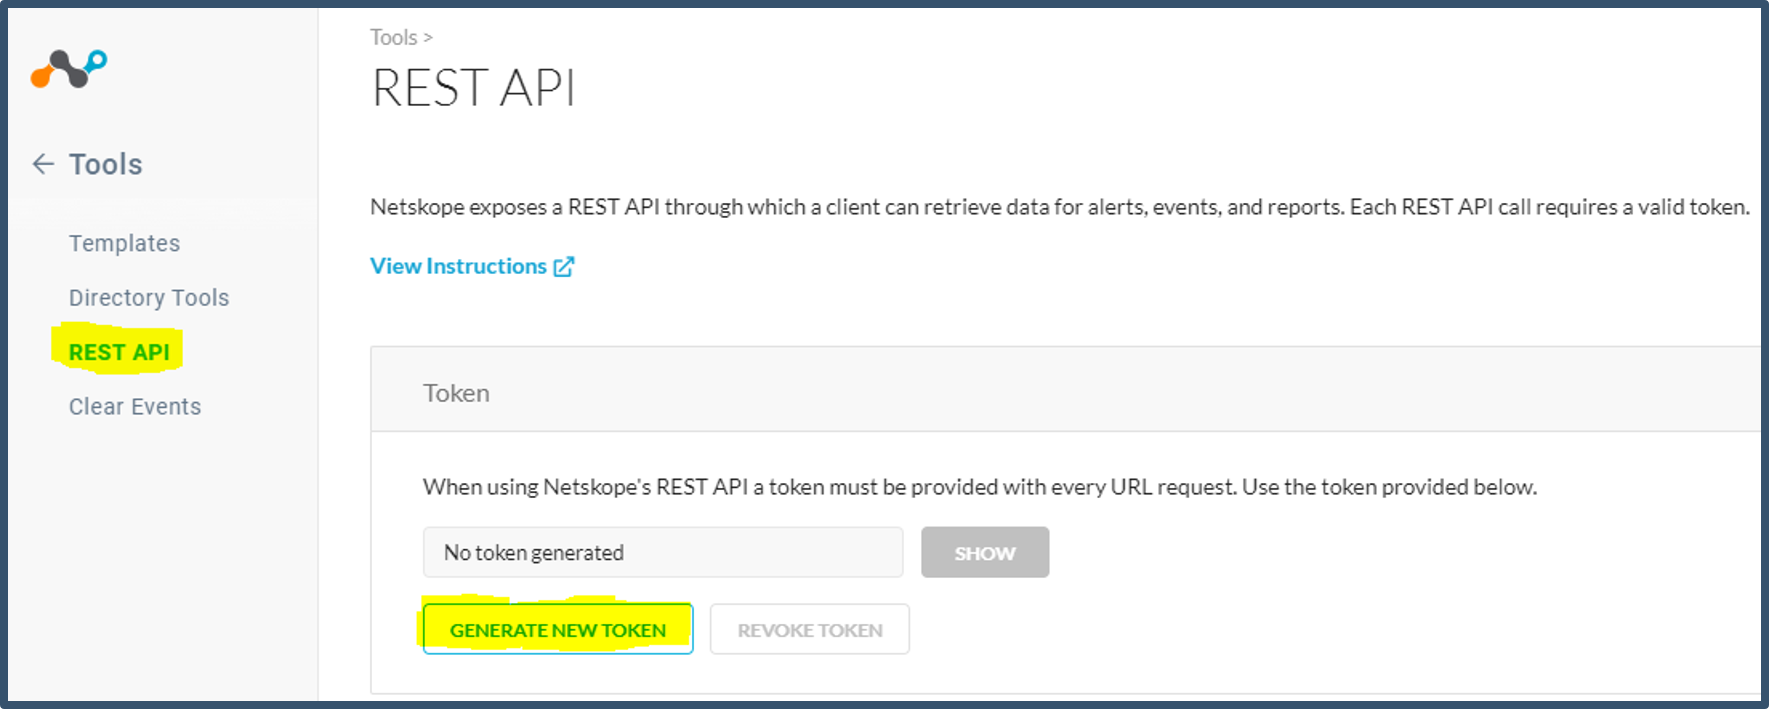
|
| 34. | Click Generate. 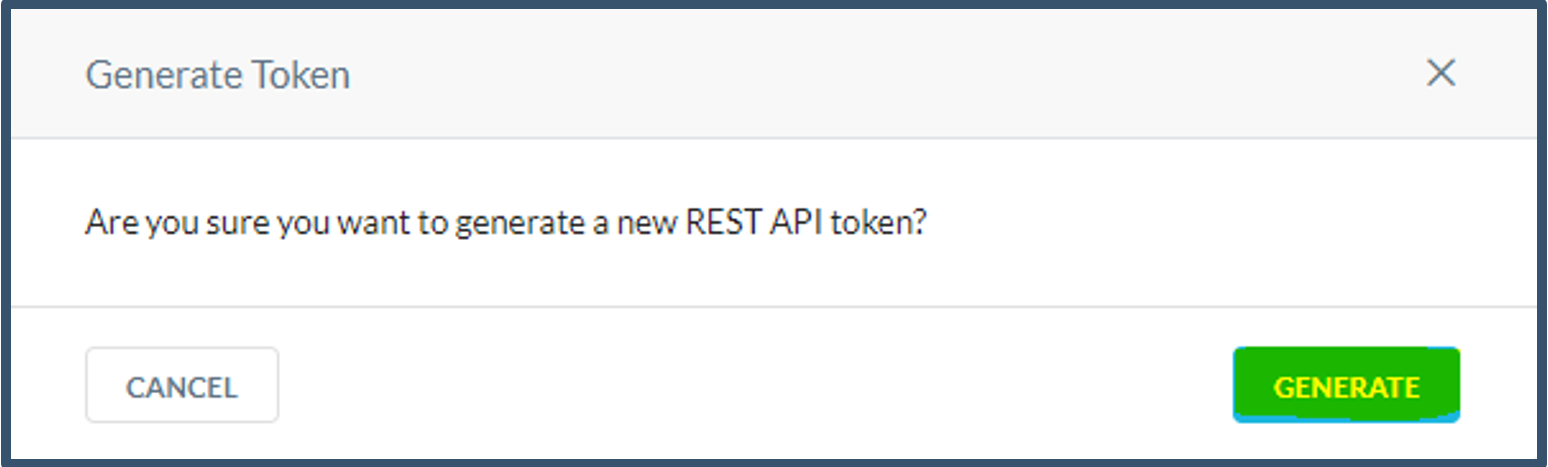
|
| 35. | Refresh page to view generated token. 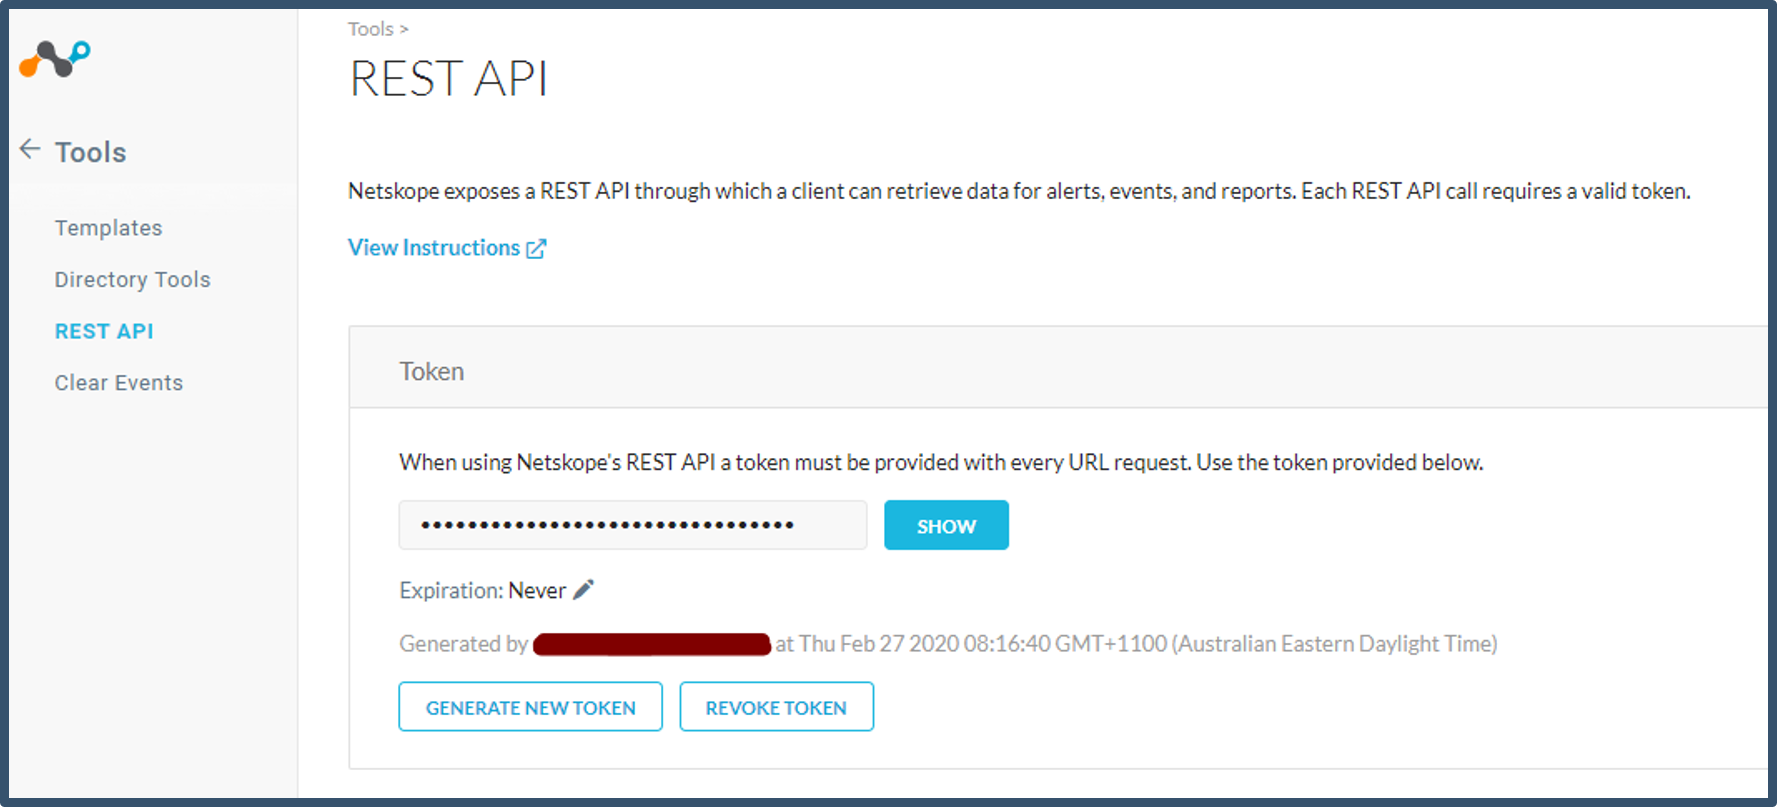
|
| 36. | You have the option to set Token Expiry. Default value is set to Never. 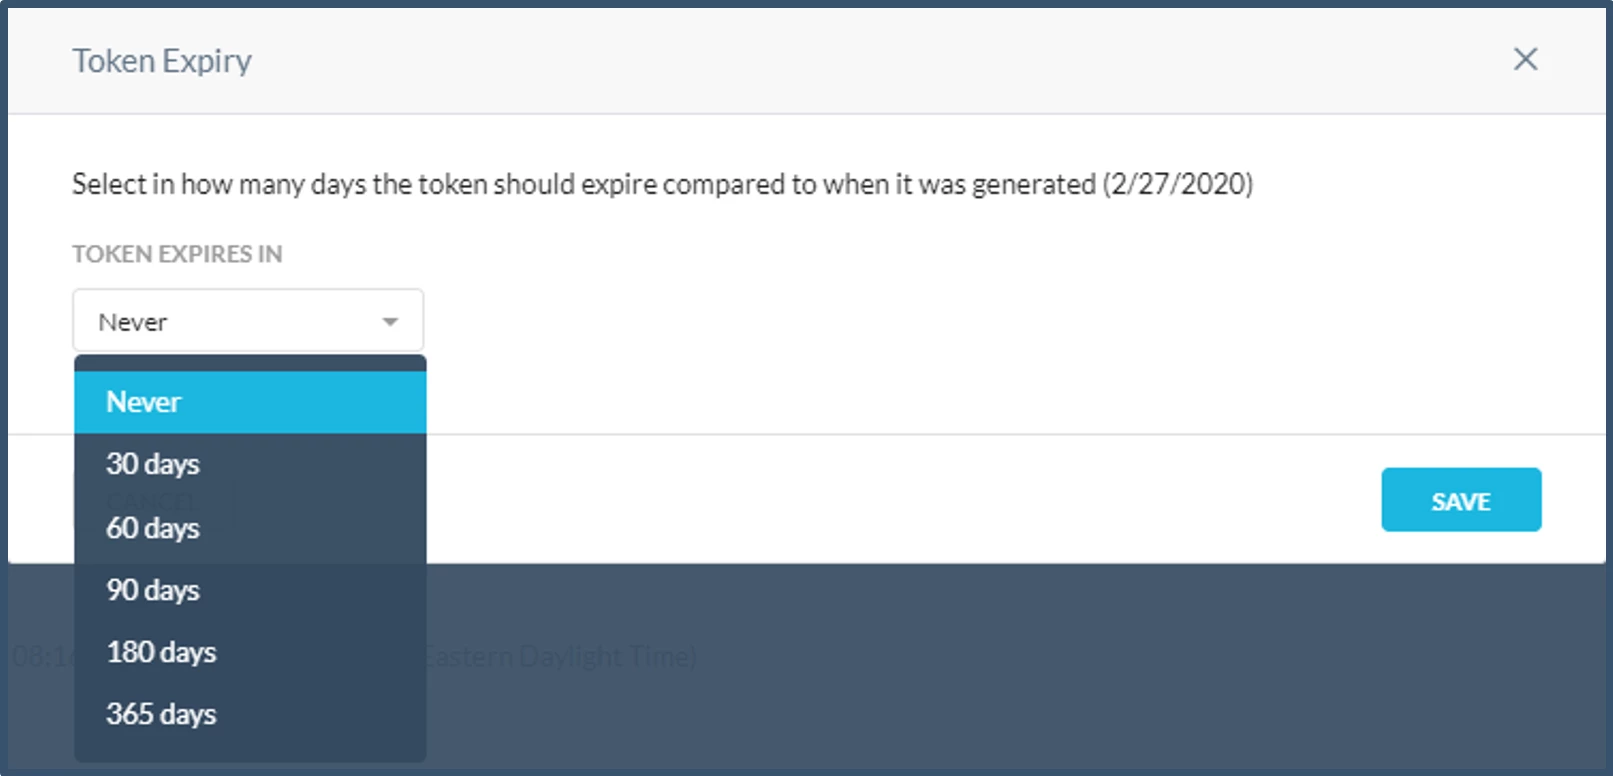 Note: If token expiry is set, then after expiry a new token needs to be generated. The Token is used in AD Importer and REST API calls to download events which will stop working on token expiry until new token details has been generated and updated in AD Importer and REST API configurations. |
| 37. | Download the AD Importer tools from the Netskope tenant. The software is under Settings > Tools > Directory Tools > Download Tools 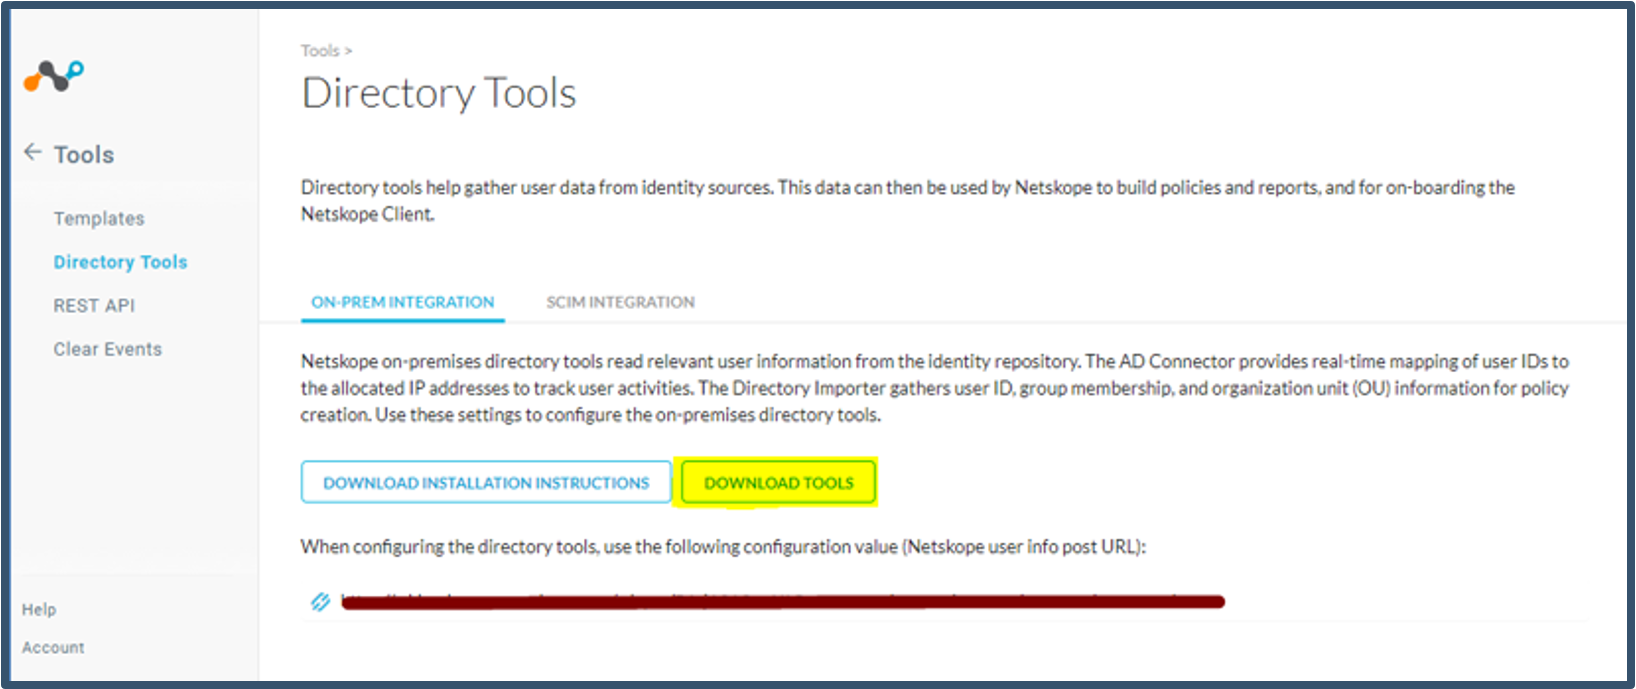
|
| 38. | Next login to the Windows device with local admin credentials. For this purpose, we are using a local admin account for this deployment (e.g. localadmin) |
| 39. | Install Visual C++ 2010 sp1 redistributable package (x64). 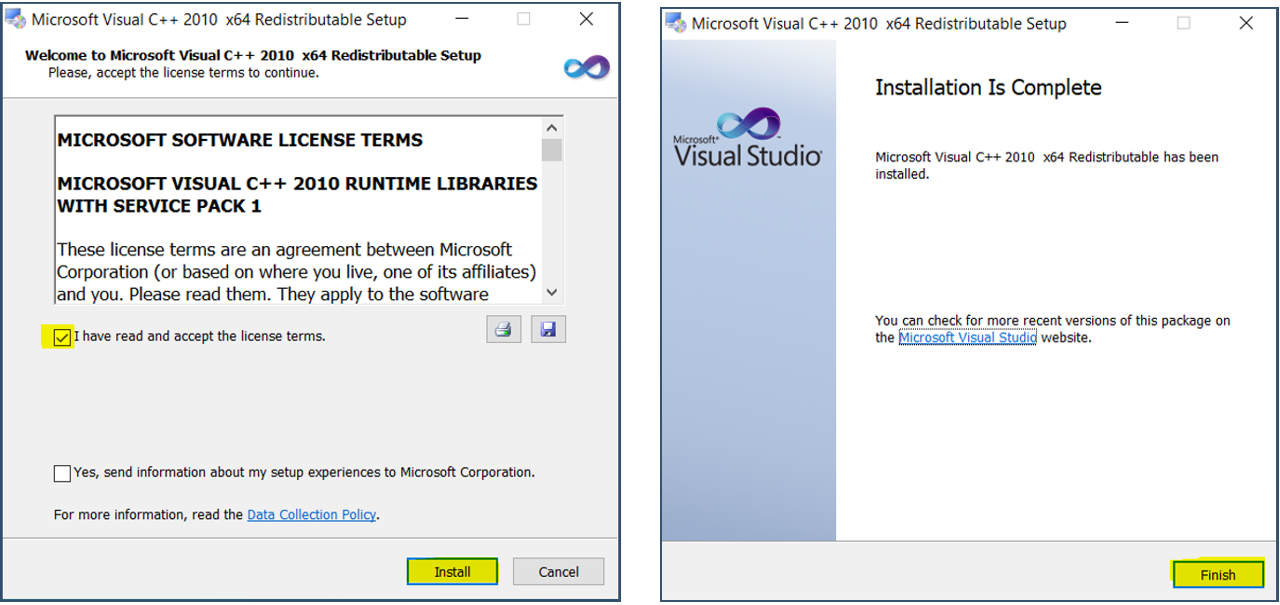
|
| 40. | Next Launch NSAdapter.msi and install Netskope Directory Importer > Click Next. 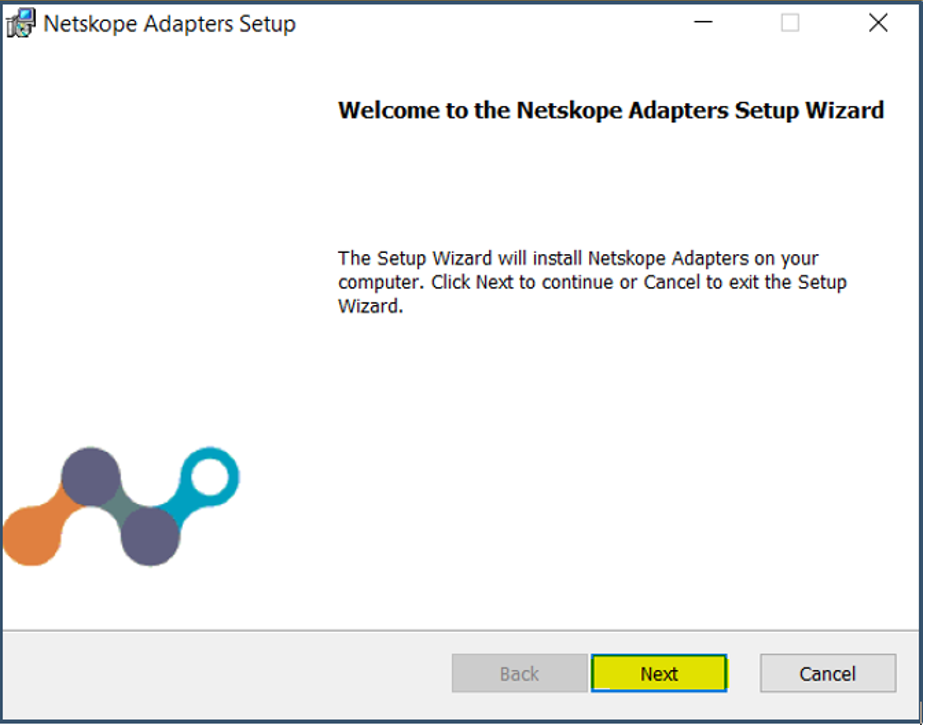
|
| 41. | Enter the local admin account (.\<local admin account> format) and password > Click Next 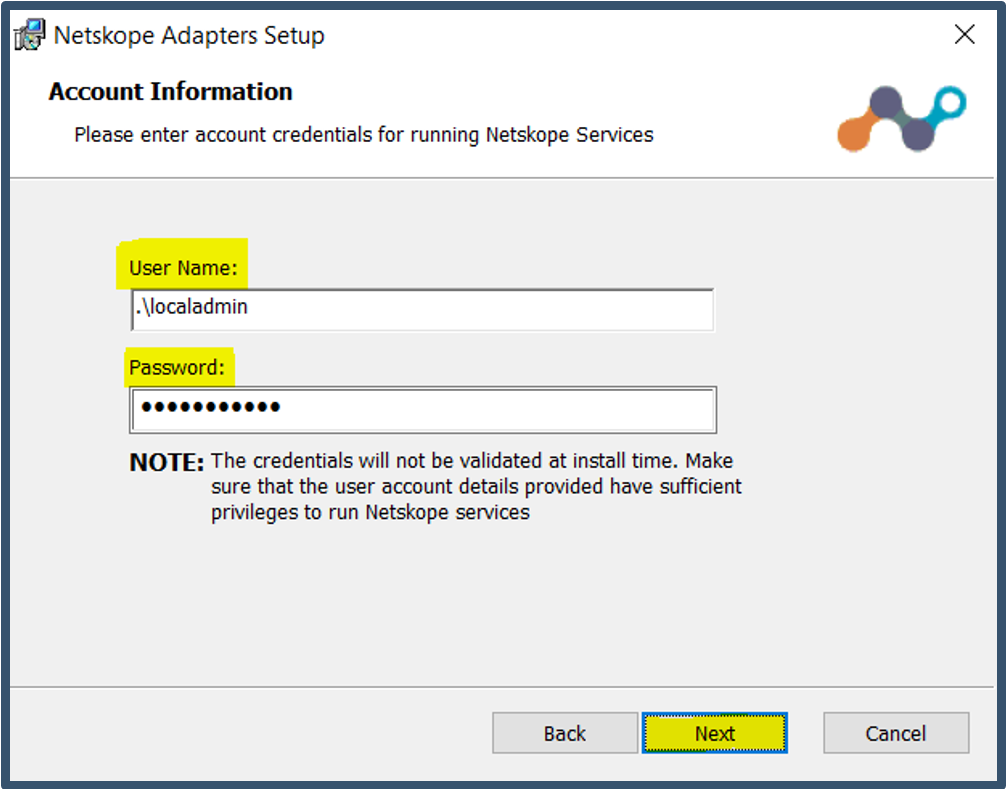
|
| 42. | Select Directory Importer > Click Install. 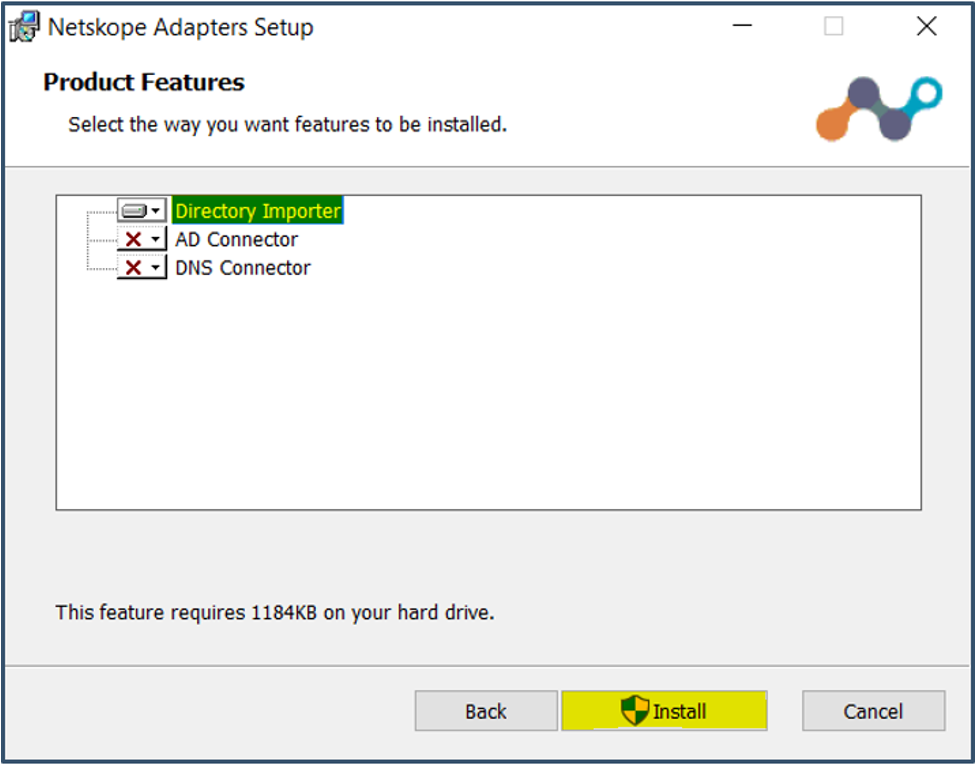
|
| 43. | Click Finish. 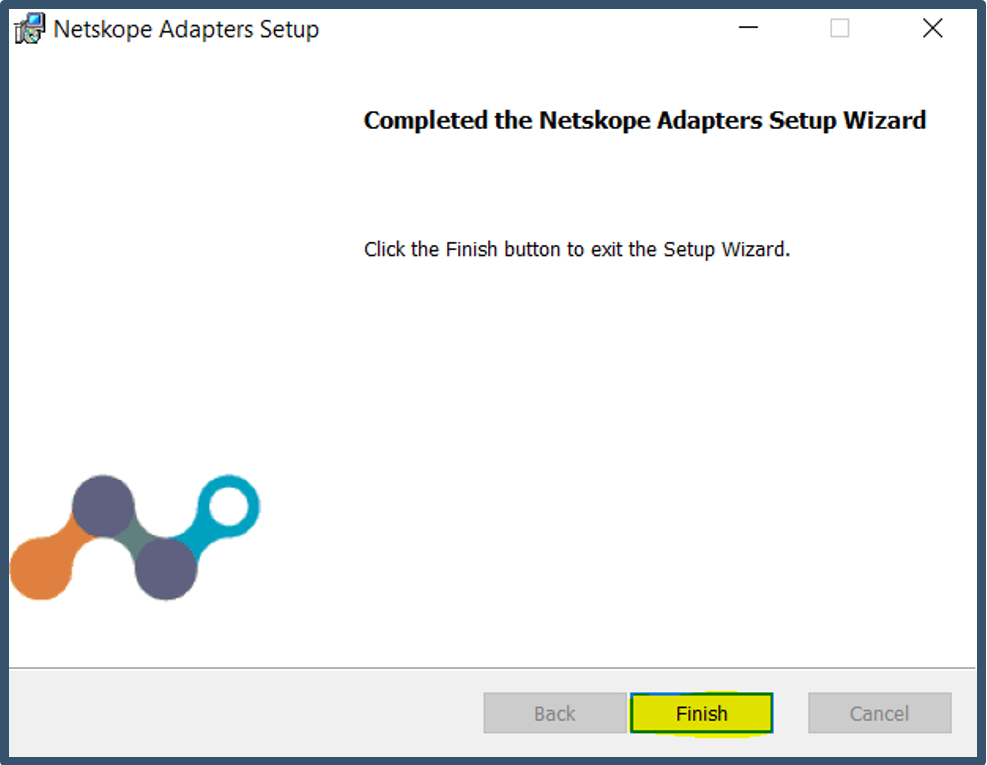
|
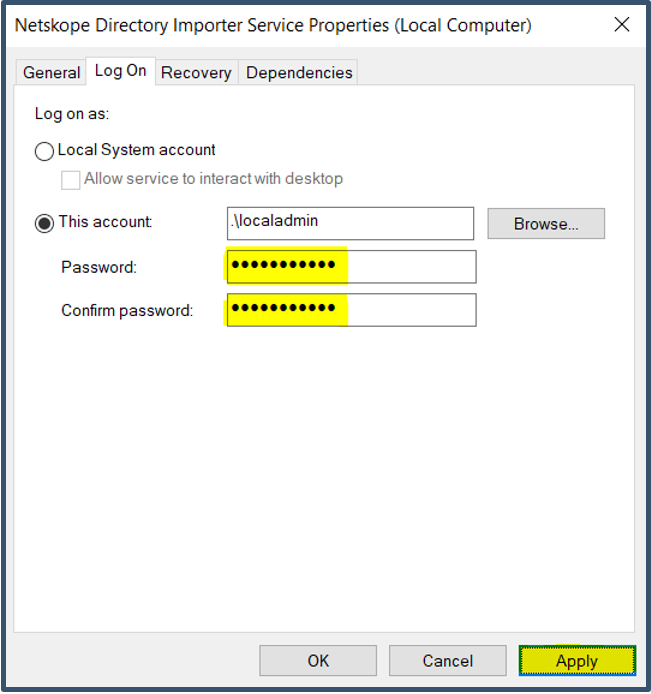
| 44. | Launch Services.msc from the command line. The installation would have registered the Netskope Directory Importer Service under Local Admin account.  Double-click the service > Select Log On tab > Re-enter password > Click Apply. 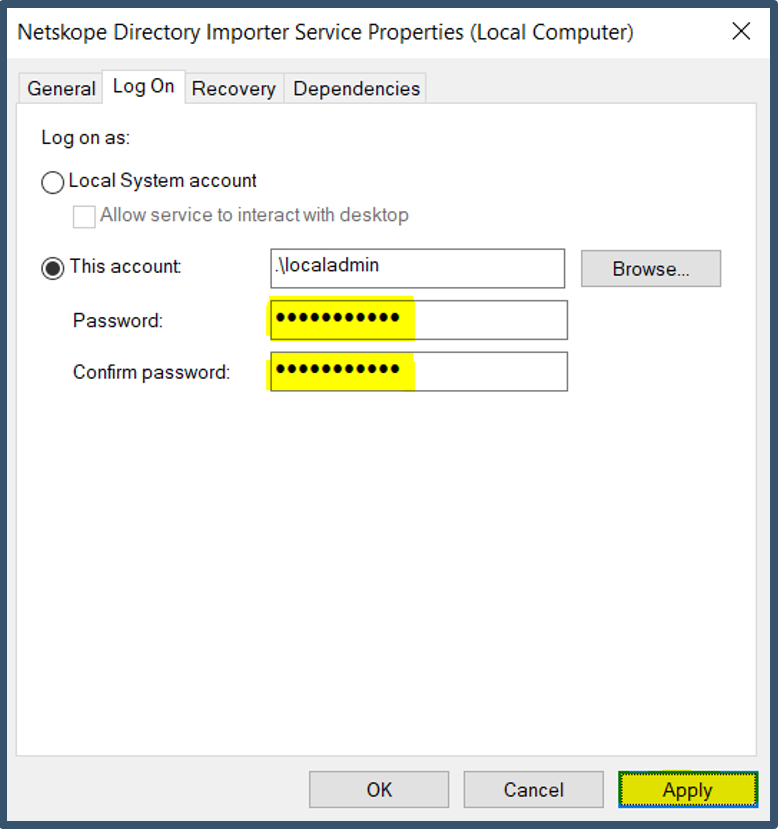
|
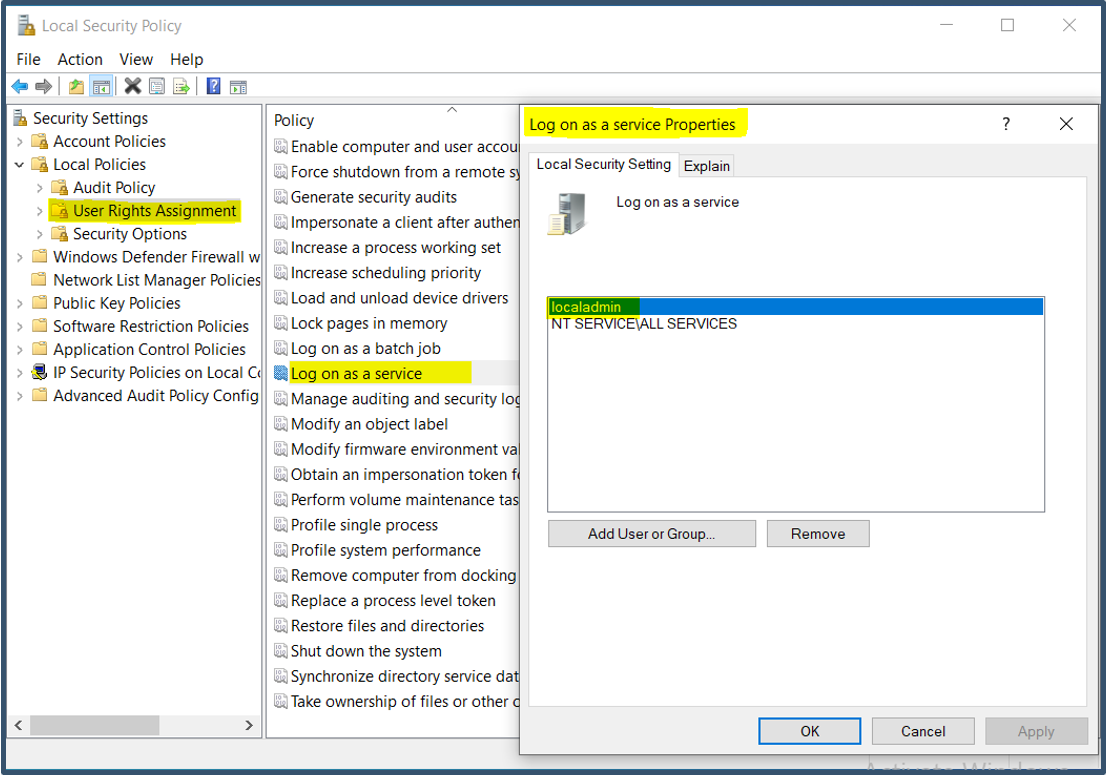
| 45. | This will register the local admin account with “Log On As A Service” privilege. Click OK and close the services console. 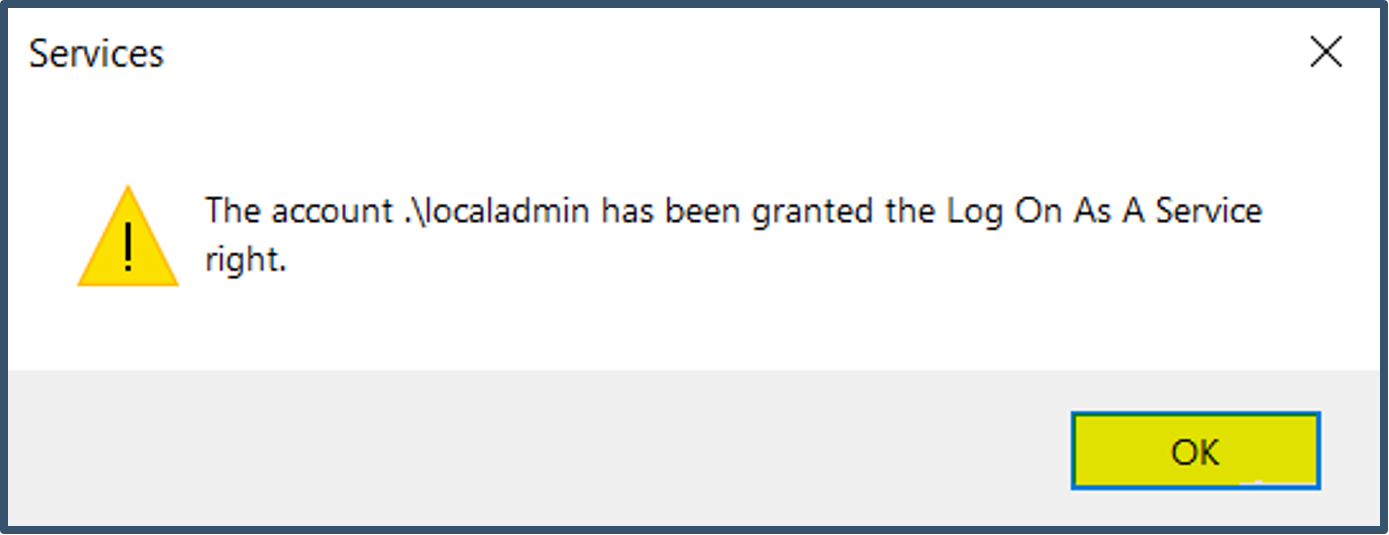
|
| 46. | A Netskope Adapter Configuration Utility icon gets created on the desktop. 
|
F. Configure Netskope Directory Importer
| Item | Task |
| 47. | Launch Netskope Adapter Configuration Utility icon on the desktop. 
|
| 48. | Enter details 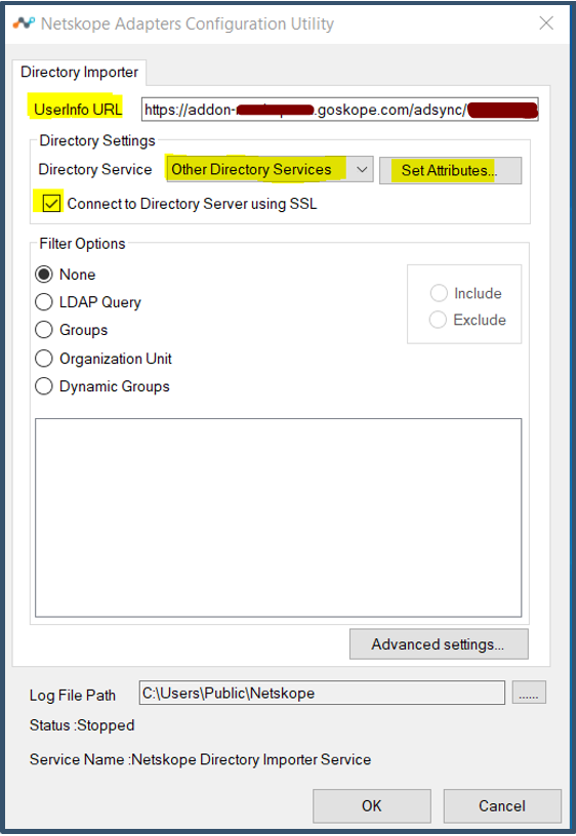
|
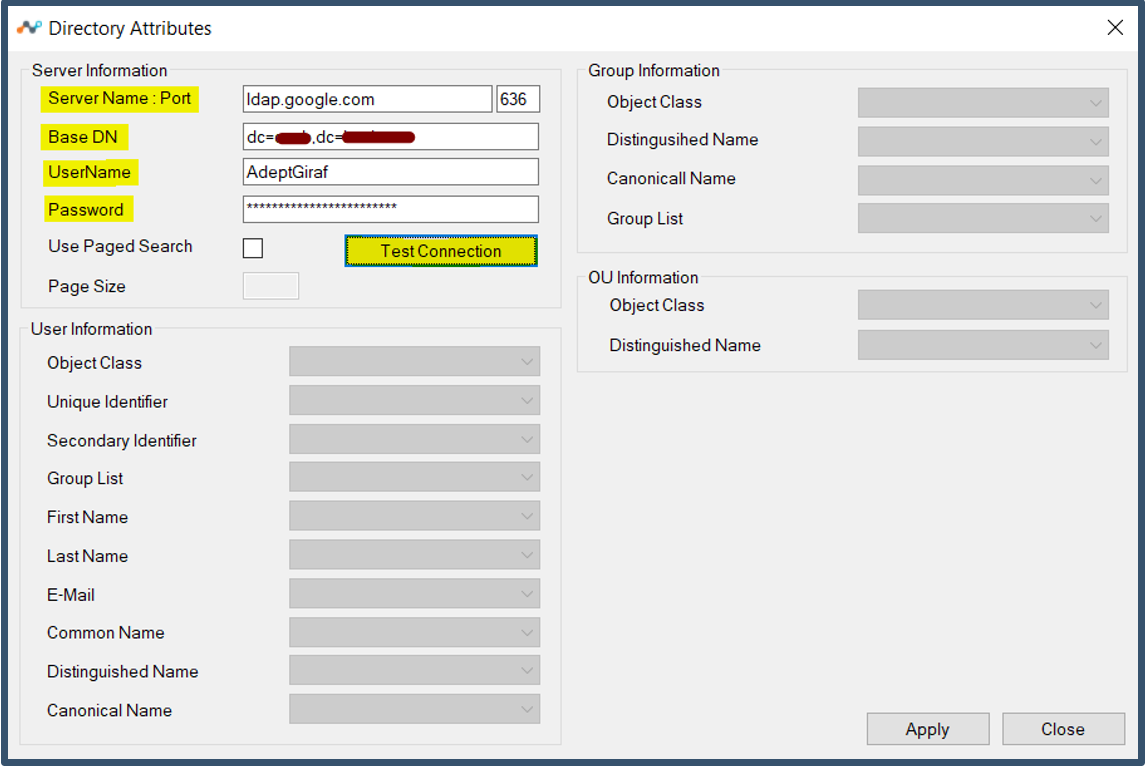
| 49. | Next enter LDAP details to connect to Google Cloud Identity  It connects to google and validates LDAP Client cert and user credentials. 
|
| 50. | When connection is successful you can select attributes. Fill in the details as shown below and click Apply and Close to back to main screen. 
|
| 51. | Select Advanced Settings and set Log Level to Debug. Click Apply and Close. 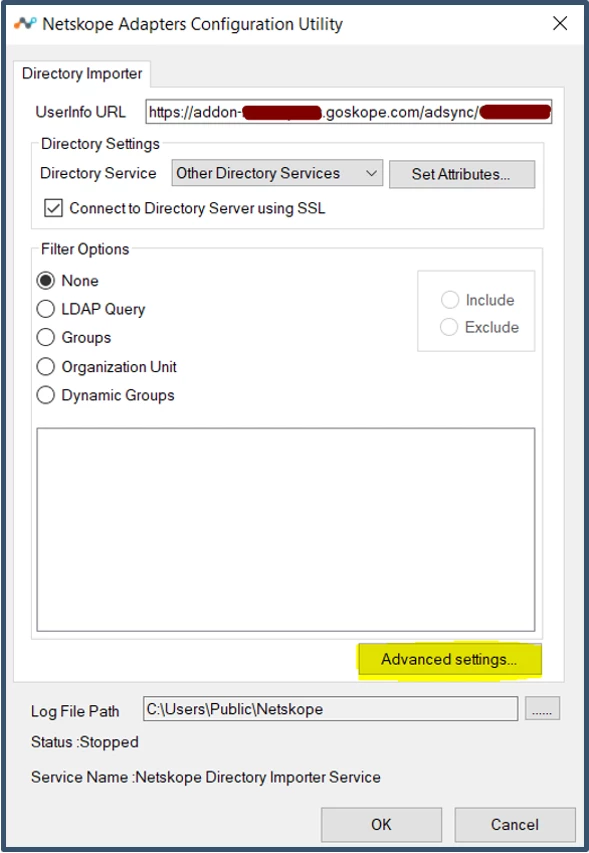  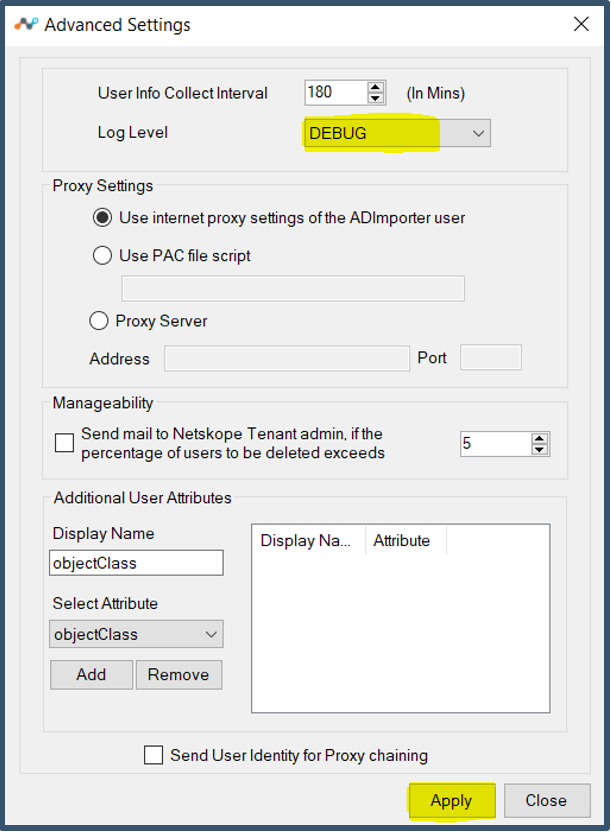
|
| 52. | Next select Dynamic Groups. 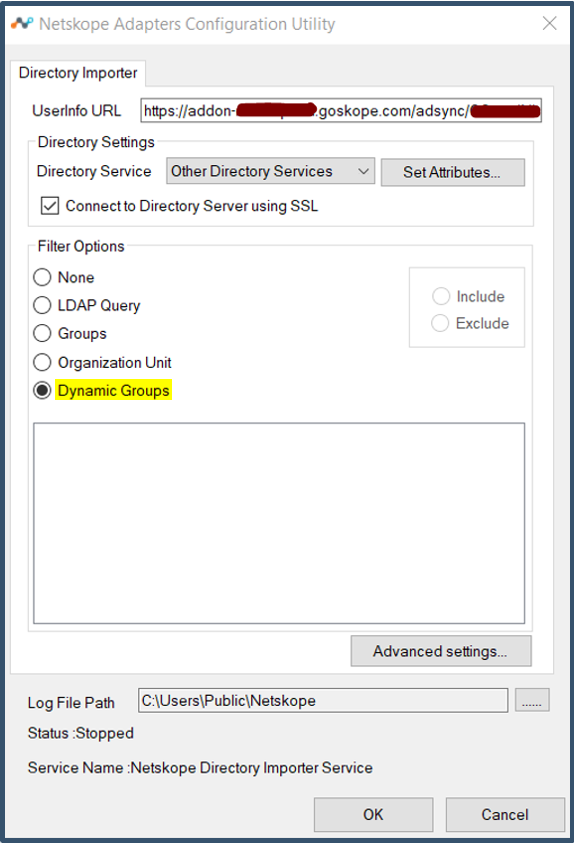
|
| 53. | Example below shows a custom group which will add all users to a custom group. 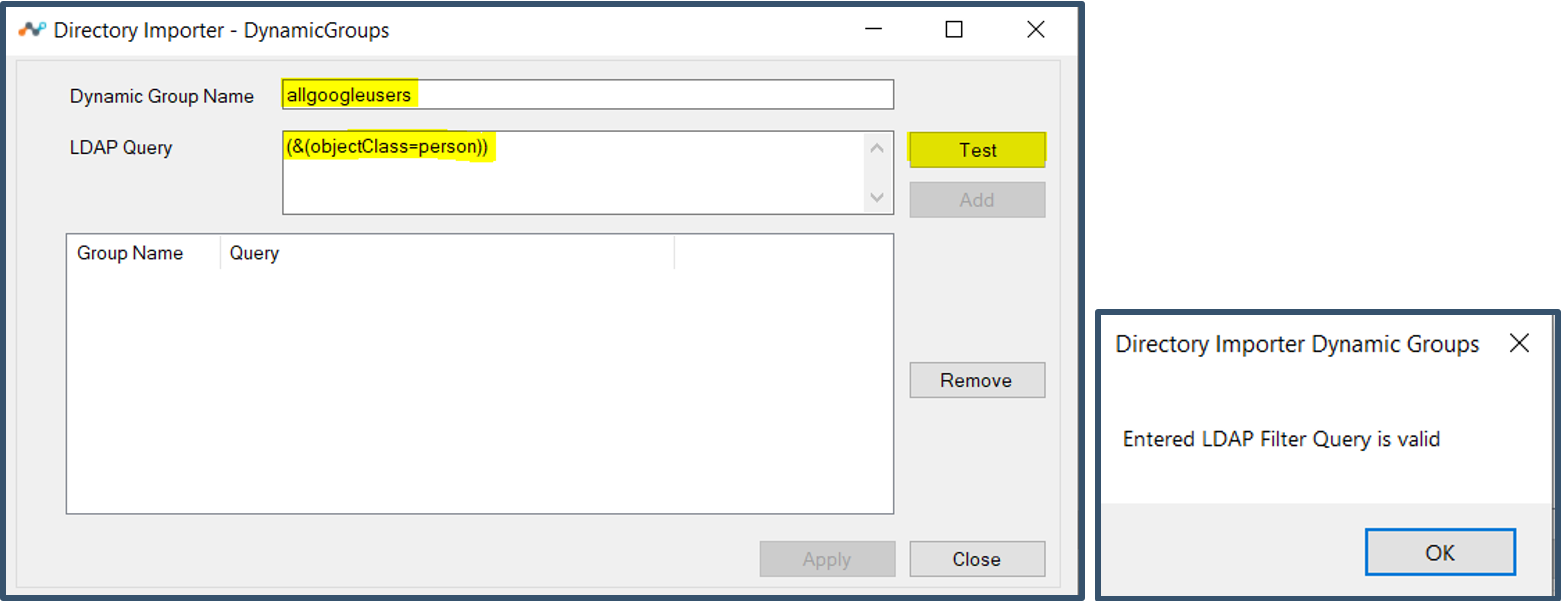
|
| 54. | Click Add. 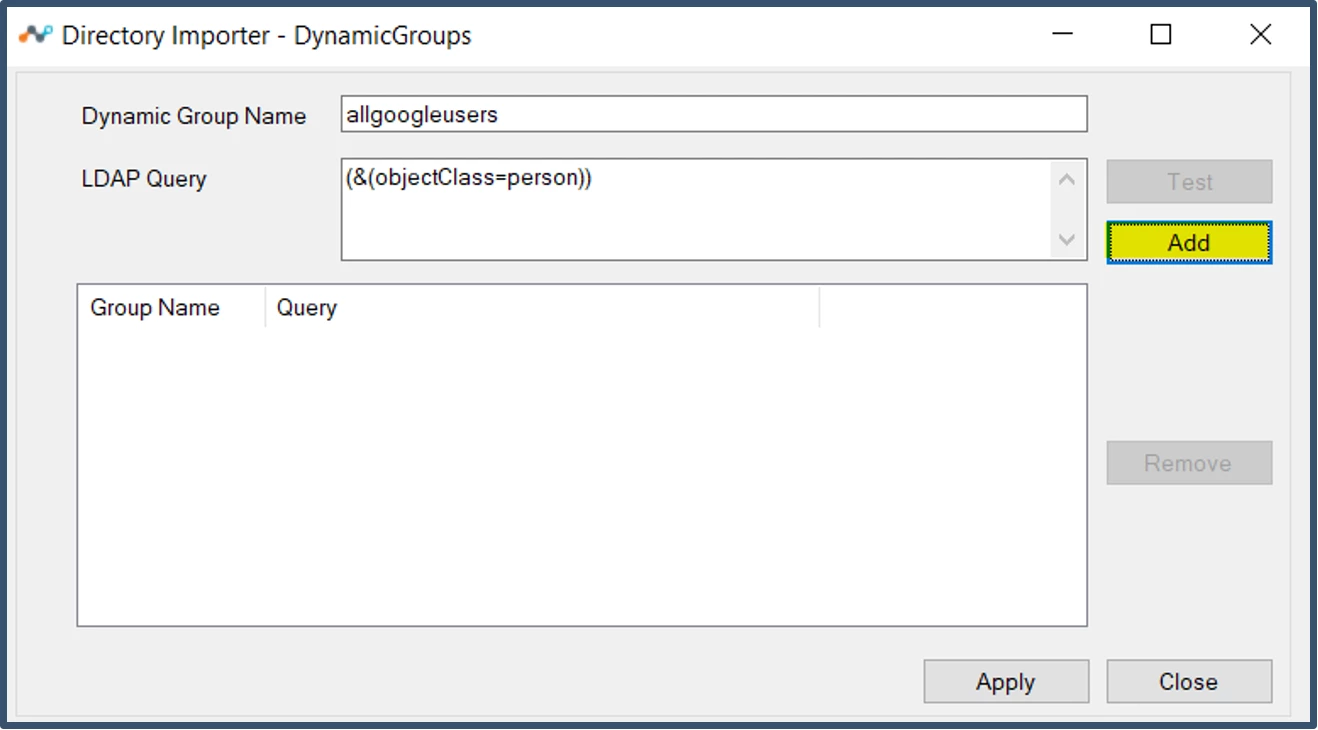
|
| 55. | The query gets added to the list. 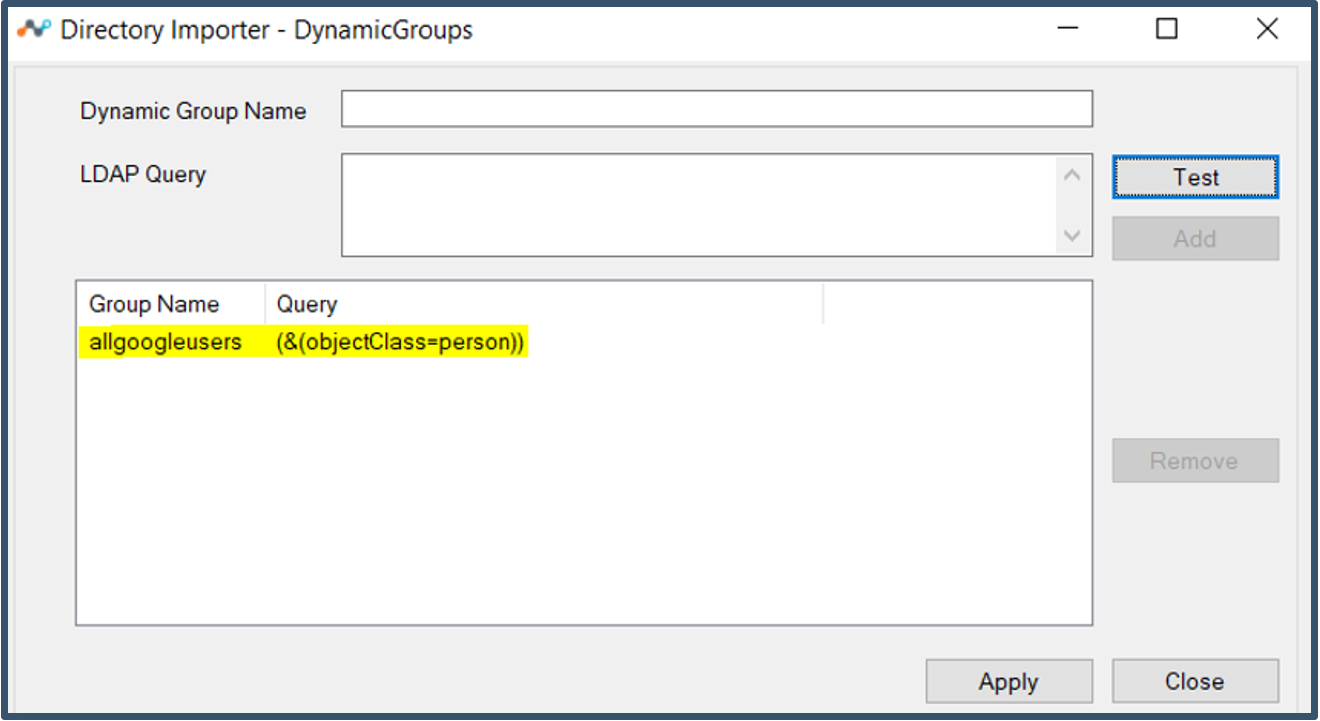
|
| 56. | Next showing an example of adding a group name that was present in Google Identity and map members to the group name. Dynamic Group Name: nsgroup 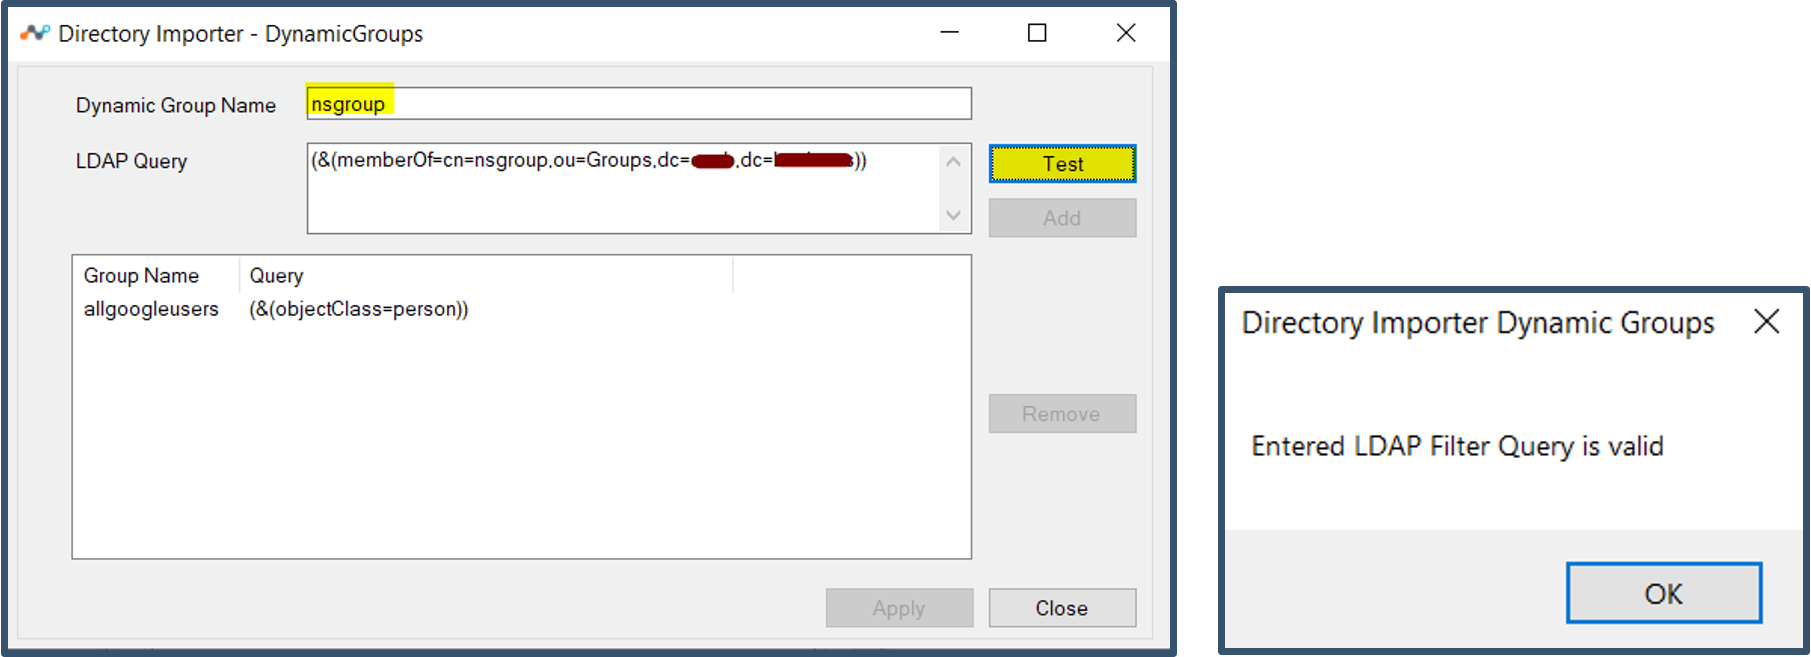 Note: Repeat this step for all the Groups you want to import to Netskope |
| 57. | Click Add. 
|
| 58. | Click Apply and Close. 
|
| 59. | Click OK. 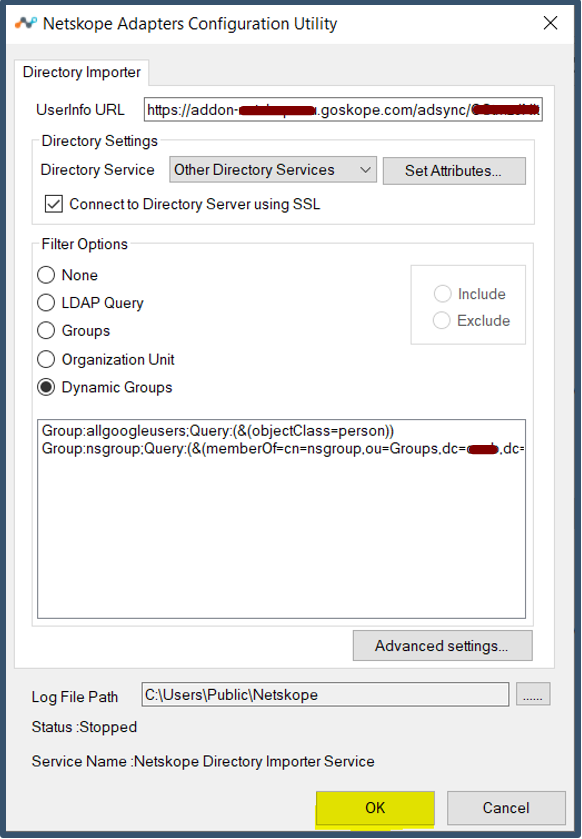
|
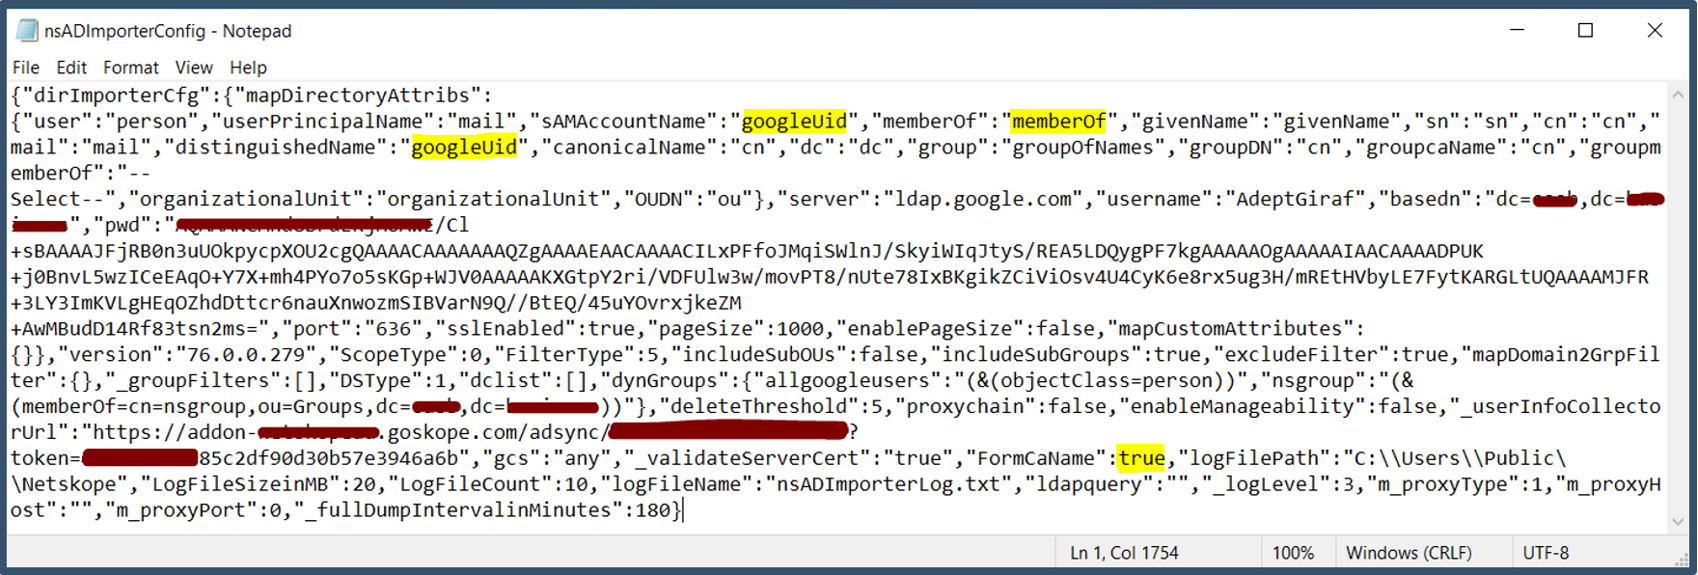
| 60. | Next edit the nsADImporterConfig.json file located under the C:\Program Files\Netskope\NSAdapters\ADImporter. 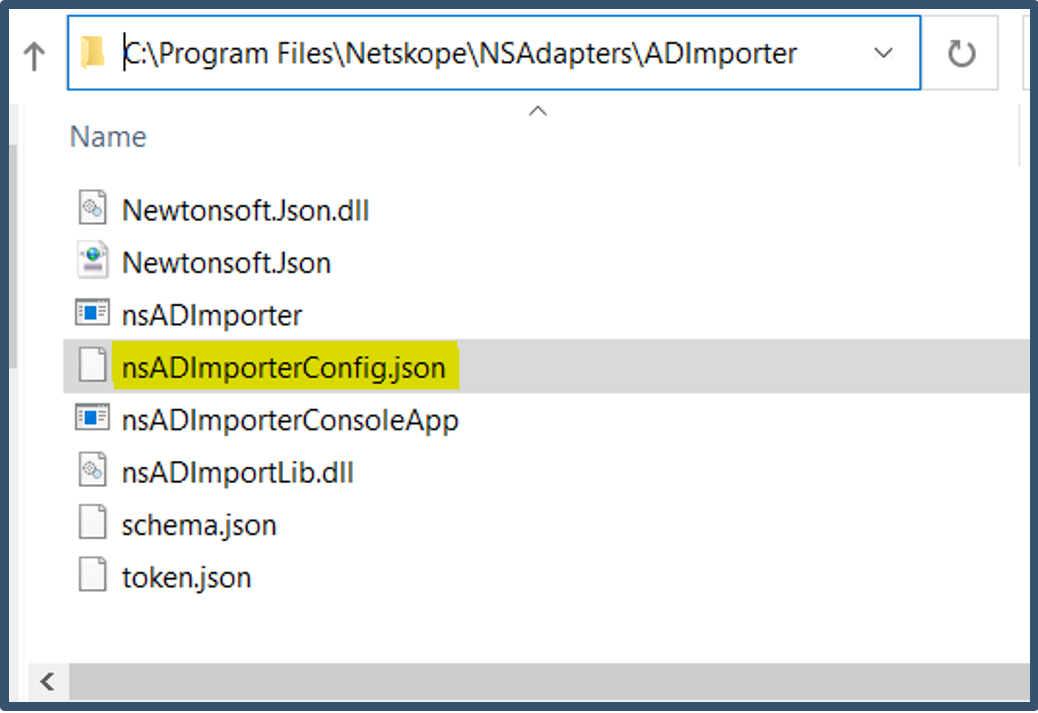 Update below attributes and save the file. Also take a copy of this new config for backup. 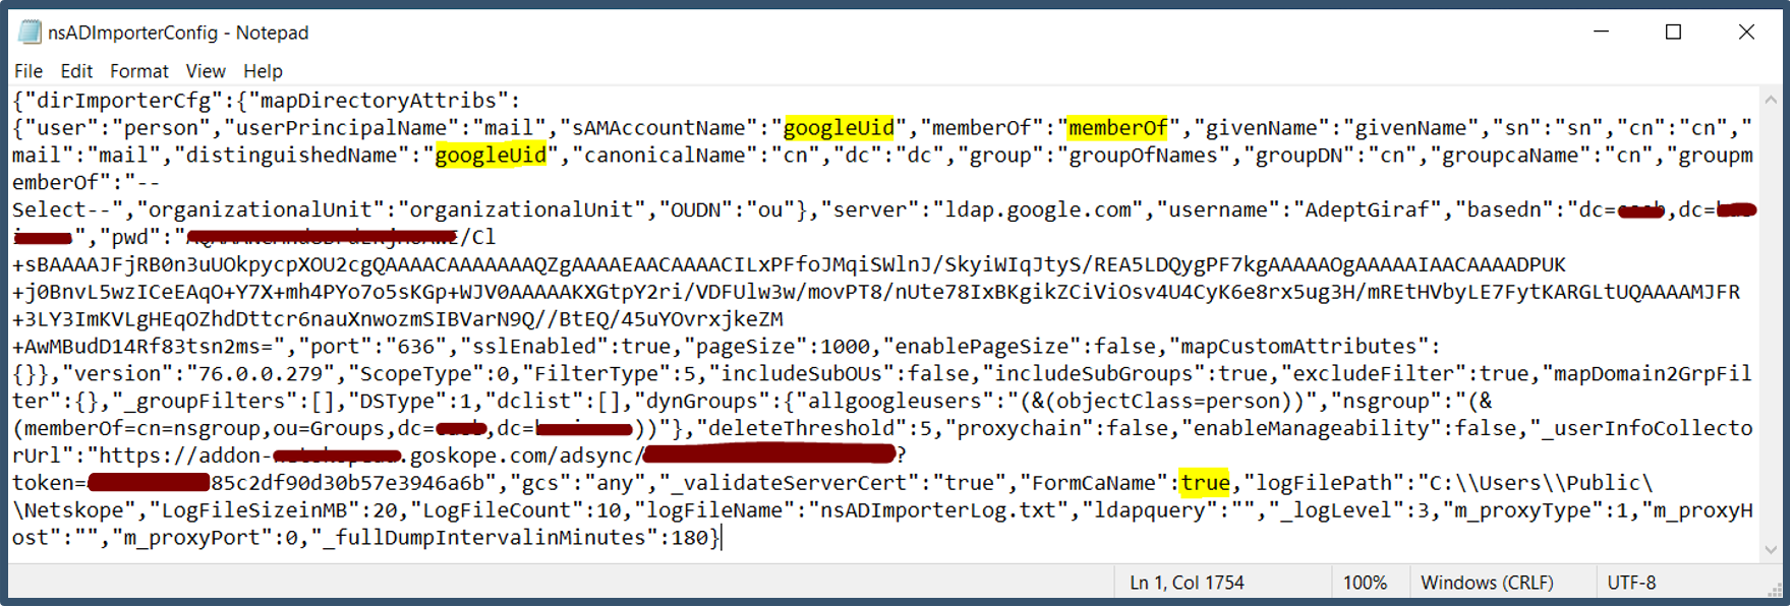
|
| 61. | Launch Services.msc console and restart the Netskope Directory Importer Service. 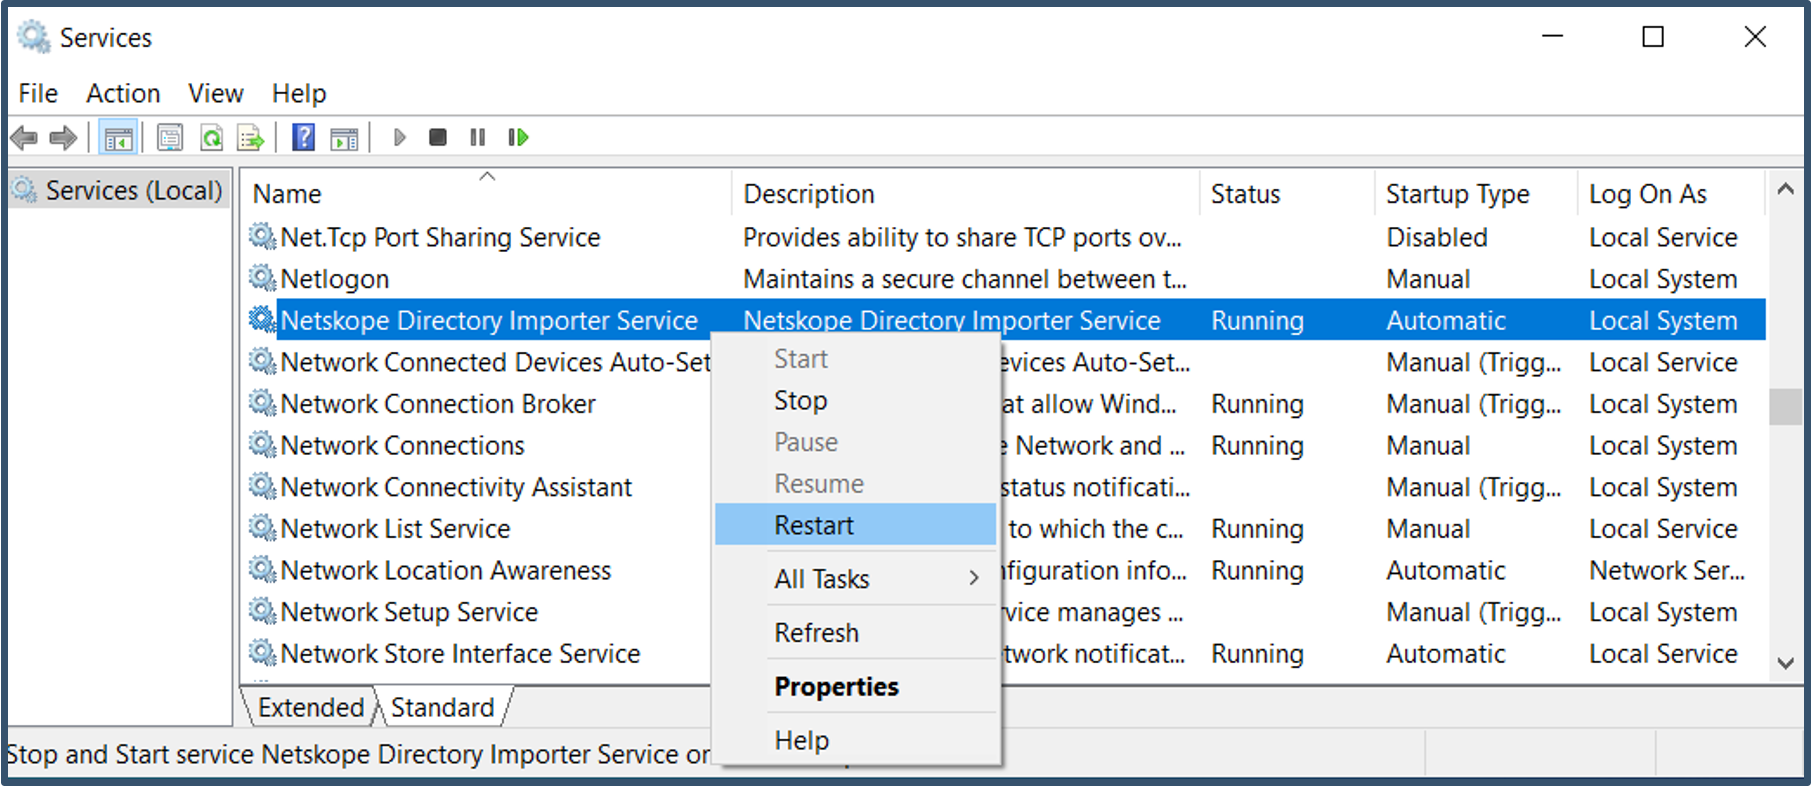
|
| 62. | Open the log file C:\Users\Public\Netskope\nsADImporterLog.log 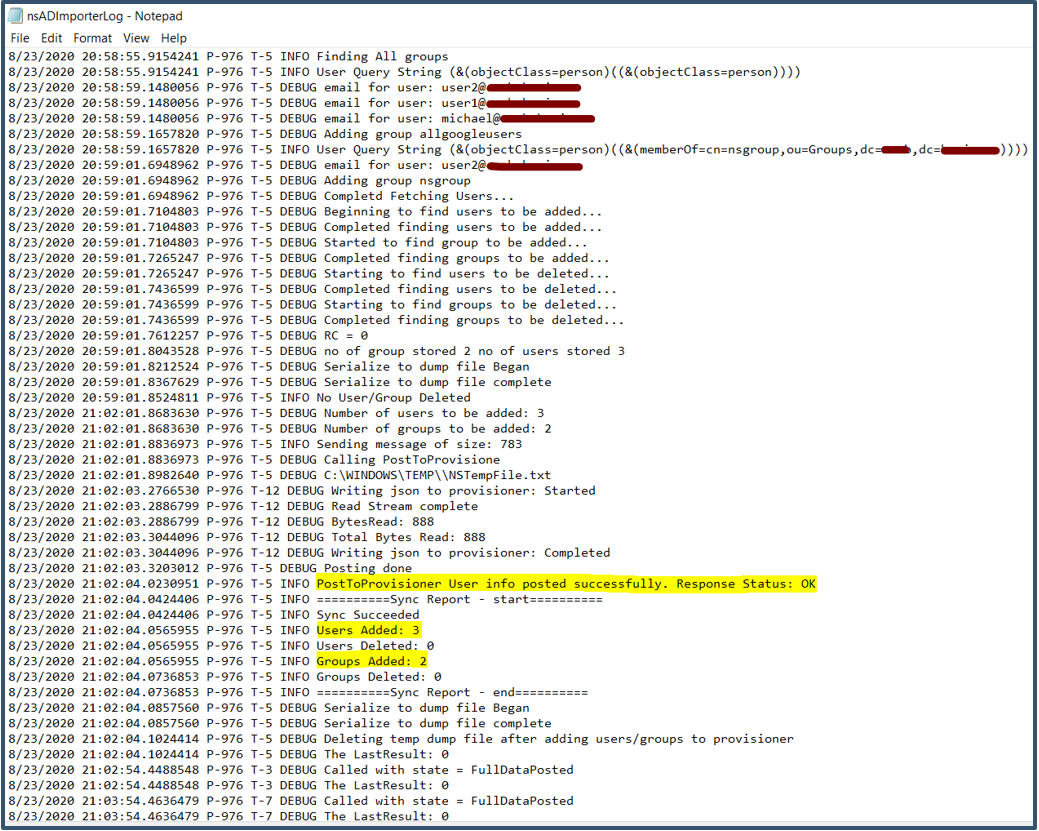
|
| 63. | Log into the Netskope tenant. 
|
| 64. | Go to Settings > Security Cloud Platform > Users. 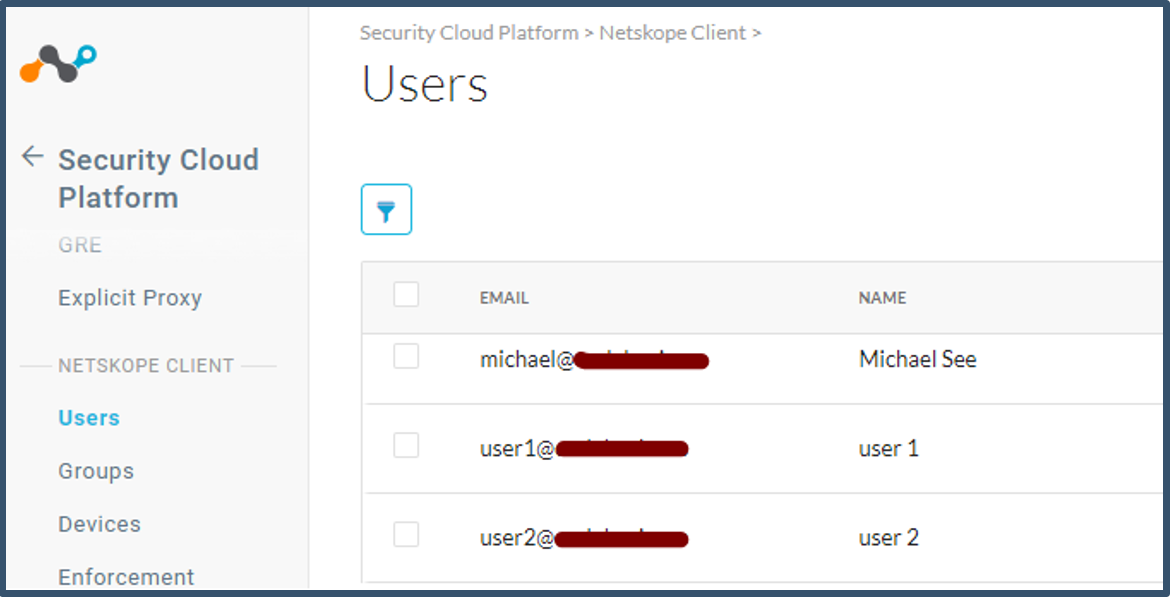 You select the users; it will display the group membership. 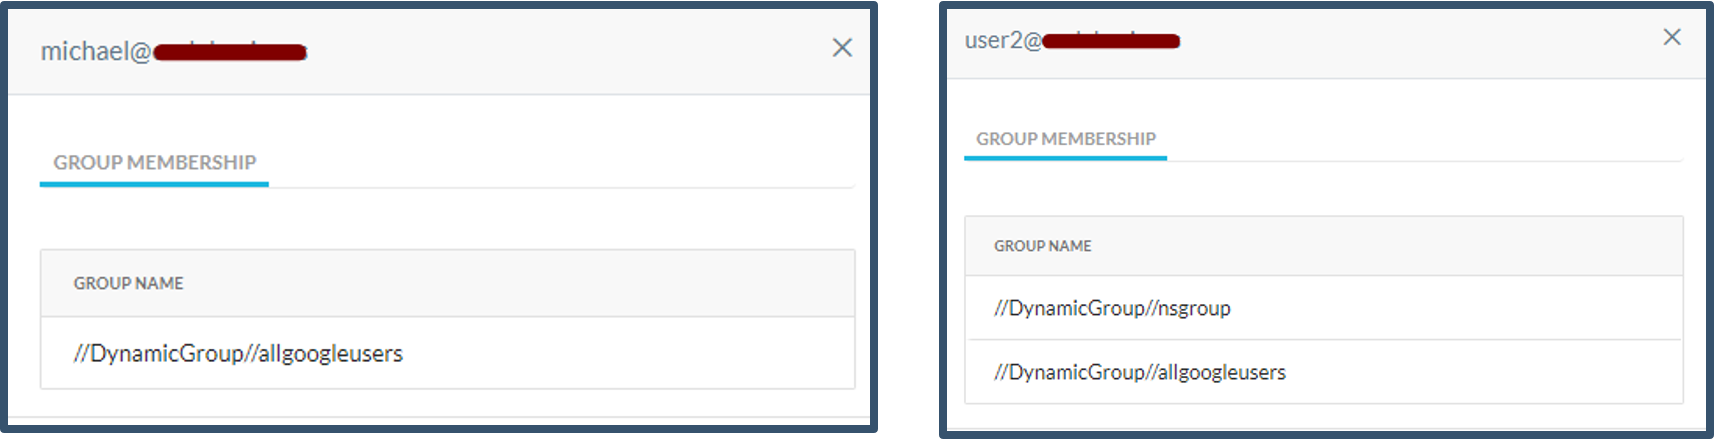
|
| 65. | Go to Settings > Security Cloud Platform > Groups.  When you select the groups; it will display members. 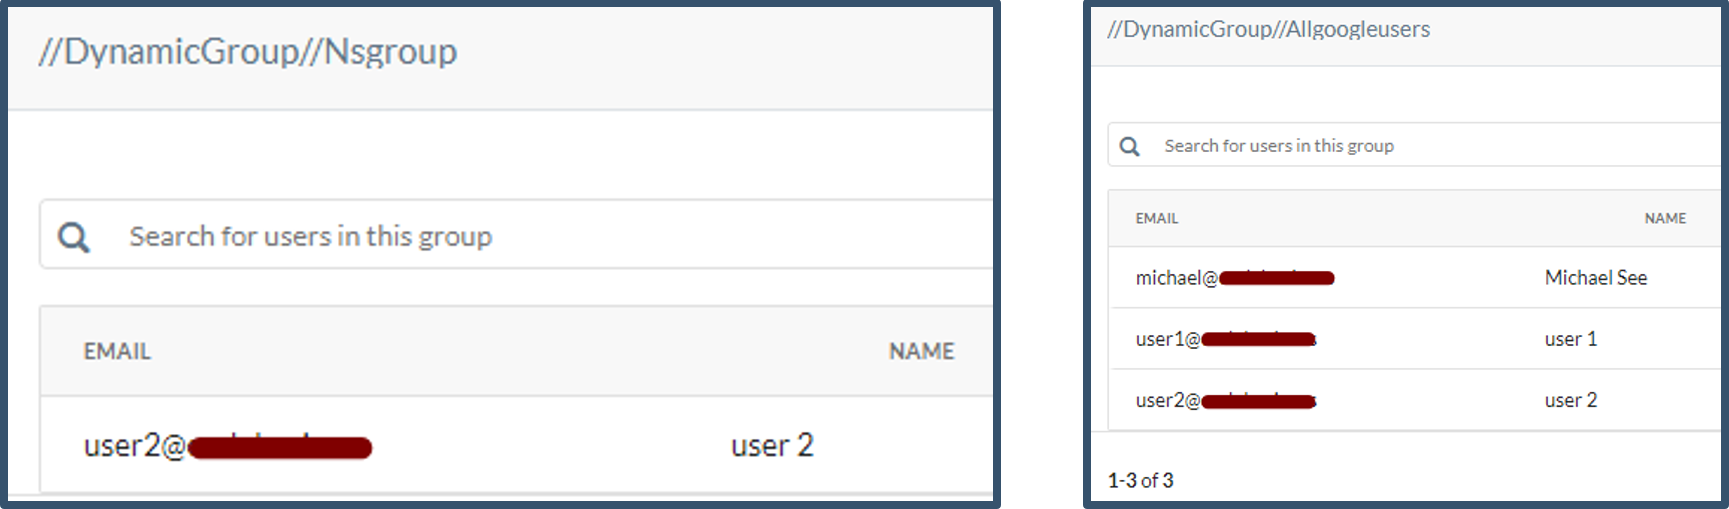
|
| 66. | The users and groups will also be available in the Real-time Protection Policy. 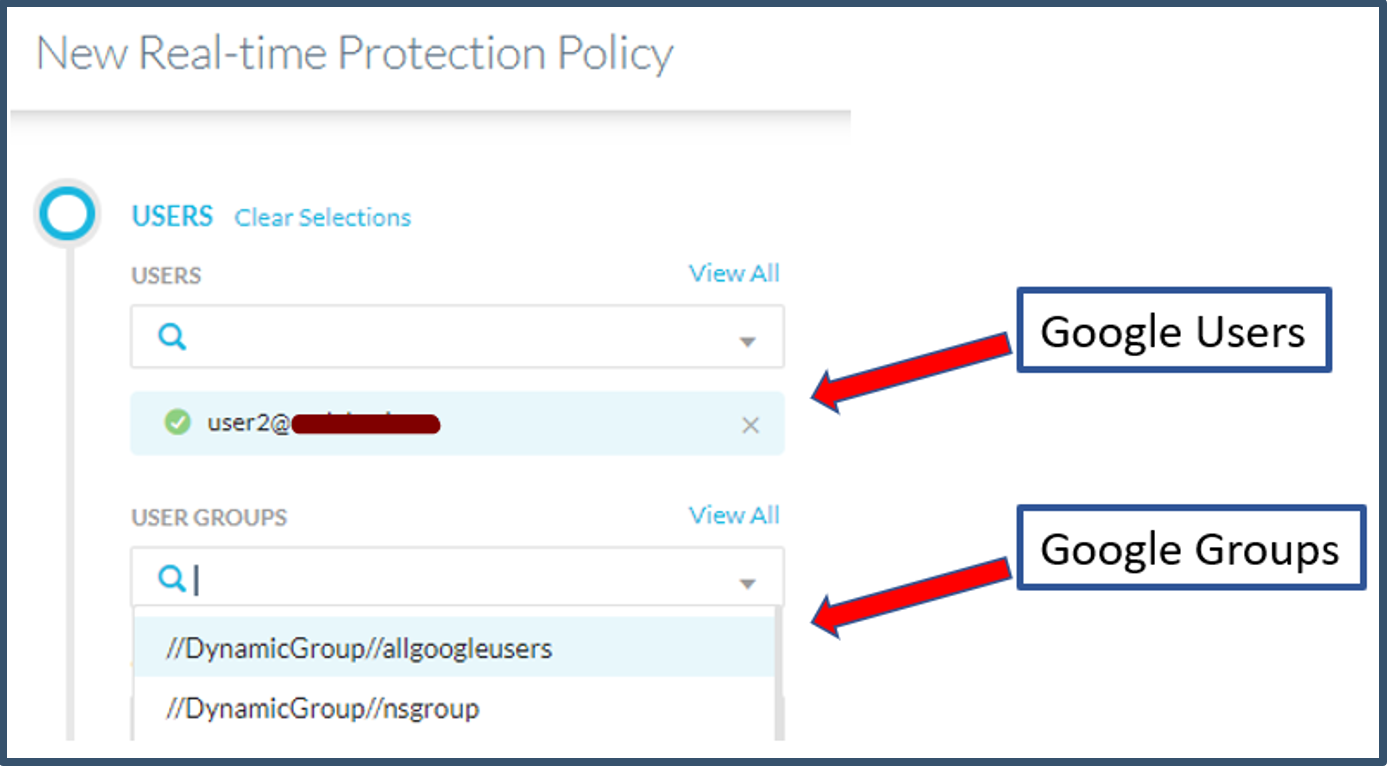
|
Appendix
1. Users and Groups are not synching to the tenant after configuring Directory Importer. Check the nsADImporterLog.log under C:\Users\Public\Netskope for any errors.
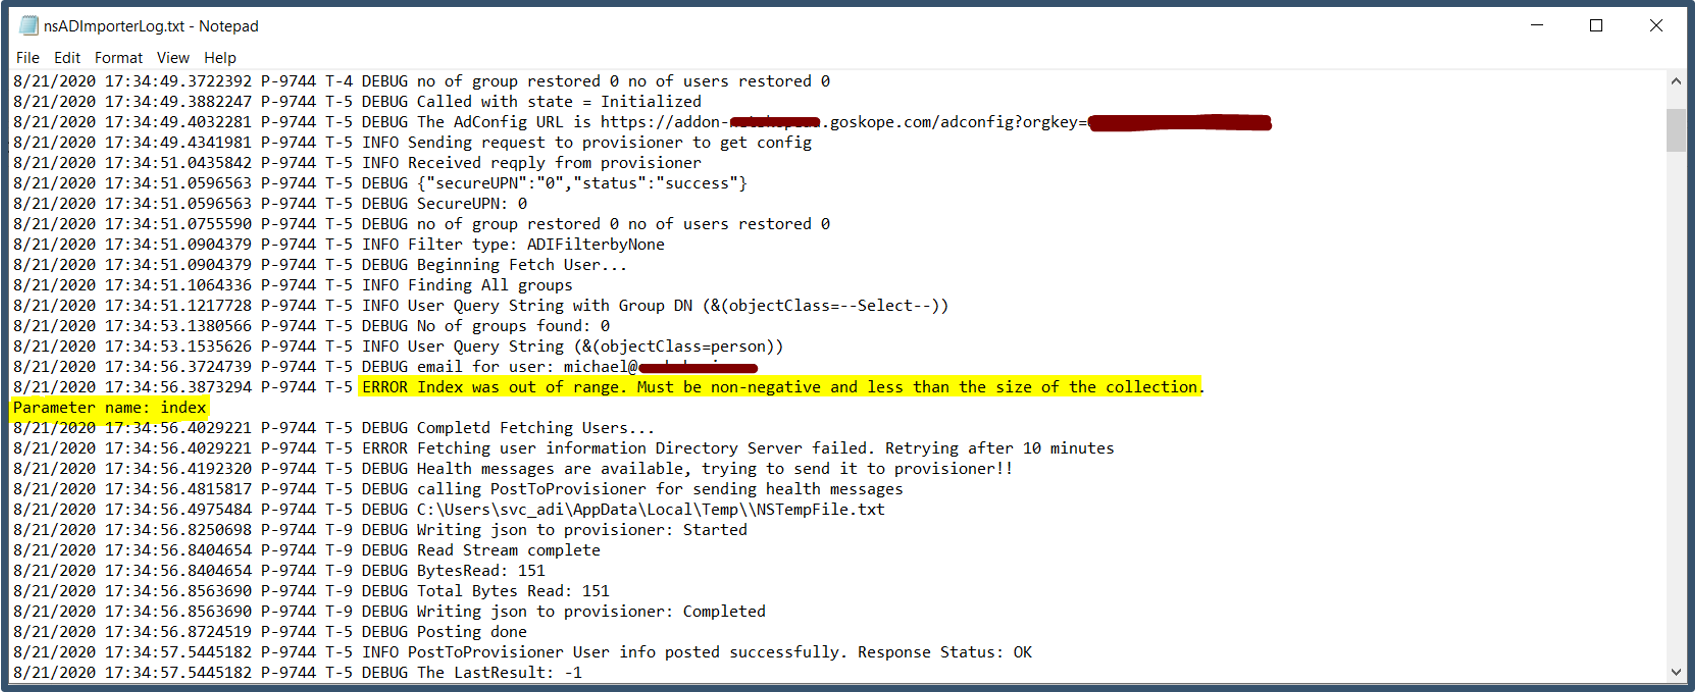
This error can occur when the attributes are not correctly configured.
a.Check the attributes in the nsadimporterconfig.json file has been configured correctly.
2. Getting authentication failure during Test Connection in Directory Importer.
a) Check user and password entered into the Directory Importer to connect to Google and Test Connection to verify. If successful it will display the attributes.
b) Check is the LDAP Client certificate has been imported into the User Personal stores of the local admin account used to login into the Windows device to configure Directory Importer.
c) Check the validity of the google certificate; generate a new certificate if expired.
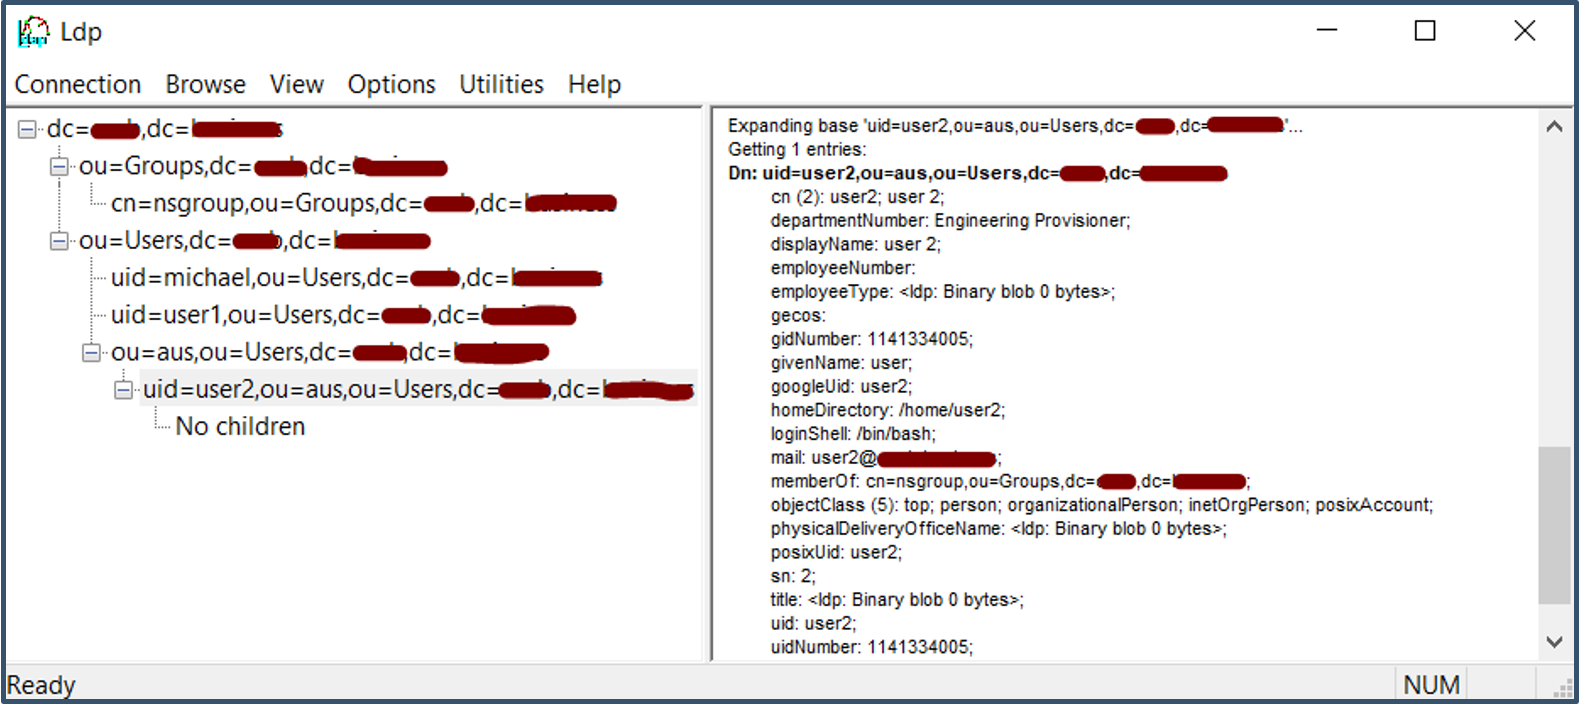
3. Can I connect to Google Identity using a LDAP browser to check connectivity and
attributes?
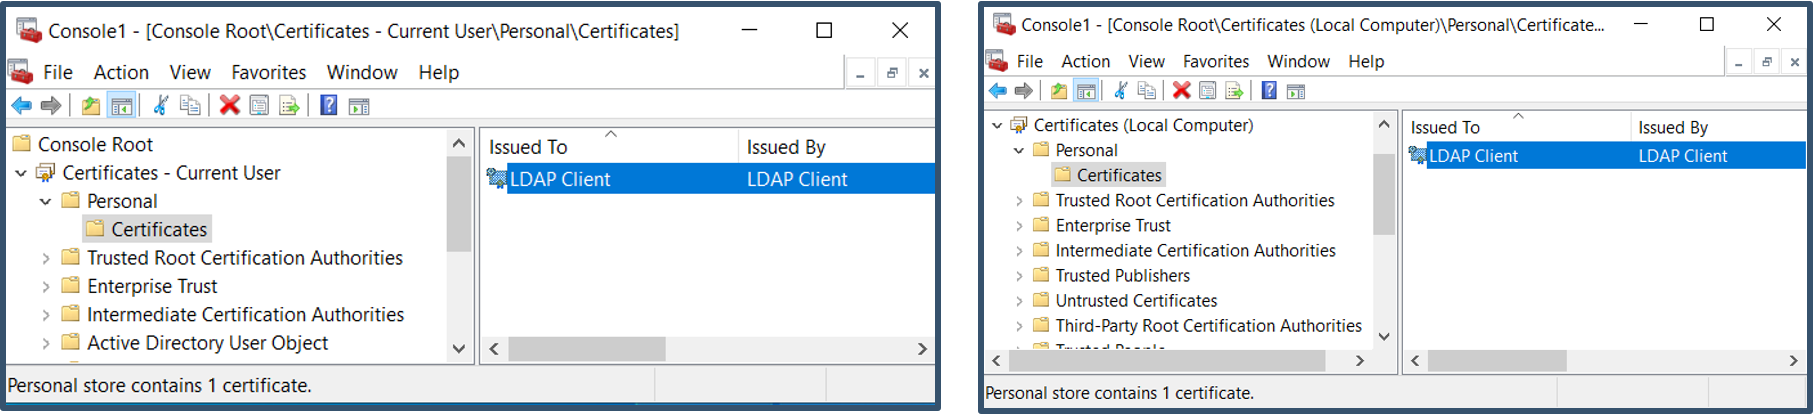
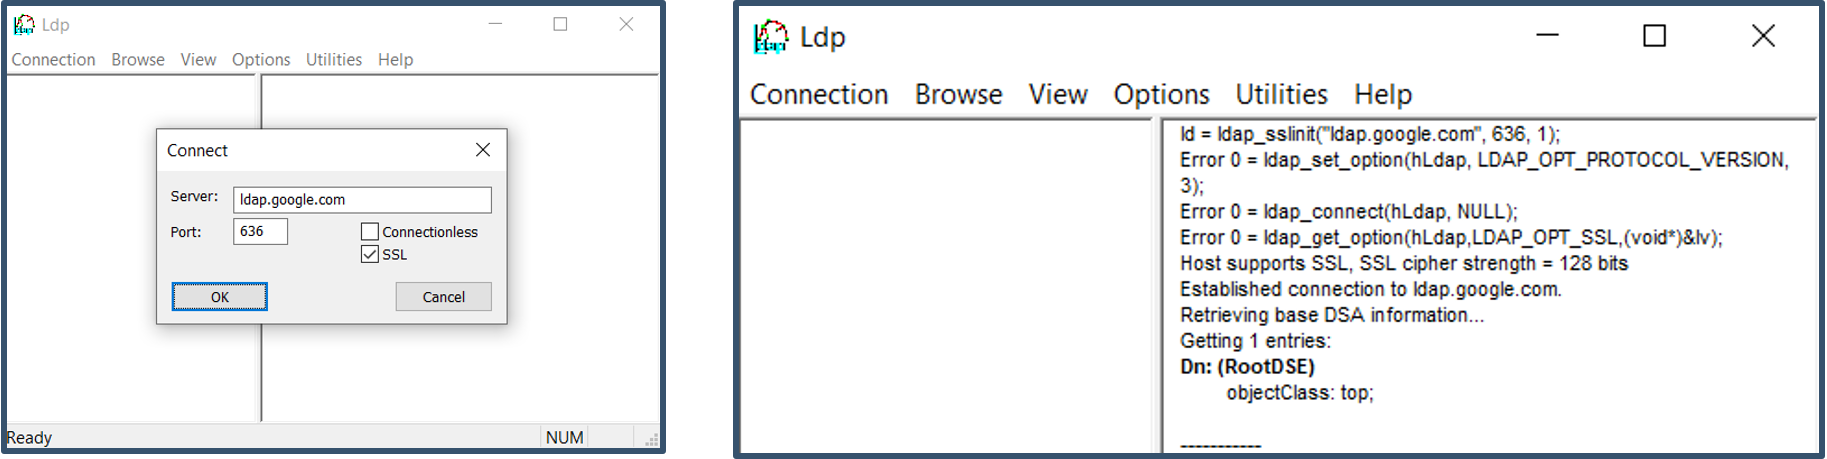
Yes, you can use tools like LDP.exe to connect to Google Identity via secure LDAP
a) You need to import the LDAP Client certificate; both to the User and Computer Personal stores of the local admin account used to login into the Windows device.
b) Download LDP.exe tool from Microsoft and configure settings as shown below.
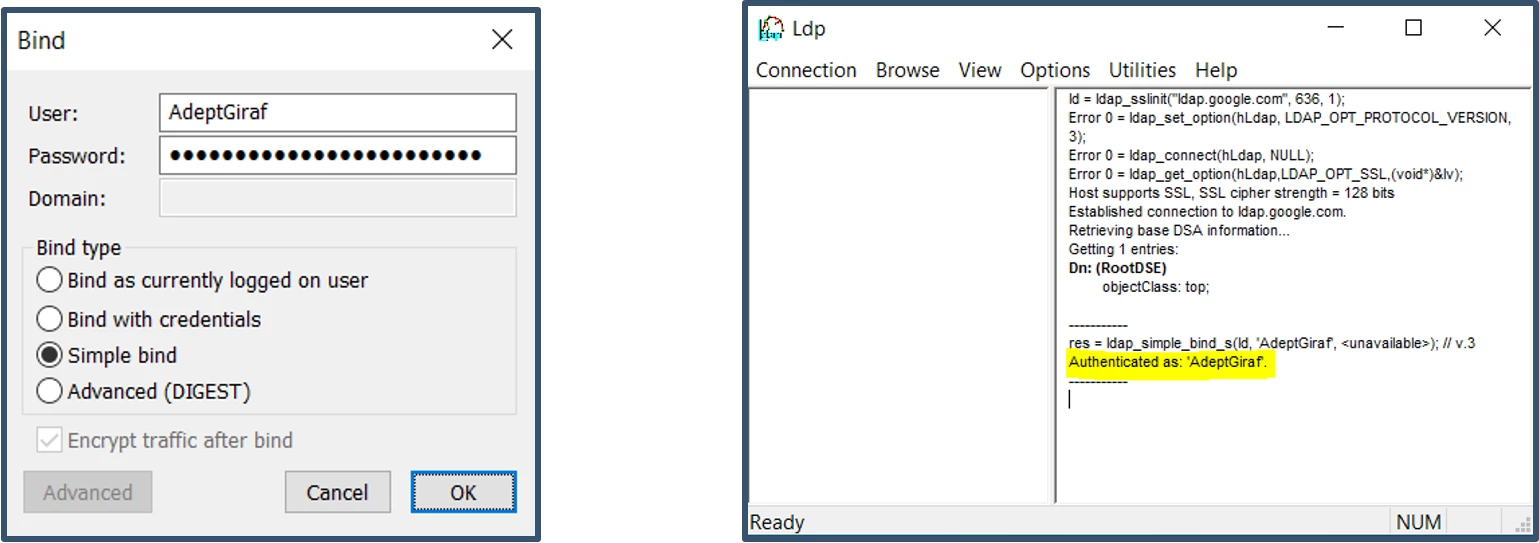
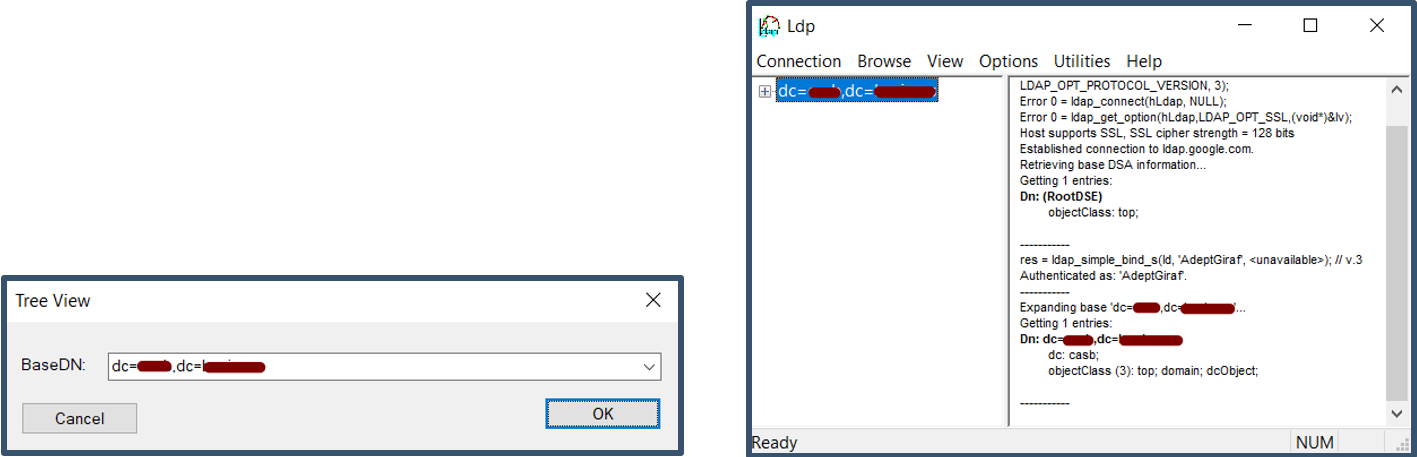
b) Browse the directory to view the attributes.
4. Can I use Google Cloud Identity free version for secure LDAP? No. You need either Google Cloud Identity Premium or G-Suite Enterprise / G-Suite Education which enables the Secure LDAP feature.
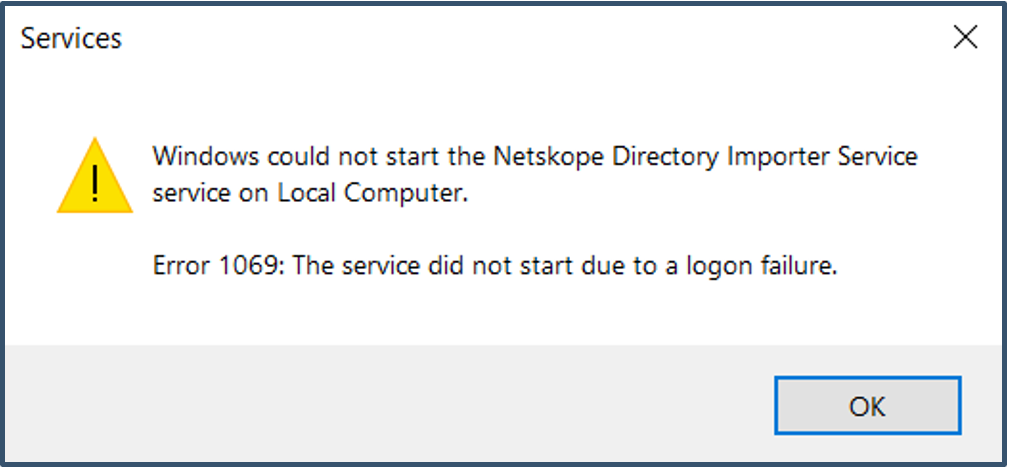
5. After Directory Importer install, I get an error - The service could not due to logon failure.
This error occurs when the account has insufficient privileges to start the service or an incorrect password has been entered during install.
a) Re-enter the password for the Directory Importer Service.
b) Launch Local Security Policy > Log on as a service > add/check the local admin account has been added to the list to start the service.
References
1. https://support.google.com/a/topic/7556686?hl=en&ref_topic=10012113
2. Netskope Adapters
or
https://<your-tenant-domain>.goskope.com/docs/Netskope_Help/en/netskope-adapters.html


