

Overview
A continuation of Sending Alerts and Events to Microsoft Sentinel using the Codeless Connector Platform.
The first article set up the Codeless Connector for a single Netskope tenant. This post extends it. It sends alerts and events from several Netskope tenants into one Microsoft Sentinel workspace, and it labels each record so you can tell the tenants apart.
If you have not read the single-tenant article, start there. The base ideas carry over: the Codeless Connector Framework, the RBACv3 service-account token, and the REST API index.
Architecture
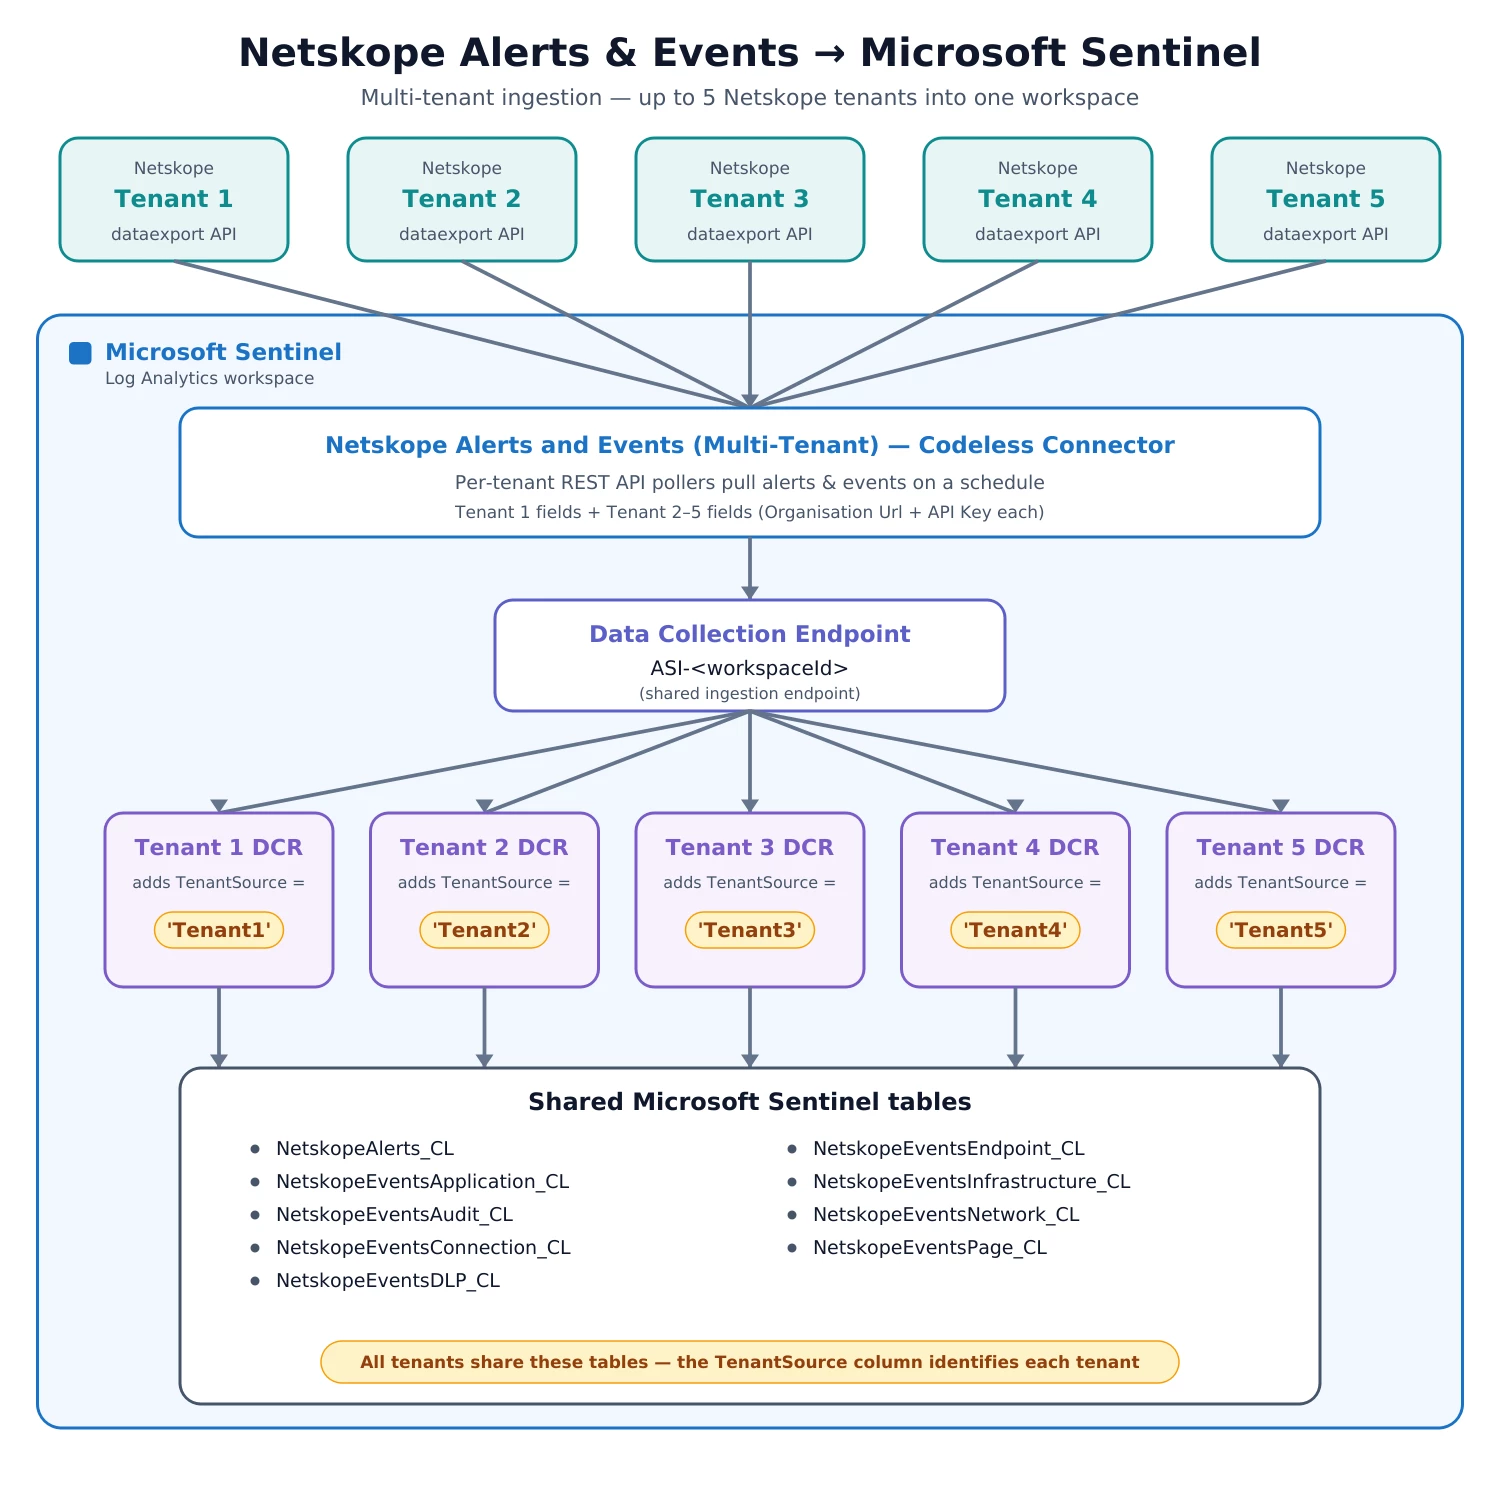
Each Netskope tenant sends alerts and events to the same connector. The connector posts the data to one Data Collection Endpoint. A separate Data Collection Rule for each tenant adds a TenantSource value and writes the record to the shared tables. The result: all tenants share the same tables, and the TenantSource column tells you which tenant a row came from.
This template supports up to five tenants.
What is different from the single-tenant setup
- You deploy an ARM template. You do not install from Content Hub.
- One connector serves all tenants, with a separate URL and API-key field per tenant.
- Every record carries a
TenantSourcevalue (Tenant1toTenant5). - All tenants write to the same tables (
NetskopeAlerts_CLand theNetskopeEventstables).
Before you start
- Read the single-tenant article. The token and index steps are the same.
- Create a Service Account RBACv3 API token in each Netskope tenant. Use the same read scopes as the single-tenant setup (Alerts, Application/Endpoint/Network/Page Events, Audit Log, Infrastructure Log, DLP Incidents).
- In Azure, have rights to deploy to the resource group and to the Log Analytics workspace where Microsoft Sentinel runs.
- Have the multi-tenant ARM template ready (attached to this post).
Step 1 — Deploy the template
- In the Azure portal, search for Deploy a custom template.
- Template Github Link: https://github.com/netskopeoss/Netskope_Web_Transactions_Azure_Sentinel/tree/a0e36609df6697e7ddef82add4417a03c1debca4/Multi-Tenant.%20Netskope%20Connector
- Select Build your own template in the editor, load the template file, and Save.
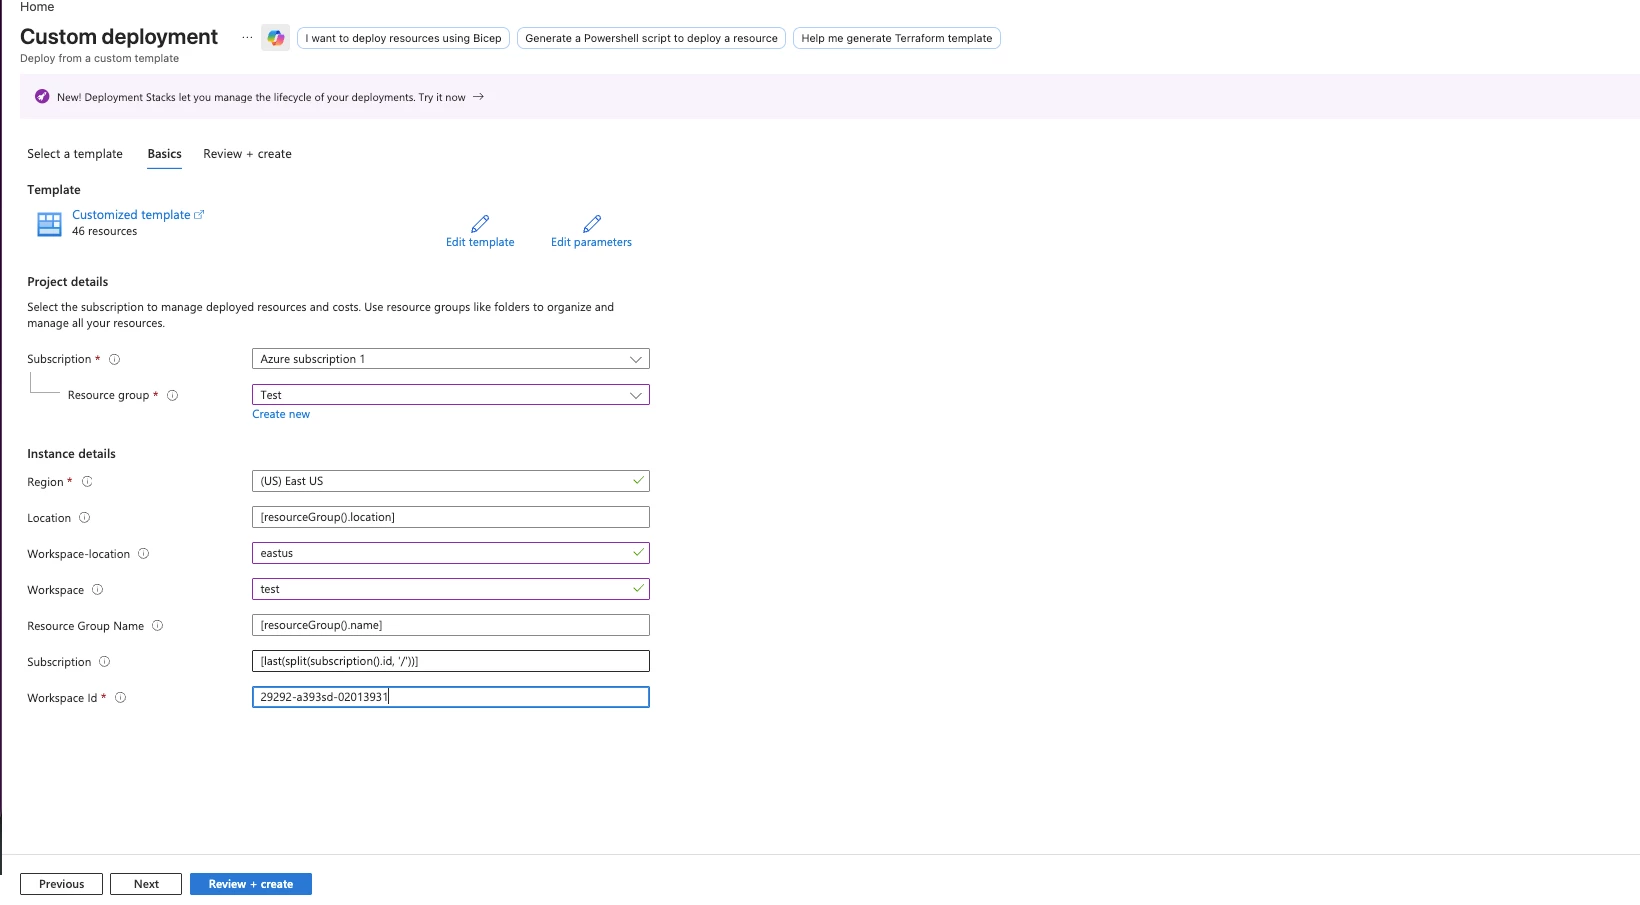
- Set the parameters:
- Workspace — your Log Analytics workspace name.
- Workspace-location — the workspace region.
- Workspace Id — the workspace GUID (Customer ID), from the workspace Overview page. This names the data collection endpoint, so it is required.
- Location, Resource Group Name, and Subscription fill in by default.
- Select Review + create, then Create.
Step 2 — Add your tenants on the connector page
- In Microsoft Sentinel, open Data connectors.
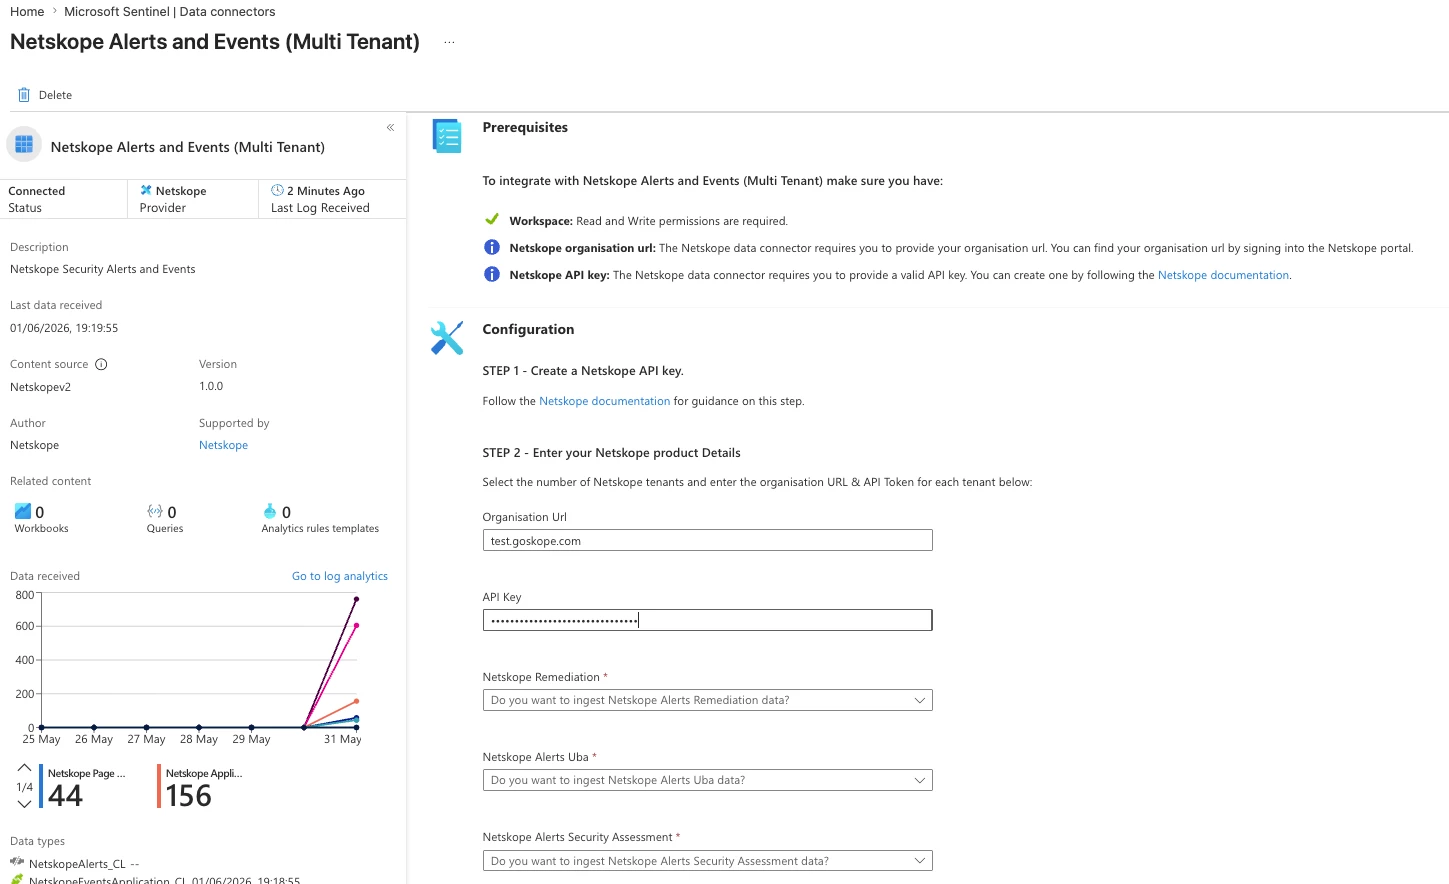
- Open Netskope Alerts and Events (Multi Tenant), then Open connector page.
- Enter Tenant 1 in Organisation Url and API Key.
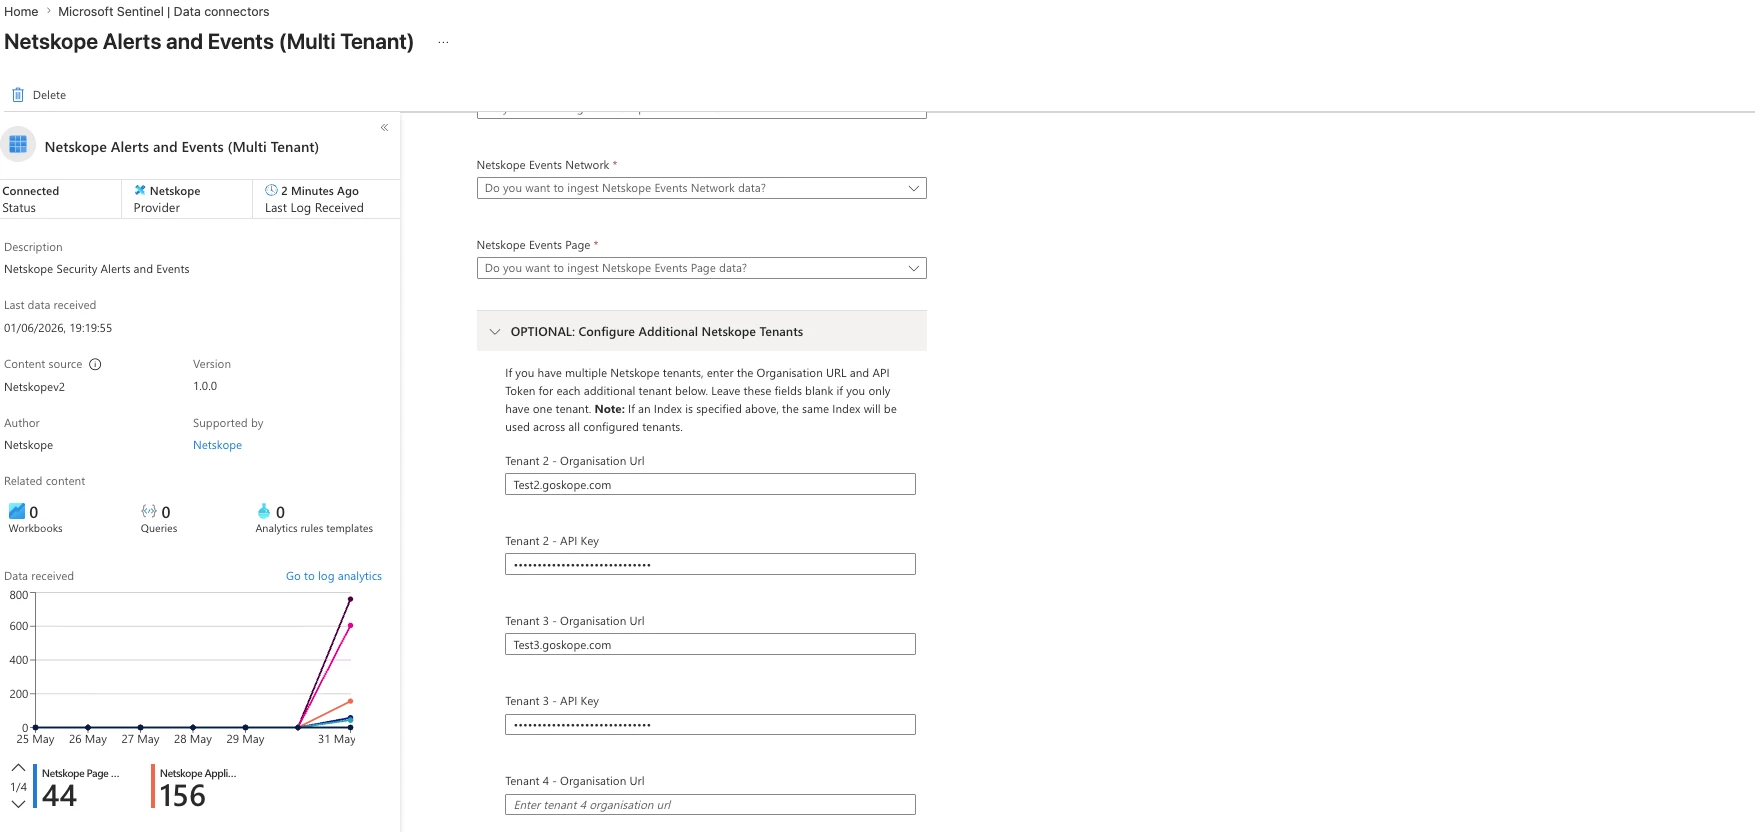
- Open the Configure Additional Netskope Tenants section. Fill in each extra tenant:
- Tenant 2 - Organisation Url and Tenant 2 - API Key
- Tenant 3 - Organisation Url and Tenant 3 - API Key, and so on through Tenant 5.
- Select Connect.
Use the same URL format for every tenant. Each tenant needs its own token.
Step 3 — Check the data per tenant
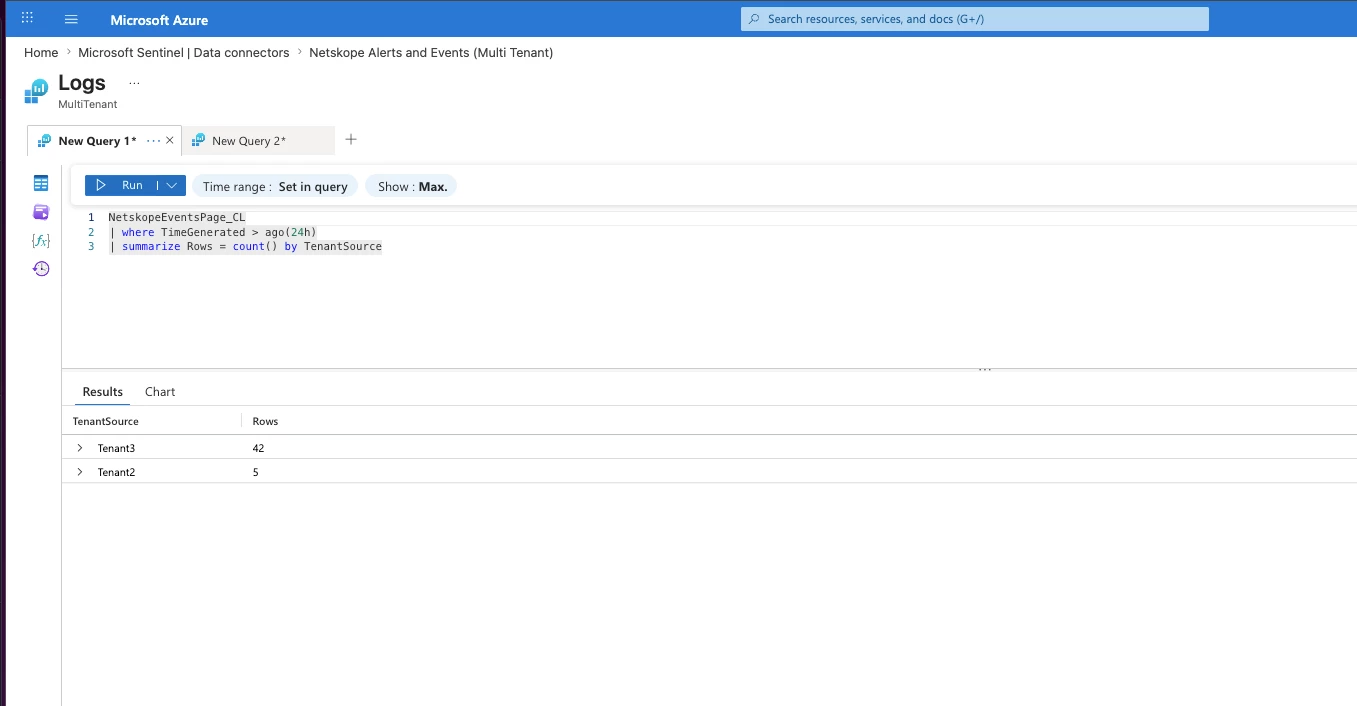
Wait 20 to 30 minutes, then run this in Logs:
NetskopeAlerts_CL
| where TimeGenerated > ago(24h)
| summarize Rows = count() by TenantSource
You should see a row for each tenant you configured (Tenant1, Tenant2, and so on). The same TenantSource field is on every NetskopeEvents table.
Notes
- If you see only
Tenant1, the extra tenant fields are most likely empty or hold the wrong token or URL. Fill them in and connect again. - The template supports up to five tenants. Adding more needs extra data collection rules.
- Test in a non-production workspace first.
- Connector and portal screens can change. Verify the field names as you go.


